当前位置:网站首页>Kotlin实现微信界面切换(Fragment练习)
Kotlin实现微信界面切换(Fragment练习)
2022-07-07 08:01:00 【倔强的加瓦】
使用kotlin实现微信界面切换功能
为了模仿出真正的环境,前提条件配置了“微信”的登录界面,主界面在登录时,有一个缺陷就是键盘不回收的小bug.因此又开始查阅各种博客,解决了点击空白处可以回收键盘的功能。并且抽象成了一个工具类,KeyBoardUtils,只需要在希望回收键盘时,点击空白处即可。
1主登录界面
<?xml version="1.0" encoding="utf-8"?>
<LinearLayout xmlns:android="http://schemas.android.com/apk/res/android" android:layout_width="match_parent" android:layout_height="match_parent" android:orientation="vertical" android:layout_gravity="center" android:background="#B50A35" >

    <LinearLayout android:layout_width="match_parent" android:layout_height="wrap_content" android:orientation="vertical" >
        <EditText android:id="@+id/textOfName" android:layout_marginTop="100dp" android:layout_width="300dp" android:layout_height="40dp" android:layout_gravity="center" android:hint="请输入用户名" android:background="@color/white" android:drawableLeft="@drawable/ic_baseline_person_24" android:drawablePadding="10dp" android:singleLine="true"/>
    </LinearLayout>

    <LinearLayout android:layout_width="match_parent" android:layout_height="wrap_content" android:orientation="horizontal" android:layout_marginTop="10dp" android:gravity="center" >
        <EditText android:id="@+id/textOfPassWord" android:layout_width="278dp" android:layout_height="40dp" android:layout_gravity="center" android:background="@color/white" android:drawableLeft="@drawable/ic_baseline_lock_24" android:drawablePadding="10dp" android:hint="请输入密码" android:inputType="textPassword" />

        <ImageView android:id="@+id/showPassword" android:layout_width="wrap_content" android:layout_height="match_parent" android:src="@drawable/ic_baseline_visibility_off_24" android:background="@color/white" android:onClick="showPassword" />

    </LinearLayout>

    <LinearLayout android:layout_width="match_parent" android:layout_height="wrap_content" android:orientation="vertical" android:gravity="center" android:layout_gravity="center" >
        <TextView android:id="@+id/mess" android:layout_width="wrap_content" android:layout_height="wrap_content" android:textColor="#DDC91F" android:gravity="center" />

        <TextView android:id="@+id/forgetPW" android:layout_width="wrap_content" android:layout_height="wrap_content" android:textColor="#DDC91F" android:onClick="forgetPassWord" android:gravity="center" />
        <TextView android:id="@+id/register" android:layout_width="wrap_content" android:layout_height="wrap_content" android:textColor="#DDC91F" android:text="第一次登录?点击注册" android:onClick="register" android:gravity="center" />

    </LinearLayout>

    <LinearLayout android:layout_width="match_parent" android:layout_height="wrap_content" android:orientation="horizontal" android:gravity="center">

        <Button android:id="@+id/surbtn" android:layout_width="wrap_content" android:layout_height="wrap_content" android:onClick="sureBtn1" android:text="确认"/>

        <Button android:id="@+id/btnCan" android:layout_width="wrap_content" android:layout_height="wrap_content" android:layout_marginLeft="50dp" android:text="取消"/>
    </LinearLayout>

</LinearLayout>
2登录界面的Activity,来处理登录界面,登录成功后即可跳转到微信首页
import android.content.Intent
import android.graphics.drawable.Drawable
import androidx.appcompat.app.AppCompatActivity
import android.os.Bundle
import android.text.method.HideReturnsTransformationMethod
import android.text.method.PasswordTransformationMethod
import android.view.MotionEvent
import android.view.MotionEvent.ACTION_DOWN
import android.view.View
import android.widget.EditText
import android.widget.ImageView

import android.widget.TextView
import androidx.annotation.CallSuper
import com.mykotlintest.util.KeyboardSetting
import com.mykotlintest.util.KeyboardUtils


class MainActivity : AppCompatActivity() {

        var count = 0;
        var showPassword = false
        //private lateinit var password:EditText
        lateinit var name:EditText
        override fun onCreate(savedInstanceState: Bundle?) {

                super.onCreate(savedInstanceState)
                setContentView(R.layout.activity_main)
                name =findViewById<EditText>(R.id.textOfName)
                name.setText(intent?.getStringExtra("username"))
        }

        fun sureBtn1(view: View) {

                var name =findViewById<TextView>(R.id.textOfName)
                var password = findViewById<EditText>(R.id.textOfPassWord)
                var message = findViewById<TextView>(R.id.mess)
                var forgetPW=findViewById<TextView>(R.id.forgetPW)
                /* * 需要变化的资源,希望从一个锁定的状态变成一个解锁的状态,然后又可以点击后面的眼睛按钮,使密码进行显示 * */
                var lockOpen = getDrawable(R.drawable.ic_baseline_lock_open_24)

                var text = "${name.text}"
                var text1 = "${password.text}"
                if ("倔强的加瓦" == text && "hik12345" == text1) {

                        // message.setText("密码或用户名为$text+$text1")
                        //设置显示的位置,前面两个参数是左上角的位置,后面两个参数是右上角的位置
                        lockOpen?.setBounds(0, 0, 40, 40)
                        password.setCompoundDrawables(lockOpen, null, null, null)
                        var intent = Intent(this@MainActivity, ThanksActivity::class.java)
                        intent.putExtra("name", text)
                        //传递参数到另一个界面上
                        startActivity(intent)
                } else {

                        count++
                        if (count < 10) {

                                message.setText("密码或用户名有误,你还有${10 - count}次机会")
                                password.setText("")
                                forgetPW.setText("忘记密码?点击找回")
                        } else {

                                message.setText("已锁定,请在10分钟后重试")
                        }
                }
        }

        fun forgetPassWord(view: View) {

                var intent=Intent(this,ThankAgain::class.java)
                startActivity(intent)
        }

        fun showPassword(view: View) {

                var password = findViewById<EditText>(R.id.textOfPassWord)

                var eye = getDrawable(R.drawable.ic_baseline_remove_red_eye_24)
                var close = getDrawable(R.drawable.ic_baseline_visibility_off_24)

                var eyeSet=findViewById<ImageView>(R.id.showPassword)
                showPassword = !showPassword
                if (showPassword) {


                        password.transformationMethod = HideReturnsTransformationMethod.getInstance()
                        password.setSelection(password.text.length)
                        eyeSet.setImageDrawable(eye)
                        //message.setText("点击一下,此时被点击是要显示明文")
                } else {

                        password.transformationMethod =PasswordTransformationMethod.getInstance()
                        //message.setText("有点击一下,需要显示密文")
                        password.setSelection(password.text.length)
                        eyeSet.setImageDrawable(close)
                }
        }


        //此处是第一次登录进行注册的界面跳转
        fun register(view: View) {

                startActivity(Intent(this,RegisterActivity::class.java))
        }

        //实现了点击空白处回收键盘的缺陷,也可以去掉,不影响整体逻辑,可以将工具类加入即可
        @CallSuper
        override fun dispatchTouchEvent(ev: MotionEvent): Boolean {

                if (ev.action == MotionEvent.ACTION_DOWN) {

                        val view = currentFocus

                        if (KeyboardUtils.isShouldHideKeyBord(view, ev)) {

                                KeyboardUtils.hintKeyBoards(view)
                        }
                }
                return super.dispatchTouchEvent(ev)
        }
2.1用于回收键盘的工具类(是一个java文件,但是可以很好的融入到kotlin文件中)
public class KeyboardUtils {

    //展示键盘的方法
    public static void showKeyboard(View view) {

        InputMethodManager imm = (InputMethodManager) view.getContext()
                .getSystemService(Context.INPUT_METHOD_SERVICE);
        if (imm != null) {

            view.requestFocus();
            imm.showSoftInput(view, 0);
        }
    }

    /** * 隐藏软键盘 * @param view */
    public static void hintKeyBoards(View view) {

        InputMethodManager manager = ((InputMethodManager) view.getContext()
                .getSystemService(Context.INPUT_METHOD_SERVICE));
        if (manager != null) {

            manager.hideSoftInputFromWindow(view.getWindowToken(), 0);
        }
    }

    /** * 判定当前是否需要隐藏 */
    public static boolean isShouldHideKeyBord(View v, MotionEvent ev) {

        if (v != null && (v instanceof EditText)) {

            int[] l = {
    0, 0};
            //获取到当前窗口的父窗口坐标
            v.getLocationInWindow(l);
            int left = l[0];
            int top = l[1];
            int bottom = top + v.getHeight();
            int right = left + v.getWidth();
            return !(ev.getX() > left && ev.getX() < right && ev.getY() > top && ev.getY() < bottom);
        }
        return false;
    }
}
3准备好微信首页界面的布局
<?xml version="1.0" encoding="utf-8"?>
<LinearLayout xmlns:android="http://schemas.android.com/apk/res/android" android:layout_width="match_parent" android:layout_height="match_parent" android:orientation="vertical">

    <LinearLayout android:layout_width="match_parent" android:layout_height="wrap_content" android:background="@color/black" android:orientation="vertical">

        <TextView android:id="@+id/display" android:layout_width="wrap_content" android:layout_height="wrap_content" android:textColor="@color/white" />


        <TextView android:layout_width="wrap_content" android:layout_height="wrap_content" android:layout_gravity="center" android:gravity="center" android:text="微信" android:textColor="@color/white" android:textSize="30dp" />
    </LinearLayout>

    <!--用于替换fragment的界面-->
    <FrameLayout android:id="@+id/content" android:layout_width="match_parent" android:layout_height="0dp" android:layout_weight="1">
    </FrameLayout>

    <!--底部导航栏-->
    <LinearLayout android:layout_width="match_parent" android:layout_height="70dp" android:background="@color/black">

        <!--消息-->
        <RelativeLayout android:id="@+id/messagePart" android:layout_marginTop="3dp" android:layout_width="0dp" android:layout_height="match_parent" android:layout_weight="1">

            <LinearLayout android:layout_width="match_parent" android:layout_height="match_parent" android:layout_centerVertical="true" android:orientation="vertical">

                <ImageView android:id="@+id/messagePicture" android:layout_width="wrap_content" android:layout_height="wrap_content" android:layout_gravity="center" android:background="@color/white" android:src="@drawable/ic_baseline_message_24" />

                <TextView android:id="@+id/messageText" android:layout_width="wrap_content" android:layout_height="wrap_content" android:layout_gravity="center" android:text="消息" android:textColor="@color/white" android:textSize="15dp" />

            </LinearLayout>

        </RelativeLayout>


        <!--通讯录-->

        <RelativeLayout android:id="@+id/addressPart" android:layout_marginTop="3dp" android:layout_width="0dp" android:layout_height="match_parent" android:layout_weight="1" android:background="@color/black">

            <LinearLayout android:layout_width="match_parent" android:layout_height="match_parent" android:orientation="vertical">

                <ImageView android:id="@+id/addressPicture" android:layout_width="wrap_content" android:layout_height="wrap_content" android:layout_gravity="center" android:background="@color/white" android:src="@drawable/ic_baseline_group_24" />

                <TextView android:id="@+id/addressText" android:layout_width="wrap_content" android:layout_height="wrap_content" android:layout_gravity="center" android:text="通讯录" android:textColor="@color/white" android:textSize="15dp" />

            </LinearLayout>

        </RelativeLayout>

        <!--发现-->
        <RelativeLayout android:layout_marginTop="3dp" android:id="@+id/foundPart" android:layout_width="0dp" android:layout_height="match_parent" android:layout_weight="1">

            <LinearLayout android:layout_width="match_parent" android:layout_height="match_parent" android:orientation="vertical">

                <ImageView android:id="@+id/foundPicture" android:layout_width="wrap_content" android:layout_height="wrap_content" android:layout_gravity="center" android:background="@color/white" android:src="@drawable/ic_baseline_widgets_24" />

                <TextView android:id="@+id/foundText" android:layout_width="wrap_content" android:layout_height="wrap_content" android:layout_gravity="center" android:text="发现" android:textColor="@color/white" android:textSize="15dp" />
            </LinearLayout>

        </RelativeLayout>


        <!--我-->

        <RelativeLayout android:layout_marginTop="3dp" android:id="@+id/mePart" android:layout_width="0dp" android:layout_height="match_parent" android:layout_weight="1">

            <LinearLayout android:layout_width="match_parent" android:layout_height="match_parent" android:orientation="vertical">

                <ImageView android:id="@+id/mePicture" android:layout_width="wrap_content" android:layout_height="wrap_content" android:layout_gravity="center" android:background="@color/white" android:src="@drawable/ic_baseline_perm_identity_24" />

                <TextView android:id="@+id/meText" android:layout_width="wrap_content" android:layout_height="wrap_content" android:layout_gravity="center" android:text="我" android:textColor="@color/white" android:textSize="15dp" />
            </LinearLayout>
        </RelativeLayout>

    </LinearLayout>
</LinearLayout>
简简单单准备好几个切换的界面,用于替换主界面中的fragment
第一个界面,其他几个界面只需要和此界面有区分度即可,都是一样的思路
<?xml version="1.0" encoding="utf-8"?>
<LinearLayout xmlns:android="http://schemas.android.com/apk/res/android" android:layout_width="match_parent" android:layout_height="match_parent" android:background="@color/red" >
    <TextView android:layout_width="match_parent" android:layout_height="wrap_content" android:text="第1个消息界面" android:textSize="40dp" android:gravity="center" android:layout_gravity="center" />
</LinearLayout>
布局的主程序,嵌入到类中,用来替换fragment操作
import android.os.Bundle
import android.view.LayoutInflater
import android.view.View
import android.view.ViewGroup
import androidx.fragment.app.Fragment

class MessageActivity : Fragment() {

        override fun onCreateView(
                inflater: LayoutInflater,
                container: ViewGroup?,
                savedInstanceState: Bundle?
        ): View? {

                return inflater.inflate(R.layout.message_fragment,container,false)
        }
}
4微信的主界面程序
import android.os.Bundle
import android.view.Window
import android.widget.ImageView
import android.widget.RelativeLayout
import android.widget.TextView
import androidx.appcompat.app.AppCompatActivity
import androidx.fragment.app.FragmentManager
import androidx.fragment.app.FragmentTransaction

class ThanksActivity : AppCompatActivity() {

		//用于获取到当前登录人员的姓名,显示在主页上,可以联系不同activity的数据的传输
        private lateinit var username: String
        //对所有的fragment的activity声明变量
        private  var messageActivity: MessageActivity? = null
        private  var addressActivity: AddressActivity?=null
        private  var foundActivity: FoundActivity?=null
        private  var myActivity: MyActivity?=null

        //对微信的首页的所有元素进行获取
        private lateinit var messagePart:RelativeLayout
        private lateinit var messagePicture:ImageView
        private lateinit var messageText:TextView

        private lateinit var addressPart:RelativeLayout
        private lateinit var addressPicture:ImageView
        private lateinit var addressText:TextView

        private lateinit var foundPart:RelativeLayout
        private lateinit var foundPicture:ImageView
        private lateinit var foundText:TextView

        private lateinit var myPart:RelativeLayout
        private lateinit var myPicture:ImageView
        private lateinit var myText:TextView

        //点击前和点击之后恢复的颜色
        private  var touchColor=0
        private  var backColor=0
        //管理
        private lateinit var support:FragmentManager


        override fun onCreate(savedInstanceState: Bundle?) {

                super.onCreate(savedInstanceState)
                requestWindowFeature(Window.FEATURE_NO_TITLE)
                setContentView(R.layout.thanks_activity)

                initValues()
                support=supportFragmentManager
                changeFragmentAndColor(0)

                var display = findViewById<TextView>(R.id.display)
                var intent = intent
                username = intent.getStringExtra("name").toString()
                display.setText("""欢迎您用户名为:【${
    intent.getStringExtra("name")}】的用户""")
                //初始默认选中第一个message

                //已经初始化好了当前的所有的数,现在需要对案件加上一个监听事件,如果点击了对应的地方,就可以改变fragment
                messagePart.setOnClickListener {

                        changeFragmentAndColor(0)
                }
                addressPart.setOnClickListener {

                        changeFragmentAndColor(1)
                }
                foundPart.setOnClickListener {

                        changeFragmentAndColor(2)
                }
               myPart.setOnClickListener {

                        changeFragmentAndColor(3)
                }

        }
        fun initValues(){

                //信息部分进行初始化
                messagePart=findViewById(R.id.messagePart)
                messagePicture=findViewById(R.id.messagePicture)
                messageText=findViewById(R.id.messageText)
                //通讯录初始化
                addressPart=findViewById(R.id.addressPart)
                addressPicture=findViewById(R.id.addressPicture)
                addressText=findViewById(R.id.addressText)
                //发现初始化
                foundPart=findViewById(R.id.foundPart)
                foundPicture=findViewById(R.id.foundPicture)
                foundText=findViewById<TextView>(R.id.foundText)
                //我的进行初始化
                myPart=findViewById(R.id.mePart)
                myPicture=findViewById(R.id.mePicture)
                myText=findViewById<TextView>(R.id.meText)

                touchColor=getColor(R.color.green)
                backColor=getColor(R.color.white)

        }

        fun changeFragmentAndColor(num:Int){

                //在每次开始变化fragment之前,先将所有的fragment停止掉,颜色全都改回去
                clearColor()
                //然后开启fragment的转换事务,这里注意使用不过时的manage
                var transaction =support.beginTransaction()
                //将现存的fragment进行隐藏,避免出现多个fragment出现在一个界面上
                hideAllFragments(transaction)
                //开始处理点击事件
                when(num){

                        0->{

                                messagePicture.setBackgroundColor(touchColor)
                                messageText.setTextColor(touchColor)
                                //转换activity
                                if(messageActivity==null){

                                        messageActivity= MessageActivity()
                                        transaction.add(R.id.content, messageActivity!!)
                                }else{

                                        transaction.show(messageActivity!!)
                                }

                        }
                        1->{

                                addressPicture.setBackgroundColor(touchColor)
                                addressText.setTextColor(touchColor)
                                //改变好颜色之后,就进行页面的加载
                                if(addressActivity==null){

                                        addressActivity=AddressActivity()
                                        transaction.add(R.id.content, addressActivity!!)
                                }else{

                                        transaction.show(addressActivity!!)
                                }

                        }
                        2->{

                                foundPicture.setBackgroundColor(touchColor)
                                foundText.setTextColor(touchColor)

                                if(foundActivity==null){

                                        foundActivity= FoundActivity()
                                        transaction.add(R.id.content,foundActivity!!)
                                }else{

                                        transaction.show(foundActivity!!)
                                }

                        }
                        3->{

                                myPicture.setBackgroundColor(touchColor)
                                myText.setTextColor(touchColor)
                                if(myActivity==null){

                                        myActivity=MyActivity()
                                        transaction.add(R.id.content,myActivity!!)
                                }else{

                                        transaction.show(myActivity!!)
                                }

                        }
                }
                transaction.commit()
        }

        //把颜色改回白色
        fun clearColor(){

                messagePicture.setBackgroundColor(backColor)
                messageText.setTextColor(backColor)

                addressPicture.setBackgroundColor(backColor)
                addressText.setTextColor(backColor)

                foundPicture.setBackgroundColor(backColor)
                foundText.setTextColor(backColor)

                myPicture.setBackgroundColor(backColor)
                myText.setTextColor(backColor)
        }

        //将所有的fragment都隐藏掉
        fun hideAllFragments(transaction:FragmentTransaction ){

                if(messageActivity!=null){

                        transaction.hide(messageActivity!!)
                }
                if(addressActivity!=null){

                        transaction.hide(addressActivity!!)
                }
               if(foundActivity!=null){

                       transaction.hide(foundActivity!!)
               }
                if(myActivity!=null){

                        transaction.hide(myActivity!!)
                }
        }


}
边栏推荐
- Phpcms realizes PC website access to wechat native payment
- [sword finger offer] 42 Stack push in and pop-up sequence
- 电表远程抄表拉合闸操作命令指令
- 能源路由器入门必读:面向能源互联网的架构和功能
- Postman interface test I
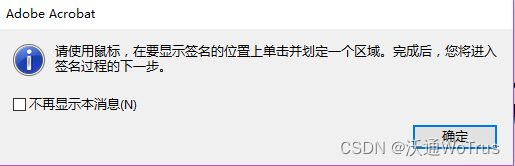
- Appx代码签名指南
- Guid主键
- ORM--查询类型,关联查询
- 一文讲解单片机、ARM、MUC、DSP、FPGA、嵌入式错综复杂的关系
- ORM -- grouping query, aggregation query, query set queryset object properties
猜你喜欢
![[ORM framework]](/img/72/13eef38fc14d85978f828584e689a0.png)

随机推荐
The combination of over clause and aggregate function in SQL Server
Wallys/IPQ6010 (IPQ6018 FAMILY) EMBEDDED BOARD WITH ON-BOARD WIFI DUAL BAND DUAL CONCURRENT
The Hal library is configured with a general timer Tim to trigger ADC sampling, and then DMA is moved to the memory space.
The landing practice of ByteDance kitex in SEMA e-commerce scene
2022.7.3DAY595
Postman interface test I
UnityWebRequest基础使用之下载文本、图片、AB包
Parameter sniffing (1/2)
Phpcms realizes PC website access to wechat native payment
嵌入式背景知识-芯片
STM32 Basics - memory mapping
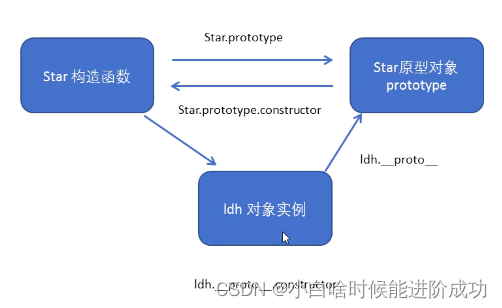
Es classes and objects, prototypes
Finally, there is no need to change a line of code! Shardingsphere native driver comes out
Why does the starting service report an error when installing MySQL? (operating system Windows)
The method of word automatically generating directory
Methods of adding centerlines and centerlines in SolidWorks drawings
MCU is the most popular science (ten thousand words summary, worth collecting)
【学习笔记-李宏毅】GAN(生成对抗网络)全系列(一)
Guid主键
C#记录日志方法