当前位置:网站首页>Construction and verification of mongodb sharding environment (redis final assignment)
Construction and verification of mongodb sharding environment (redis final assignment)
2022-06-26 08:56:00 【I have a clear idea】
Overall experimental steps : Environmental preparation ——》 Deploy Mongodb——》 Deploy Config Server——》 Deploy Shard——》 Deploy mongos——》 Start the fragmentation function ——》 Slice basic operation and function verification
Catalog
Start the fragmentation function
Slice basic operation and function verification
Experimental operation code :
#1 bigdata111 bigdata112 bigdata113 Virtual environment preparation /etc/hosts And modify it /etc/hostname Host name of the file contents
bigdata111	192.168.1.111
bigdata112	192.168.1.112
bigdata113	192.168.1.113
 You can choose to re-establish three hosts , Change to the above format in the initial information configuration
 If you already have three hosts on your virtual machine , Can be modified by command operation :
su root
hostname   View host name
vim /etc/hostname   Modify hostname
ip addr perhaps ifconfig   Look at the host IP
cd /etc/sysconfig/network-scripts
vi ifcfg-ens33  Modify network profile
{
 take BOOTPROTO=dhcp Change it to static
ONBOOT=NO Change it to yes

 The first set IPADDR=192.168..( According to your own computer ) The last one is except 2, You can fill in 1-255 Number between
NETMASK=255.255.255.0( Consistent with the subnet mask of the virtual machine )
GATEWAY=192.168..( Be consistent with the gateway of the virtual machine )
 Go to the editor to open the virtual network editor and find NAT Mode Click NAT You can see the gateway after setting
DNS1=8.8.8.8( Belongs to the default server port )
# The following four lines are where I am bigdata112 Configuration information added to the network configuration file on :( Everyone's gateway is different , Everything else should be the same as mine )
IPADDR=192.168.1.112
NETMASK=255.255.255.0
GATEWAY=192.168.80.2
DNS1=8.8.8.8
}

#2 bigdata111  take mongodb The compressed package is placed in /home/bigdata Under the table of contents   decompression
su root
mkdir -p /home/bigdata
cd /home/bigdata/
tar -zxvf mongodb-linux-x86_64-rhel70-4.4.13.tgz
mv mongodb-linux-x86_64-rhel70-4.4.13 mongodb


#3 bigdata111  Directory and data preparation
cd /home/bigdata/mongodb
mkdir -p /home/bigdata/mongodb/shardcluster/configServer/configFile
mkdir -p /home/bigdata/mongodb/shardcluster/configServer/data
mkdir -p /home/bigdata/mongodb/shardcluster/configServer/logs

mkdir -p /home/bigdata/mongodb/shardcluster/shard/configFile
mkdir -p /home/bigdata/mongodb/shardcluster/shard/shard1_data
mkdir -p /home/bigdata/mongodb/shardcluster/shard/shard2_data
mkdir -p /home/bigdata/mongodb/shardcluster/shard/shard3_data
mkdir -p /home/bigdata/mongodb/shardcluster/shard/logs

mkdir -p /home/bigdata/mongodb/shardcluster/mongos/configFile
mkdir -p /home/bigdata/mongodb/shardcluster/mongos/logs

touch /home/bigdata/mongodb/shardcluster/configServer/logs/config_server.log
touch /home/bigdata/mongodb/shardcluster/shard/logs/shard1.log
touch /home/bigdata/mongodb/shardcluster/shard/logs/shard2.log
touch /home/bigdata/mongodb/shardcluster/shard/logs/shard3.log
touch /home/bigdata/mongodb/shardcluster/mongos/logs/mongos.log

#4 bigdata111  place config server The configuration file
shardcluster/configServer/configFile        mongodb_config.conf


#5  take bigdata111 Upper mongodb The directory and its contents are uploaded to bigdata112 and bigdata113
 First in bigdata112 bigdata113 On mkdir -p /home/bigdata
scp -r /home/bigdata/mongodb/  [email protected]:/home/bigdata/
scp -r /home/bigdata/mongodb/  [email protected]1.113:/home/bigdata/

scp -r /home/bigdata/mongodb/shardcluster/configServer/configFile/mongodb_config.conf  [email protected]:/home/bigdata/mongodb/shardcluster/configServer/configFile/


#6 bigdata111 112 113  stay /etc/profile Add the following to the file
export PATH=/home/bigdata/mongodb/bin:$PATH


#7  start-up config server Set
##bigdata111 bigdata112 bigdata113
systemctl stop firewalld.service
source /etc/profile
mongod -f /home/bigdata/mongodb/shardcluster/configServer/configFile/mongodb_config.conf

#8  To configure config server Set
##bigdata111
mongo --host bigdata111 --port 27022

config_conf={
  _id: "configs",
  members: [
    {_id: 0,host: "192.168.1.111:27022"},
    {_id: 1,host: "192.168.1.112:27022"},
    {_id: 2,host: "192.168.1.113:27022"}
  ]
}

rs.initiate(config_conf)

#9  place shard The configuration file
##bigdata111 112 113
shardcluster/shard/configFile

#10  Start the three shard colony
##bigdata111 112 113
mongod -f /home/bigdata/mongodb/shardcluster/shard/configFile/mongodb_shard1.conf
mongod -f /home/bigdata/mongodb/shardcluster/shard/configFile/mongodb_shard2.conf
mongod -f /home/bigdata/mongodb/shardcluster/shard/configFile/mongodb_shard3.conf

#11  Configure three shard colony
##bigdata111
mongo --host bigdata111 --port 27018


shard_conf={
  _id: "shard1",
  members: [
    {_id: 0,host: "192.168.1.111:27018"},
    {_id: 1,host: "192.168.1.112:27019"},
    {_id: 2,host: "192.168.1.113:27020",arbiterOnly: true}
  ]
}

rs.initiate(shard_conf)

##bigdata112
mongo --host bigdata112 --port 27018

shard_conf={
  _id: "shard2",
  members: [
    {_id: 1,host: "192.168.1.111:27020",arbiterOnly: true},
    {_id: 0,host: "192.168.1.112:27018"},
    {_id: 2,host: "192.168.1.113:27019"}
  ]
}

rs.initiate(shard_conf)

##bigdata113
mongo --host bigdata113 --port 27018

shard_conf={
  _id: "shard3",
  members: [
    {_id: 2,host: "192.168.1.111:27019"},
    {_id: 1,host: "192.168.1.112:27020",arbiterOnly: true},
    {_id: 0,host: "192.168.1.113:27018"}
  ]
}

rs.initiate(shard_conf)

#12  place mongos The configuration file
shardcluster/mongos/configFile


#13  start-up mongos service
##bigdata111 112
mongos -f /home/bigdata/mongodb/shardcluster/mongos/configFile/mongodb_mongos.conf

#14  Start the fragmentation function
##bigdata111
mongo --host bigdata111 --port 27021

use gateway

sh.addShard("shard1/192.168.1.111:27018,192.168.1.112:27019,192.168.1.113:27020")

sh.addShard("shard2/192.168.1.111:27020,192.168.1.112:27018,192.168.1.113:27019")

sh.addShard("shard3/192.168.1.111:27019,192.168.1.112:27020,192.168.1.113:27018")

#15  Verify slicing function
use config
db.settings.save({"_id":"chunksize","value":1}) # Set block size 1MB
use school
for(i=1;i<=5;i++){db.user.insert({"id":i,"name":"jack"+i})} # add to 5 Document data
use gateway
sh.enableSharding("school")  # Open collection school The fragmentation function of
use school
db.user.createIndex({"id":1})  # With ID Create as primary key index
use gateway
sh.shardCollection("school.user",{"id":1})  # start-up
sh.status()   # Check the slice information
Configuration file, installation package and installation process PDF: Resource Download Office
Resource description : Pieced conf The configuration file contains 14 individual ,3 Hosts per host 3 individual shard The configuration file , One configuration file per host , Only the first two hosts have mongos Routing configuration file , You can download it through xftp File transfer to virtual machine , You can also copy content , stay linux The terminal passes through vim The write command is copied in . Later, in order to simplify the operation , You can only implement files on one machine , Then transfer to another file , But some minor changes are needed , After all, the content of the configuration file of each host is different .
Environmental preparation
1. Using commands vim etc/hostname Modify the host name and command vi /etc/sysconfig/network-scripts
/ifcfg-ens33 Modify the of the host ip Address ,ip The address and host name are as follows :
bigdata111192.168.1.111;bigdata112192.168.1.112;bigdata113192.168.1.113
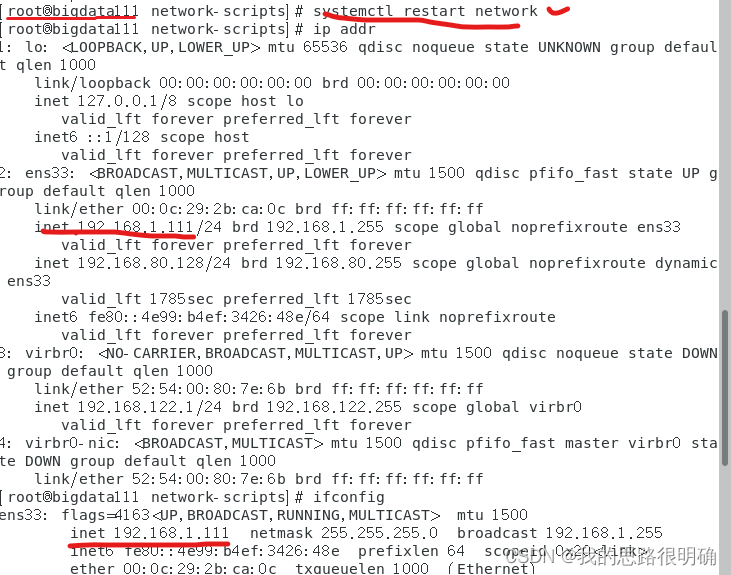
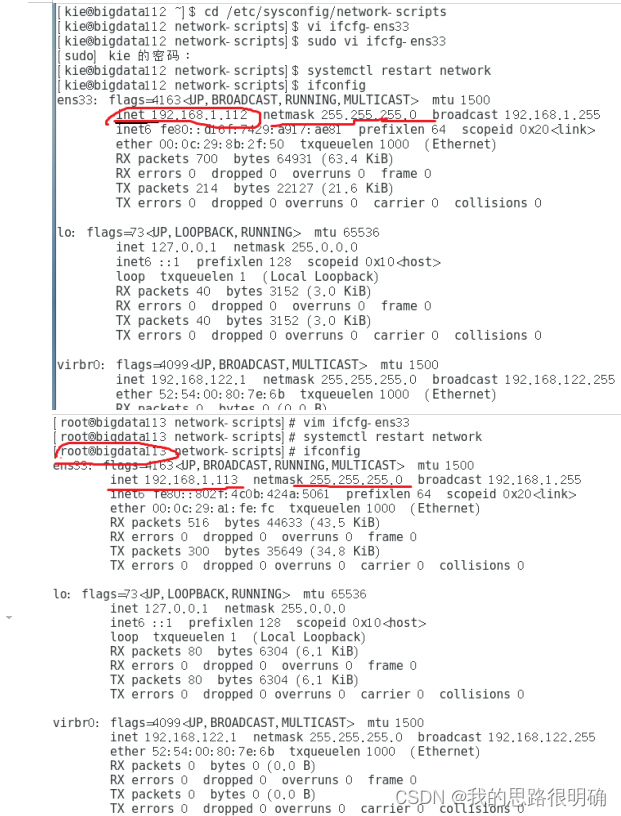
You can see the host name and ip The address is consistent with the design
2. The next in bigdata111 To create a MongoDB Data files of servers related to the partitioned cluster 、 Configuration files and log files .
The last blue directory indicates that the relevant directories and data files have been successfully prepared
Deploy Mongodb
- Just at bigdata111 I'm ready Mongodb Required environment files , After all three hosts are installed mongodb Under the circumstances , utilize scp The command bigdata111 Transfer files and directories on to bigdata112 and bigdata113 On , Because I have configured two hosts , Now only from 111 To 113 The transmission process of .

Deploy Config Server
1. stay bigdata111 Create and write on config.conf File and transfer to 112 and 113 On 
2. stay bigdata111 and 112 and 113 Start the config.conf file


After startup ,3 All hosts have appeared successfully Indicating successful startup
3. Finally back to bigdata111, start-up mongo --host bigdata111 --port 27022 Then proceed config server Configuration and initialization of .

The initialization result appears ok Field , also configs from secondary Turned into primary Indicating successful configuration .
Deploy Shard
1. Create and write... On each host 3 individual shard.conf Configure the file and use mongod Command to start , You can see that there will be three on each host successfully.


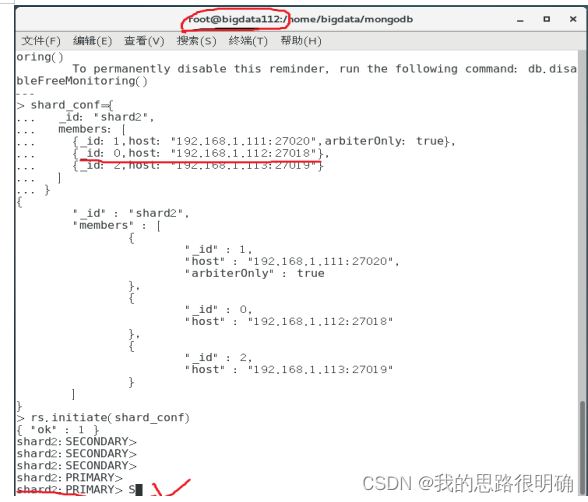
2. On each host Shard Cluster configuration operation , You can see three initialized OK Field , stay bigdata111 On shard1 from secondary become primary,bigdata112 On shard2 from secondary Turned into primary,bigdata113 On shard3 from other Turned into primary, The results show that Shard Cluster configuration succeeded .


Deploy mongos
1. stay bigdta111 and 112 Create and write on mongos.conf file , utilize mongos start-up , You can see two successfully Start successfully .

Start the fragmentation function
1. stay bigdata111 through mongo --host bigdata111 --port 27021 start-up mongodb, Use gateway database , Add three... To the sharded cluster Shard, There are three OK Field , Explain three Shard All added successfully .

Slice basic operation and function verification
1. Still bigdata111 Operation on top , Switch to the database first config, Set the block size to 1M, Then switch to the database school, Assemble to user Add 5 Documents , Finally, switch to the database gateway, utilize enableSharding Implement database school Fragmentation function , There is OK Field , This indicates that we have successfully enabled the database fragmentation function , That is, the database is successfully partitioned .

2. Switch to database school establish “id” The index of , Then switch to the database gateway With id A set of partitioned key pairs user Do the slicing operation .

3. In the database gateway View the database under school Middle set user The fragment information of , From the returned results, we can see chunks Each of them Shard The distribution information of is “shard1 767,shard2 128,shard3 129”, Explain each shard Corresponding to a quantity in which a corresponding number exists chunk, stay school.user In the message , Its partition key is shard key:{ “id”:1},shards The sharding information in also corresponds to the operations added above , To sum up, it can be seen that the verification of segmentation is successful .

边栏推荐
- 【300+精选大厂面试题持续分享】大数据运维尖刀面试题专栏(一)
- 关于极客时间 | MySQL实战45讲的部分总结
- Whale conference provides digital upgrade scheme for the event site
- Relationship extraction --r-bert
- Drawing with MATLAB (1)
- ROS learning notes (6) -- function package encapsulated into Library and called
- Segmentation of structured light images using segmentation network
- Ltp-- extract time, person and place
- Performance comparison of unaryexpr's function on matrix elements in eigen Library
- keras_ Callback function summary
猜你喜欢

Transformers loading Roberta to implement sequence annotation task
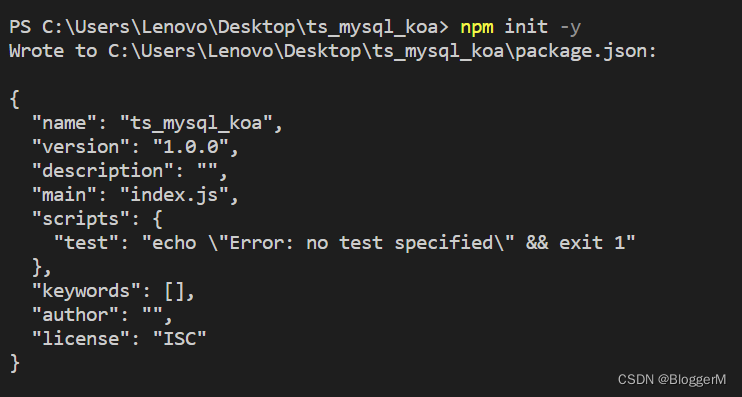
Koa_mySQL_Ts 的整合

Whale conference provides digital upgrade scheme for the event site

Install Anaconda + NVIDIA graphics card driver + pytorch under win10_ gpu
XSS 跨站脚本攻击

Reverse crawling verification code identification login (OCR character recognition)

三菱PLC若想实现以太网无线通讯,需要具备哪些条件?

Compiling owncloud client on win10

直播回顾 | smardaten李鸿飞解读中国低/无代码行业研究报告:风向变了

Relationship extraction -- casrel
随机推荐
What are the conditions for Mitsubishi PLC to realize Ethernet wireless communication?
Drawing with MATLAB (2) -- color ring
Drawing with MATLAB (1)
The best time to buy and sell stocks to get the maximum return
鲸会务为活动现场提供数字化升级方案
1.25 suggestions and design of machine learning
Detailed process of generating URDF file from SW model
Yolov5进阶之二安装labelImg
Yolov5进阶之三训练环境
【程序的编译和预处理】
pgsql_ UDF01_ jx
XSS 跨站脚本攻击
Zlib static library compilation
1.23 neural network
Fast construction of neural network
How to correctly PIP install pyscipopt
Sublime Text3 common plug-ins
滑块验证 - 亲测 (京东)
在 KubeSphere 部署 Wiki 系统 wiki.js 并启用中文全文检索
Koa_mySQL_Ts 的整合