当前位置:网站首页>Made with Flutter and Firebase!counter application
Made with Flutter and Firebase!counter application
2022-07-31 18:28:00 【Ginger Immortal】
使用 Flutter 和 Firebase 制作!计数器应用程序
目录
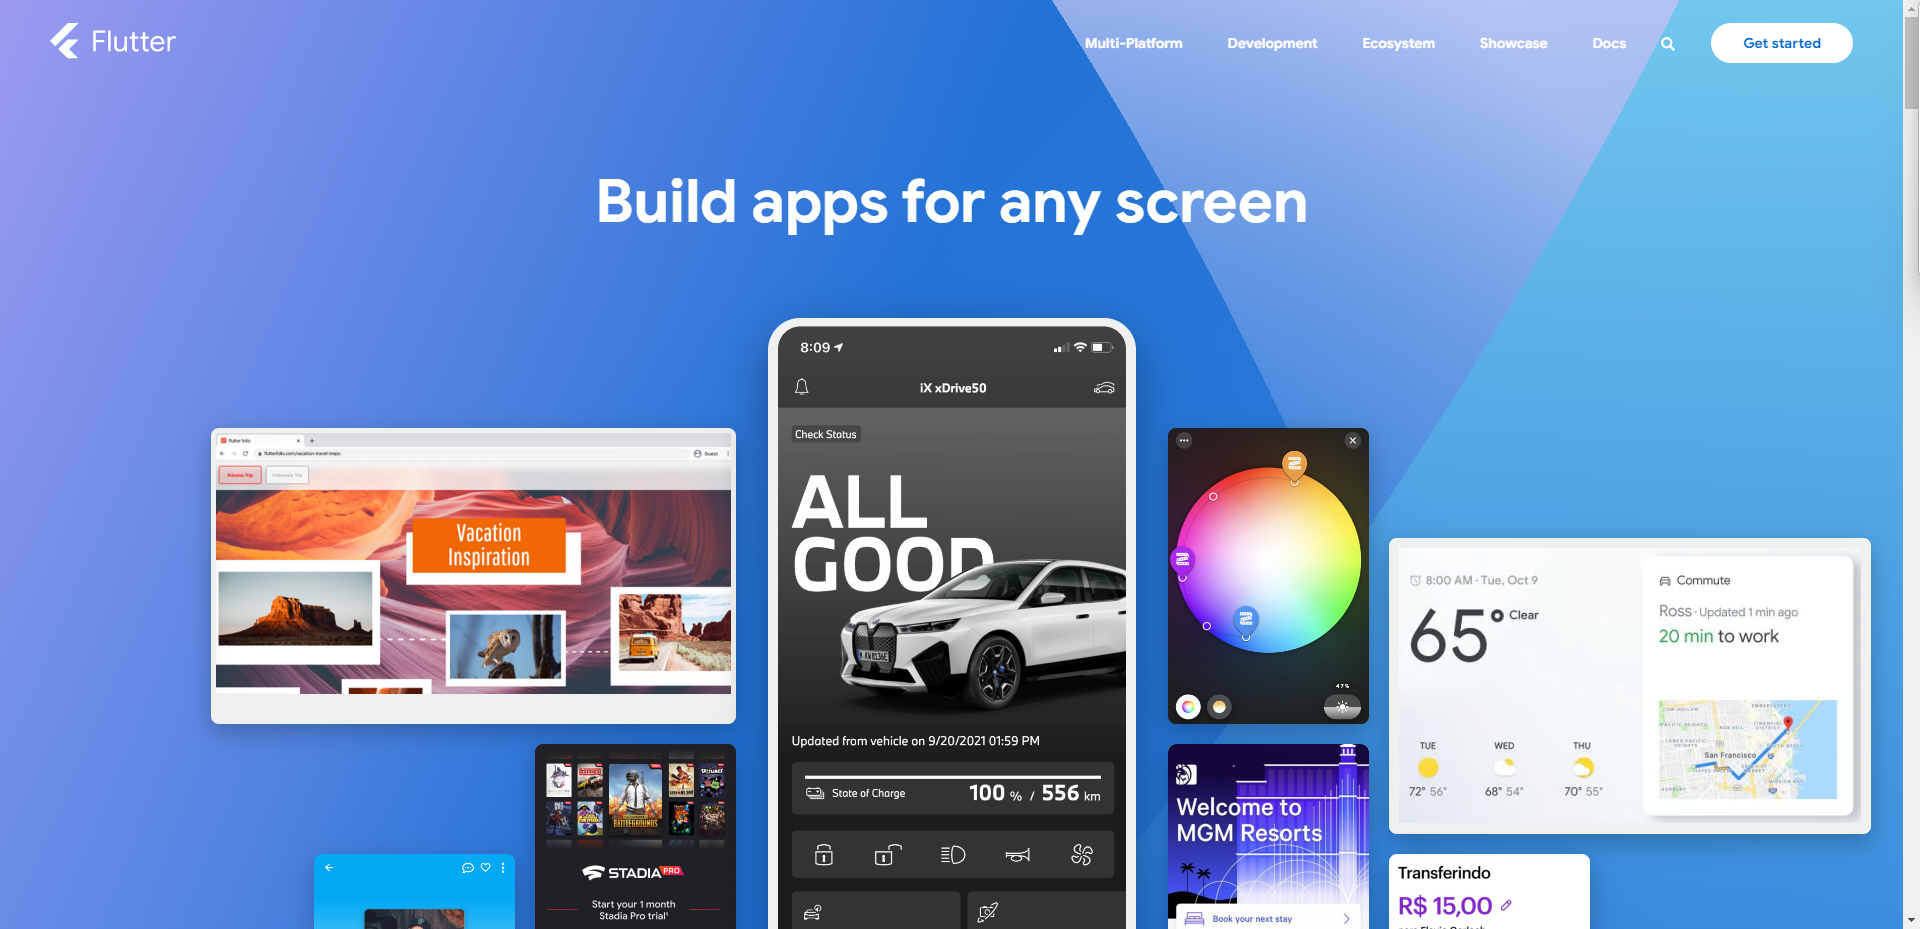
1️⃣Flutter 概述和特点
什么是Flutter?
Flutteris an open source application framework developed by Google.

Flutter的特点
Create applications for multiple platforms with just one piece of code,包括Android, iOS, Web, Windows, MacOS和Linux. 轻松访问 Material Design UIis built using a combination of gadgets 使用Dart作为开发语言 Hot reload feature enables rapid development
Flutter的文档
Flutter/DartA complete set of official documents. 这里有一些例子
关于如何开发Flutter应用程序的文档. Flutter官方文档
Flutter API参考
Dart 包搜索站点

此外,FlutterMore and more popular every year,除了官方文档外,Many developers have put together some easy-to-understand articles on other sites,Can be used as a reference for development.
2️⃣Firebase Overview and list of services
什么是Firebase?
FirebaseIs a mobile background services provided by Google(mBaaS).
FirebaseData can be easily stored and synced via the cloud、应用认证、消息通知、Features like app analytics and performance measurement added to mobile apps.
「Firebase 服务列表」
| 名称 | 内容 |
|---|---|
| A/B Testing | Easily run and analyze product and marketing tests |
| Analytics | Apply analytics |
| App Check | Provide protection for application data |
| App Distribution | Distribute the application to testers |
| Firebase Authentication | Easy to establish user authentication |
| Cloud Firestore | NoSQL Database Building Serverless |
| Cloud Functions for Firebase | Serverless running backend code |
| Firebase Cloud Messaging | Send and receive push messages |
| Firebase Crashlytics | Tracking application stability problem |
| Dynamic Links | Provides direct navigation to native app linked content |
| Firebase Extensions | Firebase 扩展 |
| Firebase Hosting | 网站部署 |
| Firebase In-App Messaging | Send targeted, contextual messages |
| Firebase ML | Provide machine learning capabilities to applications |
| Firebase Performance Monitoring | Get performance analysis |
| Firebase Realtime Database | 可以保存为 JSON 格式的数据库 |
| Firebase Remote Config | Allows for dynamic changes in functionality |
| Cloud Storage for Firebase | Save user-created content |
| Test lab | Authenticate your app on a virtual device |
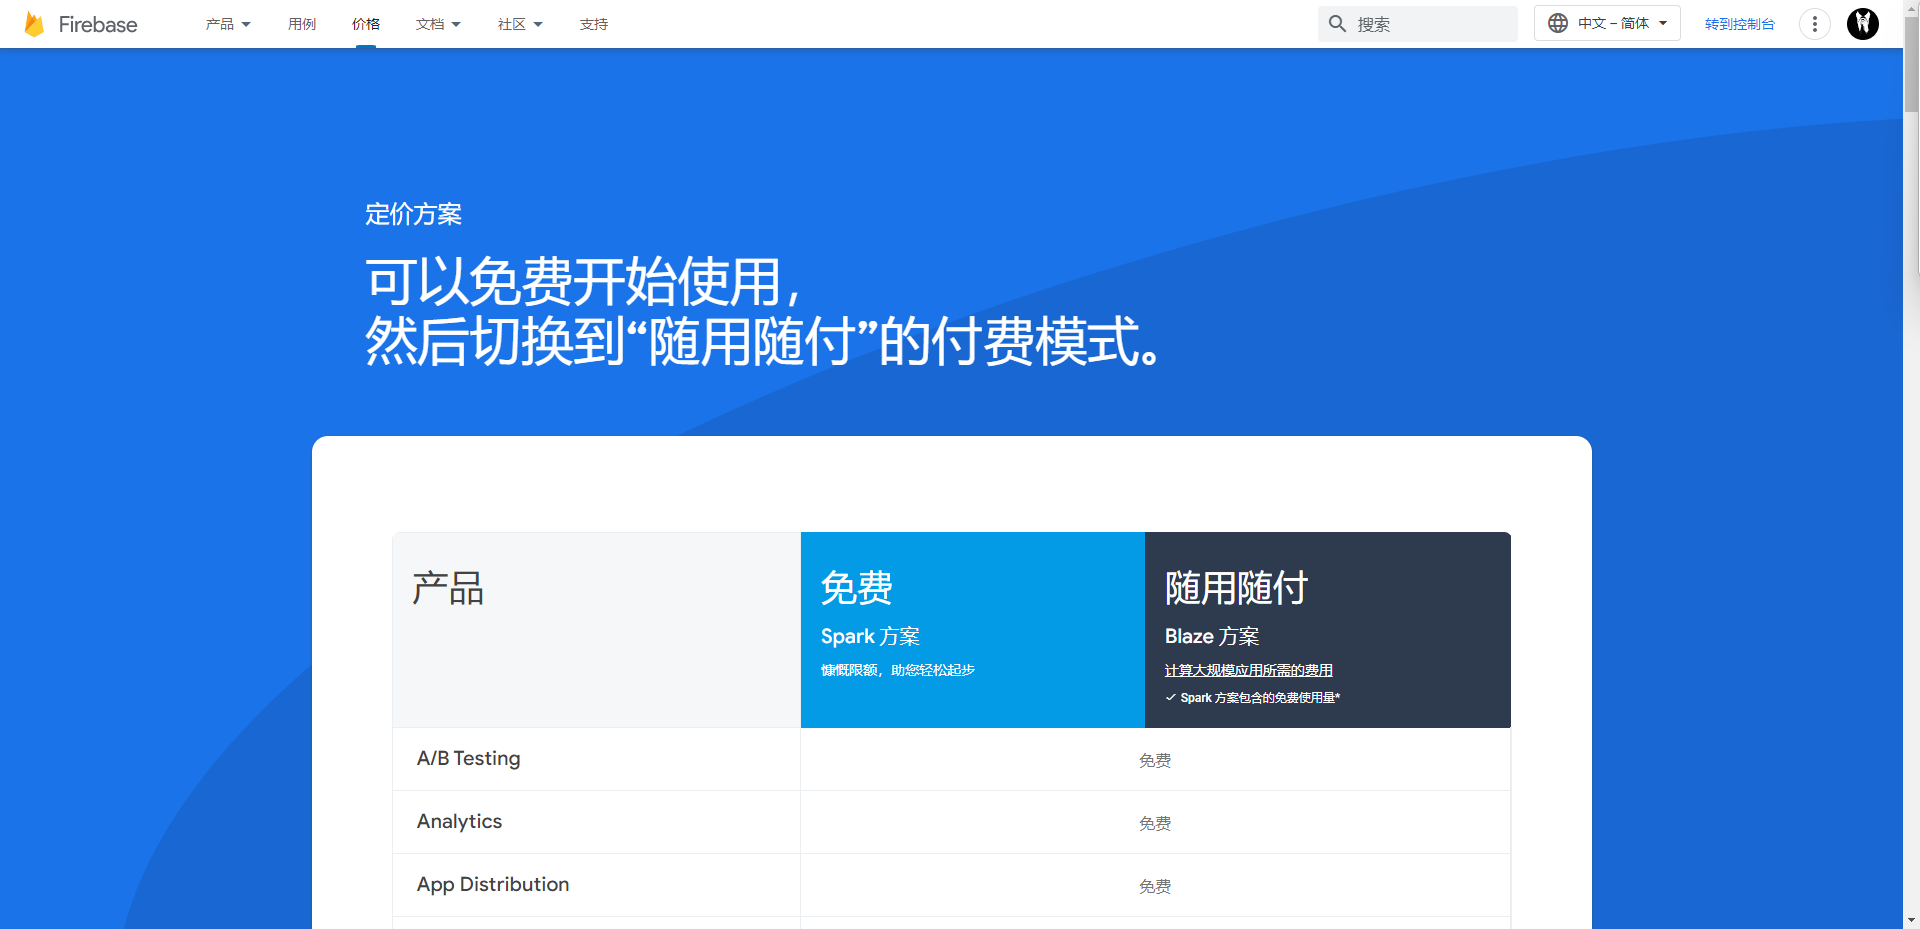
Firebase的费用
There are two fee plans
| 产品 | 价格 | 备注 |
|---|---|---|
| Spark 方案 | 免费 | Because it is a small-scale product,So limited |
| Blaze 方案 | 随用随付 | for large scale products |
Limits and detailed pricing for each plan,请参见官方网站.
3️⃣开发环境
About the environment in which this counter application was developed.
For environments different from,Code may vary.
| 项目 | 内容 |
|---|---|
| PC | Macbook Air(M1) |
| Flutter | 3.0.4 |
| Firebase CLI | 11.2.2 |
| FlutterFire | 0.2.4 |
| 模拟器 | Android 12(API 31), Chrome |
4️⃣准备编码
安装Flutter
要安装Flutter,请参考官方网站.

Create a counter application
首先,初始化Flutterapplication and create a counter application.
flutter create counter_firebase
Firebase CLI的设置
参照官方文档,安装Firebase CLI
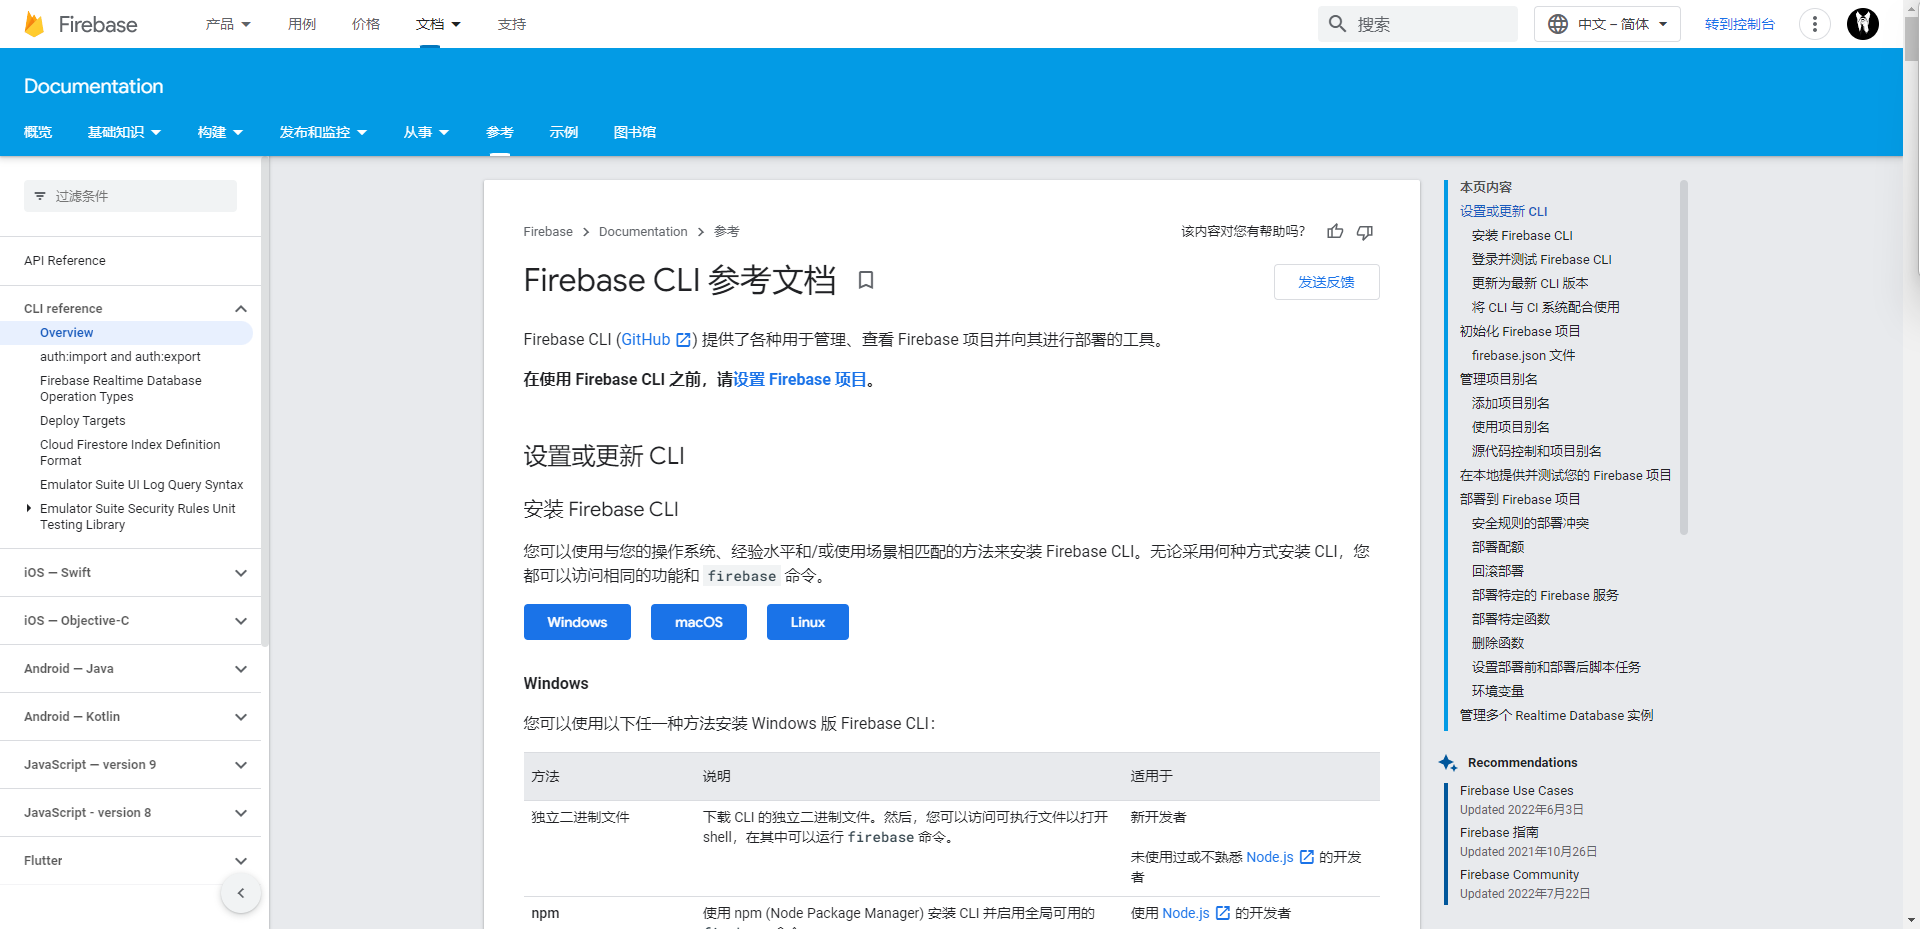 There are several installation methods,But you can also be practicalnpm来进行安装
npm install -g firebase-tools
此后,按照官方文件进行
首先,登录到firebase,全局启用flutterfire_cli
firebase login
dart pub global activate flutterfire_cli
从Firebase Console创建一个项目
It should be enabled at this pointGoogle Analytics
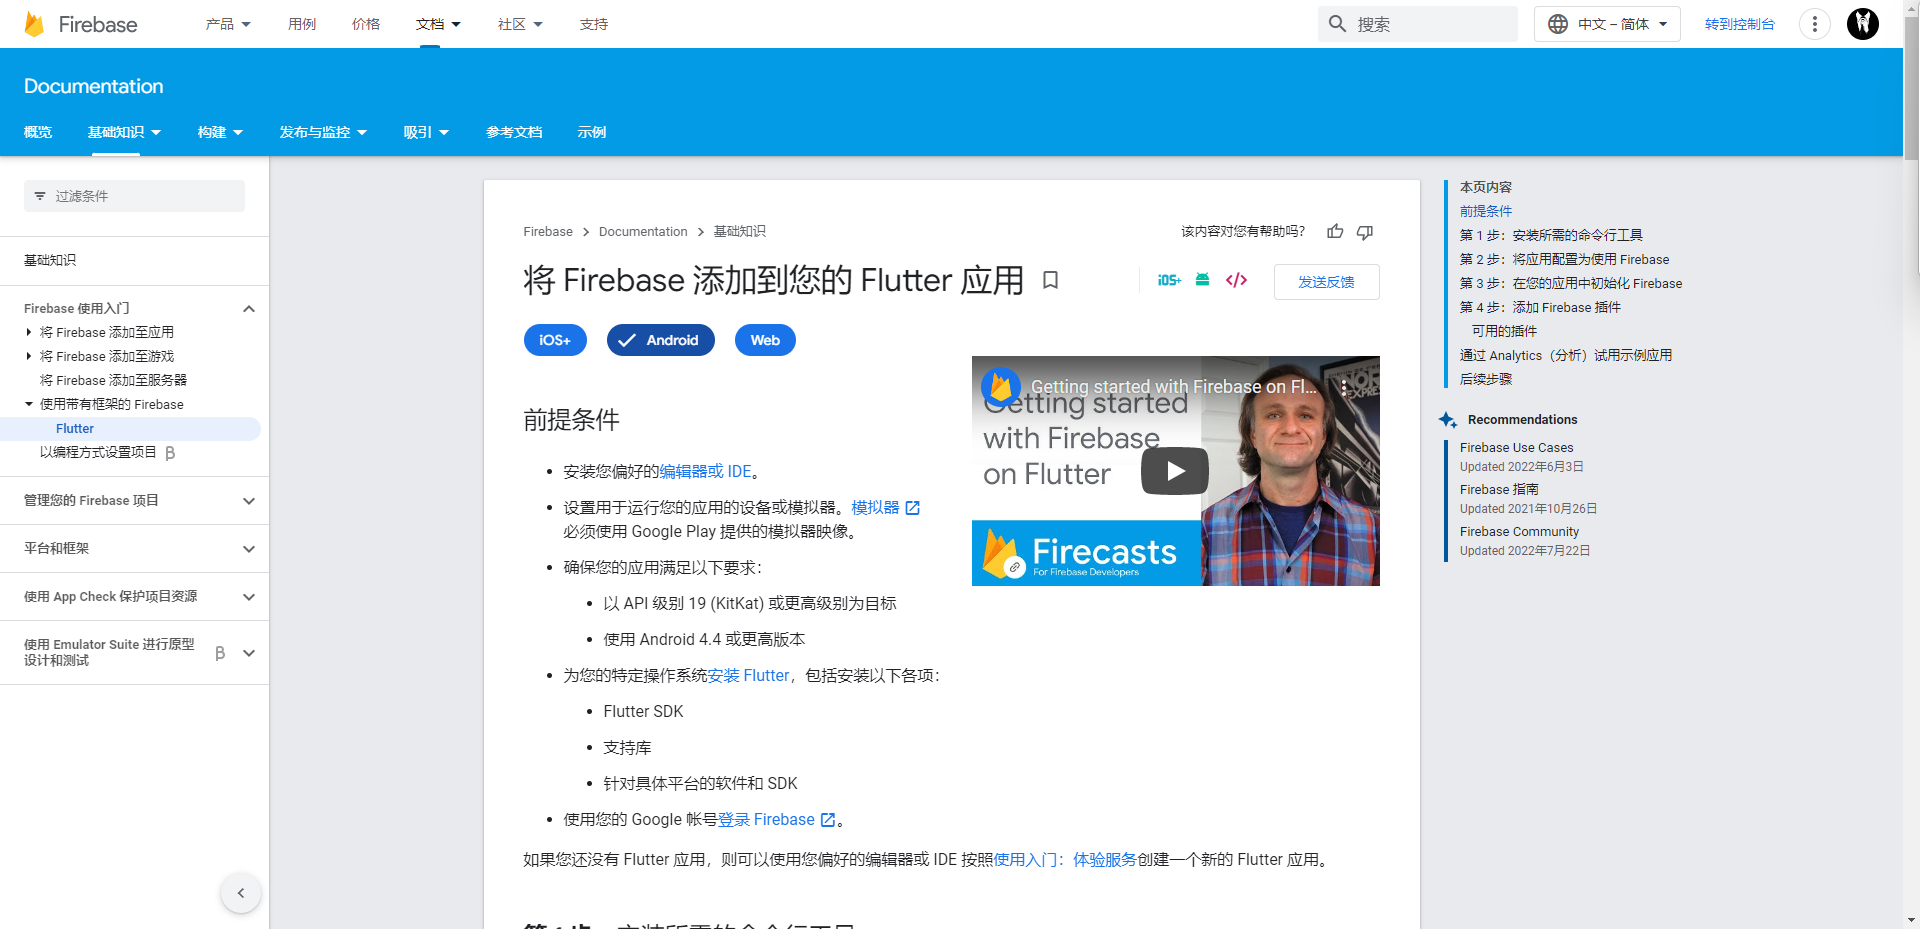
 Connect your application toFirebase
flutterfire configure
选择如下
# 选择项目
? Select a Firebase project to configure your Flutter application with ›
* counterfirebase-*** (counterFirebase)

# 平台选择. Check if all are ticked
? Which platforms should your configuration support (use arrow keys & space to select)? ›
 android
 ios
 macos
 web

# android/build.gradle是否更新
? The files android/build.gradle & android/app/build.gradle will be updated to apply Firebase configuration and gradle build plugins. Do you want to continue? (y/n) › yes
在pubspe.yaml中加入firebase_core
dependencies:
  firebase_core: ^1.19.2
确保FirebaseThe configuration is up to date
flutterfire configure
在main.dartInstall and initialize inFirebase包
import 'package:firebase_core/firebase_core.dart';
import 'firebase_options.dart';

void main() async {
  WidgetsFlutterBinding.ensureInitialized();
  await Firebase.initializeApp(
    options: DefaultFirebaseOptions.currentPlatform,
  );
  runApp(const MyApp());
}
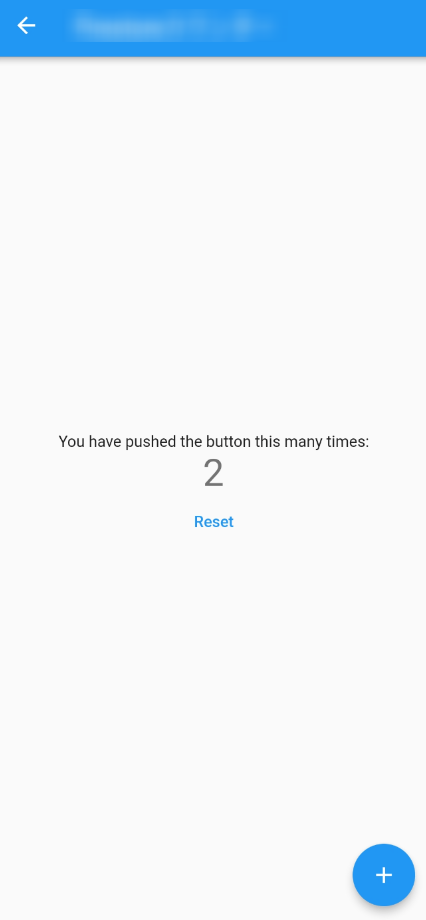
Below is a screenshot of the completed application

小结总结
The following sections have been changed from the originally created counter application
The number increased by Riverpod完成的 Transition from home screen to counter screen
「main.dart」
/// Flutter导入
import 'package:flutter/material.dart';
import 'package:flutter_riverpod/flutter_riverpod.dart';

/// Firebase导入
import 'package:firebase_core/firebase_core.dart';
import 'firebase_options.dart';

/// 导入其他页面
import 'package:counter_firebase/normal_counter_page.dart';

/// 主
void main() async {
  /// Firebase初始化
  WidgetsFlutterBinding.ensureInitialized();
  await Firebase.initializeApp(
    options: DefaultFirebaseOptions.currentPlatform,
  );

  /// runApp w/ Riverpod
  runApp(const ProviderScope(child: MyApp()));
}

/// Provider初始化
final counterProvider = StateNotifierProvider<Counter, int>((ref) {
  return Counter();
});

class Counter extends StateNotifier<int> {
  Counter() : super(0);

  ///
  void increment() => state++;
}

/// MaterialApp的配置
class MyApp extends StatelessWidget {
  const MyApp({Key? key}) : super(key: key);

  @override
  Widget build(BuildContext context) {
    return MaterialApp(
      title: 'Counter Firebase',
      theme: ThemeData(
        primarySwatch: Colors.blue,
      ),
      home: MyHomePage(),
      debugShowCheckedModeBanner: false,
    );
  }
}

/// Home screen
class MyHomePage extends ConsumerWidget {
  const MyHomePage({Key? key}) : super(key: key);

  @override
  Widget build(BuildContext context, WidgetRef ref) {
    return Scaffold(
      appBar: AppBar(
        title: const Text('My Homepage'),
      ),
      body: ListView(
        padding: const EdgeInsets.all(10),
        children: const <Widget>[
          _PagePushButton(
            buttonTitle: '计数器',
            pagename: NormalCounterPage(),
          ),
        ],
      ),
    );
  }
}

class _PagePushButton extends StatelessWidget {
  const _PagePushButton({
    Key? key,
    required this.buttonTitle,
    required this.pagename,
  }) : super(key: key);

  final String buttonTitle;
  final dynamic pagename;

  @override
  Widget build(BuildContext context) {
    return ElevatedButton(
      child: Container(
        padding: const EdgeInsets.all(10),
        child: Text(buttonTitle),
      ),
      onPressed: () {
        Navigator.push(
          context,
          MaterialPageRoute(builder: (context) => pagename),
        );
      },
    );
  }
}
「normal_counter_page.dart」
/// Flutter
import 'package:flutter/material.dart';
import 'package:flutter_riverpod/flutter_riverpod.dart';

/// 其他页面
import 'package:counter_firebase/main.dart';

class NormalCounterPage extends ConsumerStatefulWidget {
  const NormalCounterPage({Key? key}) : super(key: key);

  @override
  NormalCounterPageState createState() => NormalCounterPageState();
}

class NormalCounterPageState extends ConsumerState<NormalCounterPage> {
  @override
  void initState() {
    super.initState();
  }

  @override
  Widget build(BuildContext context) {
    final counter = ref.watch(counterProvider);

    return Scaffold(
      appBar: AppBar(
        title: const Text('Homepage'),
      ),
      body: Center(
        child: Column(
          mainAxisAlignment: MainAxisAlignment.center,
          children: <Widget>[
            const Text(
              'You have pushed the button this many times:',
            ),
            Text(
              '$counter',
              style: Theme.of(context).textTheme.headline4,
            ),
          ],
        ),
      ),
      floatingActionButton: FloatingActionButton(
        onPressed: () {
          ref.read(counterProvider.notifier).increment();
        },
        tooltip: 'Increment',
        child: const Icon(Icons.add),
      ),
    );
  }
}
5️⃣Firebase Analytics编
Firebase Analytics概述
Firebase Analytics是一项服务,允许你使用Firebase将Google Analyticsapply to your application
Analytics allows you to log your application's events,and find out the usage of the app
以下是关于在Flutterused in the analysis官方文档

准备
Preparations and previous chapters have been completed before starting
使用方法
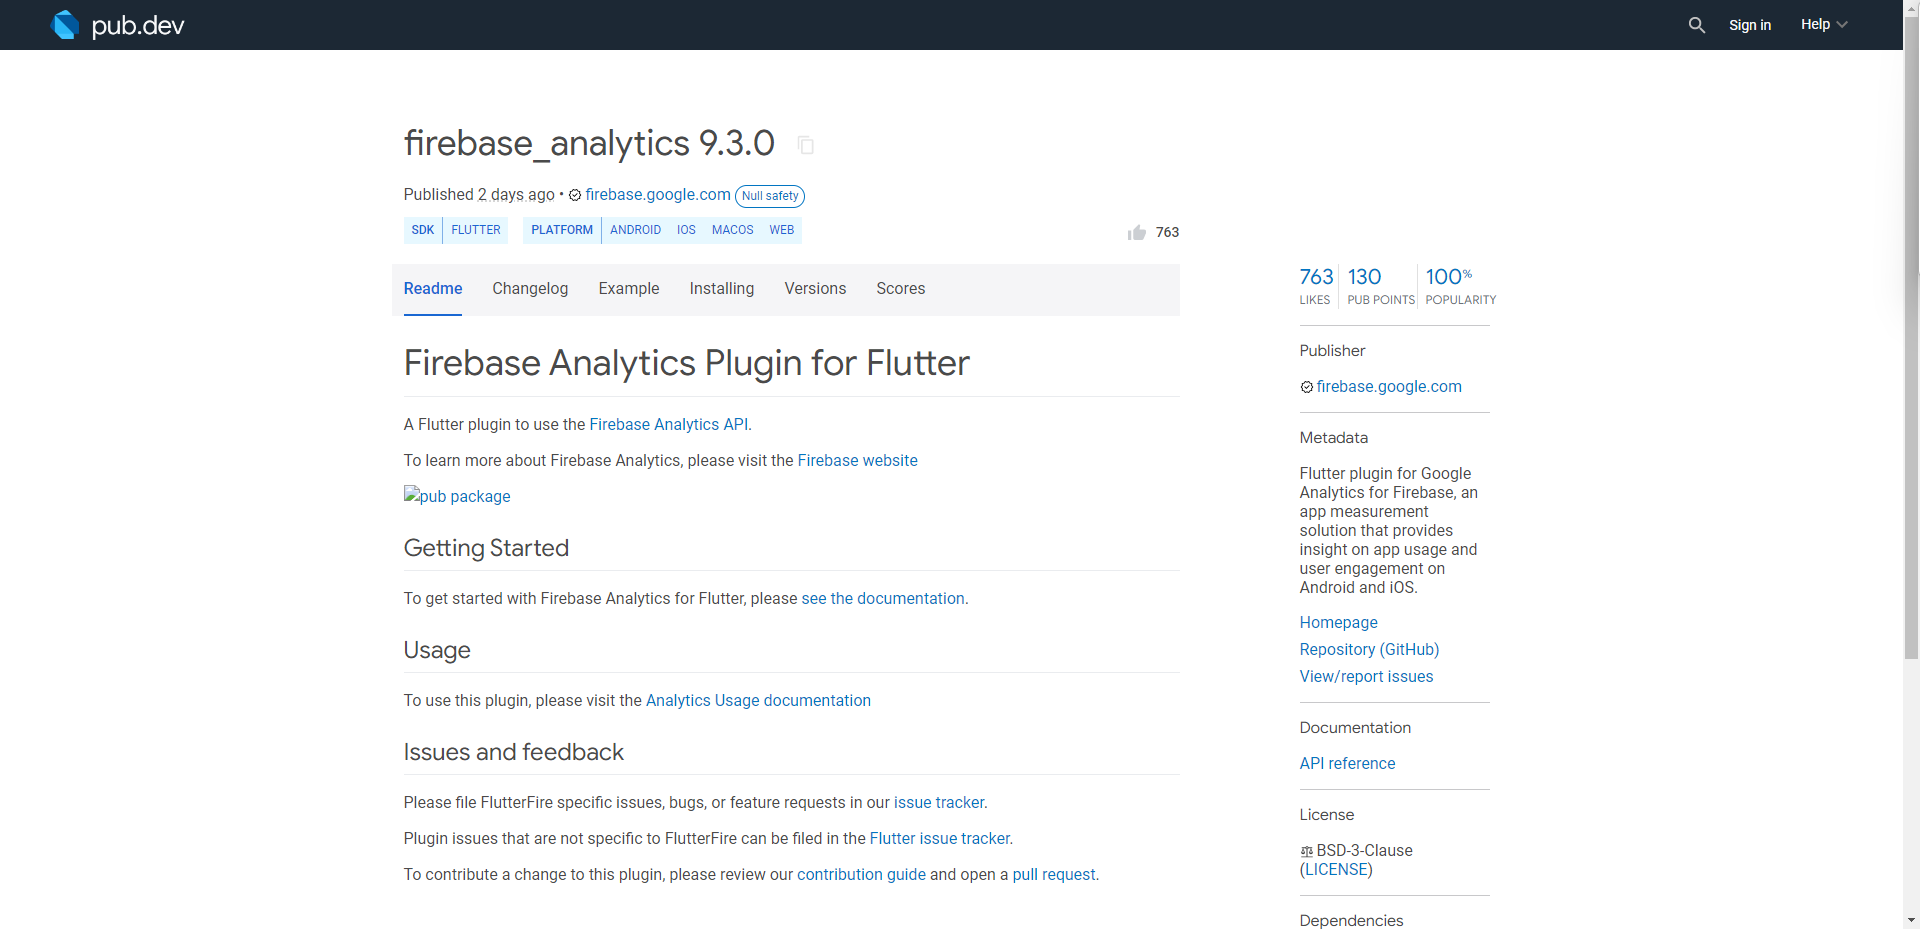
要在项目中引入firebase_analytics,将其添加到pubspec.yaml中并导入
「pubspec.yaml」
dependencies:
  firebase_analytics: ^9.2.0
Events that can be logged arefirebase_analytics_packagelisted on the webpage

安装
这一次,logEventScreen transition events are logged
import 'package:firebase_analytics/firebase_analytics.dart';

class AnalyticsService {
  Future<void> logPage(String screenName) async {
    await FirebaseAnalytics.instance.logEvent(
      name: 'screen_view',
      parameters: {
        'firebase_screen': screenName,
      },
    );
  }
}
WidgetThe terminal settings are as follows
ElevatedButton{
  child: Text(buttonTitle),
  onPressed: () {
    AnalyticsService().logPage(buttonTitle);
    Navigator.push(
        context, MaterialPageRoute(builder: (context) => pagename));
  },
},
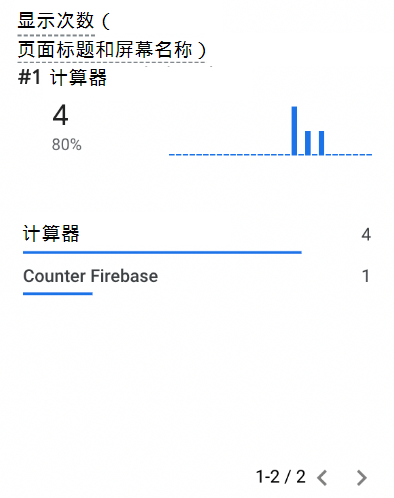
日志信息可以在Firebase控制台找到
in the analytical relationship,Real-time analysis is shown、Event Analysis and Conversion Analysis
小结总结
This is compared with the last changes
AnalyticsImplementing page transition records Other code changes
「main.dart」
/// Flutter导入
import 'package:flutter/material.dart';
import 'package:flutter_riverpod/flutter_riverpod.dart';

/// Firebase导入
import 'package:firebase_core/firebase_core.dart';
import 'firebase_options.dart';
import 'package:firebase_analytics/firebase_analytics.dart';

/// 导入其他页面
import 'package:counter_firebase/normal_counter_page.dart';

/// 主
void main() async {
  /// Firebase初始化
  WidgetsFlutterBinding.ensureInitialized();
  await Firebase.initializeApp(
    options: DefaultFirebaseOptions.currentPlatform,
  );

  /// runApp w/ Riverpod
  runApp(const ProviderScope(child: MyApp()));
}

/// Provider初始化
final counterProvider = StateNotifierProvider<Counter, int>((ref) {
  return Counter();
});

class Counter extends StateNotifier<int> {
  Counter() : super(0);

  void increment() => state++;
}

/// MaterialApp的配置
class MyApp extends StatelessWidget {
  const MyApp({Key? key}) : super(key: key);

  @override
  Widget build(BuildContext context) {
    return MaterialApp(
      title: 'Counter Firebase',
      theme: ThemeData(
        primarySwatch: Colors.blue,
      ),
      home: const MyHomePage(),
      debugShowCheckedModeBanner: false,
    );
  }
}

/// 主屏幕
class MyHomePage extends ConsumerWidget {
  const MyHomePage({Key? key}) : super(key: key);

  @override
  Widget build(BuildContext context, WidgetRef ref) {
    return Scaffold(
      appBar: AppBar(
        title: const Text('My Homepage'),
      ),
      body: ListView(
        padding: const EdgeInsets.all(10),
        children: const <Widget>[
          _PagePushButton(
            buttonTitle: '计数器',
            pagename: NormalCounterPage(),
          ),
        ],
      ),
    );
  }
}

/// Page transition buttons
class _PagePushButton extends StatelessWidget {
  const _PagePushButton({
    Key? key,
    required this.buttonTitle,
    required this.pagename,
  }) : super(key: key);

  final String buttonTitle;
  final dynamic pagename;

  @override
  Widget build(BuildContext context) {
    return ElevatedButton(
      child: Container(
        padding: const EdgeInsets.all(10),
        child: Text(buttonTitle),
      ),
      onPressed: () {
        AnalyticsService().logPage(buttonTitle);
        Navigator.push(
          context,
          MaterialPageRoute(builder: (context) => pagename),
        );
      },
    );
  }
}

/// Analytics
class AnalyticsService {
  /// Log of page transitions
  Future<void> logPage(String screenName) async {
    await FirebaseAnalytics.instance.logEvent(
      name: 'screen_view',
      parameters: {
        'firebase_screen': screenName,
      },
    );
  }
}
检查Firebase Console中的内容
6️⃣Firebase Crashlytics编
Firebase Crashlytics概述
Firebase Crashlyticsis a crash reporting tool that tracks app issues
Firebase Crashlytics可用于Android和iOS设备
Firebase Crashlytics的官方文档
准备
Preparations and previous chapters have been completed before starting
使用方法
要在项目中引入firebase_analytics,将其添加到pubspec.yaml中并导入
「pubspec.yaml」
dependencies:
  firebase_crashlytics: ^2.8.5
为了确保FirebaseThe configuration is up to date,Open a terminal in the project root directory,运行flutterfire configure
flutterfire configure
Crash handler configuration
准备好后,Configure crash handler
FirebaseCrashlytics.instance.recordFlutterFatalError会自动抓取FlutterAll errors thrown within the framework
您还可以使用runZonedGuarded(需要导入dart:async)来捕捉FlutterErrors not caught by the framework
import 'dart:async';
import 'package:firebase_crashlytics/firebase_crashlytics.dart';

void main() async {
  /// Crash handler
  runZonedGuarded<Future<void>>(() async {
    /// Firebase初始化
    WidgetsFlutterBinding.ensureInitialized();
    await Firebase.initializeApp(
      options: DefaultFirebaseOptions.currentPlatform,
    );

    /// Crash handler(FlutterAll errors thrown within the framework)
    FlutterError.onError = FirebaseCrashlytics.instance.recordFlutterFatalError;

    /// runApp w/ Riverpod
    runApp(const ProviderScope(child: MyApp()));
  },

      /// Crash handler(FlutterWithin the framework of an uncaught error)
      (error, stack) =>
          FirebaseCrashlytics.instance.recordError(error, stack, fatal: true));
}
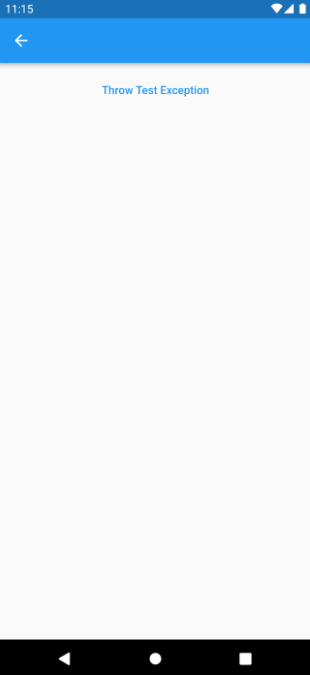
测试碰撞
一旦配置好,在安卓或iOSForced crash on device,进行测试
If you have added an error handler,调用FirebaseCrashlytics.instance.recordError(error, stack, fatal: true),available on the button onPressed 上使用 throw Exception () 使其崩溃
TextButton(
  onPressed: () => throw Exception(),
  child: const Text("Throw Test Exception"),
),
这一次,We have added a new crash page,Button and create a collapse
当崩溃发生时,Firebase Console的CrashlyticsA report will be displayed.
CrashlyticsApplication crashes will now be monitored
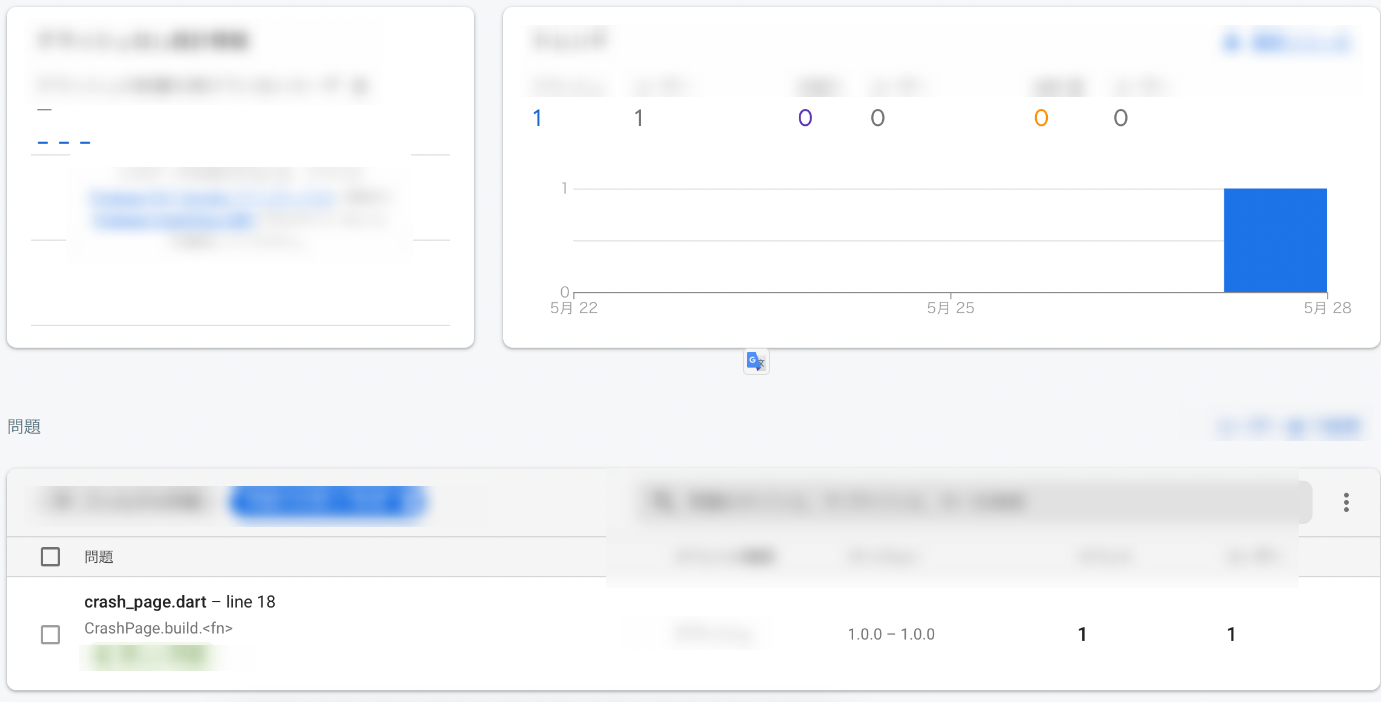
Collision reporting can also be customized
小结总结
This is compared with the last changes
Added test collision page Other code modifications
「main.dart」
/// Flutter导入
import 'package:flutter/material.dart';
import 'package:flutter_river:pod/flutter_riverpod.dart';
import 'dart:async';

/// Firebase导入
import 'package:firebase_core/firebase_core.dart';
import 'firebase_options.dart';
import 'package:firebase_analytics/firebase_analytics.dart';
import 'package:firebase_crashlytics/firebase_crashlytics.dart';

/// 导入其他页面
import 'package:counter_firebase/normal_counter_page.dart';
import 'package:counter_firebase/crash_page.dart';

void main() async {
  /// Crash handler
  runZonedGuarded<Future<void>>(() async {
    /// Firebase初始化
    WidgetsFlutterBinding.ensureInitialized();
    await Firebase.initializeApp(
      options: DefaultFirebaseOptions.currentPlatform,
    );

    /// Crash handler(FlutterAll errors thrown within the framework)
    FlutterError.onError = FirebaseCrashlytics.instance.recordFlutterFatalError;

    /// runApp w/ Riverpod
    runApp(const ProviderScope(child: MyApp()));
  },

      /// Crash handler(FlutterWithin the framework of an uncaught error)
      (error, stack) =>
          FirebaseCrashlytics.instance.recordError(error, stack, fatal: true));
}

/// Provider初始化
final counterProvider = StateNotifierProvider<Counter, int>((ref) {
  return Counter();
});

class Counter extends StateNotifier<int> {
  Counter() : super(0);

  void increment() => state++;
}

/// MaterialApp设置
class MyApp extends StatelessWidget {
  const MyApp({Key? key}) : super(key: key);

  @override
  Widget build(BuildContext context) {
    return MaterialApp(
      title: 'Counter Firebase',
      theme: ThemeData(
        primarySwatch: Colors.blue,
      ),
      home: const MyHomePage(),
      debugShowCheckedModeBanner: false,
    );
  }
}

/// 主屏幕
class MyHomePage extends ConsumerWidget {
  const MyHomePage({Key? key}) : super(key: key);

  @override
  Widget build(BuildContext context, WidgetRef ref) {
    return Scaffold(
      appBar: AppBar(
        title: const Text('My Homepage'),
      ),
      body: ListView(
        padding: const EdgeInsets.all(10),
        children: <Widget>[
          _PagePushButton(
            buttonTitle: '计数器',
            pagename: NormalCounterPage(),
          ),
          _PagePushButton(
            buttonTitle: 'crash page',
            pagename: CrashPage(),
          ),
        ],
      ),
    );
  }
}

/// Page transition buttons
class _PagePushButton extends StatelessWidget {
  const _PagePushButton({
    Key? key,
    required this.buttonTitle,
    required this.pagename,
  }) : super(key: key);

  final String buttonTitle;
  final dynamic pagename;

  @override
  Widget build(BuildContext context) {
    return ElevatedButton(
      child: Container(
        padding: const EdgeInsets.all(10),
        child: Text(buttonTitle),
      ),
      onPressed: () {
        AnalyticsService().logPage(buttonTitle);
        Navigator.push(
          context,
          MaterialPageRoute(builder: (context) => pagename),
        );
      },
    );
  }
}

/// Analytics
class AnalyticsService {
  /// Log of page transitions
  Future<void> logPage(String screenName) async {
    await FirebaseAnalytics.instance.logEvent(
      name: 'screen_view',
      parameters: {
        'firebase_screen': screenName,
      },
    );
  }
}
「crash_page.dart」
/// Flutter
import 'package:flutter/material.dart';
import 'package:flutter_riverpod/flutter_riverpod.dart';

class CrashPage extends ConsumerWidget {
  const CrashPage({Key? key}) : super(key: key);

  @override
  Widget build(BuildContext context, WidgetRef ref) {
    return Scaffold(
      appBar: AppBar(
        title: const Text('crash page'),
      ),
      body: ListView(
        padding: const EdgeInsets.all(10),
        children: <Widget>[
          TextButton(
            onPressed: () => throw Exception(),
            child: const Text("Throws a test exception"),
          ),
        ],
      ),
    );
  }
}
7️⃣Firebase Remote Config
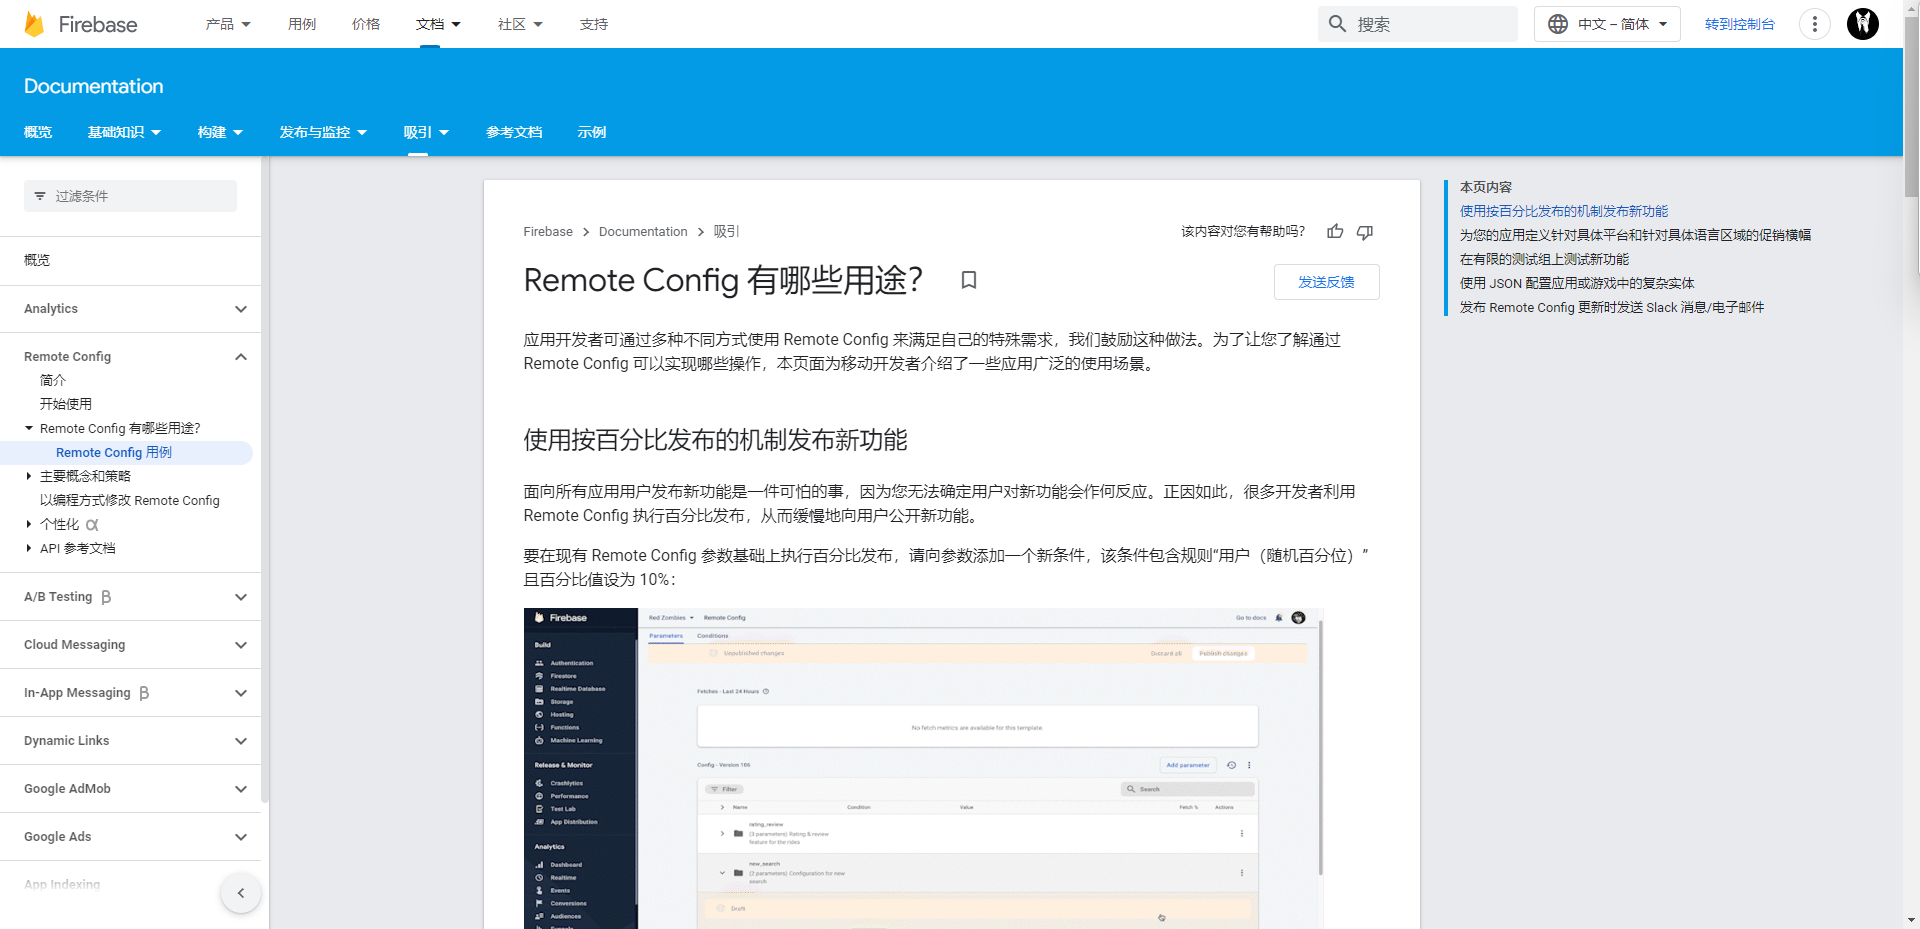
「Firebase Remote Config」概述
Firebase Remote Config是一项服务,It allows you to change the behavior and appearance of your application,without the need to publish updates and change configuration values remotely.
Firebase Remote Config的官方文档
应用案例
The official introduction of the following Remote Config 用例.
By publishing percentage to launch new features Define platform-specific and locale-specific promotional banners for your app
准备
Preparations and previous chapters have been completed before starting
使用方法
要在项目中引入firebase_remote_config,将其添加到pubspec.yaml中并导入
「pubspec.yaml」
dependencies:
  firebase_remote_config: ^2.0.12
Create and execute a method to initialize and set parameters
When retrieving a singleton object,Control the minimum fetch interval for optimal update time
使用getString()、getBool()等方法获取app中使用的参数
import 'package:firebase_remote_config/firebase_remote_config.dart';

/// Firebase Remote Config的初始化
class FirebaseRemoteConfigService {
  void initRemoteConfig() async {
    /// 实例创建
    final remoteConfig = FirebaseRemoteConfig.instance;

    /// get a singleton object
    await remoteConfig.setConfigSettings(RemoteConfigSettings(
      fetchTimeout: const Duration(minutes: 1),
      minimumFetchInterval: const Duration(minutes: 5),
    ));

    /// In the application to set the default parameter values
    await remoteConfig.setDefaults(const {
      "example_param": "Hello, world!",
    });

    /// 取值
    await remoteConfig.fetchAndActivate();
  }
}
加载
初始化
「remote_config_page.dart」
@override
void initState() {
  super.initState();

  /// Firebase Remote Config初始化
  FirebaseRemoteConfigService().initRemoteConfig();
}
导出到Text Widget时,You can see the output value(0)
「remote_config_page.dart」
Text(FirebaseRemoteConfig.instance.getString("example_param")),

更改值
然后从 Firebase Console的Remote ConfigSet backend config to change value
In the parameter key enter bysetDefaultsOK key,Enter a new value in Default value,然后'发布更改'
 过了一会儿,I was able to confirm that the text was changed to 8
小结总结
This is compared with the last changes
增加了Remote Config页面 Other code modifications
「main.dart」
/// Flutter导入
import 'package:flutter/material.dart';
import 'package:flutter_riverpod/flutter_riverpod.dart';
import 'dart:async';

/// Firebase导入
import 'package:firebase_core/firebase_core.dart';
import 'firebase_options.dart';
import 'package:firebase_analytics/firebase_analytics.dart';
import 'package:firebase_crashlytics/firebase_crashlytics.dart';
import 'package:counter_firebase/remote_config_page.dart';

/// 导入其他页面
import 'package:counter_firebase/normal_counter_page.dart';
import 'package:counter_firebase/crash_page.dart';

void main() async {
  /// Crash handler
  runZonedGuarded<Future<void>>(() async {
    /// Firebase初始化
    WidgetsFlutterBinding.ensureInitialized();
    await Firebase.initializeApp(
      options: DefaultFirebaseOptions.currentPlatform,
    );

    /// Crash handler(FlutterAll errors thrown within the framework)
    FlutterError.onError = FirebaseCrashlytics.instance.recordFlutterFatalError;

    /// runApp w/ Riverpod
    runApp(const ProviderScope(child: MyApp()));
  },

      /// Crash handler(FlutterWithin the framework of an uncaught error)
      (error, stack) =>
          FirebaseCrashlytics.instance.recordError(error, stack, fatal: true));
}

/// Provider初始化
final counterProvider = StateNotifierProvider<Counter, int>((ref) {
  return Counter();
});

class Counter extends StateNotifier<int> {
  Counter() : super(0);

  void increment() => state++;
}

/// MaterialApp设置
class MyApp extends StatelessWidget {
  const MyApp({Key? key}) : super(key: key);

  @override
  Widget build(BuildContext context) {
    return MaterialApp(
      title: 'Counter Firebase',
      theme: ThemeData(
        primarySwatch: Colors.blue,
      ),
      home: const MyHomePage(),
      debugShowCheckedModeBanner: false,
    );
  }
}

/// 主屏幕
class MyHomePage extends ConsumerWidget {
  const MyHomePage({Key? key}) : super(key: key);

  @override
  Widget build(BuildContext context, WidgetRef ref) {
    return Scaffold(
      appBar: AppBar(
        title: const Text('My Homepage'),
      ),
      body: ListView(
        padding: const EdgeInsets.all(10),
        children: <Widget>[
          _PagePushButton(
            buttonTitle: '计数器',
            pagename: NormalCounterPage(),
          ),
          _PagePushButton(
            buttonTitle: '计数器',
            pagename: CrashPage(),
          ),
          _PagePushButton(
            buttonTitle: 'Remote Config计数器',
            pagename: RemoteConfigPage(),
          ),
        ],
      ),
    );
  }
}

/// Page transition buttons
class _PagePushButton extends StatelessWidget {
  const _PagePushButton({
    Key? key,
    required this.buttonTitle,
    required this.pagename,
  }) : super(key: key);

  final String buttonTitle;
  final dynamic pagename;

  @override
  Widget build(BuildContext context) {
    return ElevatedButton(
      child: Container(
        padding: const EdgeInsets.all(10),
        child: Text(buttonTitle),
      ),
      onPressed: () {
        AnalyticsService().logPage(buttonTitle);
        Navigator.push(
          context,
          MaterialPageRoute(builder: (context) => pagename),
        );
      },
    );
  }
}

class AnalyticsService {
  /// Log of page transitions
  Future<void> logPage(String screenName) async {
    await FirebaseAnalytics.instance.logEvent(
      name: 'screen_view',
      parameters: {
        'firebase_screen': screenName,
      },
    );
  }
}
「remote_config_page.dart」
/// Flutter
import 'package:flutter/material.dart';
import 'package:flutter_riverpod/flutter_riverpod.dart';

/// Firebase导入
import 'package:firebase_remote_config/firebase_remote_config.dart';

/// 其他页面
import 'package:counter_firebase/main.dart';

class RemoteConfigPage extends ConsumerStatefulWidget {
  const RemoteConfigPage({Key? key}) : super(key: key);

  @override
  RemoteConfigPageState createState() => RemoteConfigPageState();
}

class RemoteConfigPageState extends ConsumerState<RemoteConfigPage> {
  @override
  void initState() {
    super.initState();

    /// Firebase Remote Config初始化
    FirebaseRemoteConfigService().initRemoteConfig();
  }

  @override
  Widget build(BuildContext context) {
    return Scaffold(
      appBar: AppBar(
        title: const Text('Homepage'),
      ),
      body: Center(
        child: Column(
          mainAxisAlignment: MainAxisAlignment.center,
          children: <Widget>[
            /// Remote Config数据采集
            Text(
       FirebaseRemoteConfig.instance.getString("example_param"),
              style: Theme.of(context).textTheme.headline4,
            ),
          ],
        ),
      ),
    );
  }
}

/// Firebase Remote Config的初始设置
class FirebaseRemoteConfigService {
  void initRemoteConfig() async {
    /// 实例创建
    final remoteConfig = FirebaseRemoteConfig.instance;

    /// get a singleton object
    await remoteConfig.setConfigSettings(RemoteConfigSettings(
      fetchTimeout: const Duration(minutes: 1),
      minimumFetchInterval: const Duration(minutes: 5),
    ));

    /// In the application to set the default parameter values
    await remoteConfig.setDefaults(const {
      "example_param": "0",
    });

    /// 获取数值
    await remoteConfig.fetchAndActivate();
  }
}
8️⃣Firebase Authentication
「Firebase Authentication」概述
FirebaseAuthentication is a service that can use the user authentication function

准备
Preparations and previous chapters have been completed before starting
使用方法
要在项目中引入firebase_auth,请在pubspec.yaml中添加以下内容,并导入它
「pubspec.yaml」
dependencies:
  firebase_auth: ^3.4.2
To choose your login method(电子邮件地址、电话号码等),请从Firebase Console进入认证,Select the login method you prefer under the login method.
在这种情况下,We will use an email address and password
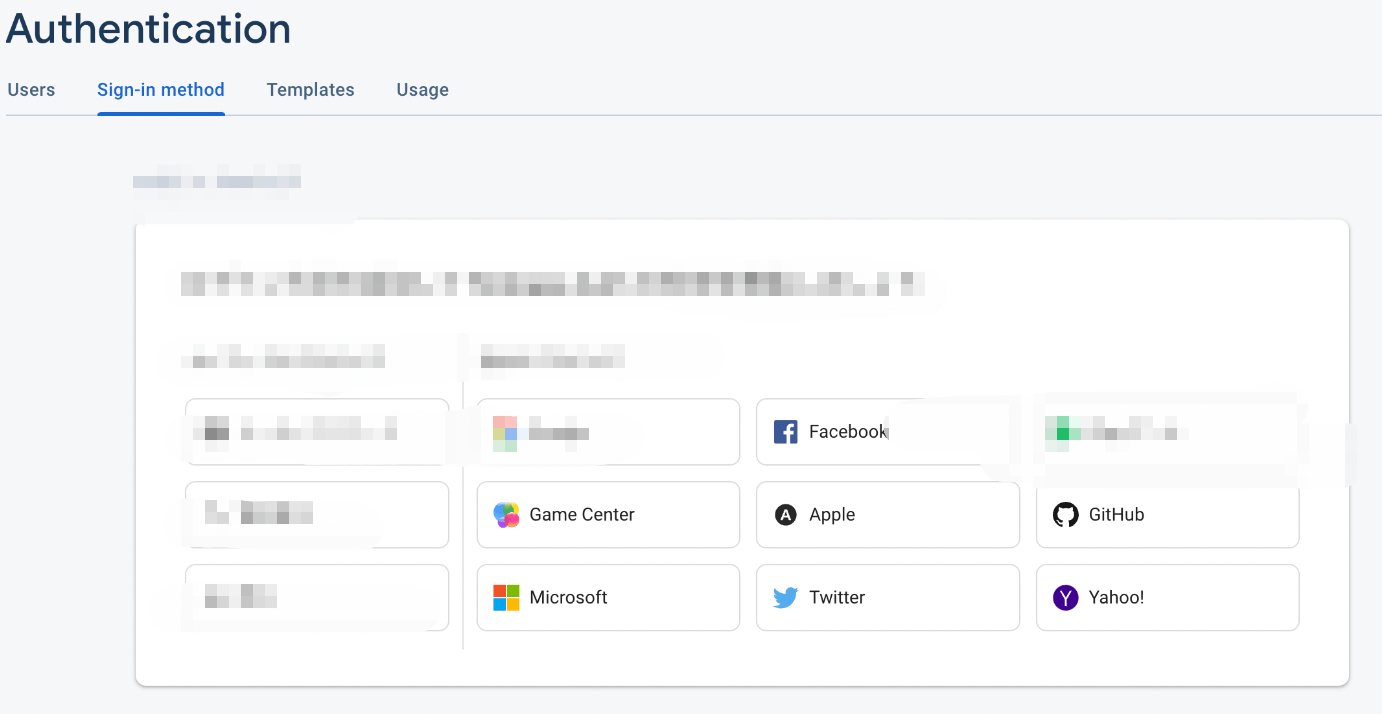 在Firebase ConsoleAfter setting the configuration in,You can practice
输入TextFieldemail address and password entered in.
通过将obscureText设置为 "true "Make the password invisible.
/// Enter your email address
TextField(
  decoration: const InputDecoration(
    label: Text('E-mail'),
  ),
  controller: _idController,
),

/// 输入密码
TextField(
  decoration: const InputDecoration(
    label: Text('Password'),
  ),
  controller: _passController,
  obscureText: true,
),
Create an execute button and call a function that allows you to create an account or log in
/// Used to create an account
Container(
  margin: const EdgeInsets.all(10),
  child: ElevatedButton(
    onPressed: () {
      _createAccount(ref, idController.text, passController.text);
    },
    child: const Text('创建账户'),
  ),
),
使用FirebaseAuth.instance.createUserWithEmailAndPasswordto handle account creation.
Email address and password are passed,如果发生错误,会产生一个错误信息.
import 'package:firebase_auth/firebase_auth.dart';

void _createAccount(String id, String pass) async {
  try {
    /// credential Account information records
    final credential =
        await FirebaseAuth.instance.createUserWithEmailAndPassword(
      email: id,
      password: pass,
    );
  }

  /// Error handling in case of account failure
  on FirebaseAuthException catch (e) {
    /// If the password is weak
    if (e.code == 'weak-password') {
      print('Please set the uppercase and lowercase letters and numbers6-18位密码');

      /// If the email address is already in use
    } else if (e.code == 'email-already-in-use') {
      print('the email to register');
    }

    ///其他错误
    else {
      print('Account creation error');
    }
  } catch (e) {
    print(e);
  }
}
The login process is usedFirebaseAuth.instance.signInWithEmailAndPassword来处理.
it passes email address and password,如果发生错误,会产生一个错误信息
void _signIn(String id, String pass) async {
  try {
    /// credential Account information records
    final credential = await FirebaseAuth.instance.signInWithEmailAndPassword(
      email: id,
      password: pass,
    );
  }

  /// Error handling when login fails
  on FirebaseAuthException catch (e) {
    /// 无效的电子邮件地址
    if (e.code == 'invalid-email') {
      print('无效的电子邮件地址');
    }

    /// 如果该用户不存在
    else if (e.code == 'user-not-found') {
      print('用户不存在');
    }

    /// 如果密码不正确
    else if (e.code == 'wrong-password') {
      print('密码不正确');
    }

    /// 其他错误
    else {
      print('登录错误');
    }
  }
}
用于登出FirebaseAuth.instance.signOut()「auth_page.dart」
void _signOut() async {
  await FirebaseAuth.instance.signOut();
}
Three ways to obtain user information.
/// 使用authStateChanges、idTokenChanges和userChanges流
FirebaseAuth.instance
  .authStateChanges()
  .listen((User? user) {
    if (user != null) {
      print(user.uid);
    }
  });

/// Used by certified(signIn)方法返回的UserCredential对象
final userCredential =
    await FirebaseAuth.instance.signInWithCredential(credential);
final user = userCredential.user;
print(user?.uid);

/// 使用FirebaseAuth实例的currentUser属性
if (FirebaseAuth.instance.currentUser != null) {
  print(FirebaseAuth.instance.currentUser?.uid);
}
使用.update***to update user profile and email address
final userCredential =
    await FirebaseAuth.instance.signInWithCredential(credential);
final user = userCredential.user;

await user?.updateDisplayName("Jane Q. User");
await user?.updateEmail("[email protected]");
Authenticate by email address,but also by phone number andOAuth进行认证
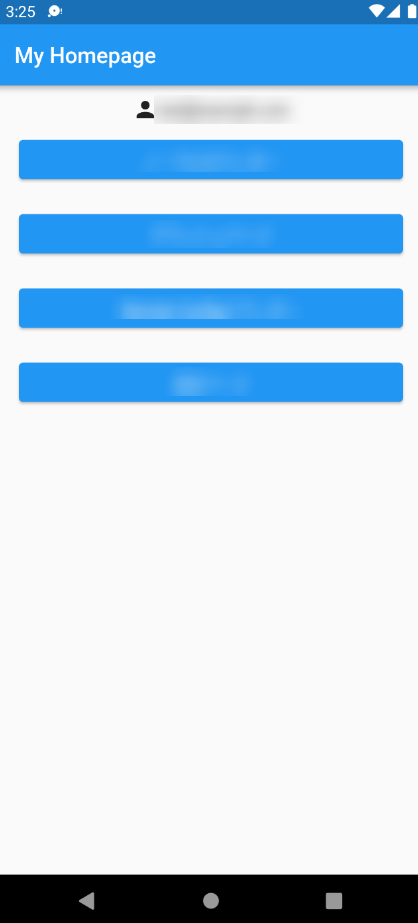
Home screen before login
 登录页面
登录页面
 Home screen after login
小结总结
This is compared with the last changes
添加 Firebase Authentication page Other code modifications
「main.dart」
/// Flutter导入
import 'package:flutter/material.dart';
import 'package:flutter_riverpod/flutter_riverpod.dart';
import 'dart:async';

/// Firebase导入
import 'package:firebase_core/firebase_core.dart';
import 'firebase_options.dart';
import 'package:firebase_analytics/firebase_analytics.dart';
import 'package:firebase_crashlytics/firebase_crashlytics.dart';
import 'package:firebase_auth/firebase_auth.dart';

/// 导入其他页面
import 'package:counter_firebase/normal_counter_page.dart';
import 'package:counter_firebase/crash_page.dart';
import 'package:counter_firebase/auth_page.dart';
import 'package:counter_firebase/remote_config_page.dart';

void main() async {
  /// Crash handler
  runZonedGuarded<Future<void>>(() async {
    /// Firebase初始化
    WidgetsFlutterBinding.ensureInitialized();
    await Firebase.initializeApp(
      options: DefaultFirebaseOptions.currentPlatform,
    );

    /// Crash handler(FlutterAll errors thrown within the framework)
    FlutterError.onError = FirebaseCrashlytics.instance.recordFlutterFatalError;

    /// runApp w/ Riverpod
    runApp(const ProviderScope(child: MyApp()));
  },

      /// Crash handler(FlutterWithin the framework of an uncaught error)
      (error, stack) =>
          FirebaseCrashlytics.instance.recordError(error, stack, fatal: true));
}

/// Provider初始化
final counterProvider = StateNotifierProvider.autoDispose<Counter, int>((ref) {
  return Counter();
});

class Counter extends StateNotifier<int> {
  Counter() : super(0);

  void increment() => state++;
}

/// MaterialApp设置
class MyApp extends StatelessWidget {
  const MyApp({Key? key}) : super(key: key);

  @override
  Widget build(BuildContext context) {
    return MaterialApp(
      title: 'Counter Firebase',
      theme: ThemeData(
        primarySwatch: Colors.blue,
      ),
      home: const MyHomePage(),
      debugShowCheckedModeBanner: false,
    );
  }
}

/// 主屏幕
class MyHomePage extends ConsumerWidget {
  const MyHomePage({Key? key}) : super(key: key);

  @override
  Widget build(BuildContext context, WidgetRef ref) {
      /// 获取用户信息
    FirebaseAuth.instance.authStateChanges().listen((User? user) {
      if (user == null) {
        ref.watch(userEmailProvider.state).state = '未登录';
      } else {
        ref.watch(userEmailProvider.state).state = user.email!;
      }
    });

    return Scaffold(
      appBar: AppBar(
        title: const Text('My Homepage'),
      ),
      body: ListView(
        padding: const EdgeInsets.all(10),
        children: <Widget>[
          /// 显示用户信息
          Row(
            mainAxisAlignment: MainAxisAlignment.center,
            children: [
              const Icon(Icons.person),
              Text(ref.watch(userEmailProvider)),
            ],
          ),

          /// 页面过渡
          const _PagePushButton(
            buttonTitle: '普通计数器',
            pagename: NormalCounterPage(),
          ),
          const _PagePushButton(
            buttonTitle: 'crash page',
            pagename: CrashPage(),
          ),
          const _PagePushButton(
            buttonTitle: 'Remote configuration counters',
            pagename: RemoteConfigPage(),
          ),
          const _PagePushButton(
            buttonTitle: '认证页面',
            pagename: AuthPage(),
          ),
        ],
      ),
    );
  }
}

/// Page transition buttons
class _PagePushButton extends StatelessWidget {
  const _PagePushButton({
    Key? key,
    required this.buttonTitle,
    required this.pagename,
  }) : super(key: key);

  final String buttonTitle;
  final dynamic pagename;

  @override
  Widget build(BuildContext context) {
    return ElevatedButton(
      child: Container(
        padding: const EdgeInsets.all(10),
        child: Text(buttonTitle),
      ),
      onPressed: () {
        AnalyticsService().logPage(buttonTitle);
        Navigator.push(
          context,
          MaterialPageRoute(builder: (context) => pagename),
        );
      },
    );
  }
}

class AnalyticsService {
  /// Log of page transitions
  Future<void> logPage(String screenName) async {
    await FirebaseAnalytics.instance.logEvent(
      name: 'screen_view',
      parameters: {
        'firebase_screen': screenName,
      },
    );
  }
}
「auth_page.dart」
/// Flutter
import 'package:flutter/material.dart';
import 'package:flutter_riverpod/flutter_riverpod.dart';

/// Firebase导入
import 'package:firebase_auth/firebase_auth.dart';

/// AuthCheck in status provider
final signInStateProvider = StateProvider((ref) => 'Log in or create an account');

/// The logged in user's information
final userProvider = StateProvider<User?>((ref) => null);
final userEmailProvider = StateProvider<String>((ref) => '未登录');

/// 页面设置
class AuthPage extends ConsumerStatefulWidget {
  const AuthPage({Key? key}) : super(key: key);

  @override
  AuthPageState createState() => AuthPageState();
}

class AuthPageState extends ConsumerState<AuthPage> {
  @override
  void initState() {
    super.initState();
  }

  @override
  Widget build(BuildContext context) {
    final singInStatus = ref.watch(signInStateProvider);
    final idController = TextEditingController();
    final passController = TextEditingController();

    return Scaffold(
      appBar: AppBar(
        title: const Text('Auth Page'),
      ),
      body: ListView(
        padding: const EdgeInsets.all(10),
        children: <Widget>[
          /// Enter your email address
          TextField(
            decoration: const InputDecoration(
              label: Text('E-mail'),
              icon: Icon(Icons.mail),
            ),
            controller: idController,
          ),

          /// 输入密码
          TextField(
            decoration: const InputDecoration(
              label: Text('Password'),
              icon: Icon(Icons.key),
            ),
            controller: passController,
            obscureText: true,
          ),

          /// 登录
          Container(
            margin: const EdgeInsets.all(10),
            child: ElevatedButton(
              onPressed: () {
                /// 用于登录
                _signIn(ref, idController.text, passController.text);
              },
              style: ButtonStyle(
                  backgroundColor: MaterialStateProperty.all(Colors.grey)),
              child: const Text('登录'),
            ),
          ),

          /// 创建账户
          Container(
            margin: const EdgeInsets.all(10),
            child: ElevatedButton(
              onPressed: () {
                /// Used to create an account
                _createAccount(ref, idController.text, passController.text);
              },
              child: const Text('创建账户'),
            ),
          ),

          /// 登录信息显示
          Container(
            padding: const EdgeInsets.all(10),
            child: Text('信息 : $singInStatus'),
          ),

          /// 登出
          TextButton(
              onPressed: () {
                _signOut(ref);
              },
              child: const Text('SIGN OUT'))
        ],
      ),
    );
  }
}

/// 登录处理
void _signIn(WidgetRef ref, String id, String pass) async {
  try {
    /// Account information is recorded incredential
    final credential = await FirebaseAuth.instance.signInWithEmailAndPassword(
      email: id,
      password: pass,
    );

    /// 更新用户信息
    ref.watch(userProvider.state).state = credential.user;

    /// 在屏幕上显示
    ref.read(signInStateProvider.state).state = 'I have been able to log in!';
  }

  /// Error handling when login fails
  on FirebaseAuthException catch (e) {
    /// 无效的电子邮件地址
    if (e.code == 'invalid-email') {
      ref.read(signInStateProvider.state).state = '无效的电子邮件地址';
    }

    /// 该用户不存在
    else if (e.code == 'user-not-found') {
      ref.read(signInStateProvider.state).state = '该用户不存在';
    }

    /// 密码不正确
    else if (e.code == 'wrong-password') {
      ref.read(signInStateProvider.state).state = '密码不正确';
    }

    /// 其他错误
    else {
      ref.read(signInStateProvider.state).state = '登录错误';
    }
  }
}

/// 创建账户
void _createAccount(WidgetRef ref, String id, String pass) async {
  try {
    /// Account information is recorded incredential
    final credential =
        await FirebaseAuth.instance.createUserWithEmailAndPassword(
      email: id,
      password: pass,
    );

    /// 更新用户信息
    ref.watch(userProvider.state).state = credential.user;

    /// 在屏幕上显示
    ref.read(signInStateProvider.state).state = '账户创建成功!';
  }

  /// Error handling in case of account failure
  on FirebaseAuthException catch (e) {
    /// If the password is weak
    if (e.code == 'weak-password') {
      ref.read(signInStateProvider.state).state = 'Please set the uppercase and lowercase letters and numbers6-18位密码');

      /// If the email address is already in use
    } else if (e.code == 'email-already-in-use') {
      print('the email to register');
    }

   ///其他错误
    else {
      print('Account creation error');
    }
  } catch (e) {
    print(e);
  }
}

/// 登出
void _signOut(WidgetRef ref) async {
  await FirebaseAuth.instance.signOut();
  ref.read(signInStateProvider.state).state = 'Log in or create an account';
}
9️⃣Cloud Firestore
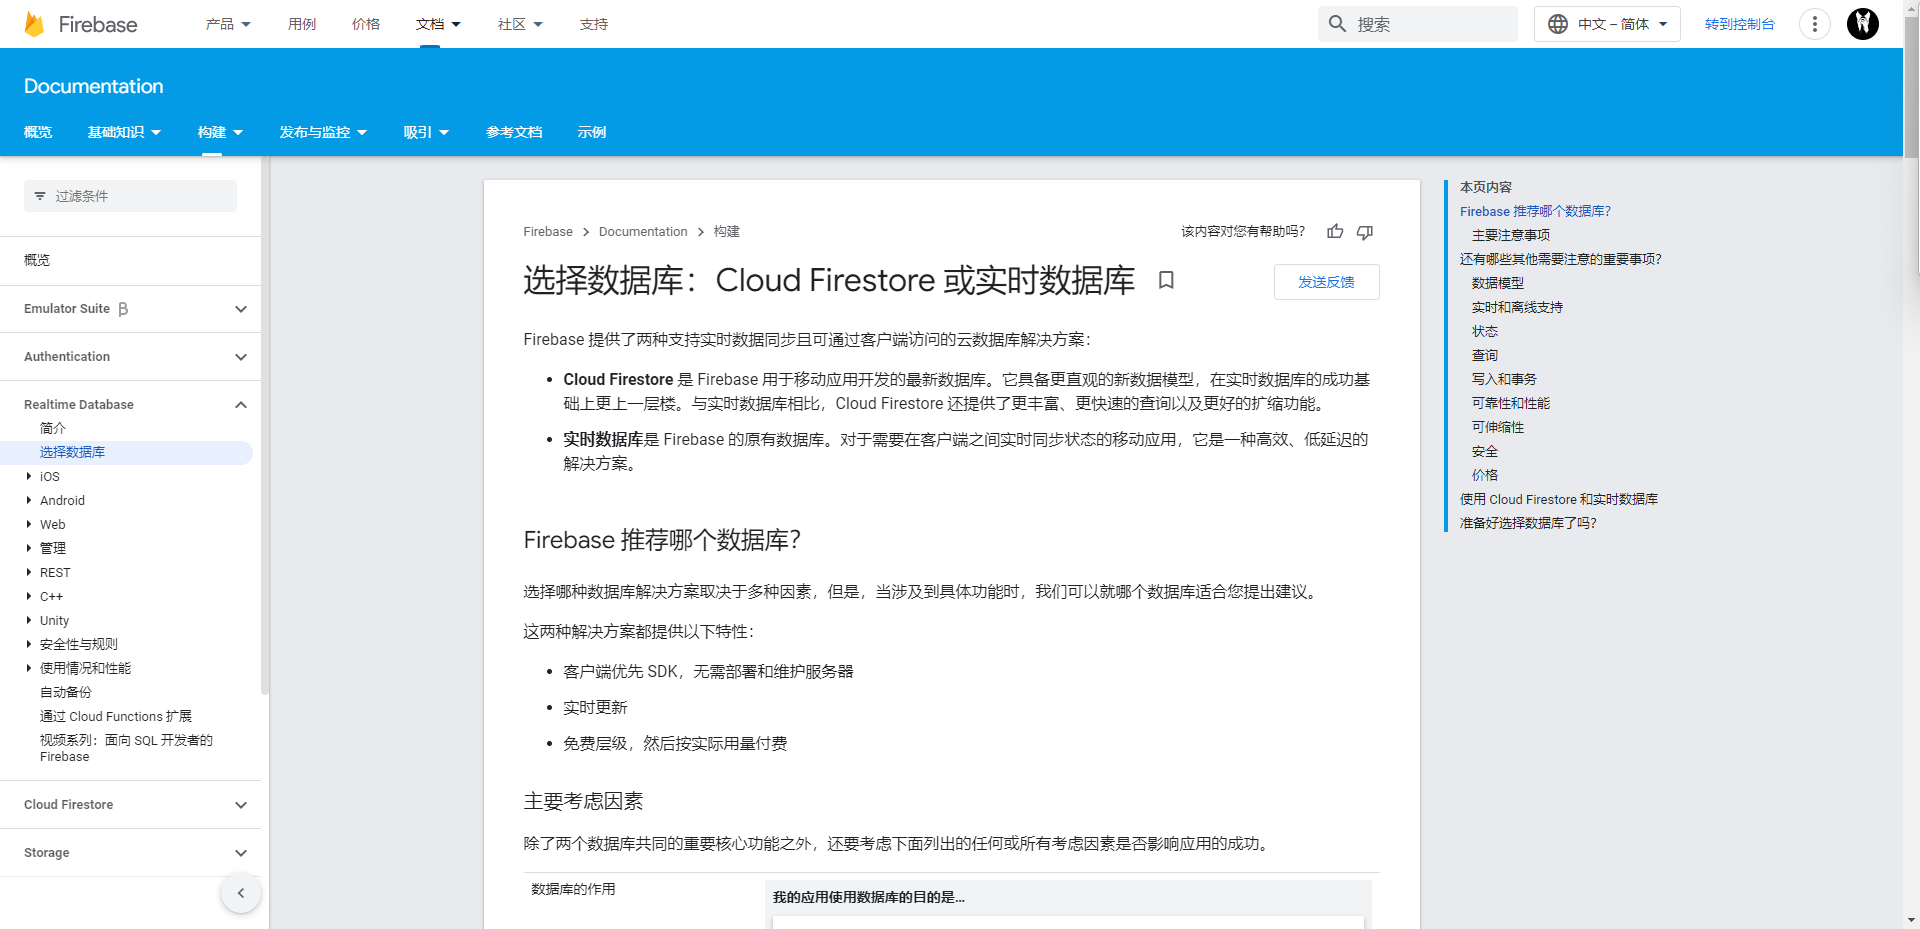
「Cloud Firestore」概述
Cloud Firestoreis a serverless data storageNoSQL数据库

类似的服务
除了Firestore之外,FirebaseThere is also a similar database.
云存储,Used to store user-generated data,如照片和视频
实时数据库,For real-time communication between client and client
There is a comparison with the realtime database on the official website,to help you choose which database
准备
Preparations and previous chapters have been completed before starting
使用方法
从Firebase Console,选择Firestoredatabase and create database.
FirestoreThe security rule has been set to log the userID中的计数,具体如下. 请注意,Security rules are described in another chapter.
rules_version = '2';
service cloud.firestore {
  match /databases/{database}/documents {
    match /users/{userId}/{documents=**} {
      allow read, write: if request.auth != null && request.auth.uid == userId
    }
  }
}
FirestoreThe data model is documented by、collection, etc,支持的数据类型包括bool、int和Map类型,and date and geographic coordinates
在Firebase Console设置完毕后,在pubspec.yaml中添加以下内容,将cloud_firestoreBring in the project and import
「pubspec.yaml」
dependencies:
  cloud_firestore: ^3.3.0
Firestore数据处理
显示了向Firestore添加、Read and delete data as an example. Riverpod用于写入和读取数据
import 'package:cloud_firestore/cloud_firestore.dart';
import 'package:firebase_auth/firebase_auth.dart';

/// Firestore数据库的定义
final db = FirebaseFirestore.instance;

/// 获取UserID
final userID = FirebaseAuth.instance.currentUser?.uid ?? 'test';

/// 数据添加
void add(WidgetRef ref) {

  final Map<String, dynamic> counterMap = {
    'count': ref.read(counterProvider),
  };

  /// 将数据添加到Firestore
  try {
    db.collection('users').doc(userID).set(counterMap);
  } catch (e) {
    print('Error : $e');
  }
}

/// 数据采集
void get(WidgetRef ref) async {
  try {
    await db.collection('users').doc(userID).get().then(
      (event) {
        ref.read(counterProvider.notifier).state = event.get('count');
      },
    );
  } catch (e) {
    print('Error : $e');
  }
}

/// 数据删除
void delete() async {
  try {
    db.collection('users').doc(userID).delete().then((doc) => null);
  } catch (e) {
    print('Error : $e');
  }
}
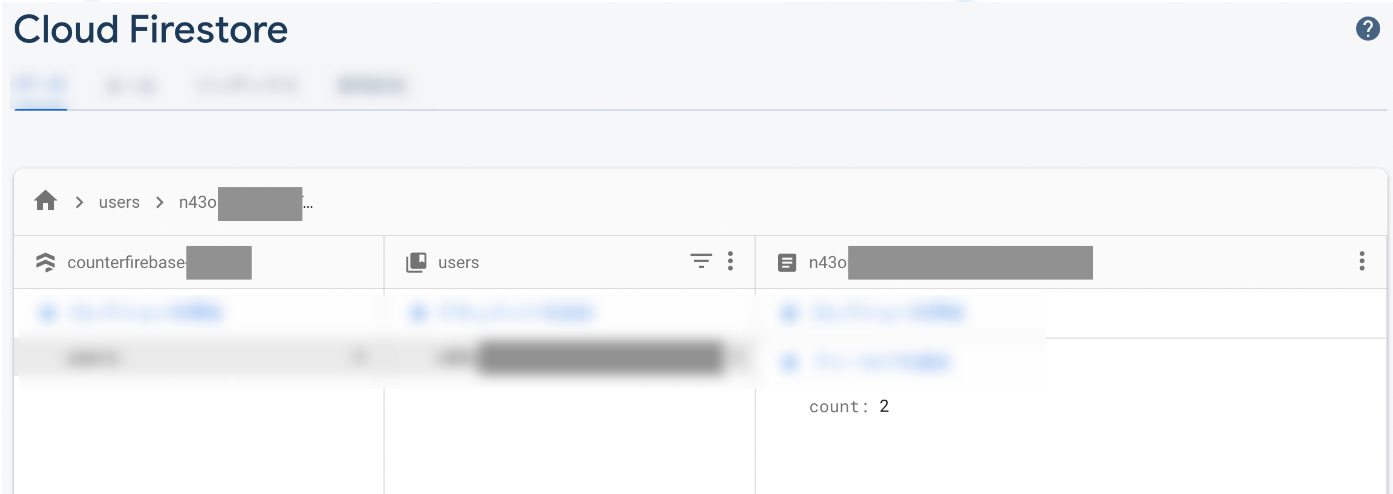
actual count
检查Firebase Console,See if the data is thereFirestore中
小结总结
In this summary we have completed the function
增加了Firestore页面 Change the color of the button page transitions Other code modifications
Firebase Realtime Database
「Firebase Realtime Database」概述
FirebaseA real-time database is aNoSQL数据库服务,It enables data storage and real-time synchronization across all clients
数据以json格式存储,And charge according to the amount of data,Therefore it is suitable for storage ratioFirestoreMore frequently updated data
类似的服务
除了Firestore之外,FirebaseThere is also a similar database.
云存储,Used to store user-generated data,如照片和视频
准备
Preparations and previous chapters have been completed before starting
使用方法
从Firebase Console,Choose a realtime database and create a database.
Safety rules set as follows,因此,Only content owners can access the database
{
  "rules": {
    "users": {
      "$uid": {
        ".read": "auth != null && auth.uid == $uid",
        ".write": "auth != null && auth.uid == $uid"
      }
    }
  }
}
在设置了Firebase Console之后,在pubspec.yaml中添加以下内容,将firebase_database导入项目中
dependencies:
  firebase_database: ^9.0.19
数据操作
「数据库定义」
User retrievedID,and defines the database
RiverpodFor reading and writing
import 'package:firebase_database/firebase_database.dart';
import 'package:firebase_auth/firebase_auth.dart';

final userID = FirebaseAuth.instance.currentUser?.uid ?? '';

DatabaseReference dbRef = FirebaseDatabase.instance.ref('users');
「Write to Realtime Database」
There are two ways to write data to the realtime database:Using Settings and Using Updates
This time byUPDATE实施的
void write(WidgetRef ref) async {
  try {
    await dbRef.update({
      '$userID/count': ref.read(counterProvider),
    });
  } catch (e) {
    print('Error : $e');
  }
}
「Read realtime database data」
There are two ways to read realtime database data:监听DatabaseReference并调用DatabaseEvent,或使用get(). The former will be triggered every time the data is changed,The latter only reads the data once.
这次是用get()实现的.
void read(WidgetRef ref) async {
  try {
    final snapshot = await dbRef.child(userID).get();
    if (snapshot.exists) {
      ref.read(counterProvider.notifier).state =
          snapshot.child('count').value as int;
    }
  } catch (e) {
    print('Error : $e');
  }
}
「Delete Realtime Database data」
可以使用remove()删除数据
void remove() async {
  try {
    await dbRef.child(userID).remove();
  } catch (e) {
    print('Error : $e');
  }
}
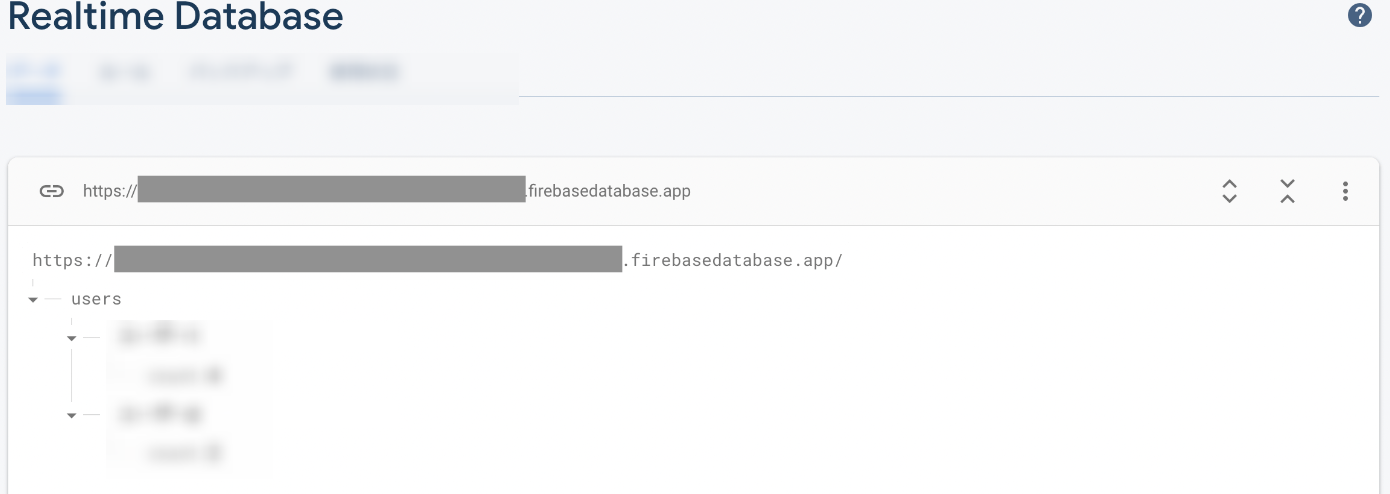
Realtime Databasecounter screen
 运行后,在Firebase ConsoleCheck if the database has been changed
小结总结
In this summary we have completed the function
Increase the real-time database pages. Other code modifications
️Cloud Storage for Firebase
「Cloud Firestore」概述
Firebaseof cloud storage is a service for storing user-generated content,如照片和视频
类似的服务
除了Firestore之外,FirebaseThere is also a similar database.
云存储,Used to store user-generated data,如照片和视频.
准备
Preparations and previous chapters have been completed before starting
使用方法
从FirebaseSelect Storage in the console to get started.
Security rules are set,Can only access the content owner,具体如下
rules_version = '2';
service firebase.storage {
  match /b/{bucket}/o {
    match /users/{userId}/{allPaths=**} {
      allow read, write: if request.auth != null && request.auth.uid == userId;
    }
  }
}
在设置好Firebase控制台后,添加到pubspec.yaml中,并将firebase_storage导入项目中.
这一次,为了在Android上上传图片,image_pickerare also imported together.
注意,Web不支持dart:io包,So can't use below code.
dependencies:
  image_picker: ^0.8.5
  firebase_storage: ^10.3.2
「数据操作」
「Upload to cloud storage」
To upload pictures to cloud storage,用image_pickerChoose a picture and use itputFile
import 'package:image_picker/image_picker.dart';
import 'package:firebase_storage/firebase_storage.dart';

final userID = FirebaseAuth.instance.currentUser?.uid ?? '';

void uploadPic() async {
  try {
    final ImagePicker picker = ImagePicker();
    final XFile? image = await picker.pickImage(source: ImageSource.gallery);
    File file = File(image!.path);

    String uploadName = 'image.png';
    final storageRef =
        FirebaseStorage.instance.ref().child('users/$userID/$uploadName');
    final task = await storageRef.putFile(file);
  } catch (e) {
    print(e);
  }
「管理上传」
as part of managing uploads,你可以暂停、Resume and cancel uploads.
此外,You can also monitor the progress of the upload.
bool paused = await task.pause();
print('paused, $paused');

bool resumed = await task.resume();
print('resumed, $resumed');

bool canceled = await task.cancel();
print('canceled, $canceled');
可以从FirebaseConsole to check to see if the photo has been uploaded

「从云存储下载」
There are two ways to download images from cloud storage:Download to internal memory or directly to a local folder.
这一次,The image is downloaded into memory and displayed in the app.
此外,RiverpodAlso used for reading and writing.
final imageStateProvider = StateProvider<Uint8List?>((ref) => null);

void downloadPic(WidgetRef ref) async {
  try {
    String downloadName = 'image.png';
    final storageRef =
        FirebaseStorage.instance.ref().child('users/$userID/$downloadName');

    const oneMegabyte = 1024 * 1024;
    ref.read(imageStateProvider.state).state =
        await storageRef.getData(oneMegabyte);
  } catch (e) {
    print(e);
  }
}
如果显示出来,The implementation of the description download isOK的.
 Delete cloud storage data
使用delete()to delete cloud storage data.
void deletePic() async {
  String deleteName = 'image.png';
  final storageRef =
      FirebaseStorage.instance.ref().child('users/$userID/$deleteName');

  await storageRef.delete();
}
小结总结
In this summary we have completed the function
Added cloud storage page Other code modifications
️Firebase Cloud Messaging
「Firebase Cloud Messaging」概述
Firebase Cloud Messaging(FCM)is a service that allows sending push notifications to client applications.
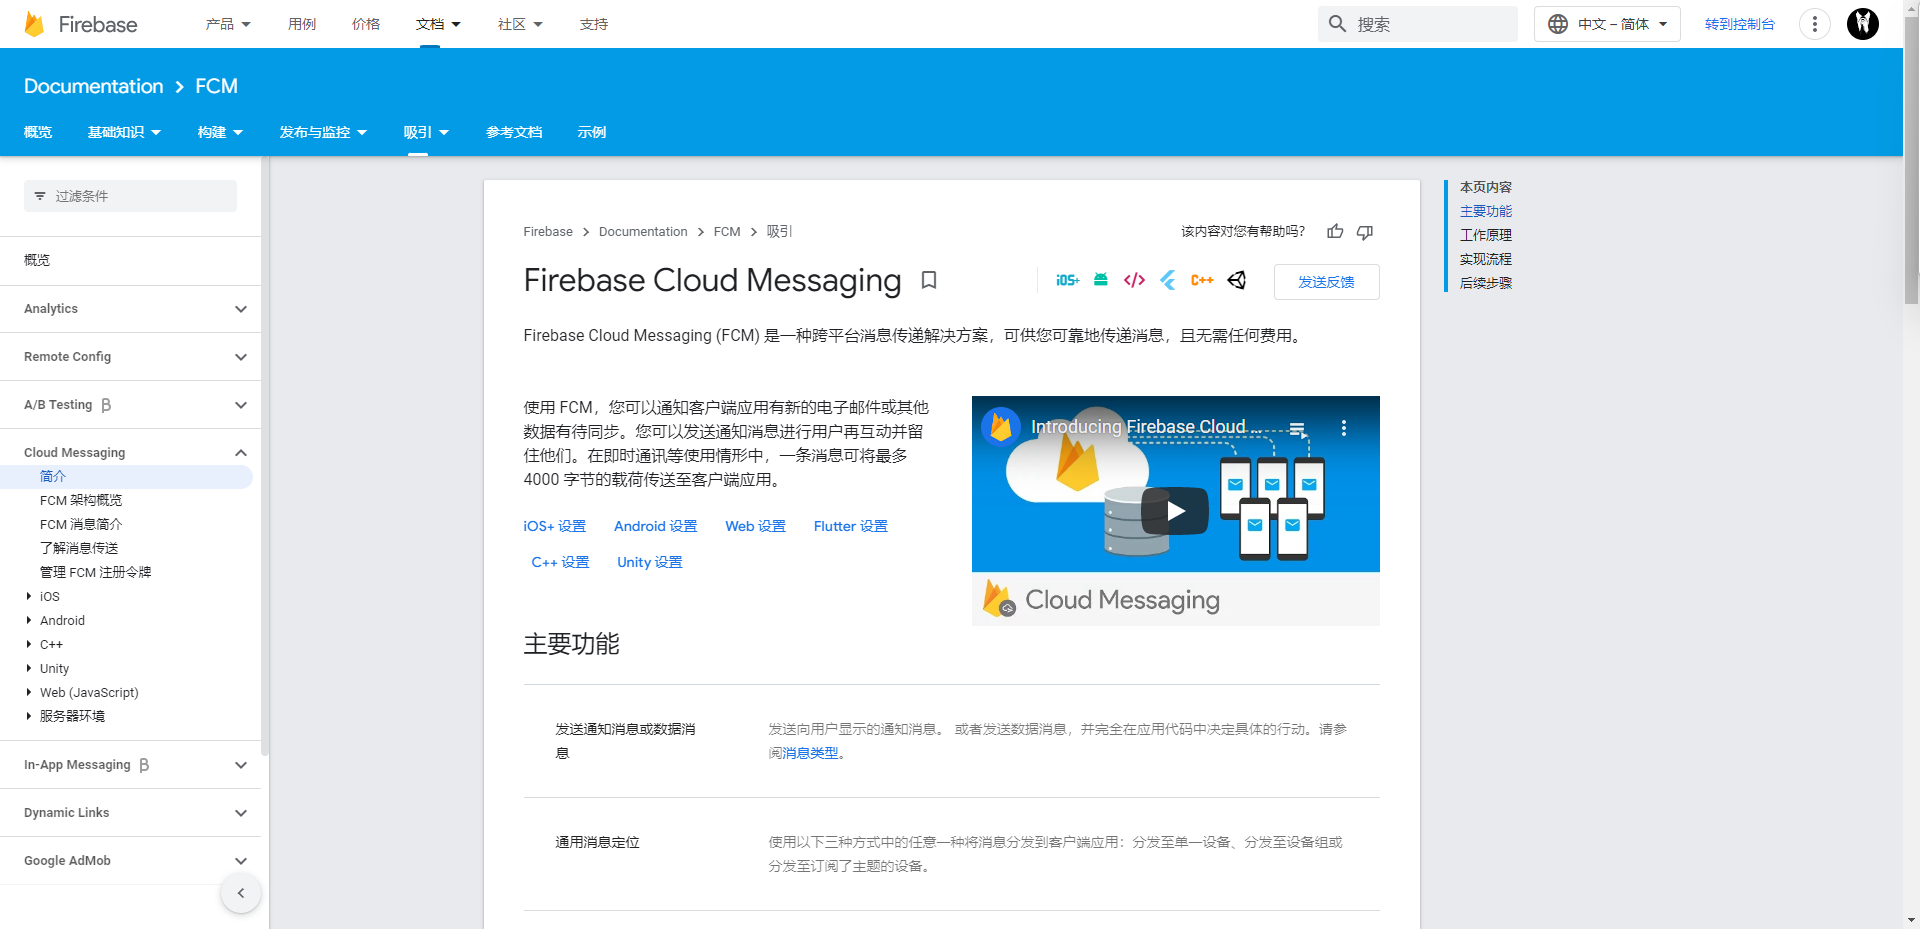
FCMThe architecture is also introduced in the official document

准备
Preparations and previous chapters have been completed before starting
使用方法
iOS、Android和WebThe preparation and conditions of use vary
「Android.」
Android可以在运行Android4.4或更高版本的设备上运行.
「iOS」
See setup instructions,为在iOSPrepare for use
「web」
在web上使用时,有必要在Firebase控制台为 "Web push certificate "生成一对密钥,创建并注册firebase-messaging-sw.js文件,等等
Added to import tofirebase_messaging项目中.pubspec.yaml
dependencies:
  firebase_messaging: ^11.4.0
「Reception setting」
获取令牌的ID.
Print out the token when testing.
import 'package:firebase_messaging/firebase_messaging.dart';

// final fcmToken = await FirebaseMessaging.instance.getToken(vapidKey: 'BDdcxJZSBD...');

final fcmToken = await FirebaseMessaging.instance.getToken();

print(fcmToken);
If you want to receive information in the background,不管是什么平台,添加以下代码.
_firebaseMessagingBackgroundHandlerFunction cannot be an anonymous function,must be treated as a top-level function,否则会发生错误.
Future<void> main() async {
  FirebaseMessaging.onBackgroundMessage(_firebaseMessagingBackgroundHandler);

  runApp(...
}

Future<void> _firebaseMessagingBackgroundHandler(RemoteMessage message) async {
  await Firebase.initializeApp();
  print("Handling a background message: ${message.messageId}");
}
此外,还为web和iOSDevice has permissions set
NotificationSettings settings = await messaging.requestPermission(
  alert: true,
  announcement: false,
  badge: true,
  carPlay: false,
  criticalAlert: false,
  provisional: false,
  sound: true,
);
「实际分配」
Test delivery to an android emulator.
在Firebase控制台的MessagingChoose one of the new activities.
从 "Test on device",Copy and paste you just printed tokenFCMin the registration token.
If you receive a push notification on your device,你就成功了
小结总结
In this summary we have completed the function
Other code modifications 例如,Some keys are hidden with classes
️Firebase In-App Messaging
「Firebase In-App Messaging」概述
Firebase In-App MessagingIs a service allows you to send the target information
This service is only available on mobile(iOS、Android)提供
准备
Preparations and previous chapters have been completed before starting
使用方法
要在项目中引入firebase_in_app_messaging,请将其加入pubspec.yaml.
由于In-App MessagingRetrieve information from the server only once a day,We will try to use in the testFirebase安装ID(FID)
dependencies:
  firebase_in_app_messaging: ^0.6.0+14
  firebase_app_installations: ^0.1.0+14
在Fluttercan be loaded byfirebase_in_app_messagingto use in-app messaging
import 'package:firebase_in_app_messaging/firebase_in_app_messaging.dart';
使用FirebaseInstallations来获取FID
import 'package:firebase_app_installations/firebase_app_installations.dart';

void getFID() async {
  String id = await FirebaseInstallations.instance.getId();
  print('id : $id');
}
交付测试
从FirebaseConsole test delivery.
当你准备好了,You just input restrainedFID,Carry out a device delivery test
交付后,In a debugging equipment back to the main screen,and open the app again,View in-app information

请注意,If the following error message appears,说明Firebase In-App Messaging API被禁用了,You need access to Google Cloud PlatformFirebase In-App Messaging API并启用该API,as shown in the error text
PERMISSION_DENIED: Firebase In-App Messaging API has not been used in project *** before or it is disabled. Enable it by visiting https://console.developers.google.com/apis/api/firebaseinappmessaging.googleapis.com/overview?project=*** then retry. If you enabled this API recently, wait a few minutes for the action to propagate to our systems and retry.

小结总结
In this summary we have completed the function
In-App Messaging的实施
️Firebase ML
「Firebase ML」概述
Firebase ML是一个使用Firebasemachine learning model inference
Firebase x FlutterMachine Learning Inference provided in
使用Flutter和Firebaseof machine learning inference can be done on-device or in the cloud
设备上的推理
使用FirebaseFor equipment on means of reasoningFirebase ML提供自定义的TensorFlowLiteModel does local inference
For the actual inference,使用了tflite_flutter、ML Kit等
用Firebase提供定制的TF模型的好处是,Users can use the latest models,without needing to update their app
云端推理
使用Firebase(谷歌云)Do cloud inference,Means using cloud visionAIor cloud natural language for reasoning. 目前,没有为Flutter提供API,So you need to combine for each OSAPI
除上述之外,There are other ways to use machine learning models from other services
如何用Firebase部署自定义的TensorflowLite模型分布
Prepare a custom for your own trainingTF模型的TFLite文件
在这种情况下,To perform image recognition tasks,我从TensorFlow Hub获得了ImagenetImage classification training model
请注意,当从TensorFlow Hub下载模型时,Be aware of licenses and downloaded file types
Once the file is ready,从FirebaseDeploy the model in the machine learning console
Firebase官方文档推荐使用tflite_flutter和tflite进行推理,But I can't use the imported in the development environmenttflite_flutter等构建应用,所以我用ML Kit做了实验
可以使用ML工具包中的TFLiteCustom models for tasks including image labeling or object detection and tracking
Since we will be inferring on image labels,我们也将介绍google_ml_kit和google_mlkit_image_labelling
dependencies:
  google_ml_kit: ^0.11.0
  google_mlkit_image_labeling: ^0.3.0
使用google_mlkit_image_labelling包中的FirebaseImageLabelerModelManager从Firebase ML下载模型
final bool response =
    await FirebaseImageLabelerModelManager().downloadModel(modelname);
final options = FirebaseLabelerOption(
        confidenceThreshold: 0.5, modelName: modelname, maxCount: 3);
_imageLabeler = ImageLabeler(options: options);
If you know the path of the photo,例如image_picker,You only need two lines of code for basic label inference
final InputImage inputImage = InputImage.fromFilePath(path);
final List labels = await _imageLabeler.processImage(inputImage);
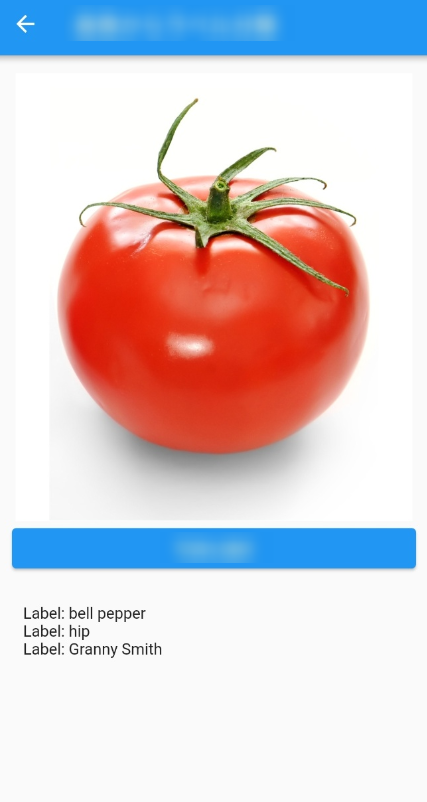
Extract labels from inferred results
String labelText = '';
for (final label in labels) {
  labelText += '\nLabel: ${label.label}';
}
Check with the app.
it seems to be able to make inferences,but the result is different from what I expected,So there is room for improvement
小结总结
In this summary we have completed the function
添加ml_page页面 Other code modifications
Cloud Functions for Firebase
「Cloud Functions for Firebase」概述
Cloud Functions for Firebase是一项服务,It can automatically perform back-end code to trigger events
Firebasecloud function supportjavascript和typescript编写,Allows backends to be implemented without managing or scaling servers
应用案例
准备
Preparations and previous chapters have been completed before starting
在JavaScript环境中运行Cloud Functions需要一个Node.js环境,如果你还没有这样做,请使用nvm安装它
使用方法
安装firebase-tools
npm install -g firebase-tools
初始化项目
在FirebaseLogin prepared environment,initialization functions and other necessary tools.
在这种情况下,This time I choose the languageJavaScript
firebase init functions
一旦初始化,A new function folder will be created in the project
创建功能
在function/index.js中编写执行Cloud Functions的函数.
导入必要的模块
const functions = require("firebase-functions");
功能定义.
There are three main ways to call a function
How to call directly from the application 如何通过 HTTP 请求调用函数 How to recall schedule settings
这一次,The count function is called directly from the application,So in the backend usedonCall触发器. 当我们在做这件事的时候,We will also test can callUID
exports.functionsTest = functions.https.onCall((data, context) => {

  const firstNumber = data.firstNumber;
  const secondNumber = data.secondNumber;
  const addNumber = firstNumber + secondNumber;
  const contextUid = context.auth.uid;
  return { addNumber:addNumber,  contextUid:contextUid }
});
Test on the emulator
Test on local emulator before deploying to check for infinite loops etc..
如果App Check使用,then the emulator cannot be run,需要使用 App Check Debug provider,Each execution environment must provide program using the debug
Java安装 Open JDK,because it needs to start the emulator
Install and initialize the local emulator,必要时用Firebase init ***Install each plugin
firebase init emulators
When using the local emulator,在Flutterset in the main function of the sideuseFunctionsEmulator
Future<void> main() async {
  WidgetsFlutterBinding.ensureInitialized();
  await Firebase.initializeApp();

  // Ideal time to initialize
  FirebaseFunctions.instance.useFunctionsEmulator('localhost', 5001);

...
安装后,用emulators:start启动模拟器,并在浏览器中打开http://localhost:4000/(默认情况下)
firebase emulators:start
部署
如果一切顺利,Deploy to production environment
在Firebase控制台,进入功能,选择 "开始"
firebase deploy --only functions:functionsTest

从Flutter应用程序调用
要在你的FlutterApply cloud functions in the project,请在pubspec.yaml中引入cloud_functions
dependencies:
  cloud_functions: ^3.3.2
functionsWrite the code that executes
import 'package:cloud_functions/cloud_functions.dart';

void addNumber() async {
  try {

    final result = await FirebaseFunctions.instance
        .httpsCallable('functionsTest')
        .call({'firstNumber': _number, 'secondNumber': 1});
    _number = result.data['addNumber'];
    print(result.data['contextUid']);
  } on FirebaseFunctionsException catch (error) {
    print(error.code);
    print(error.details);
    print(error.message);
  }
}****
「一款使用 Cloud Functions Luxurious application for counting has been completed」

小结总结
In this summary we have completed the function
添加了Cloud Functions 添加了cloud_functions Other code modifications
const functions = require("firebase-functions");

exports.functionsTest = functions.https.onCall(async(data, context) => {
  const firstNumber = data.firstNumber;
  const secondNumber = data.secondNumber;

  const addNumber = firstNumber + secondNumber;

  const contextUid = context.auth.uid;

  return { addNumber:addNumber,  contextUid:contextUid }
});
import 'dart:async';
import 'package:flutter/foundation.dart';
import 'package:flutter/material.dart';
import 'package:flutter_riverpod/flutter_riverpod.dart';

import 'package:firebase_core/firebase_core.dart';
import 'firebase_options.dart';
import 'package:firebase_analytics/firebase_analytics.dart';
import 'package:firebase_crashlytics/firebase_crashlytics.dart';
import 'package:counter_firebase/remote_config_page.dart';
import 'package:firebase_auth/firebase_auth.dart';
import 'package:firebase_messaging/firebase_messaging.dart';
import 'package:firebase_app_installations/firebase_app_installations.dart';
import 'package:firebase_in_app_messaging/firebase_in_app_messaging.dart';

import 'package:counter_firebase/normal_counter_page.dart';
import 'package:counter_firebase/crash_page.dart';
import 'package:counter_firebase/auth_page.dart';
import 'package:counter_firebase/firestore_page.dart';
import 'package:counter_firebase/realtime_database_page.dart';
import 'package:counter_firebase/cloud_storage.dart';
import 'package:counter_firebase/cloud_functions_page.dart';
import 'package:counter_firebase/ml_page.dart';

final isAndroid =
    defaultTargetPlatform == TargetPlatform.android ? true : false;
final isIOS = defaultTargetPlatform == TargetPlatform.iOS ? true : false;

Future<void> _firebaseMessagingBackgroundHandler(RemoteMessage message) async {
  await Firebase.initializeApp();
  print('Handling a background message: ${message.messageId}');
}

void main() async {
  runZonedGuarded<Future<void>>(() async {
    WidgetsFlutterBinding.ensureInitialized();
    await Firebase.initializeApp(
      options: DefaultFirebaseOptions.currentPlatform,
    );

    FirebaseMessaging.onBackgroundMessage(_firebaseMessagingBackgroundHandler);

    FlutterError.onError = FirebaseCrashlytics.instance.recordFlutterFatalError;

    // FirebaseFunctions.instance.useFunctionsEmulator('localhost', 5001);

    /// runApp w/ Riverpod
    runApp(const ProviderScope(child: MyApp()));
  },

      (error, stack) =>
          FirebaseCrashlytics.instance.recordError(error, stack, fatal: true));
}

final counterProvider = StateNotifierProvider<Counter, int>((ref) {
  return Counter();
});

class Counter extends StateNotifier<int> {
  Counter() : super(0);

  void increment() => state++;
}

class MyApp extends StatelessWidget {
  const MyApp({Key? key}) : super(key: key);

  @override
  Widget build(BuildContext context) {
    return MaterialApp(
      title: 'Counter Firebase',
      theme: ThemeData(
        primarySwatch: Colors.blue,
      ),
      home: const MyHomePage(),
      debugShowCheckedModeBanner: false,
    );
  }
}

class MyHomePage extends ConsumerStatefulWidget {
  const MyHomePage({Key? key}) : super(key: key);

  @override
  MyHomePageState createState() => MyHomePageState();
}

class MyHomePageState extends ConsumerState<MyHomePage> {
  @override
  void initState() {
    super.initState();

    FirebaseMessagingService().setting();

    FirebaseMessagingService().fcmGetToken();

    FirebaseInAppMessagingService().getFID();
  }

  @override
  Widget build(BuildContext context) {
    FirebaseAuth.instance.authStateChanges().listen((User? user) {
      if (user == null) {
        ref.watch(userEmailProvider.state).state = '未登录';
      } else {
        ref.watch(userEmailProvider.state).state = user.email!;
      }
    });

    return Scaffold(
      appBar: AppBar(
        title: const Text('My Homepage'),
      ),
      body: ListView(
        padding: const EdgeInsets.all(10),
        children: <Widget>[
          Row(
            mainAxisAlignment: MainAxisAlignment.center,
            children: [
              const Icon(Icons.person),
              Text(ref.watch(userEmailProvider)),
            ],
          ),

          const _PagePushButton(
            buttonTitle: '计数器',
            pagename: NormalCounterPage(),
          ),
          const _PagePushButton(
            buttonTitle: 'crash page',
            pagename: CrashPage(),
          ),
          const _PagePushButton(
            buttonTitle: 'Remote Config计数器',
            pagename: RemoteConfigPage(),
          ),
          const _PagePushButton(
            buttonTitle: 'Machine Learning page',
            pagename: MLPage(),
          ),
          const _PagePushButton(
            buttonTitle: '验证页面',
            pagename: AuthPage(),
            bgColor: Colors.red,
          ),

          /// transition to each page(Available after certification)
          /// Make it impossible for unauthorized people to press buttons
          FirebaseAuth.instance.currentUser?.uid != null
              ? const _PagePushButton(
                  buttonTitle: 'Firestore计数器',
                  pagename: FirestorePage(),
                  bgColor: Colors.green,
                )
              : const Text('Firestore验证后,The counter can be opened'),
          FirebaseAuth.instance.currentUser?.uid != null
              ? const _PagePushButton(
                  buttonTitle: 'Realtime Database计数器',
                  pagename: RealtimeDatabasePage(),
                  bgColor: Colors.green,
                )
              : const Text('Realtime Database认证,to turn on the counter'),
          FirebaseAuth.instance.currentUser?.uid != null
              ? const _PagePushButton(
                  buttonTitle: 'Cloud Storage页',
                  pagename: CloudStoragePage(),
                  bgColor: Colors.green,
                )
              : const Text('Cloud StoragePlease authenticate to open this page'),
          FirebaseAuth.instance.currentUser?.uid != null
              ? const _PagePushButton(
                  buttonTitle: 'Cloud Functions页',
                  pagename: CloudFunctionsPage(),
                  bgColor: Colors.green,
                )
              : const Text('Cloud FunctionsPlease authenticate to open this page'),
        ],
      ),
    );
  }
}

class _PagePushButton extends StatelessWidget {
  const _PagePushButton({
    Key? key,
    required this.buttonTitle,
    required this.pagename,
    this.bgColor = Colors.blue,
  }) : super(key: key);

  final String buttonTitle;
  final dynamic pagename;
  final Color bgColor;

  @override
  Widget build(BuildContext context) {
    return ElevatedButton(
      style: ButtonStyle(
        backgroundColor: MaterialStateProperty.all(bgColor),
      ),
      child: Container(
        padding: const EdgeInsets.all(10),
        child: Text(buttonTitle),
      ),
      onPressed: () {
        AnalyticsService().logPage(buttonTitle);
        Navigator.push(
          context,
          MaterialPageRoute(builder: (context) => pagename),
        );
      },
    );
  }
}


class AnalyticsService {

  Future<void> logPage(String screenName) async {
    await FirebaseAnalytics.instance.logEvent(
      name: 'screen_view',
      parameters: {
        'firebase_screen': screenName,
      },
    );
  }
}


class FirebaseMessagingService {
  FirebaseMessaging messaging = FirebaseMessaging.instance;


  void setting() async {
    NotificationSettings settings = await messaging.requestPermission(
      alert: true,
      announcement: false,
      badge: true,
      carPlay: false,
      criticalAlert: false,
      provisional: false,
      sound: true,
    );

    print('User granted permission: ${settings.authorizationStatus}');
  }

  void fcmGetToken() async {

    if (isAndroid || isIOS) {
      final fcmToken = await messaging.getToken();
      print(fcmToken);
    }

    else {
      final fcmToken = await messaging.getToken(
          vapidKey: FirebaseOptionMessaging().webPushKeyPair);
      print('web : $fcmToken');
    }
  }
}

class FirebaseInAppMessagingService {
  void getFID() async {
    String id = await FirebaseInstallations.instance.getId();
    print('id : $id');
  }
}
/// Flutter
import 'package:flutter/material.dart';

/// Firebase
import 'package:cloud_functions/cloud_functions.dart';

class CloudFunctionsPage extends StatefulWidget {
  const CloudFunctionsPage({Key? key}) : super(key: key);

  @override
  CloudFunctionsPageState createState() => CloudFunctionsPageState();
}

class CloudFunctionsPageState extends State<CloudFunctionsPage> {

  int _number = 0;


  void addNumber() async {
    try {

      final result = await FirebaseFunctions.instance
          .httpsCallable('functionsTest')
          .call({'firstNumber': _number, 'secondNumber': 1});
      _number = result.data['addNumber'];
    } on FirebaseFunctionsException catch (error) {
      print(error.code);
      print(error.details);
      print(error.message);
    }
  }

  @override
  Widget build(BuildContext context) {
    return Scaffold(
      appBar: AppBar(
        title: const Text('Cloud Functions页'),
      ),
      body: Center(
        child: Column(
          mainAxisAlignment: MainAxisAlignment.center,
          children: <Widget>[
            const Text('You have pushed the button this many times:'),
            Text(
              '$_number',
              style: Theme.of(context).textTheme.headline4,
            ),
          ],
        ),
      ),
      floatingActionButton: FloatingActionButton(
        onPressed: () {
          setState(() {
            addNumber();
          });
        },
        tooltip: 'Increment',
        child: const Icon(Icons.add),
      ),
    );
  }
}
Firebase Hosting
「Firebase Hosting」概述
Firebase Hostingis a web application、Static and dynamic content and hosting services provided by microservices
如果您想将您的FlutterApplication is hosted as a web application,可以使用
应用案例
准备
Preparations and previous chapters have been completed before starting
使用方法
There are two ways to deploy toFirebase Hosting
Deploy by entering the command 使用Github Actions进行部署
在这种情况下,We choose to deploy by entering the command
创建一个Firebase项目,安装Firebase CLI并初始化项目
firebase init hosting
Examples of questions and answers are as follows
? What do you want to use as your public directory? (public)
build/web

? Configure as a single-page app (rewrite all urls to /index.html)? (y/N)
No

? Set up automatic builds and deploys with GitHub? (y/N)
No
Configure settings for the network
在web/index.html中,配置html <head>设置
在web/manifest.json中,Configure behavior and icons for web apps
可以通过覆盖web/icons目录下的文件(如Icon-192.png)to change the icon of the application. Be careful not to get the size wrong at this point.
After debugging the application,在Flutterside build applications,然后用Firebase部署它
flutter build web
firebase deploy --only hosting
After accessing the deploymentURL,If the application is validated,就可以使用了
注意,If you want to use a custom domain name,你可以从Firebase Console进行设置
️Firebase Performance Monitoring
「Firebase Performance Monitoring」概述
Firebase Performance Monitoringis an item that allows you to measure yourFlutterApplication Performance Services
点击这里查看Performance Monitoring官方文件
使用方法
要在项目中引入firebase_performance,请在pubspec.yaml中添加以下内容
dependencies:
  firebase_performance: ^0.8.2
为了确保FirebaseThe configuration is up to date,Open a terminal in the project root directory,运行flutterfire configure
To show initial performance data,Run the project and check if it shows up inFirebase控制台.
If shows the chart,你就成功了.
Custom performance measurements allow you to add custom properties as well as generic properties.
Firebase 其他服务
本章概述
This chapter summarizes what was not covered in previous chaptersFirebase服务
Firebase Dynamic Links(仅限移动端)
Firebase Dynamic Linksis an offer "动态链接 "的服务,Allows you to go directly to linked content in mobile native apps
要在Flutter中构建,请将Firebase_dynamic_links导入你的项目,并从FirebaseConsole creation link
Firebase App Check
App Checkis a service that protects backend resources from misuse,such as billing fraud and phishing
使用reCAPTCHAor some other way to check if the device is trusted.
The certified vendor used will vary by platform
| 平台 | 提供者 |
|---|---|
| Apple platforms | DeviceCheck, App Attest |
| Android | Play Integrity, SafetyNet |
| web | reCAPTCHA v3, reCAPTCHA Enterprise |
它也可以与 Flutter 一起使用
如果flutterfireinstalled in your environment,从Firebase ConsoleEnable and initial configurationApp Check,并安装App Check库
flutter pub add firebase_app_check
调用执行 App Check 的代码,运行它,你就大功告成了
import 'package:flutter/material.dart';
import 'package:firebase_core/firebase_core.dart';

// Import the firebase_app_check plugin
import 'package:firebase_app_check/firebase_app_check.dart';

Future<void> main() async {
  WidgetsFlutterBinding.ensureInitialized();
  await Firebase.initializeApp();
  await FirebaseAppCheck.instance.activate(
    webRecaptchaSiteKey: 'recaptcha-v3-site-key',
  );
  runApp(App());
}
Firebase installations service
Firebase installations service负责管理Firebase的安装
用来检查Firebase的安装ID,用于Messaging、Analytics等
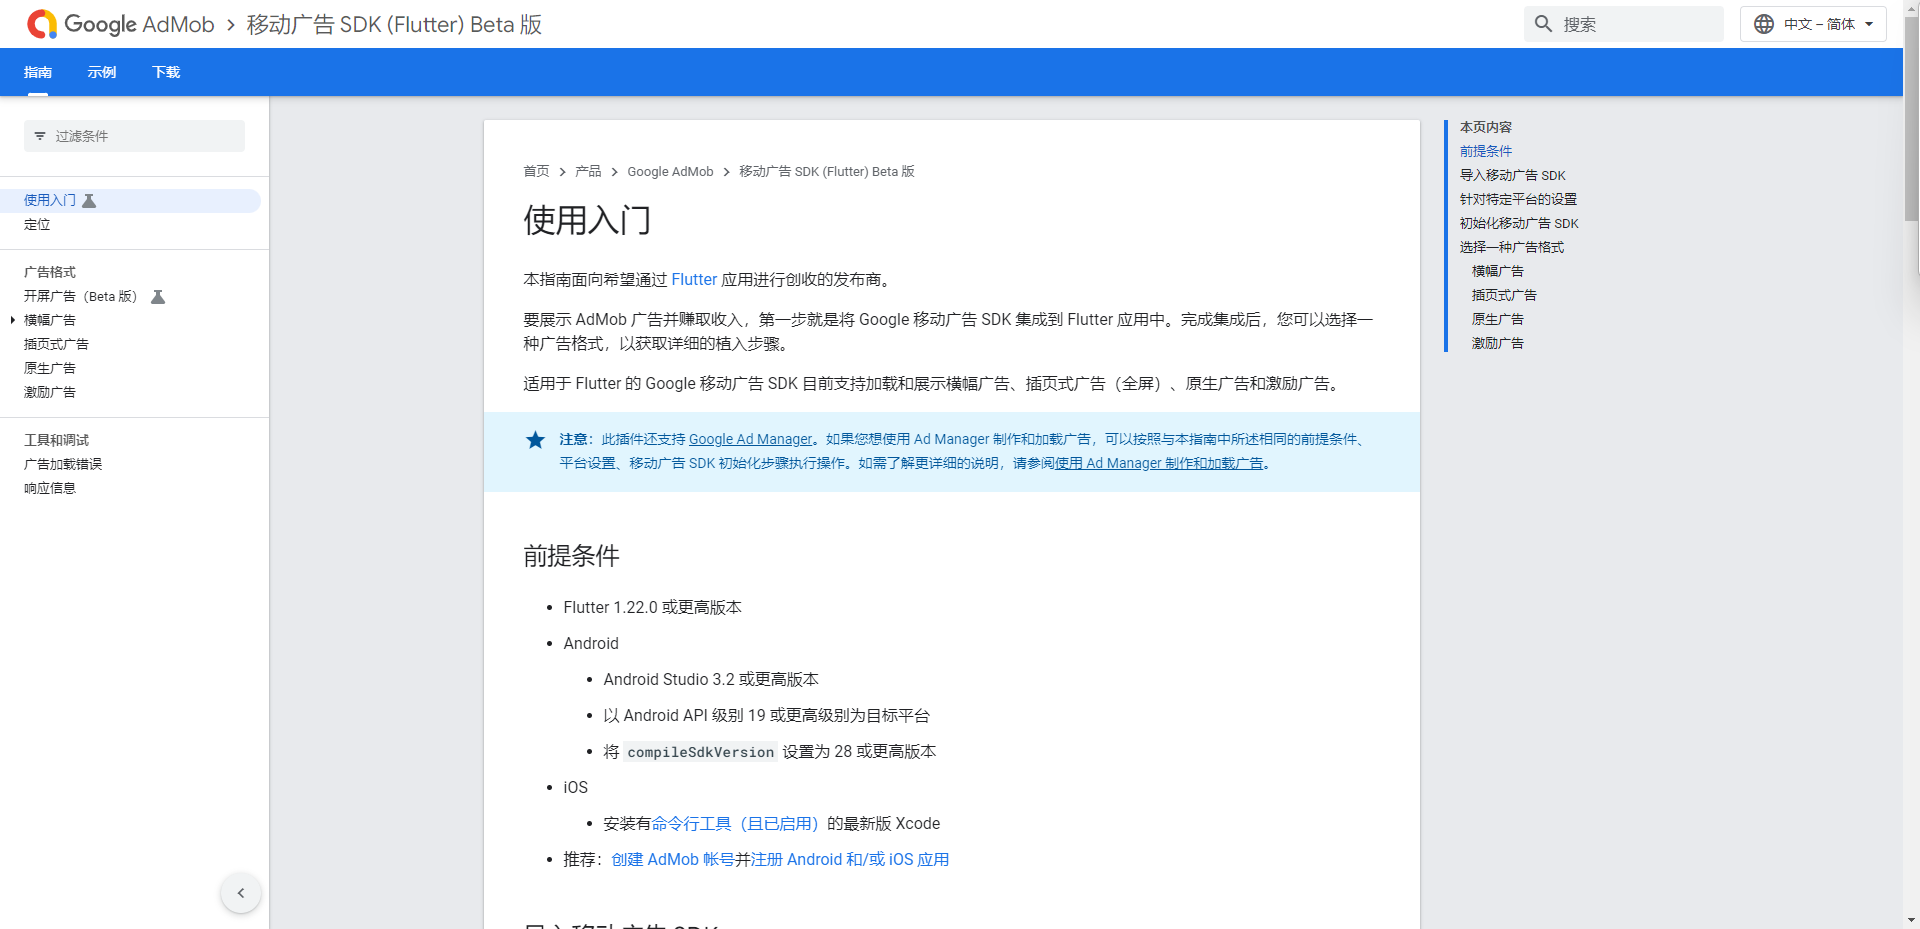
Firebase Google AdMob
Firebase Google Admobis a mobile advertising service
 如果你想在Flutter中启动AdMob广告,你不能使用Firebase的Admob,Mobile ads are requiredSDK(Flutter)(beta)
Test Lab
Test Labis a service that allows you to test your applications on cloud-hosted devices,Can be used when you want to test your application on various configurations.
You can do this by deploying your application toTest Lab,并从Firebase Console将文件上传到Robo Test,to test your mobile application.
Firebase App Distribution
Firebase App DistributionIs a promotion to the tester application distribution services
与Google Play和App StoreThe link makes it easy to distribute the application
你可以从Firebase ConsoleDistribute applications and manage testers
Firebase Extensions
Firebase Extensions是一项服务,It allows you to use packaged solution quickly add functionality for your application.
在官方的Firebase ExtensionsYou can find many extensions,这些扩展是使用Cloud Functions for Firebase编写的

请注意,Firebase ExtensionsThe installation only applies to Blaze计划(按需付费)
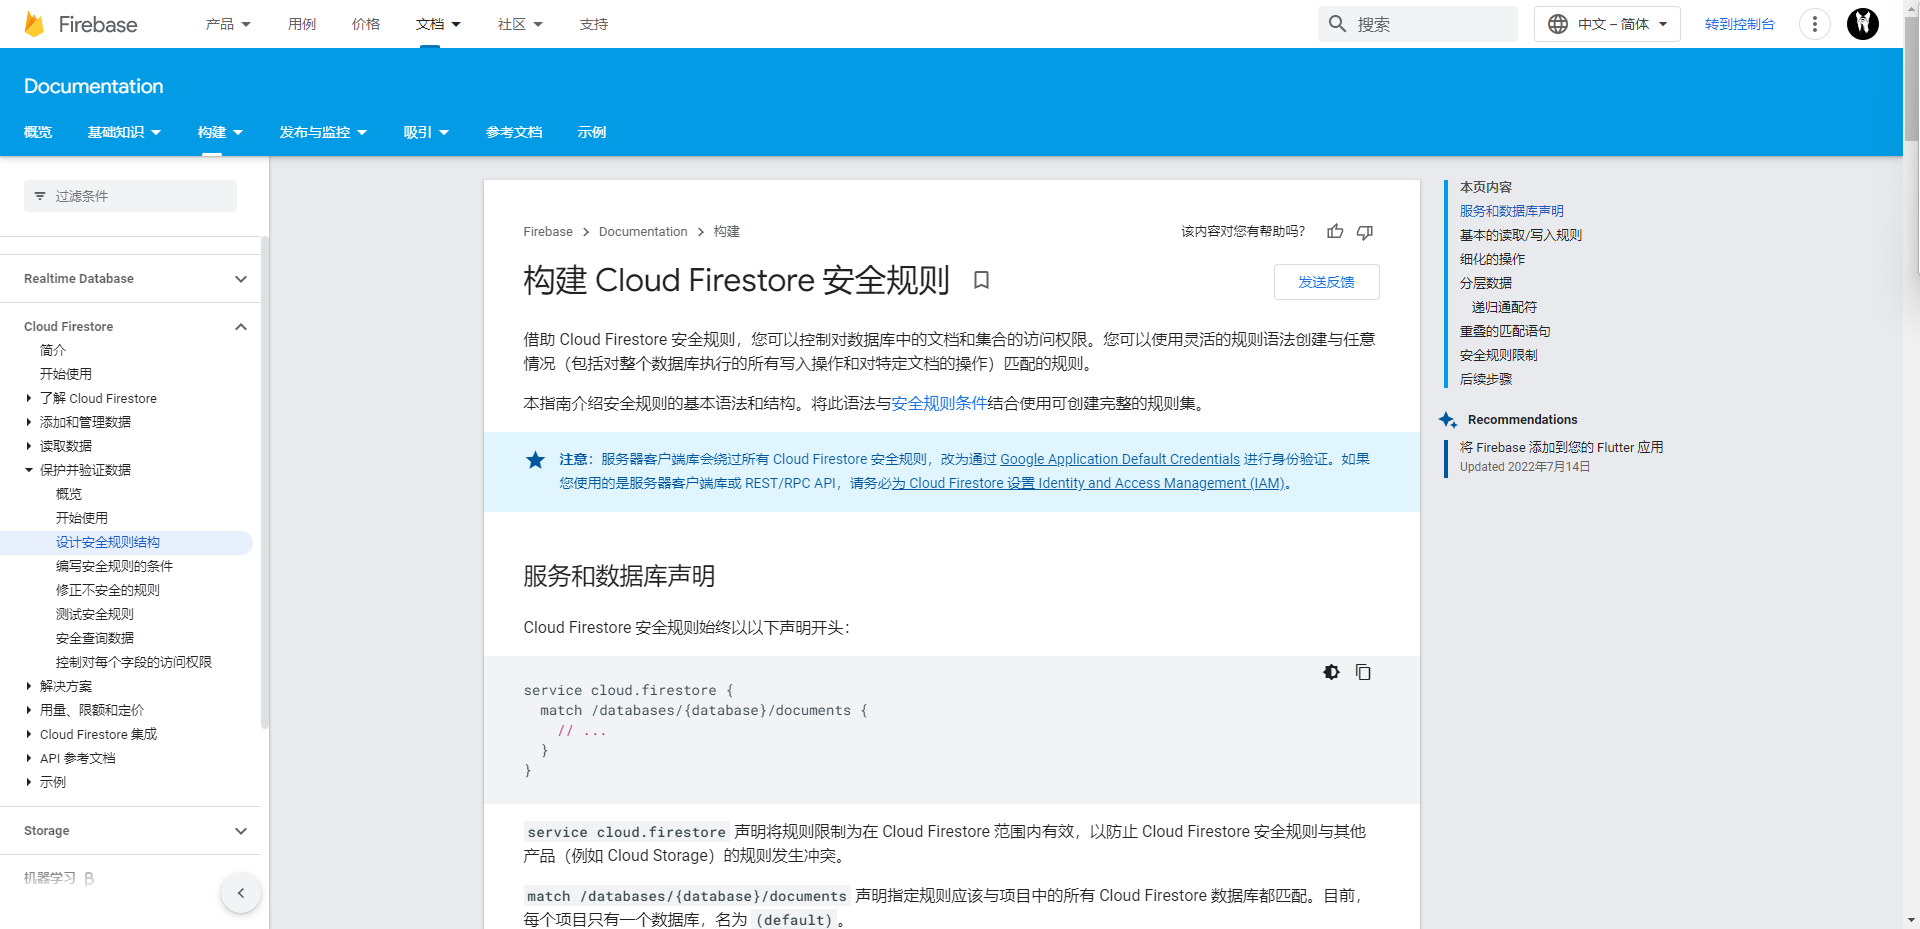
Firebase 安全规则
什么是Firebase的安全规则?
FirebaseSafety rules is to define how to allow access to the grammar of the stored data
Firestore、Realtime Database、Cloud StorageThe syntax of the following is different
Firestore的语法
FirestoreThe syntax of security rules is based onCommon Expression Language(CEL)语言
as a basic safety rule,In a test environment accessible to all authenticated users,编写
service cloud.firestore {
  match /databases/{database}/documents {
    match /{document=**} {
      allow read, write: if request.auth != null;
    }
  }
}
In a production environment where only the content owner has access,编写
service cloud.firestore {
  match /databases/{database}/documents {
    // Allow only authenticated content owners access
    match /some_collection/{userId}/{documents=**} {
      allow read, write: if request.auth != null && request.auth.uid == userId
    }
  }
}
Realtime Database
Realtime Database使用jsonFormatted Security Rules Syntax.
To ensure that only content owners can access,Please configure as follows.
{
  "rules": {
    "users": {
      "$uid": {
        ".read": "auth != null && auth.uid == $uid",
        ".write": "auth != null && auth.uid == $uid"
      }
    }
  }
}
Cloud Storage
The syntax of cloud storage security rules is based onCommon Expression Language(CEL)
Security rules that can only be accessed by content owners include
rules_version = '2';
service firebase.storage {
  match /b/{bucket}/o {
    match /users/{userId}/{allPaths=**} {
      allow read, write: if request.auth != null && request.auth.uid == userId;
    }
  }
}
参考网站
Some websites were referenced at the time of writing this article
在此表示感谢


边栏推荐
- Bika LIMS open source LIMS set - use of SENAITE (detection process)
- useragent在线查找
- 多主复制下处理写冲突(3)-收敛至一致的状态及自定义冲突解决逻辑
- Handling Write Conflicts under Multi-Master Replication (1)-Synchronous and Asynchronous Conflict Detection and Conflict Avoidance
- 京东获取商品历史价格信息 API
- 【Yugong Series】July 2022 Go Teaching Course 022-Dictionary of Go Containers
- Golang 小数操作之判断几位小数点与四舍五入
- MySQL---聚合函数
- C# 之 扑克游戏 -- 21点规则介绍和代码实现
- Introduction of Jerry voice chip ic toy chip ic_AD14NAD15N full series development
猜你喜欢

After Effects 教程,如何在 After Effects 中调整过度曝光的快照?

架构师04-应用服务间加密设计和实践

全平台GPU通用AI视频补帧超分教程
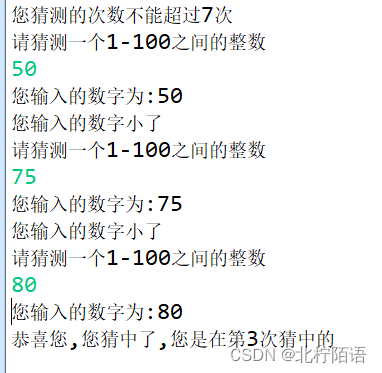
每日练习------随机产生一个1-100之间的整数,看能几次猜中。要求:猜的次数不能超过7次,每次猜完之后都要提示“大了”或者“小了”。
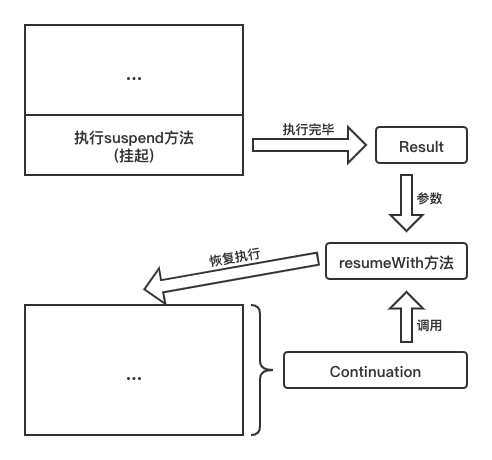
Kotlin coroutines: continuation, continuation interceptor, scheduler

How can we improve the real yourself, become an excellent architect?

九齐ny3p系列语音芯片替代国产方案KT148A性价比更高420秒长度
After Effects tutorial, How to adjust overexposed snapshots in After Effects?

程序员如何学习开源项目,这篇文章告诉你

Basics of ResNet: Principles of Residual Blocks
随机推荐
1161. 最大层内元素和 : 层序遍历运用题
【源码解析】BeanFactory和FactoryBean
UVM RAL模型和内置seq
【Yugong Series】July 2022 Go Teaching Course 021-Slicing Operation of Go Containers
无主复制系统(2)-读写quorum
Golang go-redis cluster模式下不断创建新连接,效率下降问题解决
多主复制下处理写冲突(3)-收敛至一致的状态及自定义冲突解决逻辑
【AcWing】第 62 场周赛 【2022.07.30】
How can we improve the real yourself, become an excellent architect?
Write a database document management tool based on WPF repeating the wheel (1)
Multi-datacenter operation and detection of concurrent writes
Chinese encoding Settings and action methods return values
【愚公系列】2022年07月 Go教学课程 023-Go容器之列表
多主复制下处理写冲突(1)-同步与异步冲突检测及避免冲突
flyway的快速入门教程
基于WPF重复造轮子,写一款数据库文档管理工具(一)
京东按关键字搜索商品 API
Smart Trash Can (8) - Infrared Tube Sensor (Raspberry Pi pico)
Flex布局详解
MySQL---排序与分页