当前位置:网站首页>Pytorch ADDA code learning notes
Pytorch ADDA code learning notes
2022-07-03 10:19:00 【Innocent^_^】
pretrain.py
1:.sum().item()
preds = classifier(src_encoder(images))
total_acc += (preds.max(1)[1] == labels).sum().item()
sum What is taken is preds.max(1)[1] and labels Equal number , The type is tensor,item() Turn it into python Numbers .
above preds.max(1)[1] What is it? ?
preds.max(1) Two lists are returned , The first list contains the largest element per row , The second list contains the column coordinates corresponding to the list elements above .preds.max(1)[1] Take the second list 
adapt.py
import torch.optim as optim
import torch.nn as nn
criterion = nn.CrossEntropyLoss()
optim_enc = optim.Adam(params=tgt_encoder.parameters(),
                           lr=params.lr_tgt_enc,
                           betas=(params.beta1, params.beta2))
optimizer.zero_grad()
loss = criterion(preds, labels)
loss.backward()
optimizer.step()
optim.Adam(): Reference article pytorch Use in torch.optim Optimize the selection of neural network and optimizer . Make clear Momentum( momentum , downhill slope , Good downhill shoes )、AdaGrad( resistance , Ill fitting shoes prompt downhill as soon as possible )、Adam Their respective meanings and progression 、 Inclusion relation . The parameters are as follows :
\qquad \qquad 1.params: Things to optimize
\qquad \qquad 2.lr: learning rate Learning rate , You can decide how many strides to take down the slope
\qquad \qquad 3.betas=[β1, β2]: Update momentum and resistance respectively
optimizer.zero_grad() Make the gradient all return to 0, Recalculate for each sample , The result of the previous sample cannot be saved
loss.backward() Solving gradient , Back propagation , adopt autograd Engine to execute ,loss The type of must be Tensor(pytorch 0.4.0 Version start Tensor and Variable Merge )
optimizer.step() All parameters can be updated
criterion = nn.BCEWithLogitsLoss()
First find out what is Sigmoid And its characteristics :sigmoid The function is also called Logistic function , For hidden layer neuron output , The value range is (0,1), It maps a real number to (0,1) The range of , It can be used for secondary classification .
S i g m o i d ( x ) = S ( x ) = 1 1 + e − x \qquad \qquad Sigmoid(x)=S(x)=\frac{1}{1+e^{-x}} Sigmoid(x)=S(x)=1+e−x1
S ′ ( x ) = S ( x ) ∗ ( 1 − S ( x ) ) \qquad \qquad S^{'}(x)=S(x)*(1-S(x)) S′(x)=S(x)∗(1−S(x))
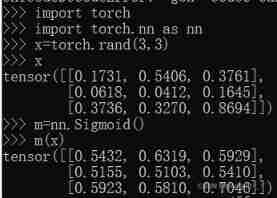
Next, let's find out BCELoss(Binary CrossEntropy):
B C E L o s s = − 1 n ∑ [ y n ∗ l n x n + ( 1 − y n ) ∗ l n ( 1 − x n ) ] \qquad \qquad BCELoss=-\frac{1}{n}\sum[y_n*lnx_n+(1-y_n)*ln(1-x_n)] BCELoss=−n1∑[yn∗lnxn+(1−yn)∗ln(1−xn)]
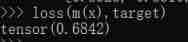
BCEWithLogitsLoss Is to put sigmoid and BCELoss Become , Both have been done :

# Underscores indicate unused variables in the loop , and swift equally
for (images_src, _), (images_tgt, _) in zip(src_loader, tgt_loader)
See details python zip() Function explanation
General explanation :
\qquad \qquad 1. This function can combine several lists or tuples , Returns a list with tuples as elements , Among them the first i The elements of tuples correspond to the original list or the first of tuples i Elements
\qquad \qquad 2.zip() The length of the list obtained is to participate zip The length of the tuple of or the shortest one in the list 
\qquad \qquad 3.unzip You can put zip Unzip the list ,zip Need and * Together with , At the same time, pay attention to the correct allocation of the number of elements 
features_src = src_encoder(images_src)
features_tgt = tgt_encoder(images_tgt)
features_concat = torch.cat([features_src, features_tgt], 0)
cat Statements can splice two tensors ,0 Stands for splicing by line ( That is, directly connect them intuitively ),1 Stands for splicing by column ( Follow the elements of the corresponding row of the following list to the corresponding row of the previous list ), When splicing, the number of corresponding splicing dimensions should be equal 
dataset/minist.py & usps.py
Methods of obtaining and processing data sets , This should be understood emphatically , At that time, you can apply the model and code to your own data set .
First figure out some data formats 
1.
.pt、.pth and .pkl yes pytorch Model file , There is no difference in format , Only the suffix is different . In use torch.save() Save the model according to your preferences . See below for the specific code :
#utils.py
def save_model(model, file_name):
    """ Save model parameters """

    # Make root directory for saving model parameters
    if not os.path.exists(params.model_root):
        os.mkdir(params.model_root)

    # Save model parameters
    torch.save(model.state_dict(), os.path.join(params.model_root, file_name))
model.parameters() and model.state_dict() All are pytorch Method for viewing network parameters in , The former is used by the optimizer , The latter is used to save the model
ubyte.gz yes MNIST Dataset format , When using, it should be transformed into png Format ( To write back )
.bz2 File is made up of bzip2 Compression algorithm compressed files , It uses block sort compression (BWT) Algorithm and run length coding (RLE) Algorithm , High level compression can be achieved , Usually used for Linux Package distribution .
And then analyze minist.py and usps.py Some code inside
'''minist.py'''
from torchvision import datasets, transforms
import params
def get_mnist(train=True):
    """ Get MNIST data loader """

    # Image pre-processing
    #pytorch Different versions ,transforms The rules of may be quite different
    transform = transforms.Compose([transforms.Resize(params.image_size),
                                    transforms.ToTensor(),
                                    transforms.Normalize((0.1307,), (0.3081,)),
                                    transforms.Lambda(lambda x: x.repeat(3, 1, 1))])

    # MNIST dataset
    mnist_dataset = datasets.MNIST(root=params.data_root,
                                   train=train,
                                   transform=transform,
                                   download=True)

    # MNIST data loader
    mnist_loader = DataLoader(dataset=mnist_dataset,
                              batch_size=params.batch_size,
                              shuffle=True)
    return mnist_loader
transforms.Compose(): The accepted parameter is a list , Explain what to do in the list , Please refer to transforms.Compose() Function details . Here is what we need .
| name | meaning |
|---|---|
| Resize | Redefine the given image size |
| ToTensor | hold PIL The format of image conversion is [Channel, Height, Width] Of torch tensor, Range from [0,255] Turn into [0,1.0] |
| Normalize | hold [0,1.0] The scope becomes [-1.0,1.0], For each channel image=(image-mean)/std |
| lambda | Official methods may not be enough , Define the operation by yourself |
there lambda x: x.repeat(3, 1, 1) What I mean by x For input , return x.repeat(3, 1, 1) Result . Notice the repeat yes pytorch Not numpy Of . there x It's a three-dimensional tensor,3,1,1 Is the number of times to repeat along the specified dimension . It can be seen from the results in the figure below ,3,1,1 Is to copy the original tensor by two more , Join them in line by line 
As for why it's done , Let's look back later when we talk about the composition of the network .
mnist_dataset = datasets.MNIST(root=params.data_root, train=train,transform=transform,download=True)
This sentence stipulates that the root directory of the dataset is params.data_root Where? ;train If the parameter is false From test.pt Create a dataset , On the contrary, from train.pt establish ;transform The parameter is the transformation operation , Don't write , The default is None, What is taken here is the one above Compose() operation ;download Parameter set to True, Then download online MINIST Data sets ( You need a ladder, or you have a high probability of failure ) To the root directory of the dataset ( Here is params.data_root), If the dataset already exists , You don't need to download againmnist_loader = DataLoader(dataset=mnist_dataset, batch_size=params.batch_size, shuffle=True)
This is for reading data ,DataLoader Is the length of the l e n ( D a t a s e t ) b a t c h s i z e \frac{len(Dataset)}{batch_size} batchsizelen(Dataset) ,shuffle It's sorting , by True Then each iteration will reorder the data
2、3 The two steps are loading data → Reading data , But this is for mnist Data sets , How to use your own data in the future still needs to try more by yourself DataLoader Methods and how to define a data set 、 What format to use and so on
__ init __.py
from .usps import get_usps
from .mnist import get_mnist
__all__ = ['get_usps', 'get_mnist']
This __init__.py Files can make their folder into recognizable packages , Go to other folders like this import You can't report an error
utils.py
def init_model(model):
    """ Initialize model """

    # Initialize model weight
    for module in model.modules():
        if type(module) in [nn.Conv2d, nn.Linear]:
            nn.init.xavier_normal_(module.weight)
            nn.init.zeros_(module.bias)

    # Load model to GPU
    model = load_gpu(model)

    return model
This code is used to initialize the initial parameters of the convolution layer and the full connection layer of the model
model.modules()It's a iterator , Can traverse model The current layer in and all its sub layers , Including the overall network structureNet(...), Show(features):Sequential(...),(classifier):Sequential(...), Iteratively traverse all sublayers of the model , Convolution is shown later 、 Pooling 、ReLu wait , It is a comprehensive model analysis .- nn.init… yes pytorch Parameter initialization method of General category of . among xavier Is a kind of method , The idea is that the input and output variances are the same , Initialization methods include uniform and normal Two kinds of .

def load_model(model, file_name):
    """ Load model parameters """
    if not os.path.exists(os.path.join(params.model_root, file_name)):
        return model, False
    model.load_state_dict(torch.load(os.path.join(params.model_root, file_name), map_location=get_device()))
    return model, True
As the name suggests, it is loaded with the trained model , Get to know os.path.join that will do : This is a Path splicing function , In this code, the root directory and filename Splicing together , Specific to the path of the model itself . The advantage of using this is that you can start without ’/’( Or other delimiters ) This symbol is automatically added to the path of , It saves a lot of trouble when writing programs .
Next is some operations about pictures , Understanding can :
# Set plot options
    plt.xlim(X[:, 0].min() * 1.2, X[:, 0].max() * 1.2)
    plt.ylim(X[:, 1].min() * 1.2, X[:, 1].max() * 1.2)
    plt.xticks([]), plt.yticks([])
    plt.title(mode, fontsize=15)
    plt.tight_layout()
plt.xlim(xmin, xmax) Used for setting up x The number range on the shaft plt.xticks It is used to change the coordinate axis into what you want , What is written in the picture is to directly let x The axis shows nothing plt.tight_layout() The subgraph parameters will be automatically adjusted , Let the axis label 、 The scale labels and titles are not next to each other
There are still great difficulties in reading the remaining two visual functions , After understanding the main parts, let's see
Used in TSNE Dimensionality reduction method , Understand and then come back to write .
models/discriminator.py & lenet.py
What you don't understand :MaxPool2d、Dropout2d、forward function
test.py
encoder.eval(): understand PyTorch Medium train() Methods and eval() The function and difference of method Just fine , I'll add later . In short, remember , When testing, you must write about the test model .eval(), Only in this way can we calculate with the trained value .with torch.no_grad(): Use it when you don't need to deal with pictures , In fact, the calculation results , It makes no difference whether you write this or not
边栏推荐
- Leetcode-404: sum of left leaves
- Leetcode - 705 design hash set (Design)
- Policy gradient Method of Deep Reinforcement learning (Part One)
- Yocto Technology Sharing Phase 4: Custom add package support
- RESNET code details
- Tensorflow2.0 save model
- Leetcode - 5 longest palindrome substring
- 【毕业季】图匮于丰,防俭于逸;治不忘乱,安不忘危。
- [C question set] of Ⅵ
- Retinaface: single stage dense face localization in the wild
猜你喜欢
![[LZY learning notes -dive into deep learning] math preparation 2.1-2.4](/img/92/955df4a810adff69a1c07208cb624e.jpg)
[LZY learning notes -dive into deep learning] math preparation 2.1-2.4
CV learning notes - deep learning

LeetCode - 508. Sum of subtree elements with the most occurrences (traversal of binary tree)

CV learning notes - clustering
What did I read in order to understand the to do list

Leetcode - 5 longest palindrome substring

3.2 Off-Policy Monte Carlo Methods & case study: Blackjack of off-Policy Evaluation
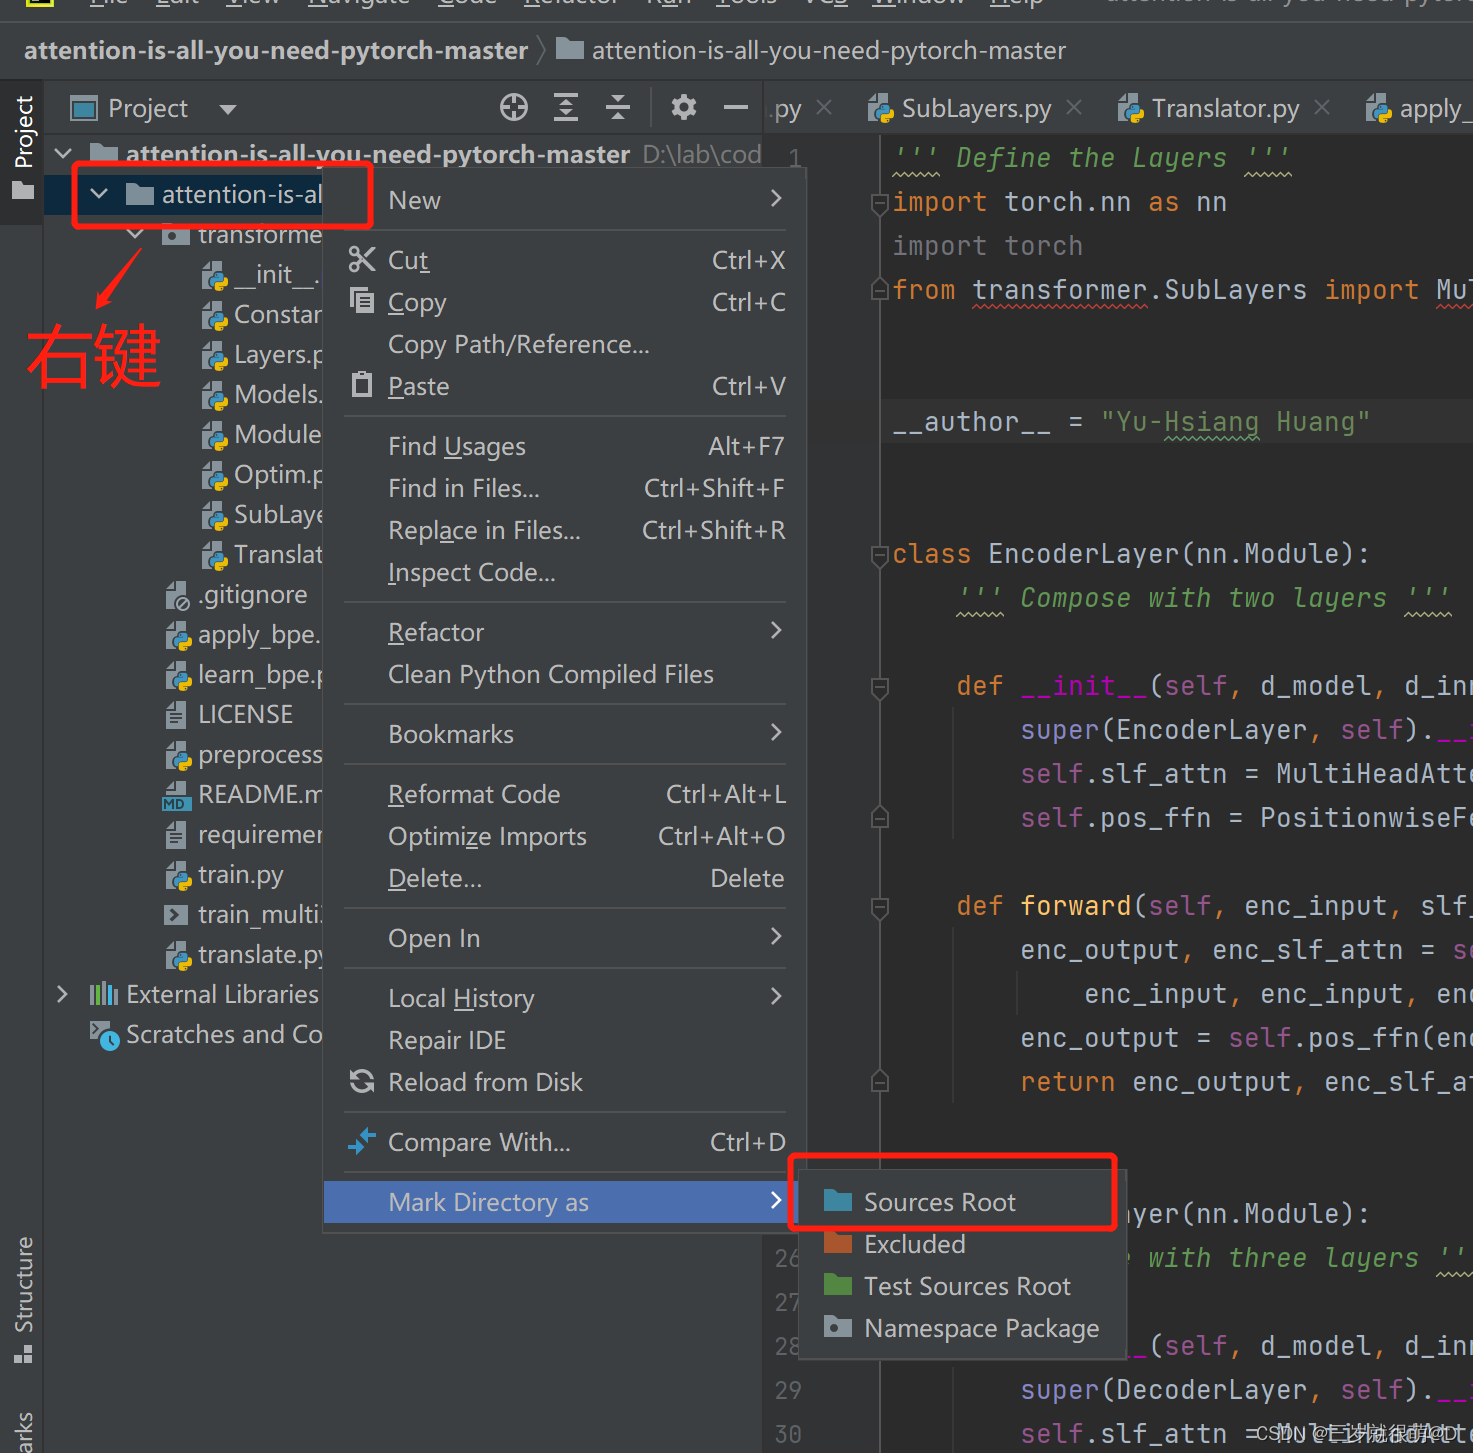
pycharm 无法引入自定义包

Neural Network Fundamentals (1)

2.2 DP: Value Iteration & Gambler‘s Problem
随机推荐
【毕业季】图匮于丰,防俭于逸;治不忘乱,安不忘危。
After clicking the Save button, you can only click it once
Pycharm cannot import custom package
CV learning notes - reasoning and training
Notes - regular expressions
What did I read in order to understand the to do list
Deep learning by Pytorch
Leetcode-404: sum of left leaves
Matplotlib drawing
Dynamic layout management
QT creator uses OpenCV Pro add
Google browser plug-in recommendation
pycharm 无法引入自定义包
Simulate mouse click
2312. Selling wood blocks | things about the interviewer and crazy Zhang San (leetcode, with mind map + all solutions)
The data read by pandas is saved to the MySQL database
Standard library header file
Label Semantic Aware Pre-training for Few-shot Text Classification
1. Finite Markov Decision Process
Window maximum and minimum settings