当前位置:网站首页>After Effects tutorial, How to adjust overexposed snapshots in After Effects?
After Effects tutorial, How to adjust overexposed snapshots in After Effects?
2022-07-31 16:39:00 【51CTO】
Welcome to the Chinese version of After Effects tutorial, the editor will take you to learn the basic tools and skills of After Effects, and learn how to adjust overexposed snapshots in AE.
This image looks a little flat, you can add a little contrast to the scene, select Contrast Click and drag to the right to add more, this will make the colors lookmore saturated.

The image changes over time as the camera moves, and some keyframes need to be added.Go to the Effect Controls panel, starting with the Exposure setting, click on the Stopwatch and hold down the mouse, drag to the Black and White area.

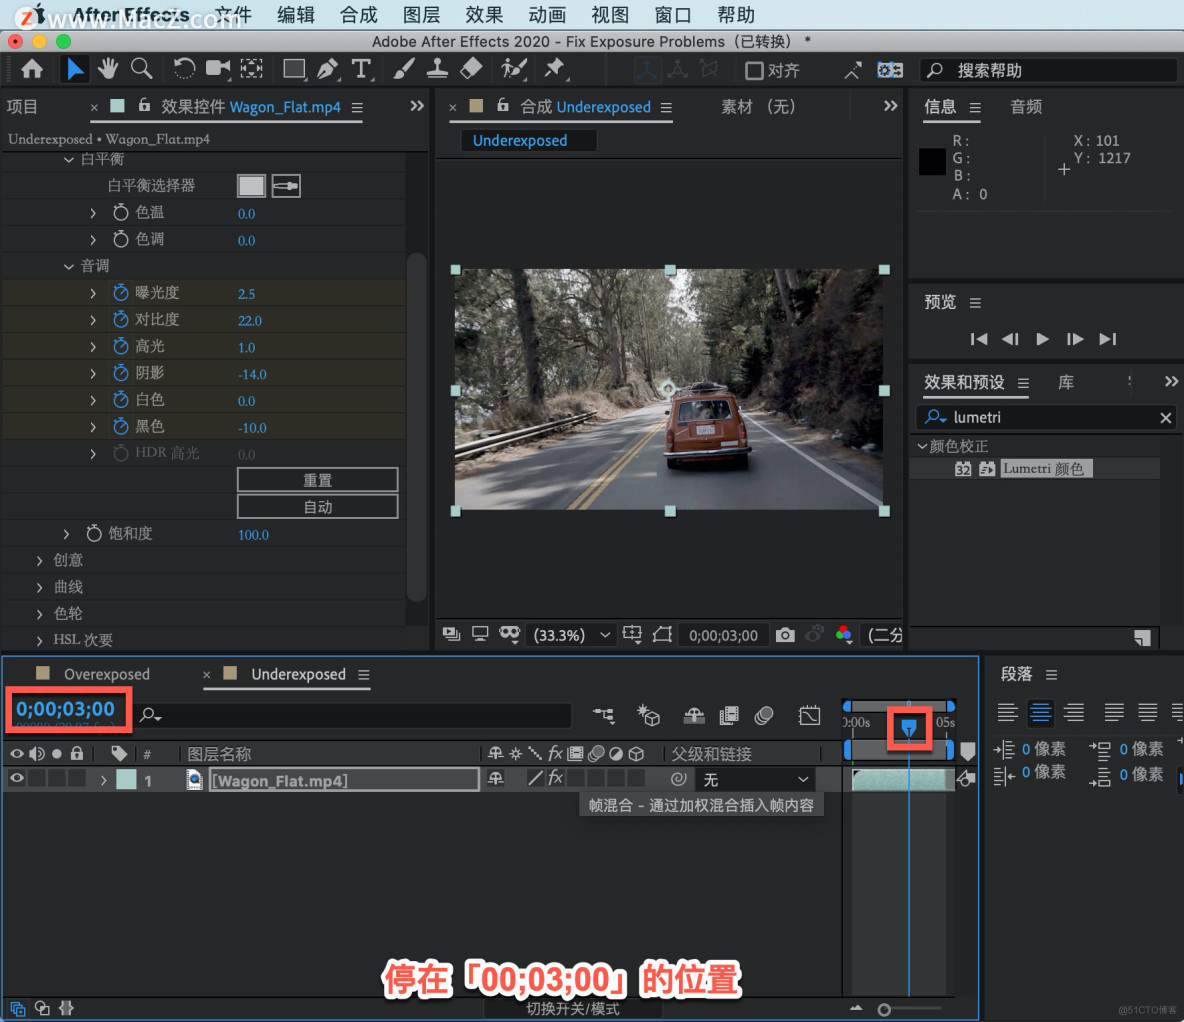
Have just keyframed the initial adjustment, now move the current time indicator down the timeline until you reach a significantly darker area of the image, stopping at "00;03;00"s position.
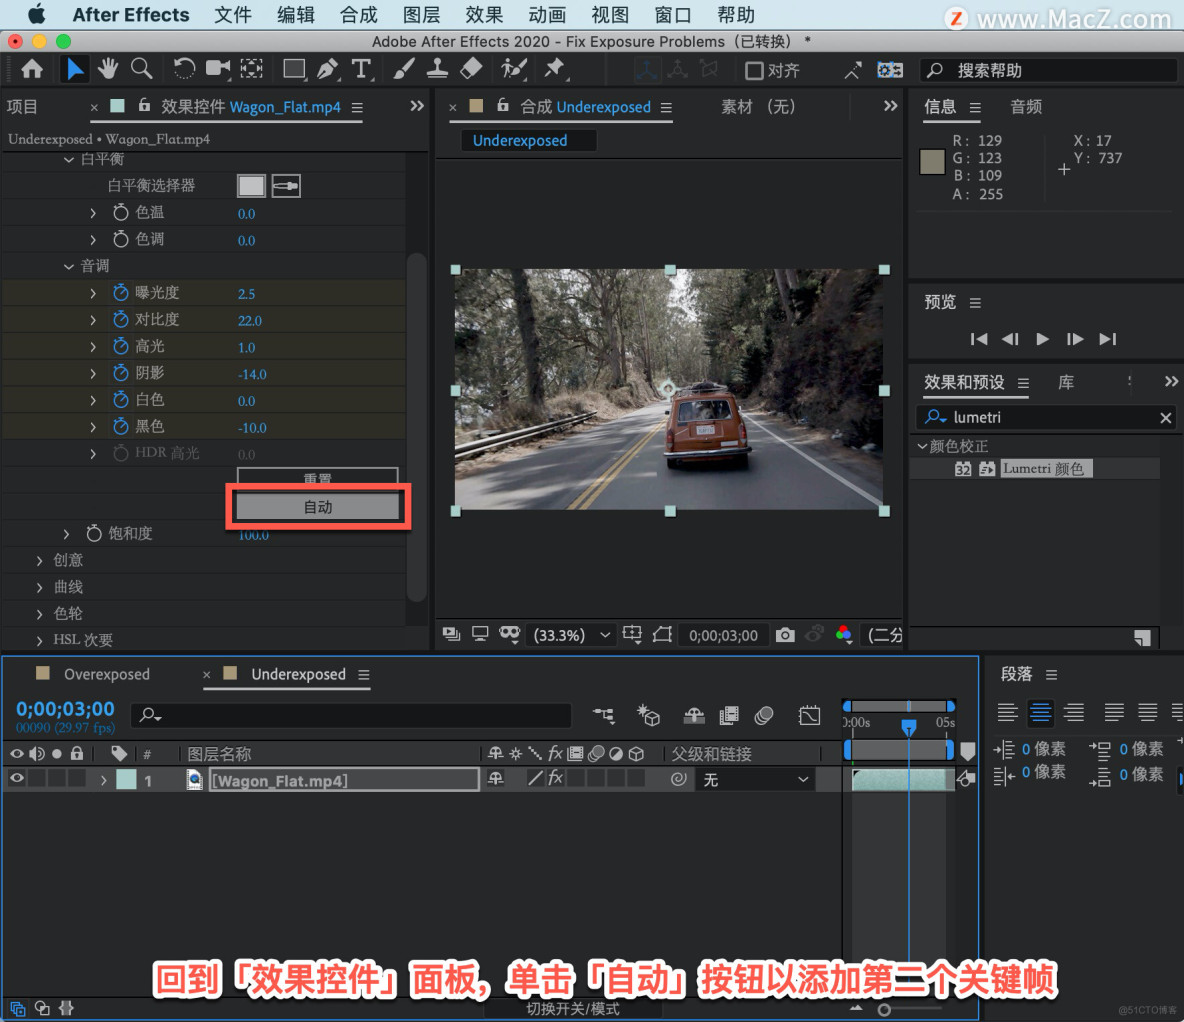
Go back to the Effect Controls panel and click the Auto button to add a second keyframe.Press the spacebar to preview the clip, and you can see that the color adjustments look smooth throughout the clip.
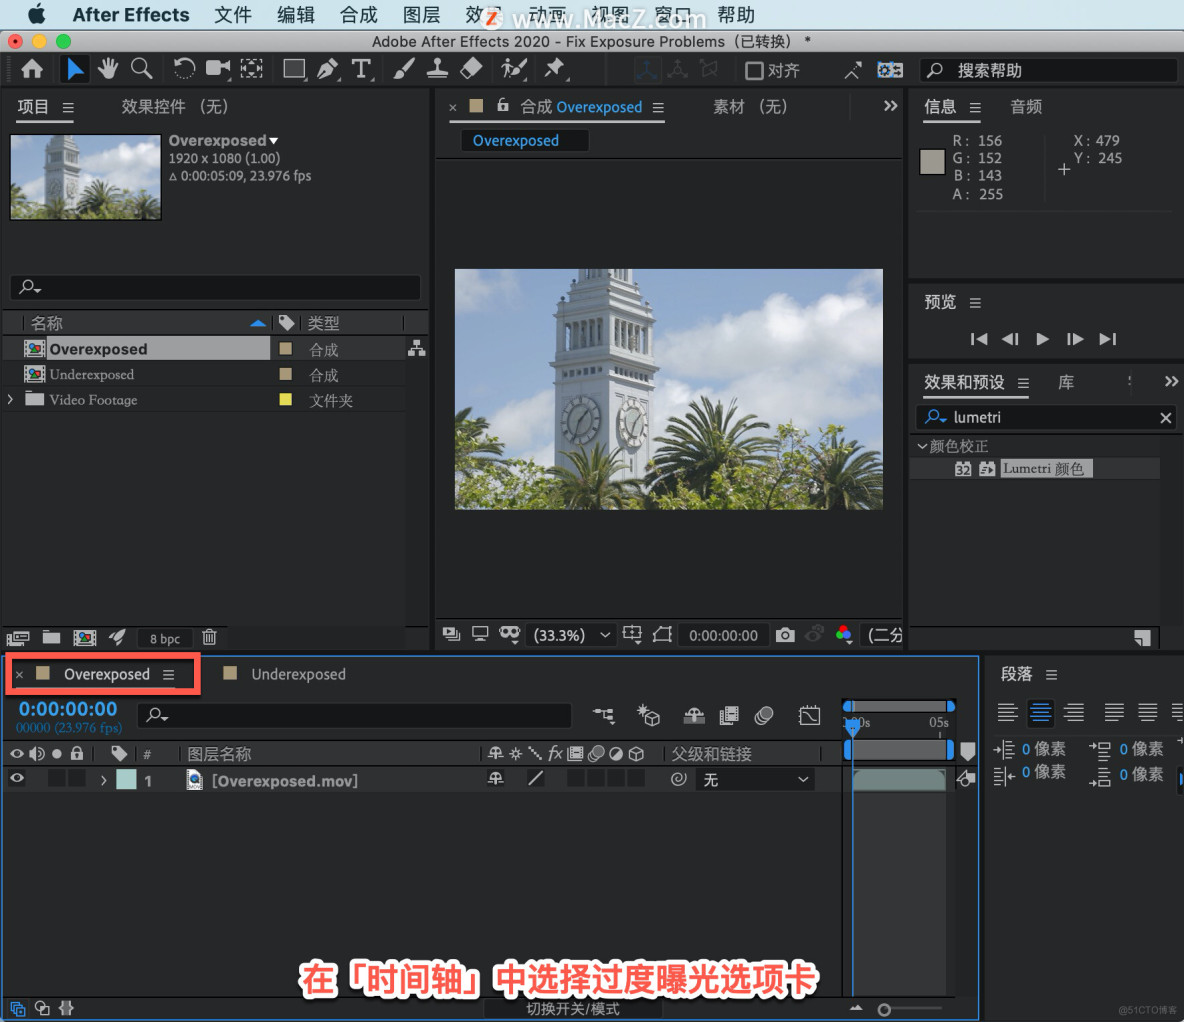
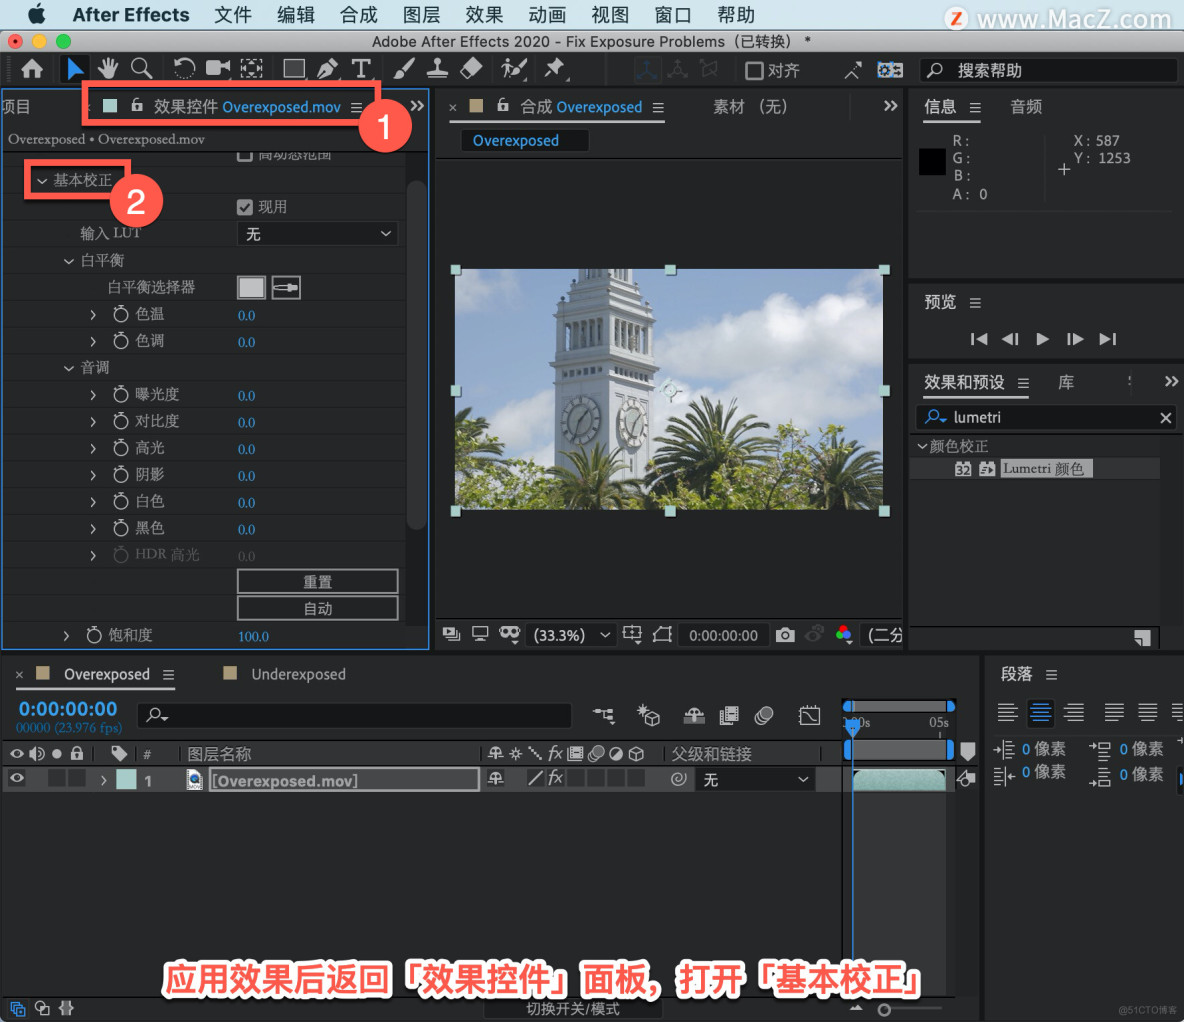
Press the spacebar to stop playback, adjust the overexposed snapshot, select the Overexposure tab in the Timeline to apply the effect.
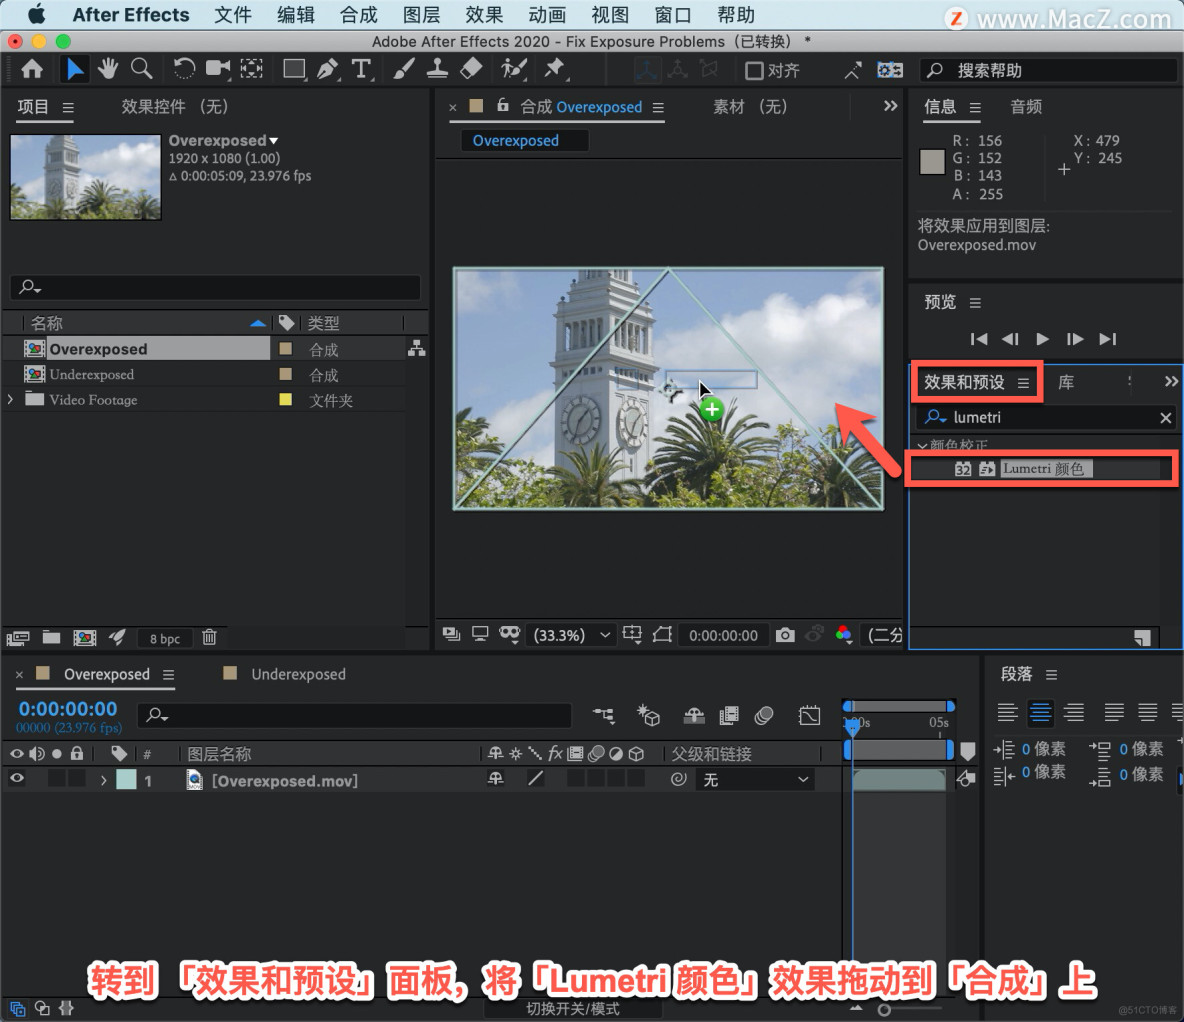
Go to the Effects and Presets panel and drag the Lumetri Color effect onto Composition.
After applying the effect, go back to the Effect Controls panel and open Basic Correction.
Make sure the Tone area is open, then click the Auto button to create the initial adjustment.
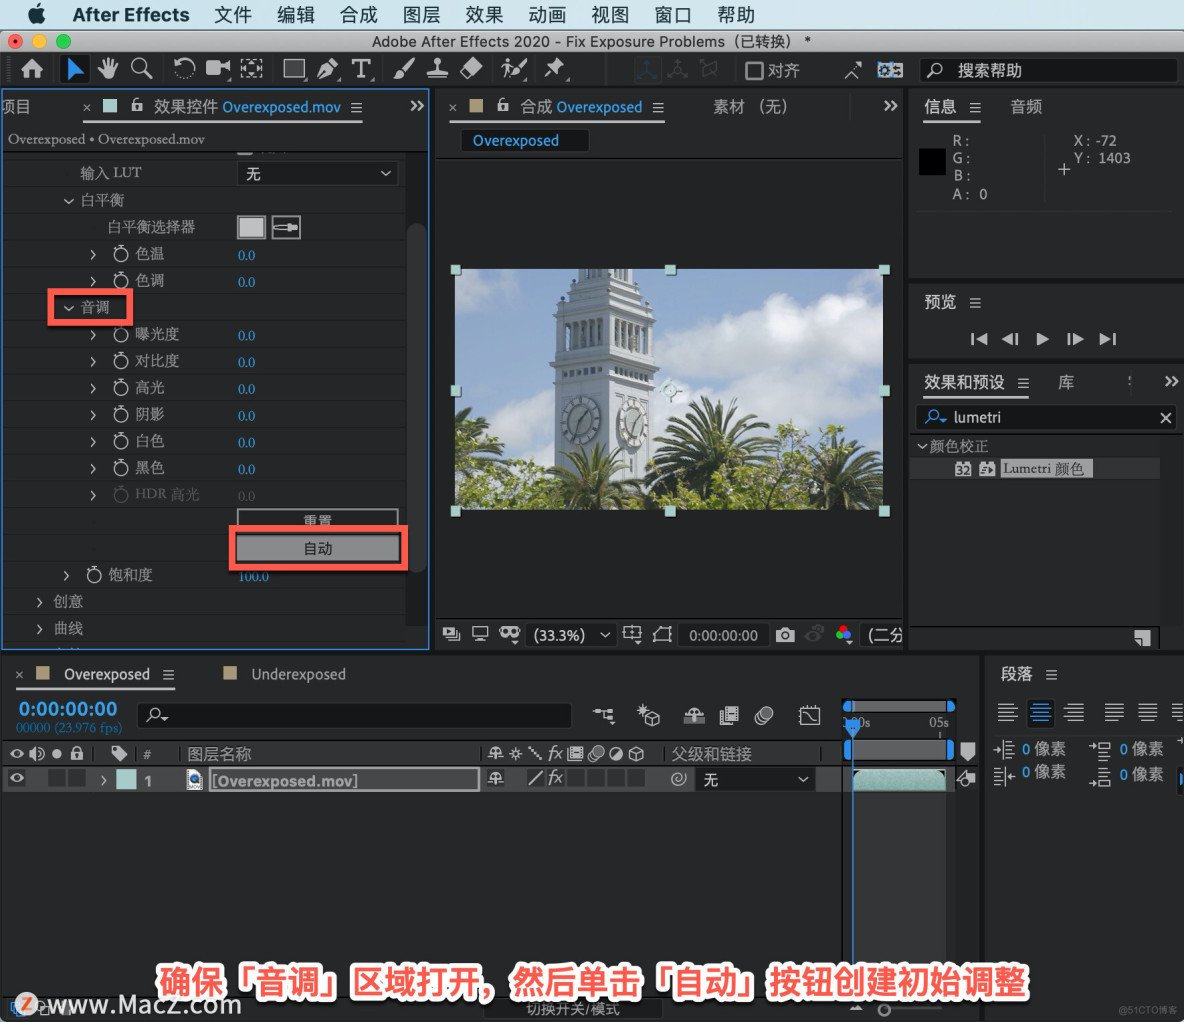
The contrast is a bit high, go back to the "Contrast" area, click and drag to the left to soften it a bit, press the spacebar to preview the snapshot.

Here's how to adjust an overexposed snapshot in After Effects.
边栏推荐
- MySQL多表联合查询
- 网站漏洞修复服务商关于越权漏洞分析
- Qt practical cases (54) - using transparency QPixmap design pictures
- Masterless Replication System (3)-Limitations of Quorum Consistency
- ML.NET related resources
- 牛客网刷题(三)
- 认识异常 (看完这篇你就懂了)
- After Effects 教程,如何在 After Effects 中调整过度曝光的快照?
- 组合学笔记(六)局部有限偏序集的关联代数,Möbius反演公式
- Smart Trash Can (8) - Infrared Tube Sensor (Raspberry Pi pico)
猜你喜欢
![[TypeScript] In-depth study of TypeScript type operations](/img/d9/ee240ccba72e8d3114ee5c52ed0c8f.png)
[TypeScript] In-depth study of TypeScript type operations

二分查找的细节坑
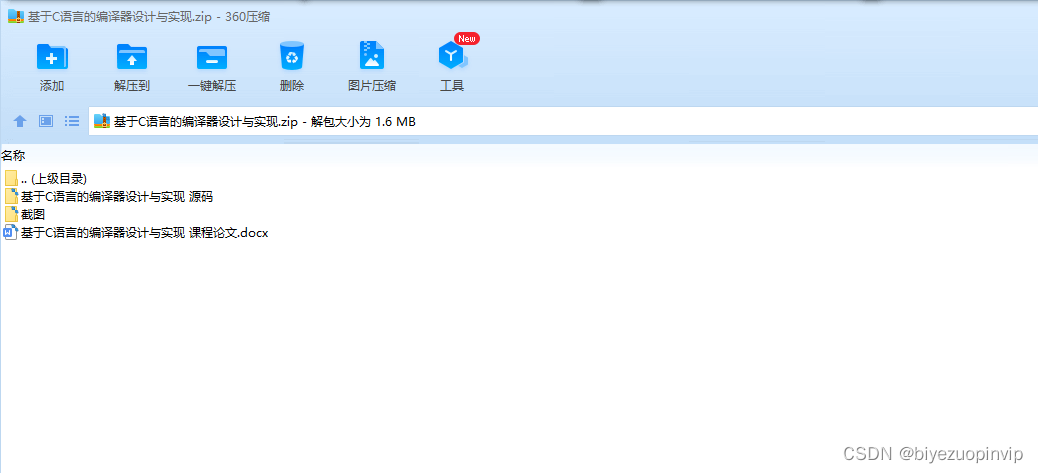
Design and Implementation of Compiler Based on C Language

【7.29】Code Source - 【Arrangement】【Stone Game II】【Cow and Snacks】【Minimum Number of Spawns】【Sequence】
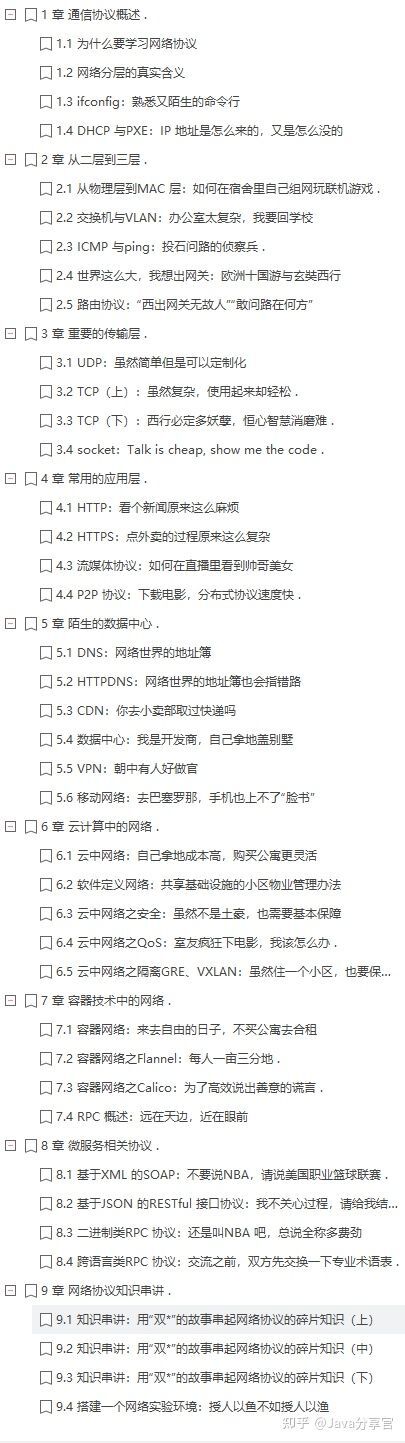
华为顶级工程师历时9年总结的“趣谈网络协议”PDF文档,太强了
Smart Trash Can (8) - Infrared Tube Sensor (Raspberry Pi pico)

使用互相关进行音频对齐

第二届中国PWA开发者日
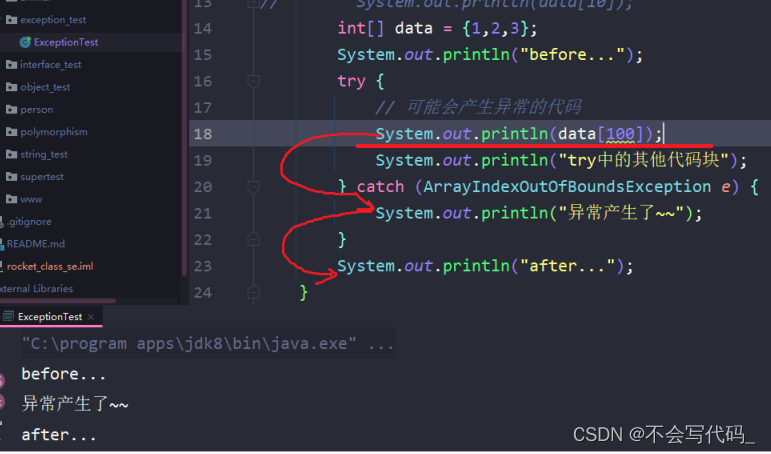
认识异常 (看完这篇你就懂了)
How Redis handles concurrent access

随机推荐
动态规划之线性dp(下)
Masterless replication system (1) - write DB when node fails
【pytorch】1.7 pytorch与numpy,tensor与array的转换
6-22 Vulnerability exploit - postgresql database password cracking
智能垃圾桶(九)——震动传感器(树莓派pico实现)
Flutter 获取状态栏statusbar的高度
【Yugong Series】July 2022 Go Teaching Course 020-Array of Go Containers
多主复制的适用场景(2)-需离线操作的客户端和协作编辑
Smart Trash Can (8) - Infrared Tube Sensor (Raspberry Pi pico)
无主复制系统(1)-节点故障时写DB
【源码解析】BeanFactory和FactoryBean
复制延迟案例(1)-最终一致性
[pytorch] pytorch automatic derivation, Tensor and Autograd
深度学习机器学习理论及应用实战-必备知识点整理分享
LevelSequence源码分析
[pytorch] 1.7 pytorch and numpy, tensor and array conversion
Huawei's top engineers lasted nine years "anecdotal stories network protocol" PDF document summary, is too strong
i.MX6ULL驱动开发 | 33 - NXP原厂网络设备驱动浅读(LAN8720 PHY)
Qt practical cases (54) - using transparency QPixmap design pictures
自动化测试—web自动化—selenium初识