当前位置:网站首页>Swoole学习(二)
Swoole学习(二)
2022-08-04 05:25:00 【eleven_-11】
Swoole小案例
此操作是在配置了LNMP环境的基础上进行
web访问路径为/usr/local/nginx/html
一、创建服务器
在/usr/local/nginx/html目录下创建server.php,里面内容为:
<?php
//创建服务器 参数分别是
//监听的地址 127.0.0.1 表示监听本机,0.0.0.0表示监听所有地址
//9502 端口号 这个你随便定都行只要没被占用过(netstat -an | grep 查看端口使用情况) 如果被占用就使用 命令 kill杀死进程
$ws = new swoole_websocket_server("0.0.0.0", 9502);

// 设置配置
$ws->set(
    array(
        'daemonize' => false,      // 是否是守护进程
        'max_request' => 10000,    // 最大连接数量
        'dispatch_mode' => 2,
        'debug_mode'=> 1,
        // 心跳检测的设置,自动踢掉掉线的fd
        'heartbeat_check_interval' => 5,
        'heartbeat_idle_time' => 600,
    )
);

//监听WebSocket连接打开事件
$ws->on('open', function ($ws, $request) {
    $ws->push($request->fd, "hello, welcome to chatroom\n");
});

//监听WebSocket消息事件,其他:swoole提供了bind方法,支持uid和fd绑定
$ws->on('message', function ($ws, $frame) {
    $msg = 'from'.$frame->fd.":{$frame->data}\n";

    // 分批次发送
    $start_fd = 0;
    while(true)
    {
        // connection_list函数获取现在连接中的fd
        $conn_list = $ws->connection_list($start_fd, 100);   // 获取从fd之后一百个进行发送
        var_dump($conn_list);
        echo count($conn_list);

        if($conn_list === false || count($conn_list) === 0)
        {
            echo "finish\n";
            return;
        }

        $start_fd = end($conn_list);

        foreach($conn_list as $fd)
        {
            $ws->push($fd, $msg);
        }
    }
});

//监听WebSocket连接关闭事件
$ws->on('close', function ($ws, $fd) {
    echo "client-{$fd} is closed\n";
    $ws->close($fd);   // 销毁fd链接信息
});

$ws->start();
二、使用浏览器作为客户端
在/usr/local/nginx/html目录下创建client.html,具体内容如下
 <!DOCTYPE html>
<html>
<head>
      <title>swoole chat room</title>
      <meta charset="UTF-8">
      <script type="text/javascript">
          if(window.WebSocket){
              var webSocket = new WebSocket("ws://192.168.173.103:9502");//服务器ip以及配置的swoole端口
              webSocket.onopen = function (event) {
                  //webSocket.send("Hello,WebSocket!");
              };
              webSocket.onmessage = function (event) {
                var content = document.getElementById('content');
                content.innerHTML = content.innerHTML.concat('<p style="margin-left:20px;height:20px;line-height:20px;">'+event.data+'</p>');
              }

              var sendMessage = function(){
                  var data = document.getElementById('message').value;
                  webSocket.send(data);
              }
          }else{
              console.log("您的浏览器不支持WebSocket");
          }
      </script>
</head>
<body>
    <div style="width:600px;margin:0 auto;border:1px solid #ccc;">
        <div id="content" style="overflow-y:auto;height:300px;"></div>
        <hr/>
        <div style="height:40px">
            <input type="text" id="message" style="margin-left:10px;height:25px;width:450px;">
            <button onclick="sendMessage()" style="height:28px;width:75px;">发送</button>
        </div>
    </div>
</body>
</html>
三、运行
在服务端使用命令行的形式运行server.php
 在浏览器访问client.html文件
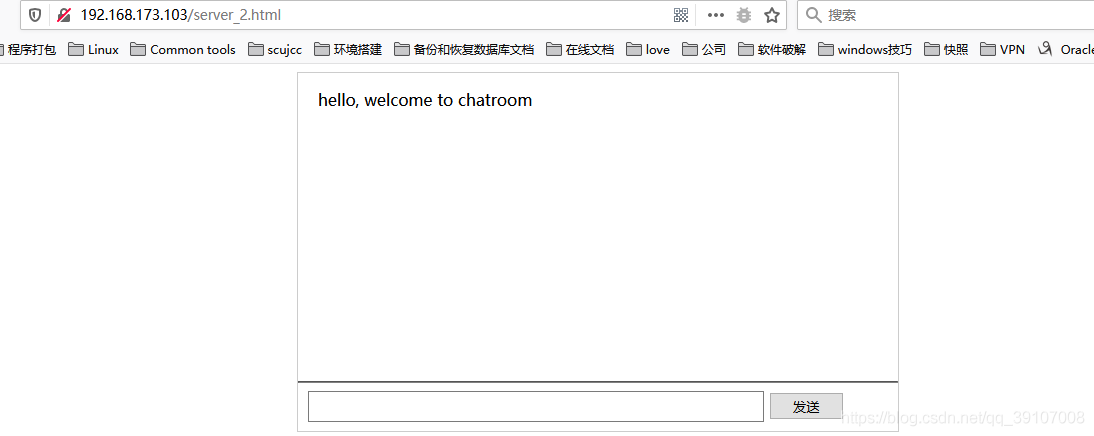 效果如下:
效果如下:
开启两个浏览器窗口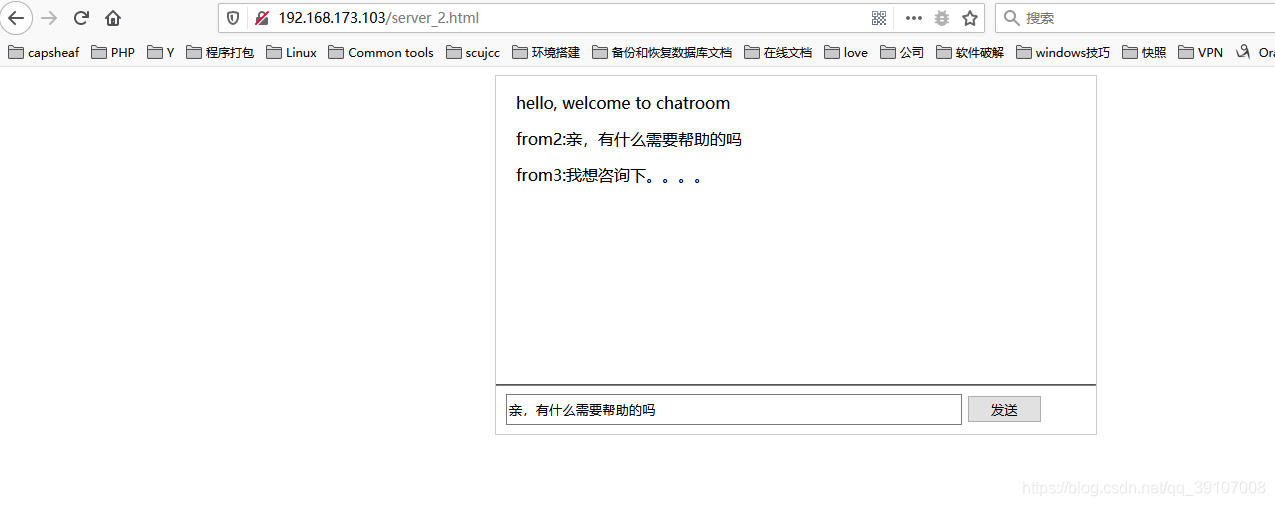
边栏推荐
猜你喜欢
随机推荐
Plus版SBOM:流水线物料清单PBOM
腾讯136道高级岗面试题:多线程+算法+Redis+JVM
Grain Mall - Basics (Project Introduction & Project Construction)
Performance testing with Loadrunner
Summary of MySQL database interview questions (2022 latest version)
Unity动画生成工具
8款最佳实践,保护你的 IaC 安全!
自动化测试的成本高效果差,那么自动化测试的意义在哪呢?
Unity表格配置编辑工具
【问题解决】同一机器上Flask部署TensorRT报错记录
力扣:343. 整数拆分
4.1 JdbcTemplate for declarative transactions
嵌入式系统驱动初级【3】——字符设备驱动基础中_IO模型
力扣题解8/3
The idea setting recognizes the .sql file type and other file types
MySQL date functions
As soon as flink cdc is started, the CPU of the source Oracle server soars to more than 80%. What is the reason?
Cannot read properties of null (reading ‘insertBefore‘)
OpenSSF 安全计划:SBOM 将驱动软件供应链安全
心余力绌:企业面临的软件供应链安全困境
![[Cocos 3.5.2]开启模型合批](/img/d9/9e8f71c9a26c8052b11291fe3ba7ac.png)
