当前位置:网站首页>Kubernetes cluster environment construction & Deployment dashboard
Kubernetes cluster environment construction & Deployment dashboard
2022-07-03 05:56:00 【Sloppy wandering swordsman】
1、Kubernetes Cluster building
Three sets are required for this environment construction CentOS The server ( One master and two subordinates ), Then install... In each server separately Docker(18.06.3)、kubeadm(1.18.0)、kubectl(1.18.0) and kubelet(1.18.0)
The configuration information of the three hosts is as follows :
| role | IP Address | operating system | To configure |
|---|---|---|---|
| Master | 192.168.56.20 | CentOS7.5+ | 2C2G |
| Node1 | 192.168.56.21 | CentOS7.5+ | 2C2G |
| Node2 | 192.168.56.22 | CentOS7.5+ | 2C2G |
1)、 Environment initialization ( All nodes have to operate )
1) Check the version of the operating system
Check the version of the operating system ( The version of the operating system is required to be at least 7.5 above ):
cat /etc/redhat-release

2) Turn off firewall and disable firewall startup
Turn off firewall :
systemctl stop firewalld
Do not turn on the firewall :
systemctl disable firewalld
3) Set host name
Set host name :
hostnamectl set-hostname <hostname>
- Set up 192.168.56.20 The host name :
hostnamectl set-hostname k8s-master
- Set up 192.168.56.21 The host name :
hostnamectl set-hostname k8s-node1
- Set up 192.168.56.22 The host name :
hostnamectl set-hostname k8s-node2
4) Host name resolution
cat >> /etc/hosts << EOF 192.168.56.20 k8s-master 192.168.56.21 k8s-node1 192.168.56.22 k8s-node2 EOF
5) Time synchronization
K8s It is required that the node time in the cluster must be accurate and consistent , So add time synchronization on each node :
yum install ntpdate -y
ntpdate time.windows.com
6) close selinux
see selinux Open or not :
getenforce
Permanent ban selinux, Need to restart :
sed -i 's/enforcing/disabled/' /etc/selinux/config
7) close swap Partition
Permanent ban swap Partition , Need to restart :
sed -ri 's/.*swap.*/#&/' /etc/fstab
8) To be bridged IPv4 Flow to iptables Chain
Bridge on each node IPv4 Flow to iptables Chain :
cat > /etc/sysctl.d/k8s.conf << EOF net.bridge.bridge-nf-call-ip6tables = 1 net.bridge.bridge-nf-call-iptables = 1 net.ipv4.ip_forward = 1 vm.swappiness = 0 EOF
load br_netfilter modular :
modprobe br_netfilter
Check whether to load br_netfilter modular :
lsmod | grep br_netfilter
take effect :
sysctl --system
9) Turn on ipvs
stay K8s in service There are two proxy models , One is based on iptables, The other is based on ipvs Of .ipvs The performance is higher than iptables Of , But if you want to use it , You need to load it manually ipvs modular
install ipset and ipvsadm:
yum -y install ipset ipvsadm
Execute the following script :
cat > /etc/sysconfig/modules/ipvs.modules <<EOF #!/bin/bash modprobe -- ip_vs modprobe -- ip_vs_rr modprobe -- ip_vs_wrr modprobe -- ip_vs_sh modprobe -- nf_conntrack_ipv4 EOF
to grant authorization 、 function 、 Check to see if :
chmod 755 /etc/sysconfig/modules/ipvs.modules && bash /etc/sysconfig/modules/ipvs.modules && lsmod | grep -e ip_vs -e nf_conntrack_ipv4
Check to see if :
lsmod | grep -e ipvs -e nf_conntrack_ipv4
10) Restart three machines
reboot
2)、 install Docker、kubeadm、kubelet and kubectl( All nodes have to operate )
1) install Docker
yum -y install wget
wget https://mirrors.aliyun.com/docker-ce/linux/centos/docker-ce.repo -O /etc/yum.repos.d/docker-ce.repo
yum -y install docker-ce-18.06.3.ce-3.el7
systemctl enable docker && systemctl start docker
docker version
Set up Docker Image accelerator :
sudo mkdir -p /etc/docker
sudo tee /etc/docker/daemon.json <<-'EOF' { "exec-opts": ["native.cgroupdriver=systemd"], "registry-mirrors": ["https://du3ia00u.mirror.aliyuncs.com"], "live-restore": true, "log-driver":"json-file", "log-opts": {"max-size":"500m", "max-file":"3"}, "storage-driver": "overlay2" } EOF
sudo systemctl daemon-reload
sudo systemctl restart docker
2) Add alicloud's yum Software sources
because K8s Image source of is abroad , Here, switch to the domestic Alibaba cloud image source :
cat > /etc/yum.repos.d/kubernetes.repo << EOF [kubernetes] name=Kubernetes baseurl=https://mirrors.aliyun.com/kubernetes/yum/repos/kubernetes-el7-x86_64 enabled=1 gpgcheck=0 repo_gpgcheck=0 gpgkey=https://mirrors.aliyun.com/kubernetes/yum/doc/yum-key.gpg https://mirrors.aliyun.com/kubernetes/yum/doc/rpm-package-key.gpg EOF
3) install kubeadm、kubelet and kubectl
yum install -y kubelet-1.18.0 kubeadm-1.18.0 kubectl-1.18.0
In order to achieve Docker The use of cgroup drvier and kubelet The use of cgroup drver Agreement , Suggest to modify /etc/sysconfig/kubelet The content of the document :
vi /etc/sysconfig/kubelet
#  modify
KUBELET_EXTRA_ARGS="--cgroup-driver=systemd"
KUBE_PROXY_MODE="ipvs"
Set it to power on and auto start , Because no configuration file was generated , The cluster starts automatically after initialization :
systemctl enable kubelet
3)、 Deploy K8s Master
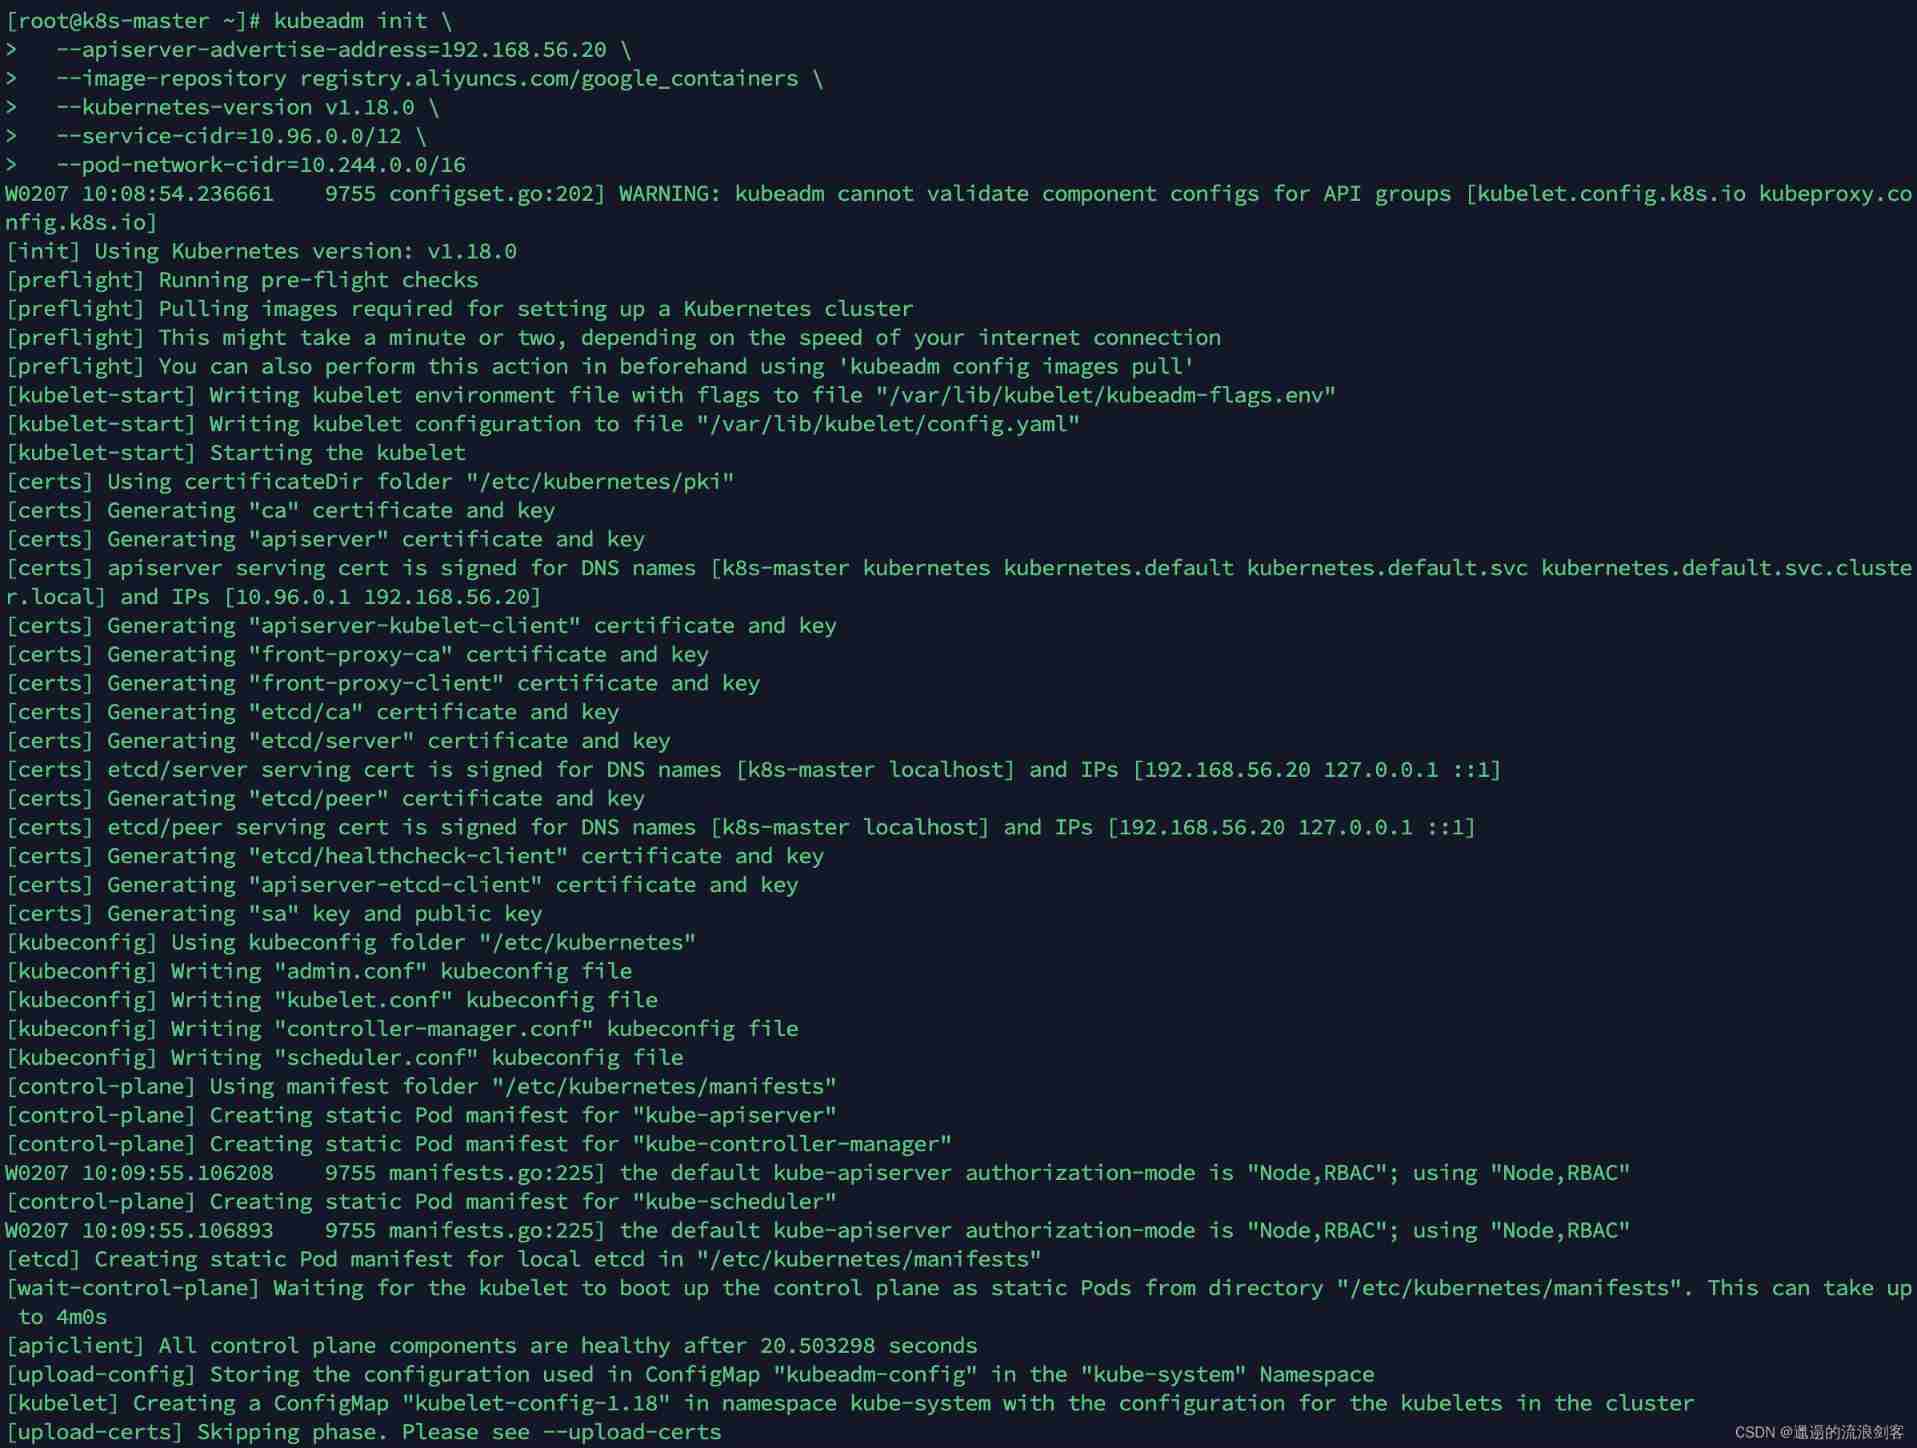
Deploy K8s Of Master node (192.168.56.20):
#  Because the default pull image address k8s.gcr.io No domestic access , Here, you need to specify the address of Alibaba cloud image warehouse  apiserver-advertise-address Corresponding IP by Master Node IP
kubeadm init \
  --apiserver-advertise-address=192.168.56.20 \
  --image-repository registry.aliyuncs.com/google_containers \
  --kubernetes-version v1.18.0 \
  --service-cidr=10.96.0.0/12 \
  --pod-network-cidr=10.244.0.0/16
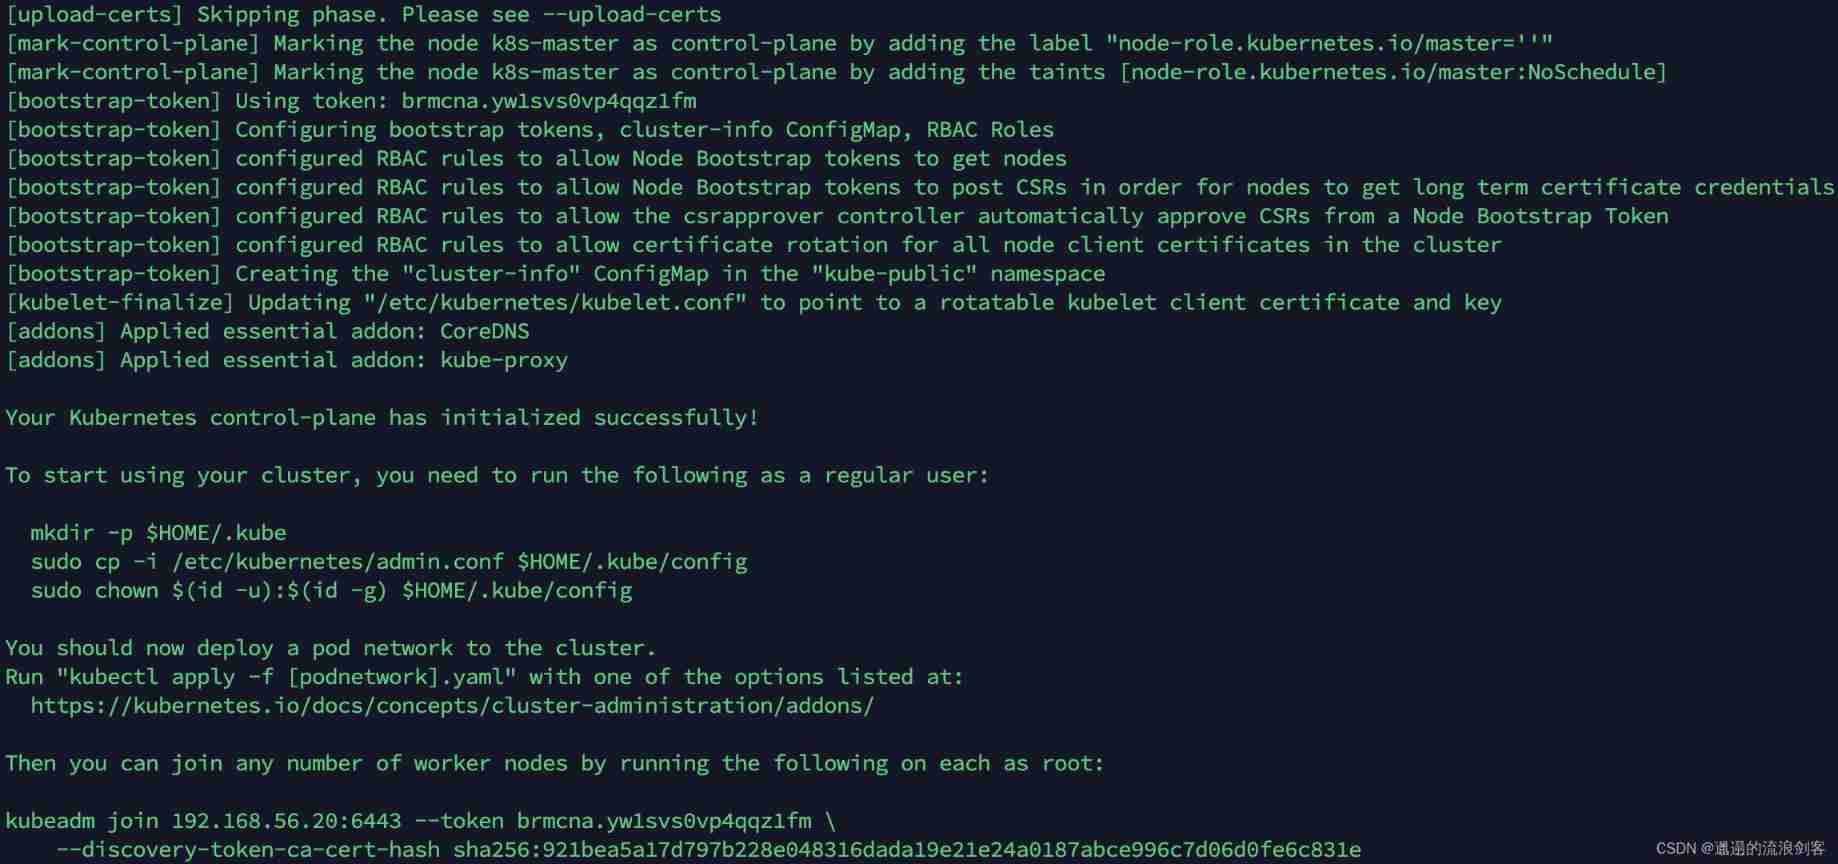
According to the tip , stay Master Use... On nodes kubectl Tools :
mkdir -p $HOME/.kube
sudo cp -i /etc/kubernetes/admin.conf $HOME/.kube/config
sudo chown $(id -u):$(id -g) $HOME/.kube/config
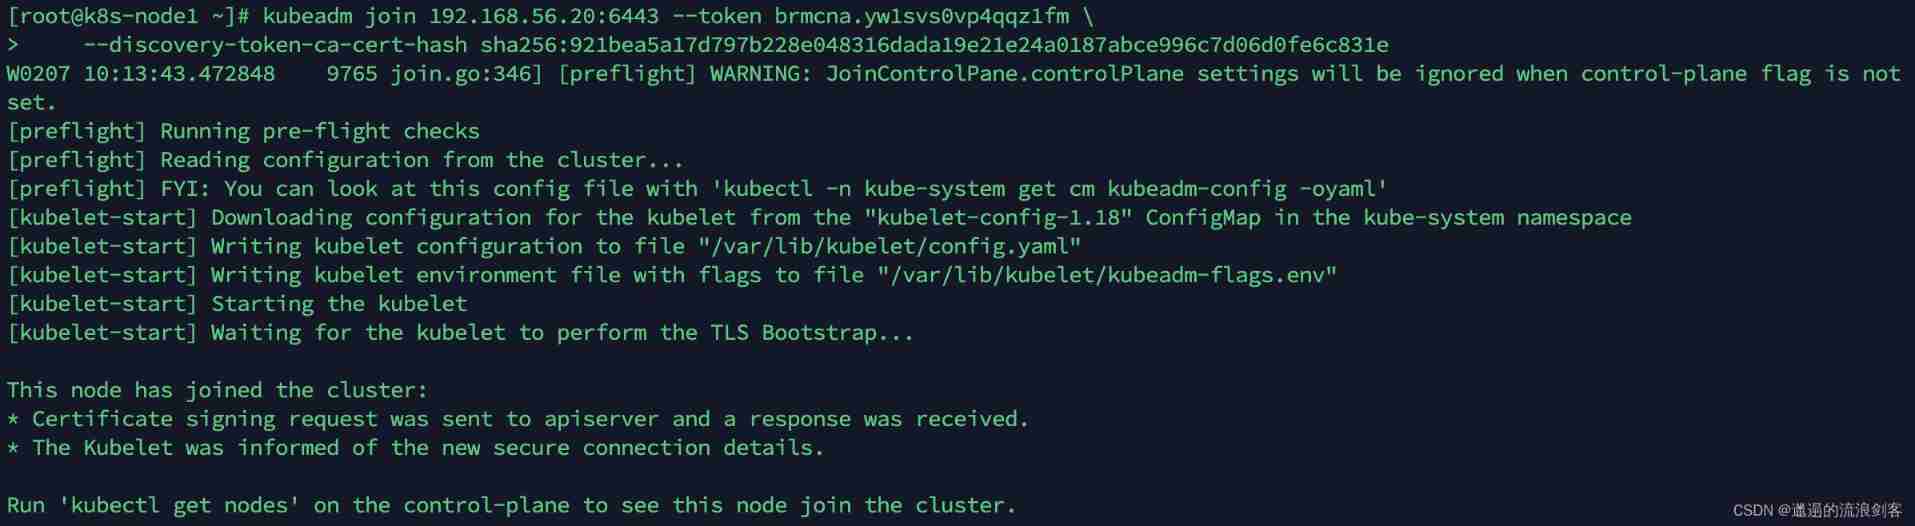
4)、 Deploy K8s Node
According to the prompt , On two Node node (192.168.56.21 and 192.168.56.22) Execute the following command on :
kubeadm join 192.168.56.20:6443 --token brmcna.yw1svs0vp4qqz1fm \
    --discovery-token-ca-cert-hash sha256:921bea5a17d797b228e048316dada19e21e24a0187abce996c7d06d0fe6c831e
default token Valid for 24 Hours , When it expires , The token It can't be used , At this time, you can use the following command to create token:
kubeadm token create --print-join-command

5)、 Deploy CNI The network plugin
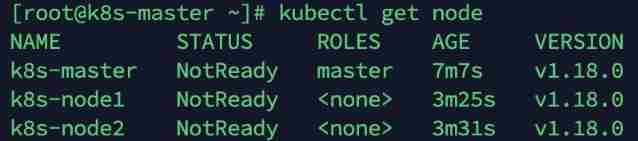
stay Master Use... On nodes kubectl Tool to view node status :
kubectl get node
K8s Support a variety of network plug-ins , such as flannel、calico、canal etc. , the flannel
stay Master Get on node flannel The configuration file :
wget https://raw.githubusercontent.com/coreos/flannel/master/Documentation/kube-flannel.yml
Use the configuration file to start flannel:
kubectl apply -f kube-flannel.yml
View deployment CNI Network plug-in progress :
kubectl get pod -n kube-system
When all pod All States are Running The installation is complete when

Check the node status again , All Node All States are Ready:
kubectl get node

6)、 test K8s colony
stay K8s Deploy one in the cluster Nginx, Test whether the cluster works normally
establish deployment:
kubectl create deployment nginx --image=nginx:1.14-alpine
expose NodePort port :
kubectl expose deployment nginx --port=80 --type=NodePort
View service status :
kubectl get pods,svc -o wide

You can see Nginx Of Pod Deployed in k8s-node2 node (192.168.56.22), The mapping of NodePort by 32296, Use browser access http://192.168.56.22:32296/ Will see Nginx The welcome page

2、 Deploy Dashboard
1)、 download yaml, And run Dashboard
1) download yaml
wget https://raw.githubusercontent.com/kubernetes/dashboard/v2.0.0/aio/deploy/recommended.yaml
2) modify kubernetes-dashboard Of Service type
vi recommended.yaml
kind: Service
apiVersion: v1
metadata:
  labels:
    k8s-app: kubernetes-dashboard
  name: kubernetes-dashboard
  namespace: kubernetes-dashboard
spec:
  type: NodePort  #  newly added
  ports:
    - port: 443
      targetPort: 8443
      nodePort: 30009  #  newly added
  selector:
    k8s-app: kubernetes-dashboard
3) Deploy
kubectl apply -f recommended.yaml
4) see namespace Under the kubernetes-dashboard Resources under
kubectl get pod,svc -n kubernetes-dashboard -o wide

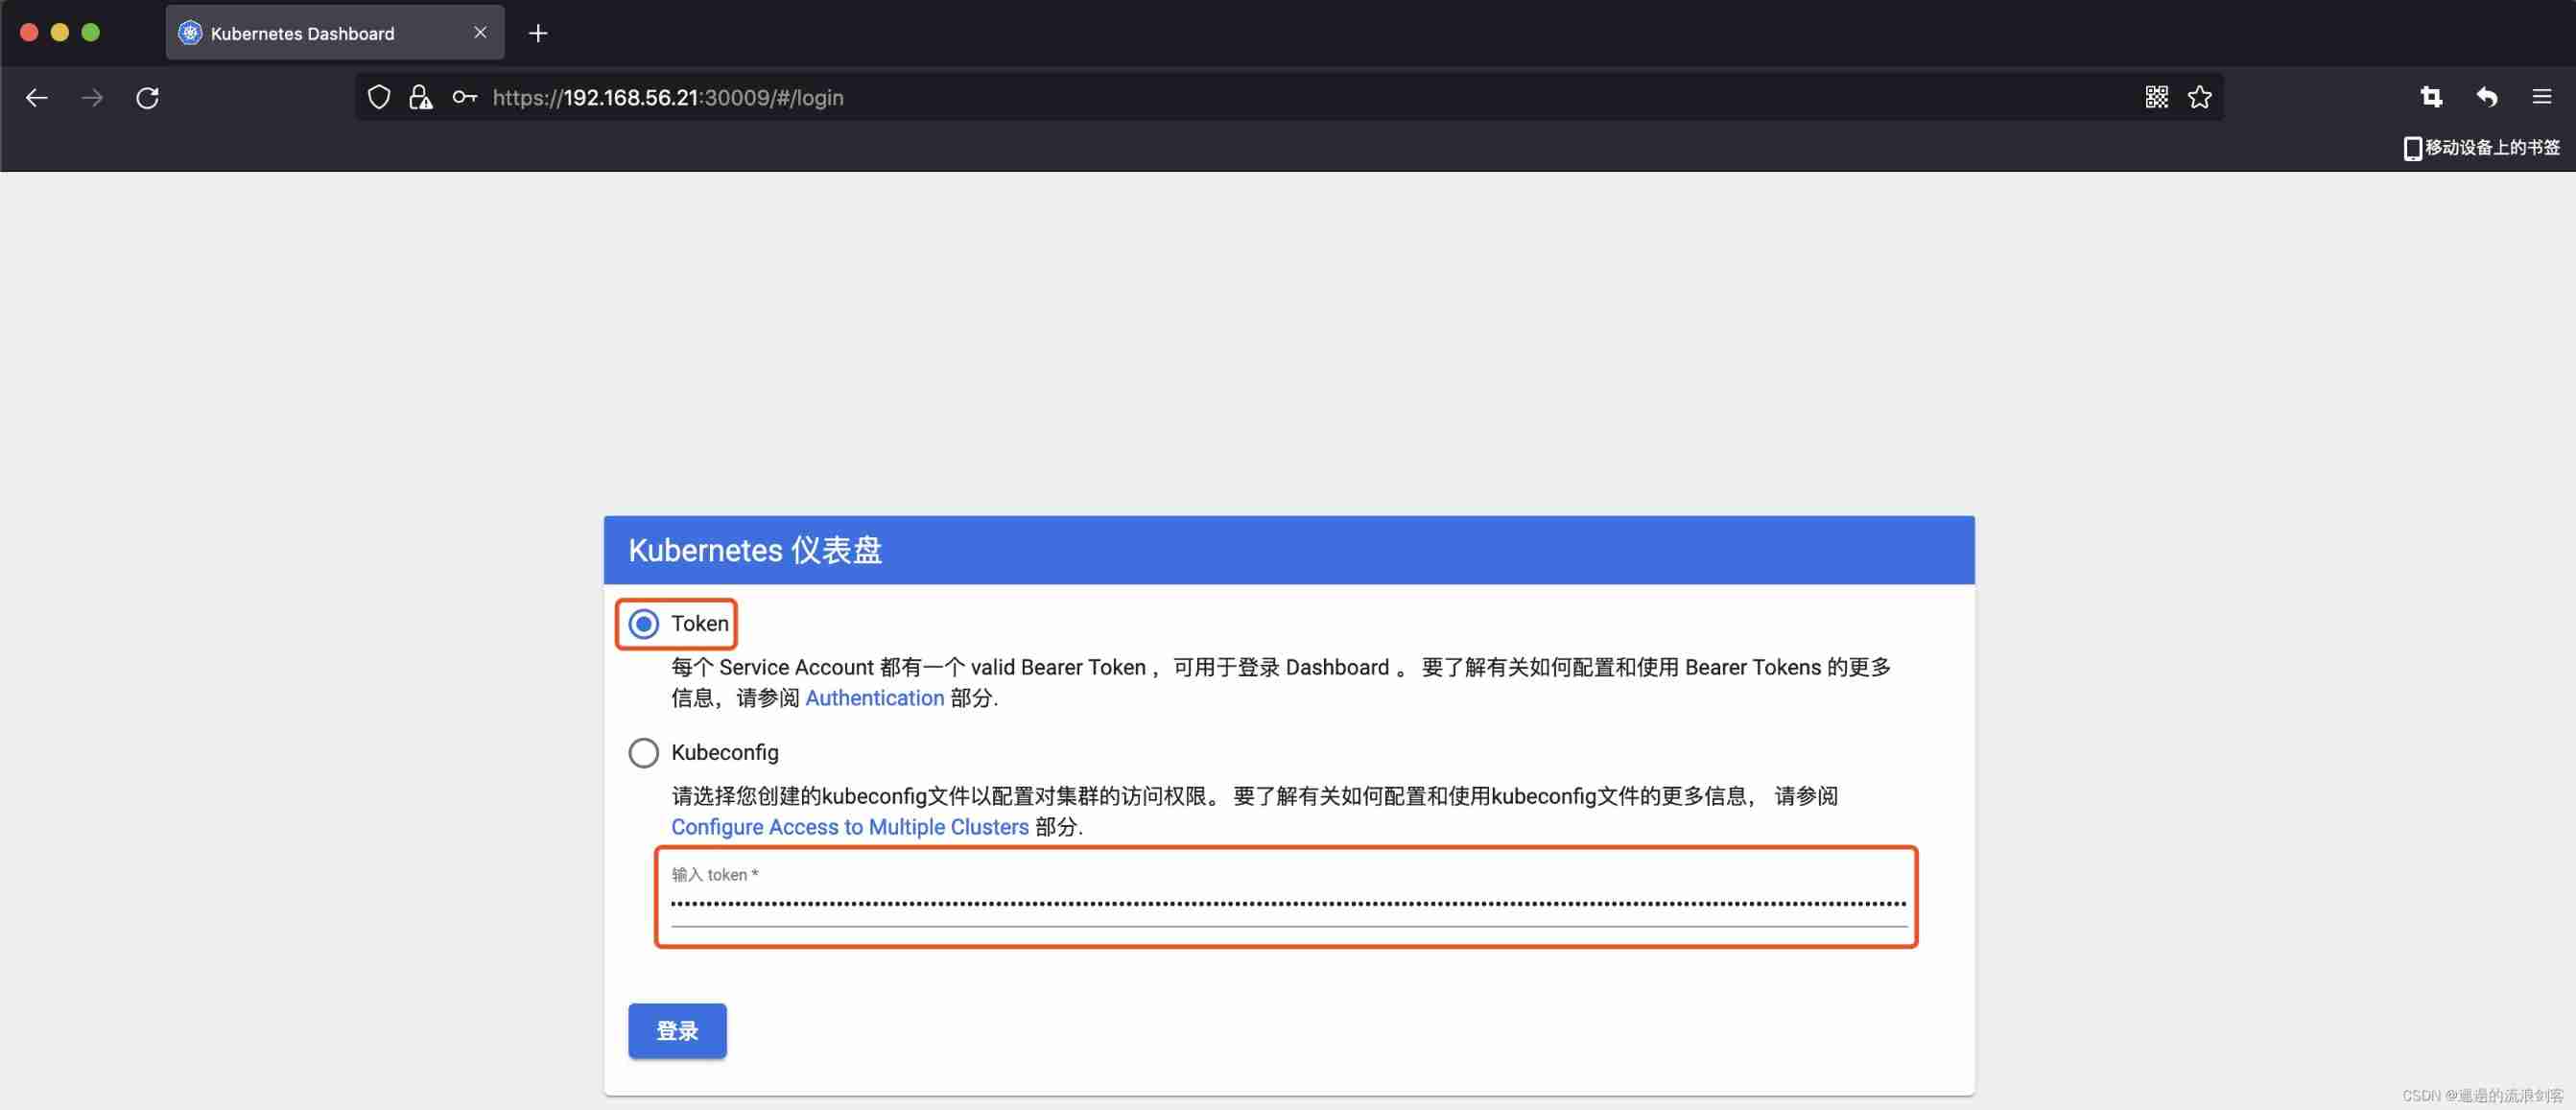
You can see kubernetes-dashboard Of Pod Deployed in k8s-node1 node (192.168.56.21), The mapping of NodePort by 30009, Use browser access https://192.168.56.21:30009/ Will see kubernetes-dashboard The landing page for
2) Create an access account , obtain token
1) Create account
kubectl create serviceaccount dashboard-admin -n kubernetes-dashboard
2) to grant authorization
kubectl create clusterrolebinding dashboard-admin-rb --clusterrole=cluster-admin --serviceaccount=kubernetes-dashboard:dashboard-admin
3) Get account number token
kubectl get secrets -n kubernetes-dashboard | grep dashboard-admin

kubectl describe secrets dashboard-admin-token-kqhc7 -n kubernetes-dashboard
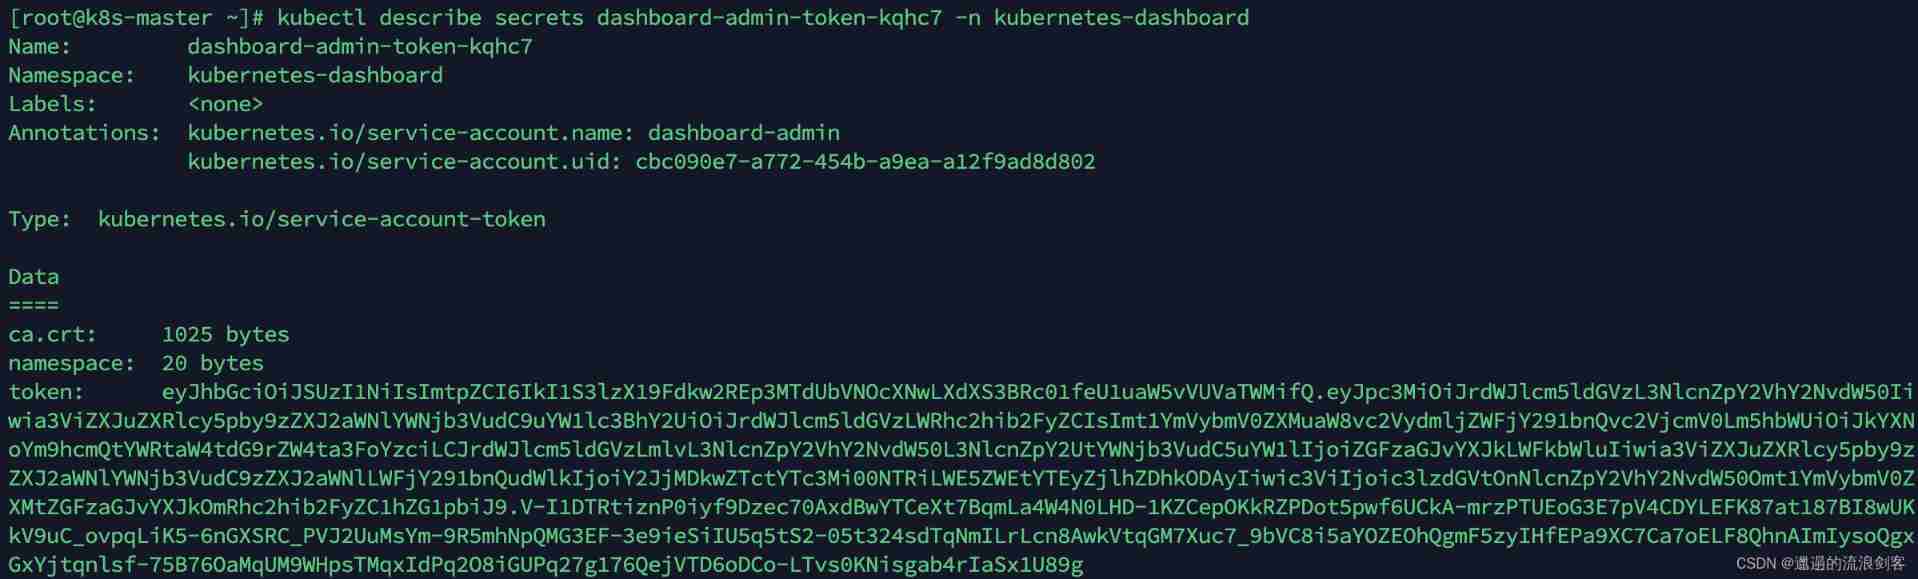
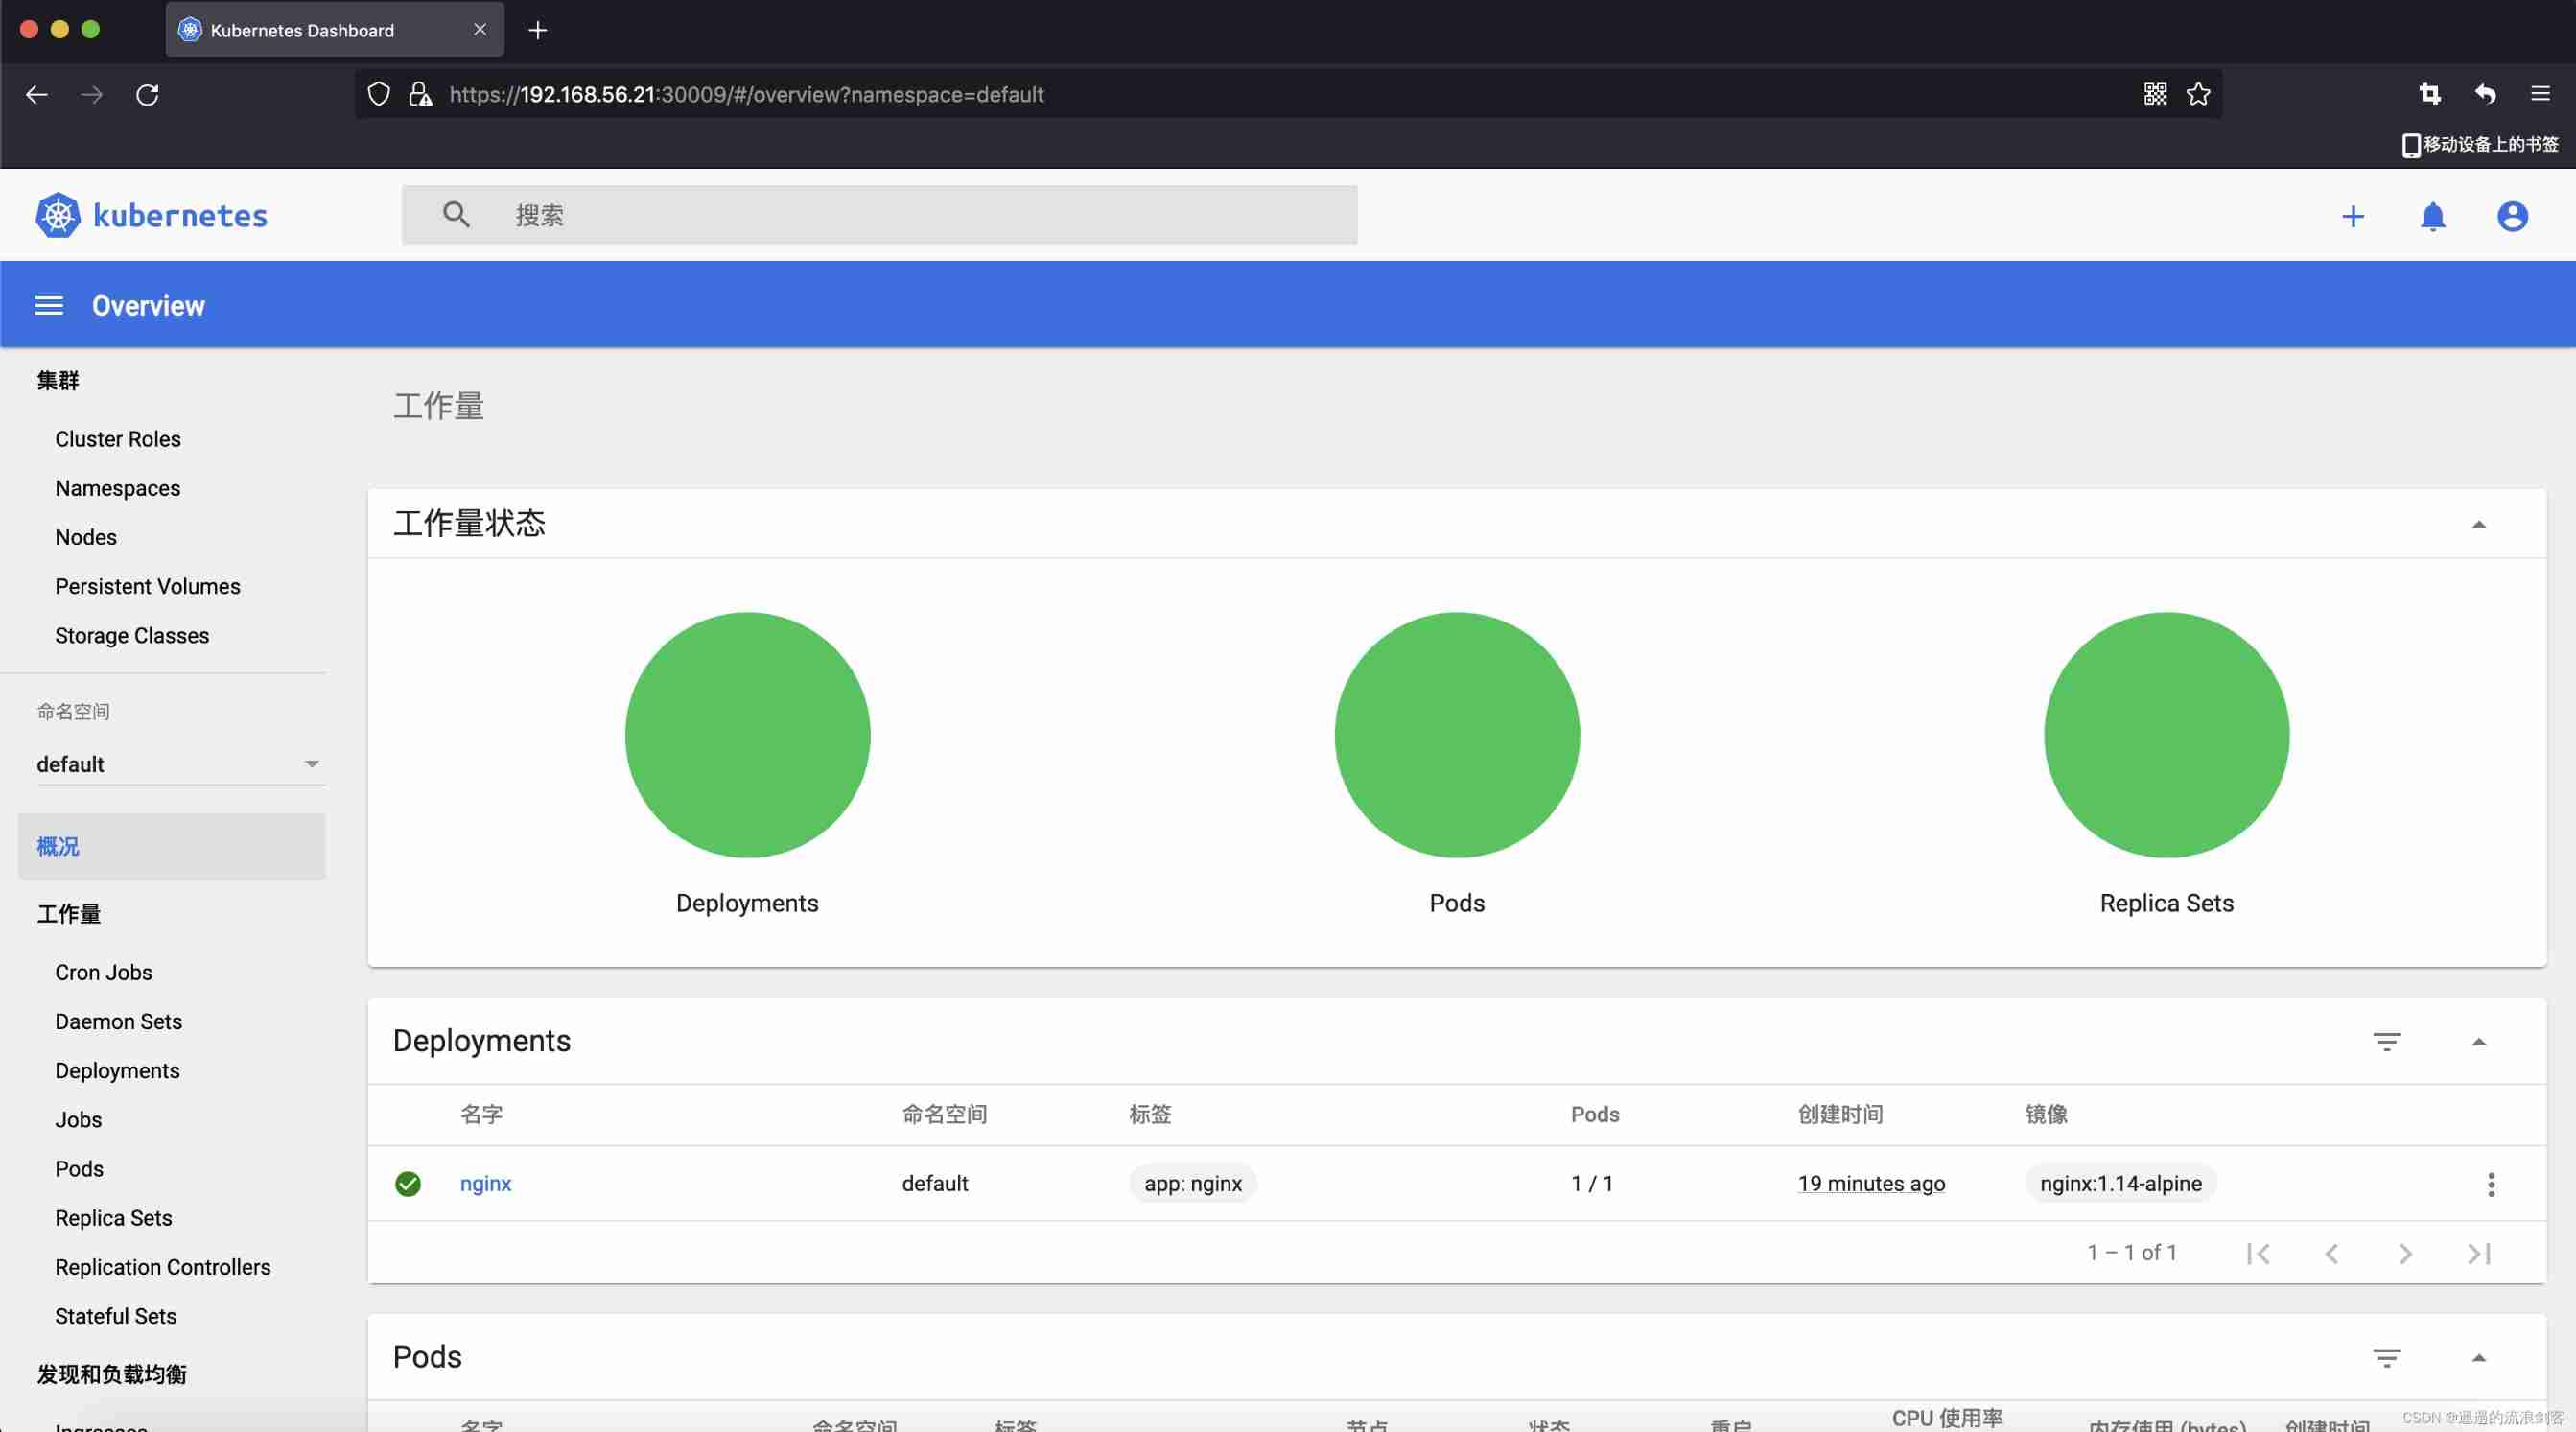
Enter the above... On the login page token
After logging in , See the following page :
边栏推荐
猜你喜欢

理解 期望(均值/估计值)和方差
mapbox尝鲜值之云图动画
![[function explanation (Part 1)] | | knowledge sorting + code analysis + graphic interpretation](/img/c2/991b8febd262cf9237017adc9d1221.jpg)
[function explanation (Part 1)] | | knowledge sorting + code analysis + graphic interpretation
![[teacher Zhao Yuqiang] Cassandra foundation of NoSQL database](/img/cc/5509b62756dddc6e5d4facbc6a7c5f.jpg)
[teacher Zhao Yuqiang] Cassandra foundation of NoSQL database

PHP notes are super detailed!!!
[teacher Zhao Yuqiang] Alibaba cloud big data ACP certified Alibaba big data product system
![[branch and cycle] | | super long detailed explanation + code analysis + a trick game](/img/aa/543d4f0dcbcd664be963579af77ec9.jpg)
[branch and cycle] | | super long detailed explanation + code analysis + a trick game
Apache+php+mysql environment construction is super detailed!!!

【一起上水硕系列】Day 7 内容+Day8

理解 YOLOV1 第一篇 预测阶段
随机推荐
[teacher Zhao Yuqiang] index in mongodb (Part 2)
Redhat7 system root user password cracking
Xaml gradient issue in uwp for some devices
[teacher Zhao Yuqiang] Flink's dataset operator
"C and pointer" - Chapter 13 function of function pointer 1 - callback function 1
[set theory] relational closure (reflexive closure | symmetric closure | transitive closure)
Sophomore dilemma (resumption)
理解 YOLOV1 第一篇 预测阶段
[teacher Zhao Yuqiang] use the catalog database of Oracle
88. 合并两个有序数组
Beandefinitionregistrypostprocessor
Redis cannot connect remotely.
Ensemble, série shuishu] jour 9
Final review (Day2)
1. 兩數之和
1. 两数之和
多线程与高并发(7)——从ReentrantLock到AQS源码(两万字大章,一篇理解AQS)
Communication - how to be a good listener?
【无标题】
PHP笔记超详细!!!