当前位置:网站首页>百日完成国产数据库opengausss的开源任务--openGuass极简版3.0.0安装教程
百日完成国产数据库opengausss的开源任务--openGuass极简版3.0.0安装教程
2022-07-05 12:41:00 【奔走的王木木Sir】
o p e n g a u s s 需 要 服 务 器 端 , 安 装 在 L i n u x 中 \textcolor{green}{opengauss需要服务器端,安装在Linux中} opengauss需要服务器端,安装在Linux中
启 动 服 务 器 端 , 最 后 才 能 在 w i n 客 户 端 中 使 用 \textcolor{green}{启动服务器端,最后才能在win客户端中使用} 启动服务器端,最后才能在win客户端中使用
本 文 从 是 安 装 服 务 器 到 客 户 端 使 用 的 过 程 以 及 出 现 的 问 题 \textcolor{green}{本文从是安装服务器到客户端使用的过程以及出现的问题} 本文从是安装服务器到客户端使用的过程以及出现的问题
欢迎各位小伙伴关注点赞️收藏留言
openGuass极简版3.0.0安装教程
环境
- Linux Centos7.6
- python 3.6.X
官方介绍
极简版为了适应小内存机器,在部署时将部分重要内存参数设置较低。极简版安装的数据库字符集将原先默认的SQL_ACSII字符集改为en_US.UTF-8。 这个在下面会给大家讲明如何去设置。
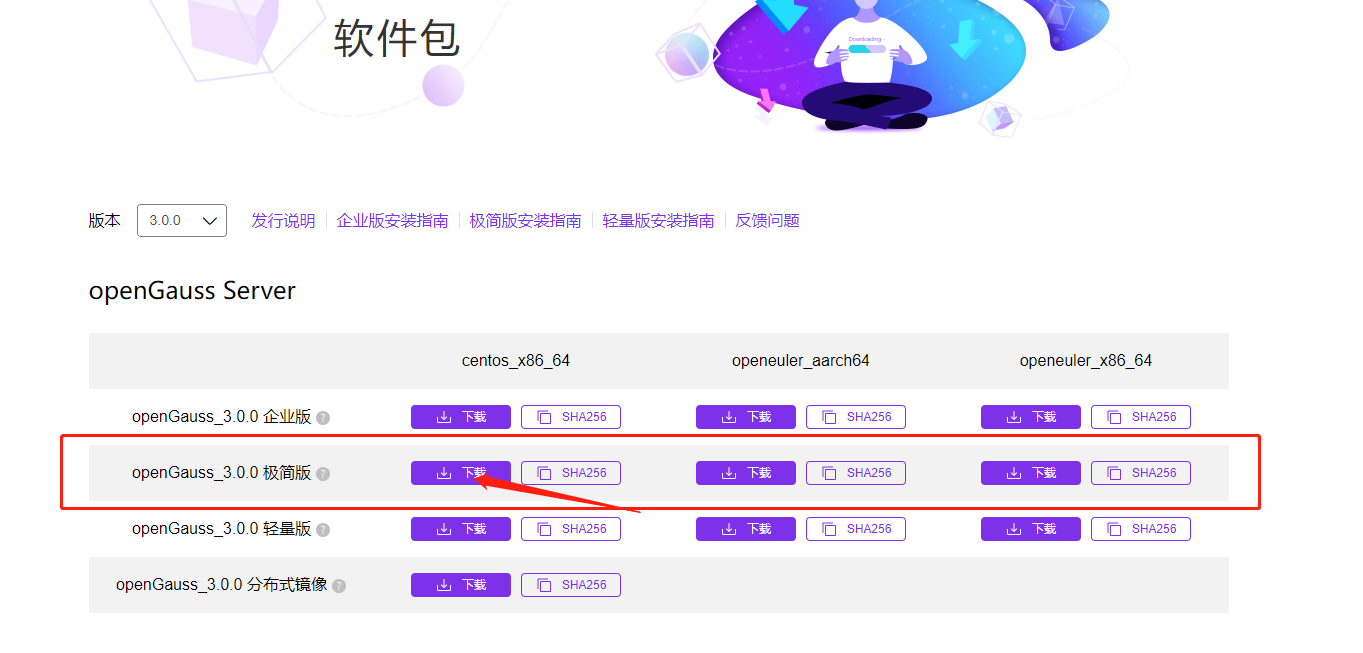
我们安装的是极简版的3.0.0,可以将以上的连接作为一个参考,我会将详细的步骤,以及中间出现过的问题写在本篇文章中
安装极简版3.0.0
环境配置
python
这里的python环境最好是3.6.X,在之前的文章中提到了如何安装python-3.6.1详情可以点击Linux中安装python3.6.X
这里再讲一种3.6.8的安装方式:
yum install -y libaio-devel flex bison ncurses-devel glibc.devel patch lsb_release openssl* python3
如果之前切换过默认版本,就不需要进行了,但我仍会将这个给写一下
将旧文件进行备份,并将python3进行软连接
cd /usr/bin
mv python python.bak
ln -s python3 /usr/bin/python
查看版本:
设置字符集
[[email protected] ~]# cat >> /etc/profile <<EOF
> export LANG=en_US.UTF-8
> EOF
如何查看
[[email protected] ~]# cat /etc/profile

如果只想查看字符集还有一种命令
[[email protected] ~]# echo $LANG

确保成功后,还要执行下面的命令,可以保证配置生效
[[email protected] ~]# source /etc/profile
关闭交换内存
[[email protected] ~]# swapoff -a
关闭swap交换内存是为了保障数据库的访问性能,避免把数据库的缓冲区内存淘汰到磁盘上。 如果服务器内存比较小,内存过载时,可打开swap交换内存保障正常运行。
yum源
centos的源默认是国外的,在之后我们要安装数据库的时候会经常使用到yum,所以我们将其换成华为。如果不更换会出现No package gs_ctl available. Error: Nothing to do,问题的解决办法在文章的问题中也有提到
# 依次运行

# 创建官方备份源文件
[[email protected] ~]# mkdir /etc/yum.repos.d/bak

# 将其进行移动
[[email protected] ~]# mv /etc/yum.repos.d/*.repo /etc/yum.repos.d/bak/

# 下载华为源
[[email protected] ~]# wget -O /etc/yum.repos.d/CentOS-Base.repo https://repo.huaweicloud.com/repository/conf/CentOS-7-reg.repo

# 清除原缓存并生成新缓存
[[email protected] ~]# yum clean all
[[email protected] ~]# yum makecache
如果wget不能使用,就需要先通过下面代码安装一下yum install wget -y。
配置完之后,我们需要安装依赖的软件包
[[email protected] ~]# yum install libaio-devel flex bison ncurses-devel glibc-devel patch redhat-lsb-core readline-devel -y
关闭防火墙
# 查看防火墙状态,如果是dead那就是关闭的,如果不是就需要继续执行下面的代码
[[email protected] ~]# systemctl status firewalld

#关闭防火墙
[[email protected] ~]# systemctl disable firewalld.service
[[email protected] ~]# systemctl stop firewalld.service

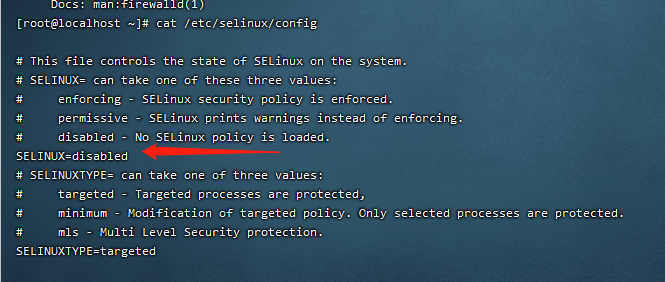
关闭 selinux
[[email protected] ~]# sed -i 's/SELINUX=enforcing/SELINUX=disabled/g' /etc/selinux/config
#查看状态
[[email protected] ~]# cat /etc/selinux/config
创建普通用户和目录,并授权
因为我们的数据库不能使用root用户,所以需要创建一个普通用户omm
# 创建用户组
[[email protected] bin]# groupadd dbgrp
# 创建用户omm
[[email protected] bin]# useradd -g dbgrp -d /home/omm -m -s /bin/bash omm
[[email protected] bin]# echo "omm" | passwd --stdin omm
#创建安装目录
[[email protected] bin]# mkdir -p /opt/software/openGauss
# 授权
[[email protected] bin]# chmod 755 -R /opt/software
[[email protected] bin]# chown -R omm:dbgrp /opt/software/openGauss
官方2.0.0提供的脚本
groupadd -g 1001 dbgrp
useradd -u 2001 -g dbgrp omm
mkdir -p /opt/software/openGauss
chown -R omm:dbgrp /opt
如果忘记密码怎么办?这里提供修改密码的方式
- root 用户下
root用户下,可以修改任何一个非root用户,而且不需要输入旧密码。# 输入passwd 用户名 [[email protected] ~]# passwd omm # 直接输入新密码,再次输入确认密码即可 - 非root用户下
首先你要登录旧帐户#登录指定账户omm [[email protected] ~]# su - omm
#直接输入passwd
[[email protected] ~]$ passwd
# 之后就需要依次输入用户当前密码,新密码,确认密码
确认时区
执行如下命令检查各数据库节点时间和时区是否一致。
[[email protected] ~]# date
如果不一样直接就需要修改时区
[[email protected] ~]# rm -fr /etc/localtime
[[email protected] ~]# ln -s /usr/share/zoneinfo/Asia/Shanghai /etc/localtime

[[email protected] ~]# ll /etc/localtime

关闭 RemoveIPC
在各数据库节点上,关闭RemoveIPC。CentOS操作系统默认为关闭,可以跳过该步骤。如果是其他版本,就需要修改。
修改/etc/systemd/logind.conf文件中的“RemoveIPC”值为“no”。
vi /etc/systemd/logind.conf修改“RemoveIPC”值为“no”。
RemoveIPC=no修改/usr/lib/systemd/system/systemd-logind.service文件中的“RemoveIPC”值为“no”。
vi /usr/lib/systemd/system/systemd-logind.service修改“RemoveIPC”值为“no”。
RemoveIPC=no重新加载配置参数。
systemctl daemon-reload
systemctl restart systemd-logind
解压并一键式安装单机openGauss
## 解压软件
## 一定要先到 omm 用户下
[[email protected] ~]# su - omm
[[email protected] ~]$ cd /opt/software/openGauss/
[[email protected] openGauss]$ tar -jxf openGauss-3.0.0-CentOS-64bit.tar.bz2 -C /opt/software/openGauss/

## 一键式脚本安装
[[email protected] openGauss]$ cd /opt/software/openGauss/simpleInstall/
## 记住这里的端口号26000
[[email protected] simpleInstall]$ sh install.sh -w [email protected]  -p 26000
如果出现-bash: bzip2: command not found
这是因为bz2这是一个压缩文件,你的LInux系统中没有解压缩,所以需要先去下载。yum install -y bzip2
如果出现报错“the maximum number of SEMMNI is not correct, the current SEMMNI is xxx. Please check it.”。
需要在有root权限的用户执行命令 sysctl -w kernel.sem="250 85000 250 330"。
此时就基本完成了
- 极简版的优势:openGauss极简版免去了用户配置XML文件的操作,也免去了配置1主+1备的配置操作,安装配置简单,适合高校学生或者个人功能测试的场景
启动数据库
一定要在omm用户下,如果在root下就会出现下面的问题
[[email protected] ~]# gs_ctl start -D $GAUSSHOME/data/single_node -Z single_node
-bash: gs_ctl: command not found
切换到omm用户
[[email protected] ~]# su - omm
Last login: Fri Jul  1 15:14:53 CST 2022 on pts/2
-bash: ulimit: open files: cannot modify limit: Operation not permitted
启动数据库
[[email protected] ~]$ gs_ctl start -D $GAUSSHOME/data/single_node -Z single_node

查看是否启动
[[email protected] ~]$ ps -ef |grep gauss
omm       48933      1 68 11:03 ?        00:00:12 /opt/software/openGauss/bin/gaussdb -D /opt/software/openGauss/data/single_node
omm       49230  48526  0 11:03 pts/0    00:00:00 grep --color=auto gauss
连接数据库,创建新用户
创建数据库用户是为用于客户端(例如:DataStudio)通过网络连接openGauss服务器。openGauss不允许使用omm用户(openGauss默认的管理员用户)来远程连接数据库。
- 使用服务器的 gsql连接数据库
数据库安装完成会生成名称为postgres的数据库,首次连接时我们可以使用它。#这里的26000就是之前让记住的端口号,当然也可以通过其他方式找到。 [[email protected] ~]$ gsql -d postgres -p 26000
# 查看端口号 [[email protected] ~]$ cat /opt/software/openGauss/data/single_node/postgresql.conf |grep port - 创建新的数据库并授予权限
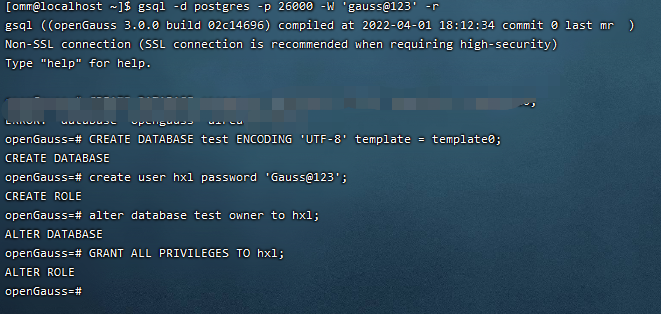
## 使用默认数据库登录
[[email protected] ~]$ gsql -d postgres -p 26000 -W '[email protected]' -r
gsql ((openGauss 3.0.0 build 02c14696) compiled at 2022-04-01 18:12:34 commit 0 last mr  )
Non-SSL connection (SSL connection is recommended when requiring high-security)
Type "help" for help.

## 创建新的数据库test
openGauss=# CREATE DATABASE test ENCODING 'UTF-8' template = template0;
CREATE DATABASE
## 创建新的用户hxl 以及密码
openGauss=# create user hxl password '[email protected]';
CREATE ROLE
##修改数据库test的所属为hxl
openGauss=# alter database test owner to hxl;
ALTER DATABASE
## 将权限赋给用户
openGauss=# GRANT ALL PRIVILEGES TO hxl;
ALTER ROLE
openGauss=#
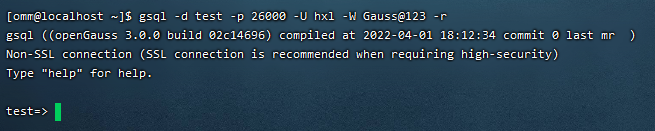
使用用户连接数据库
# gsql -d 数据库名 -p 36000 -U 用户名 -W 密码 -r
[[email protected] ~]$ gsql -d test -p 26000 -U hxl -W [email protected] -r
修改配置
其实到前面在服务器端以及可以用了,但是我们的目标是给用户使用,用户可以不会对着黑框框使用。那么为了可以使用客户端也就是Data Studio工具使用。
修改
/opt/software/openGauss/data/single_node/pg_hba.conf[[email protected] ~]$ vi /opt/software/openGauss/data/single_node/pg_hba.conf在下图中的位置加入
host all all 0.0.0.0/0 sha256
下图中的192.168.75.101 IP地址如果不知道,可以在下面的的问题中找到
修改
/opt/software/openGauss/data/single_node/postgresql.conf
修改listen_addresses[[email protected] ~]$ vi /opt/software/openGauss/data/single_node/postgresql.conf ``` ```bash # 将监听地址设置为*或者指定的客户端ip地址 listen_addresses = '*' # 如果不想写成 * ,那么就可以使用下面的方式 # listen_addresses = 'local,192.168.75.101'重新启动数据库即可
[[email protected] ~]$ gs_ctl restart -D $GAUSSHOME/data/single_node -Z single_node
连接Data Studio
在官网下载 Data Studio工具包,就可以直接使用了。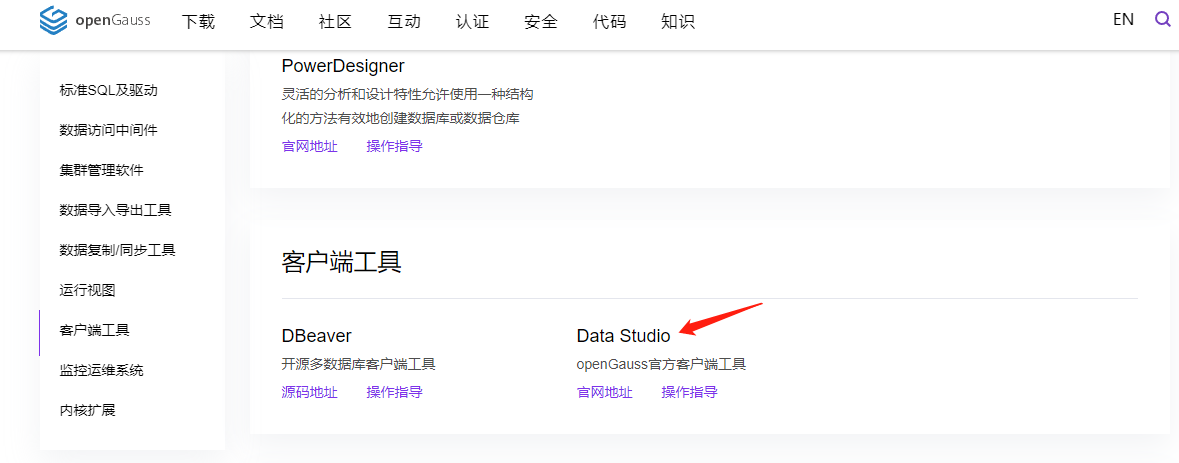
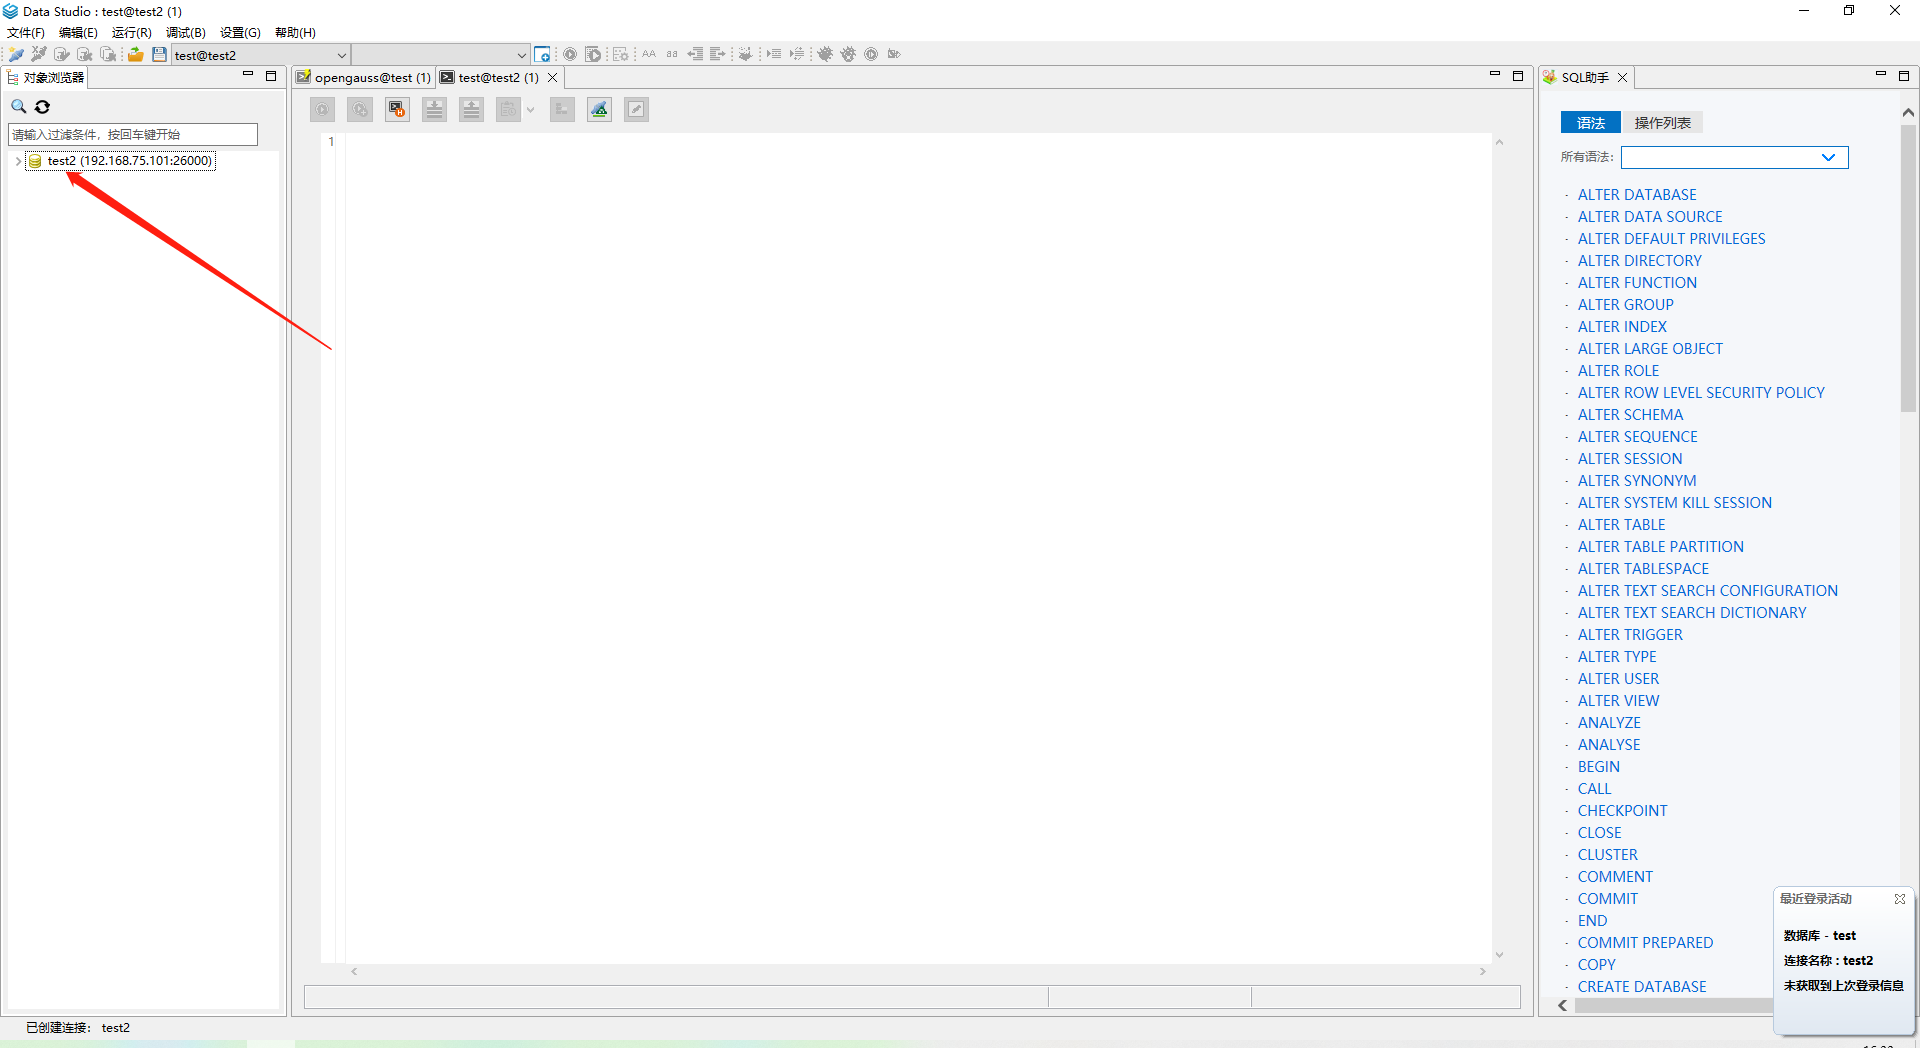
- 注意看下图,我将其中的作为说明
- 名称:自己写
- 主机号:在Linux操作系统中查出来的主机号,我这里为192.168.XX.XX
- 端口号:安装数据库的时候自己写的,也可以在服务器端查询
- 数据库:创建数据库的库名
- 用户名:同样是创建数据库的时候用户名 例如:hxl
- 密码:用户名的密码 例如:[email protected]
- 是否启动SSL:这里不需要。
点击确定进入页面就证明成功了。

出现的问题
- 执行install.sh脚本安装openGauss出现以下错误
On systemwide basis, the maximum number of SEMMNI is not correct. the current SEMMNI value is: 128. Please check it.
解决:在/etc/sysctl.conf中加入语句kernel.sem = 250 32000 100 999,然后执行sysctl -p - 提示:No package gs_ctl available. Error: Nothing to do
解决:这是因为yum源出现了问题,修改一下即可解决。
本次使用的yum源是华为的https://repo.huaweicloud.com/repository/conf/CentOS-7-reg.repo。在前面的步骤中涉及到了配置yum源,将那里重新配置即可。 - yum安装时报错:Loaded plugins: fastestmirror
fastestmirror是yum的一个加速插件,意思就是不能用了,我们将其禁用即可
运行下面语句,修改配置文件
将里面的vi /etc/yum/pluginconf.d/fastestmirror.confenabled = 1修改为enabled = 0意思就是要禁用这个插件
将里面的plugins设置为vi /etc/yum.confplugins=0意思就是不使用插件
清除缓存并重新构建yum 源
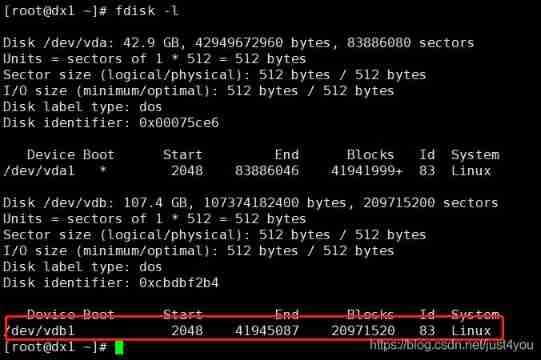
此时这个问题就解决了yum clean all yum clean dbcache yum makecache - 查看操作系统的IP地址
ipconfig或者下图中的ip addr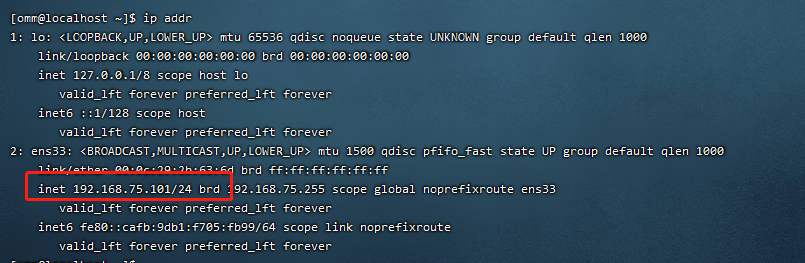
这 篇 文 章 就 定 格 在 这 里 了 , 如 果 有 问 题 , 随 时 欢 迎 私 聊 \textcolor{green}{这篇文章就定格在这里了,如果有问题,随时欢迎私聊} 这篇文章就定格在这里了,如果有问题,随时欢迎私聊
边栏推荐
- Compile kernel modules separately
- Shi Zhenzhen's 2021 summary and 2022 outlook | colorful eggs at the end of the article
- 前几年外包干了四年,秋招感觉人生就这样了..
- DNS的原理介绍
- SAP SEGW 事物码里的导航属性(Navigation Property) 和 EntitySet 使用方法
- 国内市场上的BI软件,到底有啥区别
- 开发者,云原生数据库是未来吗?
- From the perspective of technology and risk control, it is analyzed that wechat Alipay restricts the remote collection of personal collection code
- Transactions from December 29, 2021 to January 4, 2022
- Kotlin变量
猜你喜欢

Install rhel8.2 virtual machine
Kotlin变量
Add a new cloud disk to Huawei virtual machine
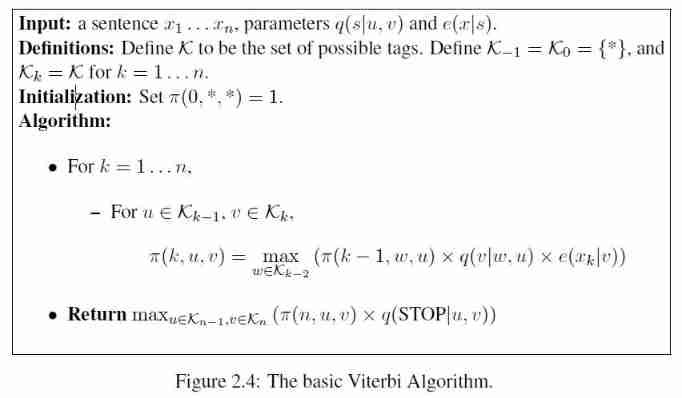
Annotation problem and hidden Markov model
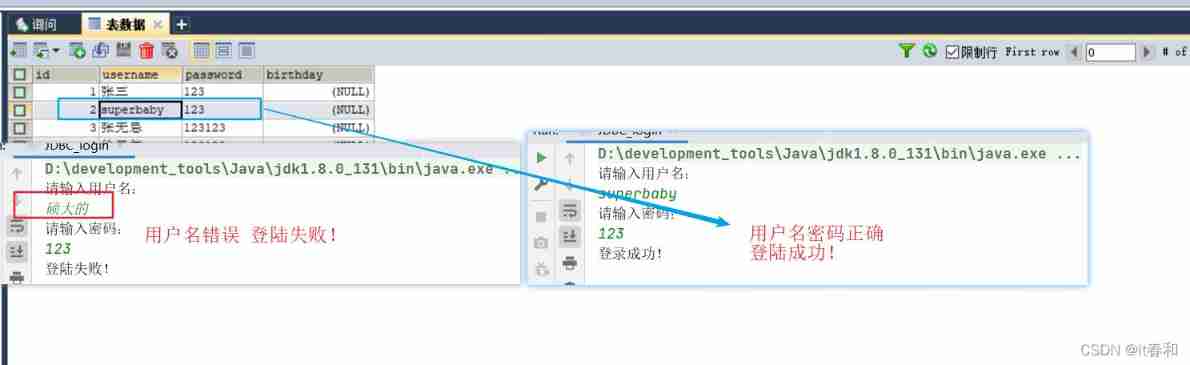
JDBC exercise - query data encapsulated into object return & simple login demo

DNS的原理介绍
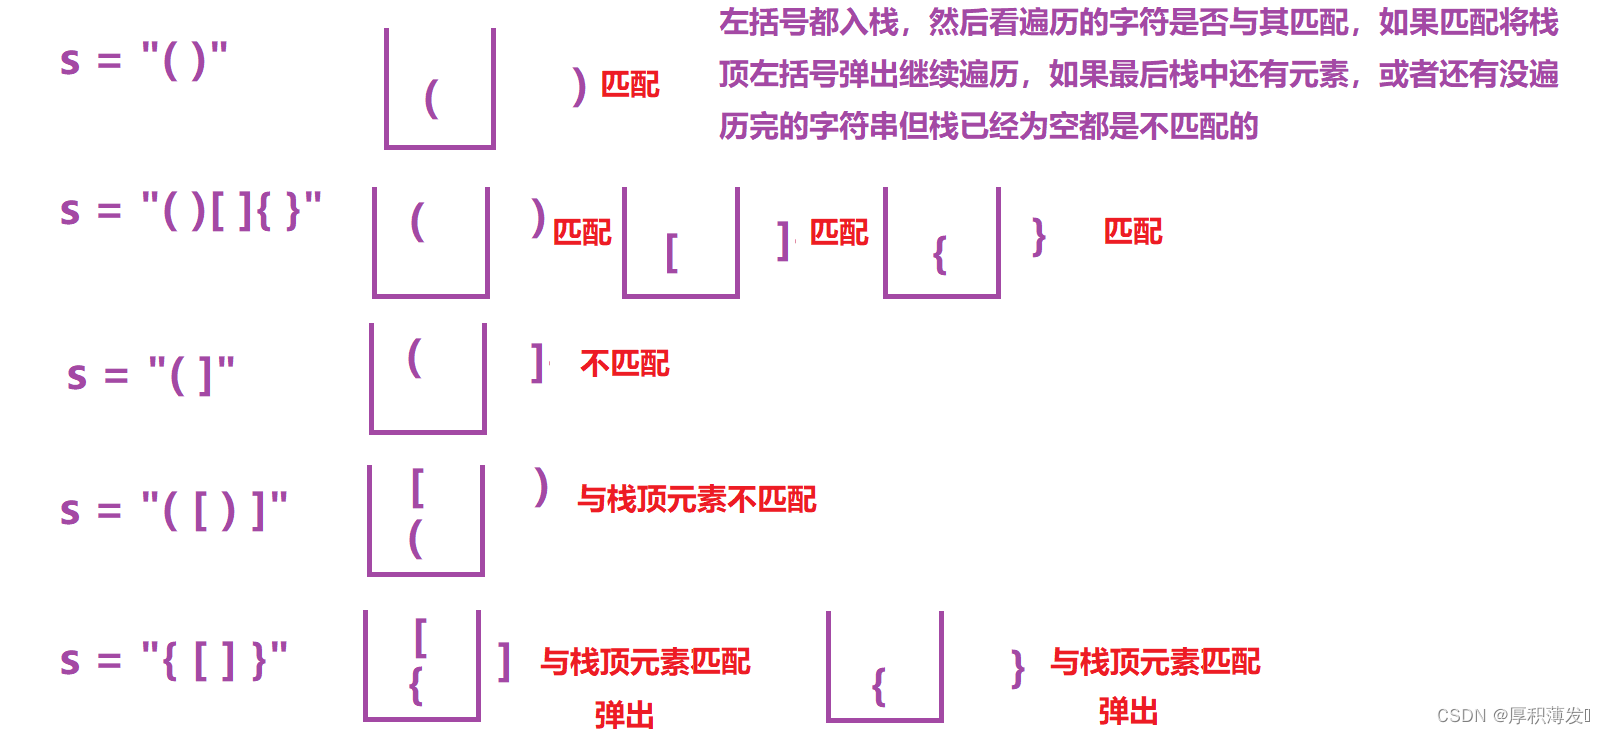
Leetcode20. Valid parentheses
SAP self-development records user login logs and other information

Vonedao solves the problem of organizational development effectiveness

Transactions from December 29, 2021 to January 4, 2022
随机推荐
Transactions from January 6 to October 2022
Comprehensive upgrade of Taobao short video photosynthetic platform
Transactions from January 14 to 19, 2022
Language model
Introduction to the principle of DNS
Kotlin function
Research: data security tools cannot resist blackmail software in 60% of cases
[cloud native] use of Nacos taskmanager task management
Lepton 无损压缩原理及性能分析
石臻臻的2021总结和2022展望 | 文末彩蛋
Taobao short videos are automatically released in batches without manual RPA open source
Transactions from December 29, 2021 to January 4, 2022
I'm doing open source in Didi
Common commands and basic operations of Apache Phoenix
Oppo Xiaobu launched Obert, a large pre training model, and promoted to the top of kgclue
解决 UnicodeDecodeError: ‘gbk‘ codec can‘t decode byte 0xa2 in position 107
关于 SAP UI5 floating footer 显示与否的单步调试以及使用 SAP UI5 的收益
深度长文探讨Join运算的简化和提速
DNS的原理介绍
Pinduoduo flag insertion remarks API