当前位置:网站首页>Flink1.15源码阅读flink-clients客户端执行流程(阅读较枯燥)
Flink1.15源码阅读flink-clients客户端执行流程(阅读较枯燥)
2022-07-27 08:33:00 【京河小蚁】
接上一篇讲到flink-clients调试,接着阅读更详细的源码,很枯燥,慢慢读。
参考链接:https://blog.51cto.com/u_13870740/5321778,讲解的很好
文章目录
- 1. 阅读开始
- CliFrontend#main 源码分析
- 获取 flink 的配置文件路径
- 解析并加载 flink-conf.yaml 配置文件中的配置到 Configuration(本质上是一个 Map)
- 初始化 3 种不同的 CLI 分别是 GenericCLI 对应的是 per-job 模式,flinkYarnSessionCLI 对应的是 yarn-session 模式,以及 DefaultCLI 对应的是 standalone 模式
- 初始化 CliFrontend 客户端对象
- SecurityUtils.install(new SecurityConfiguration(cli.configuration));
- 调用 parseAndRun 解析并执行程序
1. 阅读开始
public class CliFrontend {

    public static void main(final String[] args) {
    }
}
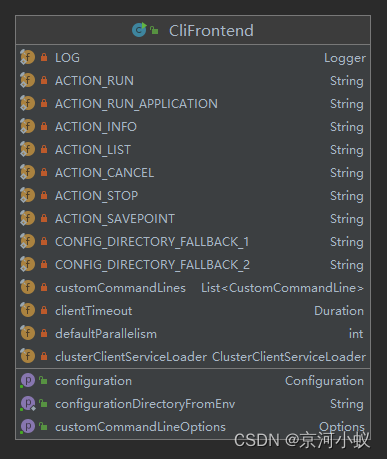
customCommandLines 这个变量是用来保存 CustomCommandLine,下面会解释它的主要作用,configuration 是用来保存 flink-conf.yaml 配置文件中的配置信息的,相当于一个 map,clusterClientServiceLoader 是用来根据提供的组件发现合适的集群客户端工厂。在构造方法中对其进行初始化。
CliFrontend#main 源码分析
/** Submits the job based on the arguments. */
    public static void main(final String[] args) {

    	// 获取 JVM 信息、hadoop 信息等打印日志
        EnvironmentInformation.logEnvironmentInfo(LOG, "Command Line Client", args);

        // 1. find the configuration directory
        // 获取 flink 的配置文件路径 即: flink/conf/flink-conf.yaml
        final String configurationDirectory = getConfigurationDirectoryFromEnv();

        // 2. load the global configuration
        // 解析并加载 flink-conf.yaml 配置文件中的配置到 Configuration(本质上是一个 Map<object,object>)
        final Configuration configuration = GlobalConfiguration.loadConfiguration(configurationDirectory);

        // 3. load the custom command lines
        // 初始化 3 种不同的 CLI 分别是 GenericCLI 对应的是 per-job 模式,flinkYarnSessionCLI 对应的是 yarn-session 模式,以及 DefaultCLI 对应的是 standalone 模式
        final List<CustomCommandLine> customCommandLines = loadCustomCommandLines(configuration, configurationDirectory);

        int retCode = 31;
        try {

            // 初始化 CliFrontend 客户端对象
            final CliFrontend cli = new CliFrontend(configuration, customCommandLines);

            SecurityUtils.install(new SecurityConfiguration(cli.configuration));
            // 调用 parseAndRun 执行
            retCode = SecurityUtils.getInstalledContext().runSecured(() -> cli.parseAndRun(args));
        } catch (Throwable t) {

        // 看源码的时候,只需要看主干代码就行,catch里面的源码可忽略
            final Throwable strippedThrowable =
                    ExceptionUtils.stripException(t, UndeclaredThrowableException.class);
            LOG.error("Fatal error while running command line interface.", strippedThrowable);
            strippedThrowable.printStackTrace();
        } finally {

            System.exit(retCode);
        }
    }
main 方法的代码逻辑非常清晰简介,大致可以分为下面 5 个步骤:
- 获取 flink 的配置文件路径 即: flink/conf/flink-conf.yaml
- 解析并加载 flink-conf.yaml 配置文件中的配置到 Configuration(本质上是一个 Map)
- 初始化 3 种不同的 CLI 分别是 GenericCLI 对应的是 per-job 模式,flinkYarnSessionCLI 对应的是 yarn-session 模式,以及 DefaultCLI 对应的是 standalone 模式
- 初始化 CliFrontend 客户端对象
- 调用 parseAndRun 解析并执行程序
下面就来看一下每个步骤具体做了哪些事情。
获取 flink 的配置文件路径
final String configurationDirectory = getConfigurationDirectoryFromEnv();
调用getConfigurationDirectoryFromEnv()
public static String getConfigurationDirectoryFromEnv() {

// 从环境变量取出FLINK_CONF_DIR值
        String location = System.getenv(ConfigConstants.ENV_FLINK_CONF_DIR);
// 如果location不为空
        if (location != null) {

        //如果文件路径存在直接返回FLINK_CONF_DIR文件路径
            if (new File(location).exists()) {

                return location;
            } else {

                throw new RuntimeException(
                        "The configuration directory '"
                                + location
                                + "', specified in the '"
                                + ConfigConstants.ENV_FLINK_CONF_DIR
                                + "' environment variable, does not exist.");
            }
            // 如果存在1 返回 private static final String CONFIG_DIRECTORY_FALLBACK_1 = "../conf";
        } else if (new File(CONFIG_DIRECTORY_FALLBACK_1).exists()) {

            location = CONFIG_DIRECTORY_FALLBACK_1;
            // 如果存在2 返回 private static final String CONFIG_DIRECTORY_FALLBACK_2 = "conf";
        } else if (new File(CONFIG_DIRECTORY_FALLBACK_2).exists()) {

            location = CONFIG_DIRECTORY_FALLBACK_2;
        } else {

            throw new RuntimeException(
                    "The configuration directory was not specified. "
                            + "Please specify the directory containing the configuration file through the '"
                            + ConfigConstants.ENV_FLINK_CONF_DIR
                            + "' environment variable.");
        }
        return location;
    }
代码比较简单,直接获取系统环境变量的值,然后返回 flink-conf.yaml 配置文件的路径。
解析并加载 flink-conf.yaml 配置文件中的配置到 Configuration(本质上是一个 Map)
// 2. load the global configuration
        final Configuration configuration =
                GlobalConfiguration.loadConfiguration(configurationDirectory);
获取配置调用方法实现源码如下:
/** * Loads the configuration files from the specified directory. * 加载配置文件来自指定的目录 * <p>YAML files are supported as configuration files. * yaml文件是支持作为配置文件 * @param configDir the directory which contains the configuration files */
    public static Configuration loadConfiguration(final String configDir) {

        return loadConfiguration(configDir, null);
    }
从上面粘贴的代码,还无法看出是怎么获取配置的,再进入下一层代码
/** * Loads the configuration files from the specified directory. If the dynamic properties * configuration is not null, then it is added to the loaded configuration. * 通过指定的文件目录加载配置文件,如果动态的属性不是为空的,那么它也可以加载到配置里面 * @param configDir directory to load the configuration from 指定文件路径不可变 * @param dynamicProperties configuration file containing the dynamic properties. Null if none. 指定动态属性 * @return The configuration loaded from the given configuration directory */
    public static Configuration loadConfiguration(
            final String configDir, @Nullable final Configuration dynamicProperties) {

//判断configDir为空,则抛出异常
        if (configDir == null) {

            throw new IllegalArgumentException(
                    "Given configuration directory is null, cannot load configuration");
        }
// 若不不存在这个文件,则抛出异常
        final File confDirFile = new File(configDir);
        if (!(confDirFile.exists())) {

            throw new IllegalConfigurationException(
                    "The given configuration directory name '"
                            + configDir
                            + "' ("
                            + confDirFile.getAbsolutePath()
                            + ") does not describe an existing directory.");
        }

        // get Flink yaml configuration file
        // 英文注释写的很清楚了,获取yaml文件
        final File yamlConfigFile = new File(confDirFile, FLINK_CONF_FILENAME);

		// 如果不存在则抛出异常
        if (!yamlConfigFile.exists()) {

            throw new IllegalConfigurationException(
                    "The Flink config file '"
                            + yamlConfigFile
                            + "' ("
                            + yamlConfigFile.getAbsolutePath()
                            + ") does not exist.");
        }

		// 通过这个方法加载yaml配置
        Configuration configuration = loadYAMLResource(yamlConfigFile);

		// 如果动态配置不为空,则全部加载到配置对象里面
        if (dynamicProperties != null) {

            configuration.addAll(dynamicProperties);
        }

		// over 返回配置对象
        return configuration;
    }
上面还是没看到源码是怎么把文件里面的配置加载到配置的,再看 loadYAMLResource(yamlConfigFile);的具体实现
    /** * Loads a YAML-file of key-value pairs. * * <p>Colon and whitespace ": " separate key and value (one per line). The hash tag "#" starts a * single-line comment. * * <p>Example: * * <pre> * jobmanager.rpc.address: localhost # network address for communication with the job manager * jobmanager.rpc.port : 6123 # network port to connect to for communication with the job manager * taskmanager.rpc.port : 6122 # network port the task manager expects incoming IPC connections * </pre> * * <p>This does not span the whole YAML specification, but only the *syntax* of simple YAML * key-value pairs (see issue #113 on GitHub). If at any point in time, there is a need to go * beyond simple key-value pairs syntax compatibility will allow to introduce a YAML parser * library. * * @param file the YAML file to read from * @see <a href="http://www.yaml.org/spec/1.2/spec.html">YAML 1.2 specification</a> */
    private static Configuration loadYAMLResource(File file) {

        final Configuration config = new Configuration();
// 看来源码底层也是用的这些
        try (BufferedReader reader =
                new BufferedReader(new InputStreamReader(new FileInputStream(file)))) {

// 初始化行号游标
            String line;
            int lineNo = 0;
            // 循环reader为null跳出循环
            while ((line = reader.readLine()) != null) {

                lineNo++;
                // 1. check for comments
                String[] comments = line.split("#", 2);
                String conf = comments[0].trim();

                // 2. get key and value
                if (conf.length() > 0) {

                    String[] kv = conf.split(": ", 2);

                    // skip line with no valid key-value pair
                    if (kv.length == 1) {

                        LOG.warn(
                                "Error while trying to split key and value in configuration file "
                                        + file
                                        + ":"
                                        + lineNo
                                        + ": \""
                                        + line
                                        + "\"");
                        continue;
                    }

                  // 获取配置的 key: value
                  // 比如,jobmanager.rpc.address: flink1
                  // key: jobmanager.rpc.address
                  // value: flink1
                    String key = kv[0].trim();
                    String value = kv[1].trim();

                    // sanity check
                    if (key.length() == 0 || value.length() == 0) {

                        LOG.warn(
                                "Error after splitting key and value in configuration file "
                                        + file
                                        + ":"
                                        + lineNo
                                        + ": \""
                                        + line
                                        + "\"");
                        continue;
                    }

                    LOG.info(
                            "Loading configuration property: {}, {}",
                            key,
                            isSensitive(key) ? HIDDEN_CONTENT : value);
                    config.setString(key, value);
                }
            }
        } catch (IOException e) {

            throw new RuntimeException("Error parsing YAML configuration.", e);
        }

        return config;
    }
好吧,原来读配置文件是这样的,普普通通是不是和我们自己写的读文件程序很相似。
初始化 3 种不同的 CLI 分别是 GenericCLI 对应的是 per-job 模式,flinkYarnSessionCLI 对应的是 yarn-session 模式,以及 DefaultCLI 对应的是 standalone 模式
// 3. load the custom command lines
        final List<CustomCommandLine> customCommandLines =
                loadCustomCommandLines(configuration, configurationDirectory);
进入到loadCustomCommandLines方法里,
public static List<CustomCommandLine> loadCustomCommandLines(
            Configuration configuration, String configurationDirectory) {

            // 初始化命令行集合
        List<CustomCommandLine> customCommandLines = new ArrayList<>();
		// 1. 添加GenericCLI到命令行集合中
        customCommandLines.add(new GenericCLI(configuration, configurationDirectory));

        // Command line interface of the YARN session, with a special initialization here
        // to prefix all options with y/yarn.
        // 命令行接口属于YARN session,是一个特殊的初始化 前缀选项都是y/yarn,
        // 可以查看org.apache.flink.yarn.cli.FlinkYarnSessionCli
        final String flinkYarnSessionCLI = "org.apache.flink.yarn.cli.FlinkYarnSessionCli";
        try {

        // 2. 添加flinkYarnSessionCLI到命令行集合中
            customCommandLines.add(
                    loadCustomCommandLine(
                            flinkYarnSessionCLI,
                            configuration,
                            configurationDirectory,
                            "y",
                            "yarn"));
        } catch (NoClassDefFoundError | Exception e) {

            final String errorYarnSessionCLI = "org.apache.flink.yarn.cli.FallbackYarnSessionCli";
            try {

                LOG.info("Loading FallbackYarnSessionCli");
                customCommandLines.add(loadCustomCommandLine(errorYarnSessionCLI, configuration));
            } catch (Exception exception) {

                LOG.warn("Could not load CLI class {}.", flinkYarnSessionCLI, e);
            }
        }

        // Tips: DefaultCLI must be added at last, because getActiveCustomCommandLine(..) will get
        // the
        // active CustomCommandLine in order and DefaultCLI isActive always return true.
        // 从上面三行大致翻译:提示:DefaultCLI必须最后添加,因为getActiveCustomCommandLine(..)将按顺序获得激活的CustomCommandLine,而DefaultCLI isActive总是返回true。
		// 3. 添加DefaultCLI到命令行集合中
        customCommandLines.add(new DefaultCLI());

        return customCommandLines;
    }
loadCustomCommandLines 主要是用来初始化 CustomCommandLine 的,返回一个 CustomCommandLine 的集合。CustomCommandLine 是一个自定义命令行接口用来加载命令行的。
这里主要有三种不同的 CustomCommandLine 实现类,分别是 GenericCLI,FlinkYarnSessionCli,DefaultCLI。
虽然咋一看实现CustomCommandLine接口的实现类这么多,但是真正使用的就上面三个实现类,其它可以归为测试或者异常实现类。
如果想具体比较三者之间的差别,请移驾看我的另一篇文章《Flink1.15源码阅读flink-clients之GenericCLI、flinkYarnSessionCLI和DefaultCLI》。
初始化 CliFrontend 客户端对象
final CliFrontend cli = new CliFrontend(configuration, customCommandLines);
接着看
public CliFrontend(Configuration configuration, List<CustomCommandLine> customCommandLines) {

        this(configuration, new DefaultClusterClientServiceLoader(), customCommandLines);
    }

public CliFrontend(
            Configuration configuration,
            ClusterClientServiceLoader clusterClientServiceLoader,
            List<CustomCommandLine> customCommandLines) {

        this.configuration = checkNotNull(configuration);
        this.customCommandLines = checkNotNull(customCommandLines);
        this.clusterClientServiceLoader = checkNotNull(clusterClientServiceLoader);

        FileSystem.initialize(
                configuration, PluginUtils.createPluginManagerFromRootFolder(configuration));

        this.customCommandLineOptions = new Options();

        for (CustomCommandLine customCommandLine : customCommandLines) {

            customCommandLine.addGeneralOptions(customCommandLineOptions);
            customCommandLine.addRunOptions(customCommandLineOptions);
        }

        this.clientTimeout = configuration.get(ClientOptions.CLIENT_TIMEOUT);
        this.defaultParallelism = configuration.getInteger(CoreOptions.DEFAULT_PARALLELISM);
    }
通过上面获取到的 configuration 和 customCommandLines 信息初始化 CliFrontend 对象。
SecurityUtils.install(new SecurityConfiguration(cli.configuration));
// 安装安全配置
SecurityUtils.install(new SecurityConfiguration(cli.configuration));
/** * Installs a process-wide security configuration. * * <p>Applies the configuration using the available security modules (i.e. Hadoop, JAAS). */
    public static void install(SecurityConfiguration config) throws Exception {

        // Install the security modules first before installing the security context
        installModules(config);
        installContext(config);
    }

static void installModules(SecurityConfiguration config) throws Exception {


        // install the security module factories
        List<SecurityModule> modules = new ArrayList<>();
        for (String moduleFactoryClass : config.getSecurityModuleFactories()) {

            SecurityModuleFactory moduleFactory = null;
            try {

                moduleFactory = SecurityFactoryServiceLoader.findModuleFactory(moduleFactoryClass);
            } catch (NoMatchSecurityFactoryException ne) {

                LOG.error("Unable to instantiate security module factory {}", moduleFactoryClass);
                throw new IllegalArgumentException("Unable to find module factory class", ne);
            }
            SecurityModule module = moduleFactory.createModule(config);
            // can be null if a SecurityModule is not supported in the current environment
            if (module != null) {

                module.install();
                modules.add(module);
            }
        }
        installedModules = modules;
    }

static void installContext(SecurityConfiguration config) throws Exception {

        // install the security context factory
        for (String contextFactoryClass : config.getSecurityContextFactories()) {

            try {

                SecurityContextFactory contextFactory =
                        SecurityFactoryServiceLoader.findContextFactory(contextFactoryClass);
                if (contextFactory.isCompatibleWith(config)) {

                    try {

                        installedContext = contextFactory.createContext(config);
                        // install the first context that's compatible and ignore the remaining.
                        break;
                    } catch (SecurityContextInitializeException e) {

                        LOG.error(
                                "Cannot instantiate security context with: " + contextFactoryClass,
                                e);
                    } catch (LinkageError le) {

                        LOG.error(
                                "Error occur when instantiate security context with: "
                                        + contextFactoryClass,
                                le);
                    }
                } else {

                    LOG.debug("Unable to install security context factory {}", contextFactoryClass);
                }
            } catch (NoMatchSecurityFactoryException ne) {

                LOG.warn("Unable to instantiate security context factory {}", contextFactoryClass);
            }
        }
        if (installedContext == null) {

            LOG.error("Unable to install a valid security context factory!");
            throw new Exception("Unable to install a valid security context factory!");
        }
    }
调用 parseAndRun 解析并执行程序
parseAndRun 解析并运行程序源码解析
retCode = SecurityUtils.getInstalledContext().runSecured(() -> cli.parseAndRun(args));
接着往下看
/** * Parses the command line arguments and starts the requested action. * * @param args command line arguments of the client. * @return The return code of the program */
    public int parseAndRun(String[] args) {


        // check for action
        if (args.length < 1) {

            CliFrontendParser.printHelp(customCommandLines);
            System.out.println("Please specify an action.");
            return 1;
        }

        // get action
        // 获取即将动作标识
        String action = args[0];

        // remove action from parameters
        final String[] params = Arrays.copyOfRange(args, 1, args.length);

        try {

            // do action
            switch (action) {

                case ACTION_RUN:
                // 本次只说run
                    run(params);
                    return 0;
                case ACTION_RUN_APPLICATION:
                    runApplication(params);
                    return 0;
                case ACTION_LIST:
                    list(params);
                    return 0;
                case ACTION_INFO:
                    info(params);
                    return 0;
                case ACTION_CANCEL:
                    cancel(params);
                    return 0;
                case ACTION_STOP:
                    stop(params);
                    return 0;
                case ACTION_SAVEPOINT:
                    savepoint(params);
                    return 0;
                case "-h":
                case "--help":
                    CliFrontendParser.printHelp(customCommandLines);
                    return 0;
                case "-v":
                case "--version":
                    String version = EnvironmentInformation.getVersion();
                    String commitID = EnvironmentInformation.getRevisionInformation().commitId;
                    System.out.print("Version: " + version);
                    System.out.println(
                            commitID.equals(EnvironmentInformation.UNKNOWN)
                                    ? ""
                                    : ", Commit ID: " + commitID);
                    return 0;
                default:
                    System.out.printf("\"%s\" is not a valid action.\n", action);
                    System.out.println();
                    System.out.println(
                            "Valid actions are \"run\", \"run-application\", \"list\", \"info\", \"savepoint\", \"stop\", or \"cancel\".");
                    System.out.println();
                    System.out.println(
                            "Specify the version option (-v or --version) to print Flink version.");
                    System.out.println();
                    System.out.println(
                            "Specify the help option (-h or --help) to get help on the command.");
                    return 1;
            }
        } catch (CliArgsException ce) {

            return handleArgException(ce);
        } catch (ProgramParametrizationException ppe) {

            return handleParametrizationException(ppe);
        } catch (ProgramMissingJobException pmje) {

            return handleMissingJobException();
        } catch (Exception e) {

            return handleError(e);
        }
    }
前面 5 个步骤都是在做一些准备工作,最后一步才是真正开始执行程序,因为我们执行的是 flink run 命令,所以会走到 run(params) 方法里面。
/** * Executions the run action. * * @param args Command line arguments for the run action. */
    protected void run(String[] args) throws Exception {

        LOG.info("Running 'run' command.");

        final Options commandOptions = CliFrontendParser.getRunCommandOptions();
        final CommandLine commandLine = getCommandLine(commandOptions, args, true);

        // evaluate help flag
        if (commandLine.hasOption(HELP_OPTION.getOpt())) {

            CliFrontendParser.printHelpForRun(customCommandLines);
            return;
        }

        final CustomCommandLine activeCommandLine =
                validateAndGetActiveCommandLine(checkNotNull(commandLine));

        final ProgramOptions programOptions = ProgramOptions.create(commandLine);

        final List<URL> jobJars = getJobJarAndDependencies(programOptions);

        final Configuration effectiveConfiguration =
                getEffectiveConfiguration(activeCommandLine, commandLine, programOptions, jobJars);

        LOG.debug("Effective executor configuration: {}", effectiveConfiguration);

        try (
        PackagedProgram program = getPackagedProgram(programOptions, effectiveConfiguration)) {

        // 真正开始执行
            executeProgram(effectiveConfiguration, program);
        }
    }
首先会获取 flink 所有的 options,然后在获取我们输入的 flink 命令。如果有 h 的话就会打印 help 信息。接下来会获取处于 active 状态的 CustomCommandLine,这里获取到的应该是 GenericCLI 。然后获取用户提交的 jar 包和依赖包,最后调用 executeProgram 开始真正的执行程序。
接下来继续看,从executeProgram方法点击进去
protected void executeProgram(final Configuration configuration, final PackagedProgram program)
            throws ProgramInvocationException {

        ClientUtils.executeProgram(
                new DefaultExecutorServiceLoader(), configuration, program, false, false);
    }
next see see
public static void executeProgram(
            PipelineExecutorServiceLoader executorServiceLoader,
            Configuration configuration,
            PackagedProgram program,
            boolean enforceSingleJobExecution,
            boolean suppressSysout)
            throws ProgramInvocationException {

        checkNotNull(executorServiceLoader);
            // 获取用户代码的类加载器,默认情况下是 ChildFirstClassLoader 这个可以在配置文件里面配置
        final ClassLoader userCodeClassLoader = program.getUserCodeClassLoader();
            // 获取当前线程的类加载器
        final ClassLoader contextClassLoader = Thread.currentThread().getContextClassLoader();
        try {

                    // 把当前线程的类加载器设置为 ChildFirstClassLoader
Thread.currentThread().setContextClassLoader(userCodeClassLoader);

            LOG.info(
                    "Starting program (detached: {})",
                    !configuration.getBoolean(DeploymentOptions.ATTACHED));
        // 初始化上下文的配置信息 ContextEnvironment
            ContextEnvironment.setAsContext(
                    executorServiceLoader,
                    configuration,
                    userCodeClassLoader,
                    enforceSingleJobExecution,
                    suppressSysout);
        // 初始化 StreamContextEnvironment
            StreamContextEnvironment.setAsContext(
                    executorServiceLoader,
                    configuration,
                    userCodeClassLoader,
                    enforceSingleJobExecution,
                    suppressSysout);

            try {

            // 通过反射去执行用户编写的代码
                program.invokeInteractiveModeForExecution();
            } finally {

                ContextEnvironment.unsetAsContext();
                StreamContextEnvironment.unsetAsContext();
            }
        } finally {

                      // 最后在把类加载器切换回去
Thread.currentThread().setContextClassLoader(contextClassLoader);
        }
    }
先是会获取用户代码的类加载器,默认情况下是 ChildFirstClassLoader 这个可以在 flink-conf.yaml 配置文件里面配置
#Flink的类加载策略
classloader.resolve-order: child-first/parent-first
这里有一个非常有意思的地方是,获取当前线程的类加载器 contextClassLoader ,然后把当前线程的类加载器设置为 ChildFirstClassLoader 或者 ParentFirstClassLoader 紧接着初始化 ContextEnvironment 和 StreamContextEnvironment 的上下文配置信息,最终通过反射的方式调用 invokeInteractiveModeForExecution 方法,也就是在执行用户的代码,注意最后在 finally 里面执行完用户代码后又把当前线程的类加载器切换到了之前的 contextClassLoader,相当于做了一个线程类加载器的切换,也就是通过这种方式,实现了用户代码和 flink 框架代码的隔离。
接下来接着看代码
/** * This method assumes that the context environment is prepared, or the execution will be a * local execution by default. */
    public void invokeInteractiveModeForExecution() throws ProgramInvocationException {

        FlinkSecurityManager.monitorUserSystemExitForCurrentThread();
        try {

            callMainMethod(mainClass, args);
        } finally {

            FlinkSecurityManager.unmonitorUserSystemExitForCurrentThread();
        }
    }
上面代码调用了callMainMethod(mainClass, args);,这里应该能想到,这里调用的是用户代码的主方法
private static void callMainMethod(Class<?> entryClass, String[] args)
            throws ProgramInvocationException {

        Method mainMethod;
        if (!Modifier.isPublic(entryClass.getModifiers())) {

            throw new ProgramInvocationException(
                    "The class " + entryClass.getName() + " must be public.");
        }

        try {

           //获取用户主类中的main方法
            mainMethod = entryClass.getMethod("main", String[].class);
        } catch (NoSuchMethodException e) {

            throw new ProgramInvocationException(
                    "The class " + entryClass.getName() + " has no main(String[]) method.");
        } catch (Throwable t) {

            throw new ProgramInvocationException(
                    "Could not look up the main(String[]) method from the class "
                            + entryClass.getName()
                            + ": "
                            + t.getMessage(),
                    t);
        }

        if (!Modifier.isStatic(mainMethod.getModifiers())) {

            throw new ProgramInvocationException(
                    "The class " + entryClass.getName() + " declares a non-static main method.");
        }
        if (!Modifier.isPublic(mainMethod.getModifiers())) {

            throw new ProgramInvocationException(
                    "The class " + entryClass.getName() + " declares a non-public main method.");
        }

        try {

        // 此处是正主,调用用户代码main程序从这里开始
            mainMethod.invoke(null, (Object) args);
        } catch (IllegalArgumentException e) {

            throw new ProgramInvocationException(
                    "Could not invoke the main method, arguments are not matching.", e);
        } catch (IllegalAccessException e) {

            throw new ProgramInvocationException(
                    "Access to the main method was denied: " + e.getMessage(), e);
        } catch (InvocationTargetException e) {

            Throwable exceptionInMethod = e.getTargetException();
            if (exceptionInMethod instanceof Error) {

                throw (Error) exceptionInMethod;
            } else if (exceptionInMethod instanceof ProgramParametrizationException) {

                throw (ProgramParametrizationException) exceptionInMethod;
            } else if (exceptionInMethod instanceof ProgramInvocationException) {

                throw (ProgramInvocationException) exceptionInMethod;
            } else {

                throw new ProgramInvocationException(
                        "The main method caused an error: " + exceptionInMethod.getMessage(),
                        exceptionInMethod);
            }
        } catch (Throwable t) {

            throw new ProgramInvocationException(
                    "An error occurred while invoking the program's main method: " + t.getMessage(),
                    t);
        }
    }
在callMainMethod方法中,首先判断该类修饰是否是public的,然后获取主方法,继续判断主方法是不是静态方法以及是否是public方法,最终通过mainMethod.invoke(null,(Object) args) 调用用户代码。
本文主要讲了 flink-client 模块 client 端启动流程,从而加深对flink 底层执行流程的理解,另外还看了有关用户代码和flink自身框架代码隔离的逻辑;
首先客户端执行流程肯定经常会被面试问到,用户代码隔离两年前败北过一次,这些都是重点。
边栏推荐
- Openresty + keepalived 实现负载均衡 + IPV6 验证
- Day3 -- flag state holding, exception handling and request hook
- The response of the database interface is very slow
- How to merge multiple columns in an excel table into one column
- ROS2安装时出现Connection failed [IP: 91.189.91.39 80]
- containerd拉取私库镜像失败(kubelet)
- Create a project to realize login and registration, generate JWT, and send verification code
- 第2章 前台数据展现
- Use of "PHP Basics" delimiters
- 带宽 与 货币
猜你喜欢

OSI seven layer model and tcp/ip four layer (TCP and UDP) (notes)

Graph node deployment and testing

"Basic knowledge of PHP" implement mathematical operations in PHP

Flask request data acquisition and response

Ubuntu: install PostgreSQL

Forced login, seven cattle cloud upload pictures

开怀一笑

"PHP Basics" uses echo statements to output information

Breadth first search

On Valentine's day, I drew an object with characters!
随机推荐
Hundreds of people participated. What are these people talking about in the opengauss open source community?
Map structure
Plato farm is expected to further expand its ecosystem through elephant swap
说透缓存一致性与内存屏障
Block, there is a gap between the block elements in the row
永久设置source的方法
IBM3650M4实体机安装VCenter7.0
Redis configuration file download
"PHP Basics" use of integer data
Management of product pictures
阿里云国际版回执消息简介与配置流程
sql_ Mode strict mode (ansi/traditional/strict_trans_tables)
Binglog backup data
【uni-app高级实战】手把手带你学习一个纯实战复杂项目的开发1/100
Help send some recruitment. If you are interested, you can have a look
Explain cache consistency and memory barrier
Breadth first search
After installing mysql, docker entered the container and found that he could not log in to MySQL
Function realization of order system
pytorch_demo1