当前位置:网站首页>Mina断线重连
Mina断线重连
2022-08-05 05:21:00 【洒家肉山大魔王】
Mina断线重连
这里的Mina 断线重连是指使用mina作为客户端软件,连接其它提供Socket通讯服务的服务器端。Socket服务器可以是Mina提供的服务器,也可以是C++提供的服务器。

1. 断线重连的方式
1.1 增加监听器/拦截器方式
在创建Mina客户端时增加一个监听器,或者增加一个拦截器,当检测到Session关闭时,自动进行重连。

1.2 基于监听器/拦截器,增加读写空闲检查
在第1种方式的基础上,增加客户端的读写通道空闲检查,当发生Session关闭或者读写空闲时,进行重连。

1.3 两种断线重连方式对比
- 第一种方式比较传统,优点是简单方便,适合网络稳定、数据量不大(1M带宽以下)的环境;不过缺点是不能对系统级的连接断开阻塞进行捕获。
- 第二种方式更加精细,基本上能捕获到应用、网络、系统级的断连。
2. 重连目的
在使用Mina做为客户端时,往往因为网络、服务器、应用程序出现问题而导致连接断开,而自动重连,就是解决连接断开的唯一方式。
如果网线断开、服务器宕机、应用程序挂了,都是断线的原因,这个时候,通过增加一个监听器或者拦截器,就能实现重连。
但是生产环境中,断线的原因可能更复杂:网络不稳定、延时、服务器负载高、服务器或者应用程序的发送或者接收缓冲区满等等问题都可能导致数据传输过程出现类似于断线的情况,这个时候,光检测Session关闭是远远不够的,这个时候就需要一种重连机制,比如读写空闲超过30秒,就进行重连。对于数据不间断、实时性高、数据量大的应用场景,更是实用。
3. 实例:
3.1 方式1-监听器方式
创建一个监听器实现mina的IoServiceListener接口,里面的方法可以不用写实现
import org.apache.mina.core.service.IoService;
import org.apache.mina.core.service.IoServiceListener;
import org.apache.mina.core.session.IdleStatus;
import org.apache.mina.core.session.IoSession;

public class IoListener implements IoServiceListener{
	@Override
	public void serviceActivated(IoService arg0) throws Exception {
		// TODO Auto-generated method stub
	}
	@Override
	public void serviceDeactivated(IoService arg0) throws Exception {
		// TODO Auto-generated method stub
	}
	@Override
	public void serviceIdle(IoService arg0, IdleStatus arg1) throws Exception {
		// TODO Auto-generated method stub
	}
	@Override
	public void sessionCreated(IoSession arg0) throws Exception {
		// TODO Auto-generated method stub
	}

	@Override
	public void sessionDestroyed(IoSession arg0) throws Exception {
		// TODO Auto-generated method stub
	}
}
在创建客户端时加入监听
        // 创建连接客户端
        NioSocketConnector connector = new NioSocketConnector();
        // 设置连接超时
		connector.setConnectTimeoutMillis(30000);
        // 设置接收缓冲区的大小
		connector.getSessionConfig().setReceiveBufferSize(10240);
        // 设置输出缓冲区的大小
		connector.getSessionConfig().setSendBufferSize(10240);
        // 加入解码器
		TextLineCodecFactory factory = new TextLineCodecFactory(Charset.forName("GBK"), LineDelimiter.WINDOWS.getValue(), LineDelimiter.WINDOWS.getValue());
		factory.setDecoderMaxLineLength(10240);
		factory.setEncoderMaxLineLength(10240);
		connector.getFilterChain().addLast("codec", new ProtocolCodecFilter(factory));
        // 设置默认访问地址
		connector.setDefaultRemoteAddress(new InetSocketAddress(host, port));
		// 添加处理器
        connector.setHandler(new IoHandler());

        // 添加重连监听
		connector.addListener(new IoListener() {
			@Override
			public void sessionDestroyed(IoSession arg0) throws Exception {
			    for (;;) {
					try {
						Thread.sleep(3000);
						ConnectFuture future = connector.connect();
                        // 等待连接创建成功
						future.awaitUninterruptibly();
                        // 获取会话
						session = future.getSession();
						if (session.isConnected()) {
							logger.info("断线重连[" + connector.getDefaultRemoteAddress().getHostName() + ":" + connector.getDefaultRemoteAddress().getPort() + "]成功");
							break;
						}
					} catch (Exception ex) {
						logger.info("重连服务器登录失败,3秒再连接一次:" + ex.getMessage());
					}
				}
			}
		});
        for (;;) {
			try {
				ConnectFuture future = connector.connect();
                 // 等待连接创建成功
				future.awaitUninterruptibly();
                // 获取会话
		        session = future.getSession();
				logger.info("连接服务端" + host + ":" + port + "[成功]" + ",,时间:" + new SimpleDateFormat("yyyy-MM-dd HH:mm:ss").format(new Date()));
				break;
			} catch (RuntimeIoException e) {
				logger.error("连接服务端" + host + ":" + port + "失败" + ",,时间:" + new SimpleDateFormat("yyyy-MM-dd HH:mm:ss").format(new Date()) + ", 连接MSG异常,请检查MSG端口、IP是否正确,MSG服务是否启动,异常内容:" + e.getMessage(), e);
                // 连接失败后,重连间隔5s
				Thread.sleep(5000);
			}
		}
3.2 方式1-拦截器方式
		connector = new NioSocketConnector();  //创建连接客户端
		connector.setConnectTimeoutMillis(30000); //设置连接超时
//		断线重连回调拦截器
		connector.getFilterChain().addFirst("reconnection", new IoFilterAdapter() {
			@Override
			public void sessionClosed(NextFilter nextFilter, IoSession ioSession) throws Exception {
				for(;;){
					try{
						Thread.sleep(3000);
						ConnectFuture future = connector.connect();
						future.awaitUninterruptibly();// 等待连接创建成功
						session = future.getSession();// 获取会话
						if(session.isConnected()){
							logger.info("断线重连["+ connector.getDefaultRemoteAddress().getHostName() +":"+ connector.getDefaultRemoteAddress().getPort()+"]成功");
							break;
						}
					}catch(Exception ex){
						logger.info("重连服务器登录失败,3秒再连接一次:" + ex.getMessage());
					}
				}
			}
		});

		TextLineCodecFactory factory = new TextLineCodecFactory(Charset.forName(encoding), LineDelimiter.WINDOWS.getValue(), LineDelimiter.WINDOWS.getValue());
		factory.setDecoderMaxLineLength(10240);
		factory.setEncoderMaxLineLength(10240);
		//加入解码器
		connector.getFilterChain().addLast("codec", new ProtocolCodecFilter(factory));
		//添加处理器
                connector.setHandler(new IoHandler());
		connector.getSessionConfig().setReceiveBufferSize(10240);	// 设置接收缓冲区的大小
		connector.getSessionConfig().setSendBufferSize(10240);          // 设置输出缓冲区的大小
		connector.setDefaultRemoteAddress(new InetSocketAddress(host, port));// 设置默认访问地址
		for (;;) {
			try {
				ConnectFuture future = connector.connect();
				// 等待连接创建成功
				future.awaitUninterruptibly();
				// 获取会话
				session = future.getSession();
				logger.error("连接服务端" + host + ":" + port + "[成功]" + ",,时间:" + new SimpleDateFormat("yyyy-MM-dd HH:mm:ss").format(new Date()));
				break;
			} catch (RuntimeIoException e) {
				logger.error("连接服务端" + host + ":" + port + "失败" + ",,时间:" + new SimpleDateFormat("yyyy-MM-dd HH:mm:ss").format(new Date()) + ", 连接MSG异常,请检查MSG端口、IP是否正确,MSG服务是否启动,异常内容:" + e.getMessage(), e);
				Thread.sleep(5000);// 连接失败后,重连间隔5s
			}
		}
3.2 方式2-加入空闲检测机制
空闲检测机制需要在创建客户端时,加入空闲超时,然后在处理器handler端的sessionIdle方法中加入一个预关闭连接的方法。让Session关闭传递到监听器或者拦截器的sessionClose方法中实现重连。
以拦截器方式为例,在创建客户端时,加入读写通道空闲检查超时机制。
		connector = new NioSocketConnector();  //创建连接客户端
		connector.setConnectTimeoutMillis(30000); //设置连接超时
//		断线重连回调拦截器
		connector.getFilterChain().addFirst("reconnection", new IoFilterAdapter() {
			@Override
			public void sessionClosed(NextFilter nextFilter, IoSession ioSession) throws Exception {
				for(;;){
					try{
						Thread.sleep(3000);
						ConnectFuture future = connector.connect();
						future.awaitUninterruptibly();// 等待连接创建成功
						session = future.getSession();// 获取会话
						if(session.isConnected()){
							logger.info("断线重连["+ connector.getDefaultRemoteAddress().getHostName() +":"+ connector.getDefaultRemoteAddress().getPort()+"]成功");
							break;
						}
					}catch(Exception ex){
						logger.info("重连服务器登录失败,3秒再连接一次:" + ex.getMessage());
					}
				}
			}
		});

		connector.getFilterChain().addLast("mdc", new MdcInjectionFilter());
		TextLineCodecFactory factory = new TextLineCodecFactory(Charset.forName(encoding), LineDelimiter.WINDOWS.getValue(), LineDelimiter.WINDOWS.getValue());
		factory.setDecoderMaxLineLength(10240);
		factory.setEncoderMaxLineLength(10240);
		//加入解码器
		connector.getFilterChain().addLast("codec", new ProtocolCodecFilter(factory));

		connector.getSessionConfig().setReceiveBufferSize(10240);	// 设置接收缓冲区的大小
		connector.getSessionConfig().setSendBufferSize(10240);// 设置输出缓冲区的大小

		connector.getSessionConfig().setIdleTime(IdleStatus.BOTH_IDLE, 30000);  //读写都空闲时间:30秒
		connector.getSessionConfig().setIdleTime(IdleStatus.READER_IDLE, 40000);//读(接收通道)空闲时间:40秒
		connector.getSessionConfig().setIdleTime(IdleStatus.WRITER_IDLE, 50000);//写(发送通道)空闲时间:50秒

		//添加处理器
                connector.setHandler(new IoHandler());

		connector.setDefaultRemoteAddress(new InetSocketAddress(host, port));// 设置默认访问地址
		for (;;) {
			try {
				ConnectFuture future = connector.connect();
				// 等待连接创建成功
				future.awaitUninterruptibly();
				// 获取会话
				session = future.getSession();
				logger.error("连接服务端" + host + ":" + port + "[成功]" + ",,时间:" + new SimpleDateFormat("yyyy-MM-dd HH:mm:ss").format(new Date()));
				break;
			} catch (RuntimeIoException e) {
				System.out.println("连接服务端" + host + ":" + port + "失败" + ",,时间:" + new SimpleDateFormat("yyyy-MM-dd HH:mm:ss").format(new Date()) + ", 连接MSG异常,请检查MSG端口、IP是否正确,MSG服务是否启动,异常内容:" + e.getMessage());
				logger.error("连接服务端" + host + ":" + port + "失败" + ",,时间:" + new SimpleDateFormat("yyyy-MM-dd HH:mm:ss").format(new Date()) + ", 连接MSG异常,请检查MSG端口、IP是否正确,MSG服务是否启动,异常内容:" + e.getMessage(), e);
				Thread.sleep(5000);// 连接失败后,重连10次,间隔30s
			}
		}
然后在数据处理器IoHandler中sessionIdle方法中加入Session会话关闭的代码,这样session关闭就能传递到拦截器或者监听器中,然后实现重连。
import org.apache.mina.core.service.IoHandlerAdapter;
import org.apache.mina.core.session.IdleStatus;
import org.apache.mina.core.session.IoSession;

public class IoHandler extends IoHandlerAdapter {
	//部分代码忽略...
	@Override
	public void sessionIdle(IoSession session, IdleStatus status) throws Exception {
		logger.info("-客户端与服务端连接[空闲] - " + status.toString());
		if(session != null){
			session.close(true);
		}
	}
	//部分代码忽略...
}
4. 总结-最佳实践:
以上两种方式我个人认为最好是使用第二种。在实际的生产环境,对于数据量比较少的情况下,需要加一个线程专门发送心跳信息,然后在服务器端进行回应心跳,这样就保证读写通道不出现空闲。如果数据量比较大,大到24小时都有数据,那么就不需要心跳线程,可以直接在IoHandler处理器端中messageReceived方法中定时发送心跳到服务器。由于读写监控还可以处理服务器、网络、应用等等方面的不确定因素,所以建议使用第二种方式。
5. 注意事项
第一:断线重连是针对长连接的,也就是说,连接后两端一直在发送数据。
第二:断线重连是针对客户端的,如果你在服务端使用,可能会有根据场景导致失败。因为服务端会自动发送心跳。
第三:断线重连如果测试设置接收超时情况,就应该一直发送数据,而服务端只接收不发送,心跳数据也不发送,到时间后才会起作用。
边栏推荐
- lvm逻辑卷及磁盘配额
- 入职前,没想到他们玩的这么花
- 深度 Zabbix 使用指南——来自惨绿少年
- The spark operator - coalesce operator
- Proprietary host CDH
- What should I do if the SSL certificate prompts that it is expired or invalid?
- Cloud computing - osi seven layers and TCP\IP protocol
- Growth: IT Operations Trends Report
- Transport layer protocol (TCP 3-way handshake)
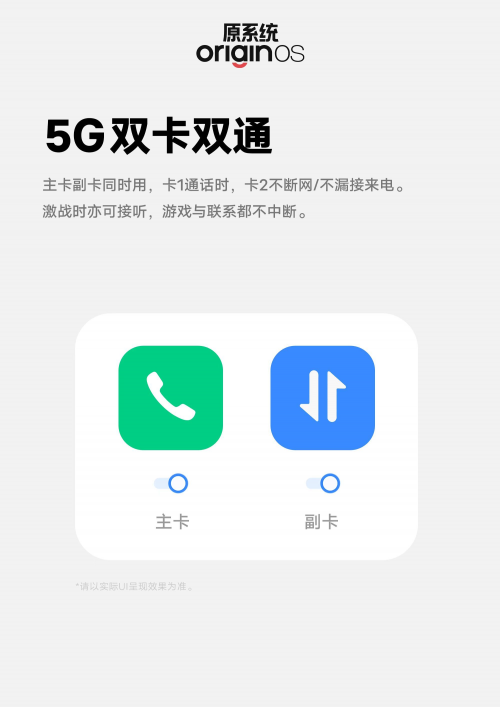
- 从“双卡双待“到”双通“,vivo率先推动DSDA架构落地
猜你喜欢

随机推荐
[Day1] VMware software installation
运维的高光时刻,从智能化开始
spark operator-wholeTextFiles operator
TCP/IP four-layer model
NAT实验
What are some things that you only know when you do operation and maintenance?
IP packet format (ICMP protocol and ARP protocol)
spark source code - task submission process - 3-ApplicationMaster
Hugo builds a personal blog
账号与权限管理
智能运维会取代人工运维吗?
Quick question and quick answer - FAQ of Tencent Cloud Server
Switch principle
Why can't I add a new hard disk to scan?How to solve?
Configuration of TensorFlow ObjecDetectionAPI under Anaconda3 of win10 system
markdown编辑器模板
Getting Started Document 09 Standalone watch
Cloud computing - osi seven layers and TCP\IP protocol
What impact does CIPU have on the cloud computing industry?
Getting Started 04 When a task depends on another task, it needs to be executed in sequence