当前位置:网站首页>Slam learning notes - build a complete gazebo multi machine simulation slam from scratch (I)
Slam learning notes - build a complete gazebo multi machine simulation slam from scratch (I)
2022-07-03 16:05:00 【Pony Baby】
List of articles
introduction
This is a relatively complete tutorial . The article will be divided into four parts :
- build gazebo Simulation environment , And run in a virtual environment slam Algorithm , Save the environment map
- Use map_merge, Multiple robots at the same time slam Drawing
- Use map_server Open the saved map , And make acml Positioning and move_base Perform autonomous navigation
- Use explore_lite The function package realizes the autonomous navigation of the robot , Edge construction map
PS: The article does not include the installation of the corresponding function package , The environment used is melodic, If there is a version inconsistency , Minor modifications may be required
gitee Address
The first part build gazebo Simulation environment
Use gazebo Of building_editor Build a map
- open building_editor

- Click on the left Wall, Draw a two-dimensional map on the whiteboard , It will automatically generate a three-dimensional map . If you want to build more complex , For example, a map with a slope , You can also use 3D modeling software to design , Import to gazebo I won't seriously introduce it here
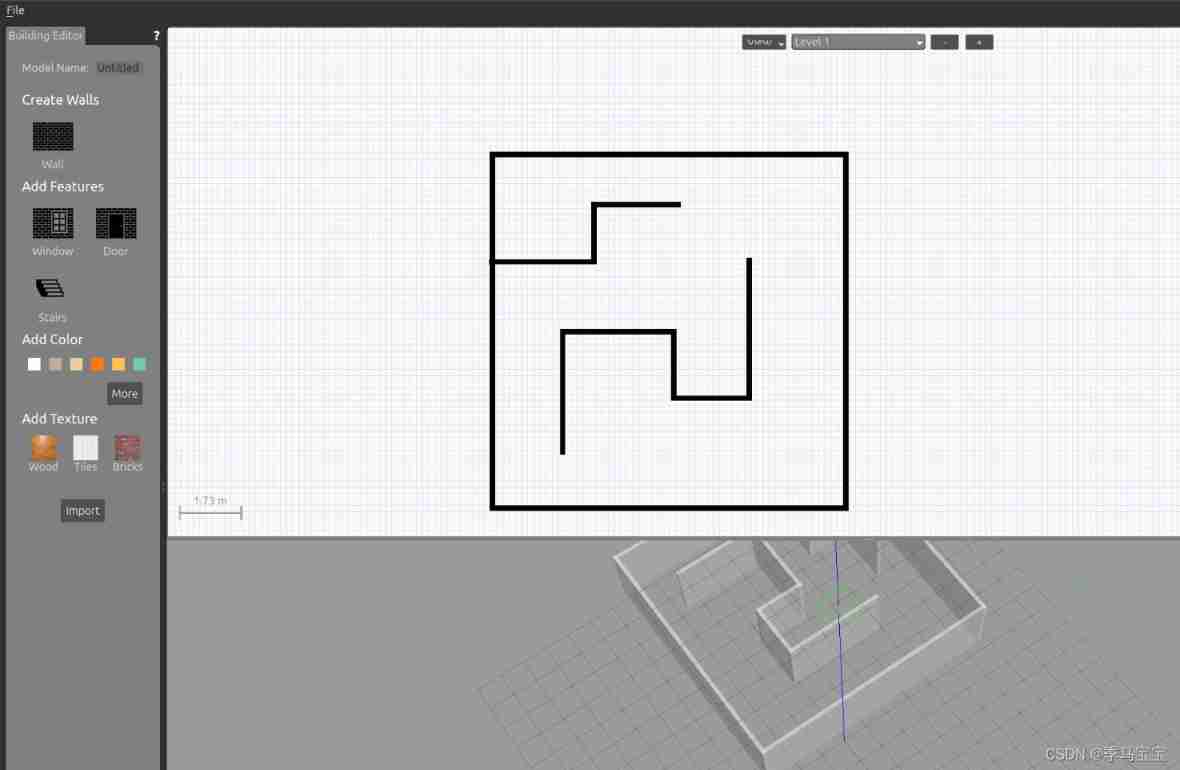
- sign out editor And click the save, It is recommended to drag the 3D model , Make the coordinate origin in the map , Otherwise, it will be inconvenient to set the robot birth point later

- Finally exit gazebo And save the map as xxx.world file , If you use a virtual machine , You will encounter the situation that the save interface is stuck , At this time, minimizing the window and opening it again can solve the problem .
Use launch File loading world file
- First create the function package , I call it " gazebo_tutorials
- Add two folders launch and world, Save what you just saved world The file is kept in world In the folder
- establish launch file , I call it create_world.launch
<launch>
  <include file="$(find gazebo_ros)/launch/empty_world.launch">
     <arg name="world_name" value="$(find gazebo_tutorials)/world/maze.world"/>
    <arg name="paused" value="false"/>
    <arg name="use_sim_time" value="true"/>
    <arg name="gui" value="true"/>
    <arg name="headless" value="false"/>
    <arg name="debug" value="false"/>
  </include>
</launch>
catkin_make Compile the , Use command roslaunch gazebo_tutorials create_world.launch You can start the simulation environment
The second part Put your robot
You can model your robot , export urdf Model , But for the sake of generality , We use it directly here turtlebot3 Model of .
Use turtlebot I referred to /opt/ros/melodic/share/turtlebot3_gazebo Files in the folder , It contains sample files of the distribution package , You search online gazebo Simulation allows you to run these files directly , Learn to read these documents by yourself , imitation , Then you can use it in your own projects .
- Write a name for place_robot.launch File placement robot ,TURTLEBOT3_MODEL You set it up by yourself turtlebot species , You can use
export TURTLEBOT3_MODEL=bugerSet the robot type as buger, Corresponding burger Model of
<launch>
    <!--  Robot initialization position parameters  -->
  <arg name="model" default="$(env TURTLEBOT3_MODEL)" doc="model type [burger, waffle, waffle_pi]"/>
  <arg name="robot_name" default="tb3_0"/>
  <arg name="robot_x_pos" default="0.0"/>
  <arg name="robot_y_pos" default="0.0"/>
  <arg name="robot_z_pos" default=" 0.0"/>
  <arg name="robot_yaw" default=" 0.0"/>
  <!--  Create robots  -->
  <group ns = "$(arg robot_name)">
    <!--  Import robot parameters  -->
    <param name="robot_description" command="$(find xacro)/xacro --inorder $(find turtlebot3_description)/urdf/turtlebot3_$(arg model).urdf.xacro" />
    <!--  Robot position publishing node  -->
    <node pkg="robot_state_publisher" type="robot_state_publisher" name="robot_state_publisher" output="screen">
      <param name="publish_frequency" type="double" value="50.0" />
      <param name="tf_prefix" value="$(arg robot_name)" />
    </node>
    <node name="spawn_urdf" pkg="gazebo_ros" type="spawn_model" args="-urdf -model $(arg robot_name) -x $(arg robot_x_pos) -y $(arg robot_y_pos) -z $(arg robot_z_pos) -Y $(arg robot_yaw) -param robot_description" />
  </group>

</launch>
roslaunch gazebo_tutorials place_robot.launch You can see that the robot was born at the origin 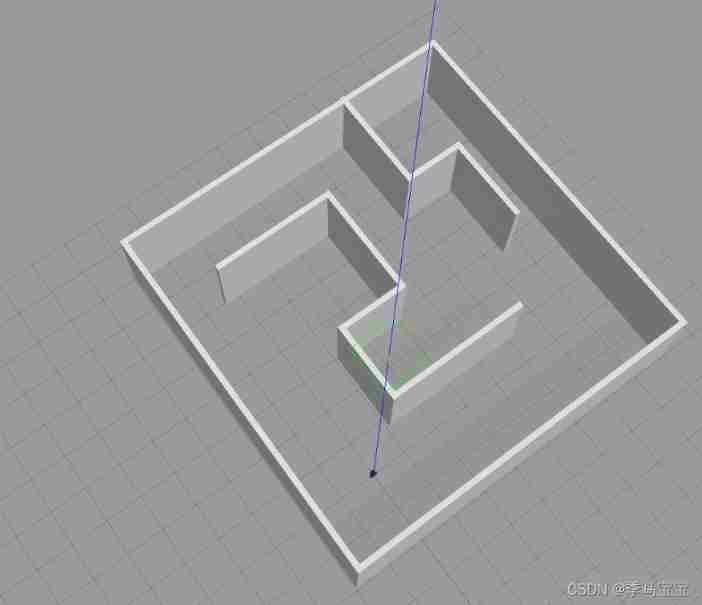
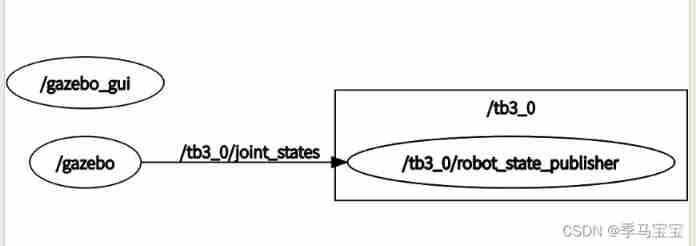
Use rostopic list、rqt_graph、rosrun rqt_tf_tree rqt_tf_tree Wait for the order to observe , Later debugging can often use these things for observation 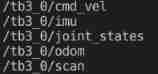
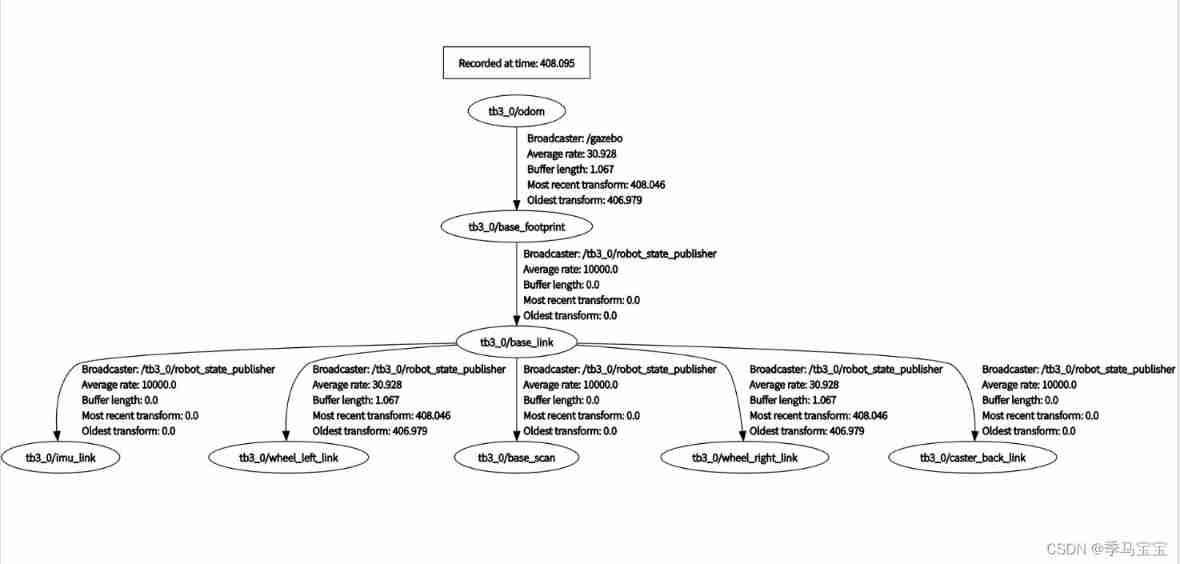
in addition , We can use roslaunch gazebo_tutials place_robot.launch robot_name:=tb3_1 robot_x_pos:=1.0 Command to create a second in a different location 、 Three robots , We'll do these things until the last article , Now keep a robot .
The third part start-up SLAM
I configured gmapping and cartorgrapher Algorithm configuration file , Only the most commonly used gmapping Algorithm configuration file , See the terminal start printing data , That is, it is opened successfully .
<launch>
  <arg name="ns" default="tb3_0"/>
  <!-- Gmapping -->
  <node pkg="gmapping" type="slam_gmapping" name="turtlebot3_slam_gmapping" output="screen" ns="$(arg ns)">
    <param name="base_frame" value="$(arg ns)/base_footprint"/>
    <param name="odom_frame" value="$(arg ns)/odom"/>
    <param name="map_frame" value="$(arg ns)/map"/>
    <param name="map_update_interval" value="2.0"/>
    <param name="maxUrange" value="4.0"/>
    <param name="minimumScore" value="100"/>
    <param name="linearUpdate" value="0.2"/>
    <param name="angularUpdate" value="0.2"/>
    <param name="temporalUpdate" value="0.5"/>
    <param name="delta" value="0.05"/>
    <param name="lskip" value="0"/>
    <param name="particles" value="120"/>
    <param name="sigma" value="0.05"/>
    <param name="kernelSize" value="1"/>
    <param name="lstep" value="0.05"/>
    <param name="astep" value="0.05"/>
    <param name="iterations" value="5"/>
    <param name="lsigma" value="0.075"/>
    <param name="ogain" value="3.0"/>
    <param name="srr" value="0.01"/>
    <param name="srt" value="0.02"/>
    <param name="str" value="0.01"/>
    <param name="stt" value="0.02"/>
    <param name="resampleThreshold" value="0.5"/>
    <param name="xmin" value="-10.0"/>
    <param name="ymin" value="-10.0"/>
    <param name="xmax" value="10.0"/>
    <param name="ymax" value="10.0"/>
    <param name="llsamplerange" value="0.01"/>
    <param name="llsamplestep" value="0.01"/>
    <param name="lasamplerange" value="0.005"/>
    <param name="lasamplestep" value="0.005"/>
  </node>
</launch>
Run at terminal rviz, Click on the bottom left corner add, stay by topic Find map Add in , You can see the built map ,rviz You can also save the configuration , Don't save it here , I'll talk more about it later when there are more robots , Including the display of coordinates 、 Selection of coordinate system, etc .
fixed_frame Choose as tb3_0/map, Set the world coordinate system as the map coordinate 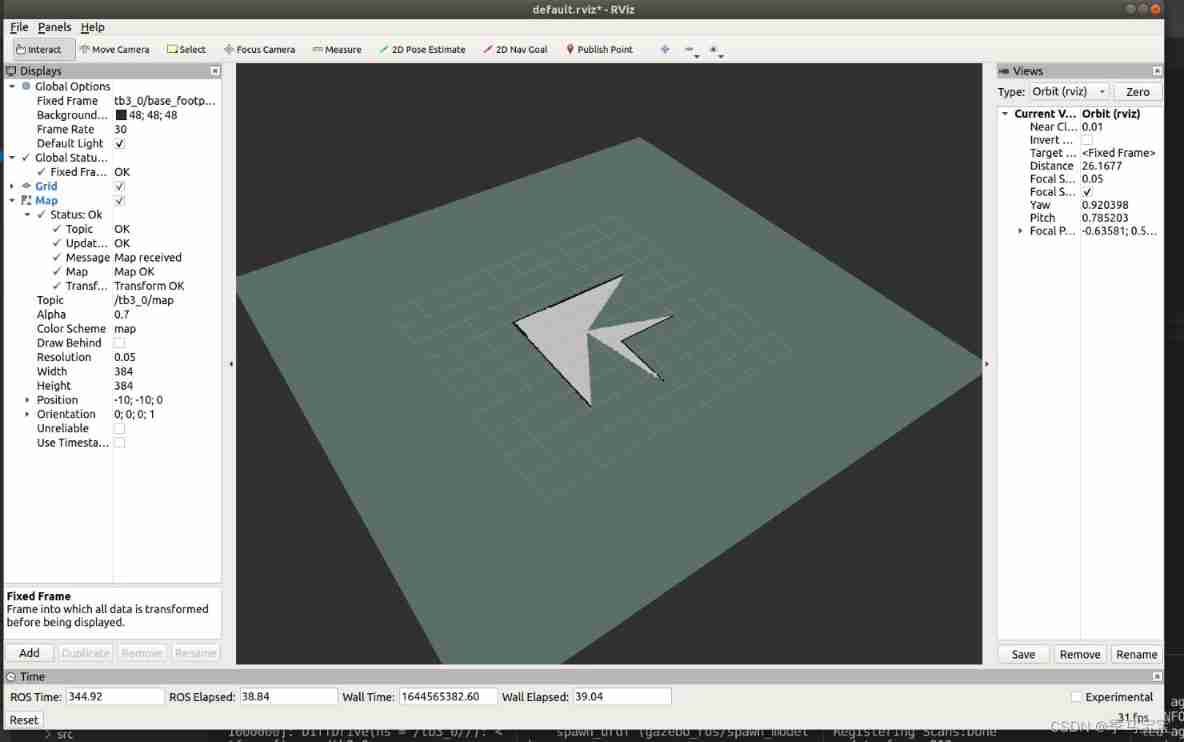
We can see , yes gazebo This environment directly gives gmapping Nodes provide scan This radar data topic
The fourth part Use keyboard control to build the map and save
Keyboard controlled robot
Use command ROS_NAMESPACE=tb3_0 rosrun teleop_twist_keyboard teleop_twist_keyboard.py that will do , Those without this control package can install one , Follow the instructions , If the robot movement is different from what you expect , You can slow down the robot and try again .
Save the map
Use the command to ROS_NAMESPACE=tb3_0 rosrun map_server map_saver -f ~/catkin_ws/src/gazebo_tutorials/map/map Save the built map 
There are two files saved , One is pgm file , Is the map built , It's a 0-255 The gray image . the other one yaml The file describes the map ,resolution=0.05 Represents an image primed case 0.05 rice ,origin Represents the coordinates represented by the pixels at the bottom left of the picture .
such , Our first lesson is finished .
边栏推荐
- How are integer and floating-point types stored in memory
- Pyinstaller is not an internal or external command, nor is it a runnable program or batch file
- 潘多拉 IOT 开发板学习(HAL 库)—— 实验5 外部中断实验(学习笔记)
- WinDbg analysis dump file
- String functions that you need to know
- Detailed explanation of four modes of distributed transaction (Seata)
- Distributed task scheduling XXL job
- UnityShader——MaterialCapture材质捕捉效果 (翡翠斧头)
- 用通达信炒股开户安全吗?
- 请求头不同国家和语言的表示
猜你喜欢

“用Android复刻Apple产品UI”(2)——丝滑的AppStore卡片转场动画

几种常见IO模型的原理

App移动端测试【5】文件的写入、读取

请做好3年内随时失业的准备?
【OpenCV 例程200篇】217. 鼠标交互获取多边形区域(ROI)

Detailed explanation of string function and string function with unlimited length
App mobile terminal test [3] ADB command

Download and install common programs using AUR
App mobile terminal test [4] APK operation
How idea starts run dashboard
随机推荐
Approval process design
CString中使用百分号
【OpenCV 例程200篇】217. 鼠标交互获取多边形区域(ROI)
SDNU_ ACM_ ICPC_ 2022_ Winter_ Practice_ 4th [individual]
Detailed pointer advanced 1
Go language self-study series | golang switch statement
2022年Q2加密市场投融资报告:GameFi成为投资关键词
App mobile terminal test [5] file writing and reading
Wechat payment -jsapi: code implementation (payment asynchronous callback, Chinese parameter solution)
UnityShader——MaterialCapture材质捕捉效果 (翡翠斧头)
App移动端测试【3】ADB命令
June to - -------
Expression of request header in different countries and languages
C language brush questions ~leetcode and simple questions of niuke.com
Download and install common programs using AUR
Microservices - load balancing ribbon
初试scikit-learn库
VC下Unicode和ANSI互转,CStringW和std::string互转
Custom annotation
How idea starts run dashboard