Today, let's share Jmeter Medium 2 Loop controller ,ForEach Controller and Loop Controller, There are still some differences in use .
ForEach Controller
ForEach Controller brief introduction
ForEach Controller It can be understood as an iterator (iterator), It is to traverse all the data that meet the current conditions , Can be used for Jmeter Parameterization in scripts .
Let's look directly at the picture , As shown below :
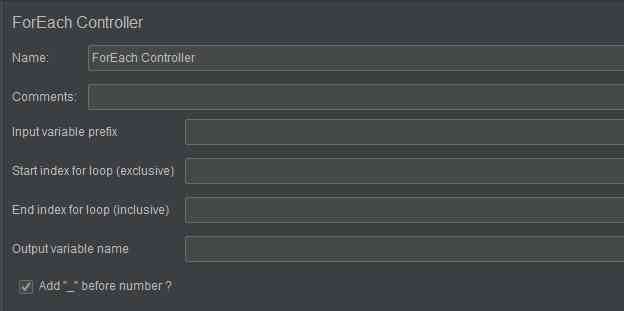
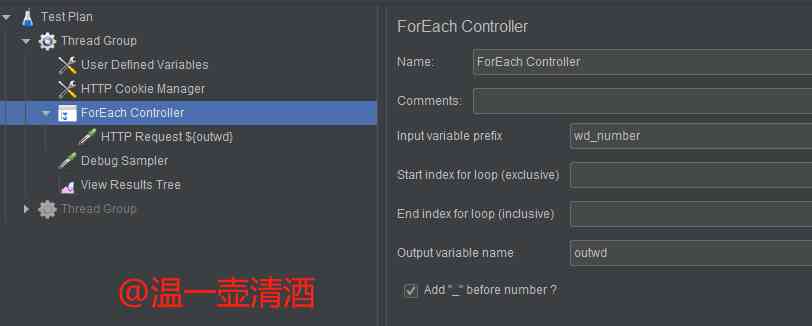
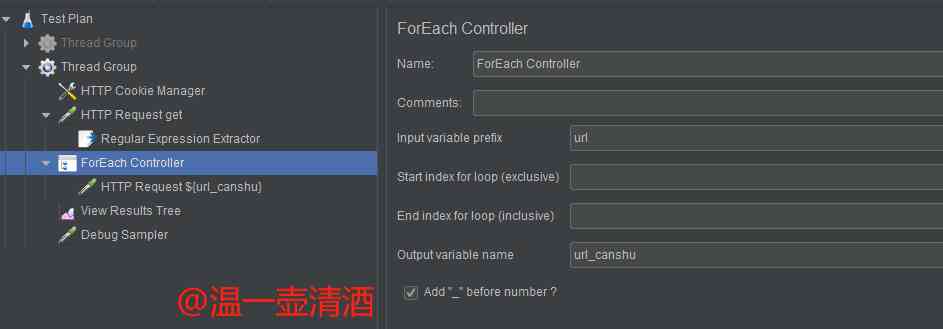
As shown above , Namely ForEach Controller Configuration interface , The interface has the following parameters , Explain one by one :
-
Name: Controller name , According to the user needs to fill in , You can leave it blank
-
Comments: Users can fill in the form of , You can leave it blank
-
Input variable prefix: Input variable prefix , Data sources :① Users can go to “ User defined variables ” Define a set of variables in , The loop controller can get the corresponding value of the variable from it , And then as a cyclic condition ;② The user can use the extracted parameters as loop conditions
-
Start index for loop(exclusive): Start loop field , Loop variable subscript starting point ( It doesn't contain )
-
End index for loop(inclusive): Loop variable subscript end point ( contain )
-
Output variable name: Output variable name , Variable name generated by loop controller , The parameter name filled in during reference is consistent with the output variable name
-
Add "_"before number?: Underline the number “_”, Whether to add variable prefix “_” As a separator
ForEach Controller Use
Let's look directly at the case ,ForEach Controller How to use . As mentioned above , The source of the variable , Taken from 2 In this case , Let's get to know one by one . But before the operation , Each has to have Jmeter Environment , In the past, you can refer to the configuration of the environment .
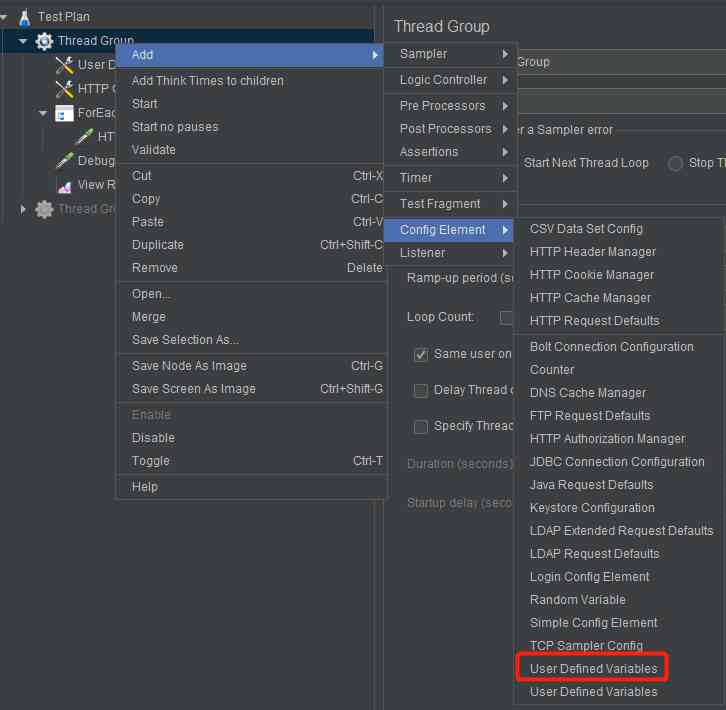
User defined variables
A user-defined variable is one of the configuration elements , Parameters can be defined , It is convenient for subsequent interfaces to be used directly , It's also a way of parameterization . The component addition entry is shown below :
Let's define a set of data , I'll take my own blog as an example , After configuring the parameters , As shown below :
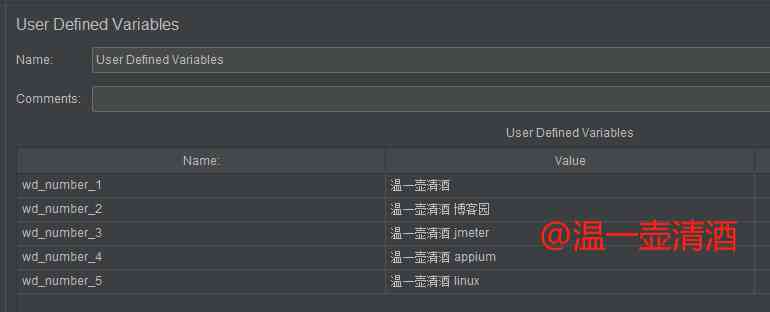
We can see that , Variable names have rules to follow , It's all about wd_number start . Maybe there's a question , Why do you set it like this , Keep looking down , You'll soon know what it does .
After the parameter source is configured , This needs to be done in ForEach Controller Configure the corresponding data , Keep up with the rhythm .
We were before ForEach Controller It is learned in the introduction that , One parameter is Input variable prefix Input variable prefix , The input here is wd_number. Because we're in components of user-defined variables , A set of data for configuration starts with this .
Start index for loop(exclusive) and End index for loop(inclusive) You can not configure , Not required data . If configured , It should be noted that , The starting bit is not included , It will be clear from the screenshot of the case .
Output variable name Output variables , This parameter is the reference name for subsequent parameters , For example, we usually use the regular extractor , Also need to define a variable , The same meaning .
Add "\_"before number This is to see the name of each user-defined variable , There are... Between variables _, You need to check , If not , Don't check it .
The configuration results are as follows :
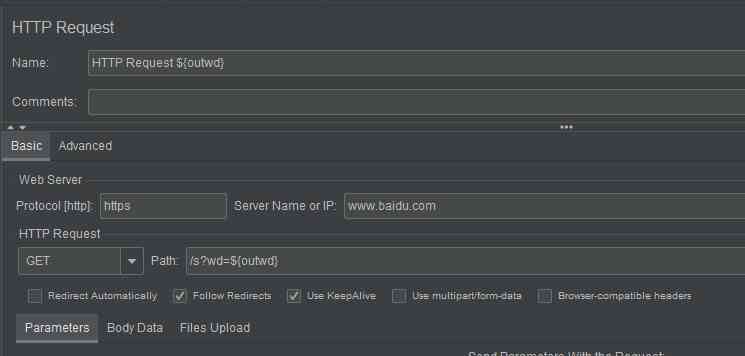
We'll use outwd Variables can be referenced to the corresponding interface parameters , As shown below :
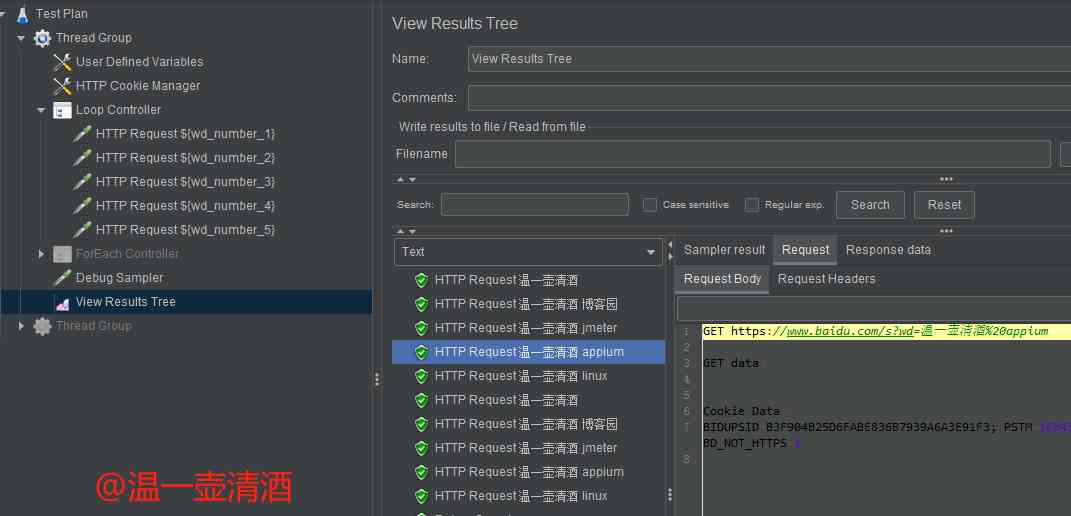
Up to now , The configuration steps have been completed , Let's run the script directly , Take a look at the running results , As shown below :
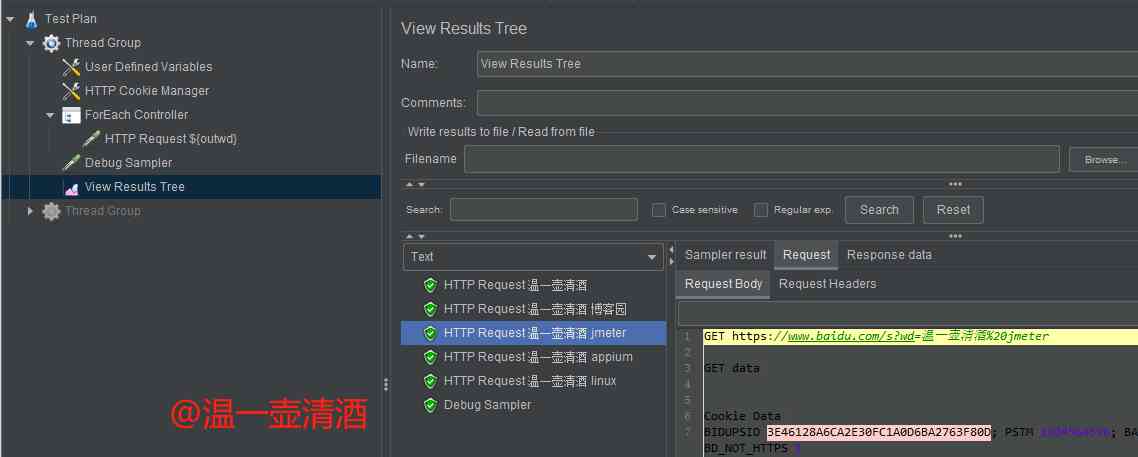
It can be seen from the running results that , We don't set the number of cycles , But why 5 Time , Because the variables we set are only 5 individual , And it is to replace the variable request interface in turn , It's just plain parameterization , Is it simple .
The result just now , We don't configure the start and end of the loop , Now we configure the upper start stop position , The configuration is as follows :

Run the script again , Let's see what the result is , As shown below :

From the results of the above operation, we can clearly see its role , The starting position is It doesn't contain Of , The ending position is contain , Configure to 1 and 3, So the running result is to take 2 and 3 To request the interface .
Extract parameters
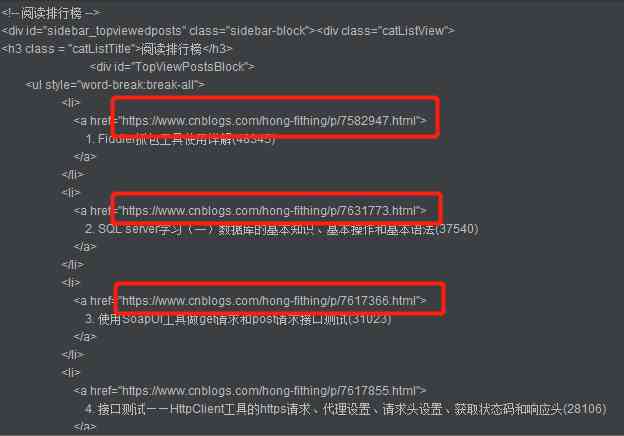
Take Blog as an example , Everyone's blog has three lists , Reading the leaderboard 、 The latest comments 、 Recommended rankings , It's just right for this demo.
You can look at the data , It's all one a label , As shown below :
Through user-defined variables , There must be ideas , How to realize the extraction parameters .
We use regularization , take 15 Data extraction , And configure the corresponding parameters to ForEach Controller that will do .
Let's start with regular matching , The knowledge of regularity is supplemented by itself , You can also refer to my previous blog posts , I won't repeat it today . We look at the data to be extracted , There are rules to follow , Add a regular extractor , And configure it as follows :
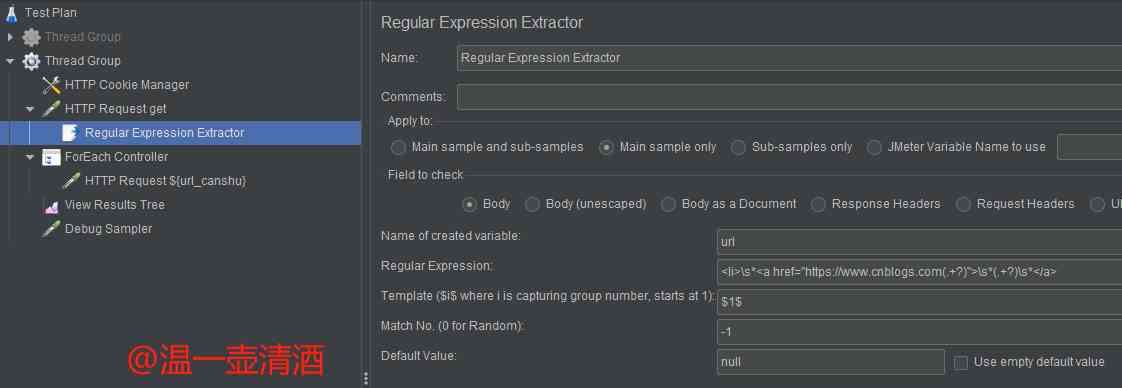
What needs to be noted here is ,Match No., We configure it here as -1, Because you need all the values that meet the criteria :
- Configure to 0, Represents a random value ;
- Configure as a positive integer , Represents the number of matched data ;
- Configure to -1, It means to get all the data matched .
After the regular configuration , You can run scripts , See if the data is extracted normally , Debugging is also part of the job of writing scripts .
Let's configure ForEach Controller, As shown below :
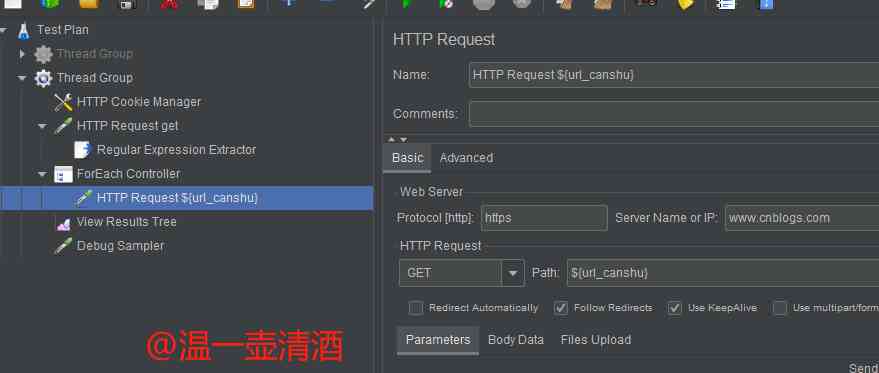
Then the output variable is referenced to the corresponding interface parameter , As shown below :
Let's run the script , Look at the overall effect , As shown below :
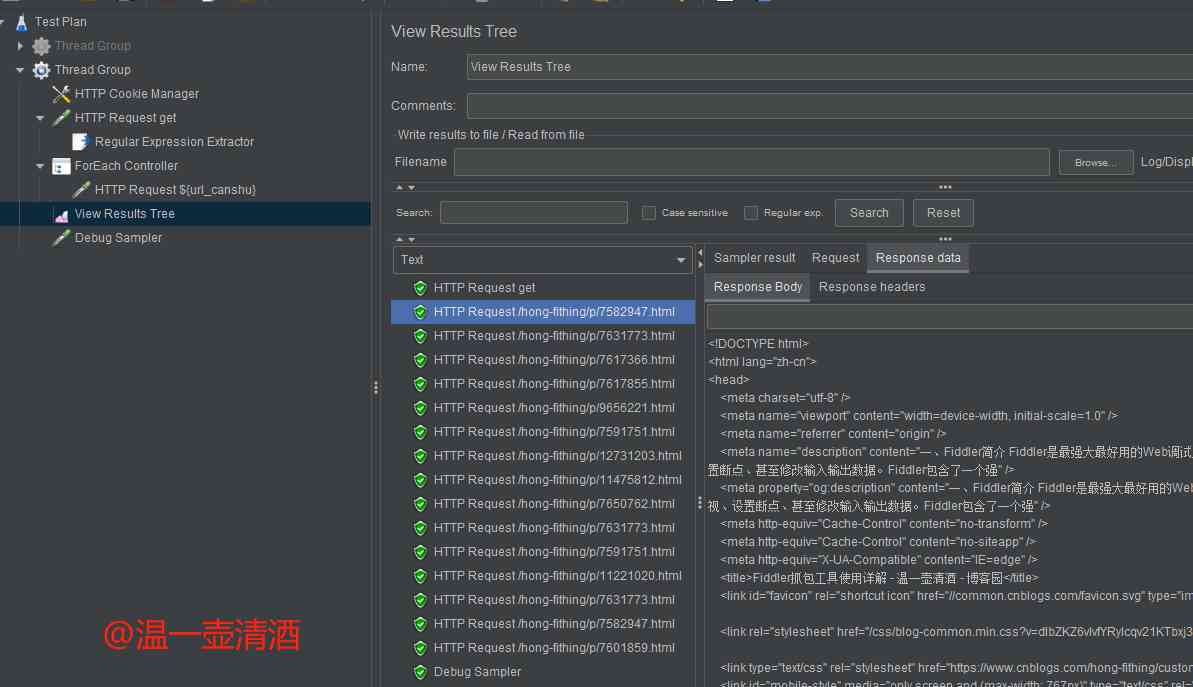
As shown above , Separately requested 15 Secondary interface , Is it convenient to use , Here we are , Is it possible to use it , Parameterization is that simple .
Loop Controller
Loop Controller brief introduction
Loop Controller, The function expansion is not strong , Can only be configured as infinite loops and specific number of cycles , It is mainly used to test the repeated call of interface .
Let's get to know , As shown below :

According to the picture above , To understand the parameter configuration :
- Loop Controller: Component name
- Name: Controller name
- Comments: notes
- Loop Count: Set the number of runs ,Infinite Check to indicate permanent operation
Loop Controller Use
Loop Controller It's easy to use , We can see the configuration interface clearly , It's nothing more than configuring the number of cycles , Or endless loops .
Specify the number of cycles
Let's look at the effect intuitively through the case , We configure the number of cycles to 2, And run the script , The running results are as follows :
We can see from the above figure that , The number of cycles is 2, Each interface calls 2 Time . For example, some businesses , The back-end interface has repeated call verification , It can be verified in this way .
Infinite loop
If it is configured as infinite loop , seeing the name of a thing one thinks of its function , That must be running scripts all the time , Unless it's stopped manually , The script stops running .
Okay , Today's 2 This is the end of this article , in summary , If it's used for parameterization , You will definitely use ForEach Controller.2 Kind of controller , Each has its own function , each takes what he needs , Hope to be helpful to the bloggers in need .