当前位置:网站首页>How to install and configure altaro VM backup for VMware vSphere
How to install and configure altaro VM backup for VMware vSphere
2022-07-03 05:19:00 【kevin20182019】
 Altaro Virtual machine backup Altaro Software Is a fast-growing developer of easy-to-use backup solutions , The solution is for SMB Customer , Focus on Microsoft Hyper-V Backup . But this will happen today (2015 year 9 month 9 Japan ) change ,Altaro announce Altaro VM Backup for VMware vSphere Full listing ! The complete press release can be found here , You can download a copy of the assessment here .
that , Let's quickly learn how to install and configure Altaro VM Backup、 Arrange some homework 、 Create and restore backups !
Hardware requirements Altaro VM The hardware requirements of the backup server are as follows :
processor : i5 Minimum or equivalent Memory : 75 MB Of RAM And extra 75 MB For each concurrent backup or restore job Operating system support This version supports VMware vSphere edition :
VMware vSphere 5.0、5.1、5.5 and 6.0 VMware vCenter 5.0、5.1、5.5 and 6.0 The backup server operating system version supported by this version :
window 2008 R2 windows server 2012 windows server 2012 R2 Windows 7(64 position ) Windows 8(64 position ) Windows 10(64 position ) Besides , To manage backup configurations and jobs from a separate machine , You can install on the following operating systems Altaro VM Backup Management software :
Windows Server 2008 R2、2012 and 2012 R2 Windows 7(64 position ) and 8(64 position ) install The installation part is very simple . After downloading the software , Run the executable .
Click next on the welcome page . Accept EULA. Select the destination folder or leave it as the default . Click Install to begin the installation process . When the installer is ready, click Finish , This will open the administration console . To configure When the installer is ready , You can continue to configure the software .
Select this computer and click Connect .Altaro Virtual machine backup 01 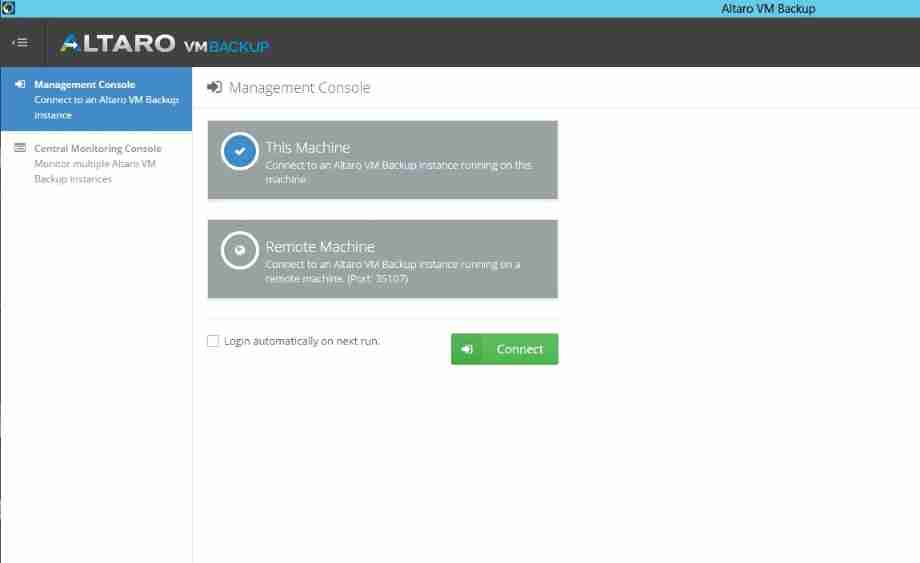 Select Add... From the dashboard Hyper-V/VMware host , And then choose VMware vCenter Server As the host type . Please note that , You can also add independent ESXi host .Altaro Virtual machine backup 02 Enter the you want to connect vCenter Server Of FQDN or IP Address , And provide the credentials of the administrator account . Press Test Connection Test settings , If it works , single click Next continue .Altaro VM Backup 03 Click Finish to close the wizard . Return to the location of Altaro VM Backup Quick settings in the upper left pane below the logo . Continue to the first 2 Step - Choose a location to store backups .
  In the add backup location wizard , Choose the options that apply to your environment . As far as I'm concerned , I have a local physical drive dedicated to backing up data .Altaro VM Backup 04 Select the drive and click next . here ,Altaro VM Backup Ready to schedule jobs and create backups !
Be careful : If you want to receive email notification , You can go to “ notice ” Configuration under pane SMTP The server .Altaro Virtual machine backup 08
Schedule backup jobs Select the schedule located under the backup location pane , Then click the add backup plan button located in the upper right corner of the backup plan pane . Select repeat mode 、 Backup time and offsite replication ( If configured ). Click save .Altaro Virtual machine backup 05 To put VM Add to this backup job , Just put the VM Drag and drop from the left pane to the right job . for example , In the screenshot below , I add all domain controllers to the backup job , You can see that they are listed under the backup plan .Altaro Virtual machine backup 06 Click save changes . The backup job will now be executed at a given time . You can track the progress of each backup job on the dashboard pane .Altaro Virtual machine backup 07
After the backup job is finished , You can go to Reports Under the Operation History Page to see the results .
Restore virtual machines from backup To restore from backup VM, Please follow the steps in the virtual machine Restore Wizard .
Click restore under virtual machine Select the location to recover from , And then click “ next step ”. Select the to restore VM, And then click Next.Altaro Virtual machine backup 10 Select the restore name 、 Restore host and place restored VM Data storage . Besides , Disable the network card to avoid IP Conflict . single click “ recovery ” Start the recovery process .Altaro Virtual machine backup 11 perhaps , Go to the dashboard to monitor the restore process . When the restore is ready , You should be in vCenter Server See the restored VM.
Recover files from backup To restore a single file , Please follow the steps in the file level Restore Wizard .
choice “ Step by step restore ” Under the “ File level restore ” Select the restore source and click next . Select the to restore from VM, Then click next . Select the backup version to restore , Then click next . Select virtual hard disk and partition in the left pane . Expand the file browser and select the file to restore . When you are finished, click next .Altaro Virtual machine backup 12 Select the extraction location and click Extract. The file will be extracted from the backup to the given location .
This summarizes how to VMware vSphere install and configure Altaro VM Backup. in my opinion , It is a reliable backup product , The interface is very fresh and intuitive , The requirements for software and hardware are extremely low . This is a good product , It is very suitable for small and medium-sized enterprises .
边栏推荐
- Installing altaro VM backup
- ES7 easy mistakes in index creation
- Calculation method of AUC
- Common methods of JS array
- C language program ideas and several commonly used filters
- Redis 击穿穿透雪崩
- "250000 a year is just the price of cabbage" has become a thing of the past. The annual salary of AI posts has decreased by 8.9%, and the latest salary report has been released
- Based on RFC 3986 (unified resource descriptor (URI): general syntax)
- Use posture of sudo right raising vulnerability in actual combat (cve-2021-3156)
- Congratulations to musk and NADELLA on their election as academicians of the American Academy of engineering, and Zhang Hongjiang and Fang daining on their election as foreign academicians
猜你喜欢

appium1.22.x 版本后的 appium inspector 需单独安装

cookie session jwt
酒店公共广播背景音乐-基于互联网+的酒店IP网络广播系统设计

Deep embedding and alignment of Google | protein sequences

Brief introduction of realsense d435i imaging principle

联想R7000显卡的拆卸与安装
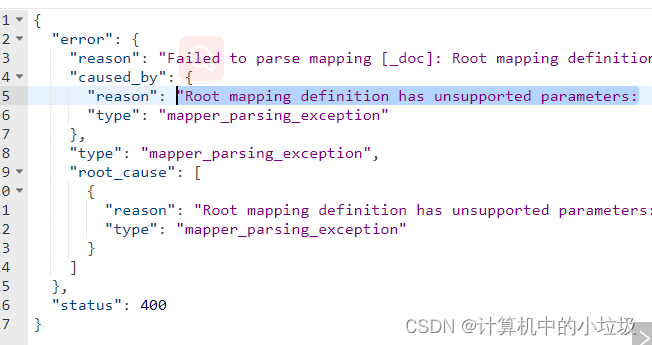
ES7 easy mistakes in index creation
Appium 1.22. L'Inspecteur appium après la version X doit être installé séparément

How to connect the network: Chapter 1 CSDN creation punch in

配置xml文件的dtd
随机推荐
Basic knowledge of reflection (detailed explanation)
(subplots usage) Matplotlib how to draw multiple subgraphs (axis field)
Get and monitor remote server logs
Audio Focus Series: write a demo to understand audio focus and audiomananger
Redis Introduction et explication des types de données
Go language interface learning notes
Calculation method of AUC
求质数的方法
About debugging the assignment of pagenum and PageSize of the formal parameter pageweb < T > (i.e. page encapsulation generic) in the controller
Gbase8s unique index and non unique index
Celebrate the new year together
JS dynamic table creation
Introduction to webrtc protocol -- an article to understand dtls, SRTP, srtcp
Detailed explanation of the output end (head) of yolov5 | CSDN creation punch in
[batch dos-cmd command - summary and summary] - CMD window setting and operation command - close CMD window and exit CMD environment (exit, exit /b, goto: EOF)
获取并监控远程服务器日志
JS scope
Dynamic programming - related concepts, (tower problem)
Transferring images using flask
leetcode452. Detonate the balloon with the minimum number of arrows