当前位置:网站首页>ELK分布式日志分析系统部署(华为云)
ELK分布式日志分析系统部署(华为云)
2022-07-05 18:43:00 【51CTO】
架构图
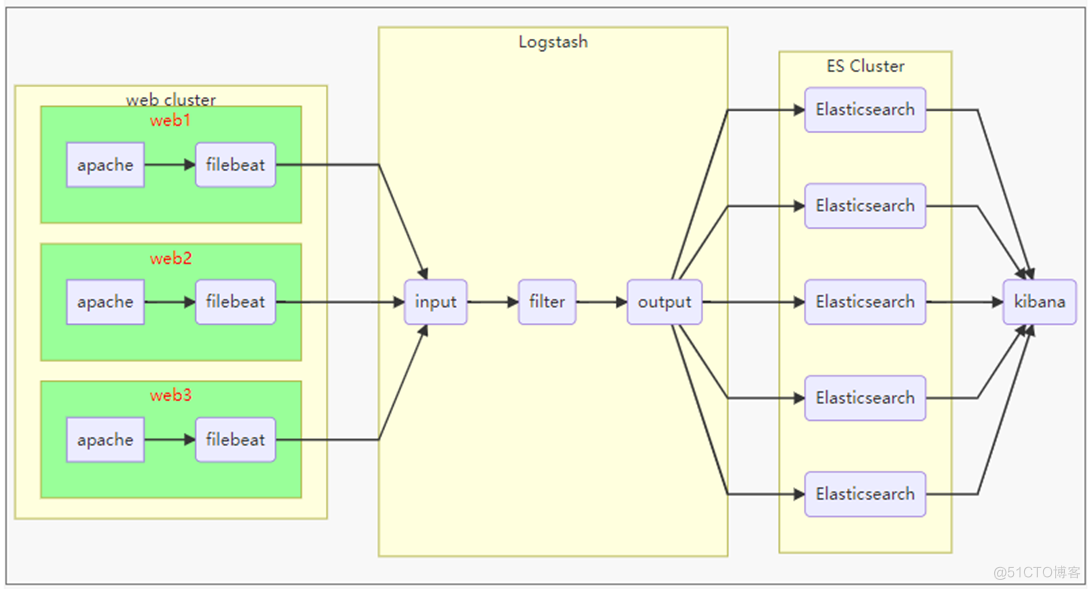
一、环境准备
1.主机清单
主机名 | IP地址 | 配置 |
es-0001 | 192.168.1.41 | 1cpu,1G内存,10G硬盘 |
es-0002 | 192.168.1.42 | 1cpu,1G内存,10G硬盘 |
es-0003 | 192.168.1.43 | 1cpu,1G内存,10G硬盘 |
es-0004 | 192.168.1.44 | 1cpu,1G内存,10G硬盘 |
es-0005 | 192.168.1.45 | 1cpu,1G内存,10G硬盘 |
Kibana | 192.168.1.46 | 1cpu,1G内存,10G硬盘 |
logstash | 192.168.1.47 | 2CPU、2G内存,10G硬盘 |
apache | 192.168.1.48 | 1PU、1G内存,10G硬盘 |
2.软件清单
- elasticsearch-2.3.4.rpm
- logstash-2.3.4-1.noarch.rpm
- kibana-4.5.2-1.x86_64.rpm
- filebeat-1.2.3-x86_64.rpm
3.插件清单:
- [x] elasticsearch插件:
软件包 | 描述 |
| bigdesk-master.zip | 是ES集群的监控工具 |
| elasticsearch-kopf-master.zip | 一个ElasticSearch的管理工具,提供对ES集群操作的API |
| elasticsearch-head-master.zip | 展现ES集群的# 显示帮助信息 ?help拓扑结构,可进行索引(index)、节点(node)级别的操作 |
4.华为云跳板机
配置yum软件仓库:
       [[email protected] <sub>]

       # rm -rf /etc/yum.repos.d/*.repo


[[email protected] </sub>]

       # curl -o /etc/yum.repos.d/CentOS-Base.repo http://mirrors.myhuaweicloud.com/repo/CentOS-Base-7.repo


[[email protected] <sub>]

       # yum clean all


[[email protected] </sub>]

       # yum makecache


[[email protected] <sub>]

       # yum install -y net-tools lftp rsync psmisc vim-enhanced tree vsftpd bash-completion createrepo lrzsz iproute


[[email protected] </sub>]

       # mkdir /var/ftp/localrepo


[[email protected] <sub>]

       # cd /var/ftp/localrepo


[[email protected] </sub>]

       # createrepo .


[[email protected] <sub>]

       # createrepo --update . # 更新


[[email protected] </sub>]

       # systemctl enable --now vsftpd


[[email protected] ~]

       # cp -a elk /var/ftp/localrepo/elk


[[email protected] elk]

       # cd /var/ftp/localrepo/


[[email protected] localrepo]

       # createrepo --update .
- 1.
- 2.
- 3.
- 4.
- 5.
- 6.
- 7.
- 8.
- 9.
- 10.
- 11.
- 12.
- 13.
- 14.
优化系统服务
       [[email protected] <sub>]

       # systemctl stop postfix


[[email protected] </sub>]

       # yum remove -y postfix firewalld-*


[[email protected] <sub>]

       # yum install chrony


[[email protected] </sub>]

       # vim /etc/chrony.conf


       # 注释掉 server 开头行,添加下面的配置


server ntp.myhuaweicloud.com minpoll

       4 maxpoll

       10 iburst


[[email protected] <sub>]

       # systemctl enable --now chronyd


[[email protected] </sub>]

       # chronyc sources -v //验证配置结果 ^* 代表成功


[[email protected] <sub>]

       # vim /etc/cloud/cloud.cfg


       # manage_etc_hosts: localhost //注释掉这一行


[[email protected] </sub>]

       # reboot
- 1.
- 2.
- 3.
- 4.
- 5.
- 6.
- 7.
- 8.
- 9.
- 10.
- 11.
安装配置ansible管理主机
       [[email protected] <sub>]

       # cp -a ansible_centos7 /var/ftp/localrepo/ansible


[[email protected] </sub>]

       # cd /var/ftp/localrepo


[[email protected] <sub>]

       # createrepo --update .


[[email protected] </sub>]

       # vim /etc/yum.repos.d/local.repo


  [local_repo]


       name

       =CentOS-

       $releasever – Localrepo


       baseurl

       =ftp://192.168.1.252/localrepo


       enabled

       =

       1


       gpgcheck

       =

       0


[[email protected] <sub>]

       # yum makecache


[[email protected] </sub>]

       # yum install -y ansible //去华为云网页下载秘钥,并上传秘钥到跳板机


[[email protected] <sub>]

       # mv luck.pem /root/.ssh/id_rsa


[[email protected] </sub>]

       # chmod 0400 /root/.ssh/id_rsa
- 1.
- 2.
- 3.
- 4.
- 5.
- 6.
- 7.
- 8.
- 9.
- 10.
- 11.
- 12.
- 13.
5.华为云模板机(镜像)配置
       [[email protected] <sub>]

       # passwd root


[[email protected] </sub>]

       # rm -rf /etc/yum.repos.d/*.repo


[[email protected] <sub>]

       # curl -o /etc/yum.repos.d/CentOS-Base.repo http://mirrors.myhuaweicloud.com/repo/CentOS-Base-7.repo


[[email protected] </sub>]

       # vim /etc/yum.repos.d/local.repo


[local_repo]


       name

       =CentOS-

       $releasever – Localrepo


       baseurl

       =ftp://192.168.1.252/localrepo


       enabled

       =

       1


       gpgcheck

       =

       0


[[email protected] <sub>]

       # yum clean all


[[email protected] </sub>]

       # yum makecache


[[email protected] <sub>]

       # yum repolist


[[email protected] </sub>]

       # yum install -y net-tools lftp rsync psmisc vim-enhanced tree lrzsz bash-completion iproute
- 1.
- 2.
- 3.
- 4.
- 5.
- 6.
- 7.
- 8.
- 9.
- 10.
- 11.
- 12.
- 13.
优化系统服务
       [[email protected] <sub>]

       # systemctl stop postfix atd tuned


[[email protected] </sub>]

       # yum remove -y postfix at audit tuned kexec-tools firewalld-*


[[email protected] <sub>]

       # yum install chrony


[[email protected] </sub>]

       # vim /etc/chrony.conf


       # 注释掉 server 开头行,添加下面的配置


 server ntp.myhuaweicloud.com minpoll

       4 maxpoll

       10 iburst


[[email protected] <sub>]

       # systemctl enable --now chronyd


[[email protected] </sub>]

       # chronyc sources -v


       # 验证配置结果 ^* 代表成功


[[email protected] <sub>]

       # vim /etc/cloud/cloud.cfg


       # manage_etc_hosts: localhost 注释掉这一行


[[email protected] </sub>]

       # yum clean all


[[email protected] ~]

       # poweroff
- 1.
- 2.
- 3.
- 4.
- 5.
- 6.
- 7.
- 8.
- 9.
- 10.
- 11.
- 12.
- 13.
1.主机名解析(相互ping通)
二、【部署Elasticsearch】(所有es节点)
A。部署elasticsearch服务
安装软件
修改配置
       # vim /etc/elasticsearch/elasticsearch.yml


       17| cluster.name: my-ES        //配置集群名称


       23|

       node.name: es1        //当前主机名称


       55| network.host:0.0.0.0      //监听所有地址/本机IP


       68| discovery.zen.ping.unicast.hosts:  [

       "es1",

       "es2",

       "es3"]    //声明集群成员(无需全部)


或者


       # sed -i '/cluster.name/s/# cluster.name/cluster.name/' /etc/elasticsearch/elasticsearch.yml //去掉注释


       # sed -i '/cluster.name/s/my-application/my-ES/' /etc/elasticsearch/elasticsearch.yml


       # sed -i '/node.name/s/# node.name: node-1/node.name: es-0002/' /etc/elasticsearch/elasticsearch.yml


       # sed -i '/network.host/s/# network.host: 192.168.0.1/network.host: 0.0.0.0/' /etc/elasticsearch/elasticsearch.yml


       # sed -i '/discovery.zen.ping/a discovery.zen.ping.unicast.hosts: ["es-0001", "es-0002"]' /etc/elasticsearch/elasticsearch.yml //行下增加配置
- 1.
- 2.
- 3.
- 4.
- 5.
- 6.
- 7.
- 8.
- 9.
- 10.
- 11.
- 12.
- 13.
- 14.
启动服务
服务验证
       # ss -ntulp | grep 9200


       # ss -ntulp | grep 9300


       # curl http://es-0001:9200/


       # curl http://192.168.1.41:9200/_cluster/health?pretty


{


       "cluster_name" :

       "my-ES",     //集群标识/名称


       "status" :

       "green",


       "timed_out" :

       false,


       "number_of_nodes" :

       3,      //集群成员数量


       "number_of_data_nodes" :

       3,   //集群有多少个节点


       "active_primary_shards" :

       0,


       "active_shards" :

       0,


       "relocating_shards" :

       0,


       "initializing_shards" :

       0,


       "unassigned_shards" :

       0,


       "delayed_unassigned_shards" :

       0,


       "number_of_pending_tasks" :

       0,


       "number_of_in_flight_fetch" :

       0,


       "task_max_waiting_in_queue_millis" :

       0,


       "active_shards_percent_as_number" :

       100.0


}


cluster:集群


health:健康
- 1.
- 2.
- 3.
- 4.
- 5.
- 6.
- 7.
- 8.
- 9.
- 10.
- 11.
- 12.
- 13.
- 14.
- 15.
- 16.
- 17.
- 18.
- 19.
- 20.
- 21.
- 22.
- 23.
- 24.
B.插件部署语应用
插件装在哪一台机器上,只能在哪台机器上使用
       本地安装用file;远程安装用ftp。


       # /usr/share/elasticsearch/bin/plugin install file:///root/file/bigdesk-master.zip


       # /usr/share/elasticsearch/bin/plugin install file:///root/file/elasticsearch-kopf-master.zip


       # /usr/share/elasticsearch/bin/plugin install file:///root/file/elasticsearch-head-master.zip


       # /usr/share/elasticsearch/bin/plugin list //查看安装好的插件


Installed plugins

       in /usr/share/elasticsearch/plugins:


       - kopf


       - bigdesk


       - head
- 1.
- 2.
- 3.
- 4.
- 5.
- 6.
- 7.
- 8.
- 9.
访问插件
1、华为云绑定弹性公网IP给 es-0005 节点
2、http://弹性公网IP:9200/_plugin/插件名称 [bigdesk|head|kopf]
http://公网IP:9200/\_plugin/kopf
http://公网IP:9200/\_plugin/head
http://公网IP:9200/\_plugin/bigdesk
http://公网IP/info.php //请求方法
Elasticsearch基本操作
查询_cat方法
       [[email protected] <sub>]

       # curl -XGET http://es-0001:9200/_cat/ # 查询支持的关键字


[[email protected] </sub>]

       # curl -XGET http://es-0001:9200/_cat/master # 查具体的信息


[[email protected] <sub>]

       # curl -XGET http://es-0001:9200/_cat/master?v # 显示详细信息 ?v


[[email protected] </sub>]

       # curl -XGET http://es-0001:9200/_cat/master?help # 显示帮助信息 ?help
- 1.
- 2.
- 3.
- 4.
创建索引
指定索引的名称,指定分片数量,指定副本数量
创建索引使用 PUT 方法,创建完成以后通过 head 插件验证
       [[email protected] ~]

       # curl -XPUT http://es-0001:9200/tedu -d \


       '{


        "settings":{ //创建


        "index":{ //索引


        "number_of_shards": 5, //分片数量


        "number_of_replicas": 1 //副本数量


        }


        }


       }'


相当于建了一个数据库


       # curl -XGET http://es-0001:9200/_cat/indices?v //查看索引详细信息


浏览器访问:http://122.9.96.62:9200/_plugin/head/    的变化,块深的为源数据,浅的为副本
- 1.
- 2.
- 3.
- 4.
- 5.
- 6.
- 7.
- 8.
- 9.
- 10.
- 11.
- 12.

增加数据
查询数据
修改数据
       [[email protected] ~]

       # curl -XPOST http://es-0001:9200/tedu/teacher/1/_update -d \


       '{


        "doc": {


        "年代": "公元701"


        }


       }'
- 1.
- 2.
- 3.
- 4.
- 5.
- 6.
删除数据
       [[email protected] <sub>]

       # curl -XDELETE http://es-0001:9200/tedu/teacher/1 //删除一条


[[email protected] </sub>]

       # curl -XDELETE http://es-0001:9200/tedu //删除索引
- 1.
- 2.
三.Kibana部署
上传kibana-4.5.2-1.x86_64.rpm
服务启动/验证
访问测试
导入日志数据
拷贝云盘 public/elk/logs.jsonl.gz 到跳板机
       [[email protected] ~]

       # gunzip logs.jsonl.gz


       # curl -XPOST http://192.168.1.41:9200/_bulk --data-binary @logs.jsonl //需等几分钟
- 1.
- 2.
导入成功:

配置kibana,通配符

修改时间与日志一致

【logstash】
安装logstash
插件与调试格式
使用json格式字符串测试 {"a":"1", "b":"2","c":"3"}
边栏推荐
- Use file and directory properties and properties
- How to write good code defensive programming
- MySQL优化六个点的总结
- Interviewer: what is the difference between redis expiration deletion strategy and memory obsolescence strategy?
- 视频融合云平台EasyCVR增加多级分组,可灵活管理接入设备
- Idea configuring NPM startup
- 小程序 修改样式 ( placeholder、checkbox的样式)
- 基于FPGA的超声波测距
- 数学分析_笔记_第9章:曲线积分与曲面积分
- Quickly generate IPA package
猜你喜欢
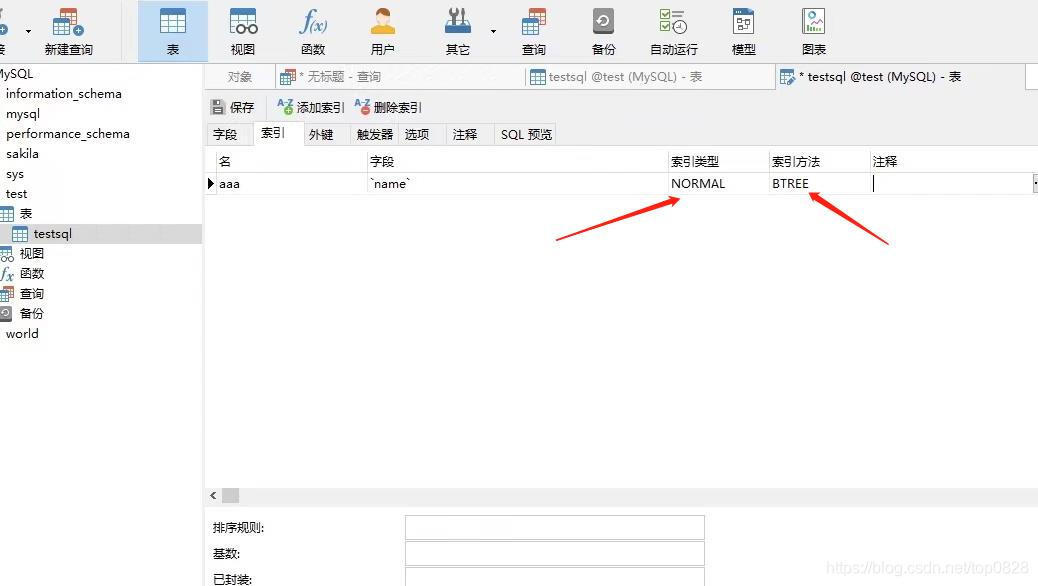
MySQL数据库索引教程(超详细)
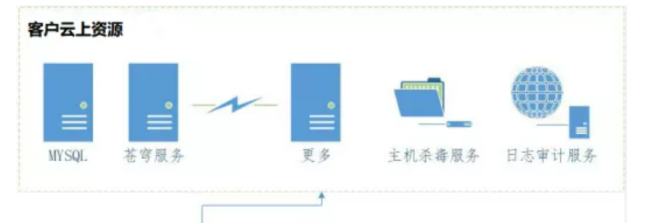
Tianyi cloud understands enterprise level data security in this way
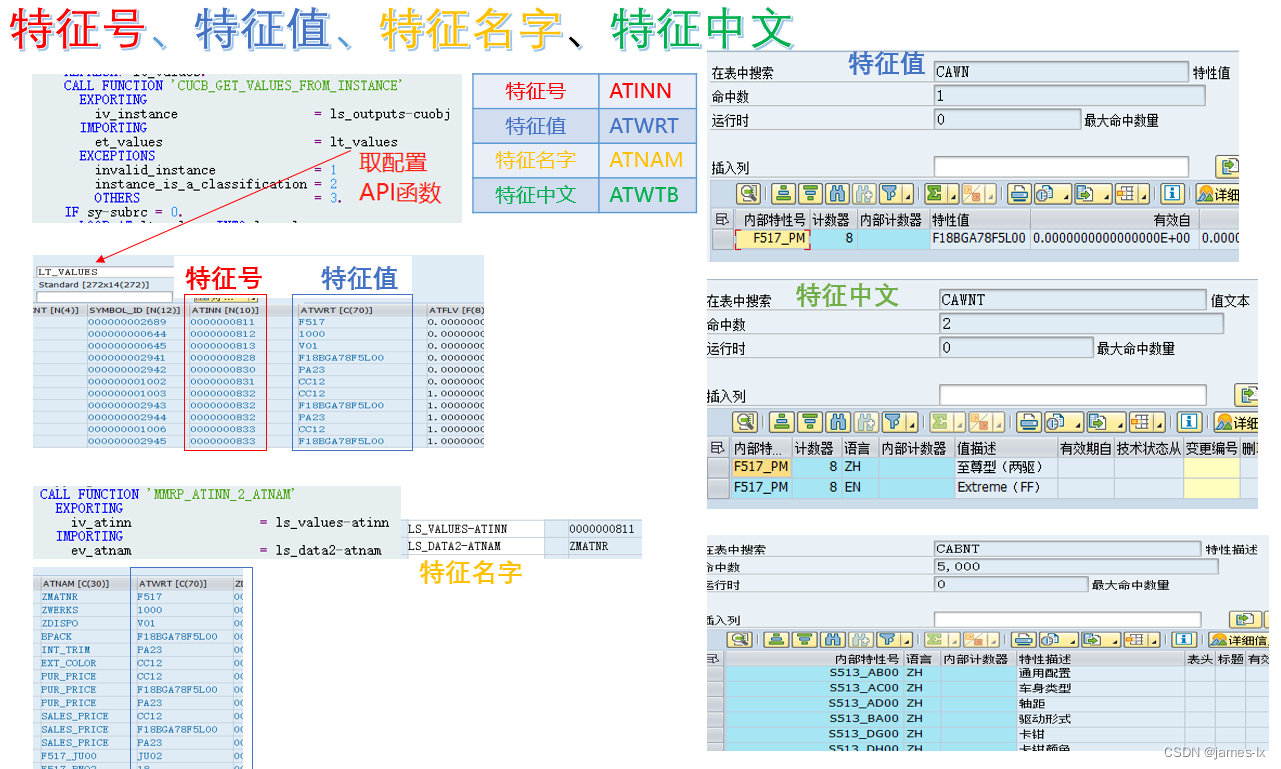
SAP feature description
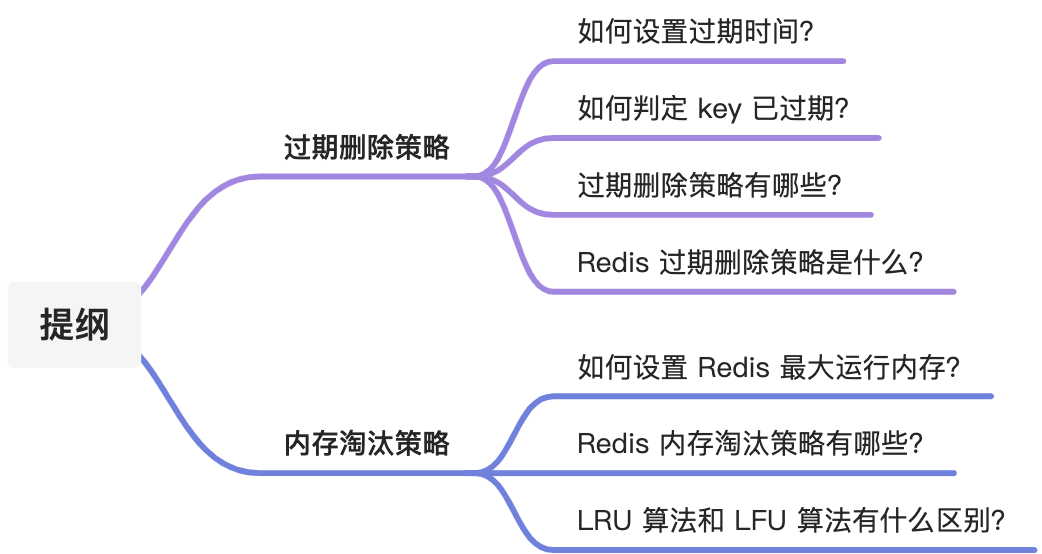
Interviewer: what is the difference between redis expiration deletion strategy and memory obsolescence strategy?
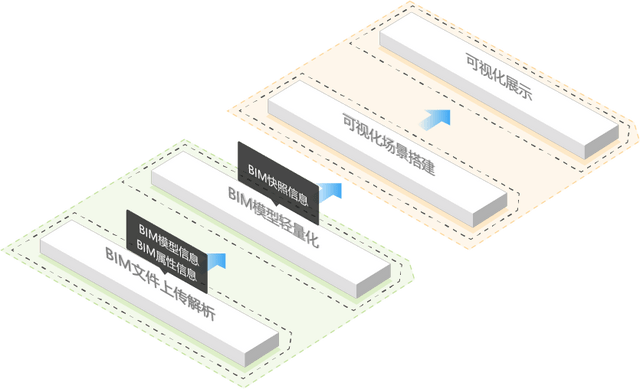
图扑软件数字孪生 | 基于 BIM 技术的可视化管理系统

A cloud opens a new future of smart transportation

技术分享 | 接口测试价值与体系
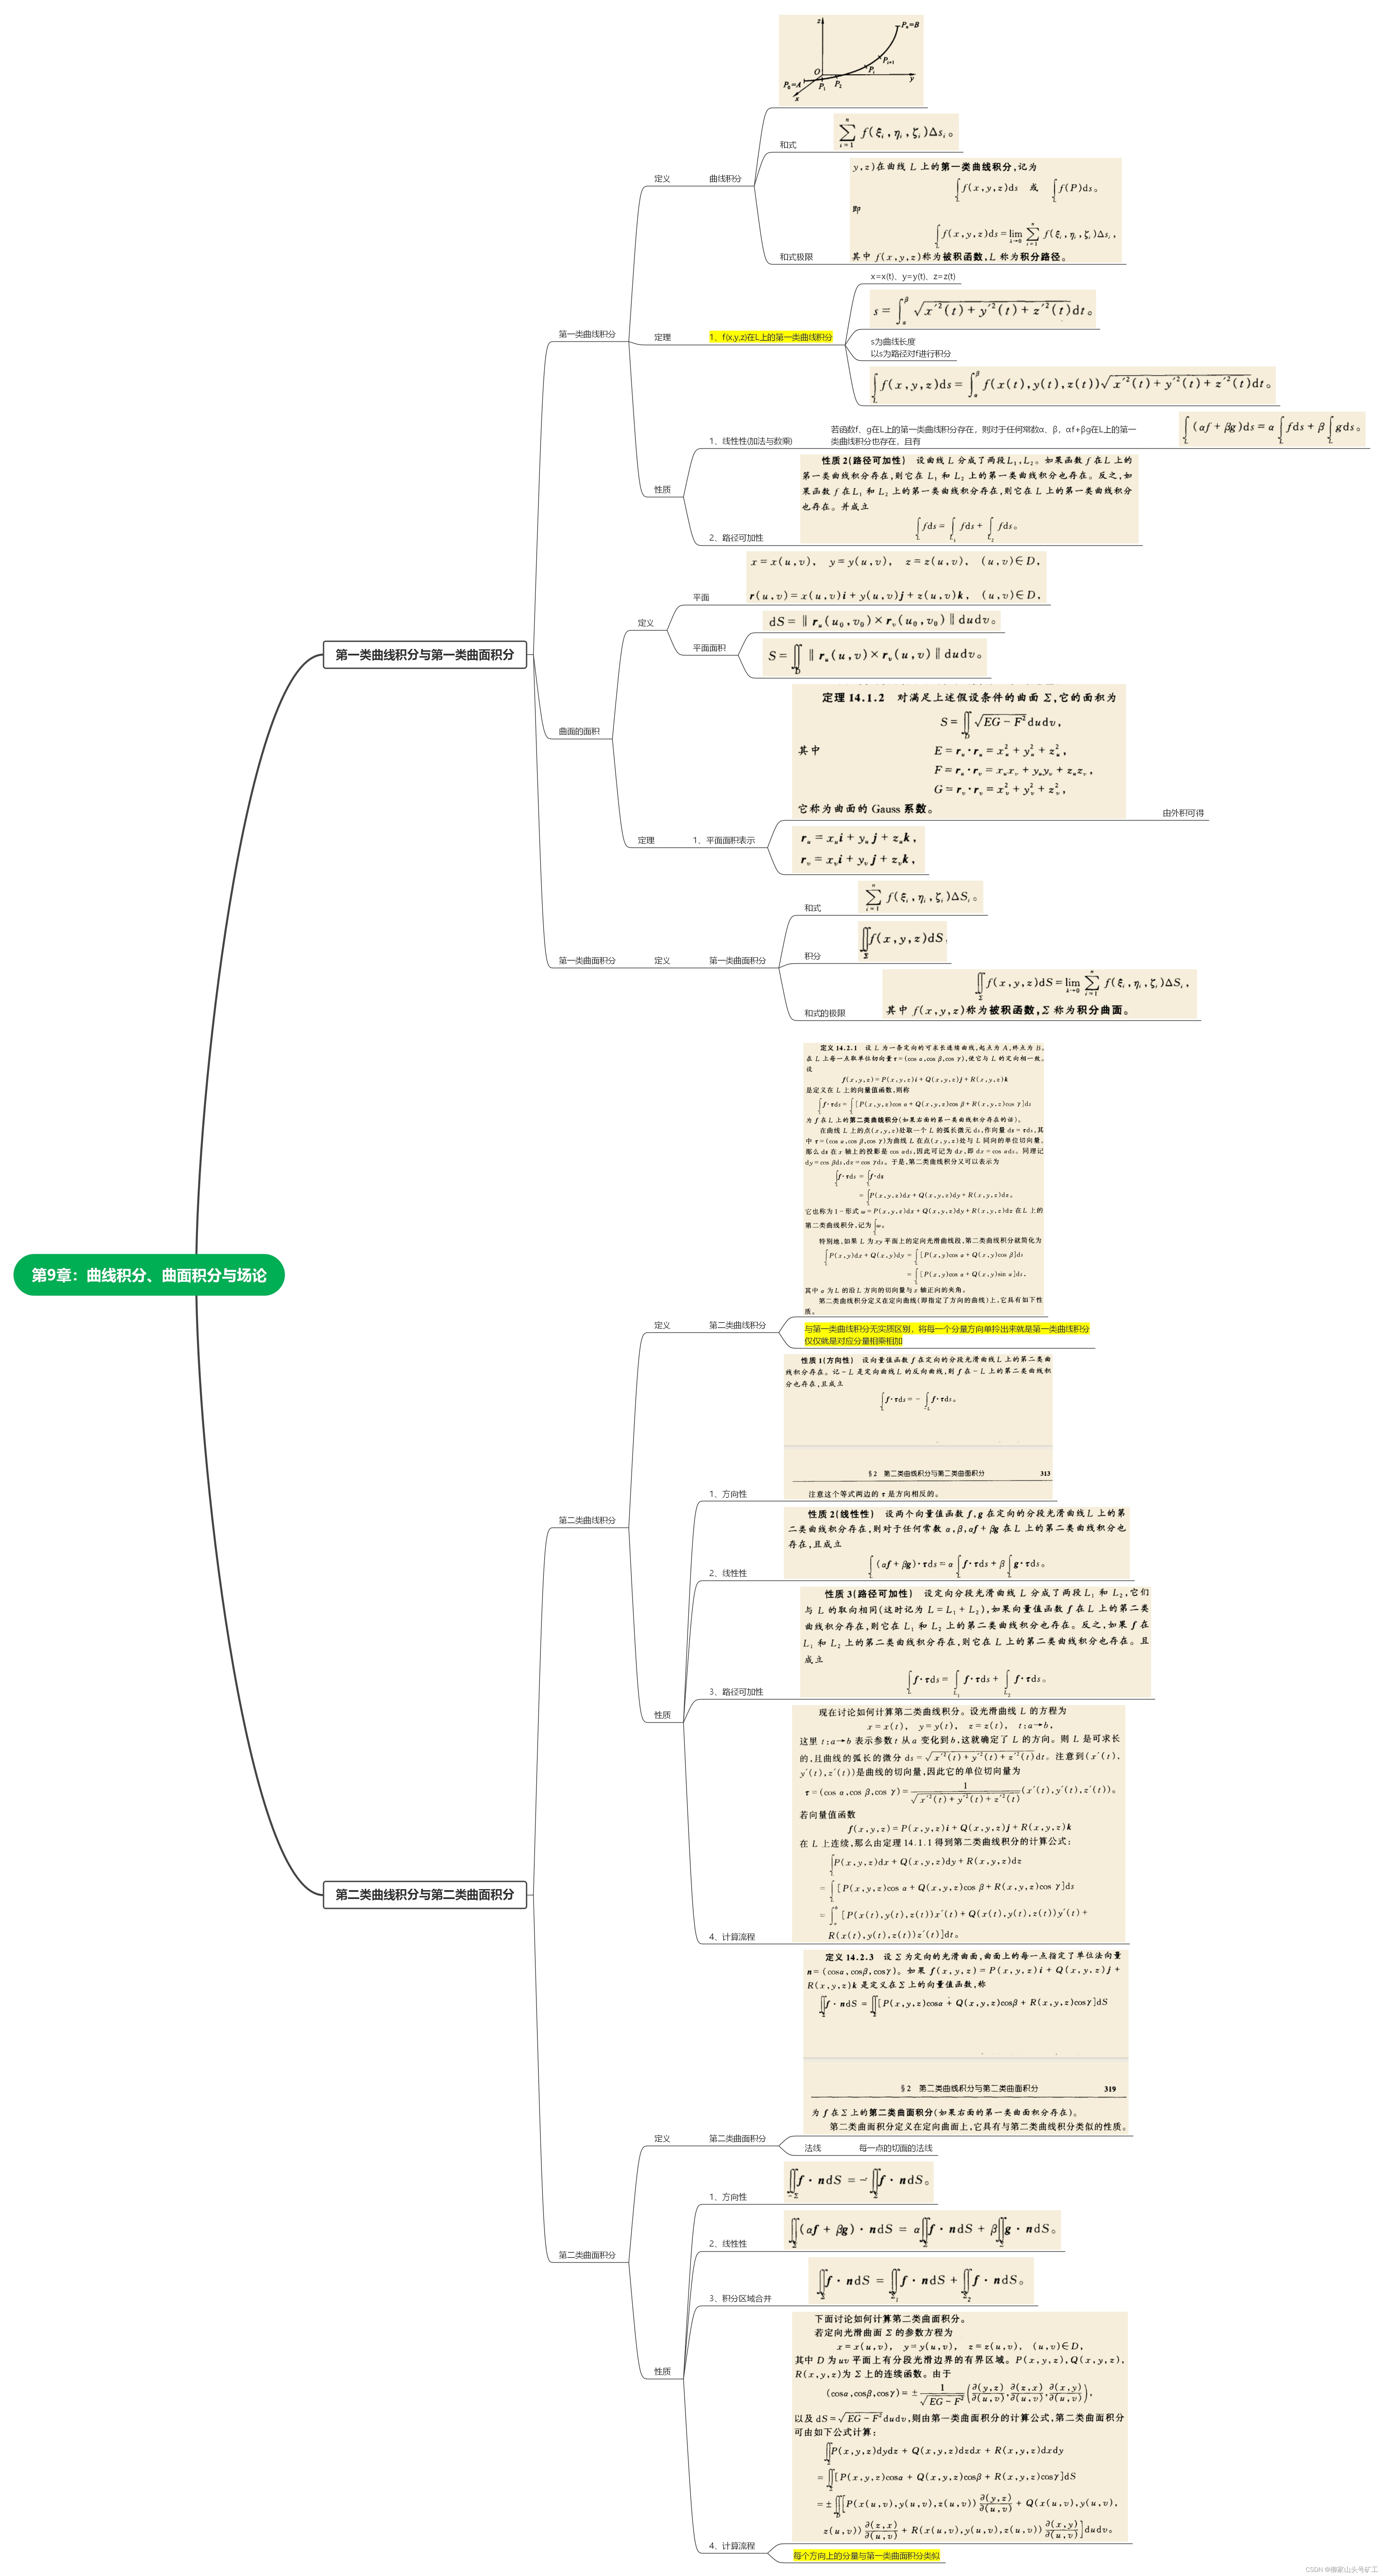
数学分析_笔记_第9章:曲线积分与曲面积分
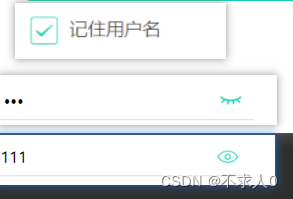
Applet modification style (placeholder, checkbox style)
Oracle Chinese sorting Oracle Chinese field sorting
随机推荐
Windows Oracle open remote connection Windows Server Oracle open remote connection
The road of enterprise digital transformation starts from here
5. 数据访问 - EntityFramework集成
C language makes it easy to add, delete, modify and check the linked list "suggested collection"
Various pits of vs2017 QT
潘多拉 IOT 开发板学习(HAL 库)—— 实验8 定时器中断实验(学习笔记)
数学分析_笔记_第9章:曲线积分与曲面积分
MySQL数据库索引教程(超详细)
Blue sky drawing bed Apple quick instructions
Tupu software digital twin smart wind power system
2022 latest intermediate and advanced Android interview questions, [principle + practice + Video + source code]
Windows Oracle 开启远程连接 Windows Server Oracle 开启远程连接
cf:B. Almost Ternary Matrix【對稱 + 找規律 + 構造 + 我是構造垃圾】
AI表现越差,获得奖金越高?纽约大学博士拿出百万重金,悬赏让大模型表现差劲的任务
尚硅谷尚优选项目教程发布
The easycvr authorization expiration page cannot be logged in. How to solve it?
Low code practice of xtransfer, a cross-border payment platform: how to integrate with other medium-sized platforms is the core
Cf:b. almost Terry matrix [symmetry + finding rules + structure + I am structural garbage]
R language uses lubridate package to process date and time data
All you want to know about clothing ERP is here