当前位置:网站首页>2020-11-05
2020-11-05
2020-11-08 08:54:00 【osc_4isxawz4】
基于Wemos D1避障WiFi小车及智能垃圾桶设计
一、实验器材
| 主控芯片 | Wemos D1 |
|---|---|
| 其他器材 | HC-SR04超声波、L9110s电机、ESP82660WiFi模块、蜂鸣器 |
| 所需设备 | TCP |
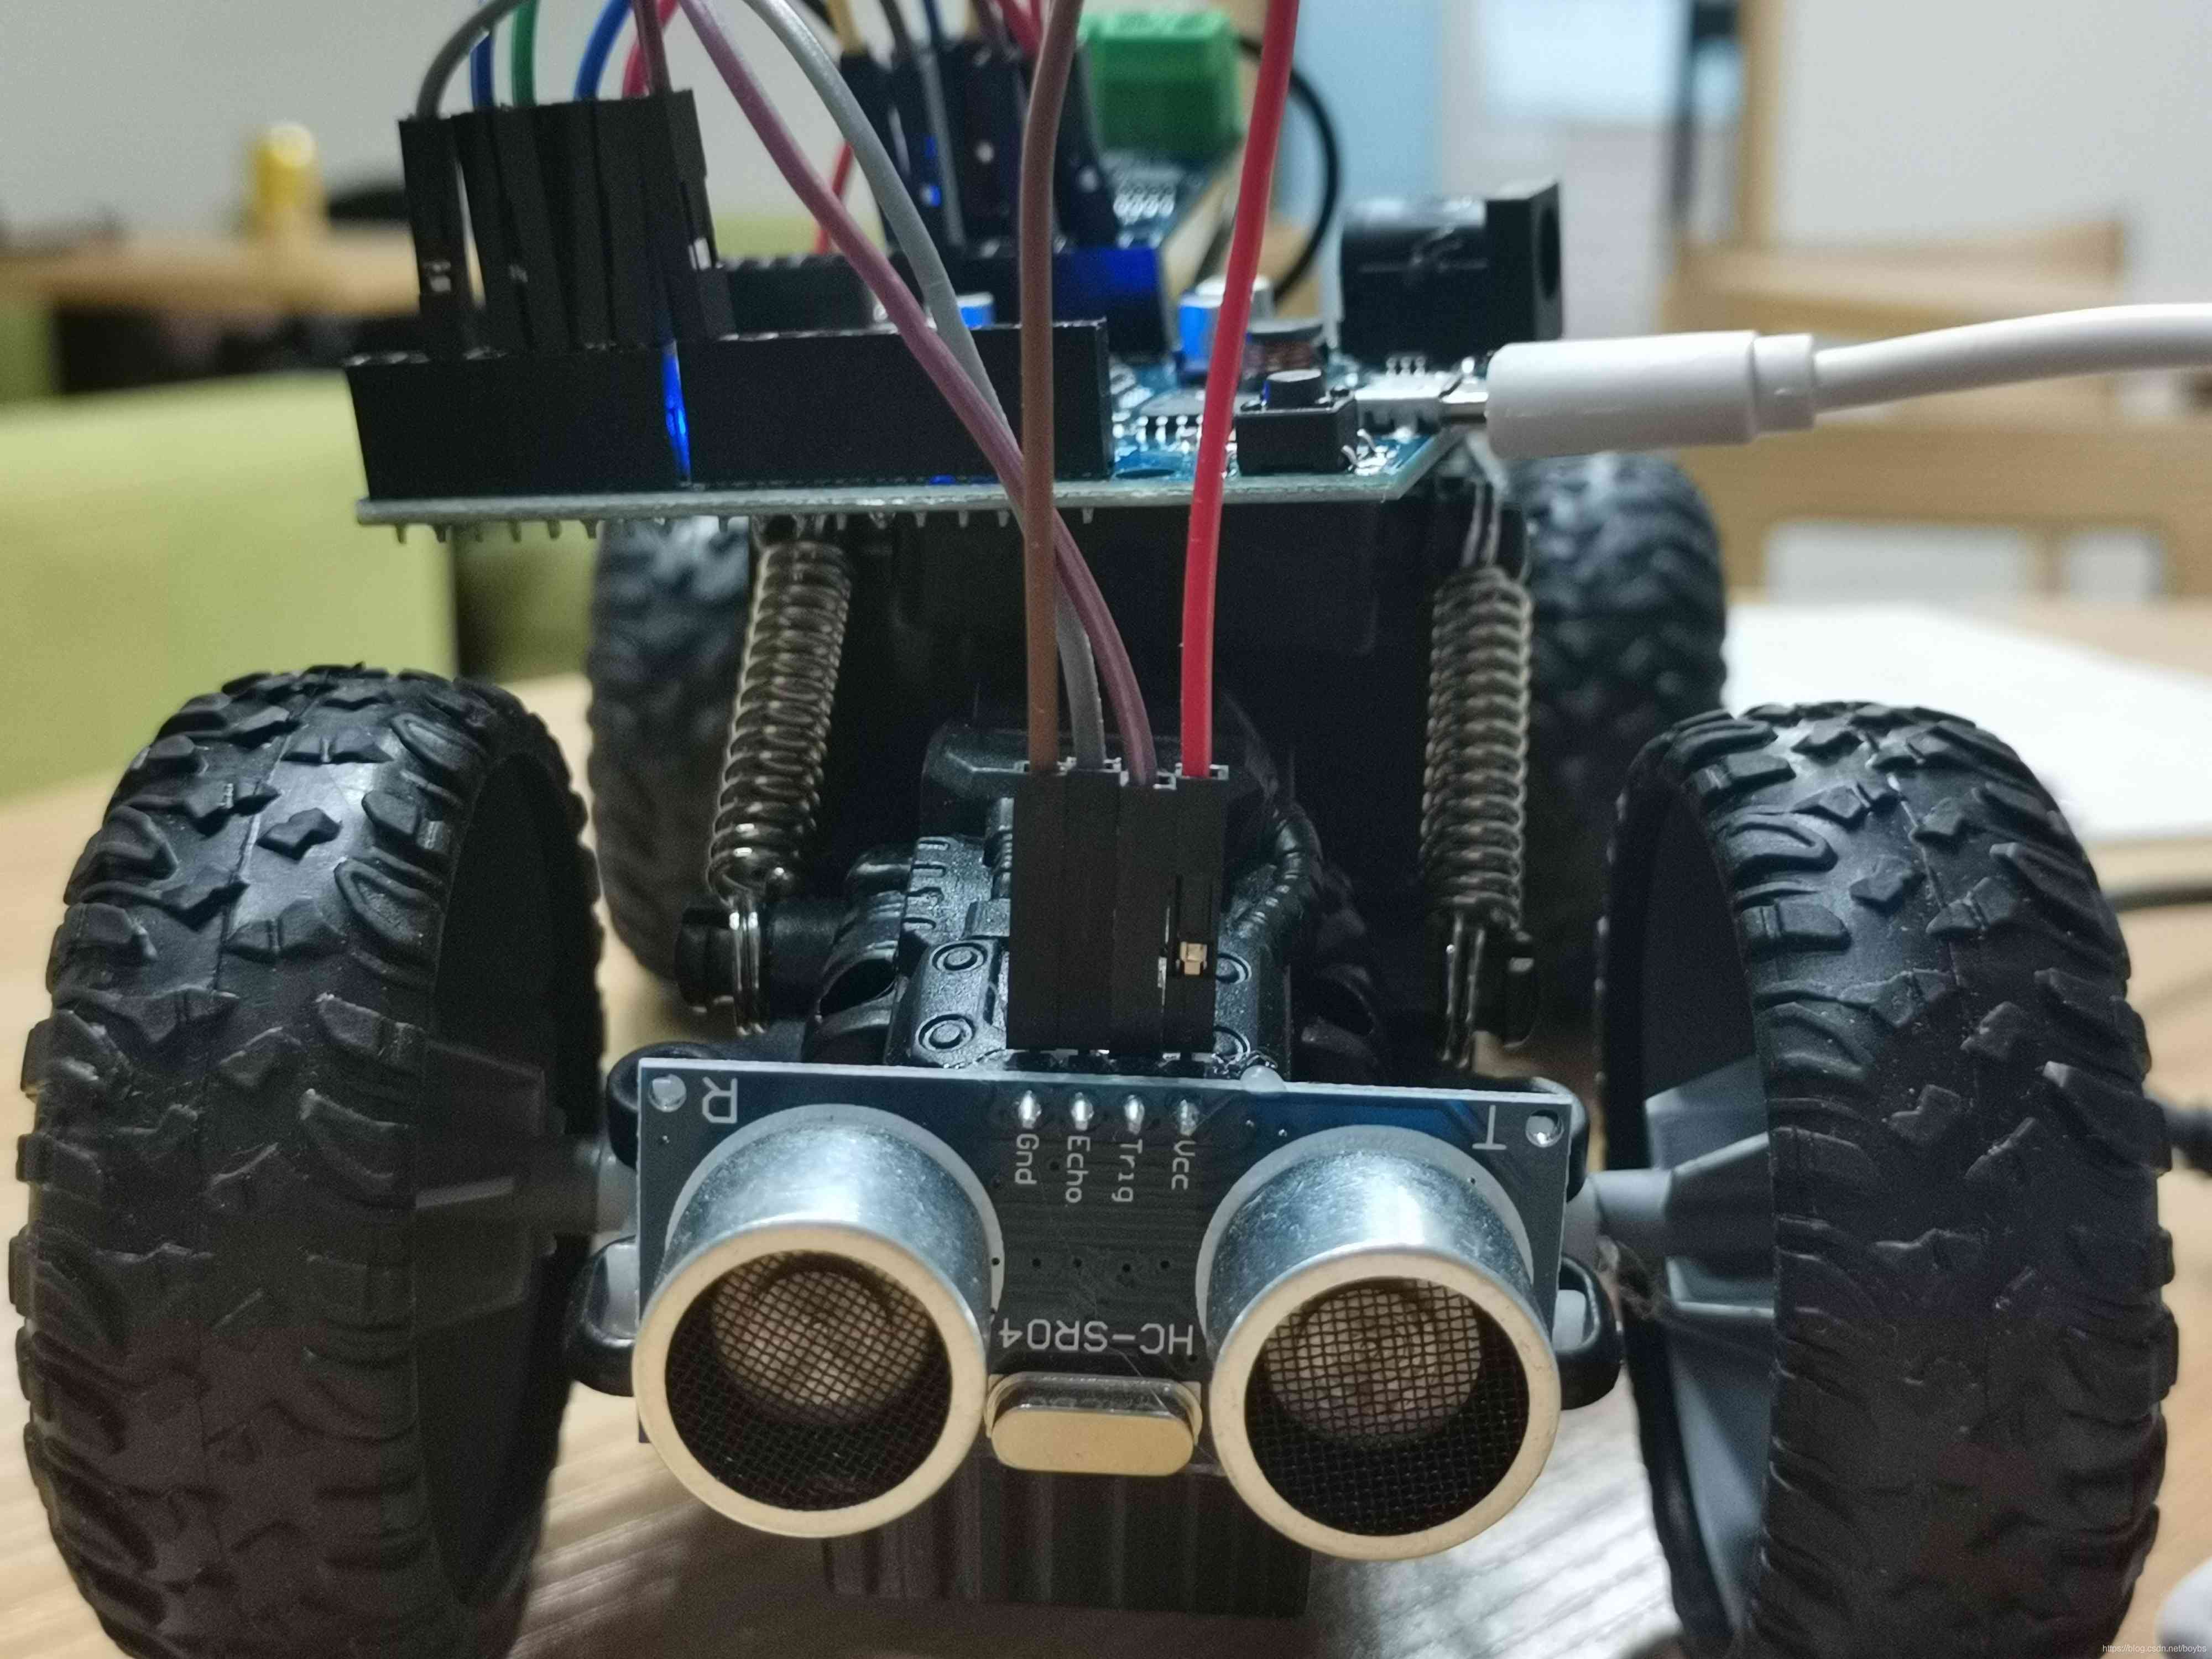
二、效果展示
图1.
三、具体操作
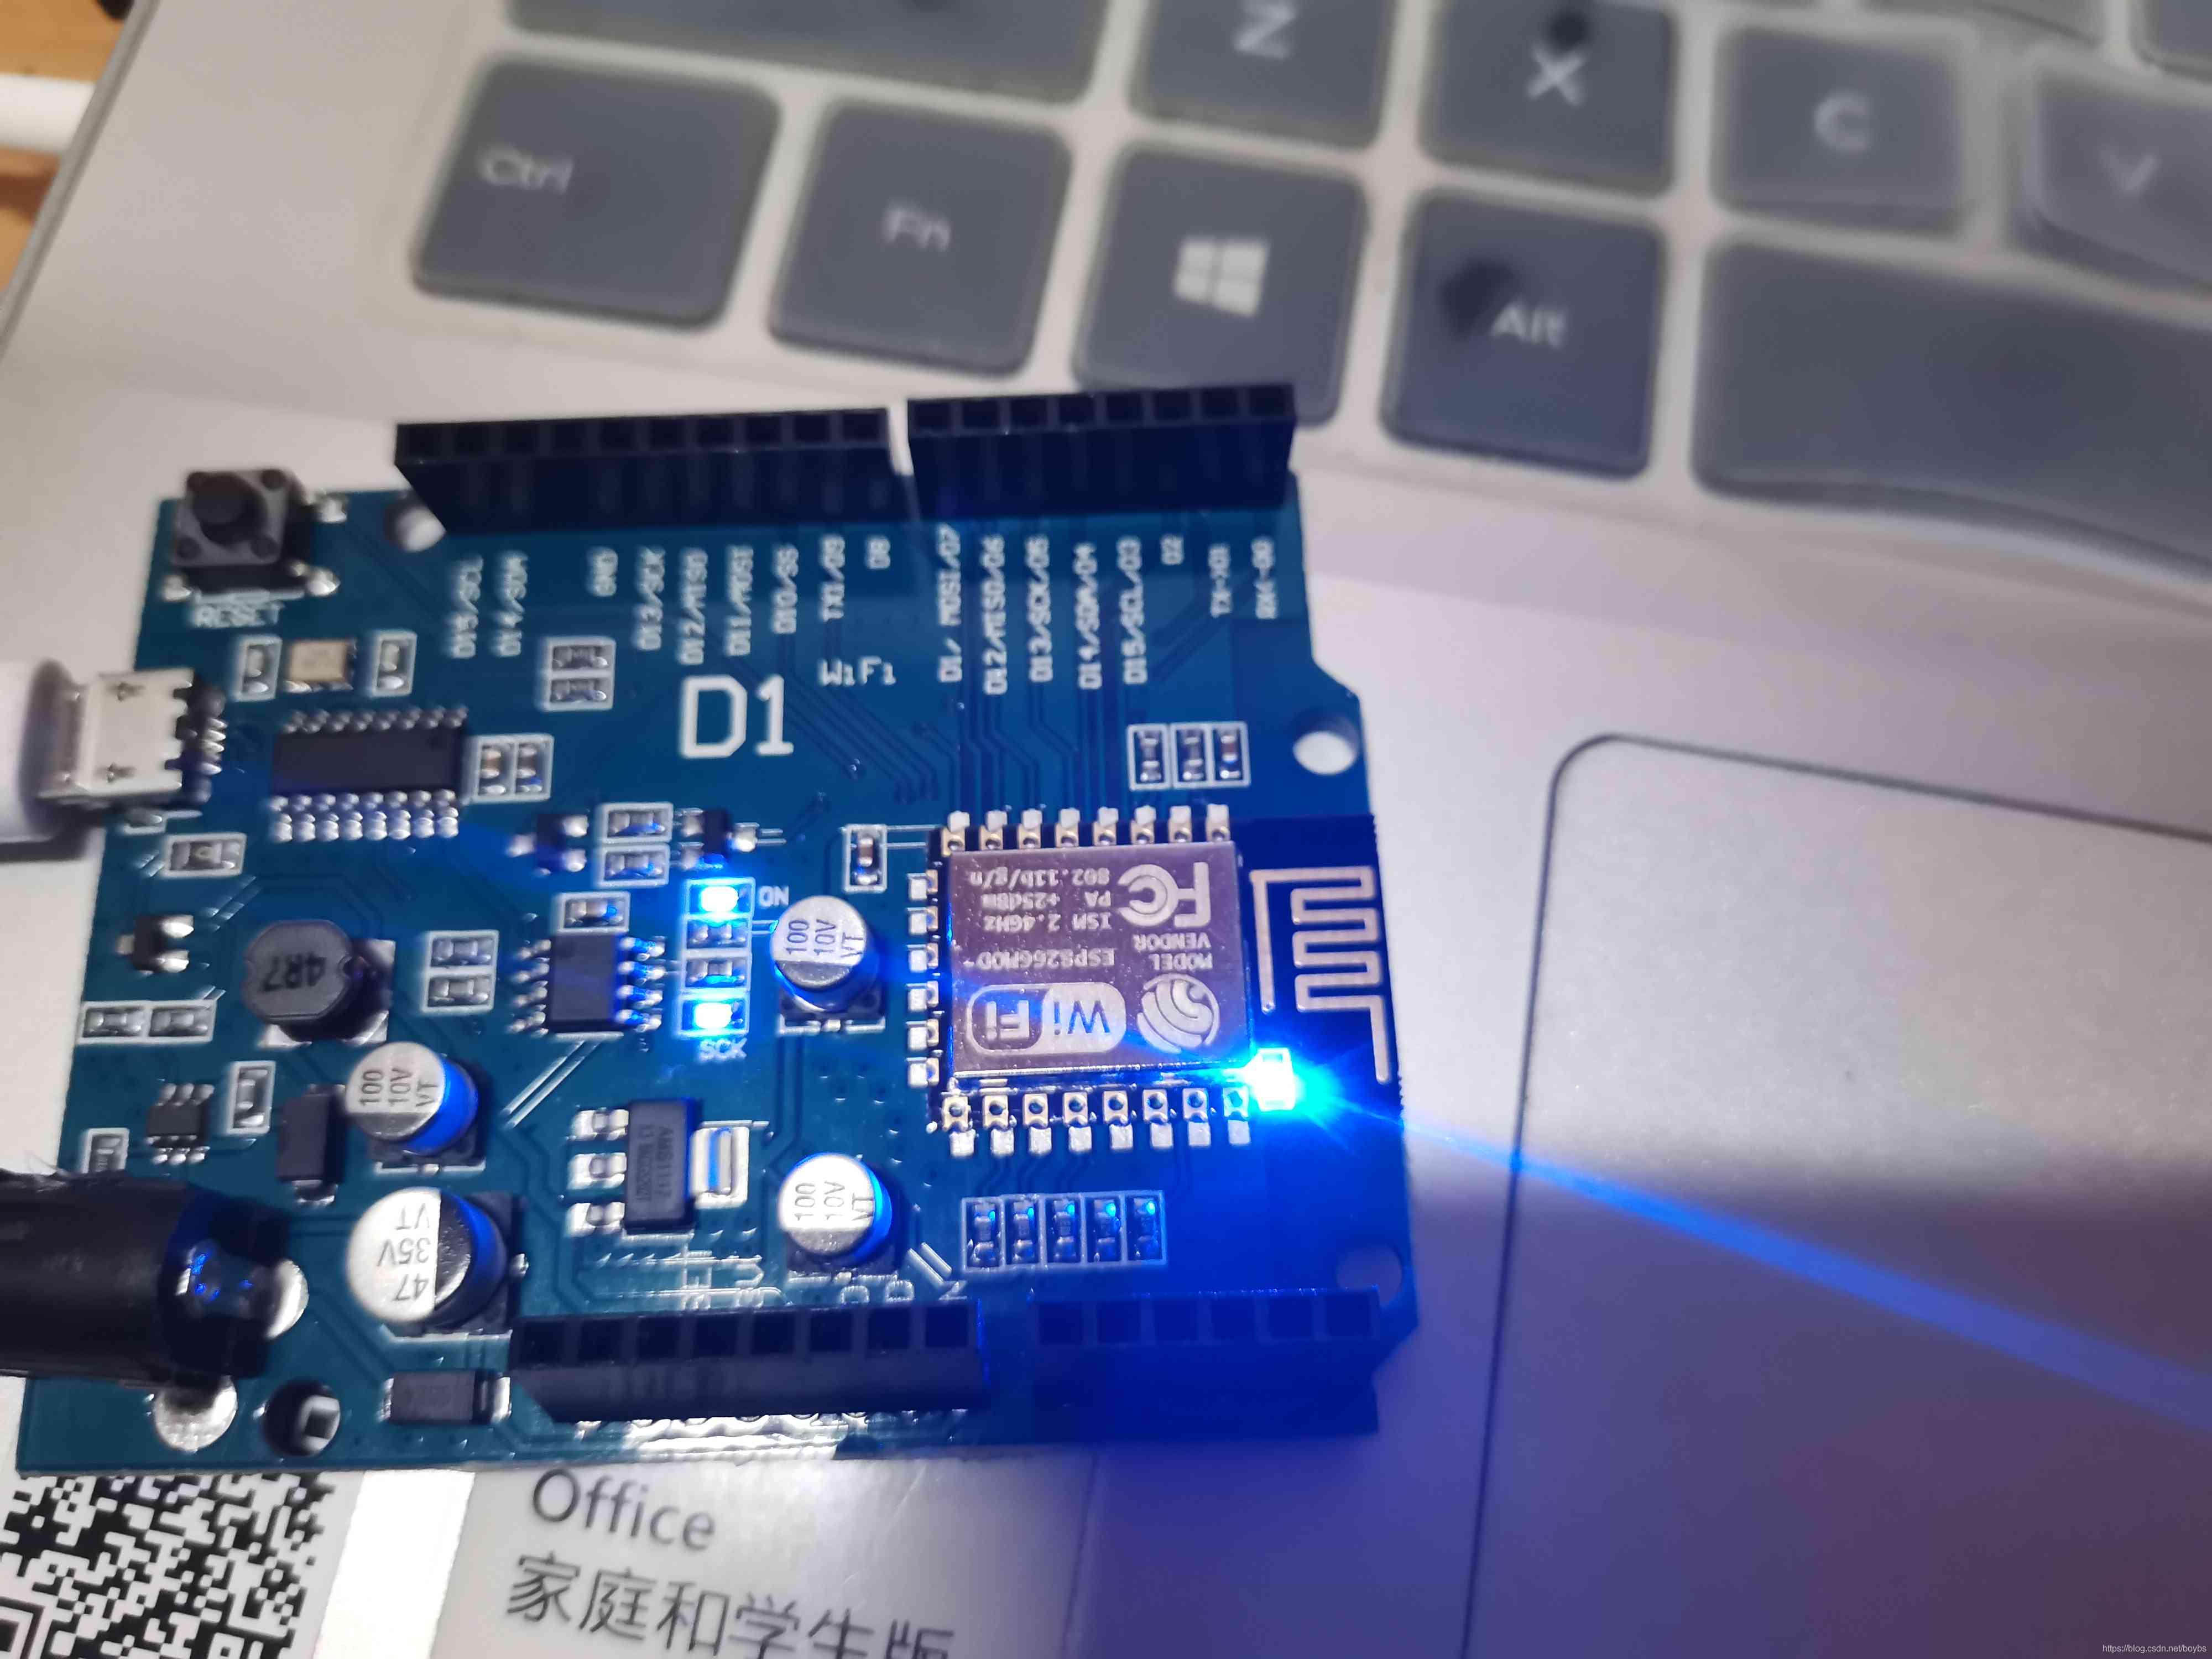
1.开始我们还是用Wemos D1来 点亮我们的第一个LED灯吧
void setup() {


  // put your setup code here, to run once:
  pinMode(2,OUTPUT);//这里我们直接用2号引脚
  //void setup()这里面为核心代码只执行一次

}

void loop() {


  // put your main code here, to run repeatedly:

  digitalWrite(2,LOW);
  delay(1000);//延迟1ms
  digitalWrite(2,HIGH);
  delay(2000);
}
图2.
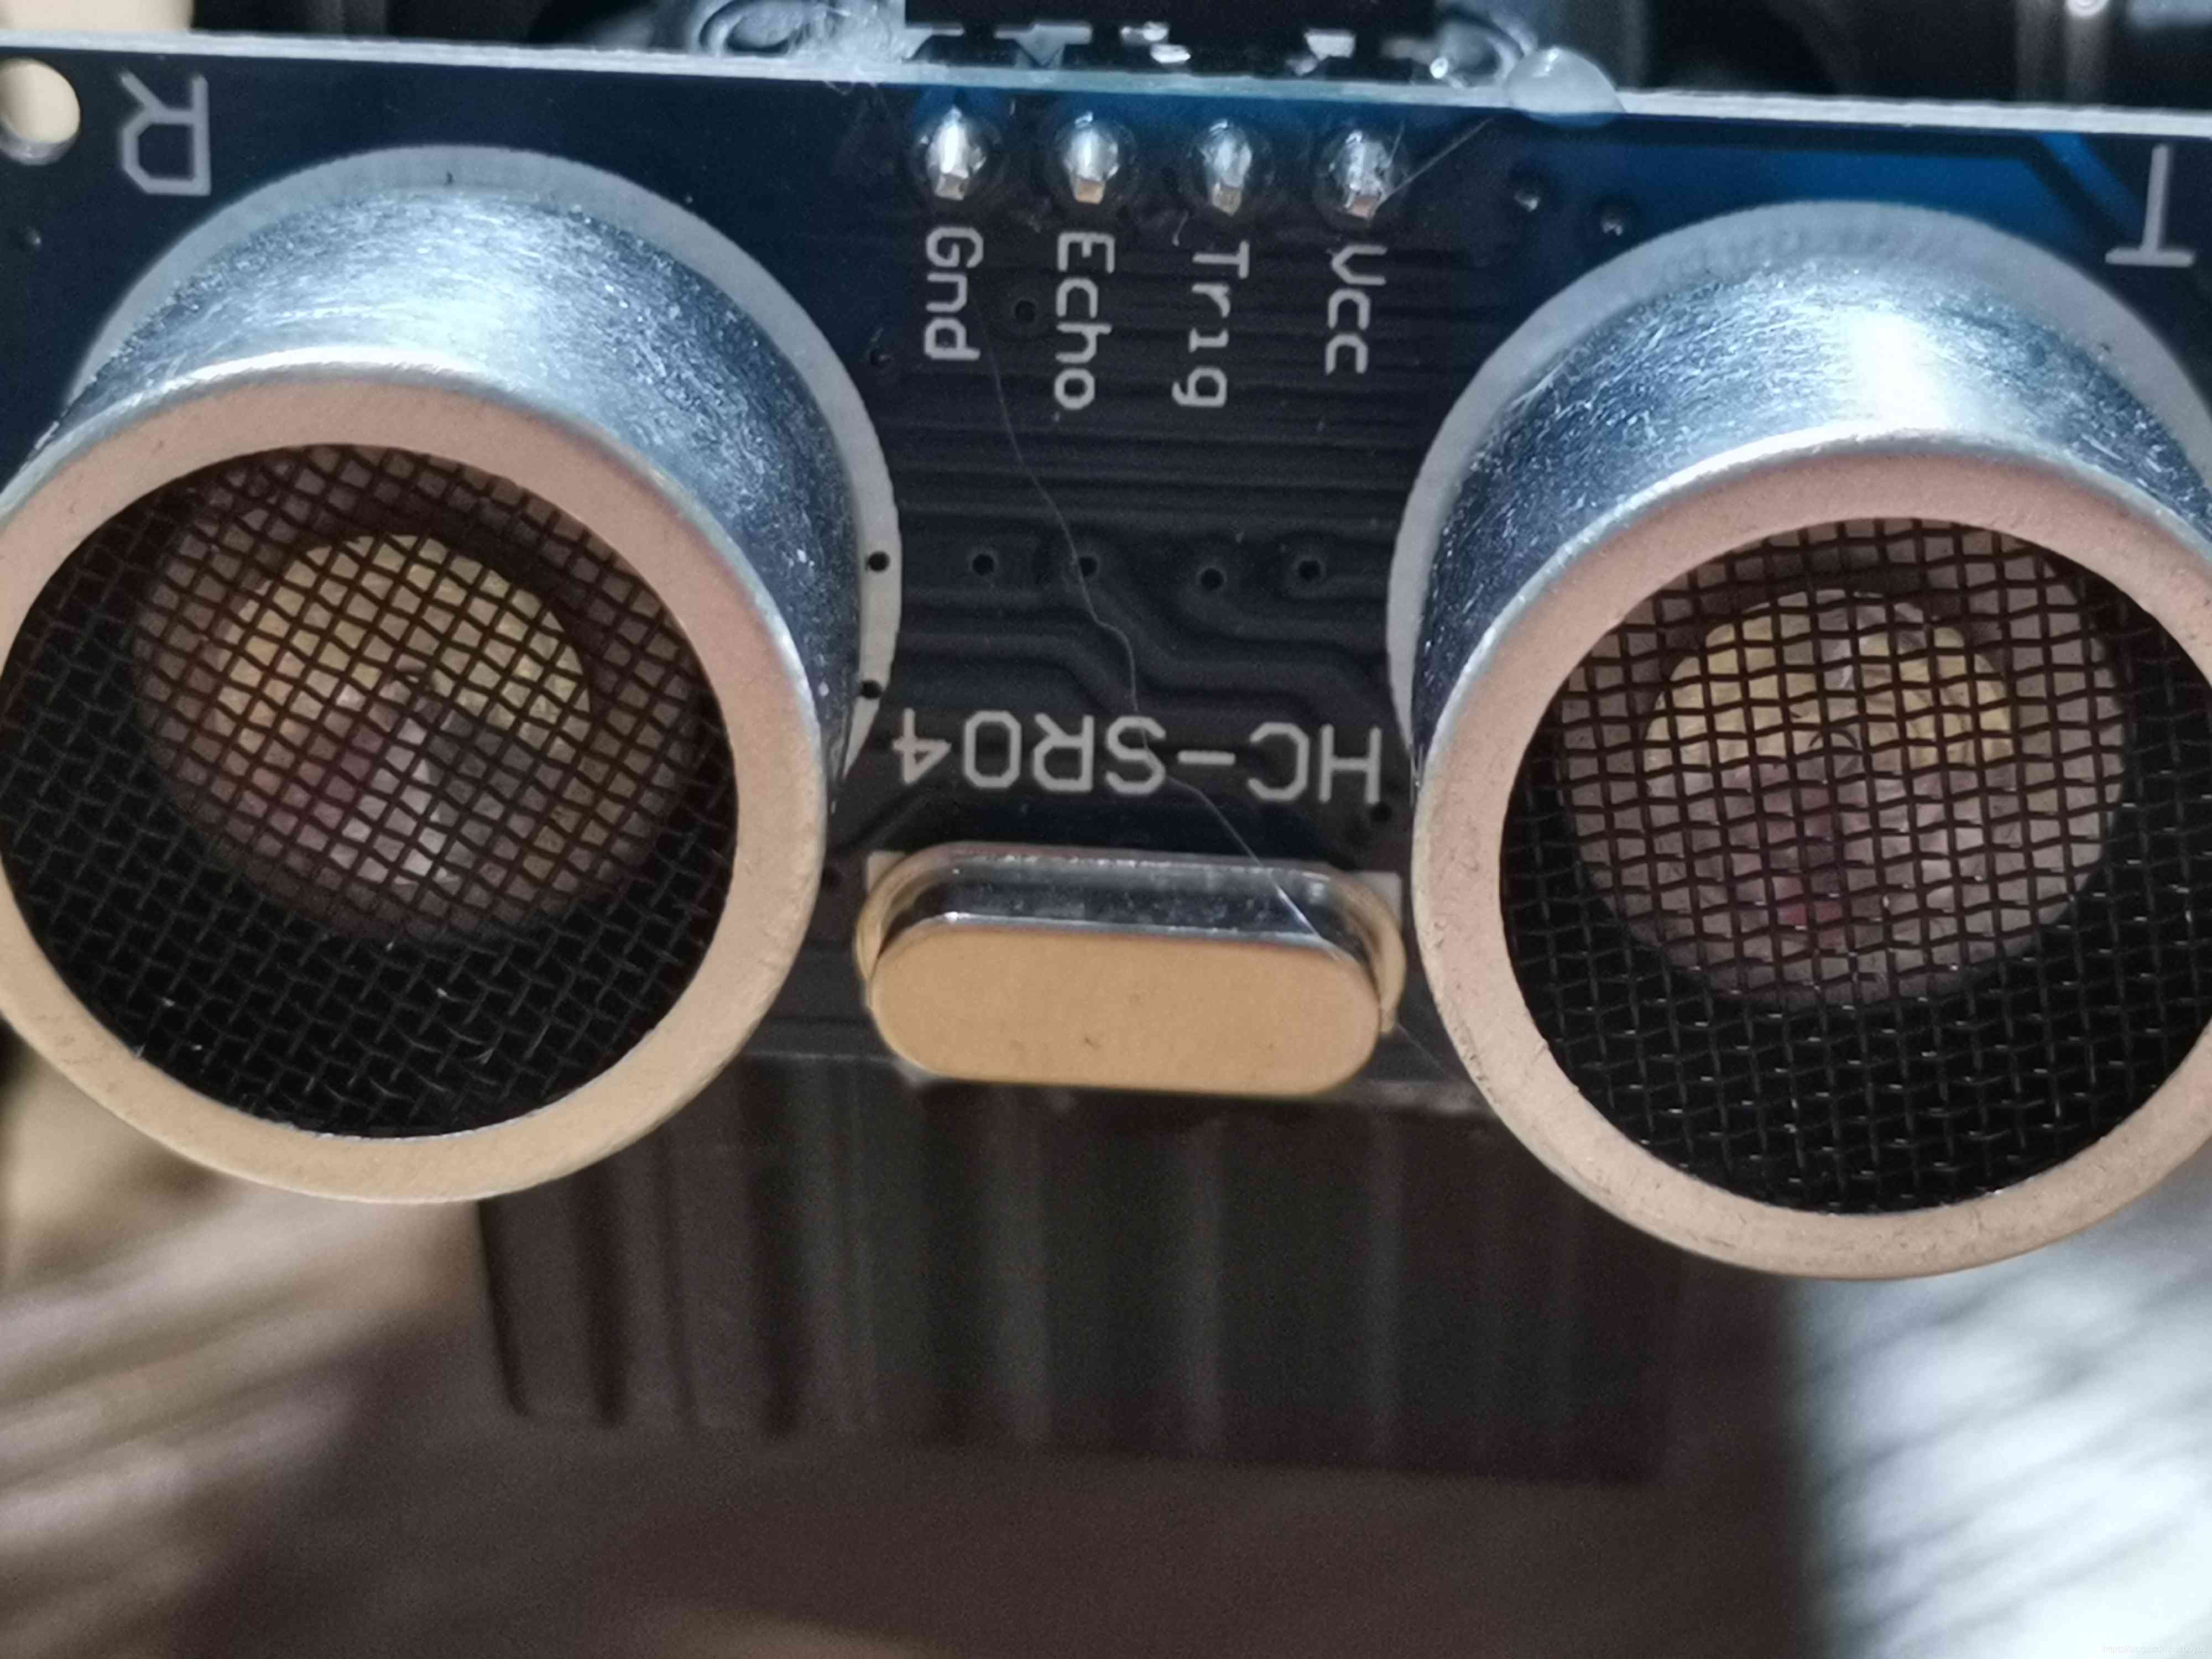
2.HC-RS04超声波
| 工作电压电流 | 5V 15mA |
|---|---|
| 感测距离 | 2——400cm |
| 4个引脚 | GND(接地) VCC(正极)Trig(触发)Eco(接受) |
| 前面的两个像眼睛的圆圈 | 一个用于发射信号、一个用来接受信号 |
图3.
运行
#define Ecno D2
#define Trig D8    //这里我们先将触发与接收两个引脚定义便于后面的操作

void initchaosbo()     //初始化超声波
{


  pinMode(Ecno,INPUT);
  pinMode(Trig,OUTPUT);
}

long getTime()       //获取待测距离
{


  digitalWrite(Trig,HIGH);
  delayMicroseconds(10);
  digitalWrite(Trig,LOW);
  return pulseIn(Ecno,HIGH);
}

void setup() {


  // put your setup code here, to run once:
  initchaosbo();
  Serial.begin(115200);  //打开串口

}

void loop() {


  // put your main code here, to run repeatedly:
  long dis;
  dis=getTime()/58;
  Serial.print(dis);
  Serial.println("cm");
  delay(500);

}
为什么要除与58?
记录一下,其他博客大哥哥讲的~~~·"声音在干燥、摄氏 20度的空气中的传播速度大约为343米/秒,合34,300厘米/秒。
或者,我们作一下单位换算,34,300除以1,000,000厘米/微秒。
即为:0.0343厘米/微秒
再换一个角度,1/(0.0343 厘米/微秒)
即:29.15 微秒/厘米。
这就意味着,每291.5微秒表示10CM的距离。1厘米就是29.15微秒。
但是发送后到接收到回波,声音走过的是2倍的距离呀。
所以实际距离就是1厘米,对应58.3微秒。
实际上整个测距过程是测的发出声波到收到回波的时间,你的程序里的第一个distance实际上是时间us。
所以换成距离cm,要除以58。当然除以58.3可能更精确。"
3.L9110s驱动步电机原理
| 驱动原理:总共有6个引脚 中间两个为电源的正负极其他四个为信号线 |
|---|
| 四个信号线我们可以用假设法0代表不转 1代表转动 |
图4.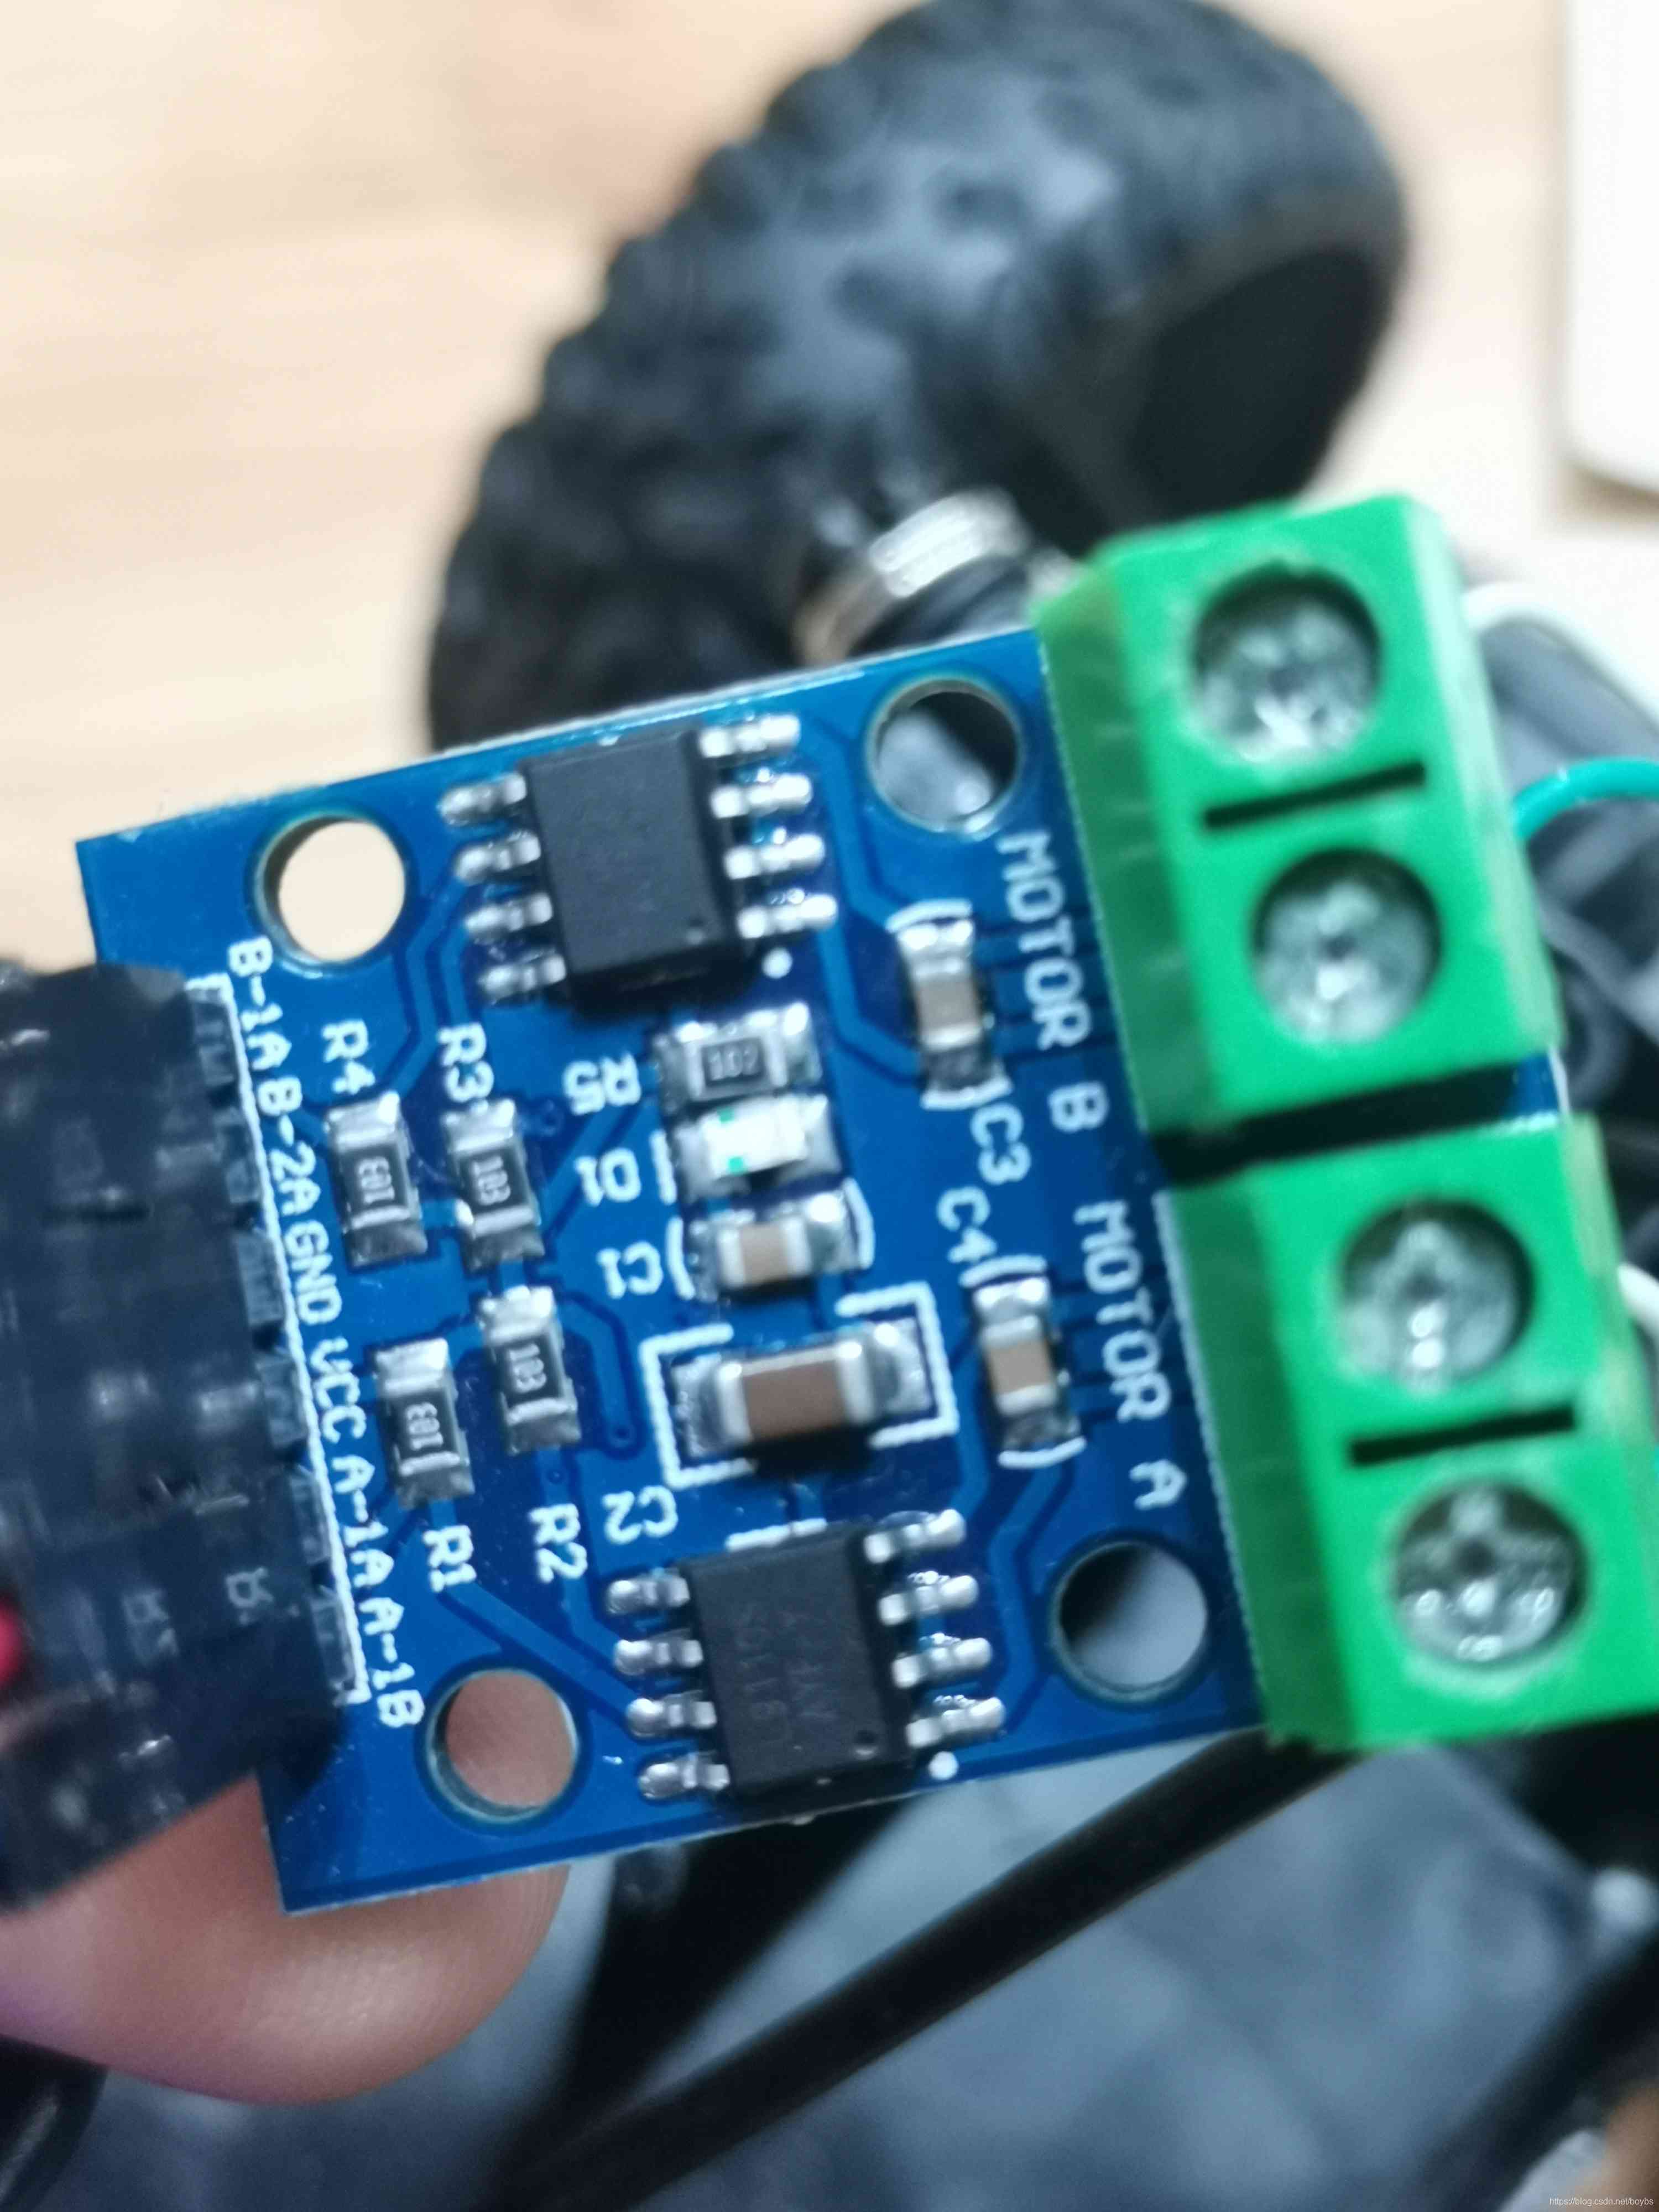
具体操作
#define Zhuang1 D4
#define Zhuang2 D5
#define Dong1   D7
#define Dong2   D8
//定义四个引脚前面两个用于控制小车前进还是后退后两个控制小车的转向

//初始化舵机
void initL9110s()
{


  pinMode(Dong1,OUTPUT);
  pinMode(Dong2, OUTPUT);
  pinMode(Zhuang1, OUTPUT);
  pinMode(Zhuang2, OUTPUT);
}

//后退
void huo()
{


  digitalWrite(Dong1, HIGH);
  digitalWrite(Dong2, LOW);
}

//前进
void qian()
{


  digitalWrite(Dong1, LOW);
  digitalWrite(Dong2, HIGH);
}
void zuo()
{


  digitalWrite(Zhuang1, HIGH);
  digitalWrite(Zhuang2, LOW);
}

//回正
void zheng()
{


  digitalWrite(Zhuang1, LOW);
  digitalWrite(Zhuang2, LOW);
}

//左转
void zuo()
{


  digitalWrite(Zhuang1, HIGH);
  digitalWrite(Zhuang2, LOW);
}

//右转
void you()
{


  digitalWrite(Zhuang1, LOW);
  digitalWrite(Zhuang2, HIGH);
}

//停止
void ting()
{


  digitalWrite(Dong1, LOW);
  digitalWrite(Dong2, LOW);
}
注:在操作过程中对于前后左右的控制可能会出错自己可以根据小车运行的情况进行相应的代码改动
4.ESP82660WiFi
Wemos D1的一个很大优势就是集成了ESP8266WiFi模块,而且运行WemosD1平台有自带的ESP8266的封装库,在这里我们只需要知道如何去调用库函数使用就可以了。
具体操作
#include<ESP8266WiFi.h>   //所需的头文件
char *ssid = "nova 5 Pro";   //WiFi热点名称 这里大家根据自己来就可以了
char *password = "yin1234567";  //WiFi密码
int port = 8888;     //端口号
WiFiServer server(port);

//初始化wifi 这里的初始化代码差不多一个模板在使用的时候可以直接用
void initwifista()
{


  WiFi.mode(WIFI_STA);//设置STA模式
  WiFi.begin(ssid, password); //连接网络
  while (WiFi.status() != WL_CONNECTED)
  {


    Serial.print(".");
    delay(500);
  }
  Serial.println(WiFi.localIP());//通过串口打印地址
}

void  setup()
{


      initwifista();
      Serial.begin(115200);
      server.begin();
}
void  loop()
{


char cmd;
WiFiClient client = server.available(); //服务初始化
  while (client.connected())
  {


    while (client.available() > 0)
    {


      cmd = client.read();
      if(cmd=='q'){


          Serial.println("xaio yin student");
          //满足自己所输入的可以更改要实现的功能
          }
          else
          {


          }
       }
    }
  }
4.WiFi小车所需要的器材使用方法就差不多都讲完了(话不多说我们在来看看整体代码吧,让小车跑起来吧 嘻嘻是不是有点成就感鸭)
#include<ESP8266WiFi.h>
#define Dong1 D6
#define Dong2 D7
#define Zhuang1 D4
#define Zhuang2 D5

#define Ecno D2
#define Trig D8
char *ssid = "nova 5 Pro";
char *password = "yin1234567";
int port = 8888;
WiFiServer server(port);

void initchaosbo()
{


  pinMode(Ecno,INPUT);
  pinMode(Trig,OUTPUT);
}

long getTime()
{


  digitalWrite(Trig,HIGH);
  delayMicroseconds(10);
  digitalWrite(Trig,LOW);
  return pulseIn(Ecno,HIGH);
}

void initwifista()
{


  WiFi.mode(WIFI_STA);//设置STA模式
  WiFi.begin(ssid, password); //连接网络
  while (WiFi.status() != WL_CONNECTED)
  {


    Serial.print(".");
    delay(500);
  }
  Serial.println(WiFi.localIP());//通过串口打印地址
}


void initL9110s()
{


  pinMode(Dong1, OUTPUT);
  pinMode(Dong2, OUTPUT);
  pinMode(Zhuang1, OUTPUT);
  pinMode(Zhuang2, OUTPUT);
}

void huo()
{


  digitalWrite(Dong1, HIGH);
  digitalWrite(Dong2, LOW);
}

void qian()
{


  digitalWrite(Dong1, LOW);
  digitalWrite(Dong2, HIGH);
}
void zuo()
{


  digitalWrite(Zhuang1, HIGH);
  digitalWrite(Zhuang2, LOW);
}

void zheng()
{


  digitalWrite(Zhuang1, LOW);
  digitalWrite(Zhuang2, LOW);
}


void you()
{


  digitalWrite(Zhuang1, LOW);
  digitalWrite(Zhuang2, HIGH);
}

void ting()
{


  digitalWrite(Dong1, LOW);
  digitalWrite(Dong2, LOW);
}


void setup() {


  initL9110s();
    initchaosbo();
  Serial.begin(115200);
  initwifista();
  server.begin();

}

void loop() {


  char cmd;
  long dis;
  dis=getTime()/58;
  WiFiClient client = server.available(); //服务初始化
  while (client.connected())
  {


    while (client.available() > 0)
    {


      cmd = client.read();
      switch (cmd)
      {


        case 'q':
          qian();
          if(dis<=10)
          {


            ting();
          }
          break;
        case 'h':
          huo();
          break;
        case 'z':
          zuo();
          break;
        case 'y':
          you();
          break;
        case 's':
          ting();
          break;
        case 'd':
          zheng();
          break;
      }
    }
  }
}
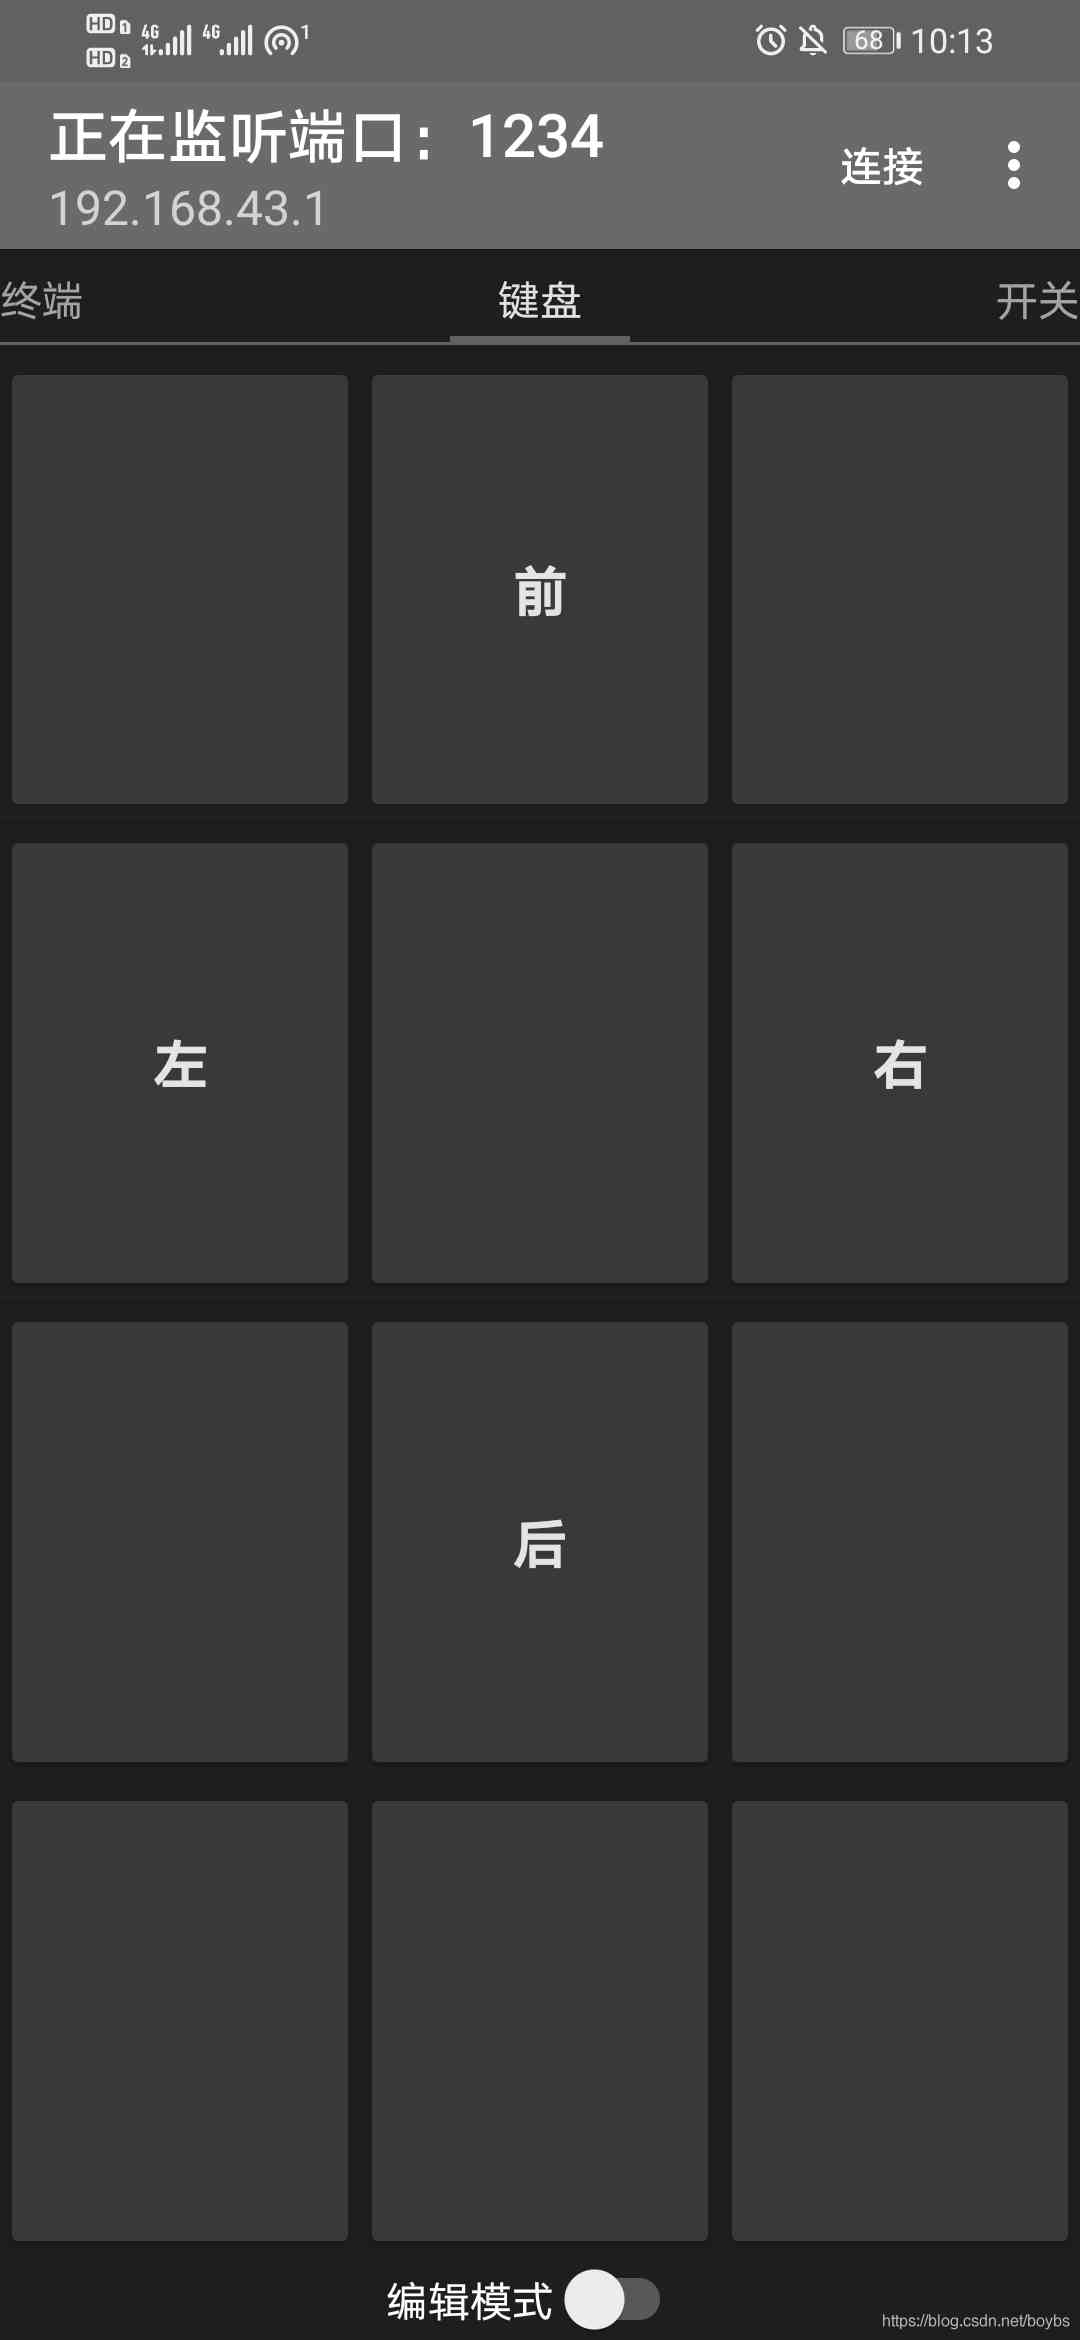
5.对了这里我忘记说用TCP来控制小车了,其实原理很简单在执行过程中我们会用到ComAssistant(当然也可以用其他软件)这个串口软件来获取我们所需要的IP地址。注意在使用过程中我们也需要将对应的端口号波特率设置成我们在代码中设置的一样哦。然后在TCP用我们所获取的ID进行远程主机连接 在根据自己的代码发送相应的指令就可以啦。
图5.
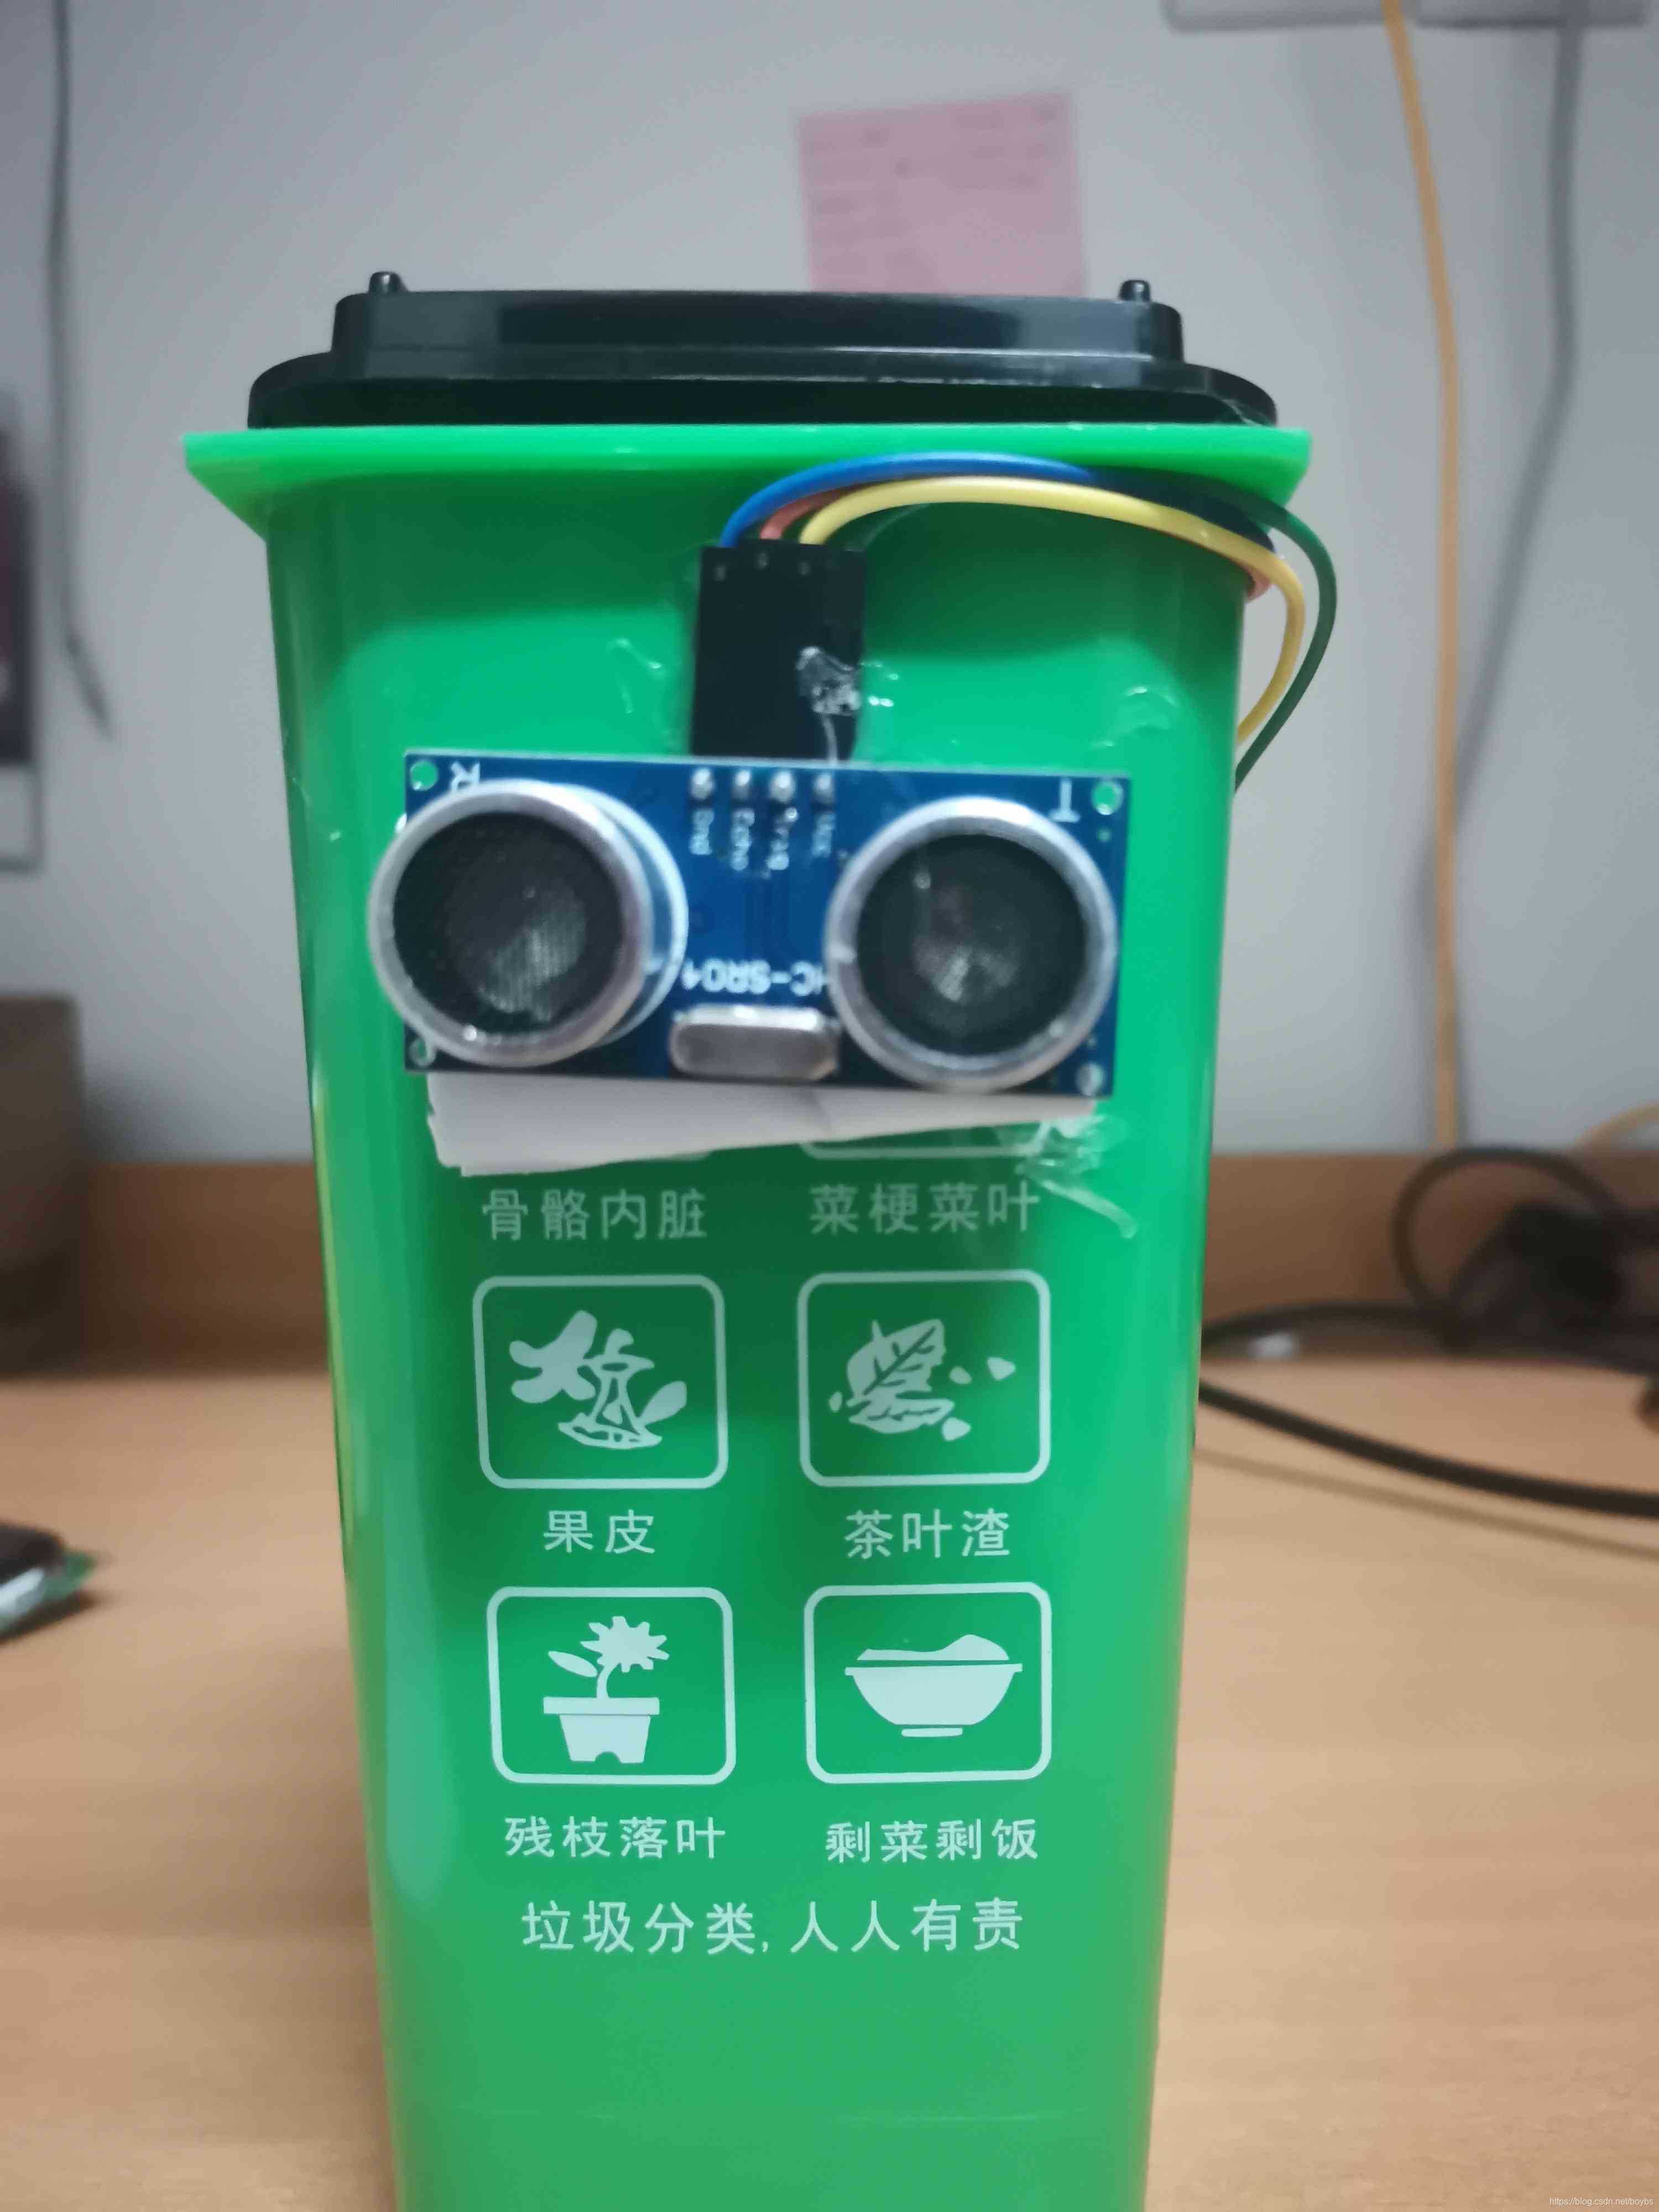
三、智能垃圾桶
在这里就不仔细说了所用到的芯片还是WemosD1 超声波与前面的WiFi小车的原理一模一样只是多一个多舵机的处理这里我们使用的是SG90舵机。
3.SG90舵机
| 型号 | SG90 重量13克 |
|---|---|
| 工作电压 | 4.8v~6v(3.3v也可以) |
| 三线对应端口 | 红色:正极 棕色:GND 橙色:信号线 |
图6.整体效果展示
具体操作
#include<Servo.h>    //所需要用到的头文件
#define Ecno D2
#define Trig D8
#define BEEP D5      //这里加了一个蜂鸣器可以根据距离的长短来控制蜂鸣器的响与不响
Servo myDuoJi;
#define DuoPin D5     //定义舵机


 //初始化蜂鸣器
void initfmq()
{


  pinMode(BEEP,OUTPUT);
  digitalWrite(BEEP,HIGH); // 在运行时我们先将其设置为高电平避免程序一运行蜂鸣器就响了
}
void setup() {


  // put your setup code here, to run once:
  myDuoJi.attach(DuoPin);   // 接入舵机
  initchaosbo();
  Serial.begin(115200);
   myDuoJi.write(180);      //翻转的度数
    //initfmq();

}

//初始化超声波
void initchaosbo()
{


  pinMode(Ecno,INPUT);
  pinMode(Trig,OUTPUT);
}

long getTime()
{


  digitalWrite(Trig,HIGH);
  delayMicroseconds(30);
  digitalWrite(Trig,LOW);
  return pulseIn(Ecno,HIGH);

}

void loop() {


  // put your main code here, to run repeatedly:

   long dis;
   dis=getTime()/58;
   Serial.println(dis);
   Serial. println("cm");

    if(dis<4)
    {


     // digitalWrite(BEEP,LOW);
     // delay(1000);
      myDuoJi.write(90);
      delay(2000);

    }
   else
    {


      //digitalWrite(BEEP,HIGH);
      myDuoJi.write(180);
    }
  }
以上就是WiFi小车和智能垃圾桶的全部代码了,个人的理解如果有错误的地方希望大家能够指出,相互学习共同进步(冲鸭)。
版权声明
本文为[osc_4isxawz4]所创,转载请带上原文链接,感谢
https://my.oschina.net/u/4302200/blog/4707898
边栏推荐
- What? Your computer is too bad? You can handle these moves! (win10 optimization tutorial)
- M 端软件产品设计思虑札记 - 知乎
- Experience the latest version of erofs on Ubuntu
- QT hybrid Python development technology: Python introduction, hybrid process and demo
- 抖音直播监控Api:随机推荐
- Shiyou's numerical analysis assignment
- SQL Server 2008R2 18456错误解决方案
- What details does C + + improve on the basis of C
- QT hybrid Python development technology: Python introduction, hybrid process and demo
- 0.计算机简史
猜你喜欢

阅读心得:FGAGT: Flow-Guided Adaptive Graph Tracking
Which is more worth starting with the difference between vivos7e and vivos7
模板链表类学习
vivoY73s和vivoY70s的区别 vivoY73s和vivoY70s哪个值得入手
Unparseable date: 'Mon Aug 15 11:24:39 CST 2016',时间格式转换异常
UCGUI简介
Blazor 准备好为企业服务了吗?
ulab 1.0.0发布
scala 中 Future 的简单使用
Littlest JupyterHub| 02 使用nbgitpuller分发共享文件
随机推荐
Cloud alibabab notes come out, the whole network detailed explanation only this one hand is slow
Unparseable date: 'mon Aug 15 11:24:39 CST 2016', time format conversion exception
Judging whether paths intersect or not by leetcode
sed之查找替换
How can a technician take over a complex system?
shiyou的数值分析作业
NOIP 2012 提高组 复赛 第一天 第二题 国王游戏 game 数学推导 AC代码(高精度 低精度 乘 除 比较)+60代码(long long)+20分代码(全排列+深搜dfs)
【总结系列】互联网服务端技术体系:高性能之数据库索引
VC6 compatibility and open file crash resolution
Learn Scala if Else statement
Daily challenges of search engines_ 4_ External heterogeneous resources - Zhihu
python_scrapy_房天下
QT hybrid Python development technology: Python introduction, hybrid process and demo
Wanxin Finance
C language I blog assignment 03
Blazor 准备好为企业服务了吗?
Which is more worth starting with the difference between vivos7e and vivos7
Solve the problem of rabbitmq message loss and repeated consumption
iOS 学习笔记二【cocopods安装使用和安装过程中遇到的问题及解决办法】【20160725更新】
京淘项目知识点总结