当前位置:网站首页>Mac安装PHP开发环境
Mac安装PHP开发环境
2022-08-04 05:36:00 【m0_67402588】
一、安装PHP
#搜索PHP,会搜索出PHP相关的资源,然后根据自己需求选择安装
$ brew search php
#安装PHP,不指定PHP版本时,默认安装最新版本
$ brew install php
程序会自动安装,安装完成后,将PHP加入 $PATH 中
#shell使用bash添加方式
$ vim ~/.bash_profile
export PATH="/usr/local/sbin:$PATH"
source ~/.bash_profile

# shell使用zsh添加方式
$ vim ~/.zshrc
export PATH="/usr/local/sbin:$PATH"
source ~/.zshrc
配置php-fpm.conf
vim /usr/local/etc/php/8.1/php-fpm.conf

#去掉第17行和第24行前面的分号
17 ;pid = run/php-fpm.pid
24 ;error_log = log/php-fpm.log
PHP相关操作
#启动|停止|重启
$ brew services start|stop|restart php
查看php-fpm是否启动成功
$ lsof -Pni4 | grep LISTEN | grep php
#启动成功输出
php-fpm   80788 yamol    8u  IPv4 0x38dc2fee9c1e7791      0t0  TCP 127.0.0.1:9000 (LISTEN)
php-fpm   80794 yamol    9u  IPv4 0x38dc2fee9c1e7791      0t0  TCP 127.0.0.1:9000 (LISTEN)
php-fpm   80795 yamol    9u  IPv4 0x38dc2fee9c1e7791      0t0  TCP 127.0.0.1:9000 (LISTEN)
二、安装nginx
#安装nginx
$ brew install nginx
#使用80端口的话,需要将nginx加入root组当中
$ sudo cp -v /usr/local/opt/nginx/*.plist /Library/LaunchDaemons/
$ sudo chown root:wheel /Library/LaunchDaemons/homebrew.mxcl.nginx.plist
#启动nginx服务
$ brew services start nginx
#测试nginx是否安装成功
$ curl -IL http://127.0.0.1:8080
安装成功结果
HTTP/1.1 200 OK
Server: nginx/1.21.4
Date: Thu, 16 Dec 2021 02:08:07 GMT
Content-Type: text/html
Content-Length: 615
Last-Modified: Tue, 02 Nov 2021 14:49:28 GMT
Connection: keep-alive
ETag: “61814ff8-267”
Accept-Ranges: bytes
Nginx 其它相关操作
#启动nginx
$ sudo nginx
#重新加载|重启|退出
$ sudo nginx -s reload|reopen|quit
#brew操作,启动|停止|重启
$ brew services start|stop|restart nginx
三、安装MySQL
#搜索mysql,查看包含哪些版本
$ brew search mysql
#安装mysql,不指定版本号,默认安装最新
$ brew install mysql
MySQL安全设置mysql_secure_installation
#执行mysql_secure_installation
$ mysql_secure_installation

Securing the MySQL server deployment.

Connecting to MySQL using a blank password.

VALIDATE PASSWORD COMPONENT can be used to test passwords
and improve security. It checks the strength of password
and allows the users to set only those passwords which are
secure enough. Would you like to setup VALIDATE PASSWORD component?
#是否验证密码强度,输入y|Y验证,输入其他不验证
Press y|Y for Yes, any other key for No:
#设置root登录密码
Please set the password for root here.

New password:
#确认密码
Re-enter new password:
By default, a MySQL installation has an anonymous user,
allowing anyone to log into MySQL without having to have
a user account created for them. This is intended only for
testing, and to make the installation go a bit smoother.
You should remove them before moving into a production
environment.

#是否删除匿名用户,输入y|Y删除,输入其他键不删除,本人选择删除
Remove anonymous users? (Press y|Y for Yes, any other key for No) : y
Success.


Normally, root should only be allowed to connect from
'localhost'. This ensures that someone cannot guess at
the root password from the network.
#是否禁止远程登录,输入y|Y禁止,输入其他键不禁止,本人选择禁止
Disallow root login remotely? (Press y|Y for Yes, any other key for No) : y
Success.

By default, MySQL comes with a database named 'test' that
anyone can access. This is also intended only for testing,
and should be removed before moving into a production
environment.

#是否删除test数据库,输入y|Y删除,输入其他键不删除,本人选择删除
Remove test database and access to it? (Press y|Y for Yes, any other key for No) : y
 - Dropping test database...
Success.

 - Removing privileges on test database...
Success.

Reloading the privilege tables will ensure that all changes
made so far will take effect immediately.

#是否重载权限表,输入y|Y重载,输入其他键不重载,本人选择重载
Reload privilege tables now? (Press y|Y for Yes, any other key for No) : y
Success.

All done!
测试数据库是否安装成功,如下显示即为安装成功
mysql -uroot -p
Enter password:
Welcome to the MySQL monitor.  Commands end with ; or g.
Your MySQL connection id is 15
Server version: 8.0.27 Homebrew

Copyright (c) 2000, 2021, Oracle and/or its affiliates.

Oracle is a registered trademark of Oracle Corporation and/or its
affiliates. Other names may be trademarks of their respective
owners.

Type 'help;' or 'h' for help. Type 'c' to clear the current input statement.

mysql>
MySQL相关操作
#启动|停止|重启 mysql服务
$ brew services start|stop|restart mysql
#本地登录MySQL
$ mysql -u用户名 -p密码
#远程登录
$ mysql -h IP地址 -u用户名 -p密码 -P端口号(默认3306)
四、整合Nginx+PHP+MySQL
1.创建配置文件的文件夹
$ mkdir -p /usr/local/etc/nginx/logs
$ mkdir -p /usr/local/etc/nginx/conf.d
$ mkdir -p /usr/local/etc/nginx/ssl

$ sudo chown :staff /usr/local/var/www
$ sudo chmod 775 /usr/local/var/www
2.修改nginx配置文件
$ vim /usr/local/etc/nginx/nginx.conf
nginx.conf 内容如下:
worker_processes 1;

error_log       /usr/local/etc/nginx/logs/error.log debug;
pid             /usr/local/var/run/nginx.pid;

events {
    worker_connections 1024;
}

http {
    include    mime.types;
    default_type  application/octet-stream;

    log_format main '$remote_addr - $remote_user [$time_local] "$request" '
                    '$status $body_bytes_sent "$http_referer" '
                    '"$http_user_agent" "$http_x_forwarded_for"';

    access_log /usr/local/etc/nginx/logs/access.log main;

     sendfile   on;

     keepalive_timeout 65;

     index index.html index.php;

     include /usr/local/etc/nginx/servers/*;
}
3.创建php-fpm配置文件
$ vim /usr/local/etc/nginx/conf.d/php-fpm
输入以下内容
location ~ .php$ {
        try_files  $uri = 404;
        fastcgi_pass 127.0.0.1:9000;
        fastcgi_index index.php;
        fastcgi_intercept_errors on;
        include /usr/local/etc/nginx/fastcgi.conf;
}
4.创建站点配置文件
$ vim /usr/local/etc/nginx/servers/default.conf
输入以下内容
server {
        listen          8080;
        server_name     localhost;
        root            /usr/local/var/www/;
        charset utf-8;

        access_log      /usr/local/etc/nginx/logs/default.access.log main;
        error_log       /usr/local/var/log/nginx/default.error.log;

        location / {
                include /usr/local/etc/nginx/conf.d/php-fpm;
        }

        location = /info {
                allow 127.0.0.1;
                deny all;
                rewrite (.*) /.info.php;
        }

        error_page 404  /404.html;
        error_page 403  /403.html;
}
重启所有服务
$ brew services restart nginx
$ brew services restart php
$ brew services restart mysql
至此整合完毕!
测试
#创建info.php
$ vim /usr/local/var/www/info.php
#输入以下内容
<?php
 phpinfo();
?>
#保存
浏览器访问http://localhost:8080/info.php
正常展示如下面表示配置成功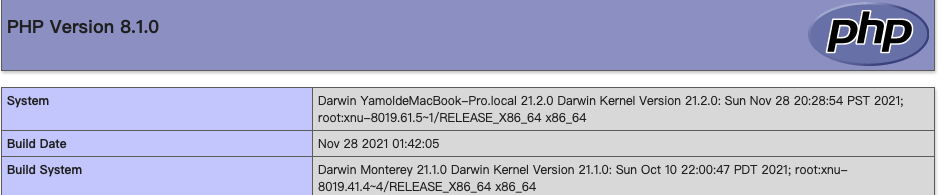
五、遇见的报错整理
1.在mac上启动nginx时会报一个警告
nginx: [warn] 1024 worker_connections exceed open file resource limit: 256
解决方案:
$ ulimit -n 1024
2.nginx: [error] invalid PID number “” in “/var/run/nginx/nginx.pid”
?  run sudo nginx -s reload
Password:
nginx: [error] invalid PID number "" in "/usr/local/var/run/nginx.pid"
#解决方案:重新指向配置文件即可
?  run sudo nginx -c /usr/local/etc/nginx/nginx.conf
nginx: [warn] 1024 worker_connections exceed open file resource limit: 256
?  run sudo nginx -s reload
3.error 2002 (hy000): can’t connect to local mysql server through socket ‘/tmp/mysql.sock’ (xxx)
#第一步,先关闭 mysql 服务,使用brew 启动的mysql服务,使用下面命令关闭
$ brew services stop mysql
#如果是使用 mysql.server start 命令启动的mysql,则使用如下命令关闭
$ mysql.server stop

#第二步,依次输入下面命令
$ pkill mysql
$ rm -rf /usr/local/var/mysql/ 	#注意:此操作会删除数据库的所有数据,请提前备份。
$ brew postinstall mysql
$ brew services restart mysql
$ mysql -uroot
先自我介绍一下,小编13年上师交大毕业,曾经在小公司待过,去过华为OPPO等大厂,18年进入阿里,直到现在。深知大多数初中级java工程师,想要升技能,往往是需要自己摸索成长或是报班学习,但对于培训机构动则近万元的学费,着实压力不小。自己不成体系的自学效率很低又漫长,而且容易碰到天花板技术停止不前。因此我收集了一份《java开发全套学习资料》送给大家,初衷也很简单,就是希望帮助到想自学又不知道该从何学起的朋友,同时减轻大家的负担。添加下方名片,即可获取全套学习资料哦
边栏推荐
猜你喜欢
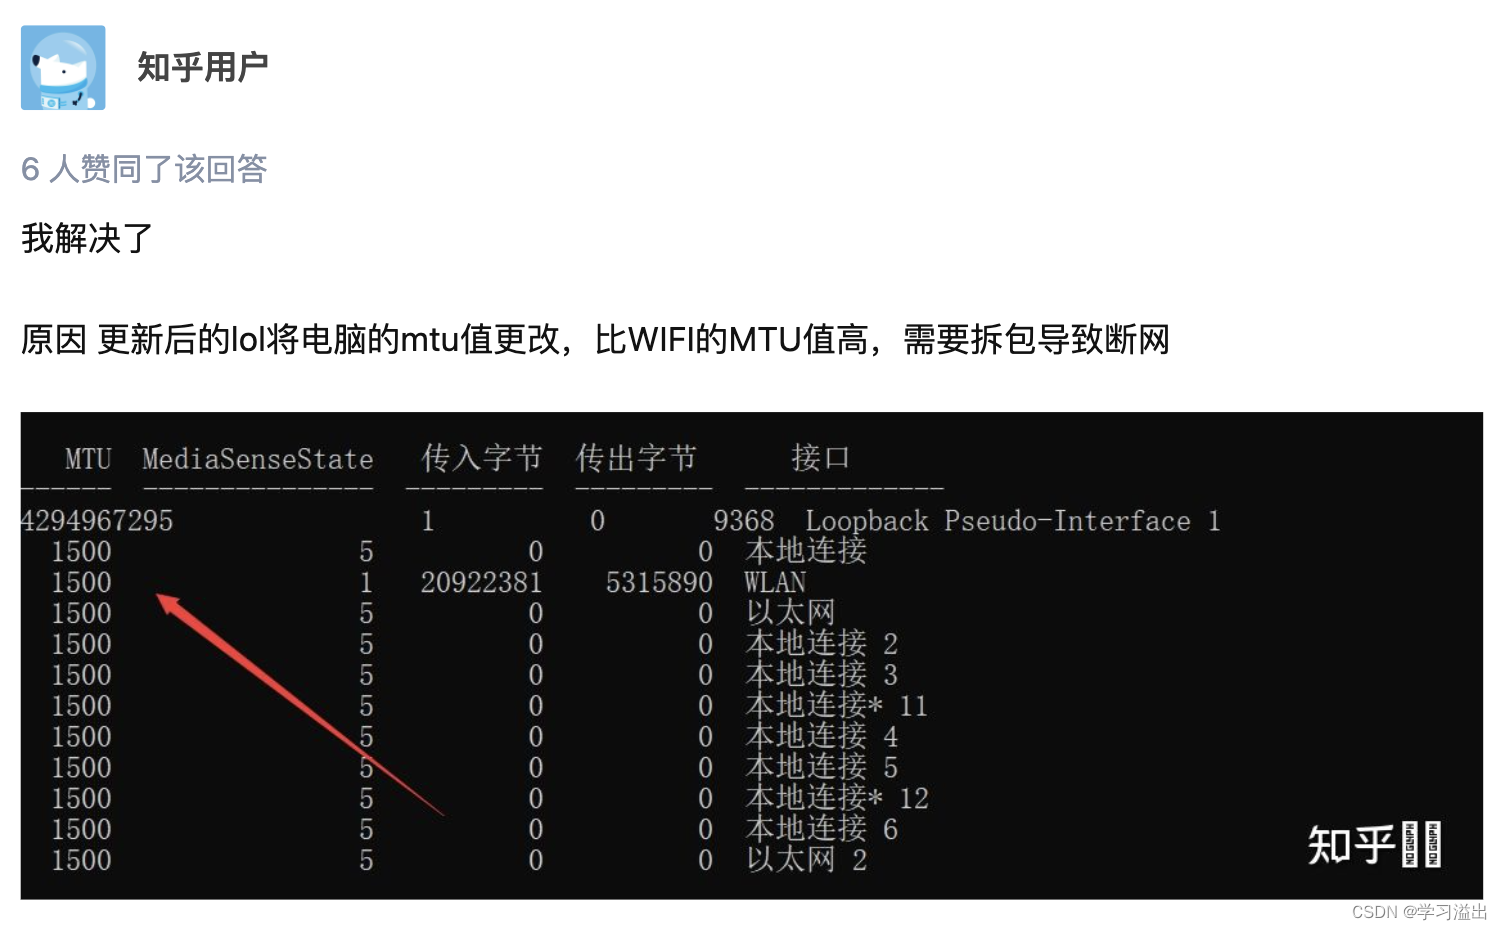
华硕飞行堡垒系列无线网经常显示“无法连接网络” || 一打开游戏就断网
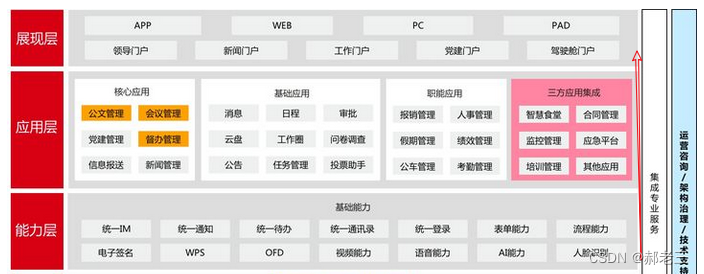
如何画好业务架构图。
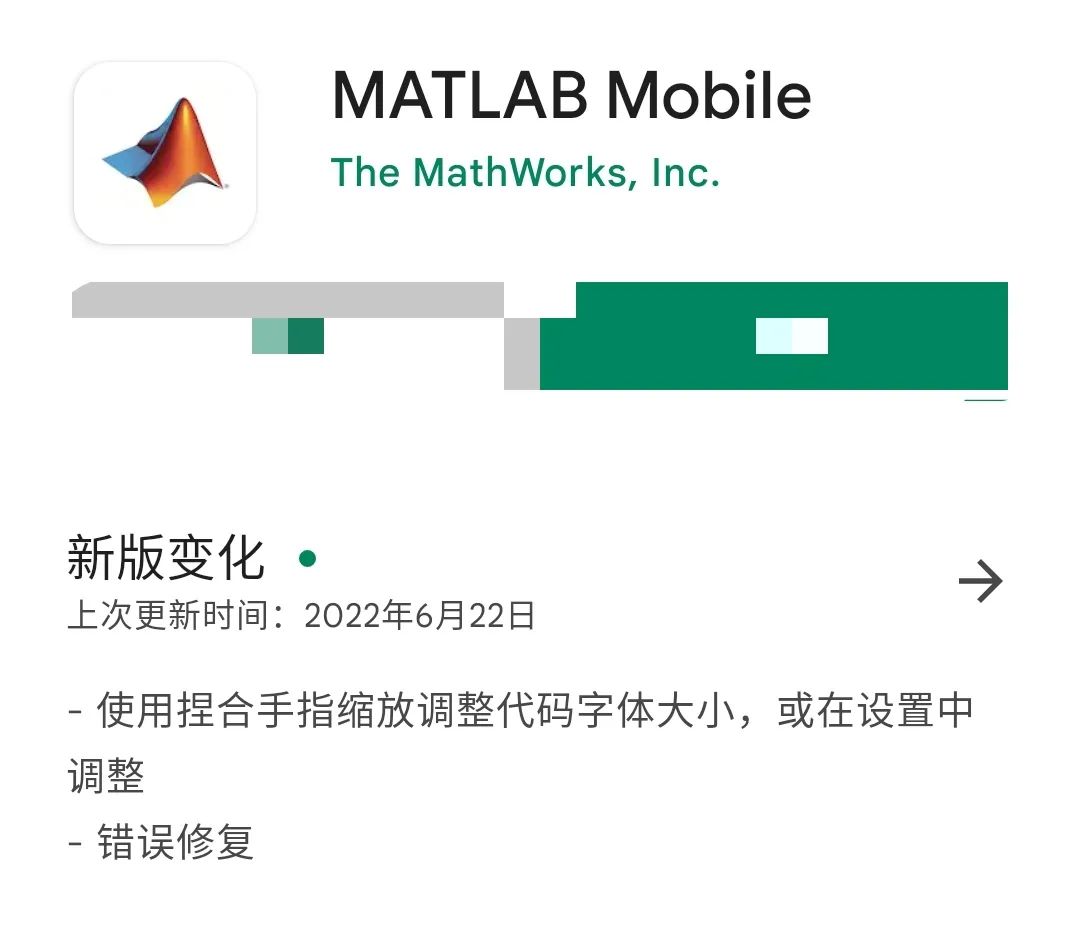
用手机也能轻松玩转MATLAB编程
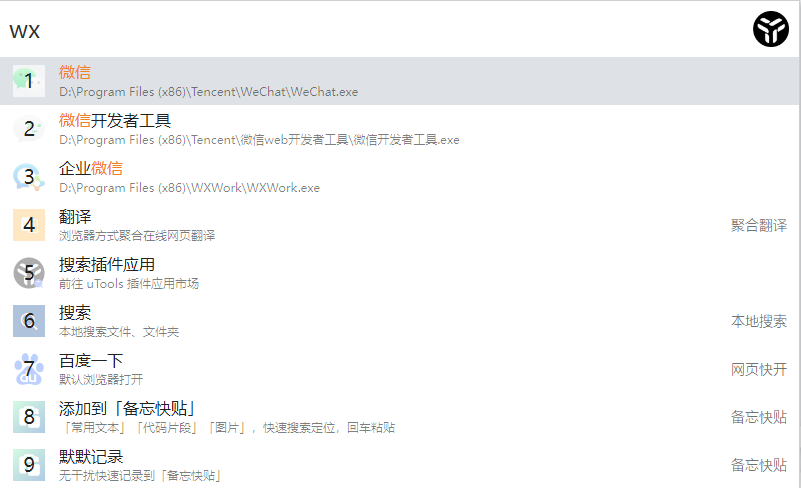
软件:给大家推荐一款国产非常好用的效率软件uTools
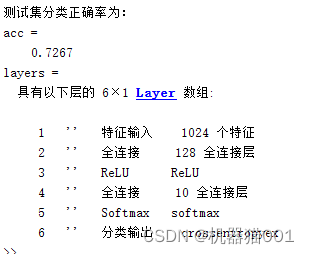
matlab的2DCNN、1DCNN、BP、SVM故障诊断与结果可视化
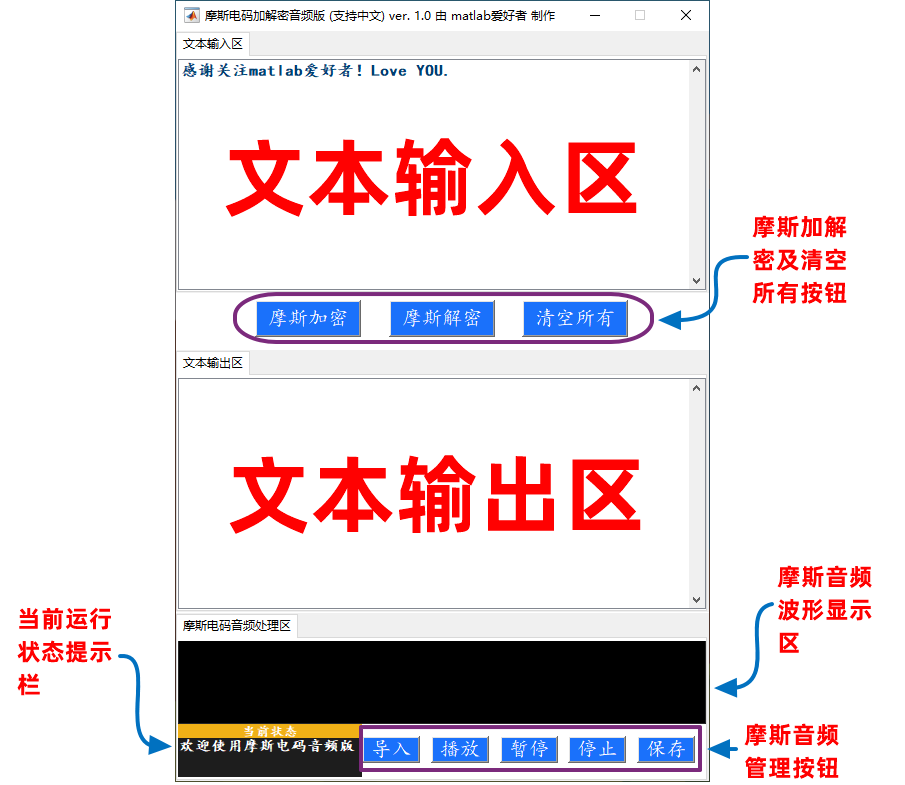
用matlab打造的摩斯电码加解码器音频版,支持包括中文在内的任意字符

IoU, GIoU, DIoU and CIoU in target detection
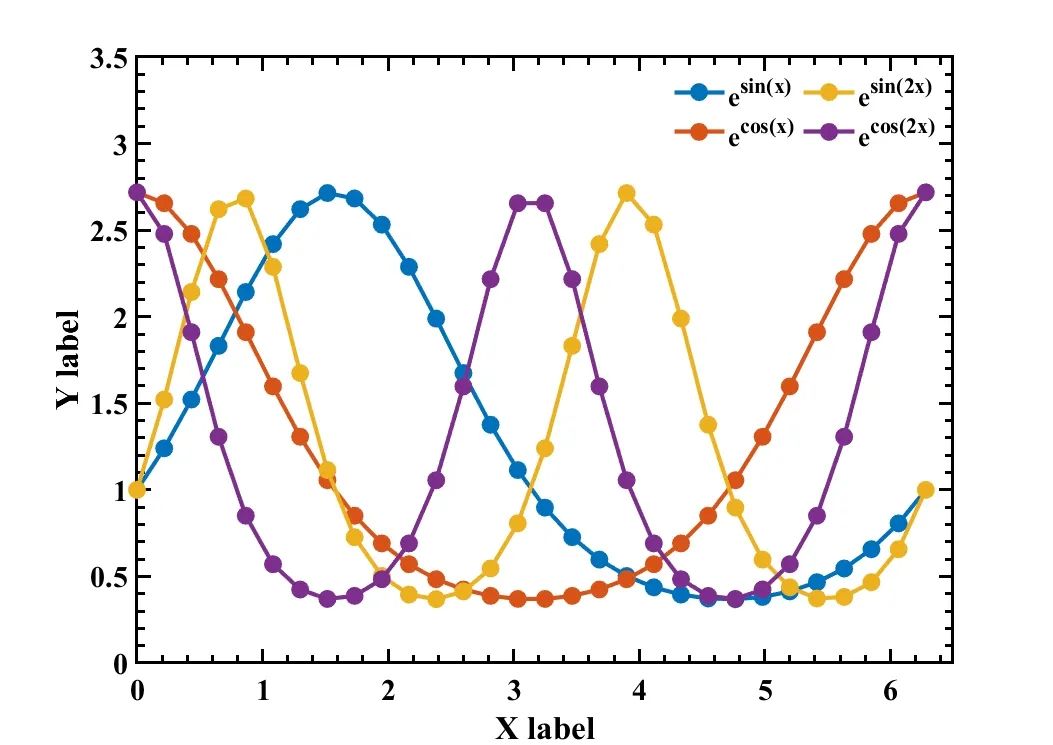
matlab科研绘图模板,直接奉上源代码!

Computer software: recommend a disk space analysis tool - WizTree
QT QOpenGLWidget 全屏导致其他控件显示问题
随机推荐
升级到 MediaPlayer 11 时跳过验证副本的方法
类图规范总结
Unable to preventDefault inside passive event listener due to target being treated as passive. See
软件:给大家推荐一款国产非常好用的效率软件uTools
数据库文档生成工具V1.0
如何在网页标题栏中加入图片!
QT signals 保存到 QMap
生成一个包含日期的随机编码
数组的一些方法
CMDB 腾讯云部分实现
第九篇 ApplicationContext初始化
DropBlock: 卷积层的正则化方法及复现代码
舍不得花钱买1stOpt,不妨试试这款免费的拟合优化神器【openLU】
基于爬行动物搜索RSA优化LSTM的时间序列预测
E-R图总结规范
【C# - 爬虫】使用Selenium实现爬虫,获取近七天天气信息(包含完整代码)
格拉姆角场GAF将时序数据转换为图像并应用于故障诊断
如何画好业务架构图。
网络技巧:教你给路由器装上电池,断电照样可以上网!
Jenkins pipeline 自动部署实践