当前位置:网站首页>Cesium loading orthophoto scheme
Cesium loading orthophoto scheme
2022-06-23 09:22:00 【Gisleung】
Cesium Load orthophoto scheme
step 1: Prepare high-definition orthophoto map

Prepare a good quality orthophoto map :
- Image format is *.tif , Such as :
D:\Users\gisleung\Desktop\cesium Load orthophoto scheme \01 Test orthophoto \new_file.tif - The correct coordinate system must be included
step 2: install CesiumLab Tools
- Official website download address :Cesium Laboratory website (cesiumlab.com)
- Login is required after installation

step 3: Use tools to slice images
- Select orthophoto , Such as :
D:\Users\gisleung\Desktop\cesium Load orthophoto scheme \01 Test orthophoto \new_file.tif - Set parameters ( General default )
- Storage type selection hash
- Choose the output path , Such as :
D:\Users\gisleung\Desktop\cesium Load orthophoto scheme \03 Output tile \tempTiles - Submit for processing , Wait for processing to complete


step 4: adopt web The server publishes tiles
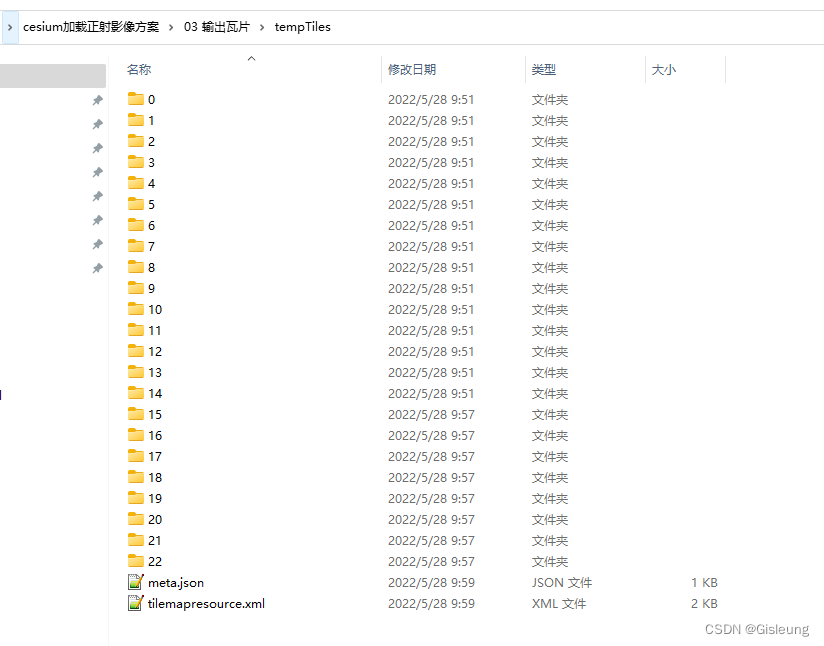
- Add tiles to the catalog (
tempTiles) Copy to web The server , Such as :nginx Release path - Provide tile directory access address , As a service address , Such as :
http://80.150.231.160:8888/webdata/maptile/tempTiles
step 5: stay Cesium Loading orthophoto tiles
- Extended service address : Such as :
http://80.150.231.160:8888/webdata/maptile/tempTiles/{z}/{x}/{y}.png - The following code can be used to implement the Cesium Loading images in
let domImage = new Cesium.UrlTemplateImageryProvider({

                "url": "http://80.150.231.160:8888/webdata/maptile/tempTiles/{z}/{x}/{y}.png"
              })
viewer.scene.imageryLayers.addImageryProvider(domImage)
- Loading results

边栏推荐
- ionic5表单输入框和单选按钮
- [learning resources] understand and love mathematics
- Sequential representation and implementation of sequencelist -- linear structure
- [極客大挑戰 2019]HardSQL
- 扫码登录基本流程
- How to use "tomato working method" in flowus, notation and other note taking software?
- [cloud native | kubernetes] kubernetes principle and installation (II)
- 使用base64,展示图片
- 基于mediapipe的手势数字识别
- Learn SCI thesis drawing skills (f)
猜你喜欢

Community article | mosn building subset optimization ideas sharing

web--信息泄漏

ionic5錶單輸入框和單選按鈕
![[极客大挑战 2019]HardSQL](/img/73/ebfb410296b8e950c9ac0cf00adc17.png)
[极客大挑战 2019]HardSQL
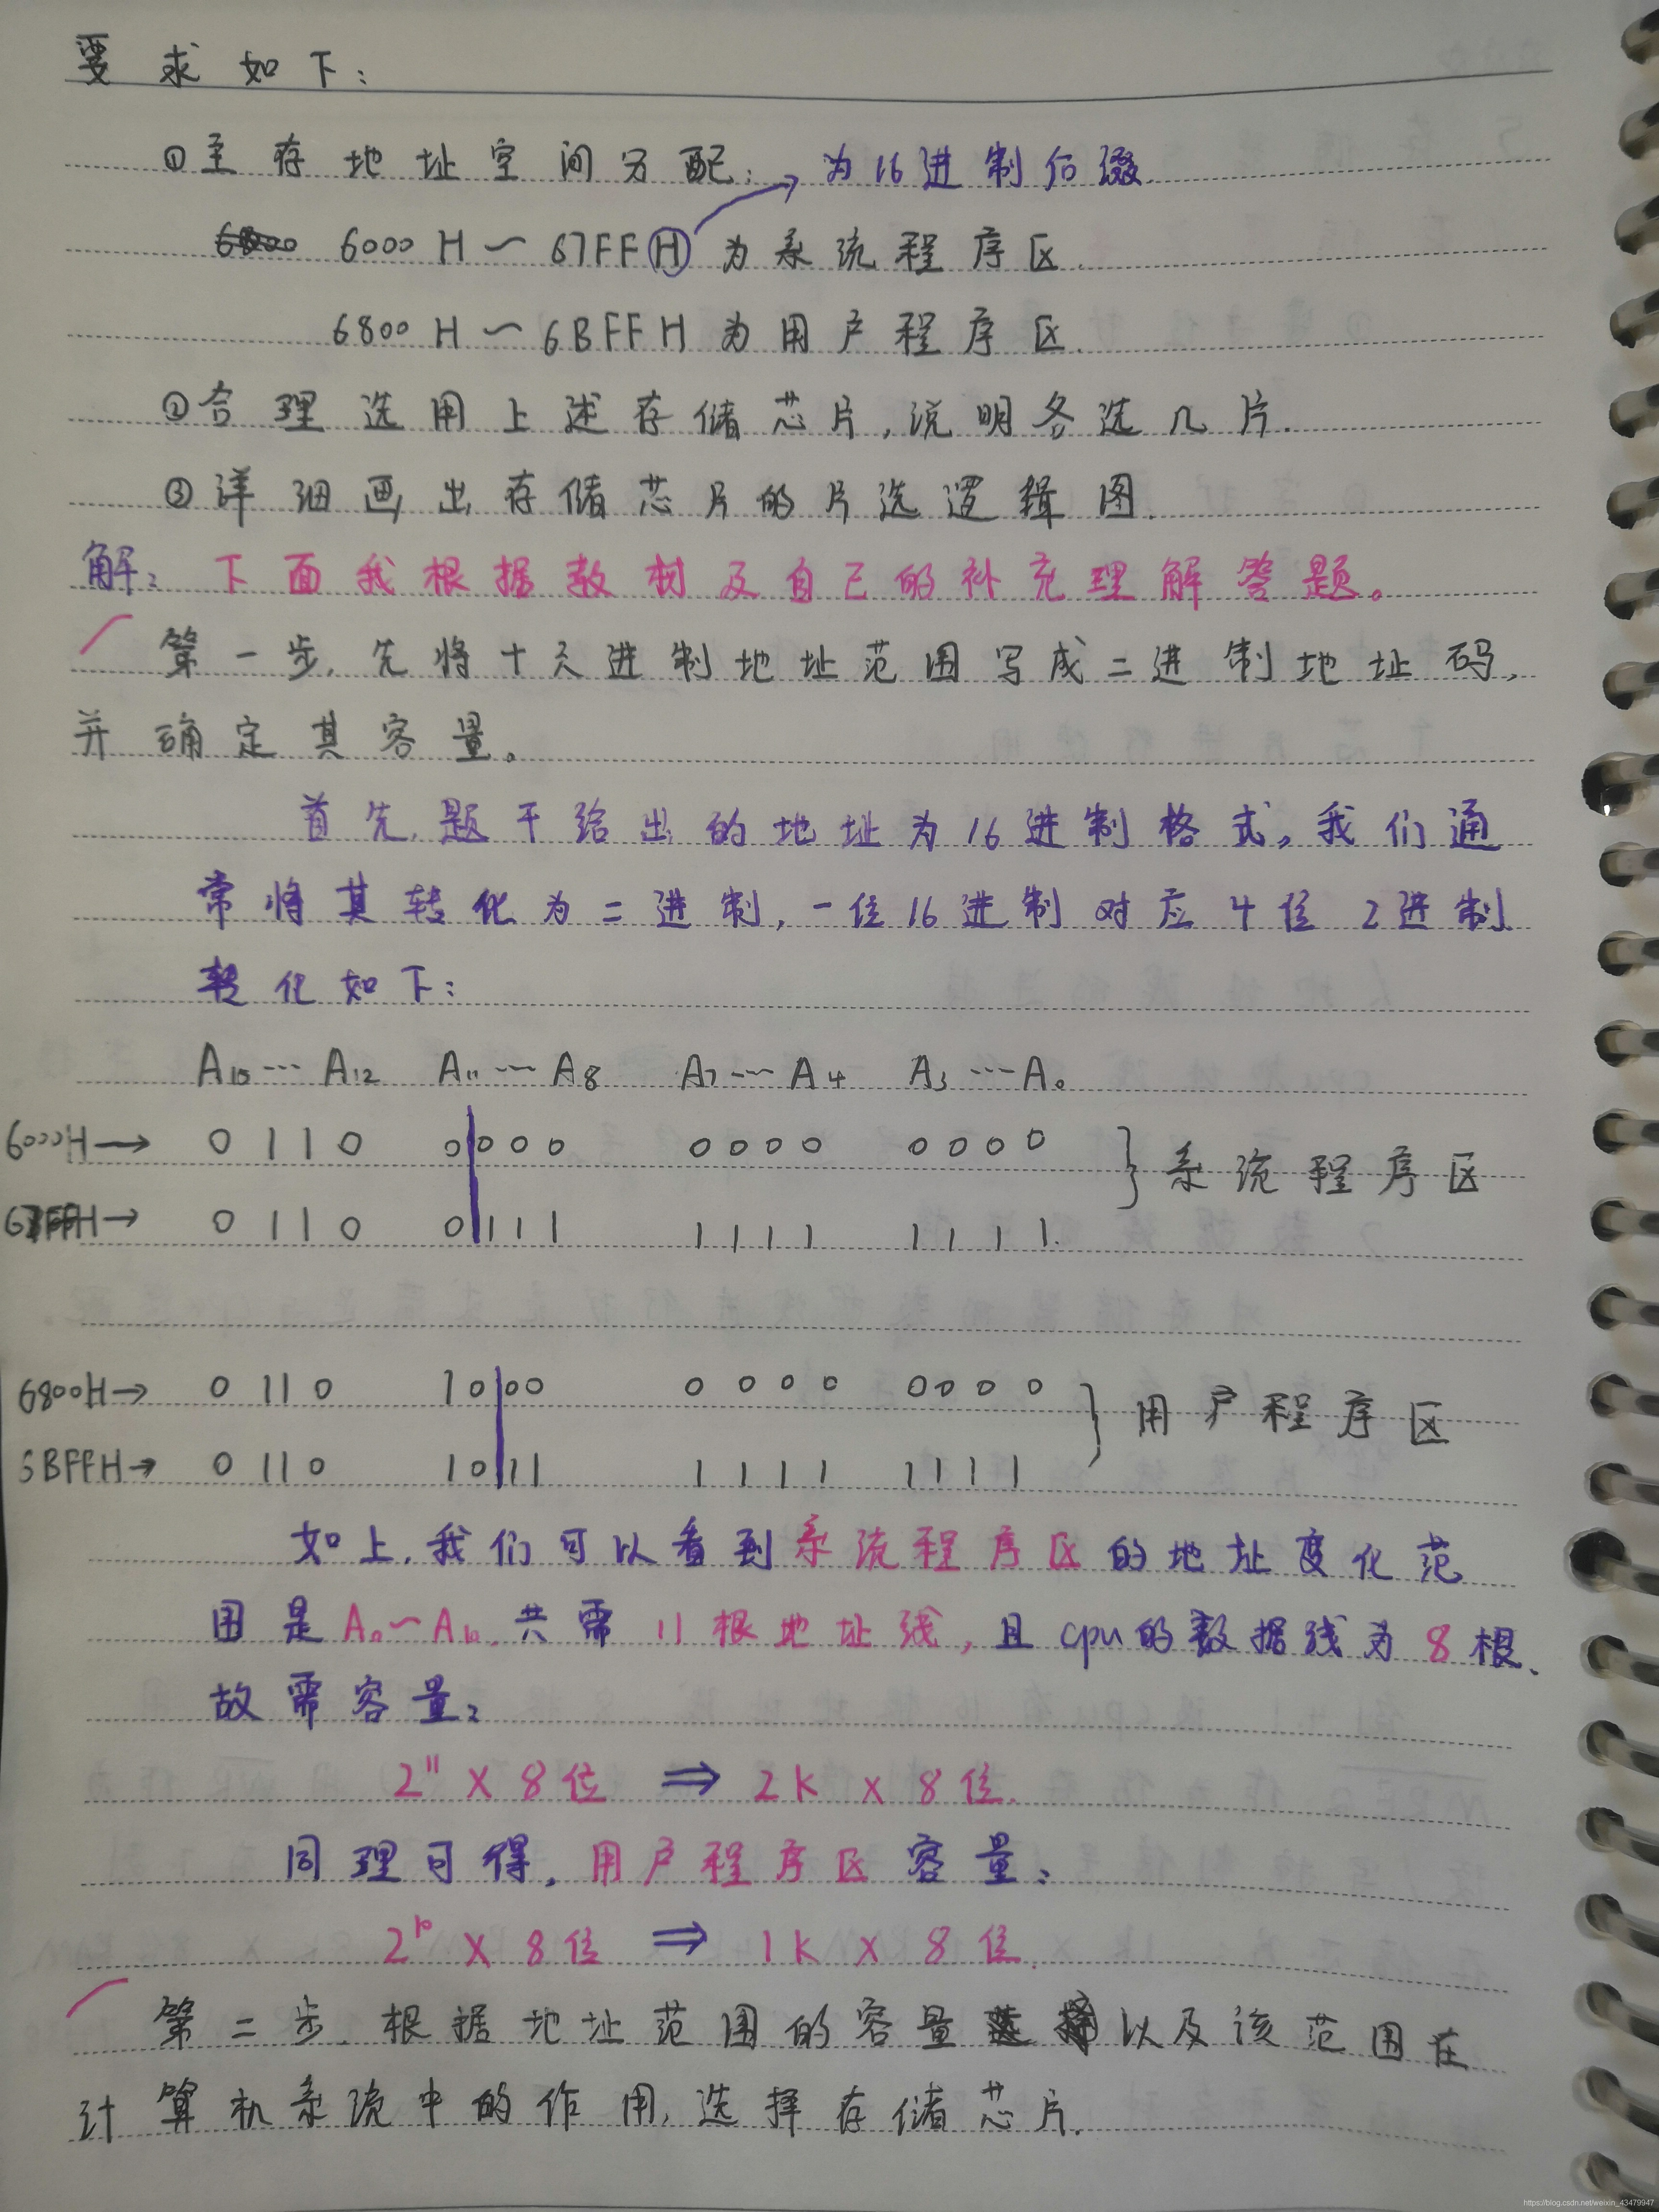
Set the CPU to have 16 address lines and 8 data lines, and use mreq as the access control line number Connection between memory and CPU
![[SUCTF 2019]CheckIn](/img/0e/75bb14e7a3e55ddc5126581a663bfb.png)
[SUCTF 2019]CheckIn

微信小程序:点击按钮频繁切换,重叠自定义markers,但是值不改变
![[MRCTF2020]Ez_bypass](/img/cd/bd6fe5dfc3f1942a9959a9dab9e7e0.png)
[MRCTF2020]Ez_bypass
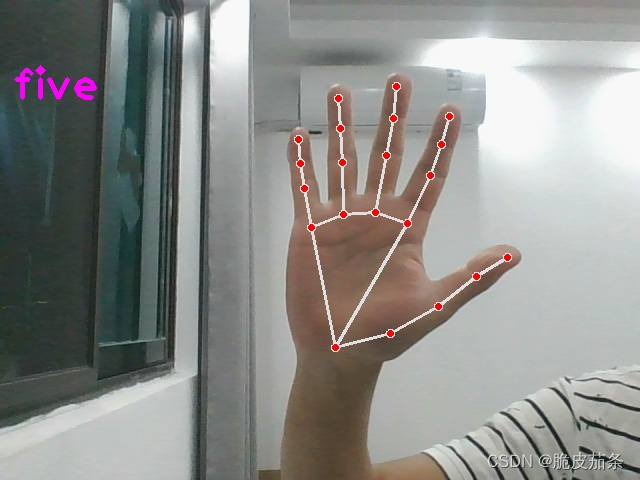
基于mediapipe的手势数字识别

Redis learning notes RDB of persistence mechanism
随机推荐
简易学生管理
Zone d'entrée du formulaire ionic5 et boutons radio
2022.6.22-----leetcode. five hundred and thirteen
MySQL fault case | error 1071 (42000): specified key was too long
UEFI 源码学习4.1 - PciHostBridgeDxe
UCOSII (learning notes)
微信小程序:点击按钮频繁切换,重叠自定义markers,但是值不改变
ThinkPHP 2.x/3.0 漏洞复现
Redis learning notes - geographic information location (GEO)
map的下标操作符
Pizza ordering design - simple factory model
Kotlin Series 1: getting started with basics
多线程初学
36 krypton launched | cloud native database company "tuoshupai" completed a new round of strategic financing, and the valuation has reached the level of quasi Unicorn
栈(Stack)的链式实现详解----线性结构
[CISCN2019 华北赛区 Day2 Web1]Hack World
Redis学习笔记—数据库管理
ARM中常见的英文解释
4sum of leetcode topic analysis
[GXYCTF2019]BabyUpload