当前位置:网站首页>openCV+dlib实现给蒙娜丽莎换脸
openCV+dlib实现给蒙娜丽莎换脸
2022-07-03 09:23:00 【果州做题家】
opencv+dlib实现给蒙娜丽莎换脸
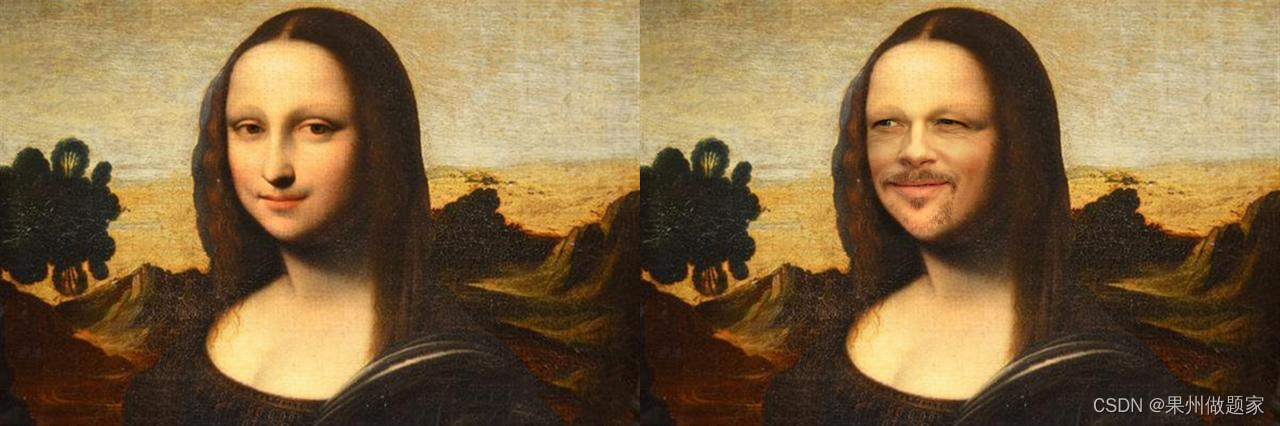
本案例利用opencv+dlib实现了给蒙娜丽莎换脸。
换脸实现的基本原理:
使用dlib的shape_predictor_68_face_landmarks.dat模型,提取有正脸的源图片和目标图片68个人脸特征点。
根据人脸特征点分别获取人脸掩模
对源图片仿射变换使其脸部对准目标图片中的脸部得到新的图片
对人脸掩模执行相同的操作仿射
将两个新得到的图取并集
利用opencv,对仿射变换后的源图片和目标图片进行泊松融合
一、主要步骤
1.导入工具包
import cv2
import dlib
import numpy as np
#导入python绘图matplotlib
import matplotlib.pyplot as plt
#使用ipython的魔法方法,将绘制出的图像直接嵌入在notebook单元格中
%matplotlib inline
#定义可视化图像函数
def look_img(img):
    '''opencv读入图像格式为BGR,matplotlib可视化格式为RGB,因此需将BGR转RGB'''
    img_RGB = cv2.cvtColor(img,cv2.COLOR_BGR2RGB)
    plt.imshow(img_RGB)
    plt.show()
2.获取图片大小(高度,宽度)
def get_image_size(image):
    """ 获取图片大小(高度,宽度) :param image: image :return: (高度,宽度) """
    image_size = (image.shape[0], image.shape[1])
    return image_size
3.获取人脸标志,68个特征点
def get_face_landmarks(image, face_detector, shape_predictor):
    """ 获取人脸标志,68个特征点 :param image: image :param face_detector: dlib.get_frontal_face_detector :param shape_predictor: dlib.shape_predictor :return: np.array([[],[]]), 68个特征点 """
    dets = face_detector(image, 1)

    shape = shape_predictor(image, dets[0])
    face_landmarks = np.array([[p.x, p.y] for p in shape.parts()])
    return face_landmarks
4.获取人脸掩模
def get_face_mask(image_size, face_landmarks):
    """ 获取人脸掩模 :param image_size: 图片大小 :param face_landmarks: 68个特征点 :return: image_mask, 掩模图片 """
    mask = np.zeros(image_size, dtype=np.uint8)
    points = np.concatenate([face_landmarks[0:16], face_landmarks[26:17:-1]])
    cv2.fillPoly(img=mask, pts=[points], color=255)
    return mask
5.获取源图片仿射变换后的图片
def get_affine_image(image1, image2, face_landmarks1, face_landmarks2):
    """ 获取图片1仿射变换后的图片 :param image1: 图片1, 要进行仿射变换的图片 :param image2: 图片2, 只要用来获取图片大小,生成与之大小相同的仿射变换图片 :param face_landmarks1: 图片1的人脸特征点 :param face_landmarks2: 图片2的人脸特征点 :return: 仿射变换后的图片 """
    three_points_index = [18, 8, 25]
    M = cv2.getAffineTransform(face_landmarks1[three_points_index].astype(np.float32),
                               face_landmarks2[three_points_index].astype(np.float32))
    dsize = (image2.shape[1], image2.shape[0])
    affine_image = cv2.warpAffine(image1, M, dsize)
    return affine_image.astype(np.uint8)
6.获取掩模的中心点坐标
def get_mask_center_point(image_mask):
    """ 获取掩模的中心点坐标 :param image_mask: 掩模图片 :return: 掩模中心 """
    image_mask_index = np.argwhere(image_mask > 0)
    miny, minx = np.min(image_mask_index, axis=0)
    maxy, maxx = np.max(image_mask_index, axis=0)
    center_point = ((maxx + minx) // 2, (maxy + miny) // 2)
    return center_point
7.获取两个掩模掩盖部分的并集
def get_mask_union(mask1, mask2):
    """ 获取两个掩模掩盖部分的并集 :param mask1: mask_image, 掩模1 :param mask2: mask_image, 掩模2 :return: 两个掩模掩盖部分的并集 """
    mask = np.min([mask1, mask2], axis=0)  # 掩盖部分并集
    mask = ((cv2.blur(mask, (5, 5)) == 255) * 255).astype(np.uint8)  # 缩小掩模大小
    mask = cv2.blur(mask, (3, 3)).astype(np.uint8)  # 模糊掩模
    return mask
8.肤色调整
def skin_color_adjustment(im1, im2, mask=None):
    """ 肤色调整 :param im1: 图片1 :param im2: 图片2 :param mask: 人脸 mask. 如果存在,使用人脸部分均值来求肤色变换系数;否则,使用高斯模糊来求肤色变换系数 :return: 根据图片2的颜色调整的图片1 """
    if mask is None:
        im1_ksize = 55
        im2_ksize = 55
        im1_factor = cv2.GaussianBlur(im1, (im1_ksize, im1_ksize), 0).astype(np.float)
        im2_factor = cv2.GaussianBlur(im2, (im2_ksize, im2_ksize), 0).astype(np.float)
    else:
        im1_face_image = cv2.bitwise_and(im1, im1, mask=mask)
        im2_face_image = cv2.bitwise_and(im2, im2, mask=mask)
        im1_factor = np.mean(im1_face_image, axis=(0, 1))
        im2_factor = np.mean(im2_face_image, axis=(0, 1))

	im1 = np.clip((im1.astype(np.float64) * im2_factor / np.clip(im1_factor, 1e-6, None)), 0, 255).astype(np.uint8)
	return im1
9.主程序
# 创建人脸检测器
det_face = dlib.get_frontal_face_detector()
# 加载标志点检测器
det_landmarks = dlib.shape_predictor("shape_predictor_68_face_landmarks.dat") # 68点
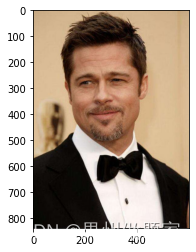
im1 = cv2.imread('peter.jpg') # 源图片
im1 = cv2.resize(im1, (600, im1.shape[0] * 600 // im1.shape[1]))
landmarks1 = get_face_landmarks(im1, det_face, det_landmarks) # 68_face_landmarks
im1_size = get_image_size(im1) # 脸图大小
im1_mask = get_face_mask(im1_size, landmarks1) # 脸图人脸掩模
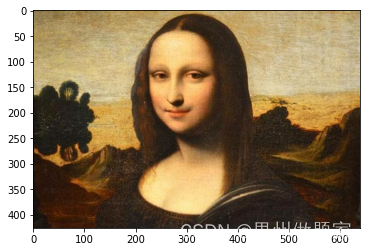
im2 = cv2.imread('mnls.jpg') # 目标图片
landmarks2 = get_face_landmarks(im2, det_face, det_landmarks) # 68_face_landmarks
im2_size = get_image_size(im2) # 目标图片大小
im2_mask = get_face_mask(im2_size, landmarks2) # 目标图片人脸掩模
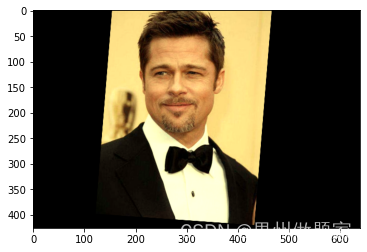
affine_im1 = get_affine_image(im1, im2, landmarks1, landmarks2) # im1(脸图)仿射变换后的图片
affine_im1_mask = get_affine_image(im1_mask, im2, landmarks1, landmarks2) # im1(脸图)仿射变换后的图片的人脸掩模
union_mask = get_mask_union(im2_mask, affine_im1_mask) # 掩模合并
affine_im1 = skin_color_adjustment(affine_im1, im2, mask=union_mask) # 肤色调整
point = get_mask_center_point(affine_im1_mask) # im1(脸图)仿射变换后的图片的人脸掩模的中心点
seamless_im = cv2.seamlessClone(affine_im1, im2, mask=union_mask, p=point, flags=cv2.NORMAL_CLONE) # 进行泊松融合
look_img(im1)
look_img(im2)
look_img(affine_im1)
look_img(seamless_im)
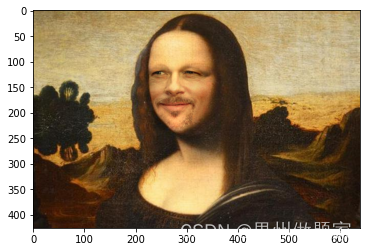
二、换脸效果图
# 原图与换脸后的图比较

from PIL import Image
img0 = cv2.cvtColor(np.hstack((im2, seamless_im)), cv2.COLOR_BGR2RGB)
im=Image.fromarray(img0)
display(im)
边栏推荐
- Wireshark use
- LeetCode - 705 设计哈希集合(设计)
- Dictionary tree prefix tree trie
- Openeuler kernel technology sharing - Issue 1 - kdump basic principle, use and case introduction
- CV learning notes - camera model (Euclidean transformation and affine transformation)
- Basic knowledge of communication interface
- Markdown latex full quantifier and existential quantifier (for all, existential)
- 20220609其他:多数元素
- Cases of OpenCV image enhancement
- Opencv gray histogram, histogram specification
猜你喜欢

LeetCode - 673. Number of longest increasing subsequences

Opencv Harris corner detection

MySQL root user needs sudo login

2. Elment UI date selector formatting problem

CV learning notes - edge extraction

Working mode of 80C51 Serial Port

LeetCode - 1670 設計前中後隊列(設計 - 兩個雙端隊列)

CV learning notes - BP neural network training example (including detailed calculation process and formula derivation)
Octave instructions
Vgg16 migration learning source code
随机推荐
My openwrt learning notes (V): choice of openwrt development hardware platform - mt7688
Opencv feature extraction sift
LeetCode - 5 最长回文子串
Swing transformer details-2
Serial communication based on 51 single chip microcomputer
2021-11-11 standard thread library
pycharm 无法引入自定义包
4G module board level control interface designed by charging pile
03 FastJson 解决循环引用
Yocto technology sharing phase IV: customize and add software package support
CV learning notes - BP neural network training example (including detailed calculation process and formula derivation)
2021-10-28
On the problem of reference assignment to reference
Circular queue related design and implementation reference 1
My notes on intelligent charging pile development (II): overview of system hardware circuit design
Qcombox style settings
Swing transformer details-1
LeetCode - 1670 設計前中後隊列(設計 - 兩個雙端隊列)
20220610其他:任务调度器
Window maximum and minimum settings