当前位置:网站首页>Kubernetes Administrator certification (CKA) exam notes (IV)
Kubernetes Administrator certification (CKA) exam notes (IV)
2022-07-05 22:10:00 【The mountains and rivers are all right】
Write it at the front
- Um. , Preparing for the exam
ckacertificate , Signed up for a shift , Spent a lot of money , Be sure to pass the exam . - This blog is the notes after attending the class , Suitable for review .
- Blog content involves :
HelmBasic concept and installation of ,HelmSource configurationchartInstallation and deployment of packages- private
HelmSource construction andchartBagpushandpull helmactual combat :Prometheus+Grafana+NodeExporter: Cluster monitoring platform constructionAPI ServerCertification managementtoken、Kubeconfig fileThe way ofAPI ServerauthenticationDemoKubeconfig fileOfestablish DemoAPI ServerAuthorization managementAPI ServerA brief description of common permission policiesRBACStrategy, actual combatDemo
The meaning of life is to learn to live truly , The meaning of life is to find the meaning of life ----- The mountains and rivers are well
heml
helm The function of is to define many resources such as svc,deployment, Pass all definitions at one time , Put it in the source for unified management , This makes it easy to deploy on other machines , Personally, this is similar to Automatic operation and maintenance in ansible Medium role Concept , The front-end project Medium npm Package management tools , The back-end project Medium maven And other construction tools , analogy Ansible Use roles to integrate playbook.yaml Achieve reusability . alike , Use helm For consolidation k8s Resource object in yaml file , Achieve reusability
Helm It's a by CNCF Incubate and manage projects , Used to respond to the need in Kubernetes Define complex applications of deployment 、 Install and update .Helm With Chart To describe the application software , Can be easily created 、 Versioning 、 Share and publish complex applications .
heml Main concepts
Chart: One Helm package , It contains the information needed to run an application Tools and resource definitions , It may also include Kubernetes colony Medium Service definition , similar Ansible Medium rhel-system-roles software package
Release: stay Kubernetes One running on the cluster Chart example . On the same cluster , One Chart Can be installed many times .
Repository: be used for Store and share Chart Warehouse . Simply speaking , Helm The main task of the whole system is , Find what you need in the warehouse Chart, And then Chart With Release In the form of Kubernetes In the cluster .
Use helm We need to install... First , Can pass Github Download installation package
heml install
Installation package download :https://github.com/helm/helm/releases:
Unpack the installation
┌──[[email protected]]-[~]
└─$tar zxf helm-v3.2.1-linux-amd64.tar.gz
┌──[[email protected]]-[~]
└─$cd linux-amd64/
┌──[[email protected]]-[~/linux-amd64]
└─$ls
helm  LICENSE  README.md
Then directly helm Copied to the /usr/local/bin/, After configuration , You can use helm command
┌──[[email protected]]-[~/linux-amd64]
└─$cp helm  /usr/local/bin/
┌──[[email protected]]-[~/linux-amd64]
└─$ls /usr/local/bin/
helm
The configuration command is automatically completed , By writing /etc/profile file souece < (helm completion bash) Configuration commands are automatically completed . Remember to use after configuration source /etc/profile To refresh the configuration
┌──[[email protected]]-[~/ansible/k8s-helm-create]
└─$helm --help | grep bash
  completion  generate autocompletions script for the specified shell (bash or zsh)
┌──[[email protected]]-[~/ansible/k8s-helm-create]
└─$vim /etc/profile
┌──[[email protected]]-[~/ansible/k8s-helm-create]
└─$source /etc/profile
┌──[[email protected]]-[~/ansible/k8s-helm-create]
└─$cat /etc/profile | grep -v ^# | grep source
source <(kubectl completion bash)
source <(helm completion bash)
┌──[[email protected]]-[~/ansible/k8s-helm-create]
└─$
Verify the installation , see heml edition
┌──[[email protected]]-[~/ansible/k8s-helm-create]
└─$helm version
version.BuildInfo{
    Version:"v3.2.1", GitCommit:"fe51cd1e31e6a202cba7dead9552a6d418ded79a", GitTreeState:"clean", GoVersion:"go1.13.10"}
┌──[[email protected]]-[~/ansible/k8s-helm-create]
└─$
To configure helm Source
Use helm Need configuration yaml Source , Common ones are Ali . Microsoft , and Githup Source on
- Alibaba cloud's source https://apphub.aliyuncs.com
- Microsoft azure Source http://mirror.azure.cn/kubernetes/charts/
Check all sources
┌──[[email protected]]-[~/ansible/k8s-helm-create]
└─$helm repo list  # Check all sources
Error: no repositories to show
Add the specified source
┌──[[email protected]]-[~/ansible/k8s-helm-create]
└─$helm repo add azure http://mirror.azure.cn/kubernetes/charts/

"azure" has been added to your repositories
┌──[[email protected]]-[~/ansible/k8s-helm-create]
└─$helm repo add ali https://apphub.aliyuncs.com
"ali" has been added to your repositories
Check the just added yum Source
┌──[[email protected]]-[~/ansible/k8s-helm-create]
└─$helm repo list
NAME    URL
azure   http://mirror.azure.cn/kubernetes/charts/
ali     https://apphub.aliyuncs.com
┌──[[email protected]]-[~/ansible/k8s-helm-create]
└─$
Helm Common usage of
Helm Common usage of , Include search Chart、 install Chart、 Customize Chart To configure 、 Update or rollback Release、 Delete Release、 Create custom Chart、 Build a private warehouse, etc
helm search: Search for available Chart
┌──[[email protected]]-[~/ansible/k8s-helm-create]
└─$helm search  repo mysql
NAME                            CHART VERSION   APP VERSION     DESCRIPTION

ali/mysql                       6.8.0           8.0.19          Chart to create a Highly available MySQL cluster
ali/mysqldump                   2.6.0           2.4.1           A Helm chart to help backup MySQL databases usi...
ali/mysqlha                     1.0.0           5.7.13          MySQL cluster with a single master and zero or ...
ali/prometheus-mysql-exporter   0.5.2           v0.11.0         A Helm chart for prometheus mysql exporter with...
azure/mysql                     1.6.9           5.7.30          DEPRECATED - Fast, reliable, scalable, and easy...
azure/mysqldump                 2.6.2           2.4.1           DEPRECATED! - A Helm chart to help backup MySQL...
azure/prometheus-mysql-exporter 0.7.1           v0.11.0         DEPRECATED A Helm chart for prometheus mysql
..........
chart Bao pull
install chart You can directly use the command to install , You can also pull it locally and install it , You can also install directly through the named line
- The local Chart Compressed package (helm install mysql-1.6.4.tgz)
- One Chart Catalog (helm install mysql/)
- A complete URL(helm install https://example.com/charts/mysql-1.6.4.tgz)
chart Bao pull
┌──[[email protected]]-[~/ansible/k8s-helm-create]
└─$helm pull azure/mysql --version=1.6.4
┌──[[email protected]]-[~/ansible/k8s-helm-create]
└─$ls
mysql-1.6.4.tgz
helm install: install Chart
chart Package direct installation
┌──[[email protected]]-[~/ansible/k8s-helm-create]
└─$#helm install db azure/mysql --version=1.6.4
┌──[[email protected]]-[~/ansible/k8s-helm-create]
└─$
Pulled chart Package details , Check after decompression
┌──[[email protected]]-[~/ansible/k8s-helm-create]
└─$ls
mysql-1.6.4.tgz
┌──[[email protected]]-[~/ansible/k8s-helm-create]
└─$tar zxf mysql-1.6.4.tgz
.......
┌──[[email protected]]-[~/ansible/k8s-helm-create]
└─$ls
mysql  mysql-1.6.4.tgz
┌──[[email protected]]-[~/ansible/k8s-helm-create]
└─$cd mysql/
┌──[[email protected]]-[~/ansible/k8s-helm-create/mysql]
└─$ls
Chart.yaml  README.md  templates  values.yaml
| yaml file | describe |
|---|---|
| Chart.yaml | Used to describe Chart The information of YAML file |
| README.md | Optional : README file |
| values.yaml | Default configuration values |
| templates | Optional : combination values.yaml, Can generate Kubernetes Of manifest file |
For downloading good yaml file , We can use it after modification helm package REPACK
┌──[[email protected]]-[~/ansible/k8s-helm-create]
└─$rm -rf mysql-1.6.4.tgz ; helm package  mysql/
Successfully packaged chart and saved it to: /root/ansible/k8s-helm-create/mysql-1.6.4.tgz
┌──[[email protected]vms81.liruilongs.github.io]-[~/ansible/k8s-helm-create]
└─$ls
mysql  mysql-1.6.4.tgz
Let's modify chart The image in is already downloaded mysql and busybox Mirror image
┌──[[email protected]]-[~/ansible]
└─$ansible 192.168.26.82 -m shell -a "docker images | grep mysql"
192.168.26.82 | CHANGED | rc=0 >>
mysql                                                     latest    ecac195d15af   2 months ago    516MB
mysql                                                     <none>    9da615fced53   3 months ago    514MB
hub.c.163.com/library/mysql                               latest    9e64176cd8a2   4 years ago     407MB
┌──[[email protected]]-[~/ansible]
└─$ansible 192.168.26.82 -m shell -a "docker images | grep busybox"
192.168.26.82 | CHANGED | rc=0 >>
busybox                                                   latest    ffe9d497c324   5 weeks ago     1.24MB
busybox                                                   <none>    7138284460ff   2 months ago    1.24MB
busybox                                                   <none>    cabb9f684f8b   2 months ago    1.24MB
busybox                                                   1.27      6ad733544a63   4 years ago     1.13MB
yauritux/busybox-curl                                     latest    69894251bd3c   5 years ago     21.3MB
┌──[[email protected]]-[~/ansible]
└─$fg
vim ./k8s-helm-create/mysql/values.yaml
┌──[[email protected]]-[~/ansible]
└─$
By repairing yaml File creation chart, View the currently running chart
┌──[[email protected]]-[~/ansible/k8s-helm-create]
└─$helm ls
NAME    NAMESPACE       REVISION        UPDATED STATUS  CHART   APP VERSION
Use helm install function Chart
Here we use the previous one mysq chart To install a mysql
┌──[[email protected]]-[~/ansible/k8s-helm-create]
└─$cd mysql/
┌──[[email protected]]-[~/ansible/k8s-helm-create/mysql]
└─$helm install mydb .
NAME: mydb
LAST DEPLOYED: Thu Jan 13 01:51:42 2022
NAMESPACE: liruilong-network-create
STATUS: deployed
REVISION: 1
NOTES:
MySQL can be accessed via port 3306 on the following DNS name from within your cluster:
mydb-mysql.liruilong-network-create.svc.cluster.local

To get your root password run:

    MYSQL_ROOT_PASSWORD=$(kubectl get secret --namespace liruilong-network-create mydb-mysql -o jsonpath="{.data.mysql-root-password}" | base64 --decode; echo)

To connect to your database:

1. Run an Ubuntu pod that you can use as a client:

    kubectl run -i --tty ubuntu --image=ubuntu:16.04 --restart=Never -- bash -il

2. Install the mysql client:

    $ apt-get update && apt-get install mysql-client -y

3. Connect using the mysql cli, then provide your password:
    $ mysql -h mydb-mysql -p

To connect to your database directly from outside the K8s cluster:
    MYSQL_HOST=127.0.0.1
    MYSQL_PORT=3306

    # Execute the following command to route the connection:
    kubectl port-forward svc/mydb-mysql 3306

    mysql -h ${MYSQL_HOST} -P${MYSQL_PORT} -u root -p${MYSQL_ROOT_PASSWORD}
Check whether it runs successfully mydb Of pod and SVC
┌──[[email protected]]-[~/ansible/k8s-helm-create/mysql]
└─$kubectl  get pods
NAME                          READY   STATUS    RESTARTS        AGE
mydb-mysql-7f8c5c47bd-82cts   1/1     Running   0               55s
pod1                          1/1     Running   2 (7d17h ago)   9d
pod2                          1/1     Running   3 (3d3h ago)    9d
┌──[[email protected]]-[~/ansible/k8s-helm-create/mysql]
└─$kubectl  get svc
NAME         TYPE           CLUSTER-IP       EXTERNAL-IP      PORT(S)        AGE
mydb-mysql   ClusterIP      10.107.17.103    <none>           3306/TCP       62s
svc1         LoadBalancer   10.106.61.84     192.168.26.240   80:30735/TCP   9d
svc2         LoadBalancer   10.111.123.194   192.168.26.241   80:31034/TCP   9d
┌──[[email protected]]-[~/ansible/k8s-helm-create/mysql]
└─$
To install a mysql Client side test OK
┌──[[email protected]]-[~]
└─$yum install  mariadb -y
┌──[[email protected]]-[~/ansible/k8s-helm-create/mysql]
└─$mysql -h10.107.17.103 -uroot -ptesting
Welcome to the MariaDB monitor.  Commands end with ; or \g.
Your MySQL connection id is 7
Server version: 5.7.18 MySQL Community Server (GPL)

Copyright (c) 2000, 2018, Oracle, MariaDB Corporation Ab and others.

Type 'help;' or '\h' for help. Type '\c' to clear the current input statement.

MySQL [(none)]> use mysql
Reading table information for completion of table and column names
You can turn off this feature to get a quicker startup with -A

Database changed
Delete helm
┌──[[email protected]]-[~/ansible/k8s-helm-create/mysql]
└─$helm del mydb
release "mydb" uninstalled
┌──[[email protected]]-[~/ansible/k8s-helm-create/mysql]
└─$helm ls
NAME    NAMESPACE       REVISION        UPDATED STATUS  CHART   APP VERSION
┌──[[email protected]]-[~/ansible/k8s-helm-create/mysql]
└─$
Build private Repository
self-built Chart After that, we naturally need to build a private warehouse . Use Nginx Build a simple Chart Private warehouse
Warehouse building
Warehouse building , Find a machine to run one Nginx Service as warehouse , Pay attention to mapping the homepage data
┌──[[email protected]]-[~]
└─$netstat  -ntulp | grep 80
┌──[[email protected]]-[~]
└─$docker run -dit --name=helmrepo -p 8080:80 -v /data:/usr/share/nginx/html/charts docker.io/nginx
7201e001b02602f087105ca6096b0816acb03db02296c35c098a3dfddcb9c8d0
┌──[[email protected]]-[~]
└─$docker ps | grep helmrepo
7201e001b026   nginx                                               "/docker-entrypoint.…"   16 seconds ago      Up 15 seconds      0.0.0.0:8080->80/tcp, :::8080->80/tcp   helmrepo
Access test
┌──[[email protected]]-[~]
└─$curl 127.0.0.1:8080
<!DOCTYPE html>
<html>
<head>
<title>Welcome to nginx!</title>
........
chart Package upload
Before packaging mysql package , Upload helm Private warehouse . Here you need to generate the index file for this read index.yaml
┌──[[email protected]]-[~/ansible/k8s-helm-create]
└─$helm  package mysql/
Successfully packaged chart and saved it to: /root/ansible/k8s-helm-create/mysql-1.6.4.tgz
┌──[[email protected]]-[~/ansible/k8s-helm-create]
└─$helm repo index . --url http://192.168.26.83:8080/charts
┌──[[email protected]]-[~/ansible/k8s-helm-create]
└─$ls
index.yaml  mysql  mysql-1.6.4.tgz
┌──[[email protected]]-[~/ansible/k8s-helm-create]
└─$cd ..
Index files and chart The package is uploaded to the private warehouse together
┌──[[email protected]]-[~/ansible]
└─$ansible 192.168.26.83 -m copy -a "src=./k8s-helm-create/index.yaml dest=/data/"
192.168.26.83 | CHANGED => {

    "ansible_facts": {

        "discovered_interpreter_python": "/usr/bin/python"
    },
    "changed": true,
    "checksum": "233a0f3837d46af8a50098f1b29aa524b751cb29",
    "dest": "/data/index.yaml",
    "gid": 0,
    "group": "root",
    "md5sum": "66953d9558e44ab2f049dc602600ffda",
    "mode": "0644",
    "owner": "root",
    "size": 843,
    "src": "/root/.ansible/tmp/ansible-tmp-1642011407.72-76313-71345316897038/source",
    "state": "file",
    "uid": 0
}
┌──[[email protected]]-[~/ansible]
└─$ansible 192.168.26.83 -m copy -a "src=./k8s-helm-create/mysql-1.6.4.tgz dest=/data/"
192.168.26.83 | CHANGED => {

    "ansible_facts": {

        "discovered_interpreter_python": "/usr/bin/python"
    },
    "changed": true,
    "checksum": "4fddb1c13c71673577570e61f68f926af7255bad",
    "dest": "/data/mysql-1.6.4.tgz",
    "gid": 0,
    "group": "root",
    "md5sum": "929267de36f9be04e0adfb2f9c9f5812",
    "mode": "0644",
    "owner": "root",
    "size": 11121,
    "src": "/root/.ansible/tmp/ansible-tmp-1642011437.58-76780-127185287864942/source",
    "state": "file",
    "uid": 0
}
┌──[[email protected]]-[~/ansible]
└─$
Warehouse index file update
If you add a new chart Package to private warehouse , The index file needs to be updated
helm create Create a custom chart package
┌──[[email protected]]-[~/ansible/k8s-helm-create]
└─$helm create  liruilonghelm
Creating liruilonghelm
┌──[[email protected]]-[~/ansible/k8s-helm-create]
└─$ls
index.yaml  liruilonghelm  mysql  mysql-1.6.4.tgz
┌──[[email protected]]-[~/ansible/k8s-helm-create]
└─$helm package liruilonghelm/
Successfully packaged chart and saved it to: /root/ansible/k8s-helm-create/liruilonghelm-0.1.0.tgz
┌──[[email protected]]-[~/ansible/k8s-helm-create]
└─$ls
index.yaml  liruilonghelm  liruilonghelm-0.1.0.tgz  mysql  mysql-1.6.4.tgz
Use the same name as the new index file
┌──[[email protected]]-[~/ansible/k8s-helm-create]
└─$helm repo index . --url http://192.168.26.83:8080/charts
┌──[[email protected]]-[~/ansible/k8s-helm-create]
└─$cat index.yaml
apiVersion: v1
entries:
  liruilonghelm:
  - apiVersion: v2
    appVersion: 1.16.0
    created: "2022-01-13T02:22:19.442365047+08:00"
    description: A Helm chart for Kubernetes
    digest: abb491f061cccc8879659149d96c99cbc261af59d5fcf8855c5e86251fbd53c1
    name: liruilonghelm
    type: application
    urls:
    - http://192.168.26.83:8080/charts/liruilonghelm-0.1.0.tgz
    version: 0.1.0
  mysql:
  - apiVersion: v1
    appVersion: 5.7.30
    created: "2022-01-13T02:22:19.444985984+08:00"
    description: Fast, reliable, scalable, and easy to use open-source relational
      database system.
    digest: 29153332e509765010c7e5e240a059550d52b01b31b69f25dd27c136dffec40f
    home: https://www.mysql.com/
    icon: https://www.mysql.com/common/logos/logo-mysql-170x115.png
    keywords:
    - mysql
    - database
    - sql
    maintainers:
    - email: [email protected]
      name: olemarkus
    - email: [email protected]
      name: viglesiasce
    name: mysql
    sources:
    - https://github.com/kubernetes/charts
    - https://github.com/docker-library/mysql
    urls:
    - http://192.168.26.83:8080/charts/mysql-1.6.4.tgz
    version: 1.6.4
generated: "2022-01-13T02:22:19.440764685+08:00"
┌──[[email protected]ilongs.github.io]-[~/ansible/k8s-helm-create]
└─$
You will find that the index file has been updated ,entries There are two objects in , Upload relevant data
┌──[[email protected]]-[~/ansible]
└─$ansible 192.168.26.83 -m copy -a "src=./k8s-helm-create/index.yaml dest=/data/"
192.168.26.83 | CHANGED => {

    "ansible_facts": {

        "discovered_interpreter_python": "/usr/bin/python"
    },
    "changed": true,
    "checksum": "dbdc550a24159764022ede9428b9f11a09ccf291",
    "dest": "/data/index.yaml",
    "gid": 0,
    "group": "root",
    "md5sum": "b771d8e50dd49228594f8a566117f8bf",
    "mode": "0644",
    "owner": "root",
    "size": 1213,
    "src": "/root/.ansible/tmp/ansible-tmp-1642012325.1-89511-190591844764611/source",
    "state": "file",
    "uid": 0
}
┌──[[email protected]]-[~/ansible]
└─$ansible 192.168.26.83 -m copy -a "src=./k8s-helm-create/liruilonghelm-0.1.0.tgz dest=/data/"
192.168.26.83 | CHANGED => {

    "ansible_facts": {

        "discovered_interpreter_python": "/usr/bin/python"
    },
    "changed": true,
    "checksum": "f7fe8a0a7585adf23e3e23f8378e3e5a0dc13f92",
    "dest": "/data/liruilonghelm-0.1.0.tgz",
    "gid": 0,
    "group": "root",
    "md5sum": "04670f9b7e614d3bc6ba3e133bddae59",
    "mode": "0644",
    "owner": "root",
    "size": 3591,
    "src": "/root/.ansible/tmp/ansible-tmp-1642012352.54-89959-104738456182106/source",
    "state": "file",
    "uid": 0
}
Use private warehouse chart Deploy application
Add private source
┌──[[email protected]]-[~/ansible]
└─$helm repo add liruilong_repo http://192.168.26.83:8080/charts
"liruilong_repo" has been added to your repositories
┌──[[email protected]]-[~/ansible]
└─$helm repo list
NAME            URL
azure           http://mirror.azure.cn/kubernetes/charts/
ali             https://apphub.aliyuncs.com
liruilong_repo  http://192.168.26.83:8080/charts
Private source to find installed chart
┌──[[email protected]]-[~/ansible]
└─$helm search repo mysql | grep liruilong
liruilong_repo/mysql            1.6.4           5.7.30          Fast, reliable, scalable, and easy to use open-...
┌──[[email protected]]-[~/ansible]
└─$
Install private power chart
┌──[[email protected]]-[~/ansible]
└─$helm list
NAME    NAMESPACE       REVISION        UPDATED STATUS  CHART   APP VERSION
┌──[[email protected]]-[~/ansible/k8s-helm-create]
└─$helm install liruilongdb  liruilong_repo/mysql
NAME: liruilongdb
LAST DEPLOYED: Thu Jan 13 02:42:41 2022
NAMESPACE: liruilong-network-create
STATUS: deployed
REVISION: 1
NOTES:
MySQL can be accessed via port 3306 on the following DNS name from within your cluster:
liruilongdb-mysql.liruilong-network-create.svc.cluster.local

To get your root password run:

    MYSQL_ROOT_PASSWORD=$(kubectl get secret --namespace liruilong-network-create liruilongdb-mysql -o jsonpath="{.data.mysql-root-password}" | base64 --decode; echo)

To connect to your database:

1. Run an Ubuntu pod that you can use as a client:

    kubectl run -i --tty ubuntu --image=ubuntu:16.04 --restart=Never -- bash -il

2. Install the mysql client:

    $ apt-get update && apt-get install mysql-client -y

3. Connect using the mysql cli, then provide your password:
    $ mysql -h liruilongdb-mysql -p

To connect to your database directly from outside the K8s cluster:
    MYSQL_HOST=127.0.0.1
    MYSQL_PORT=3306

    # Execute the following command to route the connection:
    kubectl port-forward svc/liruilongdb-mysql 3306

    mysql -h ${MYSQL_HOST} -P${MYSQL_PORT} -u root -p${MYSQL_ROOT_PASSWORD}
Verify the installation , see chart list
┌──[[email protected]]-[~/ansible/k8s-helm-create]
└─$helm list
NAME            NAMESPACE                       REVISION        UPDATED                                 STATUS         CHART            APP VERSION
liruilongdb     liruilong-network-create        1               2022-01-13 02:42:41.537928447 +0800 CST deployed       mysql-1.6.4      5.7.30
┌──[[email protected]]-[~/ansible/k8s-helm-create]
└─$
stay helm install During the execution of the command , have access to helm status Command tracking Release The state of :Helm Don't wait for all the creation process to complete , It's because of some Chart Of Docker Large mirror image , It will take a long time to download and create
┌──[[email protected]]-[~/ansible/k8s-helm-create]
└─$helm status  liruilongdb
NAME: liruilongdb
LAST DEPLOYED: Thu Jan 13 02:42:41 2022
NAMESPACE: liruilong-network-create
STATUS: deployed
REVISION: 1
NOTES:
MySQL can be accessed via port 3306 on the following DNS name from within your cluster:
liruilongdb-mysql.liruilong-network-create.svc.cluster.local

To get your root password run:

    MYSQL_ROOT_PASSWORD=$(kubectl get secret --namespace liruilong-network-create liruilongdb-mysql -o jsonpath="{.data.mysql-root-password}" | base64 --decode; echo)

To connect to your database:

1. Run an Ubuntu pod that you can use as a client:

    kubectl run -i --tty ubuntu --image=ubuntu:16.04 --restart=Never -- bash -il

2. Install the mysql client:

    $ apt-get update && apt-get install mysql-client -y

3. Connect using the mysql cli, then provide your password:
    $ mysql -h liruilongdb-mysql -p

To connect to your database directly from outside the K8s cluster:
    MYSQL_HOST=127.0.0.1
    MYSQL_PORT=3306

    # Execute the following command to route the connection:
    kubectl port-forward svc/liruilongdb-mysql 3306

    mysql -h ${MYSQL_HOST} -P${MYSQL_PORT} -u root -p${MYSQL_ROOT_PASSWORD}
After successful installation Chart after , The system will create a ConfigMap Used to hold Release Object's data
┌──[[email protected]]-[~/ansible/k8s-helm-create]
└─$kubectl  get configmaps
NAME                     DATA   AGE
kube-root-ca.crt         1      12d
liruilongdb-mysql-test   1      2d19h
┌──[[email protected]]-[~/ansible/k8s-helm-create]
└─$kubectl  describe configmaps liruilongdb-mysql-test
Name:         liruilongdb-mysql-test
Namespace:    liruilong-network-create
Labels:       app=liruilongdb-mysql
              app.kubernetes.io/managed-by=Helm
              chart=mysql-1.6.4
              heritage=Helm
              release=liruilongdb
Annotations:  meta.helm.sh/release-name: liruilongdb
              meta.helm.sh/release-namespace: liruilong-network-create

Data
====
run.sh:
----
@test "Testing MySQL Connection" {

  mysql --host=liruilongdb-mysql --port=3306 -u root -ptesting
}

BinaryData
====

Events:  <none>
┌──[[email protected]]-[~/ansible/k8s-helm-create]
└─$
View creation pod Running state
┌──[[email protected]]-[~/ansible/k8s-helm-create]
└─$kubectl  get pods
NAME                                 READY   STATUS    RESTARTS      AGE
liruilongdb-mysql-5cbf489f65-6ff4q   1/1     Running   1 (56m ago)   26h
┌──[[email protected]]-[~/ansible/k8s-helm-create]
└─$helm delete liruilongdb
release "liruilongdb" uninstalled
┌──[[email protected]]-[~/ansible/k8s-helm-create]
└─$kubectl  get pods
NAME                                 READY   STATUS        RESTARTS      AGE
liruilongdb-mysql-5cbf489f65-6ff4q   1/1     Terminating   1 (57m ago)   26h
┌──[[email protected]]-[~/ansible/k8s-helm-create]
└─$
Kubernetes Monitoring management
Kubernetes After the platform is built , understand Kubernetes The running status of the platform and the applications deployed on it , As well as the processing The system mainly promises and performance bottlenecks , It all depends on Monitoring management system .
KubernetesEarlier versions of rely onHeapsterTo achieve complete performance data collection and monitoring functions ,Kubernetes from 1.8 editionStart , Performance data starts withMetrics APlTo provide a standardized interface , And from1.10 editionBegin toHeapster Replace with MetricsServer.
stay Kubernetes In the new monitoring system :Metrics Server For providing Core indicators (Core Metrics) , Include Node, Pod Of CPU And memory usage metrics . For others Custom metrics (Custom Metrics) The monitoring of is done by Prometheus Wait for the components to complete .
Monitoring node status , We use docker You can go through docker stats.
┌──[[email protected]]-[~]
└─$docker stats
CONTAINER ID   NAME                                                                                                                             CPU %     MEM USAGE / LIMIT     MEM %     NET I/O   BLOCK I/O     PIDS
781c898eea19   k8s_kube-scheduler_kube-scheduler-vms81.liruilongs.github.io_kube-system_5bd71ffab3a1f1d18cb589aa74fe082b_18                     0.15%     23.22MiB / 3.843GiB   0.59%     0B / 0B   0B / 0B       7
acac8b21bb57   k8s_kube-controller-manager_kube-controller-manager-vms81.liruilongs.github.io_kube-system_93d9ae7b5a4ccec4429381d493b5d475_18   1.18%     59.16MiB / 3.843GiB   1.50%     0B / 0B   0B / 0B       6
fe97754d3dab   k8s_calico-node_calico-node-skzjp_kube-system_a211c8be-3ee1-44a0-a4ce-3573922b65b2_14                                            4.89%     94.25MiB / 3.843GiB   2.39%     0B / 0B   0B / 4.1kB    40
That use k8s Words , We can go through Metrics Server monitor Pod and Node Of CPU And memory Resource usage data
Metrics Server: Cluster performance monitoring platform
Metrics Server After the deployment is complete , Will pass through Kubernetes The core API Server Of /apis/metrics.k8s.io/v1beta1 Paths provide Pod and Node Monitoring data .
install Metrics Server
Metrics Server Source code and deployment configuration can be in GitHub The code base
curl -Ls https://api.github.com/repos/kubernetes-sigs/metrics-server/tarball/v0.3.6 -o metrics-server-v0.3.6.tar.gz
Related image
docker pull mirrorgooglecontainers/metrics-server-amd64:v0.3.6
Image partners can download , I've downloaded it here , Upload and import images directly
┌──[[email protected]]-[~/ansible]
└─$ansible all -m copy -a "src=./metrics-img.tar dest=/root/metrics-img.tar"
┌──[[email protected]]-[~/ansible]
└─$ansible all -m shell -a "systemctl restart docker "
192.168.26.82 | CHANGED | rc=0 >>

192.168.26.83 | CHANGED | rc=0 >>

192.168.26.81 | CHANGED | rc=0 >>
adopt docker Command import mirror
┌──[[email protected]]-[~/ansible]
└─$ansible all -m shell -a "docker load -i /root/metrics-img.tar"
192.168.26.83 | CHANGED | rc=0 >>
Loaded image: k8s.gcr.io/metrics-server-amd64:v0.3.6
192.168.26.81 | CHANGED | rc=0 >>
Loaded image: k8s.gcr.io/metrics-server-amd64:v0.3.6
192.168.26.82 | CHANGED | rc=0 >>
Loaded image: k8s.gcr.io/metrics-server-amd64:v0.3.6
┌──[[email protected]]-[~/ansible]
└─$
modify metrics-server-deployment.yaml
┌──[[email protected]]-[~/ansible]
└─$mv kubernetes-sigs-metrics-server-d1f4f6f/ metrics
┌──[[email protected]]-[~/ansible]
└─$cd metrics/
┌──[[email protected]]-[~/ansible/metrics]
└─$ls
cmd                 deploy      hack      OWNERS          README.md          version
code-of-conduct.md  Gopkg.lock  LICENSE   OWNERS_ALIASES  SECURITY_CONTACTS
CONTRIBUTING.md     Gopkg.toml  Makefile  pkg             vendor
┌──[[email protected]]-[~/ansible/metrics]
└─$cd deploy/1.8+/
┌──[[email protected]]-[~/ansible/metrics/deploy/1.8+]
└─$ls
aggregated-metrics-reader.yaml  metrics-apiservice.yaml         resource-reader.yaml
auth-delegator.yaml             metrics-server-deployment.yaml
auth-reader.yaml                metrics-server-service.yaml
Here we modify some image acquisition strategies , because Githup The mirror image on the cannot be pulled down , Or it's more troublesome , So we upload it in advance
┌──[[email protected]]-[~/ansible/metrics/deploy/1.8+]
└─$vim metrics-server-deployment.yaml
 31 - name: metrics-server
 32 image: k8s.gcr.io/metrics-server-amd64:v0.3.6
 33         #imagePullPolicy: Always
 34 imagePullPolicy: IfNotPresent
 35 command:
 36         - /metrics-server
 37         - --metric-resolution=30s
 38         - --kubelet-insecure-tls
 39         - --kubelet-preferred-address-types=InternalIP
 40 volumeMounts:
Run resource file , Create related resource objects
┌──[[email protected]]-[~/ansible/metrics/deploy/1.8+]
└─$kubectl apply -f .
see pod list ,metrics-server Create success
┌──[[email protected]]-[~/ansible/metrics/deploy/1.8+]
└─$kubectl  get pods -n kube-system
NAME                                                 READY   STATUS    RESTARTS   AGE
calico-kube-controllers-78d6f96c7b-79xx4             1/1     Running   2          3h15m
calico-node-ntm7v                                    1/1     Running   1          12h
calico-node-skzjp                                    1/1     Running   4          12h
calico-node-v7pj5                                    1/1     Running   1          12h
coredns-545d6fc579-9h2z4                             1/1     Running   2          3h15m
coredns-545d6fc579-xgn8x                             1/1     Running   2          3h16m
etcd-vms81.liruilongs.github.io                      1/1     Running   1          13h
kube-apiserver-vms81.liruilongs.github.io            1/1     Running   2          13h
kube-controller-manager-vms81.liruilongs.github.io   1/1     Running   4          13h
kube-proxy-rbhgf                                     1/1     Running   1          13h
kube-proxy-vm2sf                                     1/1     Running   1          13h
kube-proxy-zzbh9                                     1/1     Running   1          13h
kube-scheduler-vms81.liruilongs.github.io            1/1     Running   5          13h
metrics-server-bcfb98c76-gttkh                       1/1     Running   0          70m
adopt kubectl top nodes Command test ,
┌──[[email protected]]-[~/ansible/metrics/deploy/1.8+]
└─$kubectl top nodes
W1007 14:23:06.102605  102831 top_node.go:119] Using json format to get metrics. Next release will switch to protocol-buffers, switch early by passing --use-protocol-buffers flag
NAME                         CPU(cores)   CPU%   MEMORY(bytes)   MEMORY%
vms81.liruilongs.github.io   555m         27%    2025Mi          52%
vms82.liruilongs.github.io   204m         10%    595Mi           15%
vms83.liruilongs.github.io   214m         10%    553Mi           14%
┌──[[email protected]]-[~/ansible/metrics/deploy/1.8+]
└─$
Prometheus+Grafana+NodeExporter: Cluster monitoring platform
Deploy on each computing node NodeExporter collection CPU、 Memory 、 Disk and IO Information , And these Information is transmitted to the monitoring node Upper Prometheus Server run Storage analytics , adopt Grafana Visual monitoring ,
Prometheus
PrometheusIt's an open sourceMonitoring solutions, fromSoundCloudOpen source monitoring system developed by the company , Is theKubernetesafterCNCFThe first 2 Successful incubation projects , It is widely used in container and micro service fields , Can be inmonitor Kubernetes platformAt the same timeMonitor applications deployed on this platform, It provides a series of tool sets and multi-dimensional monitoring indicators .Prometheus rely on GrafanaRealizationData visualization.
Prometheus The main features are as follows :
- Use
Index nameAndKey value pair identificationOfMultidimensional data model. - Adopt flexible
query language PromQL. - Do not rely on
Distributed storage, For autonomousSingle node service. - Use
HTTPComplete the pull of monitoring data . - Supported by
Gateway pushes timing data. - Supports multiple graphics and
DashboardThe exhibition of , for exampleGrafana.
Prometheus The ecosystem is made up of various components , For function expansion :
| Components | describe |
|---|---|
| Prometheus Server | Responsible for monitoring data collection and sequential data storage , And provide data query function . |
| client SDK | docking Prometheus Development kit for . |
| Push Gateway | Gateway components for pushing data . |
| The third party Exporter | Various external indicator collection systems , Its data can be Prometheus collection |
| AlertManager | Alarm manager . |
| Other support AIDS | – |
Prometheus Core components Prometheus Server Its main functions include :
from
Kubernetes Master Get information about resources or services that need to be monitored ; From a variety ofExporterGrab (Pull) Indicator data , Then the index data is saved in the time series database (TSDB) in ; Provide... To other systemsHTTP APIThe query ; Offer based onPromQLLanguage data query ; Alarm data can be pushed (Push) toAlertManager, wait .

Prometheus System architecture :
NodeExporter
NodeExporter Mainly used to collect The server CPU、 Memory 、 disk 、IO Etc , It is a general collection scheme of machine data . Just on the host install NodeExporter and cAdisor Containers , adopt Prometheus Grab it . It is the same as Zabbix The functions of are similar .
Grafana
Grafana It's a Dashboard Tools , use Go and JS Development , It's a Time series database Of Interface display layer , adopt SQL Command query Out Metrics And show the results . It can customize A variety of dashboards , Can be easily implemented Covering multiple Docker Host monitoring information The exhibition of .
build Prometheus+Grafana+NodeExporter platform
Here we go through
helmThe way to build , Simple, convenient and quick , After running , Relevant images will be created successfully . The following is a list of successfully created images .
┌──[[email protected]]-[~/ansible/k8s-helm-create/kube-prometheus-stack]
└─$kubectl get pods
NAME                                                    READY   STATUS    RESTARTS      AGE
alertmanager-liruilong-kube-prometheus-alertmanager-0   2/2     Running   0             61m
liruilong-grafana-5955564c75-zpbjq                      3/3     Running   0             62m
liruilong-kube-prometheus-operator-5cb699b469-fbkw5     1/1     Running   0             62m
liruilong-kube-state-metrics-5dcf758c47-bbwt4           1/1     Running   7 (32m ago)   62m
liruilong-prometheus-node-exporter-rfsc5                1/1     Running   0             62m
liruilong-prometheus-node-exporter-vm7s9                1/1     Running   0             62m
liruilong-prometheus-node-exporter-z9j8b                1/1     Running   0             62m
prometheus-liruilong-kube-prometheus-prometheus-0       2/2     Running   0             61m
┌──[[email protected]]-[~/ansible/k8s-helm-create/kube-prometheus-stack]
└─$
Environment version
my K8s Cluster version
┌──[[email protected]]-[~/ansible/k8s-helm-create]
└─$kubectl  get nodes
NAME                         STATUS   ROLES                  AGE   VERSION
vms81.liruilongs.github.io   Ready    control-plane,master   34d   v1.22.2
vms82.liruilongs.github.io   Ready    <none>                 34d   v1.22.2
vms83.liruilongs.github.io   Ready    <none>                 34d   v1.22.2
hrlm edition
┌──[[email protected]]-[~/ansible/k8s-helm-create]
└─$helm version
version.BuildInfo{
    Version:"v3.2.1", GitCommit:"fe51cd1e31e6a202cba7dead9552a6d418ded79a", GitTreeState:"clean", GoVersion:"go1.13.10"}
prometheus-operator( Old name ) Problems with the installation
┌──[[email protected]]-[~/ansible/k8s-helm-create]
└─$helm  search repo prometheus-operator
NAME                            CHART VERSION   APP VERSION     DESCRIPTION
ali/prometheus-operator         8.7.0           0.35.0          Provides easy monitoring definitions for Kubern...
azure/prometheus-operator       9.3.2           0.38.1          DEPRECATED Provides easy monitoring definitions...
┌──[[email protected]]-[~/ansible/k8s-helm-create]
└─$helm install liruilong  ali/prometheus-operator
Error: failed to install CRD crds/crd-alertmanager.yaml: unable to recognize "": no matches for kind "CustomResourceDefinition" in version "apiextensions.k8s.io/v1beta1"
┌──[[email protected]]-[~/ansible/k8s-helm-create]
└─$helm pull  ali/prometheus-operator
┌──[[email protected]]-[~/ansible/k8s-helm-create]
└─$
terms of settlement : New version installation
Direct download kube-prometheus-stack( new ) Of chart package , Install by command :
┌──[[email protected]]-[~/ansible/k8s-helm-create]
└─$ls
index.yaml  kube-prometheus-stack-30.0.1.tgz  liruilonghelm  liruilonghelm-0.1.0.tgz  mysql  mysql-1.6.4.tgz
┌──[[email protected]]-[~/ansible/k8s-helm-create]
└─$helm list
NAME    NAMESPACE       REVISION        UPDATED STATUS  CHART   APP VERSION
decompression chart package kube-prometheus-stack-30.0.1.tgz
┌──[[email protected]]-[~/ansible/k8s-helm-create]
└─$tar -zxf kube-prometheus-stack-30.0.1.tgz
Create a new namespace
┌──[[email protected]]-[~/ansible/k8s-helm-create]
└─$cd kube-prometheus-stack/
┌──[[email protected]]-[~/ansible/k8s-helm-create/kube-prometheus-stack]
└─$kubectl create ns monitoring
namespace/monitoring created
┌──[[email protected]]-[~/ansible/k8s-helm-create/kube-prometheus-stack]
└─$kubectl config  set-context $(kubectl config current-context) --namespace=monitoring
Context "[email protected]" modified.
Enter folder , Directly through helm install liruilong . install
┌──[[email protected]]-[~/ansible/k8s-helm-create/kube-prometheus-stack]
└─$ls
Chart.lock  charts  Chart.yaml  CONTRIBUTING.md  crds  README.md  templates  values.yaml
┌──[[email protected]]-[~/ansible/k8s-helm-create/kube-prometheus-stack]
└─$helm install liruilong .
kube-prometheus-admission-create Corresponding Pod The relevant image of cannot be downloaded
┌──[[email protected]]-[~/ansible/k8s-helm-create]
└─$kubectl get pods
NAME                                                  READY   STATUS             RESTARTS   AGE
liruilong-kube-prometheus-admission-create--1-bn7x2   0/1     ImagePullBackOff   0          33s
see pod Details , It is found that an image of Google cannot be downloaded in China
┌──[[email protected]]-[~/ansible/k8s-helm-create]
└─$kubectl  describe pod  liruilong-kube-prometheus-admission-create--1-bn7x2
Name:         liruilong-kube-prometheus-admission-create--1-bn7x2
Namespace:    monitoring
Priority:     0
Node:         vms83.liruilongs.github.io/192.168.26.83
Start Time:   Sun, 16 Jan 2022 02:43:07 +0800
Labels:       app=kube-prometheus-stack-admission-create
              app.kubernetes.io/instance=liruilong
              app.kubernetes.io/managed-by=Helm
              app.kubernetes.io/part-of=kube-prometheus-stack
              app.kubernetes.io/version=30.0.1
              chart=kube-prometheus-stack-30.0.1
              controller-uid=2ce48cd2-a118-4e23-a27f-0228ef6c45e7
              heritage=Helm
              job-name=liruilong-kube-prometheus-admission-create
              release=liruilong
Annotations:  cni.projectcalico.org/podIP: 10.244.70.8/32
              cni.projectcalico.org/podIPs: 10.244.70.8/32
Status:       Pending
IP:           10.244.70.8
IPs:
  IP:           10.244.70.8
Controlled By:  Job/liruilong-kube-prometheus-admission-create
Containers:
  create:
    Container ID:
    Image:         k8s.gcr.io/ingress-nginx/kube-webhook-certgen:[email protected]6:f3b6b39a6062328c095337b4cadcefd1612348fdd5190b1dcbcb9b9e90bd8068
    Image ID:
    Port:          <none>
    Host Port:
    ...........................
stay dokcer A similar one was found in the warehouse , adopt kubectl edit modify
image: k8s.gcr.io/ingress-nginx/kube-webhook-certgen:v1.0 Replace with : docker.io/liangjw/kube-webhook-certgen:v1.1.1
Or you can modify the configuration file to start afresh install( Remember to put sha Comment out )
┌──[[email protected]]-[~/ansible/k8s-helm-create]
└─$ls
index.yaml  kube-prometheus-stack  kube-prometheus-stack-30.0.1.tgz  liruilonghelm  liruilonghelm-0.1.0.tgz  mysql  mysql-1.6.4.tgz
┌──[[email protected]]-[~/ansible/k8s-helm-create]
└─$cd kube-prometheus-stack/
┌──[[email protected]]-[~/ansible/k8s-helm-create/kube-prometheus-stack]
└─$ls
Chart.lock  charts  Chart.yaml  CONTRIBUTING.md  crds  README.md  templates  values.yaml
┌──[[email protected]]-[~/ansible/k8s-helm-create/kube-prometheus-stack]
└─$cat values.yaml | grep -A 3 -B 2 kube-webhook-certgen
      enabled: true
      image:
        repository: docker.io/liangjw/kube-webhook-certgen
        tag: v1.1.1
        #sha: "f3b6b39a6062328c095337b4cadcefd1612348fdd5190b1dcbcb9b9e90bd8068"
        pullPolicy: IfNotPresent
┌──[[email protected]]-[~/ansible/k8s-helm-create/kube-prometheus-stack]
└─$
┌──[[email protected]]-[~/ansible/k8s-helm-create/kube-prometheus-stack]
└─$helm del liruilong;helm install liruilong .
Then other related pod Normal creation
┌──[[email protected]]-[~/ansible/k8s-helm-create/kube-prometheus-stack]
└─$kubectl get pods
NAME                                                  READY   STATUS              RESTARTS   AGE
liruilong-grafana-5955564c75-zpbjq                    0/3     ContainerCreating   0          27s
liruilong-kube-prometheus-operator-5cb699b469-fbkw5   0/1     ContainerCreating   0          27s
liruilong-kube-state-metrics-5dcf758c47-bbwt4         0/1     ContainerCreating   0          27s
liruilong-prometheus-node-exporter-rfsc5              0/1     ContainerCreating   0          28s
liruilong-prometheus-node-exporter-vm7s9              0/1     ContainerCreating   0          28s
liruilong-prometheus-node-exporter-z9j8b              0/1     ContainerCreating   0          28s
kube-state-metrics This pod The image of is not pulled down . It should be the same reason
┌──[[email protected]]-[~/ansible/k8s-helm-create/kube-prometheus-stack]
└─$kubectl get pods
NAME                                                    READY   STATUS             RESTARTS   AGE
alertmanager-liruilong-kube-prometheus-alertmanager-0   2/2     Running            0          3m35s
liruilong-grafana-5955564c75-zpbjq                      3/3     Running            0          4m46s
liruilong-kube-prometheus-operator-5cb699b469-fbkw5     1/1     Running            0          4m46s
liruilong-kube-state-metrics-5dcf758c47-bbwt4           0/1     ImagePullBackOff   0          4m46s
liruilong-prometheus-node-exporter-rfsc5                1/1     Running            0          4m47s
liruilong-prometheus-node-exporter-vm7s9                1/1     Running            0          4m47s
liruilong-prometheus-node-exporter-z9j8b                1/1     Running            0          4m47s
prometheus-liruilong-kube-prometheus-prometheus-0       2/2     Running            0          3m34s
Again k8s.gcr.io/kube-state-metrics/kube-state-metrics:v2.3.0 This image cannot be pulled
┌──[[email protected]]-[~/ansible/k8s-helm-create/kube-prometheus-stack]
└─$kubectl  describe  pod liruilong-kube-state-metrics-5dcf758c47-bbwt4
Name:         liruilong-kube-state-metrics-5dcf758c47-bbwt4
Namespace:    monitoring
Priority:     0
Node:         vms82.liruilongs.github.io/192.168.26.82
Start Time:   Sun, 16 Jan 2022 02:59:53 +0800
Labels:       app.kubernetes.io/component=metrics
              app.kubernetes.io/instance=liruilong
              app.kubernetes.io/managed-by=Helm
              app.kubernetes.io/name=kube-state-metrics
              app.kubernetes.io/part-of=kube-state-metrics
              app.kubernetes.io/version=2.3.0
              helm.sh/chart=kube-state-metrics-4.3.0
              pod-template-hash=5dcf758c47
              release=liruilong
Annotations:  cni.projectcalico.org/podIP: 10.244.171.153/32
              cni.projectcalico.org/podIPs: 10.244.171.153/32
Status:       Pending
IP:           10.244.171.153
IPs:
  IP:           10.244.171.153
Controlled By:  ReplicaSet/liruilong-kube-state-metrics-5dcf758c47
Containers:
  kube-state-metrics:
    Container ID:
    Image:         k8s.gcr.io/kube-state-metrics/kube-state-metrics:v2.3.0
    Image ID:
    Port:          8080/TCP
    ......................
alike , We go through docker Look for the same in the warehouse , And then through kubectl edit pod Revise it
k8s.gcr.io/kube-state-metrics/kube-state-metrics Replace with : docker.io/dyrnq/kube-state-metrics:v2.3.0
You can pull it on the node machine first
┌──[[email protected]]-[~/ansible]
└─$ ansible node -m shell -a "docker pull dyrnq/kube-state-metrics:v2.3.0"
192.168.26.82 | CHANGED | rc=0 >>
v2.3.0: Pulling from dyrnq/kube-state-metrics
e8614d09b7be: Pulling fs layer
53ccb90bafd7: Pulling fs layer
e8614d09b7be: Verifying Checksum
e8614d09b7be: Download complete
e8614d09b7be: Pull complete
53ccb90bafd7: Verifying Checksum
53ccb90bafd7: Download complete
53ccb90bafd7: Pull complete
Digest: sha256:c9137505edaef138cc23479c73e46e9a3ef7ec6225b64789a03609c973b99030
Status: Downloaded newer image for dyrnq/kube-state-metrics:v2.3.0
docker.io/dyrnq/kube-state-metrics:v2.3.0
192.168.26.83 | CHANGED | rc=0 >>
v2.3.0: Pulling from dyrnq/kube-state-metrics
e8614d09b7be: Pulling fs layer
53ccb90bafd7: Pulling fs layer
e8614d09b7be: Verifying Checksum
e8614d09b7be: Download complete
e8614d09b7be: Pull complete
53ccb90bafd7: Verifying Checksum
53ccb90bafd7: Download complete
53ccb90bafd7: Pull complete
Digest: sha256:c9137505edaef138cc23479c73e46e9a3ef7ec6225b64789a03609c973b99030
Status: Downloaded newer image for dyrnq/kube-state-metrics:v2.3.0
docker.io/dyrnq/kube-state-metrics:v2.3.0
After the modification , You'll find all of them pod All created successfully
┌──[[email protected]]-[~/ansible/k8s-helm-create/kube-prometheus-stack]
└─$kubectl get pods
NAME                                                    READY   STATUS    RESTARTS      AGE
alertmanager-liruilong-kube-prometheus-alertmanager-0   2/2     Running   0             61m
liruilong-grafana-5955564c75-zpbjq                      3/3     Running   0             62m
liruilong-kube-prometheus-operator-5cb699b469-fbkw5     1/1     Running   0             62m
liruilong-kube-state-metrics-5dcf758c47-bbwt4           1/1     Running   7 (32m ago)   62m
liruilong-prometheus-node-exporter-rfsc5                1/1     Running   0             62m
liruilong-prometheus-node-exporter-vm7s9                1/1     Running   0             62m
liruilong-prometheus-node-exporter-z9j8b                1/1     Running   0             62m
prometheus-liruilong-kube-prometheus-prometheus-0       2/2     Running   0             61m
┌──[[email protected]]-[~/ansible/k8s-helm-create/kube-prometheus-stack]
└─$
Then we need to modify liruilong-grafana SVC The type of NodePort, such , The physical machine can access
┌──[[email protected]]-[~/ansible/k8s-helm-create/kube-prometheus-stack/templates]
└─$kubectl  get svc
NAME                                     TYPE        CLUSTER-IP       EXTERNAL-IP   PORT(S)                      AGE
alertmanager-operated                    ClusterIP   None             <none>        9093/TCP,9094/TCP,9094/UDP   33m
liruilong-grafana                        ClusterIP   10.99.220.121    <none>        80/TCP                       34m
liruilong-kube-prometheus-alertmanager   ClusterIP   10.97.193.228    <none>        9093/TCP                     34m
liruilong-kube-prometheus-operator       ClusterIP   10.101.106.93    <none>        443/TCP                      34m
liruilong-kube-prometheus-prometheus     ClusterIP   10.105.176.19    <none>        9090/TCP                     34m
liruilong-kube-state-metrics             ClusterIP   10.98.94.55      <none>        8080/TCP                     34m
liruilong-prometheus-node-exporter       ClusterIP   10.110.216.215   <none>        9100/TCP                     34m
prometheus-operated                      ClusterIP   None             <none>        9090/TCP                     33m
┌──[[email protected]]-[~/ansible/k8s-helm-create/kube-prometheus-stack]
└─$kubectl edit svc liruilong-grafana
service/liruilong-grafana edited
┌──[[email protected]]-[~/ansible/k8s-helm-create/kube-prometheus-stack/templates]
└─$kubectl  get svc
NAME                                     TYPE        CLUSTER-IP       EXTERNAL-IP   PORT(S)                      AGE
alertmanager-operated                    ClusterIP   None             <none>        9093/TCP,9094/TCP,9094/UDP   35m
liruilong-grafana                        NodePort    10.99.220.121    <none>        80:30443/TCP                 36m
liruilong-kube-prometheus-alertmanager   ClusterIP   10.97.193.228    <none>        9093/TCP                     36m
liruilong-kube-prometheus-operator       ClusterIP   10.101.106.93    <none>        443/TCP                      36m
liruilong-kube-prometheus-prometheus     ClusterIP   10.105.176.19    <none>        9090/TCP                     36m
liruilong-kube-state-metrics             ClusterIP   10.98.94.55      <none>        8080/TCP                     36m
liruilong-prometheus-node-exporter       ClusterIP   10.110.216.215   <none>        9100/TCP                     36m
prometheus-operated                      ClusterIP   None             <none>        9090/TCP                     35m
| Physical machine access |
|---|
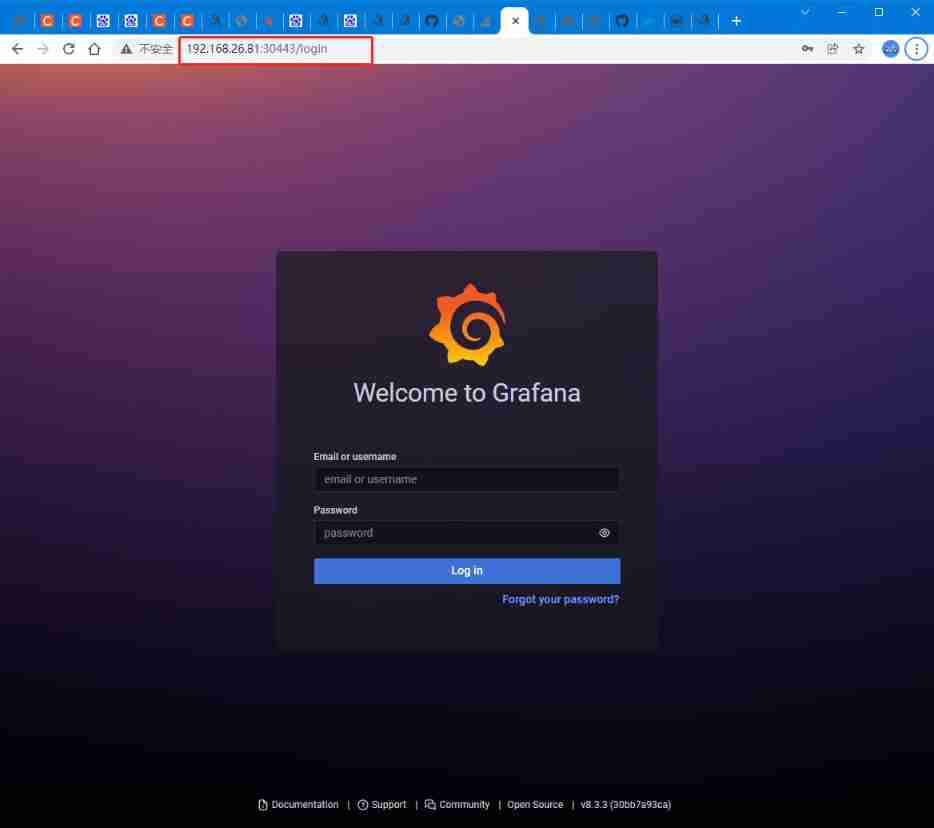 |
adopt secrets Decrypt to get user name and password
┌──[[email protected]]-[~/ansible/k8s-helm-create/kube-prometheus-stack/templates]
└─$kubectl get secrets | grep grafana
liruilong-grafana                                                  Opaque                                3      38m
liruilong-grafana-test-token-q8z8j                                 kubernetes.io/service-account-token   3      38m
liruilong-grafana-token-j94p8                                      kubernetes.io/service-account-token   3      38m
┌──[[email protected]]-[~/ansible/k8s-helm-create/kube-prometheus-stack/templates]
└─$kubectl get secrets liruilong-grafana -o yaml
apiVersion: v1
data:
  admin-password: cHJvbS1vcGVyYXRvcg==
  admin-user: YWRtaW4=
  ldap-toml: ""
kind: Secret
metadata:
  annotations:
    meta.helm.sh/release-name: liruilong
    meta.helm.sh/release-namespace: monitoring
  creationTimestamp: "2022-01-15T18:59:40Z"
  labels:
    app.kubernetes.io/instance: liruilong
    app.kubernetes.io/managed-by: Helm
    app.kubernetes.io/name: grafana
    app.kubernetes.io/version: 8.3.3
    helm.sh/chart: grafana-6.20.5
  name: liruilong-grafana
  namespace: monitoring
  resourceVersion: "1105663"
  uid: c03ff5f3-deb5-458c-8583-787f41034469
type: Opaque
┌──[[email protected]]-[~/ansible/k8s-helm-create/kube-prometheus-stack/templates]
└─$kubectl get secrets liruilong-grafana -o jsonpath='{.data.admin-user}}'| base64 -d
adminbase64:  The input is invalid
┌──[[email protected]]-[~/ansible/k8s-helm-create/kube-prometheus-stack/templates]
└─$kubectl get secrets liruilong-grafana -o jsonpath='{.data.admin-password}}'| base64 -d
prom-operatorbase64:  The input is invalid
Get the user name and password :admin/prom-operator
| Normal login , View monitoring information |
|---|
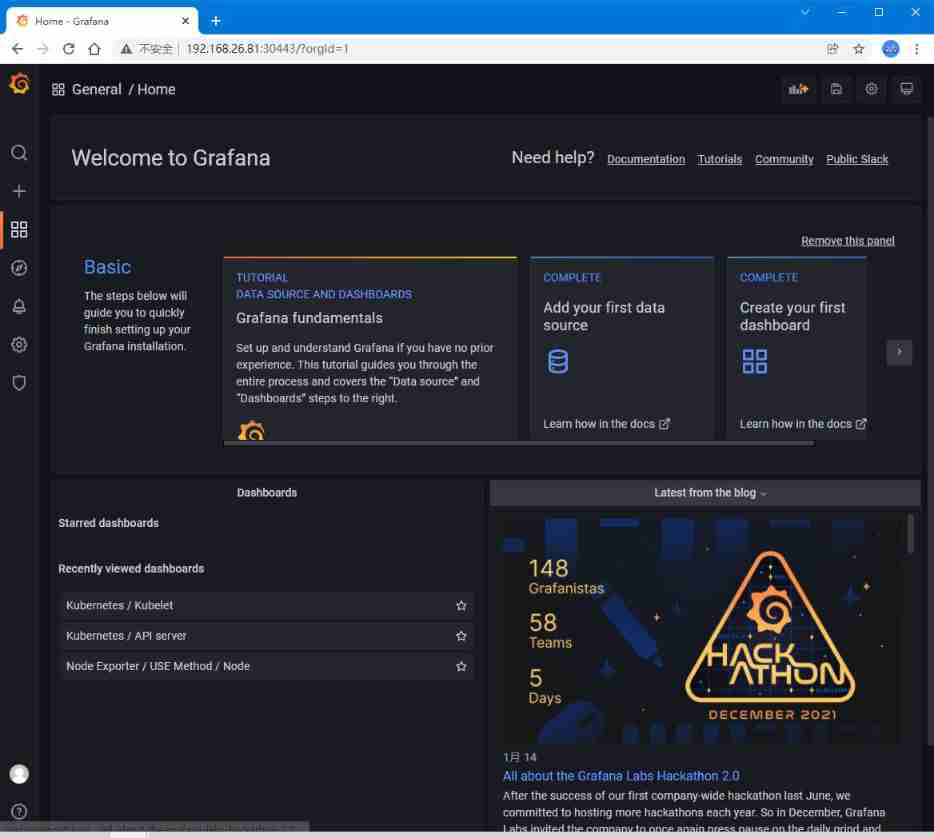 |
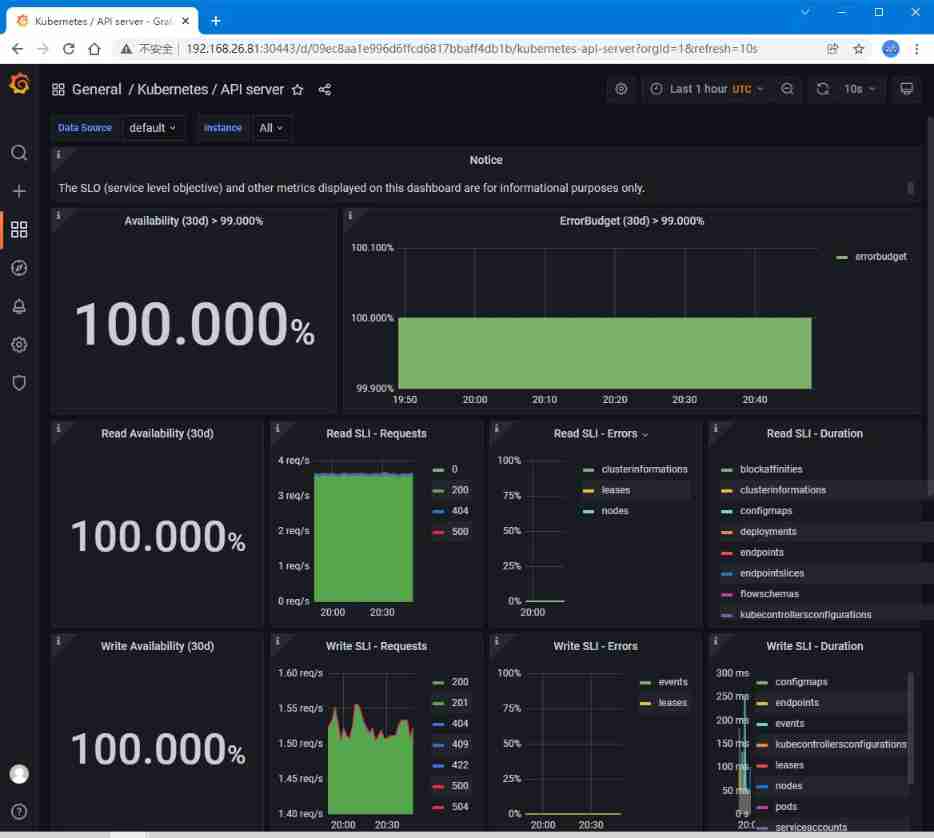 |
security management
API Server Certification management
Kubernetes colony All resources in are accessed and changed through Kubernetes API Server Of REST API To achieve , So the key point of cluster security is how to authenticate and authorize
A simple
Demo, staymasterNode , We go throughrootUsers can directly connectkubectlTo requestAPI ServiceSo as to obtain cluster information , But we don't have this permission if we log in through other users , This involves k8s A certification problem of .
root Users can normally access
┌──[[email protected]]-[~/ansible/k8s-helm-create]
└─$kubectl  get pods
NAME                                                  READY   STATUS        RESTARTS       AGE
liruilong-grafana-5955564c75-zpbjq                    3/3     Terminating   0              8h
liruilong-kube-prometheus-operator-5cb699b469-fbkw5   1/1     Terminating   0              8h
liruilong-prometheus-node-exporter-vm7s9              1/1     Terminating   2 (109m ago)   8h
prometheus-liruilong-kube-prometheus-prometheus-0     2/2     Terminating   0              8h
┌──[[email protected]]-[~/ansible/k8s-helm-create]
└─$
Switch tom Users come to visit , No authority , An error is reported and the cluster cannot be found API The location of , So why is that ?
┌──[[email protected]]-[~/ansible/k8s-helm-create]
└─$su tom
[[email protected] k8s-helm-create]$ kubectl  get pods
The connection to the server localhost:8080 was refused - did you specify the right host or port?
[[email protected] k8s-helm-create]$ exit
exit
To demonstrate certification , We need to install a client tool on the machine outside the cluster kubectl, Entry for and clusters api-Service Interaction
┌──[[email protected]]-[~]
└─$ yum install -y kubectl-1.22.2-0 --disableexcludes=kubernetes
Can pass kubectl cluster-info To view the relevant information of the cluster
┌──[[email protected]]-[~/ansible/k8s-helm-create]
└─$kubectl cluster-info
Kubernetes control plane is running at https://192.168.26.81:6443
CoreDNS is running at https://192.168.26.81:6443/api/v1/namespaces/kube-system/services/kube-dns:dns/proxy
Metrics-server is running at https://192.168.26.81:6443/api/v1/namespaces/kube-system/services/https:metrics-server:/proxy

To further debug and diagnose cluster problems, use 'kubectl cluster-info dump'.
┌──[[email protected]]-[~/ansible/k8s-helm-create]
└─$
Kubernetes The cluster provides 3 Three levels of client authentication
HTTP Token authentication : Through one Token To identify legitimate users .
HTTPS Certification : be based on CA Two way digital certificate authentication method of root certificate signature
HTTP Base authentication : By user name + Password authentication , This is just 1.19 Previous versions apply to , Later versions no longer support
Next is Token and SSL Share with your friends ,Bash Because in the higher version of K8s Is no longer supported in , So we don't talk here . About the above general user range cluster problem , We will also change the answer
HTTP Token authentication
HTTP Token The authentication of is a long, special encoding string that is difficult to imitate Token A way to identify customers .
Every Token Corresponding to a user name , Stored in APIServer In a file that can be accessed . When the client initiates API Call request when , Need to be in HTTP Header Put it in Token, thus , API Server You can identify legal users and illegal users .
When API The command line of the server is set to --token-auth-file=SOMEFILE Option , From the file Read holder token . at present , The token will be valid for a long time , And without restarting API In the case of servers Unable to change token list . Let's go through Demo To demonstrate through static Token User authentication ,
adopt openssl Generate a token
┌──[[email protected]]-[~/ansible/k8s-helm-create]
└─$openssl rand -hex 10
4bf636c8214b7ff0a0fb
The token file is a CSV file , Include at least 3 Columns :
token、user nameandUser UID. The remaining columns are treated as optional group names . What needs to be noted here is , The token file should be put in/etc/kubernetes/pkiOnly under the directory can , Perhaps the default location for reading tokens is this location
┌──[[email protected]]-[~/ansible/k8s-helm-create]
└─$echo "4bf636c8214b7ff0a0fb,admin2,3" > /etc/kubernetes/pki/liruilong.csv
┌──[[email protected]]-[~/ansible/k8s-helm-create]
└─$cat /etc/kubernetes/pki/liruilong.csv
4bf636c8214b7ff0a0fb,admin2,3
adopt Sed add to kube-apiserver Service startup parameters ,- --token-auth-file=/etc/kubernetes/pki/liruilong.csv
┌──[[email protected]]-[~/ansible/k8s-helm-create]
└─$sed  '17a \ \ \ \ - --token-auth-file=/etc/kubernetes/pki/liruilong.csv' /etc/kubernetes/manifests/kube-apiserver.yaml | grep -A 5  command
  - command:
    - kube-apiserver
    - --advertise-address=192.168.26.81
    - --allow-privileged=true
    - --token-auth-file=/etc/kubernetes/liruilong.csv
    - --authorization-mode=Node,RBAC
┌──[[email protected]]-[~/ansible/k8s-helm-create]
└─$sed -i  '17a \ \ \ \ - --token-auth-file=/etc/kubernetes/pki/liruilong.csv' /etc/kubernetes/manifests/kube-apiserver.yaml
Check the modified startup parameters
┌──[[email protected]]-[~/ansible/k8s-helm-create]
└─$cat -n /etc/kubernetes/manifests/kube-apiserver.yaml | grep -A 5  command
    14    - command:
    15      - kube-apiserver
    16      - --advertise-address=192.168.26.81
    17      - --allow-privileged=true
    18      - --token-auth-file=/etc/kubernetes/pki/liruilong.csv
    19      - --authorization-mode=Node,RBAC
┌──[[email protected]]-[~/ansible/k8s-helm-create]
└─$
restart kubelet service
┌──[[email protected]]-[~/ansible/k8s-helm-create]
└─$systemctl restart kubelet
┌──[[email protected]]-[~/ansible/k8s-helm-create]
└─$
Confirm that the cluster can access
┌──[[email protected]]-[/etc/kubernetes/pki]
└─$kubectl get nodes
NAME                         STATUS     ROLES                  AGE   VERSION
vms81.liruilongs.github.io   Ready      control-plane,master   34d   v1.22.2
vms82.liruilongs.github.io   Ready      <none>                 34d   v1.22.2
vms83.liruilongs.github.io   NotReady   <none>                 34d   v1.22.2
┌──[[email protected]]-[/etc/kubernetes/pki]
└─$
Clients outside the cluster access cluster information , Here's a hint admin2 The user has no access rights , It indicates that the certification has been successful , Just no authority
┌──[[email protected]]-[~]
└─$ kubectl -s="https://192.168.26.81:6443" --insecure-skip-tls-verify=true  --token="4bf636c8214b7ff0a0fb" get pods -n kube-system
Error from server (Forbidden): pods is forbidden: User "admin2" cannot list resource "pods" in API group "" in the namespace "kube-system"
┌──[[email protected]]-[~]
└─$
Here we modify some token String ,Token And clusters of Token The file does not correspond to , It will remind us that we are not authorized , Authentication failed
┌──[[email protected]]-[~]
└─$ kubectl -s="https://192.168.26.81:6443" --insecure-skip-tls-verify=true  --token="4bf636c8214b7ff0a0f" get pods -n kube-system
error: You must be logged in to the server (Unauthorized)
kubeconfig Document Certification
Back to the question before us , Why use root Users can access cluster information , But by tom Users cannot access cluster information , Here's a question kubeconfig The problem of document authentication
Through kubeadm When creating a cluster , I don't know if you still remember the following file admin.conf, This file is kubeadm That generated it for us kubeconfig file
┌──[[email protected]]-[~/.kube]
└─$ll /etc/kubernetes/admin.conf
-rw------- 1 root root 5676 12 month  13 02:13 /etc/kubernetes/admin.conf
┌──[[email protected]]-[~/.kube]
└─$
We copy this file to tom Under the user's directory , Modify the permissions
┌──[[email protected]]-[~/.kube]
└─$cp /etc/kubernetes/admin.conf   ~tom/
┌──[[email protected]]-[~/.kube]
└─$chown tom:tom ~tom/admin.conf
At this time, it was found that --kubeconfig=admin.conf Specify this file , You can access the cluster information
[[email protected] home]$ cd tom/
[[email protected] ~]$ ls
admin.conf
[[email protected] ~]$ kubectl get pods
The connection to the server localhost:8080 was refused - did you specify the right host or port?
[[email protected] ~]$ kubectl get pods -A --kubeconfig=admin.conf
NAMESPACE                  NAME                                                  READY   STATUS             RESTARTS          AGE
ingress-nginx              ingress-nginx-controller-744d4fc6b7-t9n4l             1/1     Running            6 (8h ago)        44h
kube-system                calico-kube-controllers-78d6f96c7b-85rv9              1/1     Running            193               31d
kube-system                calico-node-6nfqv                                     1/1     Running            254               34d
kube-system                calico-node-fv458                                     0/1     Running            50                34d
kube-system                calico-node-h5lsq                                     1/1     Running            94 (7h10m ago)    34d
kube-system       ..........................
that ,kubeconfig file What is it , This is described in the official documents :
Use kubeconfig File to organize information about the cluster 、 user 、 Namespace and identity authentication mechanism .kubectl Command line tools use kubeconfig File to find the information needed to select the cluster , And with the cluster API The server communicates .
In other words , adopt kubeconfig With clustering API The server communicates , Similar to the above Token The role of , What we are going to say HTTPS Certificate authentication is put here
By default ,kubectl stay $HOME/.kube Find the name of config The file of .
┌──[[email protected]]-[~]
└─$ls ~/.kube/config
/root/.kube/config
┌──[[email protected]]-[~]
└─$ll ~/.kube/config
-rw------- 1 root root 5663 1 month   16 02:33 /root/.kube/config
take kubeconfig file Copied to the $HOME/.kube Change the name to config Find out tom Users can still access
[[email protected] ~]$ ls
admin.conf
[[email protected] ~]$ cp admin.conf  .kube/config
[[email protected] ~]$ kubectl get pods -n kube-system
NAME                                                 READY   STATUS    RESTARTS          AGE
calico-kube-controllers-78d6f96c7b-85rv9             1/1     Running   193               31d
calico-node-6nfqv                                    1/1     Running   254               34d
calico-node-fv458                                    0/1     Running   50                34d
calico-node-h5lsq                                    1/1     Running   94 (7h13m ago)    34d
.......
It can also be set KUBECONFIG Environment variables or settings --kubeconfig Parameter to specify other kubeconfig file .
[[email protected] ~]$ export KUBECONFIG=admin.conf
[[email protected] ~]$ kubectl get pods -n kube-system
NAME                                                 READY   STATUS    RESTARTS          AGE
calico-kube-controllers-78d6f96c7b-85rv9             1/1     Running   193               31d
calico-node-6nfqv                                    1/1     Running   254               34d
calico-node-fv458                                    0/1     Running   50                34d
calico-node-h5lsq                                    1/1     Running   94 (7h11m ago)    34d
..............
When we set nothing ,tom The user cannot get kubeconfig file , No authentication information , cannot access
[[email protected] ~]$ unset KUBECONFIG
[[email protected] ~]$ kubectl get pods -n kube-system
The connection to the server localhost:8080 was refused - did you specify the right host or port?
see kubeconfig file Configuration information
┌──[[email protected]]-[~/.kube]
└─$kubectl config view
apiVersion: v1
clusters:
- cluster:
    certificate-authority-data: DATA+OMITTED
    server: https://192.168.26.81:6443
  name: kubernetes
contexts:
- context:
    cluster: kubernetes
    namespace: liruilong-rbac-create
    user: kubernetes-admin
  name: kubernetes-[email protected]
current-context: kubernetes-[email protected]
kind: Config
preferences: {
    }
users:
- name: kubernetes-admin
  user:
    client-certificate-data: REDACTED
    client-key-data: REDACTED
┌──[[email protected]]-[~/.kube]
└─$
So we want to access the cluster information , Just put this kubeconfig Copy the file to the client OK 了
however
kubeadmYesadmin.confWhen signing the certificate in , Configure it toSubject: O = system:masters, CN = kubernetes-admin.system:mastersIs an exception 、 Super user group , You can bypass the authentication layer ( for example RBAC). So we can'tadmin.confShare files with anyone , You should usekubeadm kubeconfig userCommands are generated for other userskubeconfigfile , Complete their custom authorization .
establish kubeconfig file
One kubeconfig The document includes the following parts :
- Cluster information :
- colony CA certificate
- The cluster address
- Context information
- All contextual information
- Current context
- User information
- user CA certificate
- User private key
To create a kubeconfig Word of the file , We need a private key , And cluster CA Authorized certificate . Similarly, we cannot directly generate public keys with private keys , The certificate request file must be generated with the private key ( application ), Then send the certificate request file to CA( Authority ) Apply for a certificate ( Id card ),CA The certificate will be issued after the approval .
Environmental preparation
┌──[[email protected]]-[~/ansible]
└─$kubectl create ns liruilong-rbac-create
namespace/liruilong-rbac-create created
┌──[[email protected]]-[~/ansible]
└─$mkdir k8s-rbac-create;cd k8s-rbac-create
┌──[[email protected]]-[~/ansible/k8s-rbac-create]
└─$kubectl config set-context $(kubectl config current-context) --namespace=liruilong-rbac-create
Context "[email protected]" modified.
┌──[[email protected]]-[~/ansible/k8s-rbac-create]
└─$
Apply for a certificate
Generate a 2048 Bit Private key iruilong.key file
┌──[[email protected]]-[~/ansible/k8s-rbac-create]
└─$openssl genrsa -out liruilong.key 2048
Generating RSA private key, 2048 bit long modulus
....................+++
...........................................................................................................+++
e is 65537 (0x10001)
View the private key file
┌──[[email protected]]-[~/ansible/k8s-rbac-create]
└─$cat liruilong.key
-----BEGIN RSA PRIVATE KEY-----
MIIEpAIBAAKCAQEAt9OBnwaA3VdFfjdiurJPtcaiXOGPc1AWFmrlgocq4vT5WZgq
..............................
..................................
LHd0n1yCKpwbYMGghF4iGmEGIIdsCVZP+EV6lduPKjqEm9kjuLROKzRZHFoGyASO
Krb3VR4CKHvnZAPVctv7Pu+4JgMliJHl8GVYhqM5UykbLRMdNHSNIQ==
-----END RSA PRIVATE KEY-----
┌──[[email protected]]-[~/ansible/k8s-rbac-create]
└─$
Use the newly generated private liruilong.key Generate certificate request file liruilong.key: here CN Value liruilong, It is the user authorized by us later .
┌──[[email protected]]-[~/ansible/k8s-rbac-create]
└─$openssl req -new -key liruilong.key -out liruilong.csr -subj "/CN=liruilong/O=cka2020"
┌──[[email protected]]-[~/ansible/k8s-rbac-create]
└─$ls
liruilong.csr  liruilong.key
The certificate request file is base64 code
┌──[[email protected]]-[~/ansible/k8s-rbac-create]
└─$cat liruilong.csr | base64 |tr -d "\n"
LS0tLS1CRUdJTiBDRVJUSUZJ...............
Prepare the document for applying for certificate yaml file :cat csr.yaml
apiVersion: certificates.k8s.io/v1
kind: CertificateSigningRequest
metadata:
  name: liruilong
spec:
  signerName: kubernetes.io/kube-apiserver-client
  request: LS0tLS1CRUdJTiBDRVJUSUZJ...............
  usages:
  - client auth
here request Inside is base64 Encoded certificate request file . Apply for a certificate
┌──[[email protected]]-[~/ansible/k8s-rbac-create]
└─$kubectl apply -f csr.yaml
certificatesigningrequest.certificates.k8s.io/liruilong created
View the issued certificate request :
┌──[[email protected]]-[~/ansible/k8s-rbac-create]
└─$kubectl  get csr
NAME        AGE   SIGNERNAME                            REQUESTOR          REQUESTEDDURATION   CONDITION
liruilong   15s   kubernetes.io/kube-apiserver-client   kubernetes-admin   <none>              Pending
Approval certificate :
┌──[[email protected]]-[~/ansible/k8s-rbac-create]
└─$kubectl certificate approve liruilong
certificatesigningrequest.certificates.k8s.io/liruilong approved
View the approved certificate :
┌──[[email protected]]-[~/ansible/k8s-rbac-create]
└─$kubectl get csr/liruilong -o yaml
apiVersion: certificates.k8s.io/v1
kind: CertificateSigningRequest
metadata:
  annotations:
    kubectl.kubernetes.io/last-applied-configuration: | {"apiVersion":"certificates.k8s.io/v1","kind":"CertificateSigningRequest","metadata":{"annotations":{},"name":"liruilong"},"spec":{"request":"LS0tLS1CRUdJTiBDRVJUSUZJQ0FURSBSRVFVRVNULS0tLS0KTUlJQ2F6Q0NBVk1DQVFBd0pqRVNNQkFHQTFVRUF3d0piR2x5ZFdsc2IyNW5NUkF3RGdZRFZRUUtEQWRqYTJFeQpNREl3TUlJQklqQU5CZ2txaGtpRzl3MEJBUUVGQUFPQ0FROEFNSUlCQ2dLQ0FRRUF0OU9CbndhQTNWZEZmamRpCnVySlB0Y2FpWE9HUGMxQVdGbXJsZ29jcTR2VDVXWmdxd1g5T0RvSnpDREJZZVFJQ3h0Wm5uUk9XY1B2dVB6K1IKb1Eybk83K3FnNUNjZzlWZmVOWFRwUDB0VXZsQ21ZVVg2dkRDdlgxUDR3VnNFdXNydlZBdkF4NmdqZTZzNW94VgphZTIwcXFBRXpTUXJhczhPeldsZ1Frd0xjNU5MZ2k3bWlpNHNzaVpQRXU1ZFZIRWs5dHdCeUZTV0dsanJETkhvCnN4UkFFNXlrWjBnODBWSzN1U1JNNmFHSEJ0QmVpbysxa2d0U0xDMlVScy9QWUwwRGNSQm9zUUx0c3JublFSMTkKSE5NWTkweUhYN3Jta3ZqcHdOdkRZWjNIWUVvbGJQZThWZjhBTFpsbDVBTnJ5SUJqbXNrY01QM2lRMzdxWGZUNwptSzhKeHdJREFRQUJvQUF3RFFZSktvWklodmNOQVFFTEJRQURnZ0VCQUFwa09aUUNTTGxGYWJTVk9zNmtzL1ZyCmd3b3FTdjFOM1YzUC84SmNzR1pFUTc4TkpJb2R0REExS3EwN25DWjJWUktselZDN1kyMCszZUVzTXZNWnFMc1MKbUtaS0w2SFE3N2RHa1liUjhzKzRMaFo4YXR6cXVMSnlqZUZKODQ2N1ZrUXF5T1R6by9wZ3E4YWJJY01XNzlKMgoxWEkybi92RWlIMEgvWU9DaWExVHRqTnpSWGtlL2hPQTZ4Y29CcVRpdWtkUHBqZDJSaWFTRUNUS1h4ZGNOS0xLCmZVbFhkb2s5UkVkQ2V3bU9ISUdvVG9qUGRWdWlPdkYzZkFqUXZNNDJ3UjJDdklHMWs1YUQzdWVlbzcwd0pnUlQKYzhZNnUwY2padEI5ZW5xUStmRFFqdUUyZElrMDJLbm5HQVppK0wxUnRnSnA2Tm1udEg5WUc3RlBLSXYrakFZPQotLS0tLUVORCBDRVJUSUZJQ0FURSBSRVFVRVNULS0tLS0K","signerName":"kubernetes.io/kube-apiserver-client","usages":["client auth"]}}
  creationTimestamp: "2022-01-16T15:25:24Z"
  name: liruilong
  resourceVersion: "1185668"
  uid: 51837659-7214-4dec-bcd4-b7a9129ee2bb
spec:
  groups:
  - system:masters
  - system:authenticated
  request: LS0tLS1CRUdJTiBDRVJUSUZJQ0FURSBSRVFVRVNULS0tLS0KTUlJQ2F6Q0NBVk1DQVFBd0pqRVNNQkFHQTFVRUF3d0piR2x5ZFdsc2IyNW5NUkF3RGdZRFZRUUtEQWRqYTJFeQpNREl3TUlJQklqQU5CZ2txaGtpRzl3MEJBUUVGQUFPQ0FROEFNSUlCQ2dLQ0FRRUF0OU9CbndhQTNWZEZmamRpCnVySlB0Y2FpWE9HUGMxQVdGbXJsZ29jcTR2VDVXWmdxd1g5T0RvSnpDREJZZVFJQ3h0Wm5uUk9XY1B2dVB6K1IKb1Eybk83K3FnNUNjZzlWZmVOWFRwUDB0VXZsQ21ZVVg2dkRDdlgxUDR3VnNFdXNydlZBdkF4NmdqZTZzNW94VgphZTIwcXFBRXpTUXJhczhPeldsZ1Frd0xjNU5MZ2k3bWlpNHNzaVpQRXU1ZFZIRWs5dHdCeUZTV0dsanJETkhvCnN4UkFFNXlrWjBnODBWSzN1U1JNNmFHSEJ0QmVpbysxa2d0U0xDMlVScy9QWUwwRGNSQm9zUUx0c3JublFSMTkKSE5NWTkweUhYN3Jta3ZqcHdOdkRZWjNIWUVvbGJQZThWZjhBTFpsbDVBTnJ5SUJqbXNrY01QM2lRMzdxWGZUNwptSzhKeHdJREFRQUJvQUF3RFFZSktvWklodmNOQVFFTEJRQURnZ0VCQUFwa09aUUNTTGxGYWJTVk9zNmtzL1ZyCmd3b3FTdjFOM1YzUC84SmNzR1pFUTc4TkpJb2R0REExS3EwN25DWjJWUktselZDN1kyMCszZUVzTXZNWnFMc1MKbUtaS0w2SFE3N2RHa1liUjhzKzRMaFo4YXR6cXVMSnlqZUZKODQ2N1ZrUXF5T1R6by9wZ3E4YWJJY01XNzlKMgoxWEkybi92RWlIMEgvWU9DaWExVHRqTnpSWGtlL2hPQTZ4Y29CcVRpdWtkUHBqZDJSaWFTRUNUS1h4ZGNOS0xLCmZVbFhkb2s5UkVkQ2V3bU9ISUdvVG9qUGRWdWlPdkYzZkFqUXZNNDJ3UjJDdklHMWs1YUQzdWVlbzcwd0pnUlQKYzhZNnUwY2padEI5ZW5xUStmRFFqdUUyZElrMDJLbm5HQVppK0wxUnRnSnA2Tm1udEg5WUc3RlBLSXYrakFZPQotLS0tLUVORCBDRVJUSUZJQ0FURSBSRVFVRVNULS0tLS0K
  signerName: kubernetes.io/kube-apiserver-client
  usages:
  - client auth
  username: kubernetes-admin
status:
  certificate: LS0tLS1CRUdJTiBDRVJUSUZJQ0FURS0tLS0tCk1JSURDekNDQWZPZ0F3SUJBZ0lRUC9aR05rUjdzVy9sdHhkQTNGQjBoekFOQmdrcWhraUc5dzBCQVFzRkFEQVYKTVJNd0VRWURWUVFERXdwcmRXSmxjbTVsZEdWek1CNFhEVEl5TURFeE5qRTFNakV3TWxvWERUSXpNREV4TmpFMQpNakV3TWxvd0pqRVFNQTRHQTFVRUNoTUhZMnRoTWpBeU1ERVNNQkFHQTFVRUF4TUpiR2x5ZFdsc2IyNW5NSUlCCklqQU5CZ2txaGtpRzl3MEJBUUVGQUFPQ0FROEFNSUlCQ2dLQ0FRRUF0OU9CbndhQTNWZEZmamRpdXJKUHRjYWkKWE9HUGMxQVdGbXJsZ29jcTR2VDVXWmdxd1g5T0RvSnpDREJZZVFJQ3h0Wm5uUk9XY1B2dVB6K1JvUTJuTzcrcQpnNUNjZzlWZmVOWFRwUDB0VXZsQ21ZVVg2dkRDdlgxUDR3VnNFdXNydlZBdkF4NmdqZTZzNW94VmFlMjBxcUFFCnpTUXJhczhPeldsZ1Frd0xjNU5MZ2k3bWlpNHNzaVpQRXU1ZFZIRWs5dHdCeUZTV0dsanJETkhvc3hSQUU1eWsKWjBnODBWSzN1U1JNNmFHSEJ0QmVpbysxa2d0U0xDMlVScy9QWUwwRGNSQm9zUUx0c3JublFSMTlITk1ZOTB5SApYN3Jta3ZqcHdOdkRZWjNIWUVvbGJQZThWZjhBTFpsbDVBTnJ5SUJqbXNrY01QM2lRMzdxWGZUN21LOEp4d0lECkFRQUJvMFl3UkRBVEJnTlZIU1VFRERBS0JnZ3JCZ0VGQlFjREFqQU1CZ05WSFJNQkFmOEVBakFBTUI4R0ExVWQKSXdRWU1CYUFGR0RjS1N1dVY1TTV5Wk5CR1AxLzZoN0xZNytlTUEwR0NTcUdTSWIzRFFFQkN3VUFBNElCQVFCagpOelREMmZ5bTc3bXQ4dzlacXRZN3NQelhmNHJQTXpWUzVqV3NzenpidlhEUzhXcFNMWklIYkQ3VU9vYlYxcFYzClYzRW02RXlpWUEvbjhMYTFRMnZra0EyUDk1d3JqWlBuemZIeUhWVFpCTUY4YU1MSHVpVHZ5WlVVV0JYMTg1UFAKQ2MxRncwanNmVThJMDBzbUNOeURBZjVMejFjRUVrNWlGYUswMDJRblUyNk5lcDF3U3BMcVZWWVptSW9UVU9DOApCNzNpU3J6Y0wyVmdBejRCaUQxdUVlUkFMM20zRTB2VVpsQjduKzF1MllrNDFCajdGYnpWR2w1dFpYT3hDMVhxCjJVc0hSbmkzY1VYZ203QlloZDU3aTFHclRRRFJpckRwVFV1RDB3ZlFYTjZLdEx1TmVDYUc0alc4ZTl4QkQrTjIKOFE4Z25UZjdPSEI3VWZkUzVnMWQKLS0tLS1FTkQgQ0VSVElGSUNBVEUtLS0tLQo=
  conditions:
  - lastTransitionTime: "2022-01-16T15:26:02Z"
    lastUpdateTime: "2022-01-16T15:26:01Z"
    message: This CSR was approved by kubectl certificate approve.
    reason: KubectlApprove
    status: "True"
    type: Approved
Export certificate file :
┌──[[email protected]]-[~/ansible/k8s-rbac-create]
└─$kubectl get csr liruilong -o jsonpath='{.status.certificate}'| base64 -d > liruilong.crt
Authorize users , Here to liruilong A clustered role cluster-role( Be similar to root The same role ), such liruilong Have administrator rights
┌──[[email protected]]-[~/ansible/k8s-rbac-create]
└─$kubectl create clusterrolebinding test  --clusterrole=cluster-admin --user=liruilong
clusterrolebinding.rbac.authorization.k8s.io/test created
┌──[[email protected]]-[~/ansible/k8s-rbac-create]
└─$
establish kubeconfig file
Copy CA certificate
┌──[[email protected]]-[~/ansible/k8s-rbac-create]
└─$ls
csr.yaml      #( Apply for certificate request document yaml)
liruilong.crt # Public key ( Certificate file )
liruilong.csr #( Certificate request file )
liruilong.key # Private key
┌──[[email protected]]-[~/ansible/k8s-rbac-create]
└─$ls /etc/kubernetes/pki/
apiserver.crt              apiserver.key                 ca.crt  front-proxy-ca.crt      front-proxy-client.key  sa.pub
apiserver-etcd-client.crt  apiserver-kubelet-client.crt  ca.key  front-proxy-ca.key      liruilong.csv
apiserver-etcd-client.key  apiserver-kubelet-client.key  etcd    front-proxy-client.crt  sa.key
┌──[[email protected]]-[~/ansible/k8s-rbac-create]
└─$cp  /etc/kubernetes/pki/ca.crt .
Set the cluster field , The cluster name is included here , Service address and cluster certificate
┌──[[email protected]]-[~/ansible/k8s-rbac-create]
└─$kubectl config --kubeconfig=kc1 set-cluster cluster1  --server=https://192.168.26.81:6443 --certificate-authority=ca.crt --embed-certs=true
Cluster "cluster1" set.
Create a context in the above cluster context1
┌──[[email protected]]-[~/ansible/k8s-rbac-create]
└─$kubectl config --kubeconfig=kc1 set-context context1 --cluster=cluster1 --namespace=default --user=liruilong
Context "context1" created.
here –embed-certs=true Means to write the contents of the certificate to this kubeconfig In the document .
Set user fields , Include user name , User certificate , User private key
┌──[[email protected]]-[~/ansible/k8s-rbac-create]
└─$kubectl config --kubeconfig=kc1 set-credentials liruilong --client-certificate=liruilong.crt --client-key=liruilong.key --embed-certs=true
User "liruilong" set.
View the created kubeconfig file information
┌──[[email protected]]-[~/ansible/k8s-rbac-create]
└─$cat kc1
apiVersion: v1
clusters:
- cluster:
    certificate-authority-data: LS0tLS1CRUdJTiBDRVJUSUZJQ0FURS0tLS0tCk1JSUMvakNDQWVhZ0F3SUJBZ0lCQURBTkJna3Foa2lHOXcwQkFRc0ZBREFWTVJNd0VRWURWUVFERXdwcmRXSmwKY201bGRHVnpNQjRYRFRJeE1USXhNakUyTURBME1sb1hEVE14TVRJeE1ERTJNREEwTWxvd0ZURVRNQkVHQTFVRQpBeE1LYTNWaVpYSnVaWFJsY3pDQ0FTSXdEUVlKS29aSWh2Y05BUUVCQlFBRGdnRVBBRENDQVFvQ2dnRUJBTkdkCisrWnhFRDJRQlR2Rm5ycDRLNFBrd2lsYXUrNjdXNTVobVdwc09KSHF6ckVoWUREY3l4ZTU2Z1VJVDFCUTFwbU0KcGFrM0V4L0JZRStPeHY4ZmxtellGbzRObDZXQjl4VXovTW5HQi96dHZsTGpaVEVHZy9SVlNIZTJweCs2MUlSMQo2Mkh2OEpJbkNDUFhXN0pmR3VXNDdKTXFUNTUrZUNuR00vMCtGdnI2QUJnT2YwNjBSSFFuaVlzeGtpSVJmcjExClVmcnlPK0RFTGJmWjFWeDhnbi9tcGZEZ044cFgrVk9FNFdHSDVLejMyNDJtWGJnL3A0emd3N2NSalpSWUtnVlUKK2VNeVIyK3pwaTBhWW95L2hLYmg4RGRUZ3FZeERDMzR6NHFoQ3RGQnVia1hmb3Ftc3FGNXpQUm1ZS051RUgzVAo2c1FNSFl4emZXRkZvSGQ2Y0JNQ0F3RUFBYU5aTUZjd0RnWURWUjBQQVFIL0JBUURBZ0trTUE4R0ExVWRFd0VCCi93UUZNQU1CQWY4d0hRWURWUjBPQkJZRUZHRGNLU3V1VjVNNXlaTkJHUDEvNmg3TFk3K2VNQlVHQTFVZEVRUU8KTUF5Q0NtdDFZbVZ5Ym1WMFpYTXdEUVlKS29aSWh2Y05BUUVMQlFBRGdnRUJBRVE0SUJhM0hBTFB4OUVGWnoyZQpoSXZkcmw1U0xlanppMzkraTdheC8xb01SUGZacElwTzZ2dWlVdHExVTQ2V0RscTd4TlFhbVVQSFJSY1RrZHZhCkxkUzM5Y1UrVzk5K3lDdXdqL1ZrdzdZUkpIY0p1WCtxT1NTcGVzb3lrOU16NmZxNytJUU9lcVRTbGpWWDJDS2sKUFZxd3FVUFNNbHFNOURMa0JmNzZXYVlyWUxCc01EdzNRZ3N1VTdMWmg5bE5TYVduSzFoR0JKTnRndjAxdS9MWAo0TnhKY3pFbzBOZGF1OEJSdUlMZHR1dTFDdEFhT21CQ2ZjeTBoZHkzVTdnQXh5blR6YU1zSFFTamIza0JDMkY5CkpWSnJNN1FULytoMStsOFhJQ3ZLVzlNM1FlR0diYm13Z1lLYnMvekswWmc1TE5sLzFJVThaTUpPREhTVVBlckQKU09ZPQotLS0tLUVORCBDRVJUSUZJQ0FURS0tLS0tCg==
    server: https://192.168.26.81:6443
  name: cluster1
contexts:
- context:
    cluster: cluster1
    namespace: default
    user: liruilong
  name: context1
current-context: ""
kind: Config
preferences: {
    }
users:
- name: liruilong
  user:
    client-certificate-data: LS0tLS1CRUdJTiBDRVJUSUZJQ0FURS0tLS0tCk1JSURDekNDQWZPZ0F3SUJBZ0lRUC9aR05rUjdzVy9sdHhkQTNGQjBoekFOQmdrcWhraUc5dzBCQVFzRkFEQVYKTVJNd0VRWURWUVFERXdwcmRXSmxjbTVsZEdWek1CNFhEVEl5TURFeE5qRTFNakV3TWxvWERUSXpNREV4TmpFMQpNakV3TWxvd0pqRVFNQTRHQTFVRUNoTUhZMnRoTWpBeU1ERVNNQkFHQTFVRUF4TUpiR2x5ZFdsc2IyNW5NSUlCCklqQU5CZ2txaGtpRzl3MEJBUUVGQUFPQ0FROEFNSUlCQ2dLQ0FRRUF0OU9CbndhQTNWZEZmamRpdXJKUHRjYWkKWE9HUGMxQVdGbXJsZ29jcTR2VDVXWmdxd1g5T0RvSnpDREJZZVFJQ3h0Wm5uUk9XY1B2dVB6K1JvUTJuTzcrcQpnNUNjZzlWZmVOWFRwUDB0VXZsQ21ZVVg2dkRDdlgxUDR3VnNFdXNydlZBdkF4NmdqZTZzNW94VmFlMjBxcUFFCnpTUXJhczhPeldsZ1Frd0xjNU5MZ2k3bWlpNHNzaVpQRXU1ZFZIRWs5dHdCeUZTV0dsanJETkhvc3hSQUU1eWsKWjBnODBWSzN1U1JNNmFHSEJ0QmVpbysxa2d0U0xDMlVScy9QWUwwRGNSQm9zUUx0c3JublFSMTlITk1ZOTB5SApYN3Jta3ZqcHdOdkRZWjNIWUVvbGJQZThWZjhBTFpsbDVBTnJ5SUJqbXNrY01QM2lRMzdxWGZUN21LOEp4d0lECkFRQUJvMFl3UkRBVEJnTlZIU1VFRERBS0JnZ3JCZ0VGQlFjREFqQU1CZ05WSFJNQkFmOEVBakFBTUI4R0ExVWQKSXdRWU1CYUFGR0RjS1N1dVY1TTV5Wk5CR1AxLzZoN0xZNytlTUEwR0NTcUdTSWIzRFFFQkN3VUFBNElCQVFCagpOelREMmZ5bTc3bXQ4dzlacXRZN3NQelhmNHJQTXpWUzVqV3NzenpidlhEUzhXcFNMWklIYkQ3VU9vYlYxcFYzClYzRW02RXlpWUEvbjhMYTFRMnZra0EyUDk1d3JqWlBuemZIeUhWVFpCTUY4YU1MSHVpVHZ5WlVVV0JYMTg1UFAKQ2MxRncwanNmVThJMDBzbUNOeURBZjVMejFjRUVrNWlGYUswMDJRblUyNk5lcDF3U3BMcVZWWVptSW9UVU9DOApCNzNpU3J6Y0wyVmdBejRCaUQxdUVlUkFMM20zRTB2VVpsQjduKzF1MllrNDFCajdGYnpWR2w1dFpYT3hDMVhxCjJVc0hSbmkzY1VYZ203QlloZDU3aTFHclRRRFJpckRwVFV1RDB3ZlFYTjZLdEx1TmVDYUc0alc4ZTl4QkQrTjIKOFE4Z25UZjdPSEI3VWZkUzVnMWQKLS0tLS1FTkQgQ0VSVElGSUNBVEUtLS0tLQo=
    client-key-data: LS0tLS1CRUdJTiBSU0EgUFJJVkFURSBLRVktLS0tLQpNSUlFcEFJQkFBS0NBUUVBdDlPQm53YUEzVmRGZmpkaXVySlB0Y2FpWE9HUGMxQVdGbXJsZ29jcTR2VDVXWmdxCndYOU9Eb0p6Q0RCWWVRSUN4dFpublJPV2NQdnVQeitSb1Eybk83K3FnNUNjZzlWZmVOWFRwUDB0VXZsQ21ZVVgKNnZEQ3ZYMVA0d1ZzRXVzcnZWQXZBeDZnamU2czVveFZhZTIwcXFBRXpTUXJhczhPeldsZ1Frd0xjNU5MZ2k3bQppaTRzc2laUEV1NWRWSEVrOXR3QnlGU1dHbGpyRE5Ib3N4UkFFNXlrWjBnODBWSzN1U1JNNmFHSEJ0QmVpbysxCmtndFNMQzJVUnMvUFlMMERjUkJvc1FMdHNybm5RUjE5SE5NWTkweUhYN3Jta3ZqcHdOdkRZWjNIWUVvbGJQZTgKVmY4QUxabGw1QU5yeUlCam1za2NNUDNpUTM3cVhmVDdtSzhKeHdJREFRQUJBb0lCQUJsS0I3TVErZmw1WUI0VgpFSWdPcjlpYUV3d2tHOUFKWElDSkJEb0l6bVdhdmhNTlZCUjZwd3BuOTl0UWkxdGFZM2RuVjZuTVlBMzdHck9vCjB5Z004TXpQZVczUUh6Z2p5cGFkRkJqR204Mm1iUHNoekVDT0RyeHkyT0txaEV1MS9yWjBxWU1NVzVvckU2NUQKOEJ3NmozaEp1MTlkY251bk1Lb2hyUlJ4MGNGOGJrVHpRcWk1Y0xGZ0lBUlArNklFcnQrS0FVSGFVQ0wvSUtTYgoyblJnSmhvSWszTUJnQnM3eVl0NFpVNlpkSVFLRU56RzRUd2VjNG5ESXE2TkllU1ZpSEVtbmdjRXVOdTNOaWEvCmxwTWd5ZHJKZWJKYStrc0FiZU4zU21TRGc2MXpVWUpHV2FOZUFPemdmbkZRTVp2Y2FyNEQ1b0xCQUE5Rlpic0EKc0hUZjBBRUNnWUVBNWVmdDJSV25kM2pueWJBVVExa3dRTzlzN1BmK241OXF3ekIwaEdrcC9qcjh2dGRYZkxMNgo0THBoNWFhKzlEM0w5TEpMdk8xa0cyaG5UbFE4Q25uVXpVUUUreldiYlRJblR0eE1hRzB5VjJlZ3NaQkFseERYClk1K2tZZ29EVXIyN2dWbE5QZ29SWVkzRG1ZZHplVmp0NEFHOE9JNWRPUlJ6bFE3VHN0Nk9XUUVDZ1lFQXpMQ3kKM2Q0SkRZRjBpeXFFc2FsNFNsckdEc3hmY2xxeUZaVWpmcUcvdGFHeEFTeE9zL0h3SDNwR1cwQXh3c2tPdVNkUwpWcGxOOC9uZjBMQjdPV0hQL2FjTlJLbHdJeUZrNG9EU0VMOVJ5d0FFVEF3NHdrYitoRzNZdUFHU2YvY1dEWXNtCjNJUUxlMVdFS0JSZDVBS1lkYXdyYlJtclFkSndSaFFkalNzOTJzY0NnWUVBck1WSVpwVHhUc1ViV3VQcHRscjEKK2paekl2bVM3WjI5ZTRXVWFsVWxhNW9raWI0R1R2MnBydXdoMlpVZmR5aGhkemZ0MXNLSE1sbVpHTElRbE1iTgpkcHdoS2k4MDZEQ0NmYTdyOUtYcTZPaEZTR3JoUHlVMjEvVUdjVzZZNUxzVWg3WDJhQ0xrd096cUN4eFJXT1hOCmpVT0FrUGZiY3FPOTRFeE9KdU05RWdFQ2dZRUFwNUVqN0xPL0wzcENBVWVlZDU3bjVkN244dWRtWDhSVnM0dHoKRWxDeUU2dzVybDhxVXUrR0J3N2ZtQVkyZG1LSUZoVlZ0NlVyQnNjUmJkTjhIUjZ3MmRNdTduM1RXajhWU3NQdwp0RnNiUjVkTTdVQzRHbnRxRXRtbUtBVEpmTTYzRkFGTm9Bck5KM3Q3aENBZ09PL1RCY29iaHVZVHAvL3hmNzBwCjhBNXRSYk1DZ1lCMkJTb0ZTbW1sVFN5RjdnZnhmM281dTNXM3lwTENIRFV0cFZkYlAxZm9vemJwZUs3V29IY2YKTEhkMG4xeUNLcHdiWU1HZ2hGNGlHbUVHSUlkc0NWWlArRVY2bGR1UEtqcUVtOWtqdUxST0t6UlpIRm9HeUFTTwpLcmIzVlI0Q0tIdm5aQVBWY3R2N1B1KzRKZ01saUpIbDhHVllocU01VXlrYkxSTWROSFNOSVE9PQotLS0tLUVORCBSU0EgUFJJVkFURSBLRVktLS0tLQo=
┌──[[email protected]]-[~/ansible/k8s-rbac-create]
└─$
modify kubeconfig The current context of the file is the previously created context
┌──[[email protected]]-[~/ansible/k8s-rbac-create]
└─$sed  's#current-context: ""#current-context: "context1"#' kc1 | grep current-context
current-context: "context1"
┌──[[email protected]]-[~/ansible/k8s-rbac-create]
└─$sed -i  's#current-context: ""#current-context: "context1"#' kc1
┌──[[email protected]]-[~/ansible/k8s-rbac-create]
└─$cat  kc1 | grep current-context
current-context: "context1"
such kubeconfig The file is created , Let's start the verification kubeconfig file .
┌──[[email protected]]-[~/ansible/k8s-rbac-create]
└─$kubectl auth can-i list pods --as liruilong # Check for  list  In the current namespace  pod  Authority
yes
┌──[[email protected]]-[~/ansible/k8s-rbac-create]
└─$kubectl auth can-i list pods -n kube-system --as liruilong # Check   Whether they have  list  Namespace  kube-system  in  pod  Authority
yes
┌──[[email protected]]-[~/ansible/k8s-rbac-create]
└─$
Copy the certificate to the client
┌──[[email protected]]-[~/ansible/k8s-rbac-create]
└─$scp kc1  [email protected]:~
The client specifies the certificate access test
┌──[[email protected]]-[~]
└─$ kubectl --kubeconfig=kc1 get pods -n kube-system
NAME                                                 READY   STATUS        RESTARTS        AGE
calico-kube-controllers-78d6f96c7b-85rv9             1/1     Running       194 (14h ago)   33d
calico-node-6nfqv                                    0/1     Running       255 (14h ago)   35d
calico-node-fv458                                    0/1     Running       50              35d
calico-node-h5lsq                                    1/1     Running       94 (38h ago)    35d
............
┌──[[email protected]]-[~]
└─$
Such a kubeconfig The file is created
API Server Authorization management
Environment version
┌──[[email protected]]-[~/ansible]
└─$kubectl  get nodes
NAME                         STATUS     ROLES                  AGE   VERSION
vms81.liruilongs.github.io   Ready      control-plane,master   41d   v1.22.2
vms82.liruilongs.github.io   Ready      <none>                 41d   v1.22.2
vms83.liruilongs.github.io   Ready      <none>                 41d   v1.22.2
except k8s colony , We also use machines outside the cluster liruilongs.github.io, This machine acts as a client , Installed kubectl client , To upload liruilong User kubeconfig Certificate file
Namespace environment preparation
┌──[[email protected]]-[~/ansible]
└─$kubectl create ns liruilong-rbac-create
namespace/liruilong-rbac-create created
┌──[[email protected]]-[~/ansible]
└─$mkdir k8s-rbac-create;cd k8s-rbac-create
┌──[[email protected]]-[~/ansible/k8s-rbac-create]
└─$kubectl config set-context $(kubectl config current-context) --namespace=liruilong-rbac-create
Context "[email protected]" modified.
┌──[[email protected]]-[~/ansible/k8s-rbac-create]
└─$
Brief description of authorization policy
When the client initiates API Server Invocation time , API Server User authentication must be carried out internally , Then execute the user authentication process , That is, an authentication policy is used to determine a API Whether the call is legal . I think I'm no stranger to development partners , frequently-used Spring Security Equal safety framework , Will involve the process of authentication and authentication .
Since authentication , There must be a process of authorization , In short , Authorization is to grant different access rights to different users .
API ServerAt present, the following authorization policies are supported
| Strategy | describe |
|---|---|
| AlwaysDeny | To refuse all requests , Generally used for testing . |
| AlwaysAllow | Allow to receive all requests , If the cluster does not require an authorization process , You can use this strategy , This is also Kubernetes Default configuration . |
| ABAC | (Attribute-Based Access Control) Property based access control , Indicates that the authorization rules configured by the user are used to match and control user requests . |
| Webhook | By calling the external REST Services authorize users . |
| RBAC | (Role-Based Access Control) Role-based access control . |
| Node | It's a dedicated mode , Used to deal with kubelet Request for access control . |
The policy is set through API Server Start parameter of "--authorization-mode" Set up .
┌──[[email protected]]-[~/ansible/k8s-rbac-create]
└─$cat /etc/kubernetes/manifests/kube-apiserver.yaml | grep authorization-mode
    - --authorization-mode=Node,RBAC
┌──[[email protected]]-[~/ansible/k8s-rbac-create]
└─$
About authorization policy ,AlwaysAllow and AlwaysDeny Not much ,ABAC inflexible ,Node The authorizer is mainly used in various fields node Upper kubelet visit apiserver The use of , Others are generally made up of RBAC Authorizer to authorize , So let's see RBAC Permission policy
RBAC Authorization mode
This piece of , The official documents are very detailed , Study in detail , I'd better go to the official website , Here are some commonly used complete Demo, Official website address :https://kubernetes.io/zh/docs/reference/access-authn-authz/rbac/
RBAC(Role-Based Access Control, Role-based access control ) That is, permissions are related to roles , Users are assigned corresponding roles as their members .
stay
Kubernetes Of 1.5The version introduces , stay1.6Upgrade toBeta edition, stay1.8Upgrade toGA. AskubeadmThe default option of installation mode , Compared with other access control methods , new RBAC It has the following advantages .
- Complete coverage of resource and non resource permissions in the cluster .
- Whole RBAC It's all about a few API Object complete , Same as others API object , It can be used
kubectlorAPITo operate . - It can be adjusted at runtime , No need to restart
API Server.
To use RBAC Authorization mode , Need to be in API Server Add... To the startup parameters of –authorization-mode=RBAC, If the small partner defaults to kubeadm install , So by default Node,RBAC Two strategies
┌──[[email protected]]-[~/ansible/k8s-rbac-create]
└─$cat /etc/kubernetes/manifests/kube-apiserver.yaml | grep authorization-mode
    - --authorization-mode=Node,RBAC
RBAC Of API Resource object introduces 4 A new top-level resource object :
RoleClusterRoleRoleBindingClusterRoleBinding
Same as others API Resource objects are the same , Users can use kubectl perhaps API Call to operate these resource objects .
role
role (Role) A role is a set of permissions . stay In the same namespace , It can be used Role To define a role , If it's cluster level , You need to use ClusterRole 了 . Roles can only authorize resources within a namespace
The cluster character (ClusterRole) In addition to having the same , The management ability of resources in the namespace , Because of the scope of its cluster level , It can also be used for authorization of the following special elements .
- Cluster wide resources , for example Node.
- Non resource based path , for example “/api"
- Resources that contain all the namespace , for example pods ( be used for
kubectl get pods -all-namespacesSuch operations are authorized ).
Now let's find a cluster role administrator built in the cluster to see the details
┌──[[email protected]]-[~/ansible/k8s-rbac-create]
└─$kubectl describe clusterrole admin
Name:         admin
Labels:       kubernetes.io/bootstrapping=rbac-defaults
Annotations:  rbac.authorization.kubernetes.io/autoupdate: true
PolicyRule:
  Resources                                       Non-Resource URLs  Resource Names  Verbs
  ---------                                       -----------------  --------------  -----
  rolebindings.rbac.authorization.k8s.io          []                 []              [create delete deletecollection get list patch update watch]
  roles.rbac.authorization.k8s.io                 []                 []              [create delete deletecollection get list patch update watch]
  configmaps                                      []                 []              [create delete deletecollection patch update get list watch]
  events                                          []                 []              [create delete deletecollection patch update get list watch]
  persistentvolumeclaims                          []                 []              [create delete deletecollection patch update get list watch]
  pods                                            []                 []              [create delete deletecollection patch update get list watch]
  replicationcontrollers/scale                    []                 []              [create delete deletecollection patch update get list watch]
.........
┌──[[email protected]]-[~/ansible/k8s-rbac-create]
└─$
In the administrator cluster role above ,
ResourcesList as allowed resources ,VerbsList the allowed actions or actions
Character binding
There's a character , How are roles bound to users or user groups , Here you need to bind the resource object by role , I don't know if the boy remembers , When we are doing certification , There is an authorized action
Authorize users , Here to liruilong A clustered role cluster-role( Be similar to root The same role ), such liruilong Have administrator rights
┌──[[email protected]]-[~/ansible/k8s-rbac-create]
└─$kubectl create clusterrolebinding test  --clusterrole=cluster-admin --user=liruilong
clusterrolebinding.rbac.authorization.k8s.io/test created
┌──[[email protected]]-[~/ansible/k8s-rbac-create]
└─$
ad locum , We put cluster-admin This cluster role is bound to users liruilong,cluster-admin This role is equivalent to a root User's role
Character binding (RoleBinding) Bind with cluster role (ClusterRoleBinding) : Used to bind a character to a target , The binding target can be User ( user ) 、Group ( Group ) perhaps Service Account.
In general , Use RoleBinding Authorize... For a namespace , Use ClusterRoleBinding Authorize for cluster wide .
The difference between role binding :
RoleBinding( Character binding ) You can reference Role To authorize . You can also quote ClusterRole, To belong to the same namespace ClusterRole Define the resource subject to authorize
ClusterRoleBinding( Cluster role binding ) Roles in can only be clustered roles (ClusterRole), For authorization at the cluster level or for all namespace
actual combat
Character creation
View the roles in the system
┌──[[email protected]ongs.github.io]-[~/ansible]
└─$kubectl  get role
No resources found in liruilong-rbac-create namespace.
Create a role Role resource object
┌──[[email protected]]-[~/ansible]
└─$kubectl create role role-liruilong --verb=get,list,watch  --resource=pod --dry-run=client -o yaml
Here we create a role , Name is role-liruilong, Define that this role has pod View details of resources , List view , monitor , Create permissions
View the resource file
apiVersion: rbac.authorization.k8s.io/v1
kind: Role
metadata:
  creationTimestamp: null
  name: role-liruilong
rules:
- apiGroups:
  - ""
  resources:
  - pods
  verbs:
  - get
  - list
  - watch
  - create
Resource file properties
- apiGroups: Supported by
API Group list, for example“apiVersion:batch/v1”,“apiVersion: extensions:v1beta1”,“apiVersion: apps/v1beta1”etc. - resources: Supported by
Resource objectslist , for examplepods、deployments、jobsetc. . - verbs: Yes
Resource objectsOfOperation methodlist , for exampleget、watch、list、delete、replace、patchetc.
adopt yaml File to create a role Resource objects
┌──[[email protected]]-[~/ansible]
└─$kubectl create role role-liruilong --verb=get,list,watch,create  --resource=pod --dry-run=client -o yaml >role-liruilong.yaml
┌──[[email protected]]-[~/ansible]
└─$kubectl apply -f role-liruilong.yaml
role.rbac.authorization.k8s.io/role-liruilong created
View the role information
┌──[[email protected]]-[~/ansible]
└─$kubectl  get role
NAME             CREATED AT
role-liruilong   2022-01-23T13:17:15Z
View role details
┌──[[email protected]]-[~/ansible]
└─$kubectl describe role role-liruilong
Name:         role-liruilong
Labels:       <none>
Annotations:  <none>
PolicyRule:
  Resources  Non-Resource URLs  Resource Names  Verbs
  ---------  -----------------  --------------  -----
  pods       []                 []              [get list watch create]
Create role binding
Bind characters to liruilong user
┌──[[email protected]]-[~/ansible/k8s-rbac-create]
└─$kubectl create  rolebinding  rbind-liruilong --role=role-liruilong --user=liruilong
rolebinding.rbac.authorization.k8s.io/rbind-liruilong created
Look at the role binding
┌──[[email protected]]-[~/ansible/k8s-rbac-create]
└─$kubectl  get rolebindings
NAME              ROLE                  AGE
rbind-liruilong   Role/role-liruilong   23s
View the details of the binding role
┌──[[email protected]]-[~/ansible/k8s-rbac-create]
└─$kubectl describe rolebindings rbind-liruilong
Name:         rbind-liruilong
Labels:       <none>
Annotations:  <none>
Role:
  Kind:  Role
  Name:  role-liruilong
Subjects:
  Kind  Name       Namespace
  ----  ----       ---------
  User  liruilong
┌──[[email protected]]-[~/ansible/k8s-rbac-create]
└─$
Then we access the test on the client
Here we use the one we created before kubeonfig certificate , We used to create certificates based on users liruilong Of
┌──[[email protected]]-[~/ansible/k8s-rbac-create]
└─$kubectl config view | grep namesp
    namespace: liruilong-rbac-create
Revise it kubeonfig The namespace of the certificate
┌──[[email protected]]-[~]
└─$ cat kc1 | grep namesp
    namespace: default
┌──[[email protected]]-[~]
└─$ sed 's#namespace: default#namespace: liruilong-rbac-create#g' kc1 | grep namesp
    namespace: liruilong-rbac-create
┌──[[email protected]]-[~]
└─$ sed -i 's#namespace: default#namespace: liruilong-rbac-create#g' kc1 | grep namesp
Specify on the client kubeconfig File test , There is no problem with authentication , There are no resource objects in the current namespace
┌──[[email protected]]-[~]
└─$ kubectl --kubeconfig=kc1 get pods
No resources found in liruilong-rbac-create namespace.
Then we create a pod
┌──[[email protected]]-[~]
└─$ kubectl --kubeconfig=kc1  run pod-demo --image=nginx --image-pull-policy=IfNotPresent --dry-run=client -o yaml >pod-demo.yaml
see pod resources , Create success
┌──[[email protected]]-[~]
└─$ kubectl  --kubeconfig=kc1 get pods
NAME       READY   STATUS    RESTARTS   AGE
pod-demo   1/1     Running   0          28m
Delete one pod, Because there is no permission to authorize deletion , So can't delete
┌──[[email protected]]-[~]
└─$ kubectl  --kubeconfig=kc1 delete pod pod-demo
Error from server (Forbidden): pods "pod-demo" is forbidden: User "liruilong" cannot delete resource "pods" in API group "" in the namespace "liruilong-rbac-create"
┌──[[email protected]]-[~]
└─$
Back to the cluster , Add or delete roles
┌──[[email protected]]-[~/ansible/k8s-rbac-create]
└─$vim role-liruilong.yaml
┌──[[email protected]]-[~/ansible/k8s-rbac-create]
└─$kubectl apply -f role-liruilong.yaml
role.rbac.authorization.k8s.io/role-liruilong configured
apiVersion: rbac.authorization.k8s.io/v1
kind: Role
metadata:
  creationTimestamp: null
  name: role-liruilong
rules:
- apiGroups:
  - ""
  resources:
  - pods
  verbs:
  - get
  - list
  - watch
  - create
  - delete
Re delete ,pod Delete successful
┌──[[email protected]]-[~]
└─$ kubectl  --kubeconfig=kc1 delete pod pod-demo
Error from server (Forbidden): pods "pod-demo" is forbidden: User "liruilong" cannot delete resource "pods" in API group "" in the namespace "liruilong-rbac-create"
┌──[[email protected]]-[~]
└─$ kubectl  --kubeconfig=kc1 delete pod pod-demo
pod "pod-demo" deleted
┌──[[email protected]]-[~]
└─$
Here we look at SVC Information , No permission found
┌──[[email protected]]-[~]
└─$ kubectl  --kubeconfig=kc1 get svc
Error from server (Forbidden): services is forbidden: User "liruilong" cannot list resource "services" in API group "" in the namespace "liruilong-rbac-create"
Prompt our users liruilong Need to add services Resource permissions
┌──[[email protected]]-[~/ansible/k8s-rbac-create]
└─$vim role-liruilong.yaml
┌──[[email protected]]-[~/ansible/k8s-rbac-create]
└─$kubectl apply  -f role-liruilong.yaml
role.rbac.authorization.k8s.io/role-liruilong configured
apiVersion: rbac.authorization.k8s.io/v1
kind: Role
metadata:
  creationTimestamp: null
  name: role-liruilong
rules:
- apiGroups:
  - ""
  resources:
  - pods
  - services
  - deployments
  verbs:
  - get
  - list
  - watch
  - create
  - delete
Here we add svc and deploy. Then access the test on the client , You didn't have permission to access before , Now prompt that there are no resources in the namespace , It indicates that the authentication is successful
┌──[[email protected]]-[~]
└─$ kubectl  --kubeconfig=kc1 get svc
No resources found in liruilong-rbac-create namespace.
┌──[[email protected]]-[~]
└─$
But we visit deploy When , Prompt error , No authority , What's the reason , This involves a - apiGroups: Why
┌──[[email protected]]-[~]
└─$ kubectl  --kubeconfig=kc1 get deployments
Error from server (Forbidden): deployments.apps is forbidden: User "liruilong" cannot list resource "deployments" in API group "apps" in the namespace "liruilong-rbac-create"
┌──[[email protected]]-[~]
└─$
We see the api Resource objects , Find out deployments and service The version definitions of are different , One is apps/v1, One is v1, Resource object defined yaml In file apiGroups Field is used to define the version Group .
┌──[[email protected]]-[~/ansible/k8s-rbac-create]
└─$kubectl api-resources | grep pods
pods                              po           v1                                     true         Pod
pods                                           metrics.k8s.io/v1beta1                 true         PodMetrics
podsecuritypolicies               psp          policy/v1beta1                         false        PodSecurityPolicy
┌──[[email protected]]-[~/ansible/k8s-rbac-create]
└─$kubectl api-resources | grep deploy
deployments                       deploy       apps/v1                                true         Deployment
┌──[[email protected]]-[~/ansible/k8s-rbac-create]
└─$kubectl api-resources | grep service
serviceaccounts                   sa           v1                                     true         ServiceAccount
services                          svc          v1                                     true         Service
apiservices                                    apiregistration.k8s.io/v1              false        APIService
servicemonitors                                monitoring.coreos.com/v1               true         ServiceMonitor
┌──[[email protected]]-[~/ansible/k8s-rbac-create]
└─$
Modify the resource configuration file , add to v1 Of apps
┌──[[email protected]]-[~/ansible/k8s-rbac-create]
└─$vim role-liruilong.yaml
┌──[[email protected]]-[~/ansible/k8s-rbac-create]
└─$kubectl apply  -f role-liruilong.yaml
role.rbac.authorization.k8s.io/role-liruilong configured
apiVersion: rbac.authorization.k8s.io/v1
kind: Role
metadata:
  creationTimestamp: null
  name: role-liruilong
rules:
- apiGroups:
  - ""
  - "apps"
  resources:
  - pods
  - services
  - deployments
  verbs:
  - get
  - list
  - watch
  - create
  - delete
Client access testing , Authentication success , But there is nothing related deploy resources
┌──[[email protected]]-[~]
└─$ kubectl  --kubeconfig=kc1 get deployments
Error from server (Forbidden): deployments.apps is forbidden: User "liruilong" cannot list resource "deployments" in API group "apps" in the namespace "liruilong-rbac-create"
┌──[[email protected]]-[~]
└─$ kubectl  --kubeconfig=kc1 get deployments
No resources found in liruilong-rbac-create namespace.
┌──[[email protected]]-[~]
└─$
Here we create a deploy
┌──[[email protected]]-[~]
└─$ kubectl  --kubeconfig=kc1 create  deployment  web-liruilong --image=nginx --replicas=2 --dry-run=client -o yaml
apiVersion: apps/v1
kind: Deployment
metadata:
  creationTimestamp: null
  labels:
    app: web-liruilong
  name: web-liruilong
spec:
  replicas: 2
  selector:
    matchLabels:
      app: web-liruilong
  strategy: {
    }
  template:
    metadata:
      creationTimestamp: null
      labels:
        app: web-liruilong
    spec:
      containers:
      - image: nginx
        name: nginx
        resources: {
    }
status: {
    }
┌──[[email protected]]-[~]
└─$ kubectl  --kubeconfig=kc1 create  deployment  web-liruilong --image=nginx --replicas=2 --dry-run=client -o yaml >web-liruilong.yaml
Create success , see deploy Resources for , It can be viewed normally
┌──[[email protected]]-[~]
└─$ kubectl  --kubeconfig=kc1  apply -f web-liruilong.yaml
deployment.apps/web-liruilong created
┌──[[email protected]]-[~]
└─$ kubectl   --kubeconfig=kc1 get deployments
NAME            READY   UP-TO-DATE   AVAILABLE   AGE
web-liruilong   0/2     2            0           31s
┌──[[email protected]]-[~]
└─$ kubectl   --kubeconfig=kc1 get pods
NAME                            READY   STATUS              RESTARTS   AGE
web-liruilong-c546cb69b-g2pvm   0/1     ContainerCreating   0          59s
web-liruilong-c546cb69b-w6xfh   0/1     ContainerCreating   0          59s
┌──[[email protected]]-[~]
└─$
But let's modify deplo Number of copies , Will report a mistake , What's the reason for this , Hint that we are less patch jurisdiction , There is no way to modify deploy Number of copies of
┌──[[email protected]]-[~]
└─$ kubectl   --kubeconfig=kc1  scale deployment  web-liruilong --replicas=3
Error from server (Forbidden): deployments.apps "web-liruilong" is forbidden: User "liruilong" cannot patch resource "deployments/scale" in API group "apps" in the namespace "liruilong-rbac-create"
┌──[[email protected]]-[~]
└─$
Again , add to patch jurisdiction
┌──[[email protected]]-[~/ansible/k8s-rbac-create]
└─$vim role-liruilong.yaml
┌──[[email protected]]-[~/ansible/k8s-rbac-create]
└─$kubectl apply  -f role-liruilong.yaml
role.rbac.authorization.k8s.io/role-liruilong configured
apiVersion: rbac.authorization.k8s.io/v1
kind: Role
metadata:
  creationTimestamp: null
  name: role-liruilong
rules:
- apiGroups:
  - ""
  - "apps"
  resources:
  - pods
  - services
  - deployments
  - deployments/scale
  verbs:
  - get
  - list
  - watch
  - create
  - delete
  - patch
Execute the command at time , It can be modified normally deploy Copy of
┌──[[email protected]]-[~]
└─$ kubectl   --kubeconfig=kc1  scale deployment  web-liruilong --replicas=3
deployment.apps/web-liruilong scaled
┌──[[email protected]]-[~]
└─$ kubectl  --kubeconfig=kc1 get deployments
NAME            READY   UP-TO-DATE   AVAILABLE   AGE
web-liruilong   2/3     3            2           7m43s
┌──[[email protected]]-[~]
└─$ kubectl  --kubeconfig=kc1 get pods
NAME                            READY   STATUS              RESTARTS   AGE
web-liruilong-c546cb69b-52nqm   0/1     ContainerCreating   0          16s
web-liruilong-c546cb69b-g2pvm   1/1     Running             0          7m50s
web-liruilong-c546cb69b-w6xfh   1/1     Running             0          7m50s
┌──[[email protected]]-[~]
└─$
apiVersion: rbac.authorization.k8s.io/v1
kind: Role
metadata:
  creationTimestamp: null
  name: role-liruilong
rules:
- apiGroups:
  - ""
  resources:
  - pods
  - services
  verbs:
  - get
  - list
  - watch
  - create
  - delete
- apiGroups:
  - "apps"
  resources:
  - deployments
  - deployments/scale
  verbs:
  - get
  - list
  - watch
  - create
  - delete
  - patch
Create cluster role
Roles are namespace based , That is, the role-based permissions of different namespaces will not be affected , Here we need to define the role as global effectiveness , You need a cluster role
Let's modify the resource file with the previous role , Change the resource type to cluster role ClusterRole
┌──[[email protected]]-[~/ansible/k8s-rbac-create]
└─$sed 's#kind: Role#kind: ClusterRole#g' role-liruilong.yaml | grep kind
kind: ClusterRole
┌──[[email protected]]-[~/ansible/k8s-rbac-create]
└─$sed -i 's#kind: Role#kind: ClusterRole#g' role-liruilong.yaml | grep kind
┌──[[email protected]]-[~/ansible/k8s-rbac-create]
└─$kubectl apply -f role-liruilong.yaml
clusterrole.rbac.authorization.k8s.io/role-liruilong created
┌──[[email protected]]-[~/ansible/k8s-rbac-create]
└─$
At the same time, we need to integrate the cluster roles and users liruilong binding
┌──[[email protected]]-[~/ansible/k8s-rbac-create]
└─$kubectl  get clusterrolebindings | grep liruilong
cbind-liruilong                                        ClusterRole/role-liruilong                                                         2m29s
┌──[[email protected]]-[~/ansible/k8s-rbac-create]
└─$
see pod resources list, You can not only view Current namespace , You can also view default、kube-system Namespace
┌──[[email protected]]-[~]
└─$ kubectl  --kubeconfig=kc1 get pods
No resources found in liruilong-rbac-create namespace.
┌──[[email protected]]-[~]
└─$ kubectl  --kubeconfig=kc1 get pods -n default
No resources found in default namespace.
┌──[[email protected]]-[~]
└─$ kubectl  --kubeconfig=kc1 get pods -n kube-system
NAME                                                 READY   STATUS    RESTARTS          AGE
calico-kube-controllers-78d6f96c7b-85rv9             1/1     Running   272 (5m49s ago)   39d
calico-node-6nfqv                                    1/1     Running   290 (41m ago)     41d
calico-node-fv458                                    0/1     Running   50                41d
calico-node-h5lsq                                    1/1     Running   98 (17m ago)      41d
coredns-7f6cbbb7b8-ncd2s                             1/1     Running   21 (6d14h ago)    39d
coredns-7f6cbbb7b8-pjnct                             1/1     Running   20 (6d14h ago)    39d
etcd-vms81.liruilongs.github.io                      1/1     Running   126 (8h ago)      41d
kube-apiserver-vms81.liruilongs.github.io            1/1     Running   12 (8h ago)       7d10h
kube-controller-manager-vms81.liruilongs.github.io   1/1     Running   88 (8h ago)       40d
kube-proxy-scs6x                                     1/1     Running   10 (7d22h ago)    41d
kube-proxy-tbwz5                                     1/1     Running   22 (6d14h ago)    41d
kube-proxy-xccmp                                     1/1     Running   6 (8d ago)        41d
kube-scheduler-vms81.liruilongs.github.io            1/1     Running   242 (8h ago)      41d
metrics-server-bcfb98c76-ktgnj                       1/1     Running   0                 6d
┌──[[email protected]]-[~]
└─$
Delete the role 、 Character binding
Delete the role 、 Character binding
┌──[[email protected]]-[~/ansible/k8s-rbac-create]
└─$kubectl delete  role role-liruilong
role.rbac.authorization.k8s.io "role-liruilong" deleted
┌──[[email protected]]-[~/ansible/k8s-rbac-create]
└─$kubectl delete  rolebindings rbind-liruilong
rolebinding.rbac.authorization.k8s.io "rbind-liruilong" deleted
Delete the cluster role 、 Cluster role binding
┌──[[email protected]]-[~/ansible/k8s-rbac-create]
└─$kubectl delete  ClusterRole  role-liruilong
clusterrole.rbac.authorization.k8s.io "role-liruilong" deleted
┌──[[email protected]]-[~/ansible/k8s-rbac-create]
└─$kubectl delete  clusterrolebinding cbind-liruilong
clusterrolebinding.rbac.authorization.k8s.io "cbind-liruilong" deleted
┌──[[email protected]]-[~/ansible/k8s-rbac-create]
└─$
About Api Service Authorization management , There's a lot more , Time relation , Share it with my friends here first , Life cheer
边栏推荐
- Interview questions for famous enterprises: Coins represent a given value
- Reptile practice
- Database tuning solution
- The real situation of programmers
- Leetcode simple question: check whether each row and column contain all integers
- POJ 3237 tree (tree chain splitting)
- The solution to the problem that Oracle hugepages are not used, causing the server to be too laggy
- K210学习笔记(四) K210同时运行多个模型
- 阿龙的感悟
- Cross end solutions to improve development efficiency
猜你喜欢
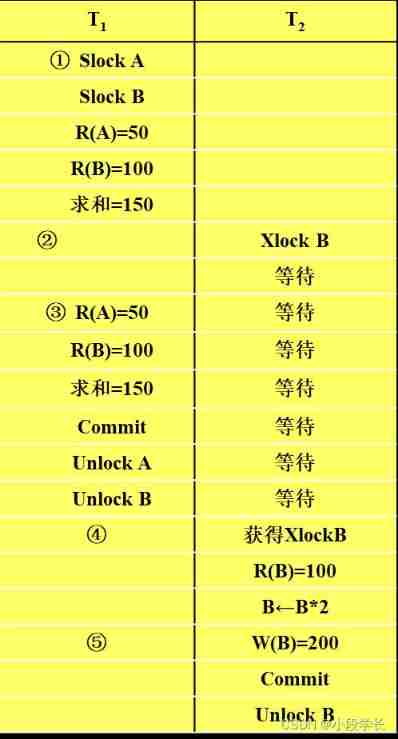
Blocking protocol for concurrency control
Win11 runs CMD to prompt the solution of "the requested operation needs to be promoted"

Two stage locking protocol for concurrency control
AD637使用笔记

Cobaltstrike builds an intranet tunnel

Huawei game multimedia service calls the method of shielding the voice of the specified player, and the error code 3010 is returned
Drawing HSV color wheel with MATLAB
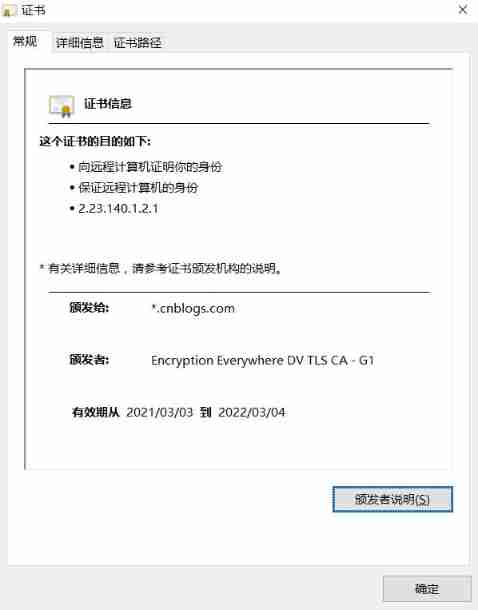
CA certificate trampled pit

科技云报道荣膺全球云计算大会“云鼎奖”2013-2022十周年特别贡献奖
Summarize the reasons for 2XX, 3xx, 4xx, 5xx status codes
随机推荐
Pl/sql basic case
Ad637 notes d'utilisation
Common interview questions of redis factory
Oracle hint understanding
2022-07-05:给定一个数组,想随时查询任何范围上的最大值。 如果只是根据初始数组建立、并且以后没有修改, 那么RMQ方法比线段树方法好实现,时间复杂度O(N*logN),额外空间复杂度O(N*
MySQL服务莫名宕机的解决方案
Advantages and disadvantages of the "Chris Richardson microservice series" microservice architecture
Huawei game multimedia service calls the method of shielding the voice of the specified player, and the error code 3010 is returned
Serializability of concurrent scheduling
Matlab | app designer · I used Matlab to make a real-time editor of latex formula
大约SQL现场“这包括”与“包括在”字符串的写法
Performance testing of software testing
Alternating merging strings of leetcode simple questions
Summary of El and JSTL precautions
Official clarification statement of Jihu company
Recovery technology with checkpoints
Business learning of mall order module
Hysbz 2243 staining (tree chain splitting)
MMAP learning
【愚公系列】2022年7月 Go教学课程 003-IDE的安装和基本使用