当前位置:网站首页>【基于 RT-Thread Studio的CPK-RA6M4 开发板环境搭建】
【基于 RT-Thread Studio的CPK-RA6M4 开发板环境搭建】
2022-07-06 19:38:00 【2345VOR】
基于 RT-Thread Studio的CPK-RA6M4 开发板环境搭建
1. CPK-RA6M4 开发板特点
基于瑞萨RA6M4 MCU开发的CPK-RA6M4 MCU评估板 ,通过 灵活配置软件包和IDE,可帮助用户对RA6M4 MCU 群组的特性轻松进行评估,并对嵌入系统应用程序进行开发。
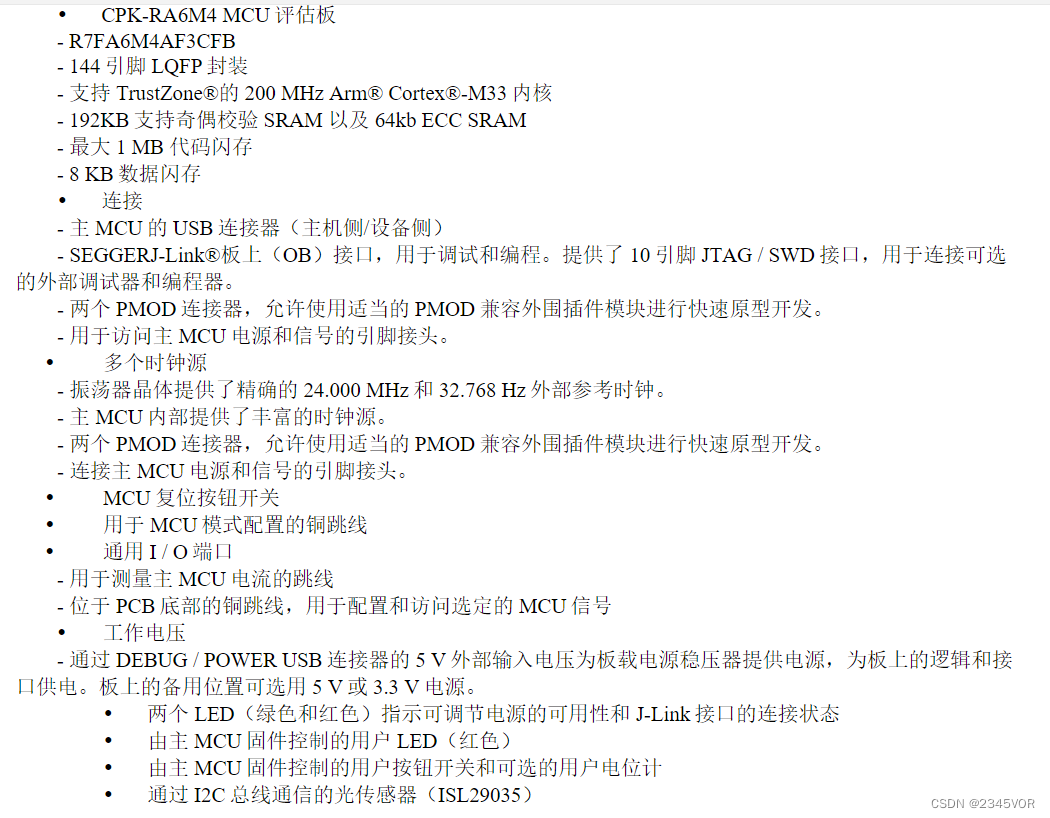
1.1 搭载资源
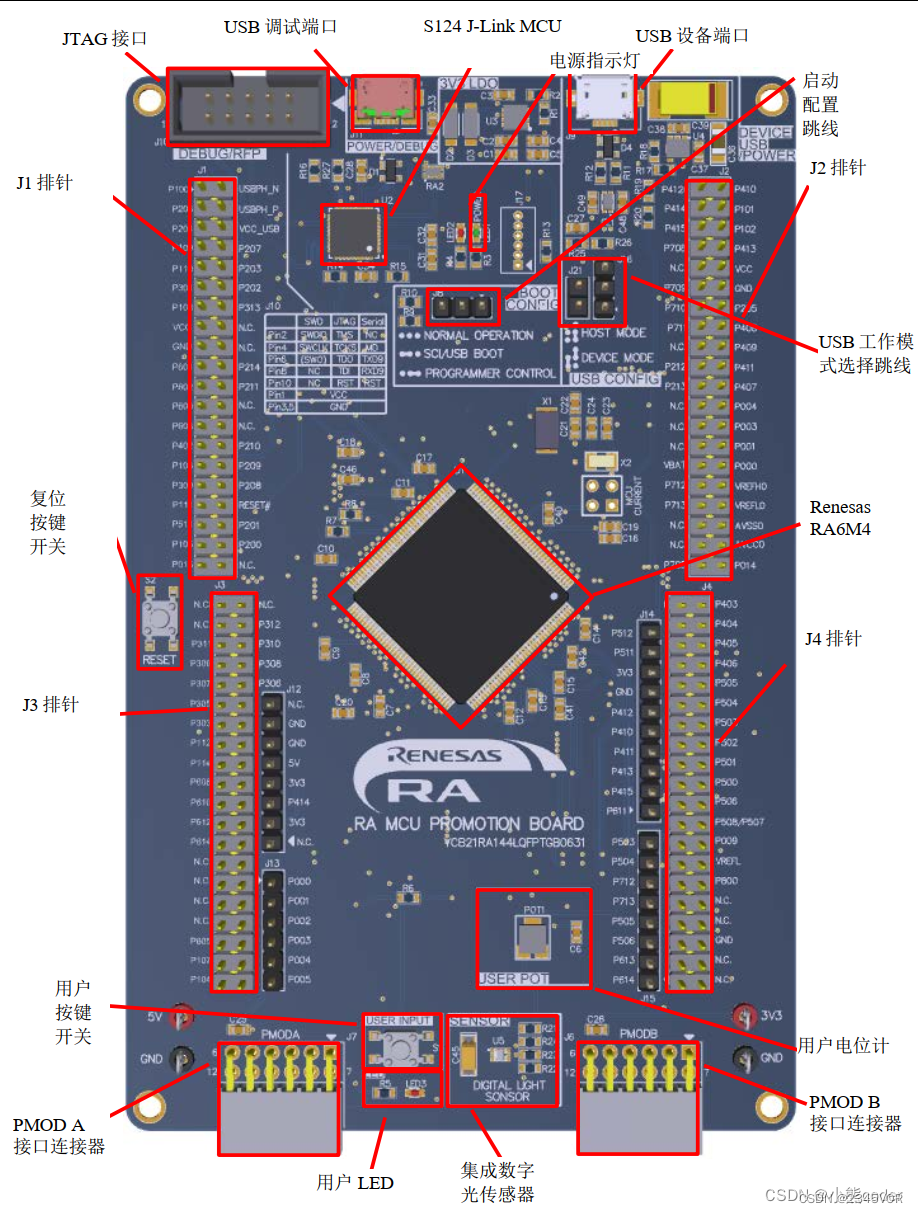
1.2 外观正面
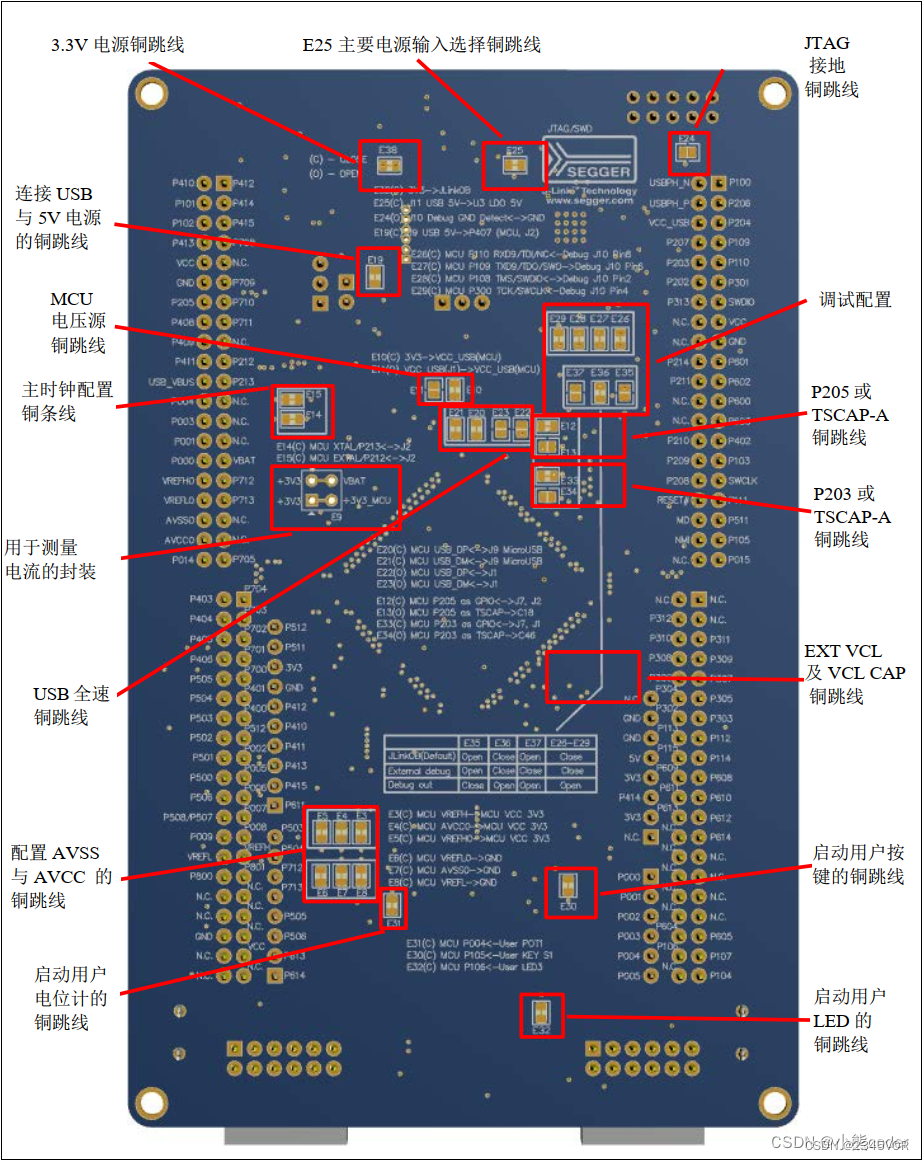
1.3 外观反面
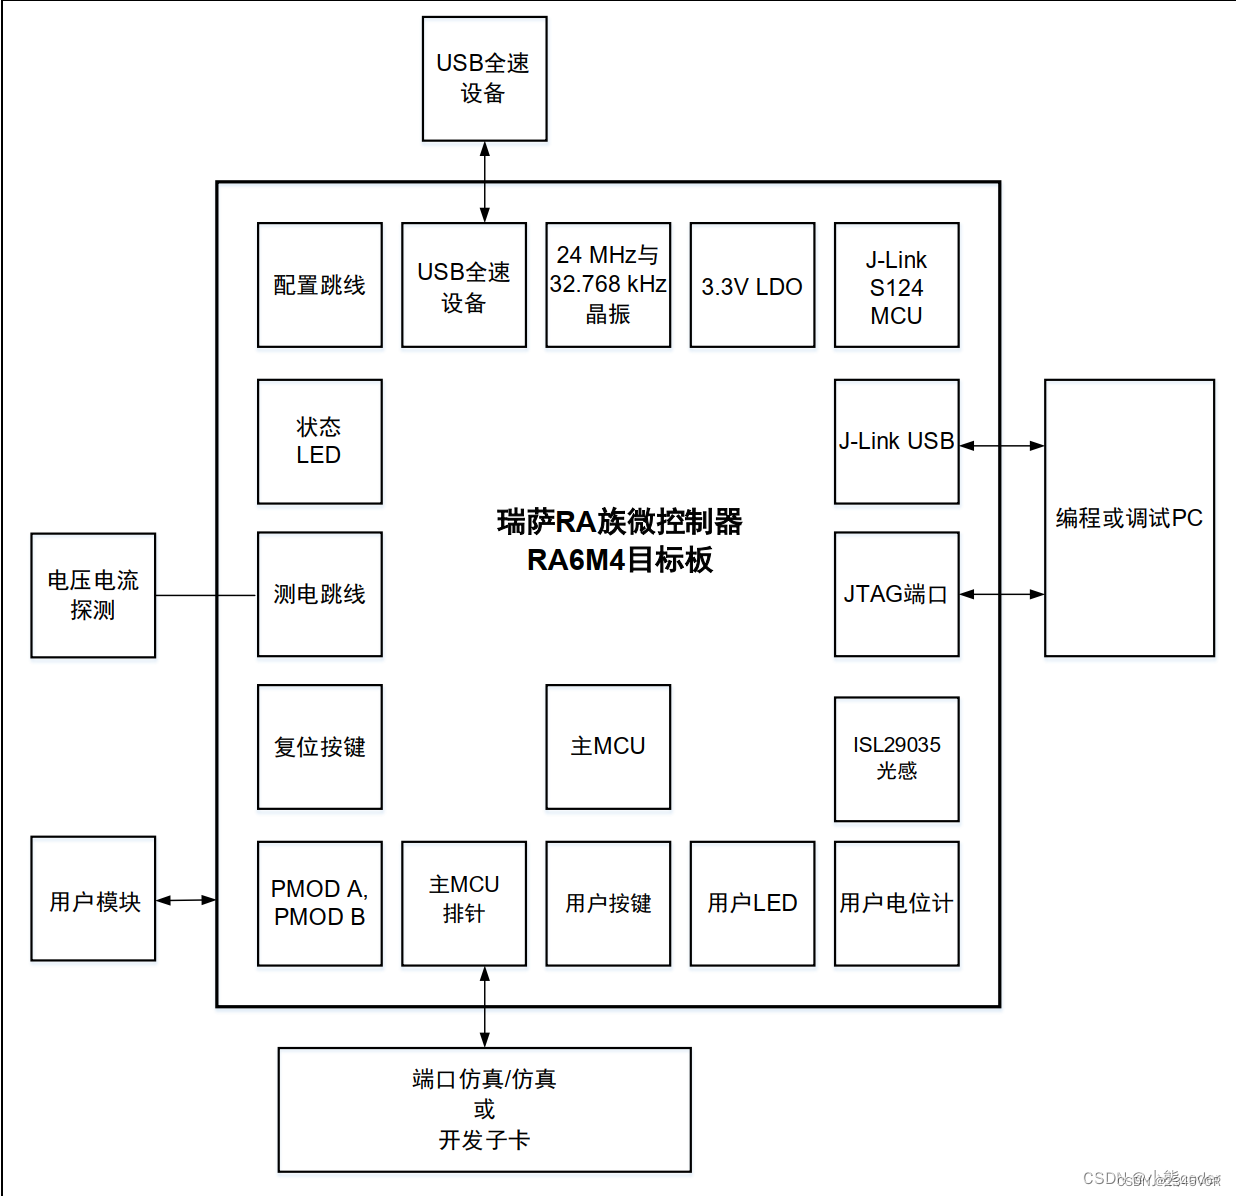
1.4 系统框图
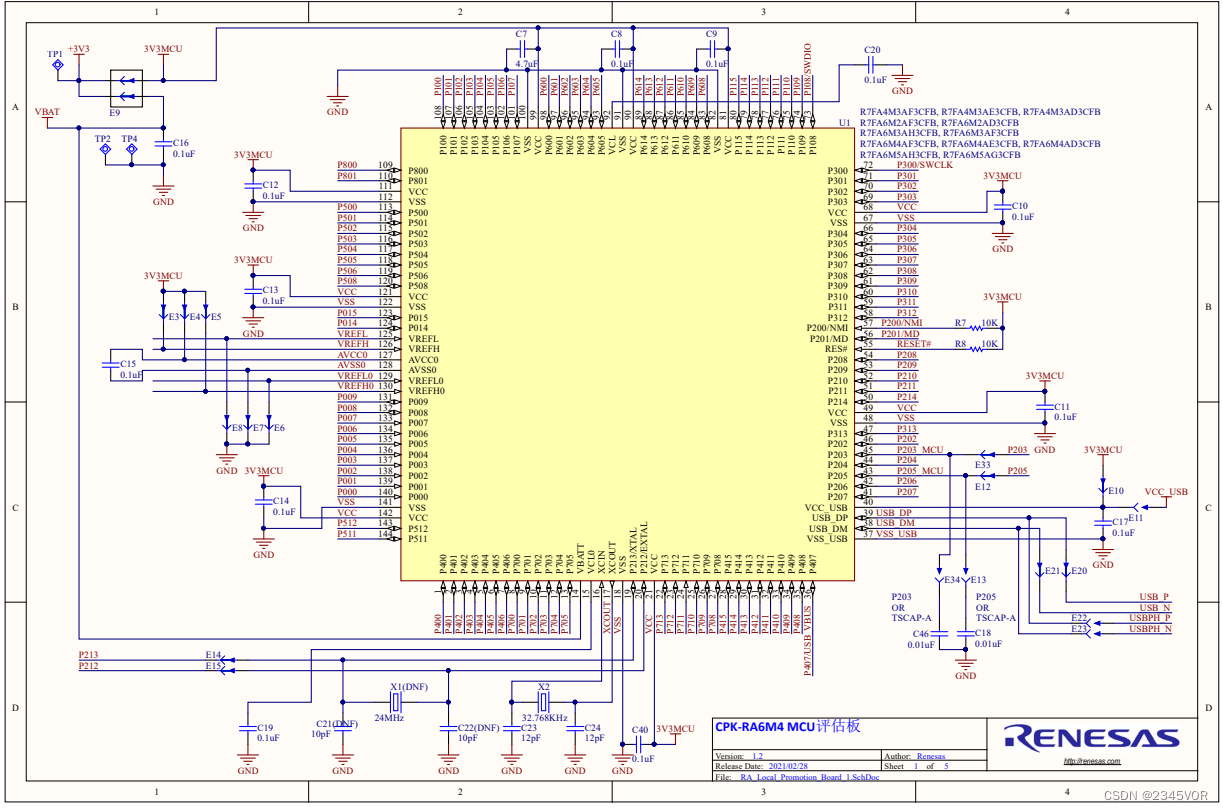
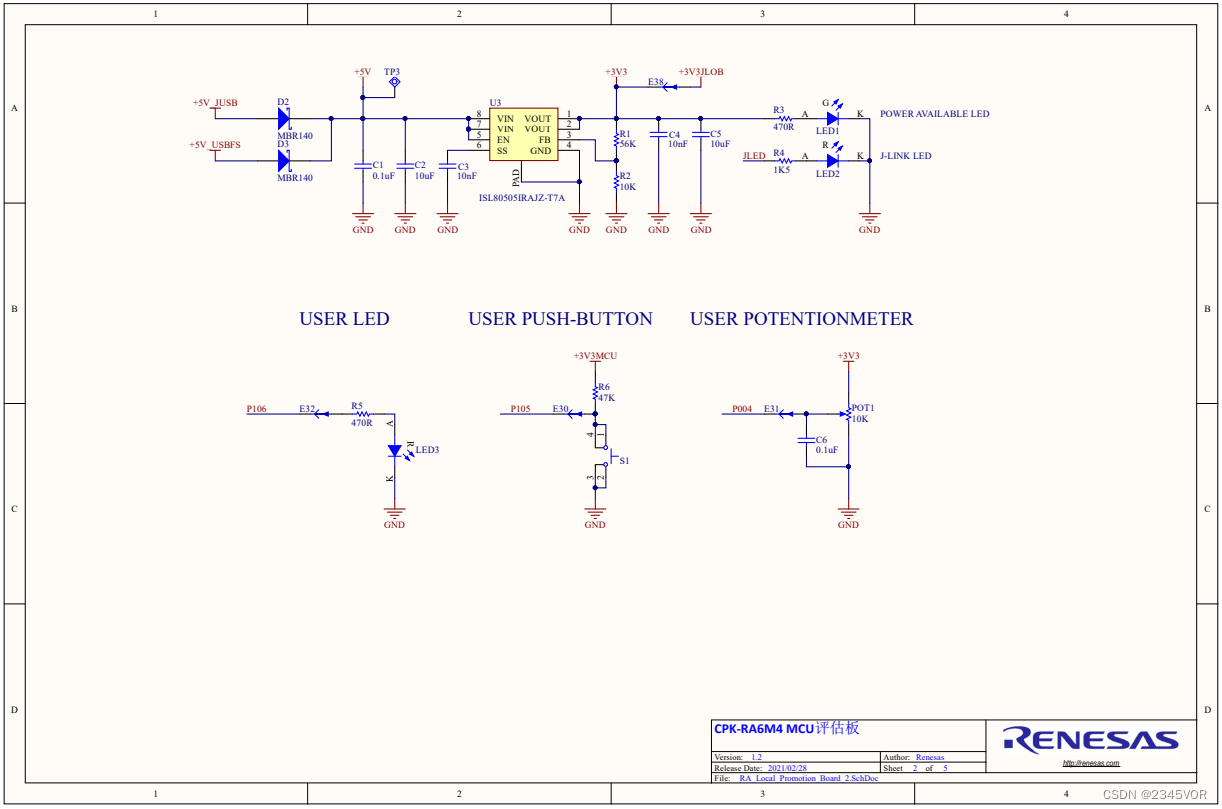
1.5 板载原理图
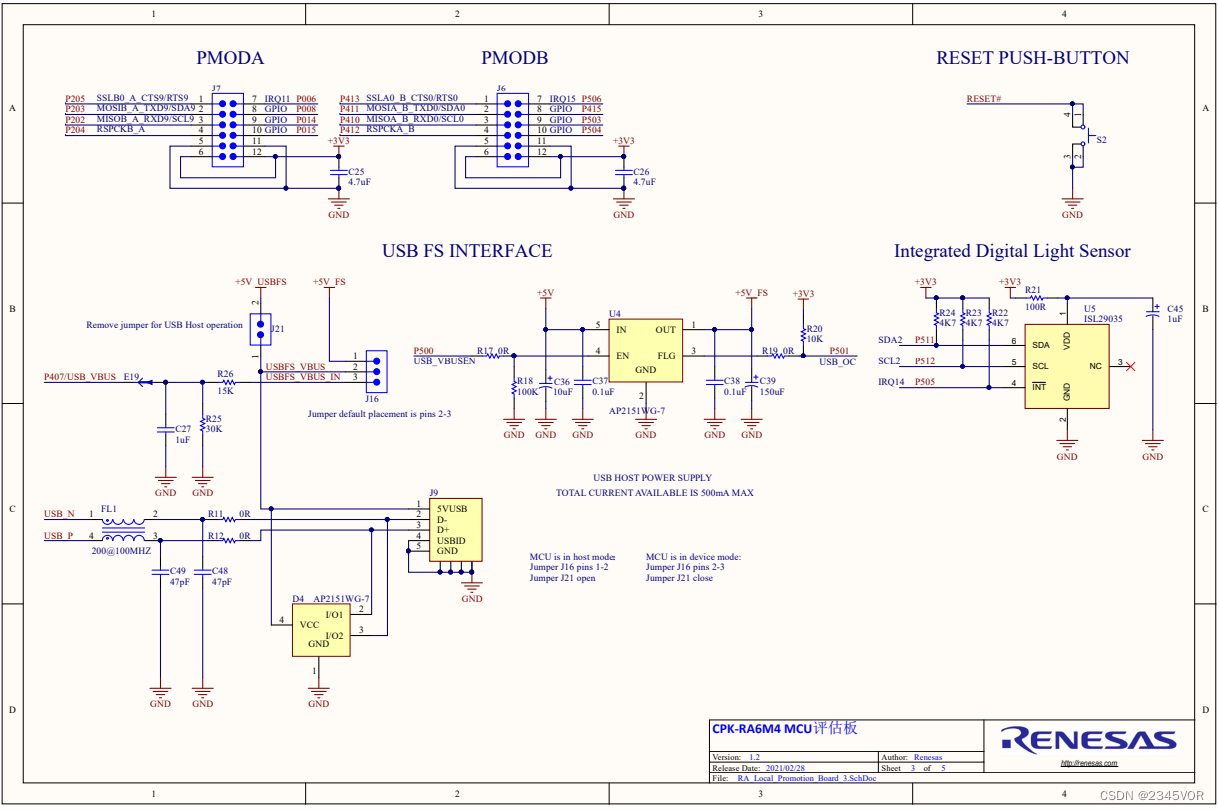
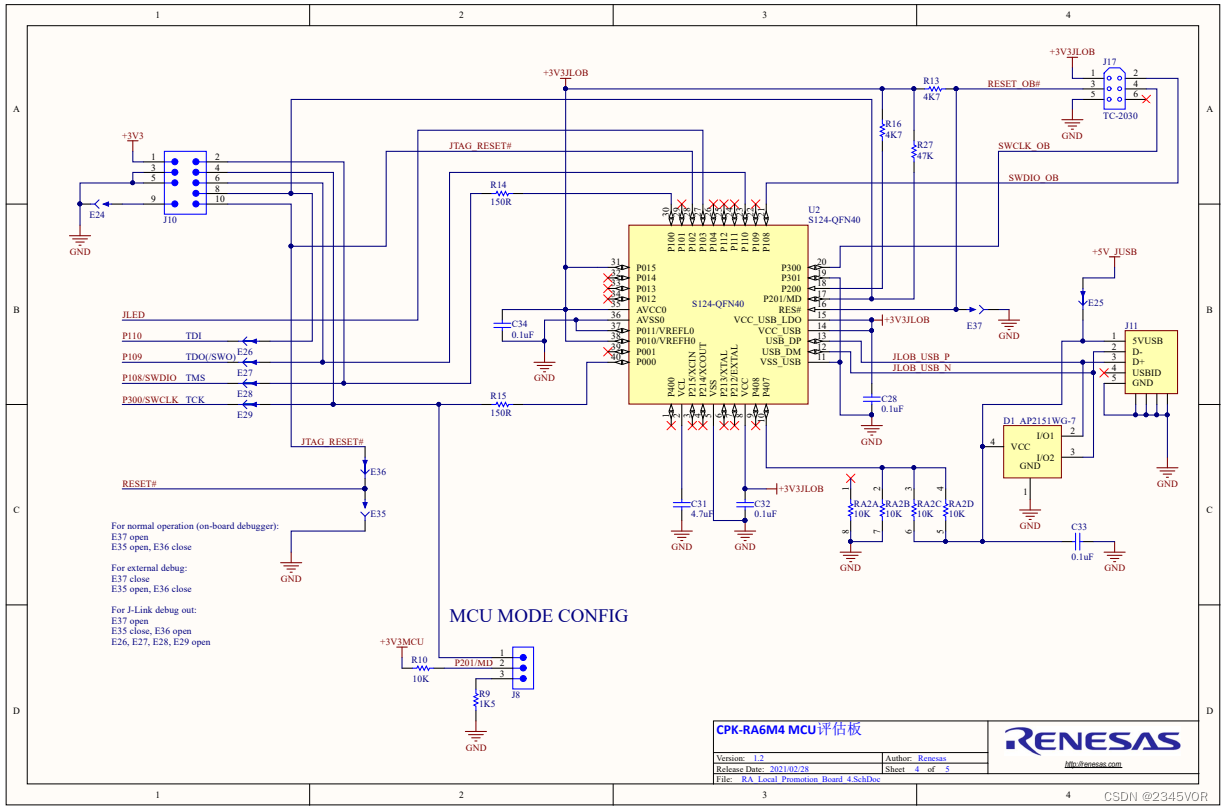
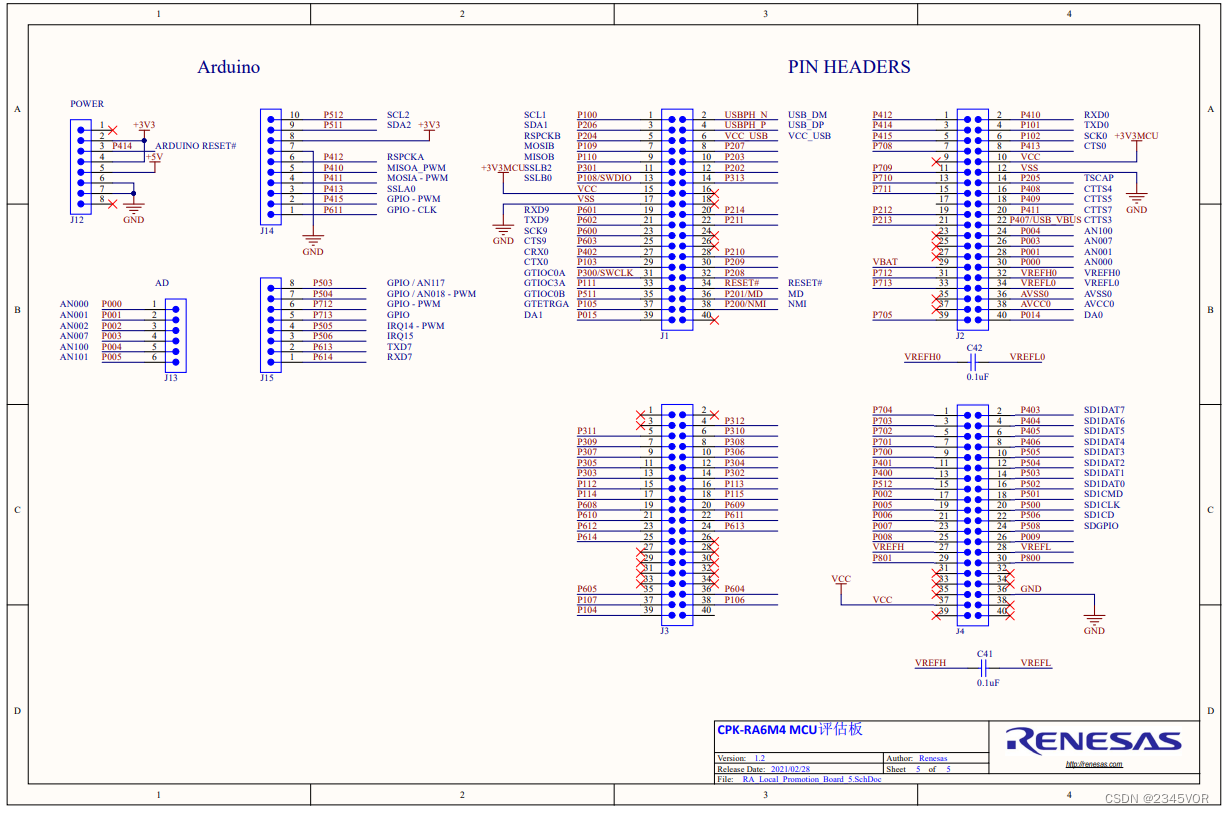
本文将使用瑞萨的 CPK-RA6M4 开发板介绍如何在 RA 系列 MCU 上让 RT-Thread 运行起来。开发环境的搭建将分为以下几个部分:
- RA 开发环境搭建
- 基于 RT-Thread Studio开发环境搭建
2. RA 开发环境搭建
2.1 必备工具
2.1.1 灵活配置软件包 (FSP) :
可快速配置开发板的外设功能,请使用 v3.5.0 版本,目前可在github上下载3.5.0版本(下载地址:https://github.com/renesas/fsp/releases/tag/v3.5.0 ,注意文件名称为:setup_fsp_v3_5_0_rasc_v2021-10.exe)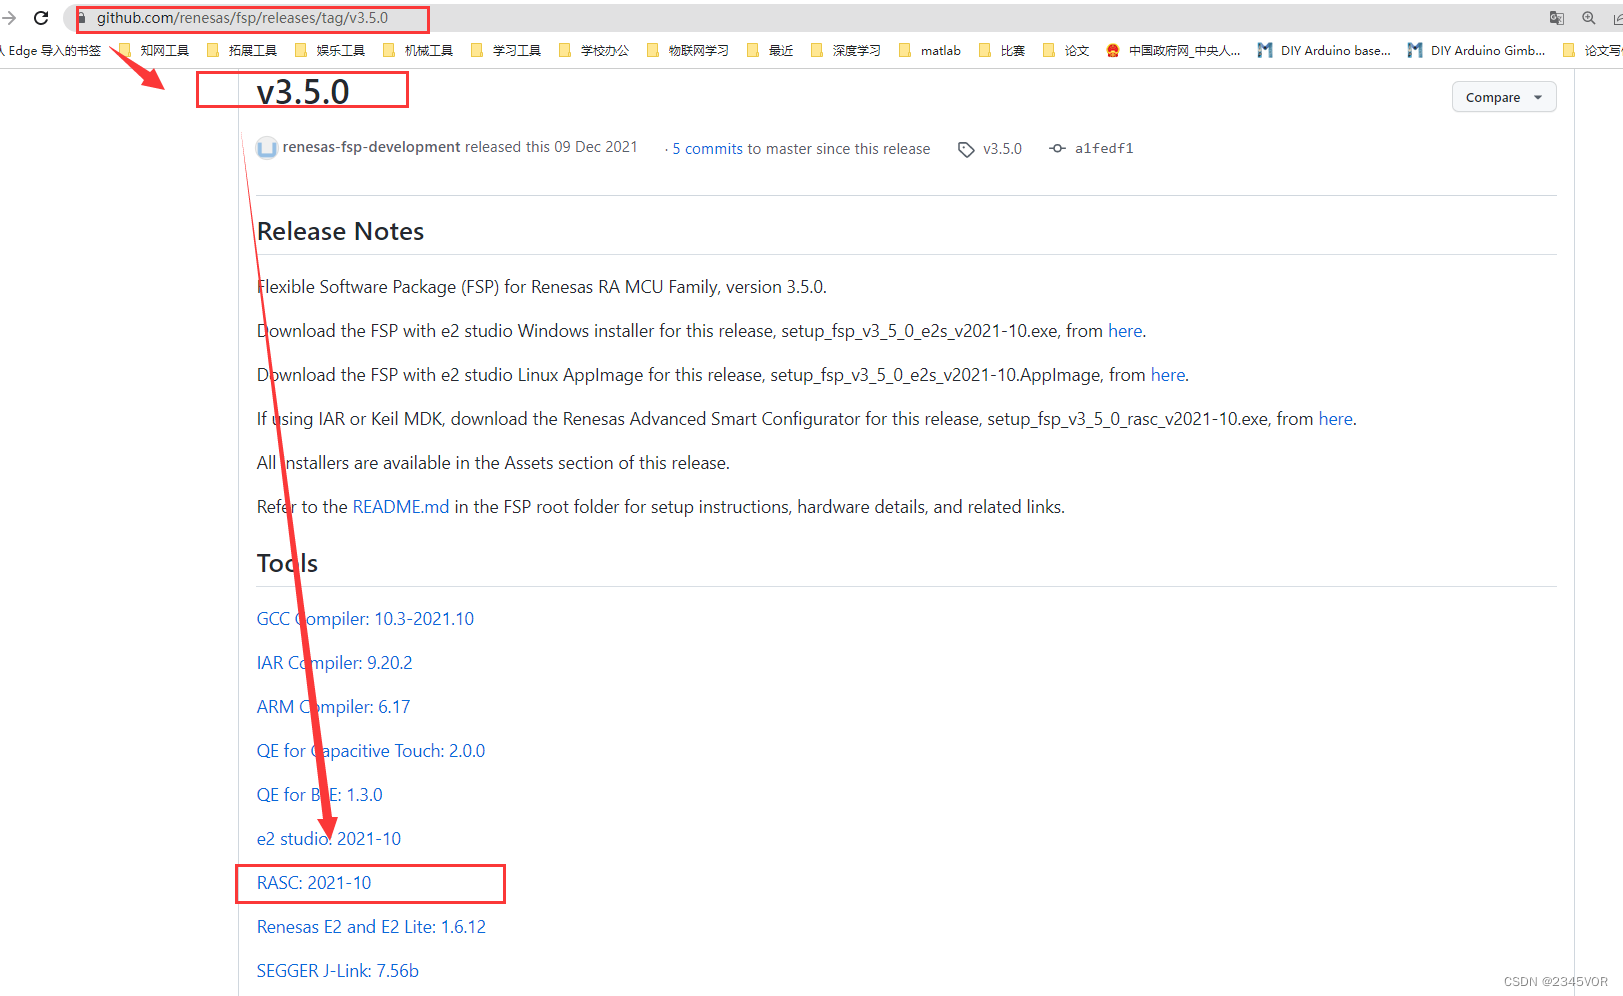
<注意官网为3.8.0版本,不向前兼容,使用3.8.0版本会会导致本工程不可用>
2.1.2 CPK-RA6M4 板级支持包:
配合 FSP 一起使用,是开发板的图形化配置支持包,请使用 v3.5.0 版本
可在Renesas官网下载:
网盘下载链接:https://cowtransfer.com/s/b9eddec169d544
已包含 上述FSP 软件和 FSP 板级支持包,从此链接下载可一步到位。
2.2 环境搭建
灵活配置软件包 (FSP)
1、打开链接下载 FSP,请确认下载的 3.5.0 版本,从网盘下载可忽略此下载步骤。
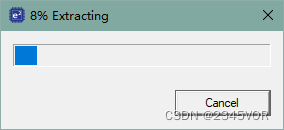
目前 RT-Thread 中 CPK-RA6M4 的 BSP 支持的版本是 3.5.0。可以在 BSP 的 README 中确认目前支持的 FSP 版本。 2、找到下载的文件打开(注意文件名称包含为rasc):setup_fsp_v3_5_0_rasc_v2021-10.exe
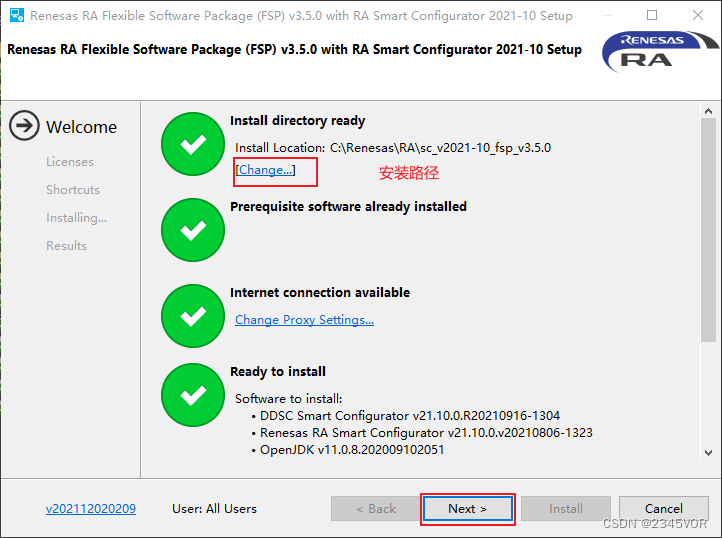
3、配置安装路径,安装完成后找到此路径,之后添加 CPK-RA6M4 板级支持包 时会用到
4、勾选 Licenese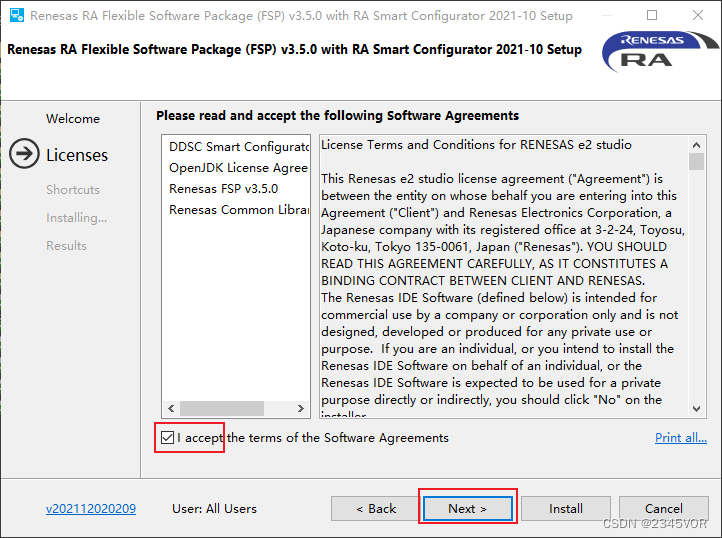
5、点击 install 等待安装完成。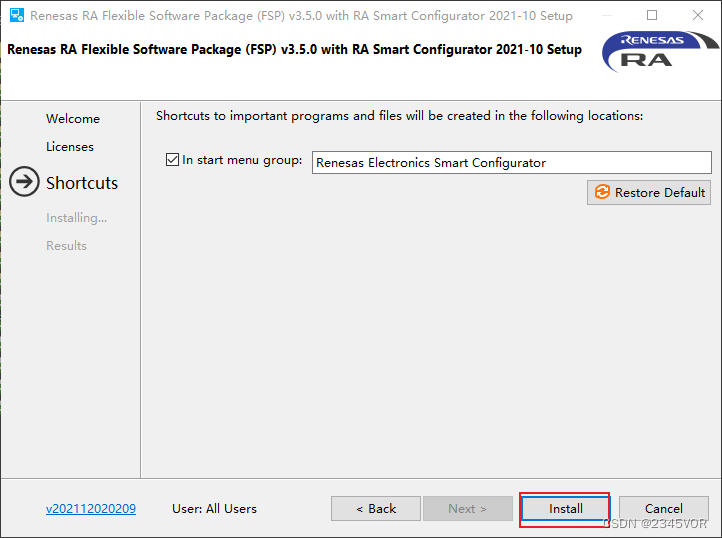
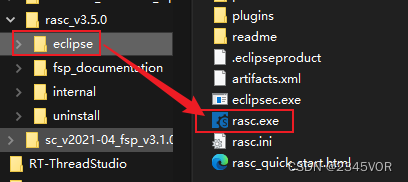
6、运行 rasc.exe,验证是否安装成功。路径:\eclipse\rasc.exe
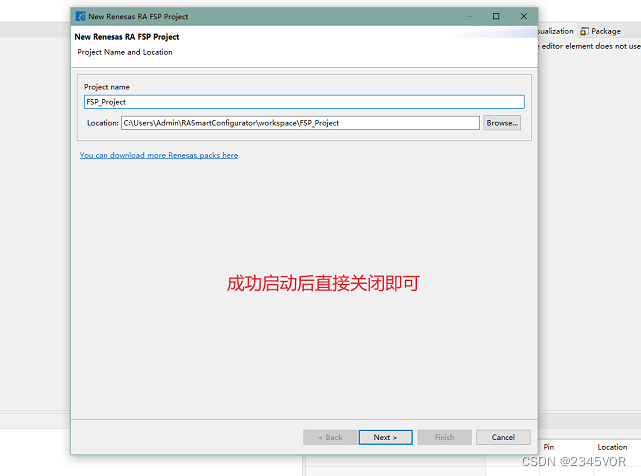
7、成功启动后关闭即可,继续接下来的操作
2.3 CPK-RA6M4 板级支持包
1、此部分,你可以参考Renesas官网文档《向FSP中添加CPK评估板的BSP 》
下载 3.5.0 版本支持包。从网盘下载可忽略此下载步骤。
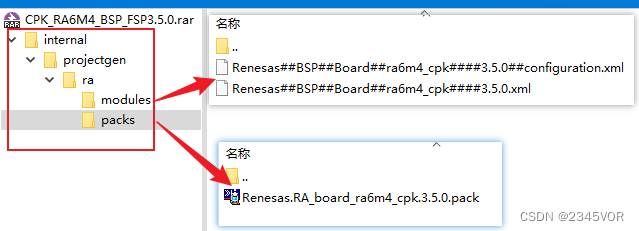
2、在下载的支持包中可以找到以下三个文件
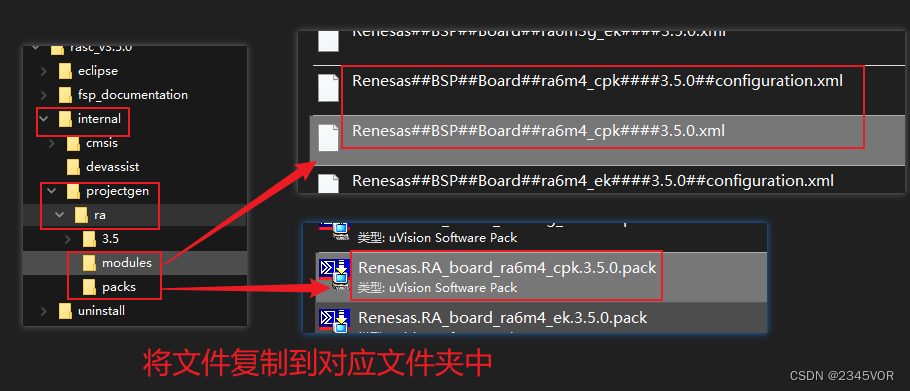
3、此时找到 FSP 的安装路径,进入 \internal\projectgen\ra\ ,将文件复制到对应的文件夹中。
4、再次打开 rasc.exe,查看是否添加成功。点击 next 进入工程创建
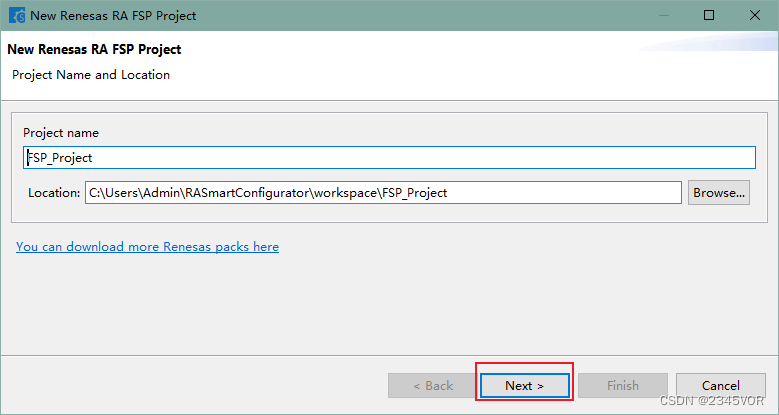
5、确认是否存在已添加的 CPK-RA6M4 开发板的支持包,此步骤仅为验证是否添加成功,不必继续创建工程,关闭即可。
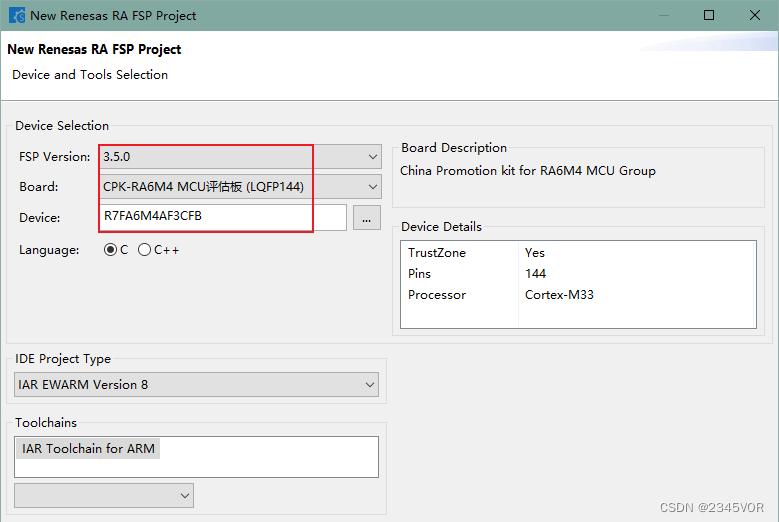
6、到此基本将瑞萨开发板相关的环境搭建完成。调试器 J-link 的安装,在下面的步骤中介绍。
3. RT-Thread 开发环境搭建
3.1 基于 RT-Thread studio
下载安装必备软件环境
- 下载并安装 RT-Thread studio
- 打开 RT-Thread studio,进入包管理器,下载 RT-Thread 的 bsp 支持包及相关工具。
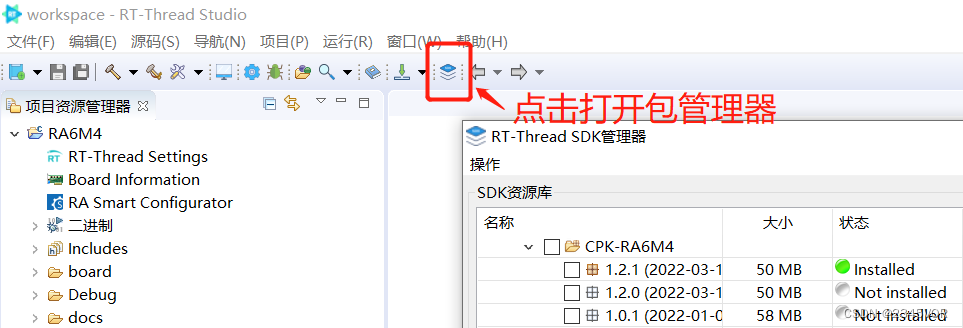
下载 BSP 支持包,勾选最新版即可。

PS:BSP 支持包会自动下载依赖的资源包:
- RT-Thread 系统源码包
- GCC工具链:版本 10.2.1
- 调试器 J-link:版本 7.50a
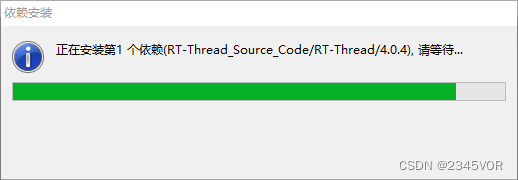
3.2 创建工程测试结果
1、打开 RT-Thread studio,新建 RT-Thread 项目 —> 基于开发板,创建CPK-RA6M4的工程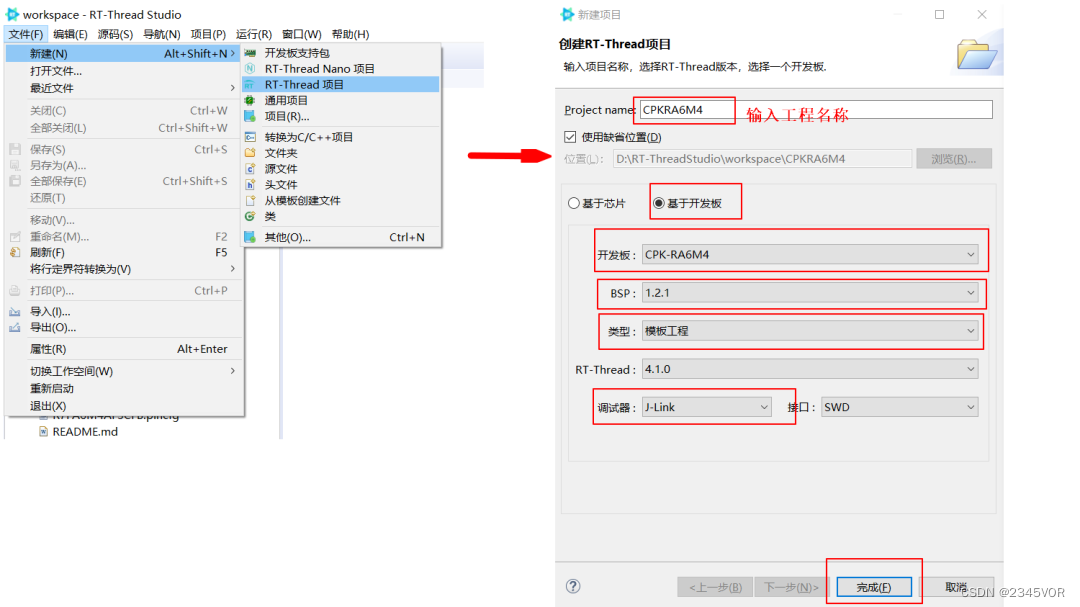
2、打开创建的工程,双击 RA Smart Configurator 即可打开刚刚安装的 FSP 配置工具图片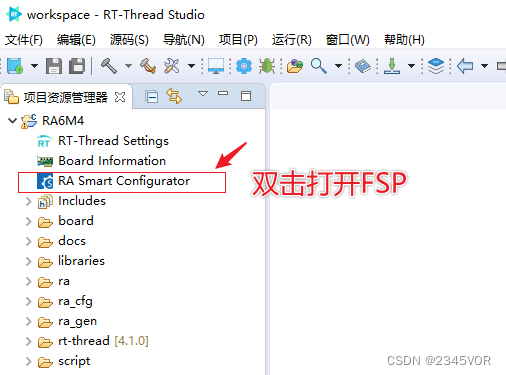
3、第一次打开需要配置 FSP 路径,选择到安装路径即可。确认可打开 FSP 即可关闭,先不做修改继续后续操作。
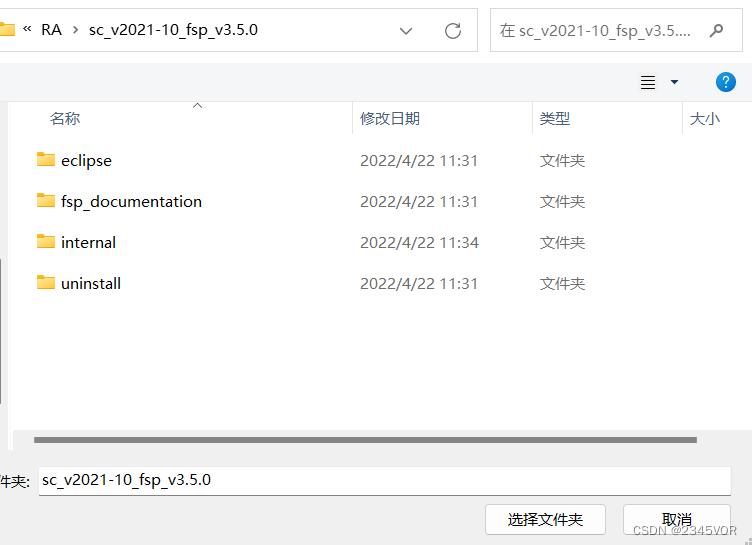
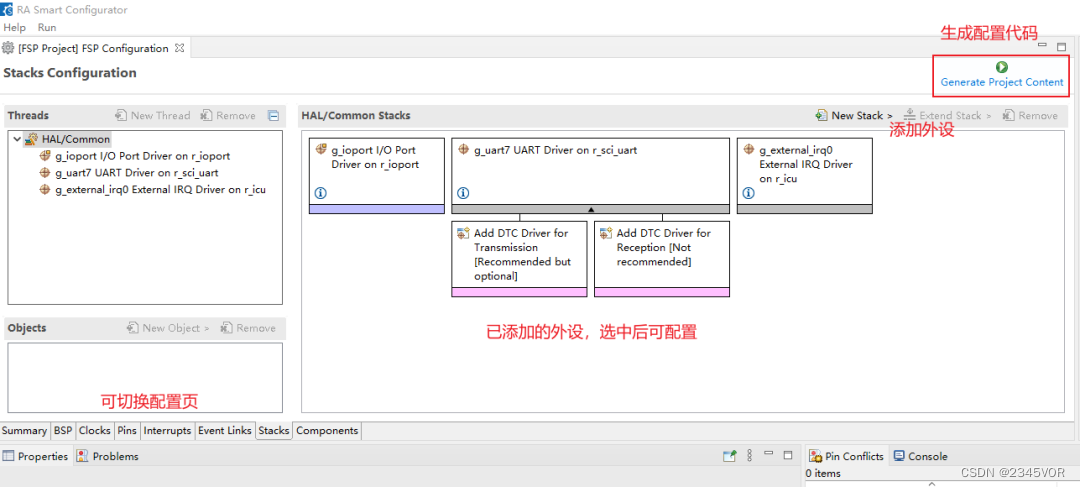

4、编译工程,确认工具链配置正确
5、接线:连接串口工具、USB-Jlink (跳帽恢复到normal operation以及device mode)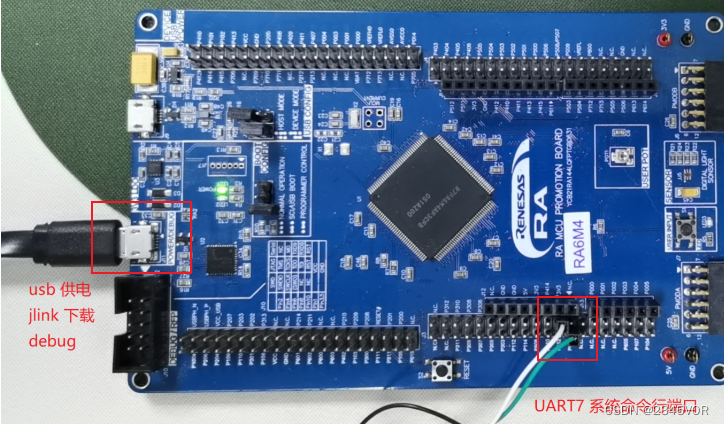
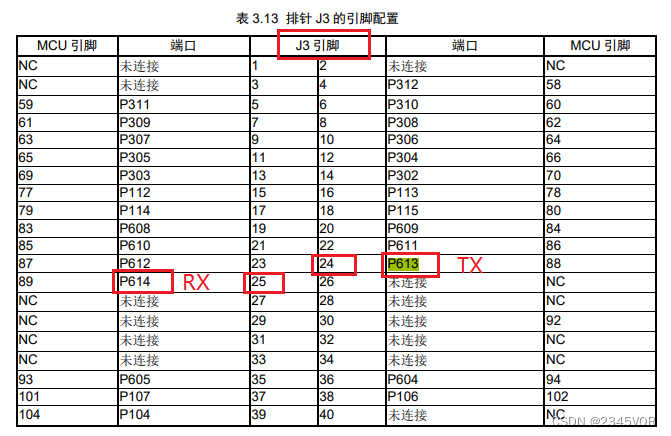
6、连接 UART7 (TX:P613; RX:P614),波特率 115200。此路串口用于 RT-Thread 系统命令行交互。
7、下载程序到开发板,注意下载的是 HEX 文件。
- 查看运行结果
下载程序成功之后,系统会自动运行并打印系统信息。 连接开发板对应串口到 PC ,在终端工具里打开相应的串口(115200-8-1-N),复位设备后,可以看到 RT-Thread 的输出信息。输入 help命令可查看系统中支持的命令。
板载LED3会以1Hz频率闪烁
- 打开示波器
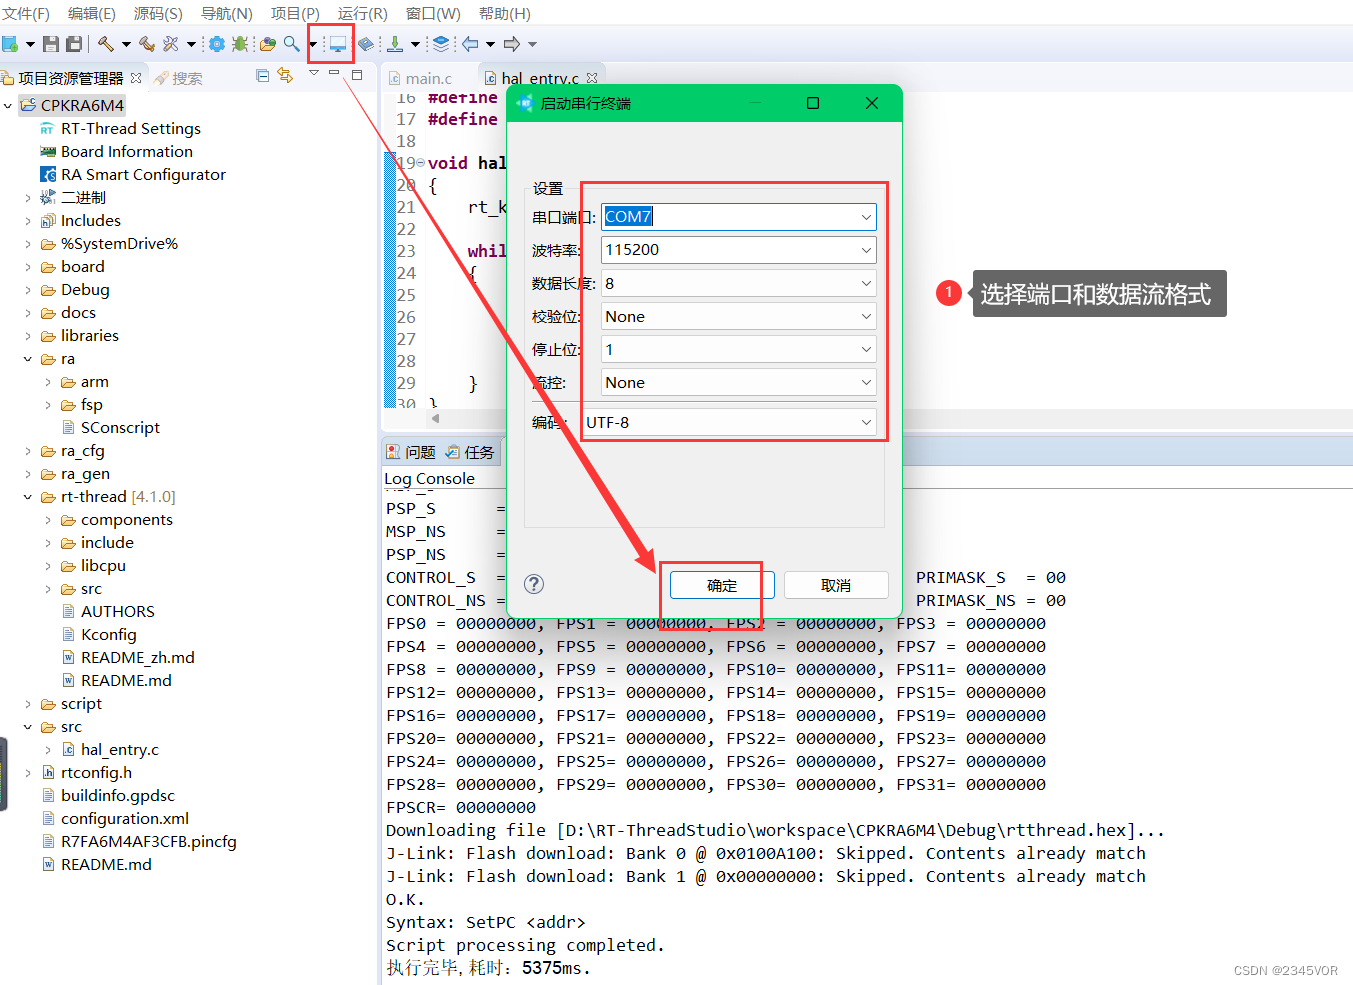
- 板载reset, 查看相关内置信息
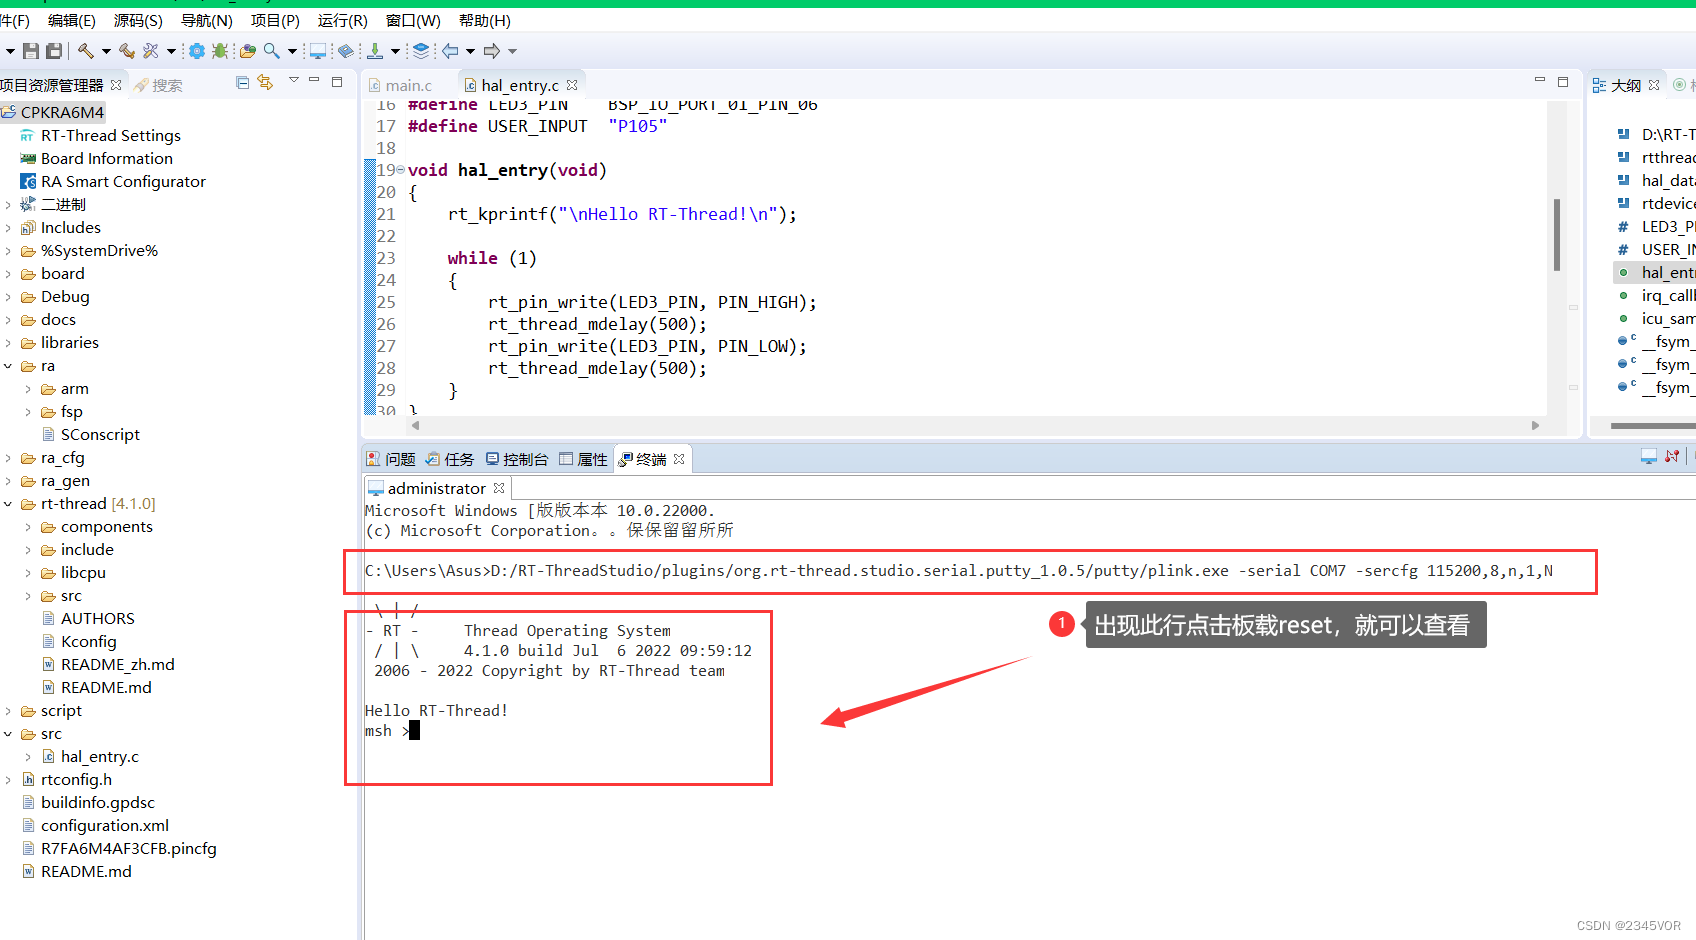
- 打印结果如下
 \ | /
- RT -     Thread Operating System
 / | \     4.1.0 build Jan 18 2022 18:48:37
 2006 - 2021 Copyright by rt-thread team

Hello RT-Thread!
msh >
RT-Thread shell commands:
icu_sample       - icu sample
list             - list all commands in system
list_device      - list device in system
list_timer       - list timer in system
list_msgqueue    - list message queue in system
list_mailbox     - list mail box in system
list_mutex       - list mutex in system
list_event       - list event in system
list_sem         - list semaphore in system
list_thread      - list thread
version          - show RT - Thread version information
clear            - clear the terminal screen
hello            - say hello world
free             - Show the memory usage in the system.
ps               - List threads in the system.
help             - RT - Thread shell help.
reboot           - Reboot System

msh >
8、应用入口函数
- 应用层的入口函数在 bsp\ra6m4-cpk\src\hal_emtry.c 中 的 void hal_entry(void) 。用户编写的源文件可直接放在 src 目录下。
void hal_entry(void)
{

    rt_kprintf("\nHello RT-Thread!\n");    while (1)
    {

        rt_pin_write(LED3_PIN, PIN_HIGH);
        rt_thread_mdelay(500);
        rt_pin_write(LED3_PIN, PIN_LOW);
        rt_thread_mdelay(500);
    }
}
- main.c 在项目文件夹地re_ge下
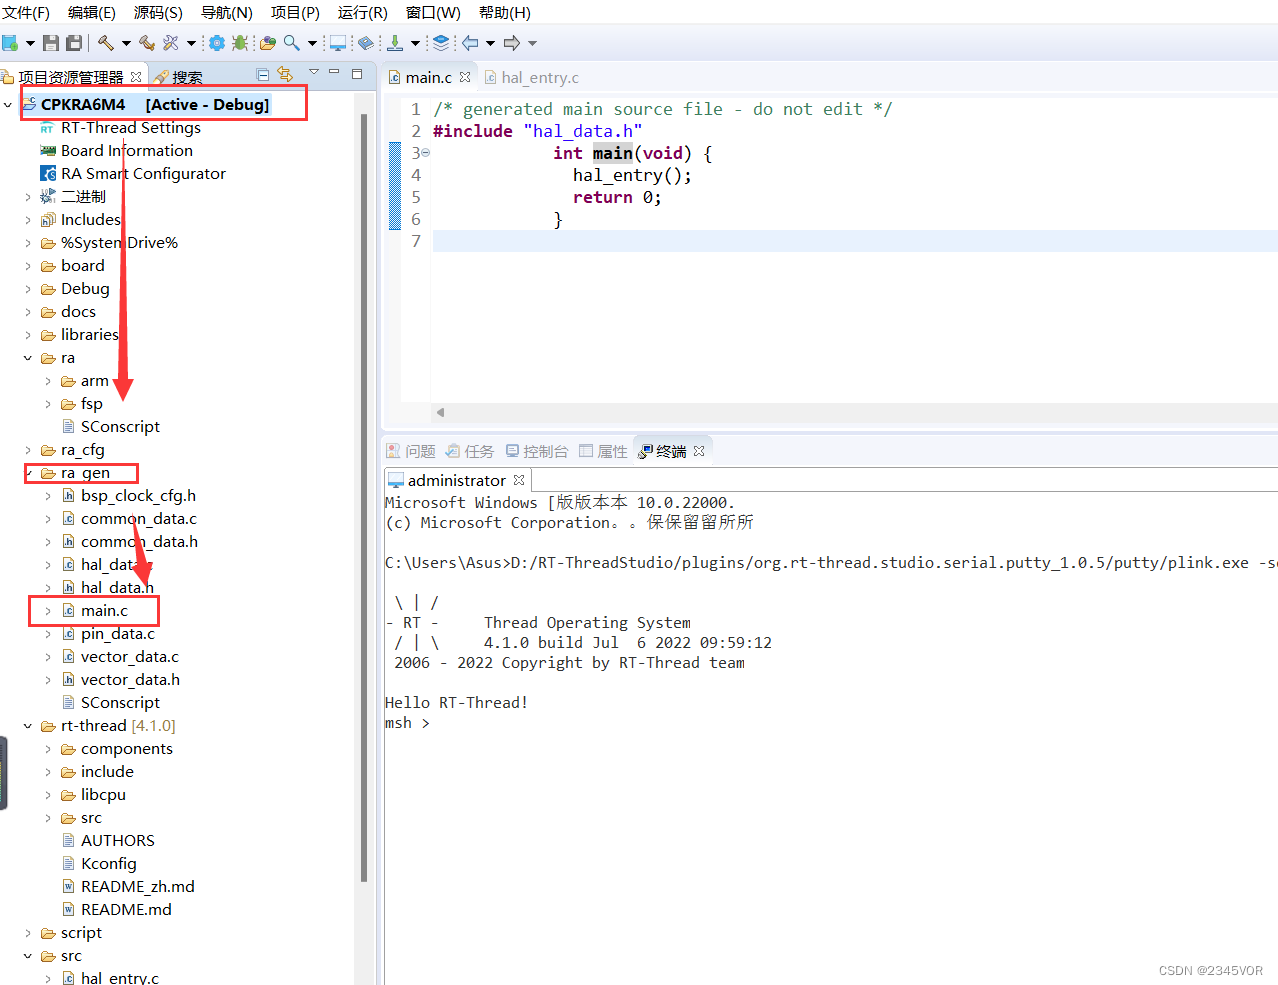
/* generated main source file - do not edit */
#include "hal_data.h"
            int main(void) {

              hal_entry();
              return 0;
            }
关于RA系列MCU 相关资源可见:
《开发板用户手册》
RA系列MCU:
CPK-RA6M4 评估板页面:
RA系列MCU RT-Thread BSP:
RA系列RT-Thread驱动介绍:
RA系列BSP外设驱动使用教程:
RA系列使用 FSP 配置外设驱动
边栏推荐
- How to design interface test cases? Teach you a few tips to draft easily
- Another million qubits! Israel optical quantum start-up company completed $15million financing
- What are the applications and benefits of MES management system
- 杰理之FM 模式单声道或立体声选择设置【篇】
- Simple bubble sort
- Data analysis from the perspective of control theory
- 简单冒泡排序
- IDEA重启后无法创建Servlet文件的解决方案
- 换个姿势做运维!GOPS 2022 · 深圳站精彩内容抢先看!
- QT Bluetooth: qbluetooth DeviceInfo
猜你喜欢
Redis getting started complete tutorial: replication configuration
Django数据库(SQlite)基本入门使用教程
Install redis from zero

Redis入门完整教程:复制配置
Redis入门完整教程:RDB持久化
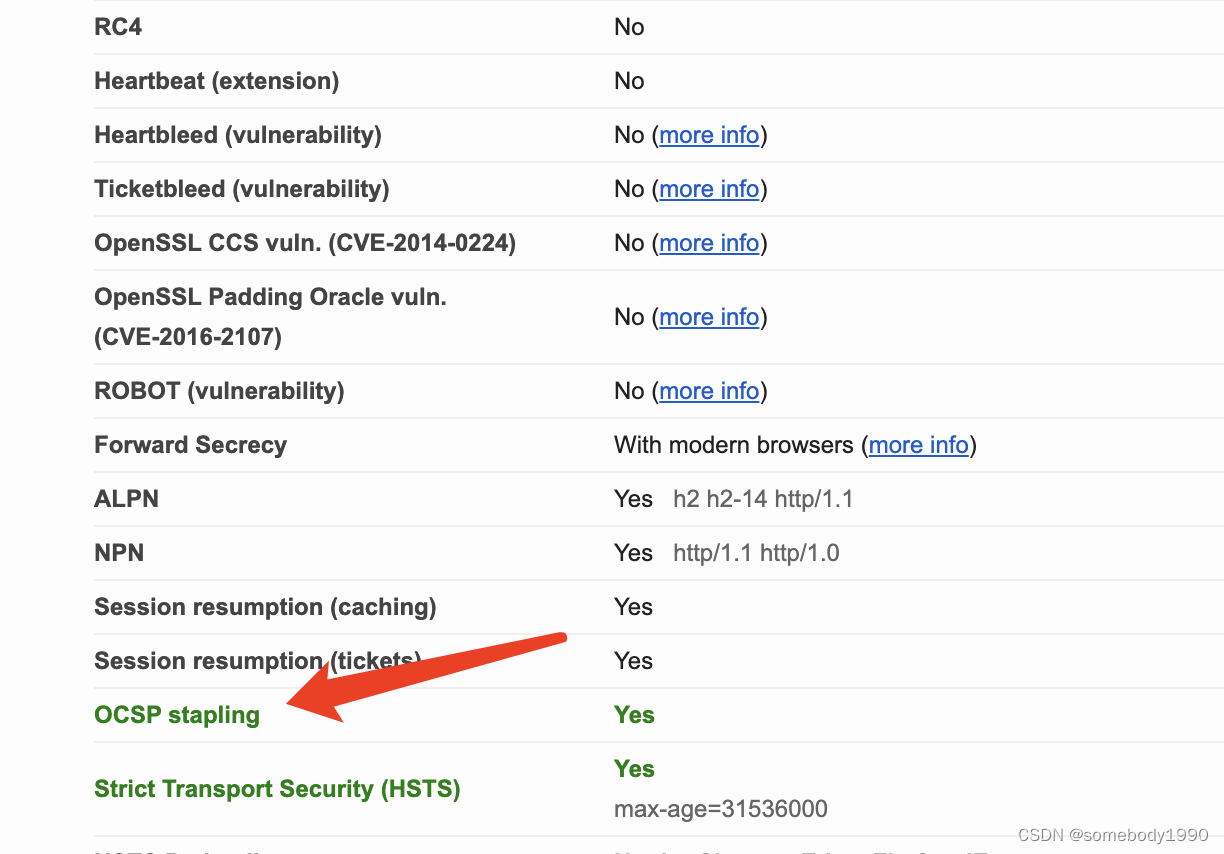
Cryptography series: detailed explanation of online certificate status protocol OCSP
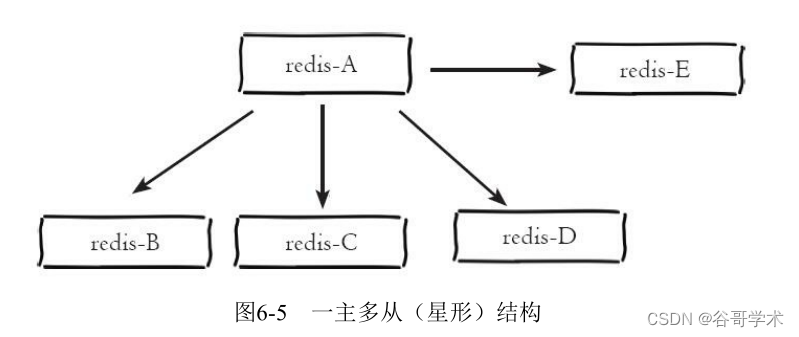
Redis getting started complete tutorial: replication topology
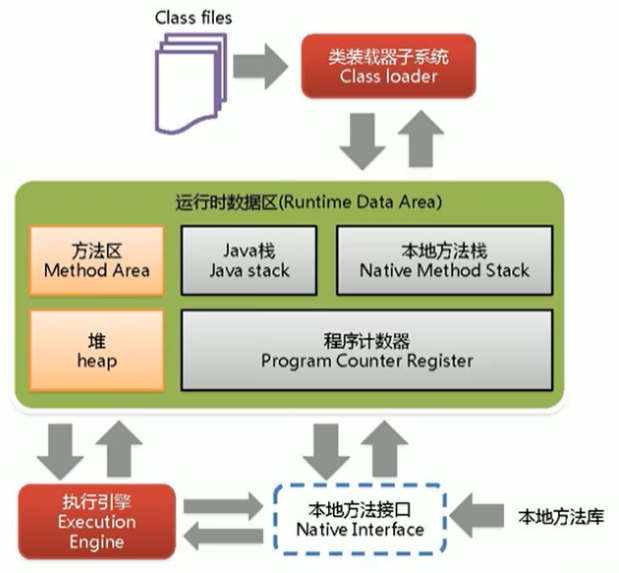
尚硅谷JVM-第一章 类加载子系统

Change your posture to do operation and maintenance! GOPs 2022 Shenzhen station highlights first!

Mmdetection3d loads millimeter wave radar data
随机推荐
c语言字符串排序
凌云出海记 | 易点天下&华为云:推动中国电商企业品牌全球化
Babbitt | metauniverse daily must read: is IP authorization the way to break the circle of NFT? What are the difficulties? How should holder choose the cooperation platform
input_delay
新标杆!智慧化社会治理
[software test] the most complete interview questions and answers. I'm familiar with the full text. If I don't win the offer, I'll lose
【2022国赛模拟】多边形——计算几何、二分答案、倍增
Redis introduction complete tutorial: replication principle
Digital scrolling increases effect
左程云 递归+动态规划
SQL Tuning Advisor一个错误ORA-00600: internal error code, arguments: [kesqsMakeBindValue:obj]
PSINS中19维组合导航模块sinsgps详解(滤波部分)
2022 information security engineer examination outline
掘金量化:通过history方法获取数据,和新浪财经,雪球同用等比复权因子。不同于同花顺
Unity使用MaskableGraphic画一条带箭头的线
Redis入门完整教程:复制拓扑
[secretly kill little partner pytorch20 days] - [Day1] - [example of structured data modeling process]
Statistics of radar data in nuscenes data set
Redis入门完整教程:AOF持久化
Summary of basic debugging steps of S120 driver
