当前位置:网站首页>【项目实现】Boost搜索引擎
【项目实现】Boost搜索引擎
2022-08-04 02:45:00 【同途异梦】
文章目录
前言
Boost是为C++语言标准库提供扩展的一些C++程序库的总称。Boost库是一个可移植、提供源代码的C++库,作为标准库的后备,是C++标准化进程的开发引擎之一,是为C++语言标准库提供扩展的一些C++程序库的总称。
Boost库由Boost社区组织开发、维护。其目的是为C++程序员提供免费、同行审查的、可移植的程序库。Boost库可以与C++标准库完美共同工作,并且为其提供扩展功能。Boost库使用Boost License来授权使用,根据该协议,商业的非商业的使用都是允许并鼓励的。
一. 项目的相关背景
相较于对全网内容的搜索引擎,如某些互联网大型企业的搜索引擎,即:百度、谷歌、Mozilla火狐搜索引擎,我们想要自己实现是需要耗费极大的时间和物质精力的,因为这涉及我们将全网的相关网页信息抓取,以及将全网信息进行保存和建立相关的索引模块,且这些搜索引擎已经有了相当成熟的受众群体,再去实现的意义有待商榷。
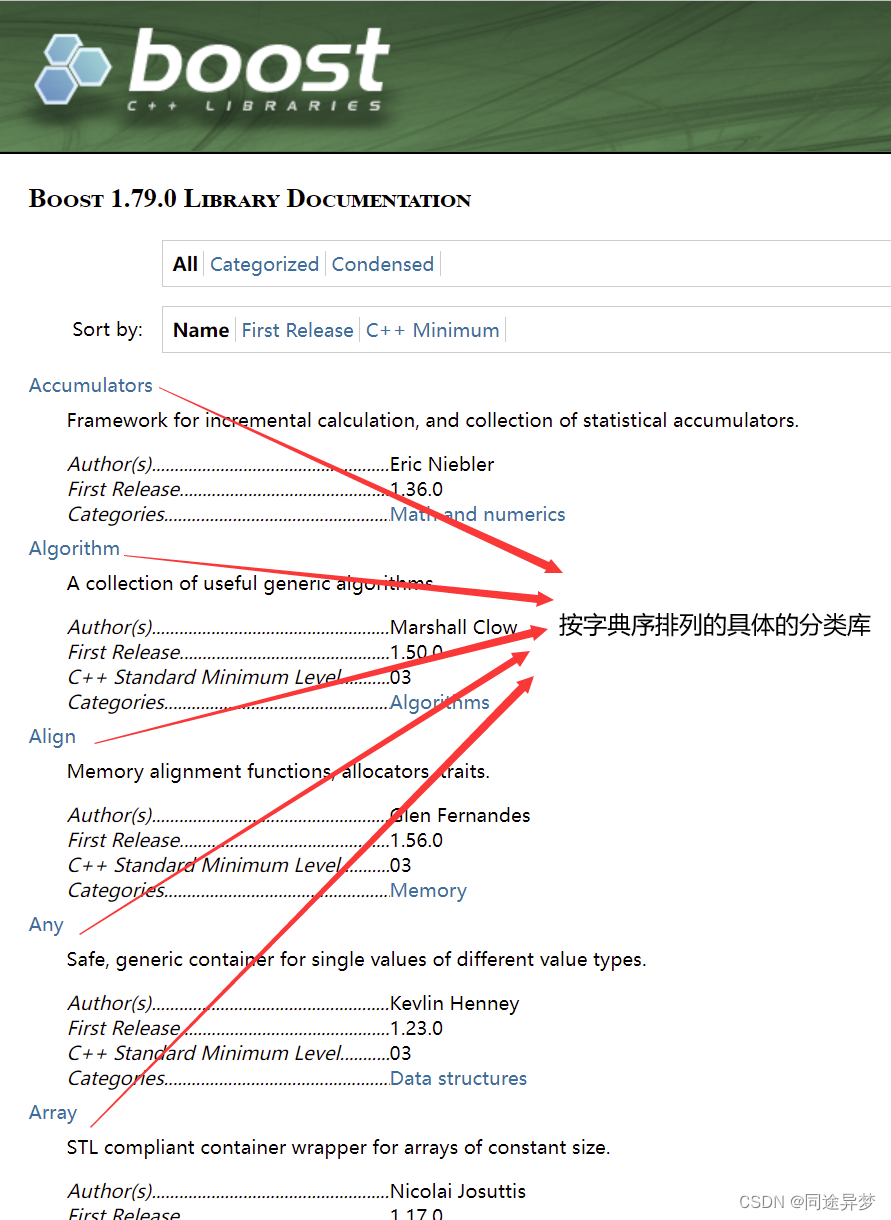
Boost库由C++标准委员会库工作组成员发起,其中有些内容有望成为下一代C++标准库内容。在C++社区中影响甚大,是不折不扣的“准”标准库。即便如此,Boost库的官方网站https://www.boost.org/ 内并没有对Boost库这一庞大库配置针对性搜索的相关的搜索引擎,截止实现该项目前的Boost官网中,Boost库的发行版本已至1.79.0,测试版本已至1.80.0,无论是什么版本,我们想了解Boost库中某一具体库的功能,都需要通过按照功能分类的Boost库列表,即相关版本的Documentation进行查找,我们可以通过实现一个Boost搜索引擎实现更优地解决这个问题。我们实现的是站内搜索,这使我们搜索的数据更垂直,相关度更高,数据量更小,针对性也就更强。
通过和目前主流搜索引擎搜索到的内容做对比,可以发现搜索的展现结果:网页的标题(title)、网页内容的摘要描述(content/desc)、即将跳转的网址url(url) 等,这也将是我们重点实现的。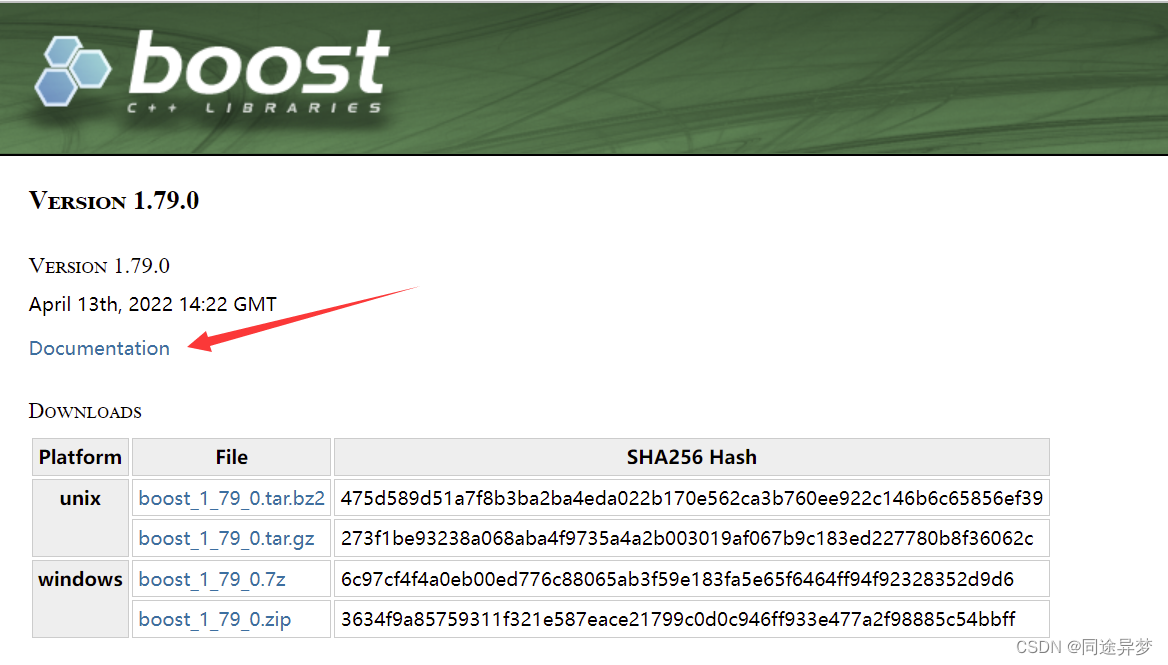
二. 搜索引擎的相关宏观原理
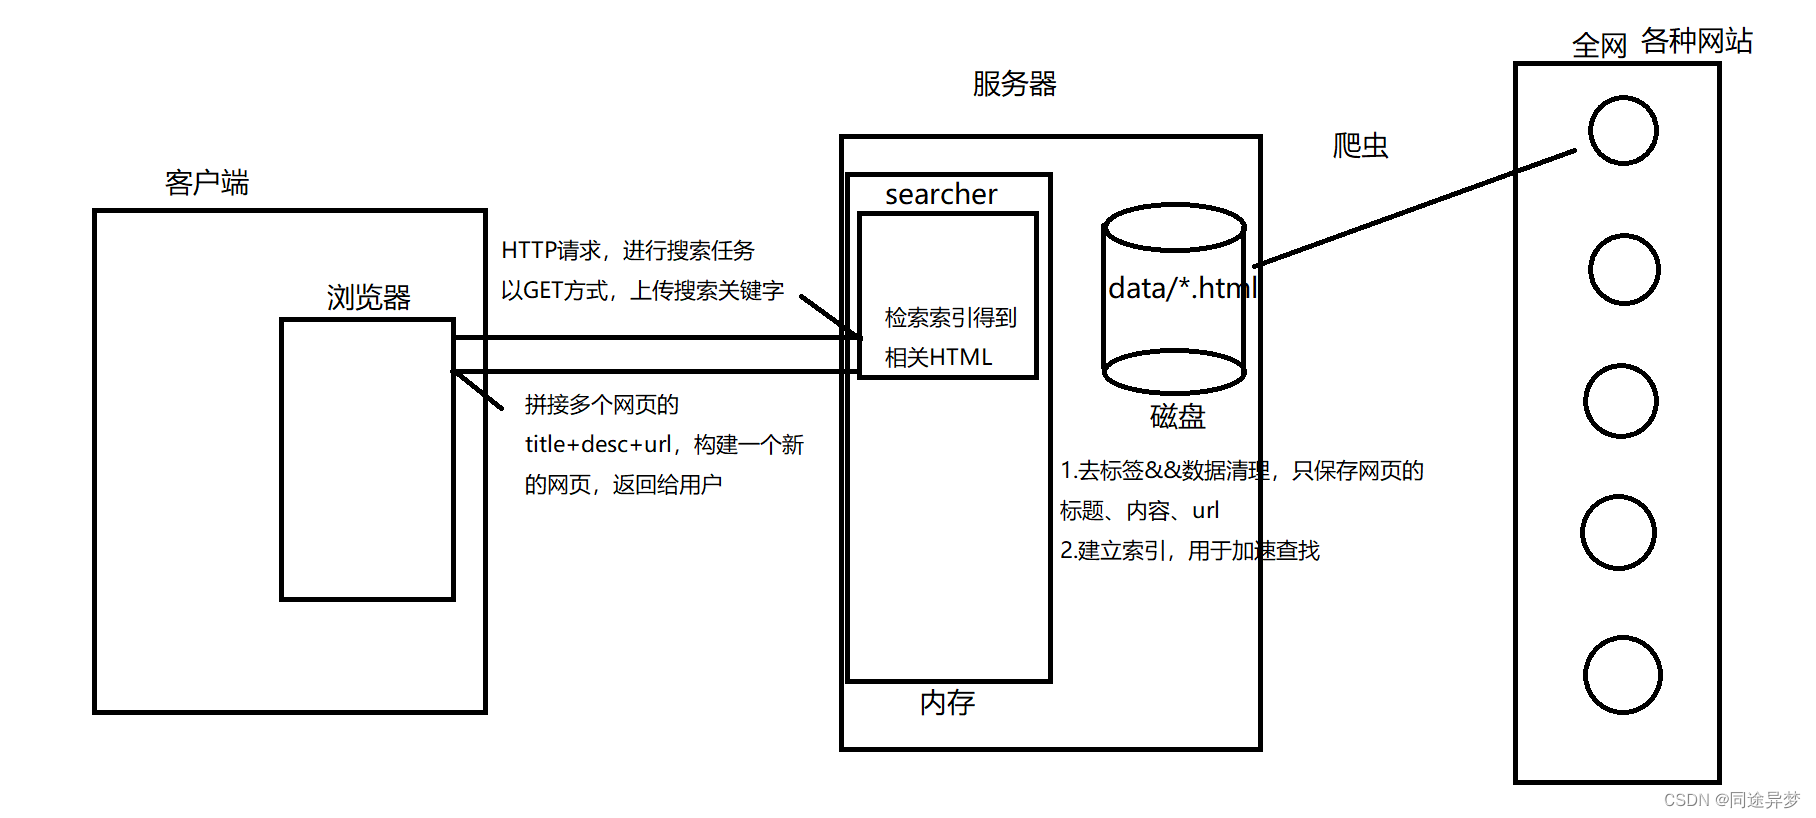
站内搜索通俗来讲是一个网站或商城的“大门口”,一般在形式上包括两个要件:搜索入口和搜索结果页面,此处我们不用考虑爬取数据,因为我们的数据是从Boost官方网站中下载下来的,所以宏观上我们主要考虑客户端和服务器的交互即可。
三. 搜索引擎技术栈和项目环境
技术栈: C/C++/C++11,STL,准标准库Boost库,Jsoncpp,cppjieba,cpp-httplib
- 不用考虑从网站上爬取数据的过程,只考虑客户端和服务端要进行交互,于是我们采用Jsoncpp达到浏览器和服务器之间进行数据交换的目的
- 使用cppjieba将搜索关键字进行切分
项目环境: Centos7云服务器(Xshell7),vim/gcc(g++)/Makefile,VSCode
前端实现(选学): HTML5,CSS,JavaScript,jQuery,Ajax
四. 搜索引擎具体原理
后台架构上是比较复杂的,其核心要件包括:中文分词技术、页面抓取技术、建立索引、对搜索结果排序以及对搜索关键词的统计、分析、关联、推荐等。
4.1 正排索引
正排索引:从文档ID找到文档内容(文档中的关键字)
假设此处有两个文档,如:
- 文档1:雷军买了四斤小米
- 文档2:雷军发布了小米手机
| 文档ID | 文档内容 |
|---|---|
| 1 | 雷军买了四斤小米 |
| 2 | 雷军发布了小米手机 |
4.2 倒排索引
目标文档分词:
目的: 方便建立倒排索引和查找
停止词: 的、了、a、the,一般我们在分词的时候可以不考虑
分词:
- 雷军买了四斤小米:雷军\买\四斤\小米
- 雷军发布了小米手机:雷军\发布\小米\手机
倒排索引:根据文档内容,分词,整理不重复的各个关键字,联系到对应文档ID
| 关键字(具有唯一性) | 文档ID,weight(权重) |
|---|---|
| 雷军 | 文档1、文档2 |
| 买 | 文档1 |
| 四斤 | 文档1 |
| 小米 | 文档1、文档2 |
| 四斤小米 | 文档1 |
| 发布 | 文档2 |
| 小米手机 | 文档2 |
模拟一次查找的过程:
给出要查找的关键字或具体内容 -> 小米手机
倒排索引中查找 ->
根据文档内容分词后的关键字提取出文档ID -> 文档2(2)
正排索引中查找 -> 2
根据文档ID找到文档内容 -> 雷军发布了小米手机
title+content/desc+url文档结果进行摘要 ->
构建相应结果
五. 编写数据去标签与数据清洗的模块Parser
5.1 数据导入
Boost官网:http://www.boost.org/
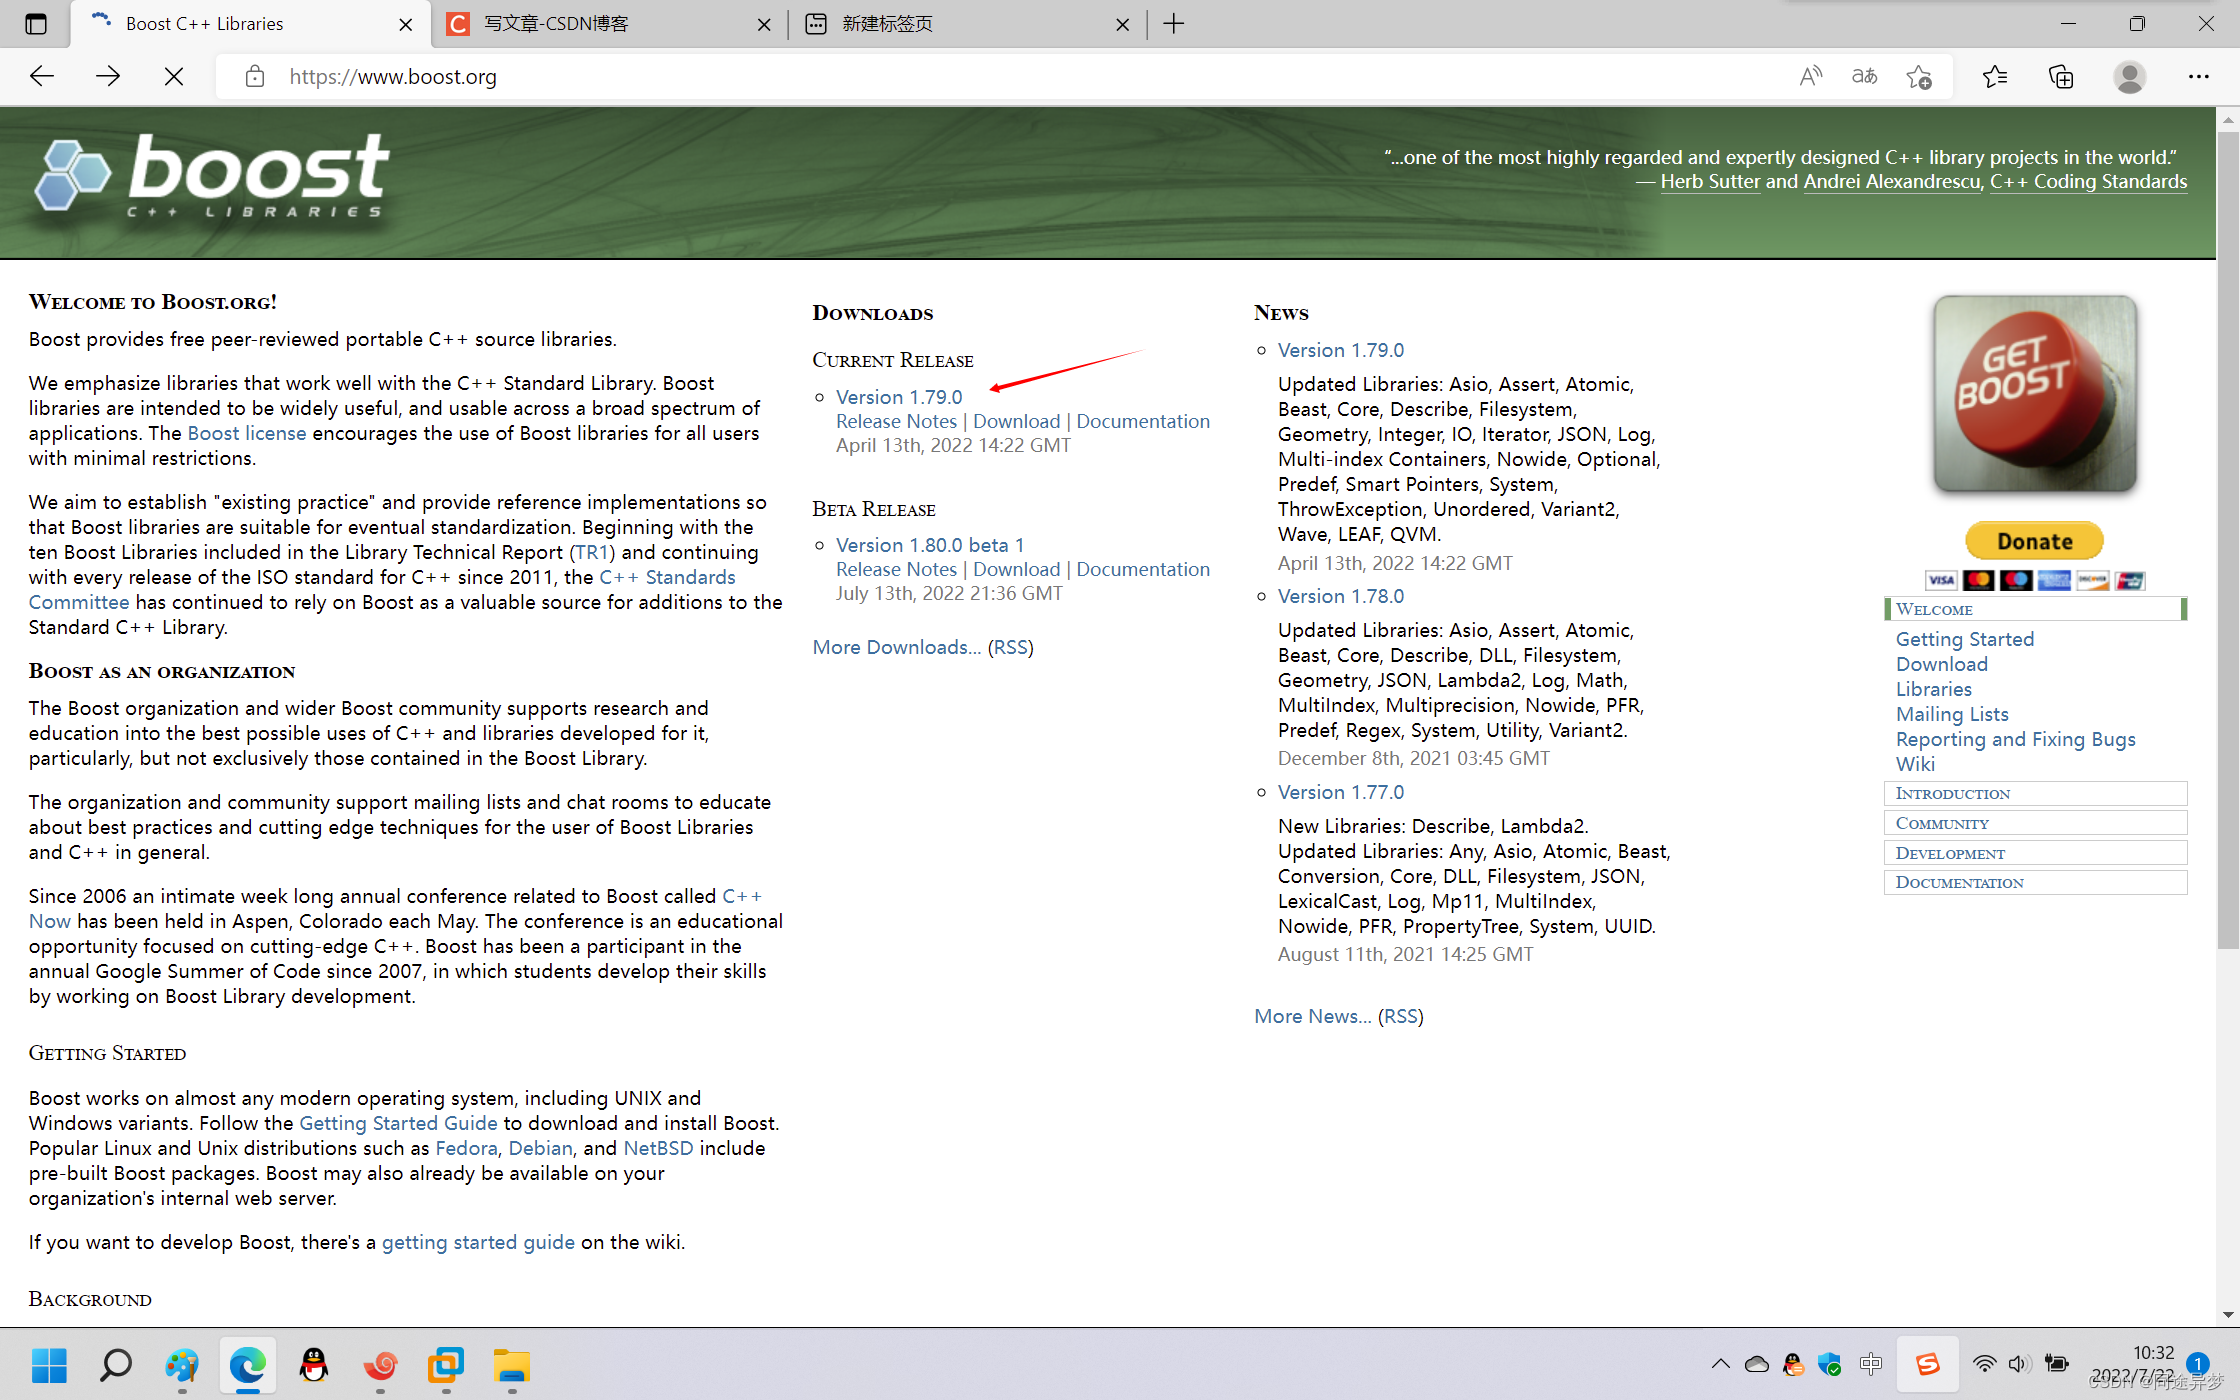
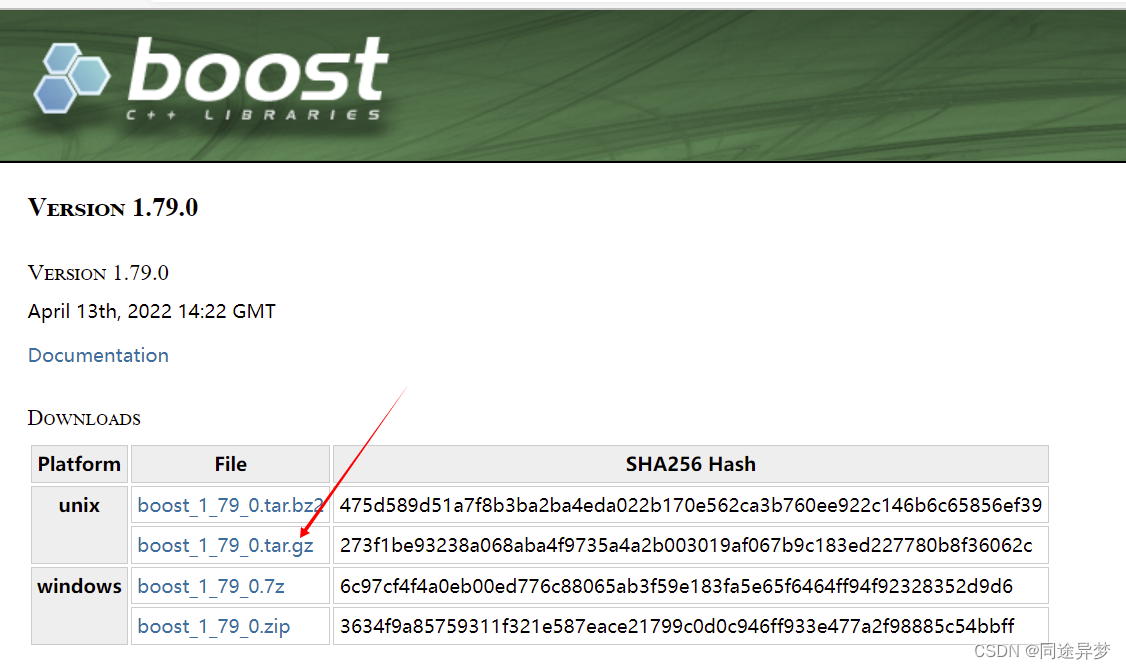
1. 从boost官网下载数据
此处我们下载的是最新发行版本1.79.0
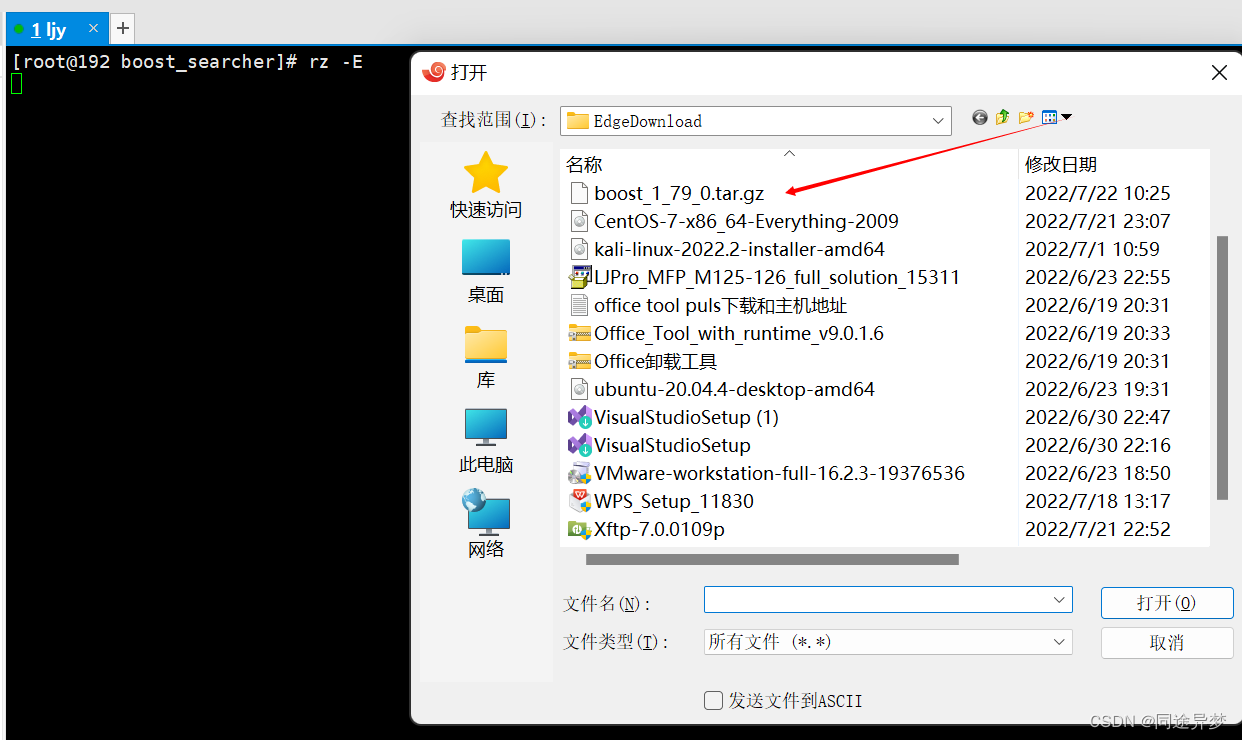
2. 在我们的云服务器中打开
rz -E
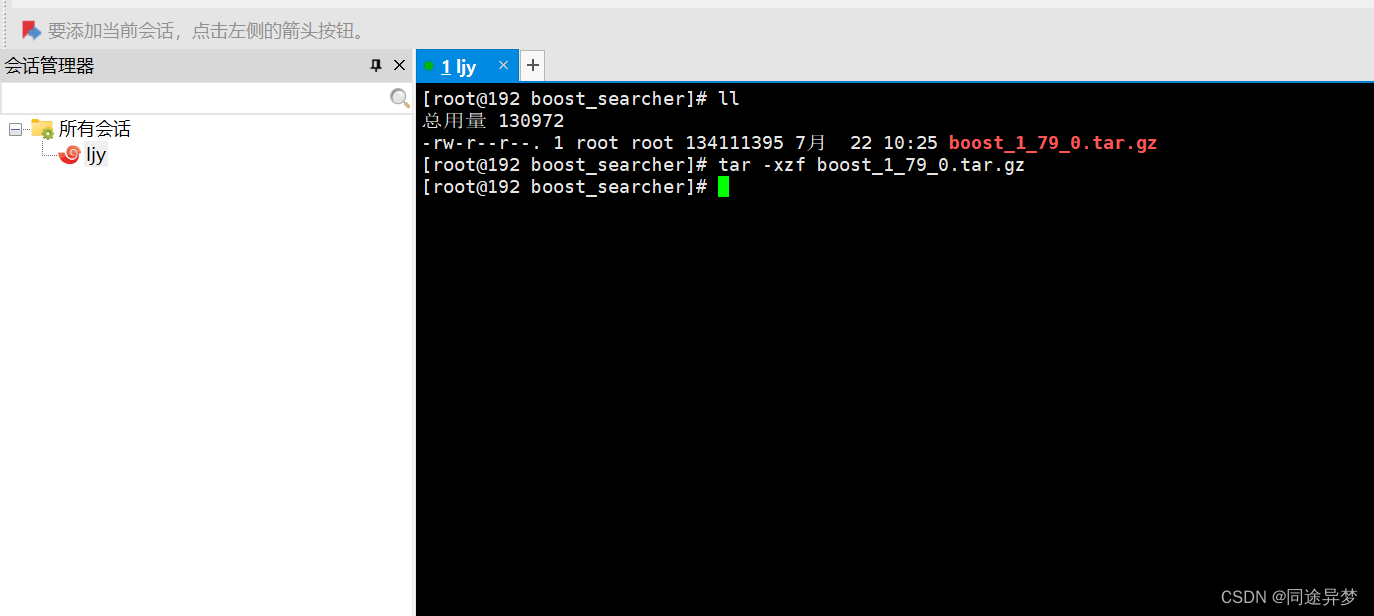
3. 解压打开的boost文件
tar -xzf boost_1_79_0.tar.gz
4. 显示
所显示的内容就是我们在boost官网所看到的全部内容
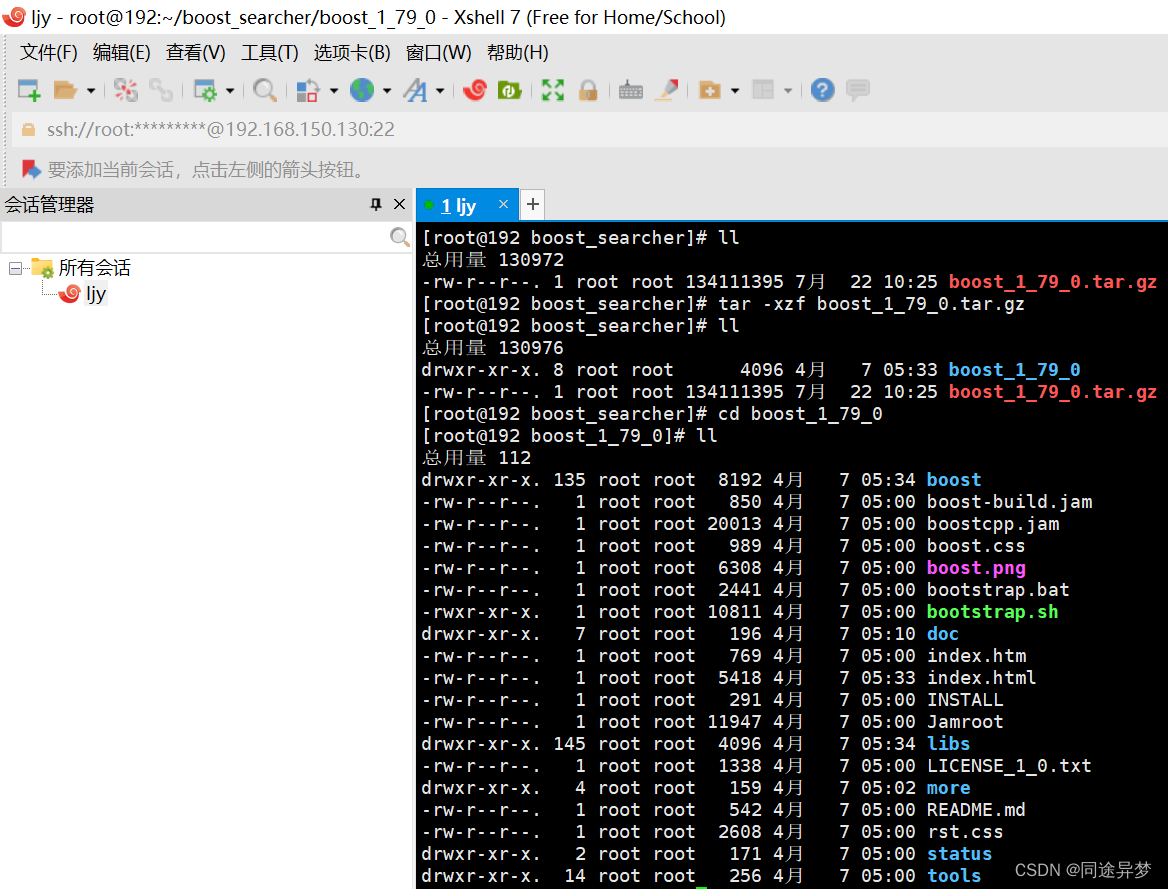
5. 建立data/input,将boost文档下的html文件复制到input中,input用于存放数据源
//cd boost_searcher
//cd doc
//doc中存放着绝大多数的html文件

mkdir -p data/input//建立目录
cp -rf boost_1_79_0/doc/html/ * data/input/  //将doc下所有的网页内容html*拷贝到input下,input作为数据源
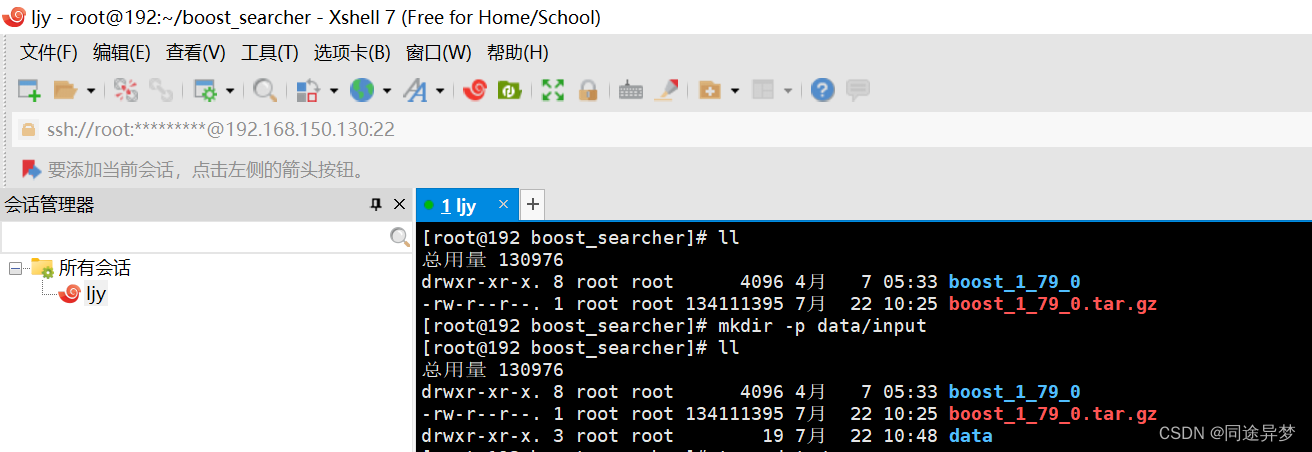

6. 此时boost文件已经用不到了,可以删除
rm boost_1_79_0/ -rf//rm -rf 命令意味着递归地、强制删除指定的目录

rm boost_1_79_0.tar.gz//删除压缩包

目前只需要boot_1_79_0/doc/html目录下的html文件,用它来建立索引
5.2 数据清理
首先在/root/boost_searcher下建立parser.cc文件,用来后续编写数据清理的代码;继续建立util.hpp作为接下来系列操作的工具包。
[[email protected]192 boost_searcher]# touch parser.cc
[[email protected]192 boost_searcher]# touch util.hpp
5.2.1 处理Html文件与boost库的引用
//原始数据->去标签之后的数据
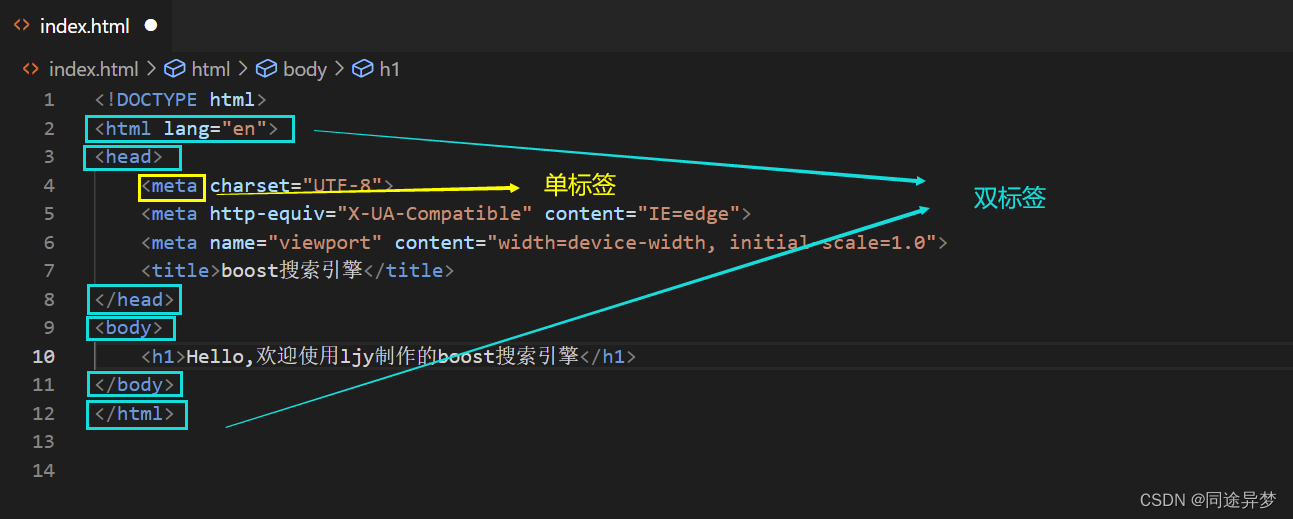
<>:HTML的标签,这个标签对我们进行搜索是没有价值的,我们需要将他处理掉,标签又分为单标签和双标签,比较典型的单标签有<meta>,比较典型的双标签有<html></html>、<head></head>、<body></body>

//代码:
[[email protected]192 data]# mkdir raw_html
[[email protected]192 data]# ll
总用量 16
drwxr-xr-x. 58 root root 12288 7月  22 10:51 input//这里放的是原始的html文档
drwxr-xr-x.  2 root root     6 7月  22 11:08 raw_html//这里放的是去标签之后的文档

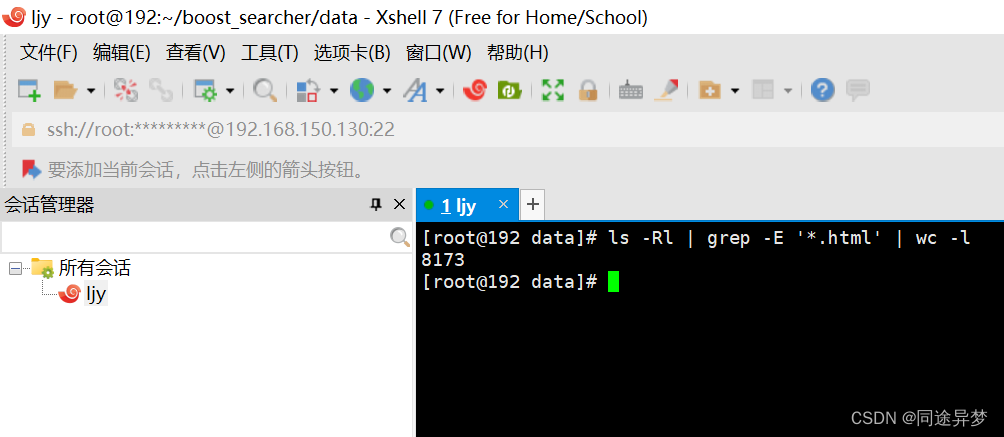
[[email protected]192 data]# ls -Rl | grep -E '*.html' | wc -l
8173
目标:
version1: 把每个文档都去标签,然后写入到同一个文件中,每个文档内容不需要\n换行,文档和文档之间\3区分:
类似于:XXXXXXXXX\3YYYYYYYYYYY\3ZZZZZZZZZZZZZZZ\3
采用:
version2: 写入文件中,一定要考虑下一次在读取时,也要方便操作,即便于我们使用getline(ifstream,line)直接获取文档全部内容:title\3content\3url\3
类似于:title\3content\3url \n title\3content\3url \n title\3content\3url \n…
为什么要用\3作为分隔符:这是因为文档中的每个字符实际上与ASCII表一一对应,ASCII表中又分为ASCII控制字符和ASCII打印字符,ASCII控制字符是不可显示的,因此,一般我们在文档中看到的字符都属于ASCII打印字符,\3中的3对应Ctrl^C,字符解释为正文结束,同时它不会显示,也不会对我们去标签后的新的文档产生影响。
以上实现起来都需要我们对boost库的使用:
boost库的安装:
[[email protected] data]# sudo yum install -y boost-devel //是boost的开发库
//使用boost库实现以\3作为分隔符并进行压缩
class StringUtil{

public:
    static void Split(const std::string &target,std::vector<std::string> *out,const std::string &sep) //sep是切分符
    {

       //boost::split(vec,test,boost::is_any_of(","),boost::token_compress_on); vec是一个数组,test是一个字符串,is_any_of()里面是分隔符
       //token_compress_on: aaa\3bbb\3\3\3\3\ccc\3 即确定"bbb\3"和"ccc\3"之间的"\3\3\3"需不需要压缩,默认是off,即不压缩
       boost::split(*out,target,boost::is_any_of(sep),boost::token_compress_on);
    }
};
ParseHtml(重点):
1. ParseTitle:
提取对应的title:
2.ParseContent:
去掉文档内容的标签: 在进行遍历时,只要碰到了" > ",就意味着当前标签被处理完毕,新的标签开始了。
3.ParseUrl:
构建url: boost库的官方文档,和我们下载下来的文档是有路径的对应关系的。
官网URL样例:https://www.boost.org/doc/libs/1_79_0/doc/html/accumulators.html

我们下载下来的URL样例:boost_1_79_0/doc/html/accumulators.html

我们拷贝到我们项目中的样例:data/input/accumuelators.html//我们把下载下来的boost库doc/html/* copy data/input/

url_head = "https://www.boost.org/doc/libs/1_79_0/doc/html/"
url_tail = "/accumuelators.html"
url = url_head + url_tail;
SaveHtml:
将解析内容写入文件中:
我们采取version2进行写入,使用getline(ifstream,line)直接获取文档全部内容,完成后进入data目录下的raw_html目录,cat打印即可看到解析后的文档全部被写进。
5.2.2 代码结构
//Parser.cc基本结构

#include<iostream>
#include<vector>
#include<string>
#include<boost/filesystem.hpp>
#include"util.hpp"

//是一个目录,下面放的是所有的html网页
const std::string src_path = "data/input";
const std::string output = "data/raw_html/raw.txt";

typedef struct DocInfo
{

    std::string title;//文档标题
    std::string content;//文档内容
    std::string url;//该文档在官网中的url
}DocInfo_t;

//const& : 输入
//* :输出
//& : 输入输出

bool EnumFile(const std::string &src_path,std::vector<std::string> *files_list);
bool ParseHtml(const std::vector<std::string> &files_list,std::vector<DocInfo_t> *results);
bool SaveHtml(const std::vector<DocInfo_t> &results,const std::string &output);

int main()
{

    std::vector<std::string> files_list;
    //第一步:递归式的把每个html文件名带路径保存到files_list中,方便后期进行文件一个一个的读取
    if(!EnumFile(src_path,&files_list))
    {

        std::cerr<<"enum file name error!"<<std::endl;
        return 1;
    }
    //第二步:按照files_list读取每个文件的内容,并进行解析
    std::vector<DocInfo_t> results;
    if(!ParseHtml(files_list,&results))
    {

        std::cerr<<"parse html error"<<std::endl;
        return 2;
    }
    //第三步:把解析完毕的各个文件内容,写入到output中,按照\3作为每个文档的分隔符
    if(!SaveHtml(results,output))
    {

        std::cerr<<"save html error"<<std::endl;
        return 3;
    }

    return 0;
}

//待具体实现
//枚举文件
bool EnumFile(const std::string &src_path, std::vector<std::string> *files_list)
{

	return true;
}
//解析HTML,获取title、去标签、设置分隔符、合并url等
bool ParseHtml(const std::vector<std::string> &files_list, std::vector<DocInfo_t> *results)
{

	return true;
}
//写入/保存HTML
bool SaveHtml(const std::vector<DocInfo_t> &results, const std::string &output)
{

	return true;
}
六. 编写建立索引的模块Index
建立索引需要我们根据正排索引和倒排索引的规则建立起一个完整的映射关系:
- 正排索引:文档ID和文档内容的映射(doc_id和content)
- 倒排索引:关键字和文档ID的映射(word和doc_id)
与此同时,文档内容的切分是倒排索引建立必不可少的一个环境,因为我们需要通过文档内容切分而成的关键字去找到存在该关键字的文档的文档ID,同时根据关键字在同一段文档内容中出现的次数去确定该关键字的权值weight,这样最终显示出来的搜索结果按关键字的权重而有一个先后顺序是合理的。
6.1 Index基本结构
//Index.hpp基本结构

#pragma once
#include<iostream>
#include<string>
#include<vector>
#include<unordered_map>
namespace ns_index{

    struct DocInfo
    {

        std::string title;//文档标题
        std::string content;//文档内容
        std::string url;//文档url
        uint64_t doc_id;//将来文档的ID
    };

    struct InvertedElem//倒排索引中的元素
    {

        int doc_id;//文档ID
        std::string word;//关键字
        int weight;//权重
    };

    //倒排拉链
    typedef std::vector<InvertedElem> InvertedList;

	//Index基本结构
    class Index{

        private:
            //正排索引的数据结构:数组,数组的下标天然是文档的ID
            std::vector<DocInfo> forward_index;//正排索引

            //倒排索引一定是一个关键字和一个或一组InvertedElem对应,即关键字和倒排拉链的映射关系
            std::unordered_map<std::string,InvertedList> inverted_index;
        public:
            Index(){
    }
            ~Index(){
    }
        public:
            //根据doc_id找到文档内容
            DocInfo *GetForwardIndex(uint64_t doc_id)
            {


                return nullptr;
            }
            //根据关键字word获得倒排拉链
            InvertedList *GetInvertedList(const std::string &word)
            {


                return nullptr;
            }
            //根据去标签、格式化之后的文档,构建正排和索引
            bool BuildIndex(const std::string &input)//parse处理完毕的数据需要交付
            {


                return true;
            }
    };
}
6.2 构建正排
//构建正排
DocInfo *BuildForwardIndex(const std::string &line)
{

    //1.解析line,字符串切分,line->3 string,title,content,url
    const std::string sep ="\3";
    std::vector<std::string> results;
    ns_util::StringUtil::Split(line,&results,sep);
    //此时已经把字符串切分完,需要进行判断
    if(results.size() != 3)//我们把字符串切分成title/content/url三部分
    {

        return nullptr;
    }


    //2.字符串进行填充到DocInfo中
    DocInfo doc;
    doc.title = results[0];//title
    doc.content = results[1];//content
    doc.url = results[2];//url
    doc.doc_id = forward_index.size();      //先保存id再插入,对应的id就是当前doc再vector中的下标,如果先插入再保存,则下标对应size-1


    //3.插入到正排索引的vector
    forward_index.push_back(std::move(doc));//doc里包含了很多html文件内容,会发生拷贝导致效率低下,所以我们使用move
    return &forward_index.back();
}
6.3 构建倒排
6.3.1 倒排原理
//原理:
struct InvertedElem
{

    int doc_id;//文档ID
	std::string word;
	int weight;//权重
};

//倒排拉链:
typedef std::vector<InvertedElem> InvertedList;

//倒排索引一定是一个关键字和一个或一组InvertedElem对应[关键字和倒排拉链的映射关系]
std::unordered_map<std::string,InvertedList> inverted_index;

//我们获取到的文档内容
struct DocInfo
{

     std::string title;//标题
     std::string content;//文档去标签后的内容
     std::string url;//官网文档的url
     uint64_t doc_id;//将来文档的ID
};

//假设我们有一个文档为:
title:开汽车
content:开汽车到加油站
url:http://XXX
doc_id:1

根据文档内容,形成一个或者多个InvertedElem(倒排拉链)
因为当前我们是一个一个文档进行处理的,一个文档会包含多个“词”,都应当对应到当前的doc_id

1.需要使用jieba对title和content先分词
title:开/汽车/开汽车
content:开/汽车/加油站

2.词频统计
struct word_cnt
{

	title_cnt;
	content_cnt;
}
unordered_map<std::string,word_cnt> wordC;
for(auto &word : title_word)
{

	word_cnt[word].title_cnt++;
}
for(auto &word : content_word)
{

	word_cnt[word].content_cnt++;
}

由此可知在文档中标题和内容按分词情况每个词出现的次数

3.自定义相关性
词和文档的相关性(词频:在标题中出现的词,可以认为相关性更高一些,在内容中出现相关性低一些)
for(auto &word : word_cnt
{

	//具体一个词和文档1的对应关系
	//当有多个不同的词指向同一个文档,此时需要我们依照相关性确定其优先级
	struct InvertedElem elem;
	elem.doc_id = 1;
	elem.word = word。first;
	elem.weight = 10 * word.second.title_cnt + 2 * word.secend.conten_cnt;//相关性,此处需要我们确定一个计算方法,看个人
	inverted_index[word.first].push_back(elem);//倒排拉链其中一个结点
}
6.3.2 cppjieba的下载与链接
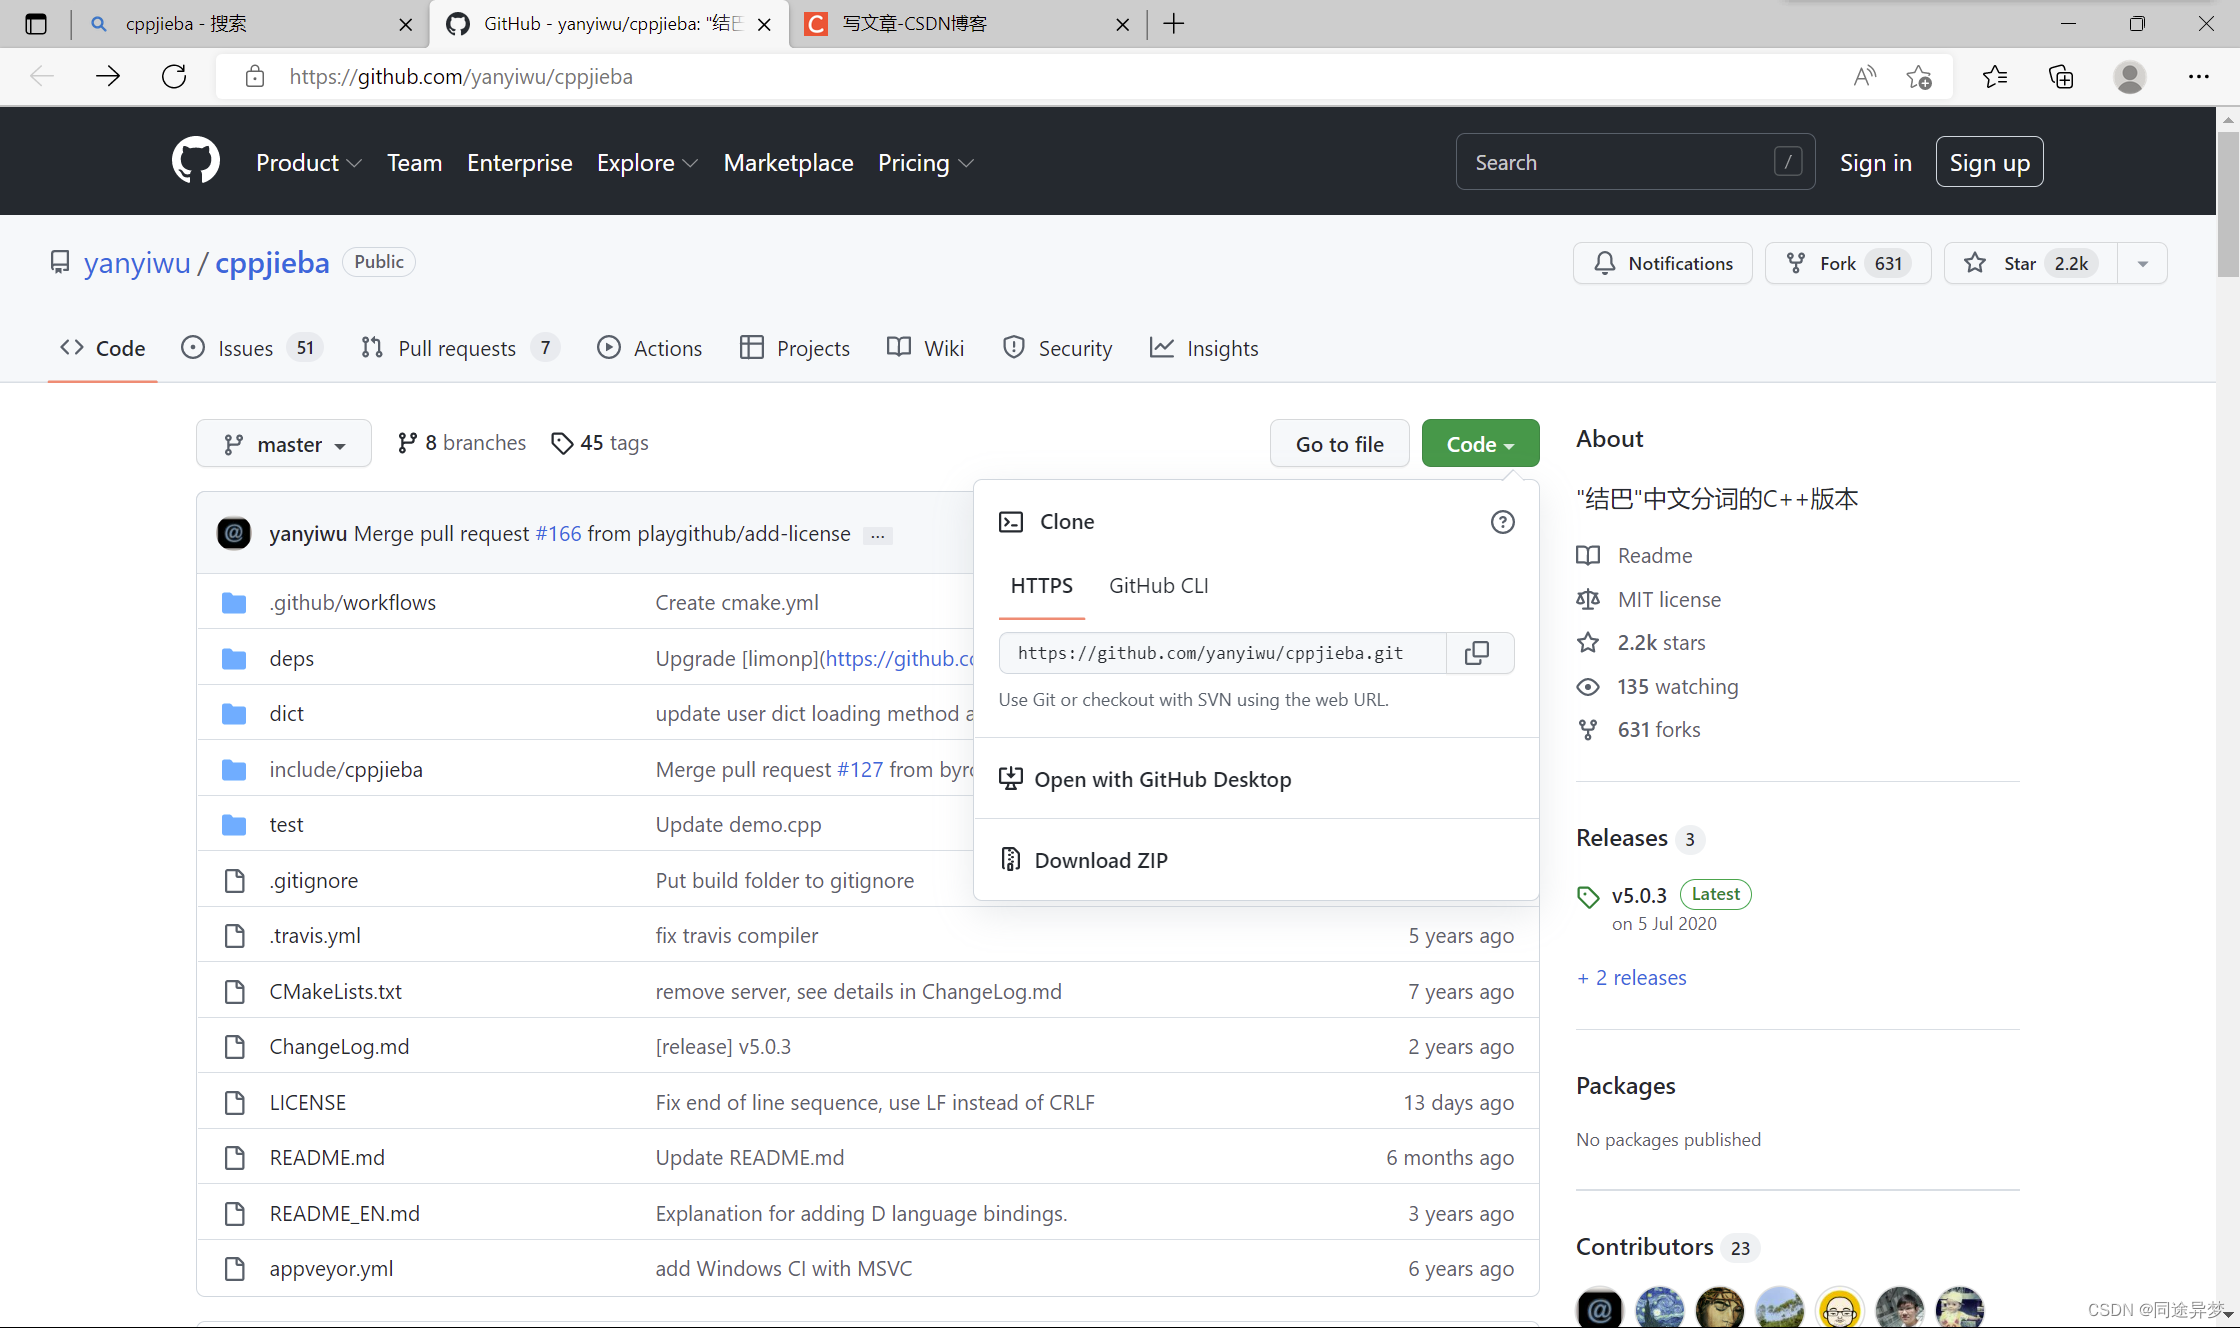
1.在linux命令行中输入:git clone https://github.com/yanyiwu/cppjieba.git
2.将root/boost_searcher/test/cppjieba/deps/limonp文件复制到root/boost_searcher/test/cppjieba/include/cppjieba/下,否则会有链接错误
//代码
//cd boost_searcher
//cd test
//cd cppjieba
cp deps/limonp include/cppjieba/ -rf

3.建立软链接ln [-参数][源文件或目录][目标文件或目录],使cppjieba在另外一个位置建立一个同步的链接
//代码
//cd boost_searcher
ln -s ~/boost_searcher/test/cppjieba/include/cppjieba cppjieba

ln -s ~/boost_searcher/test/cppjieba/dict dict//分词需要词库,也需要链接


6.3.3 cppjieba的使用
引入jieba分词,原始的cppjieba有很多种分词方式,我们只保留一种,接下来就可以通过导入cppjieba分别对文档标题和文档内容进行分词了,即在工具包util.hpp的头文件中写入:
//util.hpp
#include "inc/cppjieba/Jieba.hpp"
class JiebaUtil{

    private:
        static cppjieba::Jieba jieba;

    public:
        static void CutString(const std::string &src,std::vector<std::string> *out)//src是切分的对象
        {

            jieba.CutForSearch(src,*out);
        }
};
cppjieba::Jieba JiebaUtil::jieba(DICT_PATH,HMM_PATH,USER_DICT_PATH,IDF_PATH,STOP_WORD_PATH);
//demo.cpp
#include "inc/cppjieba/Jieba.hpp"
#include<iostream>
#include<string>
#include<vector>
using namespace std;

const char* const DICT_PATH = "./dict/jieba.dict.utf8";
const char* const HMM_PATH = "./dict/hmm_model.utf8";
const char* const USER_DICT_PATH = "./dict/user.dict.utf8";
const char* const IDF_PATH = "./dict/idf.utf8";
const char* const STOP_WORD_PATH = "./dict/stop_words.utf8";

int main(int argc, char** argv) {

  cppjieba::Jieba jieba(DICT_PATH,
        HMM_PATH,
        USER_DICT_PATH,
        IDF_PATH,
        STOP_WORD_PATH);
  vector<string> words;
  string s;

  s = "小明硕士毕业于中国科学院计算所,后在日本京都大学深造";
  cout << s << endl;
  cout << "[demo] CutForSearch" << endl;
  jieba.CutForSearch(s, words);
  cout << limonp::Join(words.begin(), words.end(), "/") << endl;

  return EXIT_SUCCESS;
}
6.3.4 倒排索引代码
//构建倒排
bool BuildInvertedIndex(const DocInfo &doc)
{

  //DocInfo[title,content,url,doc_id]
  //word -> 倒排拉链
  struct word_cnt
  {

      int title_cnt;
      int content_cnt;
      word_cnt():title_cnt(0),content_cnt(0){
    }
  };
  std::unordered_map<std::string,word_cnt> word_map;//用来暂存词频的映射表

  //对标题进行分词
  std::vector<std::string> title_words;
  ns_util::JiebaUtil::CutString(doc.title,&title_words);


  //对标题进行词频统计
  for(std::string s : title_words)
  {

      boost::to_lower(s);     //搜索时不区分大小写,将分词统计转化为小写
      word_map[s].title_cnt++;//[]:如果存在就获取,如果不存在就新建
  }


  //对文档内容进行分词
  std::vector<std::string> content_words;
  ns_util::JiebaUtil::CutString(doc.content,&content_words);


  //对文档内容进行词频统计
  for(std::string s : content_words)
  {

      boost::to_lower(s);     //搜索时不区分大小写,将分词统计转化为小写
      word_map[s].content_cnt++;
  }
#define X 10
#define Y 2 //倒排索引
  for(auto &word_pair : word_map)
  {

      InvertedElem item;
      item.doc_id = doc.doc_id;
      item.word = word_pair.first;
      item.weight = X * word_pair.second.title_cnt + Y * word_pair.second.content_cnt;//相关性
      InvertedList &inverted_list = inverted_index[word_pair.first];
      inverted_list.push_back(std::move(item));
  }
  return true;
}
七. 编写搜索引擎模块Searcher
| 关键字(具有唯一性) | 文档ID,weight(权重) |
|---|---|
| 雷军 | 文档1、文档2 |
| 买 | 文档1 |
| 四斤 | 文档1 |
| 小米 | 文档1、文档2 |
| 四斤小米 | 文档1 |
| 发布 | 文档2 |
| 小米手机 | 文档2 |
搜索:
雷军小米 -> 雷军/小米 -> 查倒排索引 -> 两个倒排拉链(文档1,文档2、文档1,文档2)
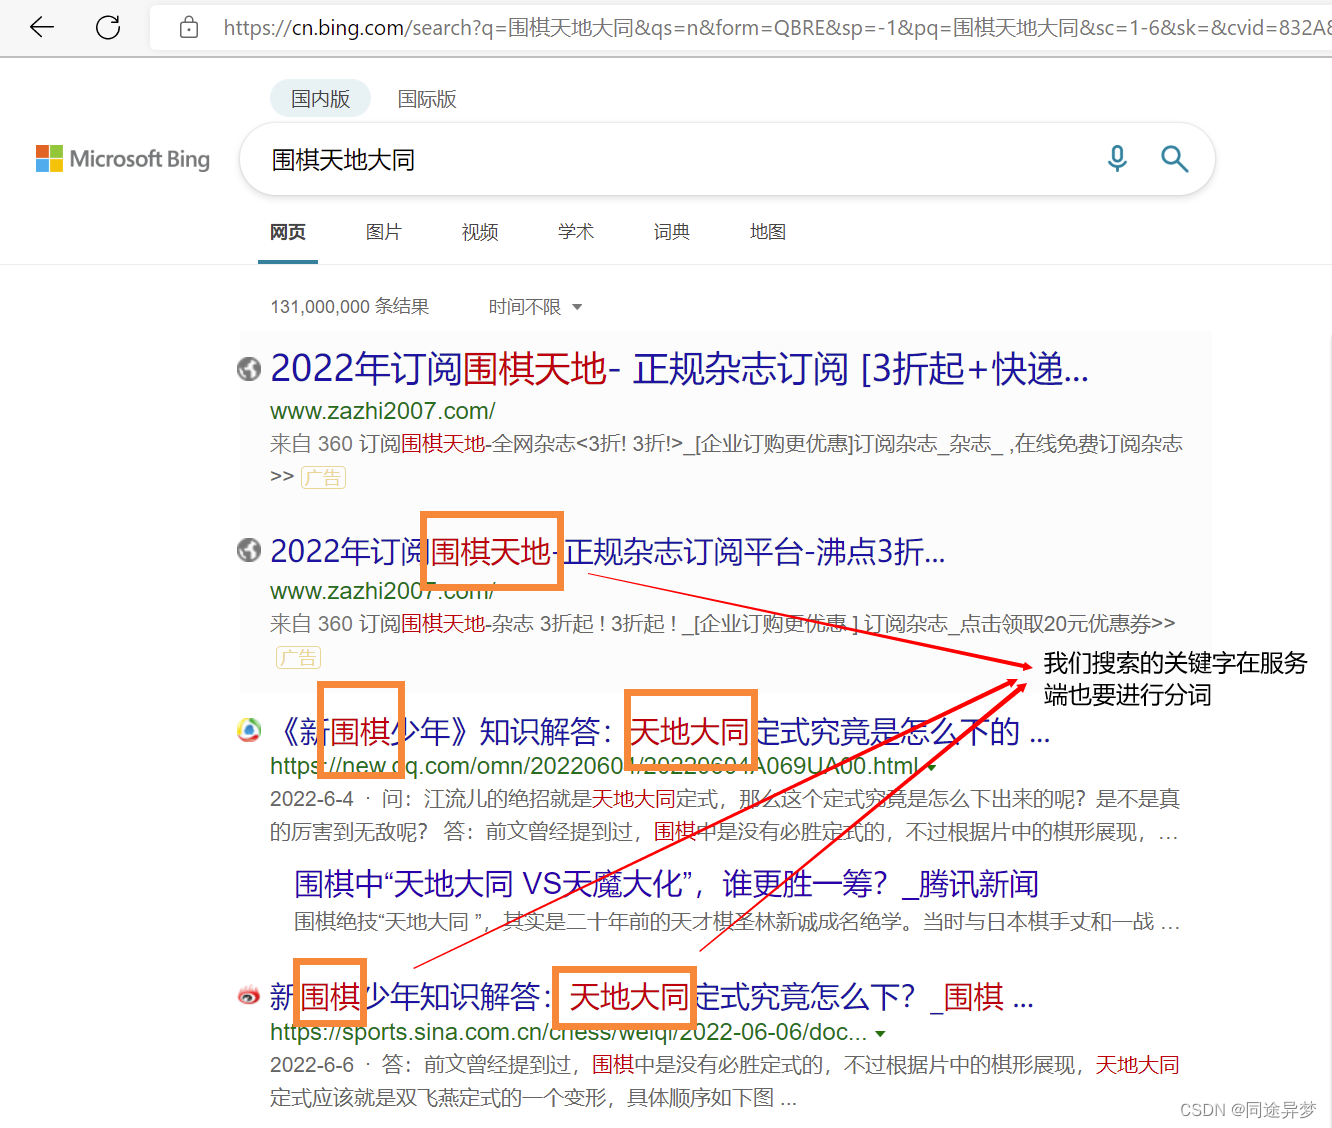
则最终的搜索结果会将文档1和文档2这两个网址在显示界面重复显示多次,所以我们在服务端对关键字也要进行分词,才能开始查找它的倒排索引。
考虑到客户端和服务端要进行交互,于是我们采用Jsoncpp达到客户端和服务器之间进行数据传输和状态同步的目的。
7.1 Jsoncpp的安装与基本使用
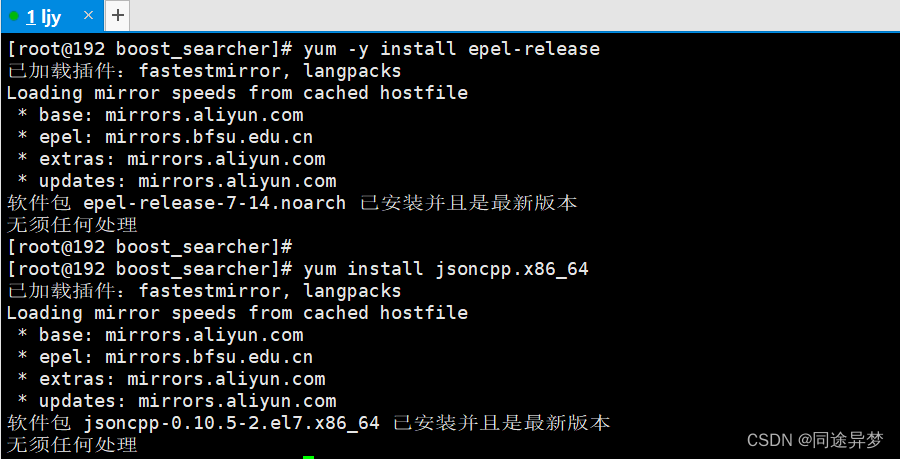
1. 安装jsoncpp:
yum -y install epel-release

yum install jsoncpp.x86_64
2. Jsoncpp的基本使用
Jsoncpp是C++解析JSON串常用的解析库之一,其常用的类有:
(a)Json::Value:可以表示里所有的类型,比如int,string,object,array等,其支持的类型可以参考Json:ValueType中的值。
(b)Json::Reader:将json文件流或字符串解析到Json::Value,主要函数有Parse。
Json::Writer:与Json::Reader相反,将Json::Value转化成字符串流,注意它的两个子类:Json::FastWriter和Json::StyledWriter,分别输出不带格式的json和带格式的json。
//Json小测试

#include <iostream>
#include<string>
#include<vector>
#include<jsoncpp/json/json.h>
//#include<boost/algorithm/string.hpp>

int main()
{

    //Json:Value Reader Writer
    Json::Value root;
    Json::Value test1;
    test1["key1"] = "value1";
    test1["key2"] = "value2";

    Json::Value test2;
    test2["key1"] = "value3";
    test2["key2"] = "value4";

    root.append(test1);
    root.append(test2);

    Json::StyledWriter writer;//StyledWriter/FastWriter
    std::string s = writer.write(root);
    std::cout << s << std::endl;


    //std::vector<std::string> result;
    //std::string target = "aaa\3\3\3\3bbb\3ccc";
    //boost::split(result,target,boost::is_any_of("\3"),boost::token_compress_on);//boost::token_compress_on默认是off

    //for(auto &s : result)
    //{

    // std::cout << s << std::endl;
    //}
    return 0;
}

//效果如下
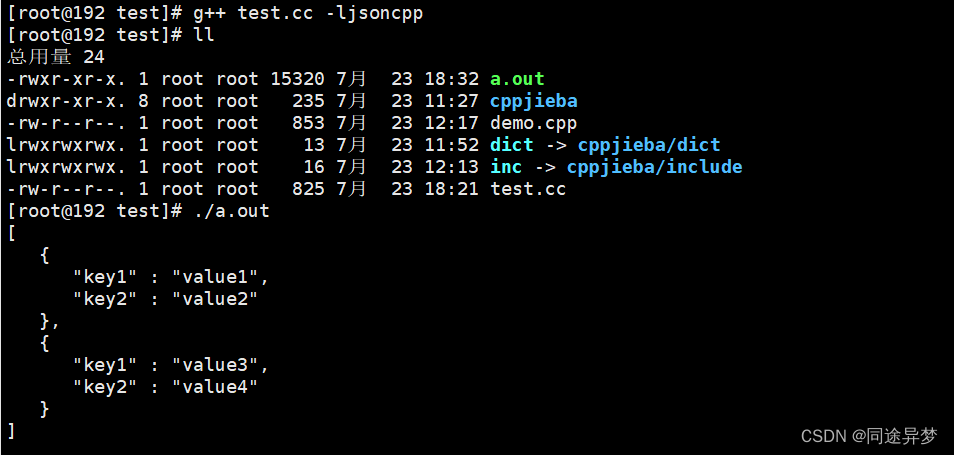
Jsoncpp测试: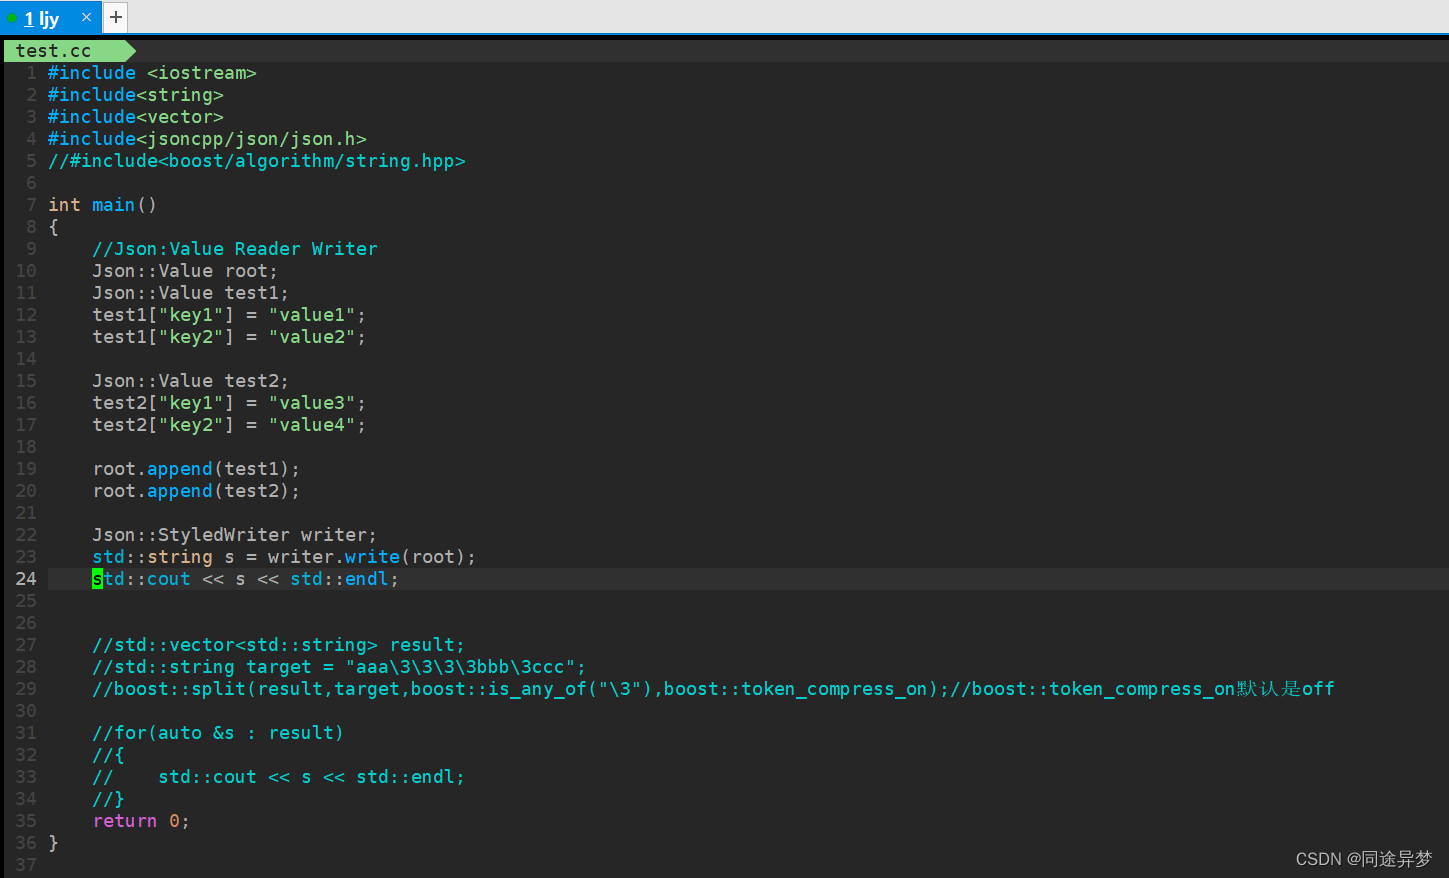
7.2 Searcher基本结构
项目基本结构:
//Searcher.hpp基本结构

#include "index.hpp"
namespace ns_searcher{

	class Searcher{

	private:
		ns_index::Index *index;
	public:
		void InitSearcher(const std::string &input)
		{

			//1.获取或者创建index对象
			//2.根据index对象建立索引
		}
		//query:搜索关键字
		//json_string:返回给用户浏览器的搜索结果
		void Search(const std::string &query,std::string *json_string)
		{

			//1.分词:对query进行按照searcher的要求的分词
			//2.根据分词后的各个“词”,进行index查找,建立index时是忽略大小写的,所以搜索的关键字也需要忽略大小写,全部转化为小写
			//3.合并与排序:汇总查找结果,按照相关性即权重weight降序排序
			//4.根据查找出的结果,构建json串,返回给用户,需要使用第三方库jsoncpp,一般通过jsoncpp完成序列化和反序列化的功能
		}
	};
}
获取摘要:
//找到word在html_content中的首次出现,然后往前找些许字节,往后找些许字节,截取这部分字节片段;若没有这些字节,就从begin开始,或到end结束也可以
//截取内容片段
const int prev_step = 50;
const int next_step = 100;
//1.找到首次出现

//2.获取start,end,std::size_t是一个无符号整数
int start = 0;
int end = html_content.size() - 1;
//如果之前有50个字符,就更新位置
if(pos > start + prev_step)//在无符号整形的情况下,使用pos - prev_step > start 相减可能会出现负数并溢出
{

    start = pos - prev_step;
}
//如果当前位置后不足100字符
if(pos < end - next_step)//如果是size_t类型则要强转成int,防止溢出
{

    end = pos + next_step;
}

//3.截取子串,返回
关于调试:
把整个html文件读到内存,先取到标题,然后对整个文件去标签,此时如果一个词在title中出现,且搜索词恰是此词,则这个词一定会被当title和content分别被统计一次。
//2.根据分词后的各个“词”,进行index查找,建立index时是忽略大小写的,所以搜索的关键字也需要忽略大小写,全部转化为小写
//ns_index::InvertedList inverted_list_all;//存放的是倒排拉链的结点InvertedElem
std::vector<InvertedElemPrint> inverted_list_all;
std::unordered_map<uint64_t,InvertedElemPrint> tokens_map;//去重

for(std::string word : words)
{

    boost::to_lower(word);
    ns_index::InvertedList *inverted_list = index->GetInvertedList(word);
    if(inverted_list == nullptr)//没有倒排结点
    {

        continue;
    }
    //此处需要处理一个词被分词后形成了许多常见的简单的小词,这些词在同一个文档中出现,导致这些词doc_id相同,显示的搜索结果重复
    //inverted_list_all.insert(inverted_list_all.end(), inverted_list->begin(), inverted_list->end());//倒排拉链合并在一起
    for(const auto &elem : *inverted_list)
    {

        auto &item = tokens_map[elem.doc_id];//[]:如果存在直接获取,如果不存在则新建
        //item一定是doc_id相同的print结点
        item.doc_id = elem.doc_id;
        item.weight += elem.weight;
        item.words.push_back(elem.word);
    }
}
for(const auto &item : tokens_map)
{

    inverted_list_all.push_back(std::move(item.second));
}
八. 编写HTTP-Server模块
升级gcc:
cpp-httplib库:https://gitcode.net/mirrors/yhirose/cpp-httplib
cpp-httplib在使用时需要使用较新版本的gcc,centos7默认下gcc4.8.5

[[email protected]192 boost_searcher]# gcc -v
使用内建 specs。
COLLECT_GCC=gcc
COLLECT_LTO_WRAPPER=/usr/libexec/gcc/x86_64-redhat-linux/4.8.5/lto-wrapper
目标:x86_64-redhat-linux
配置为:../configure --prefix=/usr --mandir=/usr/share/man --infodir=/usr/share/info --with-bugurl=http://bugzilla.redhat.com/bugzilla --enable-bootstrap --enable-shared --enable-threads=posix --enable-checking=release --with-system-zlib --enable-__cxa_atexit --disable-libunwind-exceptions --enable-gnu-unique-object --enable-linker-build-id --with-linker-hash-style=gnu --enable-languages=c,c++,objc,obj-c++,java,fortran,ada,go,lto --enable-plugin --enable-initfini-array --disable-libgcj --with-isl=/builddir/build/BUILD/gcc-4.8.5-20150702/obj-x86_64-redhat-linux/isl-install --with-cloog=/builddir/build/BUILD/gcc-4.8.5-20150702/obj-x86_64-redhat-linux/cloog-install --enable-gnu-indirect-function --with-tune=generic --with-arch_32=x86-64 --build=x86_64-redhat-linux
线程模型:posix
gcc 版本 4.8.5 20150623 (Red Hat 4.8.5-44) (GCC)

升级到较高版本gcc:
sudo yum install centos-release-scl scl-utils-build
sudo yum install -y devtoolset-7-gcc devtoolset-7-gcc-c++

然后打开目录:
ls /opt/rh
可以看到目录下存在文件
devtoolset-7

启动:命令行启动只在本对话有效
scl enable devtoolset-7 bash

查看gcc版本:
gcc -v

每次都使用较新版本的gcc: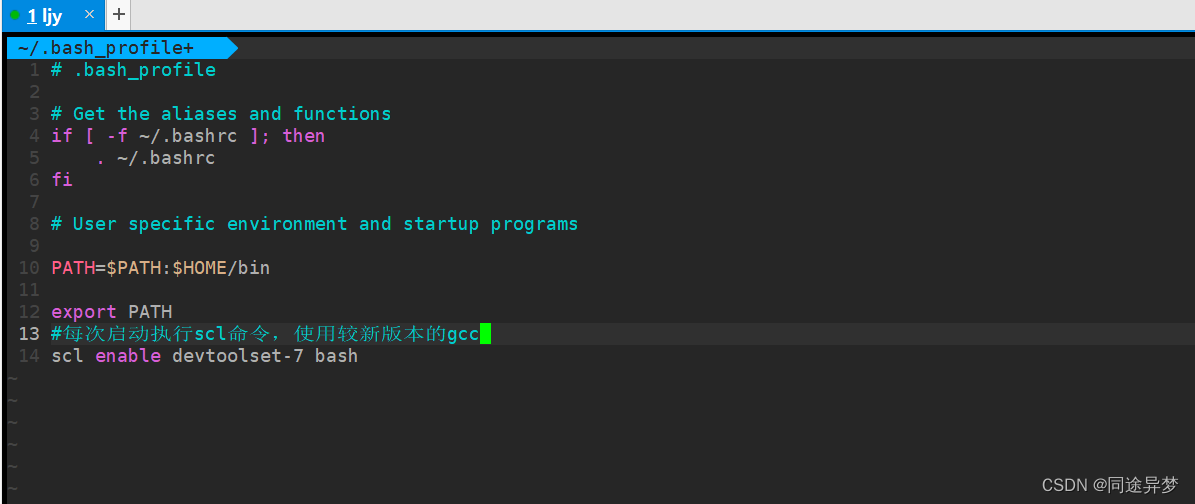
安装cpp-httplib
上传到服务器即可
[[email protected]192 boost_searcher]# ln -s ~/boost_searcher/test/cpp-httplib-0.7.15/ cpp-httplib
[[email protected]192 boost_searcher]# ll
总用量 1520
lrwxrwxrwx. 1 root root     45 7月  24 12:10 cpp-httplib -> /root/boost_searcher/test/cpp-httplib-0.7.15/
lrwxrwxrwx. 1 root root     52 7月  23 13:46 cppjieba -> /root/boost_searcher/test/cppjieba/include/cppjieba/
drwxr-xr-x. 4 root root     35 7月  22 17:19 data
-rwxr-xr-x. 1 root root 608048 7月  24 10:51 debug
-rw-r--r--. 1 root root    502 7月  24 09:04 debug.cc
lrwxrwxrwx. 1 root root     40 7月  23 13:47 dict -> /root/boost_searcher/test/cppjieba/dict/
-rwxr-xr-x. 1 root root 409456 7月  24 10:51 http_server
-rw-r--r--. 1 root root     53 7月  24 10:48 http_server.cc
-rw-r--r--. 1 root root   7075 7月  24 10:33 index.hpp
-rw-r--r--. 1 root root    373 7月  24 10:51 makefile
-rwxr-xr-x. 1 root root 492840 7月  24 10:51 parser
-rw-r--r--. 1 root root   6245 7月  22 22:08 parser.cc
-rw-r--r--. 1 root root   4728 7月  24 09:36 searcher.hpp
drwxr-xr-x. 4 root root    102 7月  24 12:02 test
-rw-r--r--. 1 root root   2084 7月  24 09:57 util.hpp
[[email protected]192 boost_searcher]# ls cpp-httplib/httplib.h
cpp-httplib/httplib.h
基本使用测试
#include"searcher.hpp"
#include"cpp-httplib/httplib.h"
int main()
{

    httplib::Server svr;
    svr.Get("/hi",[](const httplib::Request &req,httplib::Response &rsp){

            rsp.set_content("hello world","text/plant;charset = utf-8");
            });
    svr.listen("0.0.0.0",8081);
    return 0;
}


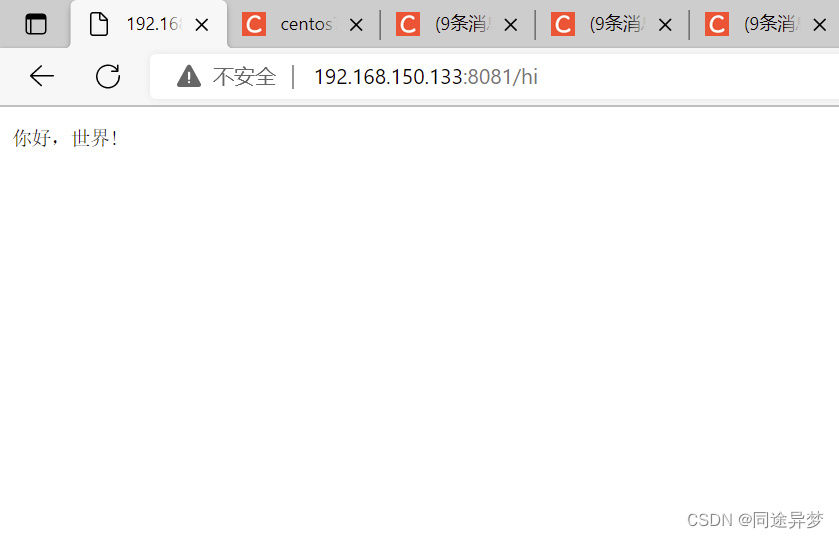
存在一个端口为8081的请求:
可能需要关闭防火墙:
systemctl stop firewalld.service
正式编写httplib的调用
#include"searcher.hpp"
#include "cpp-httplib/httplib.h"

const std::string root_path = "./wwwroot";
const std::string input = "data/raw_html/raw.txt";
int main()
{

    ns_searcher::Searcher search;
    search.InitSearcher(input);


    httplib::Server svr;
    svr.set_base_dir(root_path.c_str());
    svr.Get("/s",[&search](const httplib::Request &req,httplib::Response &rsp){

            if(!req.has_param("word"))
            {

                rsp.set_content("必须要有搜索关键字!","text/plain;charset=utf-8");
                return;
            }
            std::string word = req.get_param_value("word");
            std::cout<<"用户在搜索:"<<word<<std::endl;
            std::string json_string;
            search.Search(word,&json_string);
            rsp.set_content(json_string,"application/json");
            //rsp.set_content("你好,世界!","text/plain;charset=utf-8");
            });
    svr.listen("0.0.0.0",8081);

    return 0;
}
九. 编写前端模块
VSCode是一个高效的编辑器,除此之外,利用VSCode里面自带的插件还可以实现将VSCode和我们的云服务器相连通,直接在VSCode上编写代码,按Ctrl+S可实现数据同步,此处前端模块我们使用VSCode编写。
//三个插件
Chinese
open io browser
Remote - SSH
9.1 VSCode远程连接云服务器
远程连接:
Remote - SSH:

1. 按F1后将vscode和服务器连接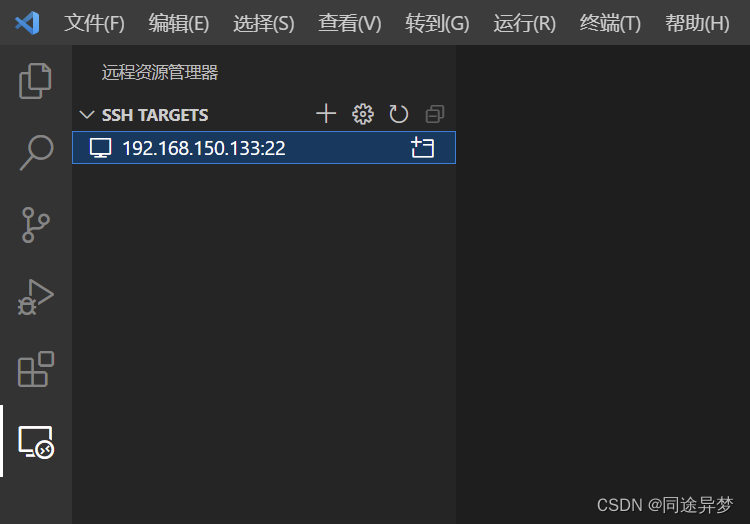
2. 与boost_searcher下的wwwroot文件夹同步,因为我们要使用vscode编写里面index.html前端代码
//cd boost_searcher
mkdir -p wwwroot
touch index.html
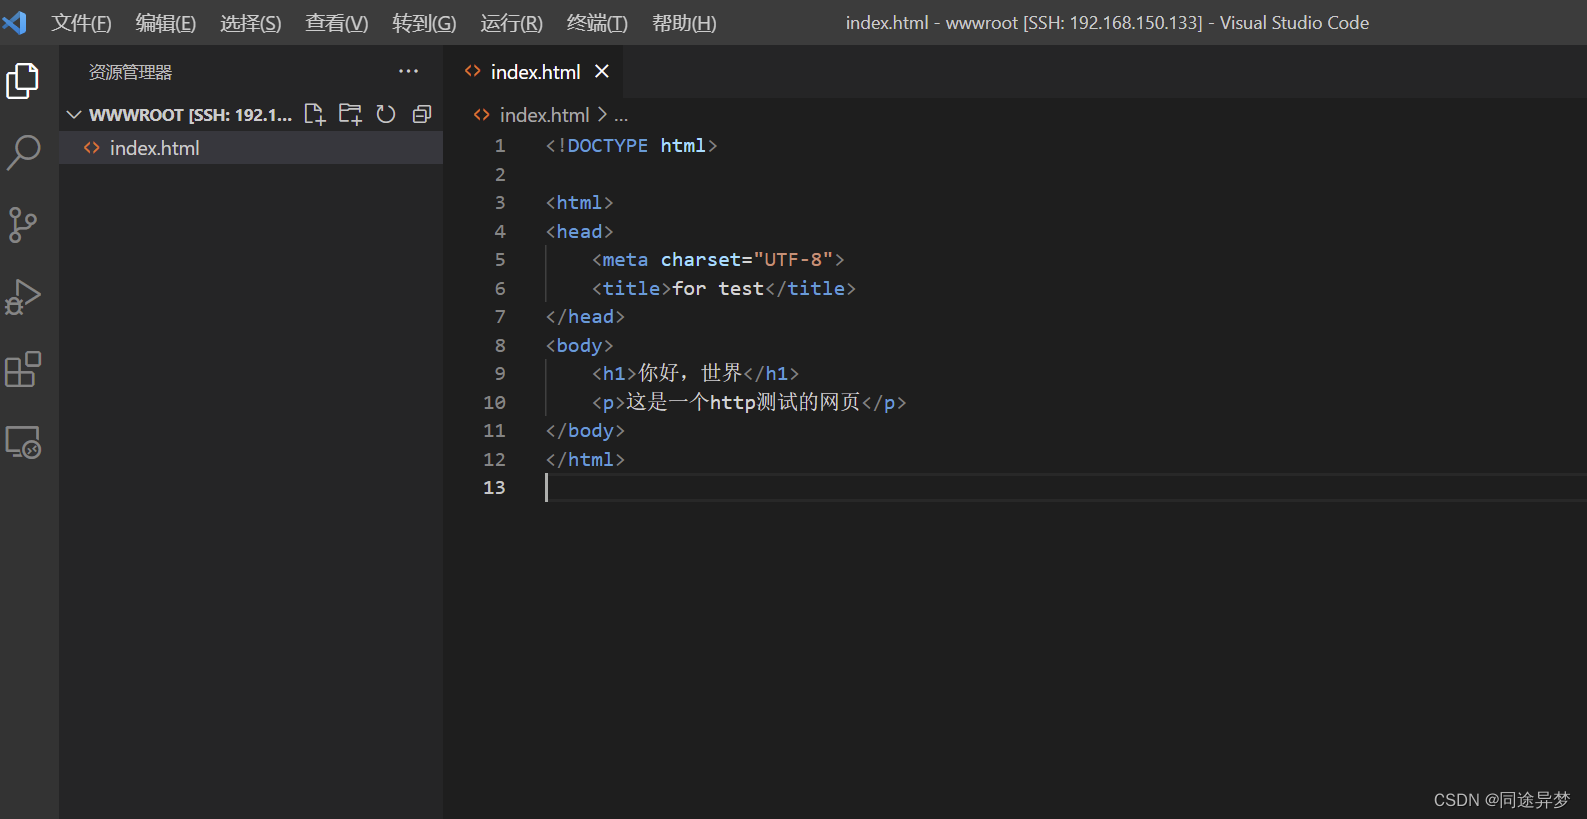
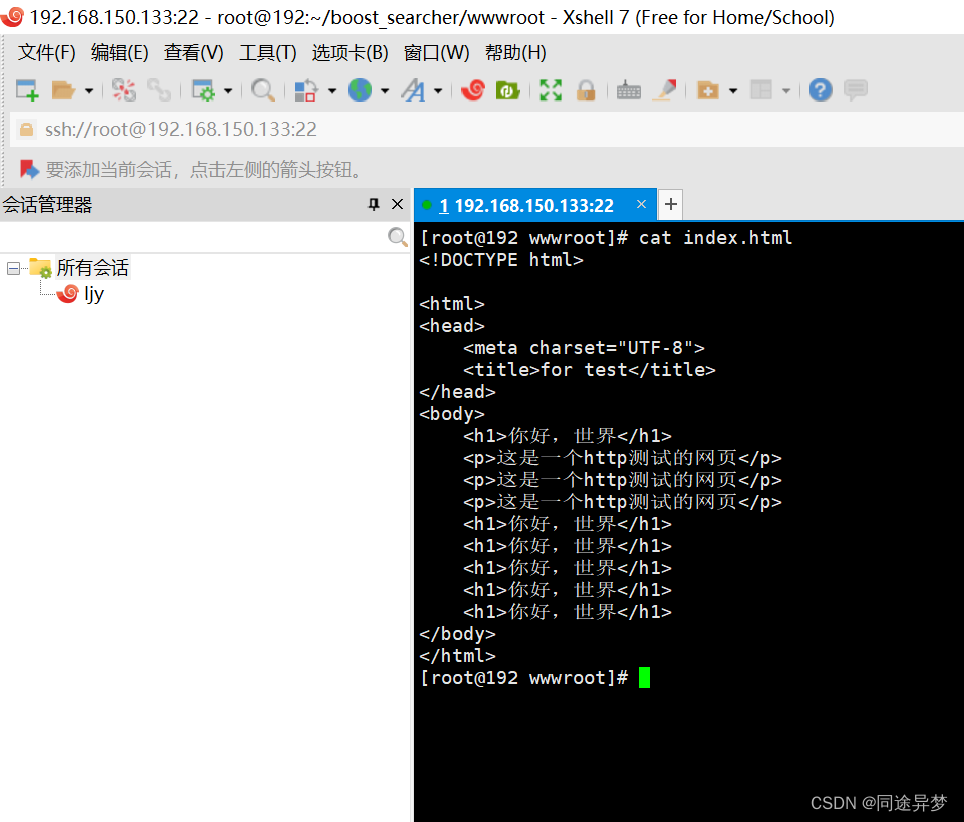
3. 按下Ctrl+S即可同步到我们的服务器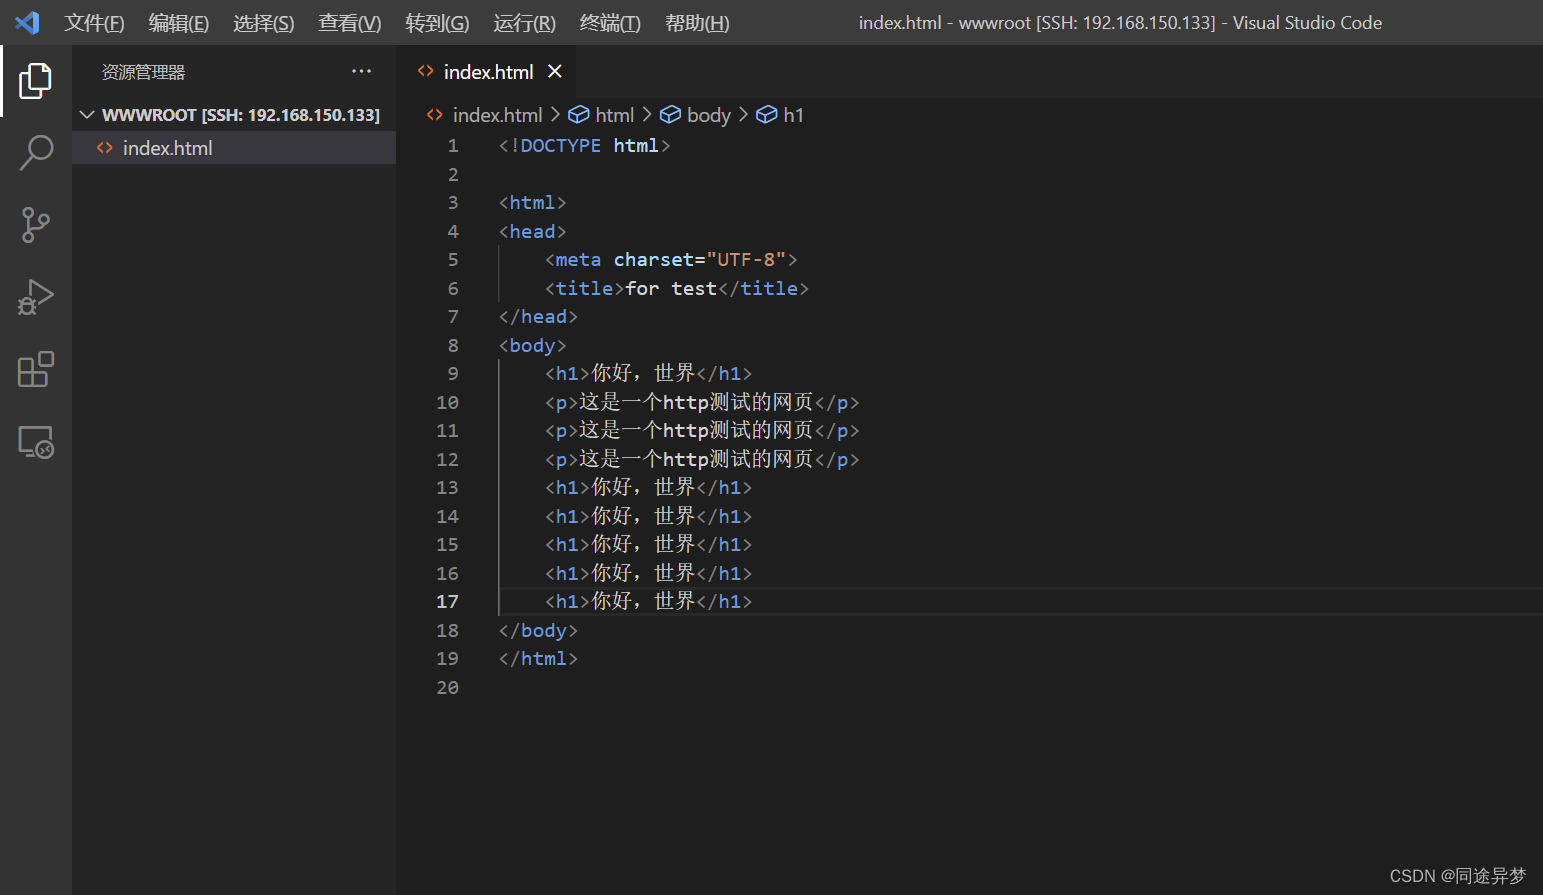
9.2 编写前端代码
1.生成默认框架:!tab
2.网页由标签构成:单标签、双标签
简单了解HTML,CSS,JS
HTML:网页的骨骼--负责网页结构
CSS:网页的肌肉--负责网页美观
JS(JavaSript):网页的动态效果--负责动态效果、前后端交互
编写HTML基本框架
<!DOCTYPE html>
<html lang="en">
<head>
    <meta charset="UTF-8">
    <meta http-equiv="X-UA-Compatible" content="IE=edge">
    <meta name="viewport" content="width=device-width, initial-scale=1.0">
    <title>boost搜索引擎</title>
</head>
<body>
    <div class="container">
        <div class="search">
            <input type = "text" value=" ">
            <button>搜索</button>
        </div>
        <div class = 'result'>
            <div class = "item">
                <a href="#">这是标题</a>
                <p>这是摘要这是摘要这是摘要这是摘要这是摘要这是摘要这是摘要这是摘要</p>
                <i>https://www.qlu.edu.cn/</i>//斜体
            </div>
            <div class = "item">
                <a href="#">这是标题</a>
                <p>这是摘要这是摘要这是摘要这是摘要这是摘要这是摘要这是摘要这是摘要</p>
                <i>https://www.qlu.edu.cn/</i>
            </div>
            <div class = "item">
                <a href="#">这是标题</a>
                <p>这是摘要这是摘要这是摘要这是摘要这是摘要这是摘要这是摘要这是摘要</p>
                <i>https://www.qlu.edu.cn/</i>
            </div>
            <div class = "item">
                <a href="#">这是标题</a>
                <p>这是摘要这是摘要这是摘要这是摘要这是摘要这是摘要这是摘要这是摘要</p>
                <i>https://www.qlu.edu.cn/</i>
            </div>
            <div class = "item">
                <a href="#">这是标题</a>
                <p>这是摘要这是摘要这是摘要这是摘要这是摘要这是摘要这是摘要这是摘要</p>
                <i>https://www.qlu.edu.cn/</i>
            </div>
        </div>
    </div>
</body>
</html>
编写CSS进行美化:
设置标签的属性:
1.选择特定的标签:类选择器、标签选择器,复合选择器
2.设置指定标签的属性:见代码

<style>
        /*去掉网页中的所有的默认内外边距,html盒子模型*/
        *{

            margin:0;/*设置外边距*/
            padding:0;/*设置内边距*/
        }
        /*将我们的body内的内容和html呈现100%吻合*/
        html,
        body{

            height: 100%;
        }
        /*类选择器.container*/
        .container{

            width: 800px;/* 设置div的宽度 */
            margin: 0px auto; /*通过设置外边距达到居中对齐的目的*/
            margin-top: 15px;/*设置外边距的上边距,保持元素和网页上边缘的距离*/
        }
        /* 复合选择器,选中container下的search */
        .container .search{

            width: 100%;/*宽度与父标签保持一致*/
            height: 52px;/*高度设置为52像素点*/
        }
        /*选中input标签,设置标签的属性,先选中(也是复合选择),input:标签选择器*/
        .container .search input{

            float:left;/*设置left浮动,拼接*/
            width: 600px;
            height: 50px;
            border: 1px solid black;/*输入边框高度和颜色*/
            border-right: none;/*去掉input边框的右边框*/
            padding-left: 10px;/*设置内边距,默认文字和左边框不要紧挨着*/
            color: #ccc;/*设置input边框内部的字体的颜色*/
            font-size: 15px;/*设置input边框内部的字体的样式*/
        }
        /*选中button标签,设置标签的属性,先选中(也是复合选择),button:标签选择器*/
        .container .search button{

            float: left;/*设置left浮动,拼接*/
            width: 150px;
            height: 52px;
            background-color:#fc5531;/*设置button的背景颜色*/
            color: #FFF;/*设置字体的颜色*/
            font-size: 17px;/*设置字体的大小*/
            font-family:'Courier New', Courier, monospace;/*修改字体*/
        }
        .container .result{

            width: 100%;
        }
        .container .result .item{

            margin-top: 15px;/*搜索结果之间的距离*/
        }
        /*设置a标签*/
        .container .result .item a{

            display: block;/*设置为块级元素,单独占一行*/
            text-decoration: none;/*去掉a标签的下划线*/
            font-size: 20px;/*设置a标签文字大小*/
            color: #4e6ef2;/*设置字体的颜色*/
        }
        .container .result .item a:hover{

            text-decoration: underline;/*光标放在a标签时会有下划线,效果更明显*/
        }
        /*设置p标签*/
        .container .result .item p{

            margin-top: 4px;
            display: block;
            font-size: 17px;
            font-family:Cambria, Cochin, Georgia, Times, 'Times New Roman', serif;
        }
        /*设置i标签*/
        .container .result .item i{

            display: block;
            font-size: 14px;
            font-style: normal;/*取消斜体风格*/
            color: green;
        }
    </style>
编写JS:
如果直接使用原生的JS,成本会比较高(xml),推荐使用JQuery。
<script>
        function Search()
        {

            //alert("Hello js!");/*浏览器的一个弹出框*/
            //1.提取数据,$可以理解为就是JQuery的别称
            let query = $(".container .search input").val();
            console.log("query = "+ query);//console是浏览器的对话框,可以用来进行查看js数据

            //2.发起http请求,ajax属于JQuery一个和后端进行数据交互的函数
            $.ajax({

                type: "GET",
                url: "/s?word=" + query,
                success:function(data)
                {

                    console.log(data);
                    BuildHtml(data);
                }
            });
        }
        function BuildHtml(data)
        {

            let result_lable = $(".container .result");//获取html中的result标签
            //清空历史搜索结果
            result_lable.empty();
            for( let elem of data)
            {

                //console.log(elem.title);
                //caches.log(elem.url);
                let a_lable = $("<a>",{

                    text:elem.title,
                    href:elem.url,
                    target:"_blank"//跳转到新界面
                });
                let p_lable = $("<p>",{

                    text:elem.desc
                });
                let i_lable = $("<i>",{

                    text:elem.url
                });
                let div_lable = $("<div>",{

                    class:"item"
                });
                a_lable.appendTo(div_lable);
                p_lable.appendTo(div_lable);
                i_lable.appendTo(div_lable);
                div_lable.appendTo(result_lable);
            }
        }
    </script>
十. 优化
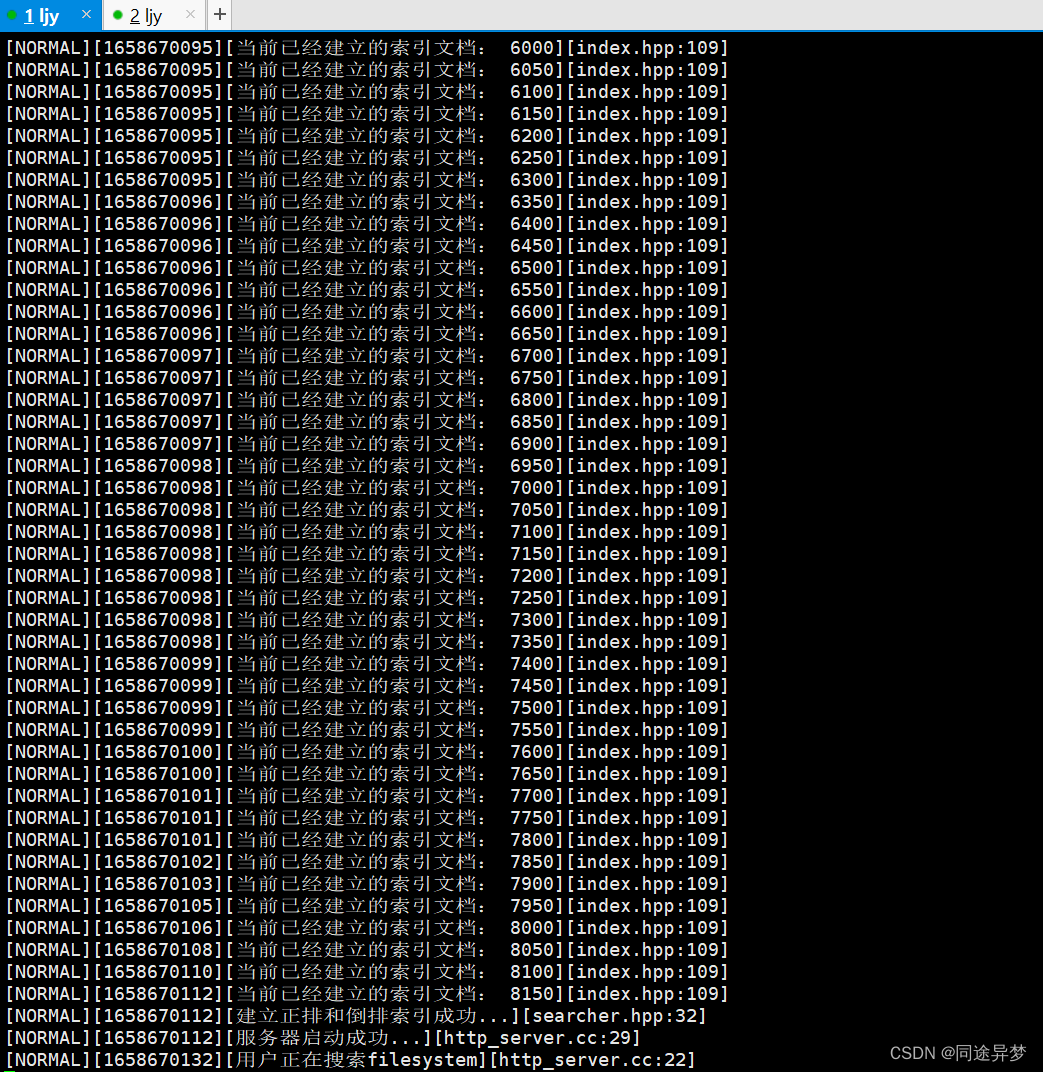
10.1 添加日志
#pragma once

#include<iostream>
#include<string>
#include<ctime>

#define NORMAL 1
#define WARNING 2
#define DEBUG 3
#define FATAL 4

#define LOG(LEVEL,MESSAGE) log(#LEVEL,MESSAGE,__FILE__,__LINE__)

void log(std::string level, std::string message, std::string file, int line)
{

    std::cout<< "[" << level << "]" << "[" << time(nullptr) << "]" << "[" << message << "]" << "[" << file << ":" << line << "]" << std::endl;
}
10.2 挂起服务
使用挂起服务可以帮助我们即使在没有运行./http_server的情况下,依旧可以建立客户端与服务器的连接,继续使用我们的搜索引擎。
部署挂起服务:
nohup ./http_server > log.txt 2>&1 &

终止挂起服务:
kill + 进程号

十一. 效果
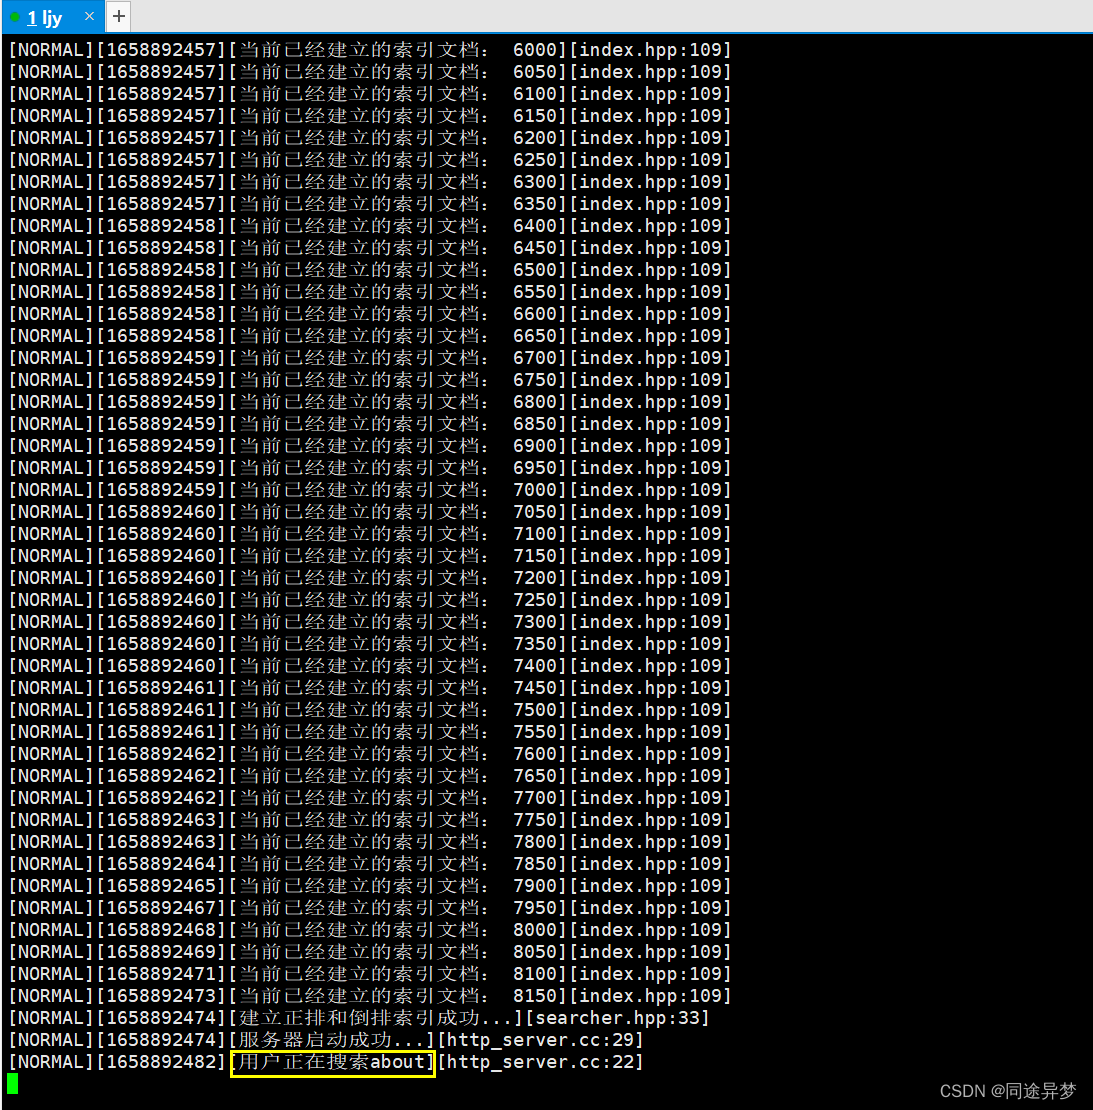
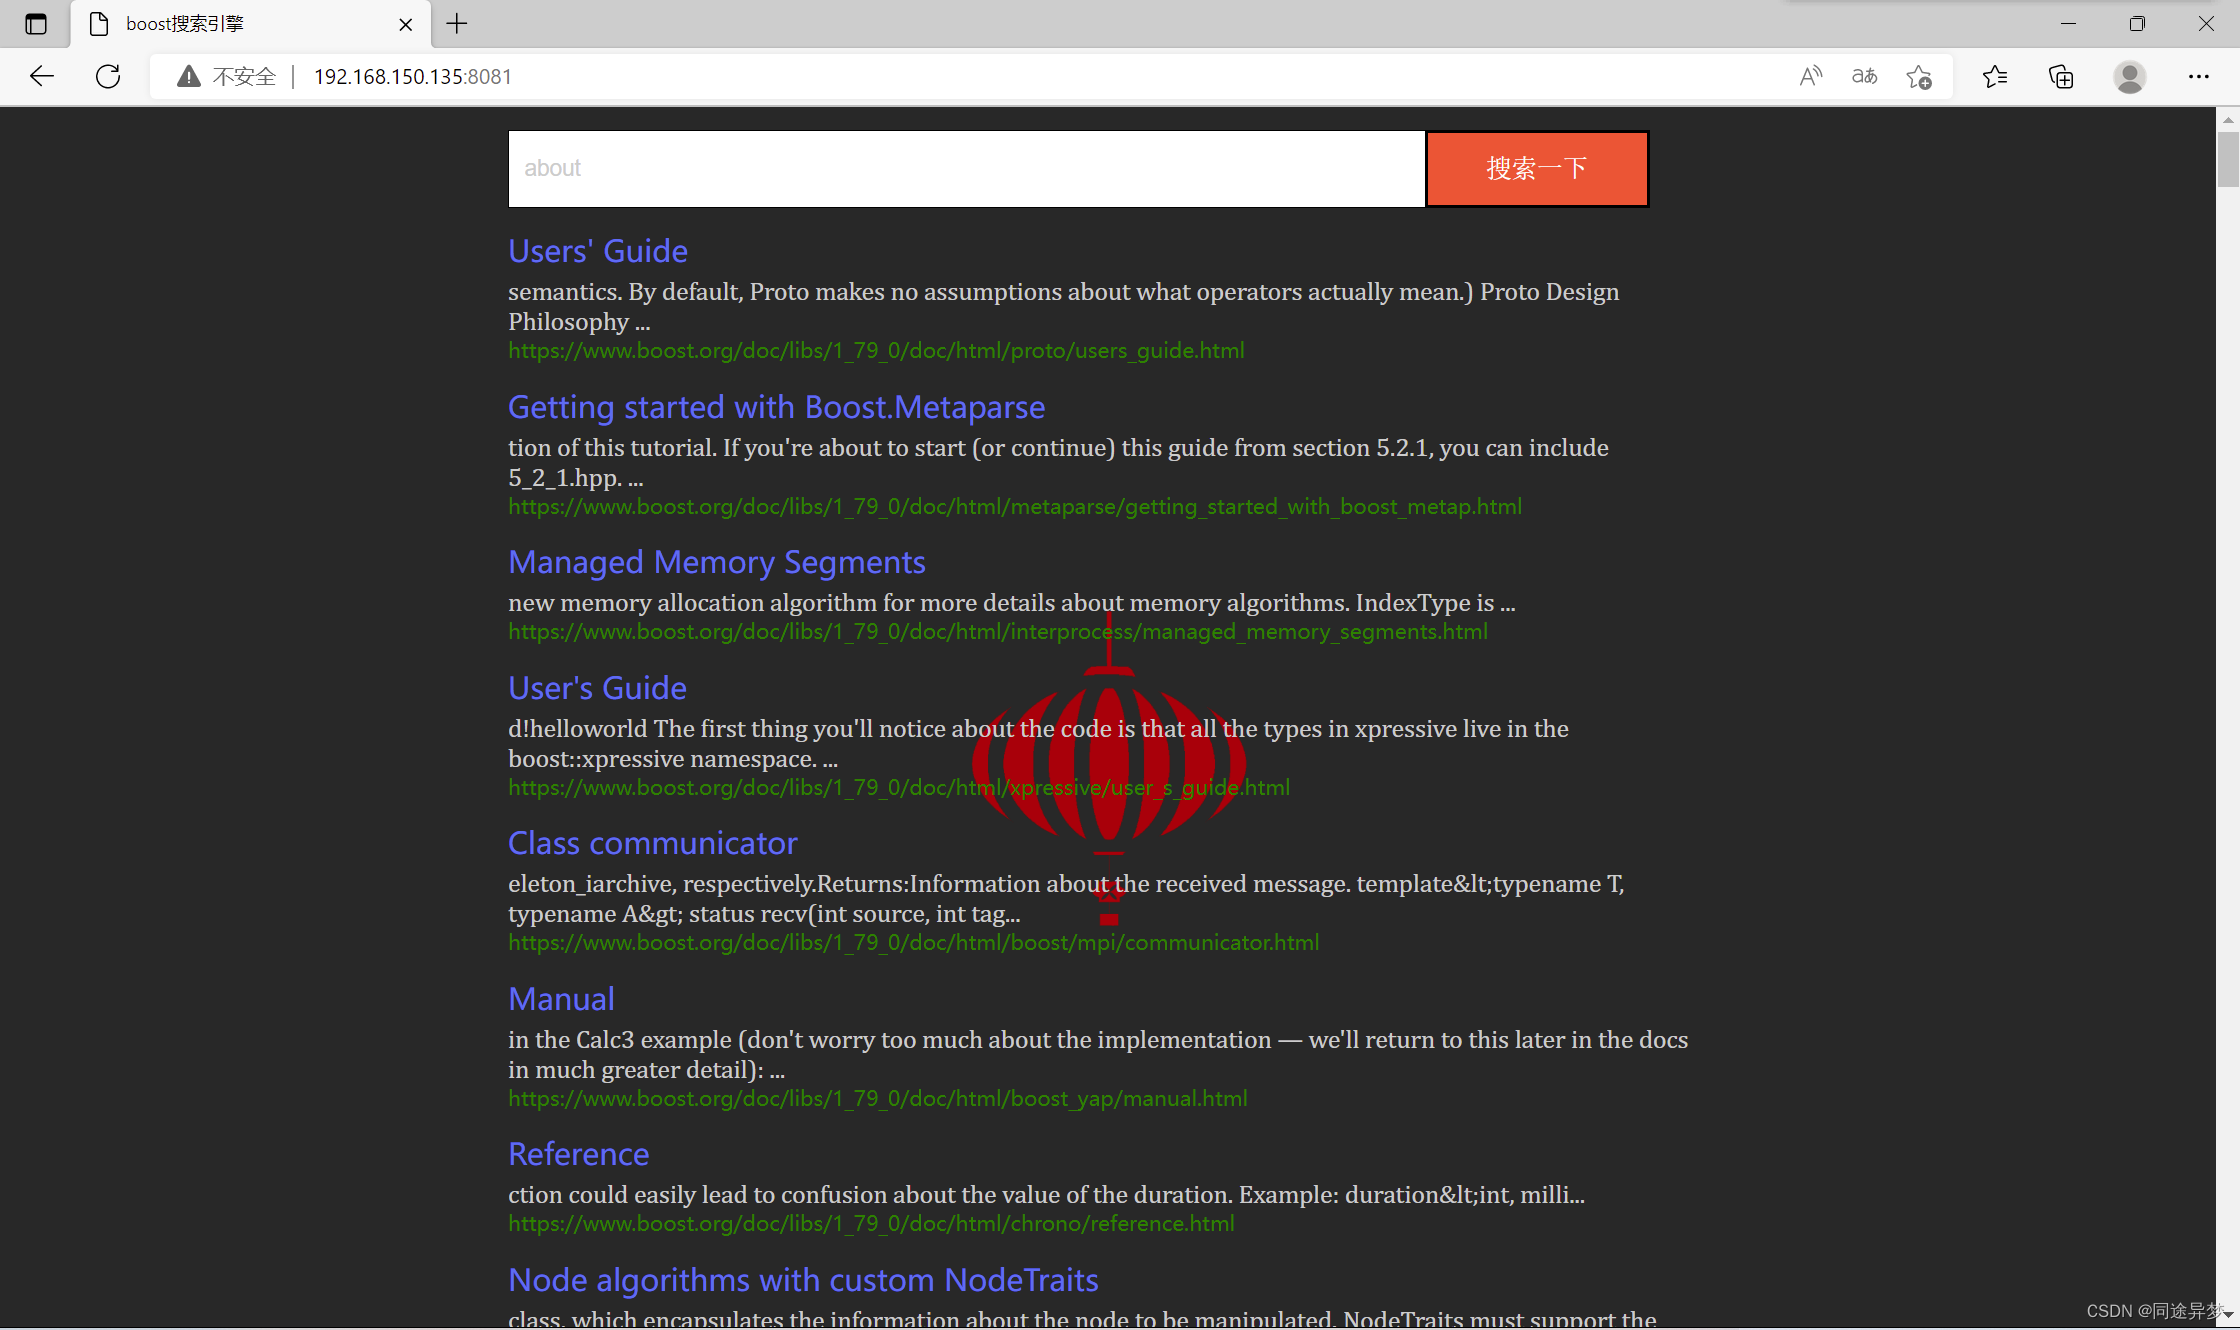
总结
//原创文章,请勿转载以及为个人使用。

//源代码地址

https://github.com/Ph4rynx/BOOST_SEARCHER
边栏推荐
- Simple record of Flink principle flow chart
- 2022年T电梯修理考题及答案
- Returns the maximum number of palindromes in a string
- Small Turtle Compilation Notes
- [Original] Start the XPS/OXPS reader that comes with Windows 10
- 第08章 索引的创建与设计原则【2.索引及调优篇】【MySQL高级】
- There are n steps in total, and you can go up to 1 or 2 steps each time. How many ways are there?
- 【原创】启动Win10自带的XPS/OXPS阅读器
- Qt中对象树的机制介绍以及底层实现,各种结果分析:(以及自己写容易犯错的点)
- web端动效 lottie-web 使用
猜你喜欢
随机推荐
【指针内功修炼】深度剖析指针笔试题(三)
esp8266-01s刷固件步骤
Example 037: Sorting
云开发校园微社区微信小程序源码/二手交易/兼职交友微信小程序开源源码
TOML configuration file format, YAML's top contender
参加Oracle OCP和MySQL OCP考试的学员怎样在VUE预约考试
The browser
JVM内存和垃圾回收-07.堆
查看mysql死锁语法
在更一般意义上验算移位距离和假设
View mysql deadlock syntax
异步编程解决方案 Generator生成器函数、iterator迭代器、async/await、Promise
倒计时2天,“文化数字化战略新型基础设施暨文化艺术链生态建设发布会”启幕在即
sudo 权限控制,简易
Kubernetes:(九)coredns(浪不动了)
Security First: Tools You Need to Know to Implement DevSecOps Best Practices
小甲鱼汇编笔记
Architecture of the actual combat camp module three operations
Parquet encoding
简单排序(暑假每日一题 14)


