当前位置:网站首页>S32 design studio for arm 2.2 quick start
S32 design studio for arm 2.2 quick start
2022-07-04 23:20:00 【Auto FAE advanced road】
List of articles
1. brief introduction
This paper mainly introduces S32 Design Studio for ARM 2.2 Installation and use of development environment , The use of SDK Built in for this environment RTM 3.0.0, It aims to help readers quickly master the development environment , More convenient development S32K1xx series MCU.
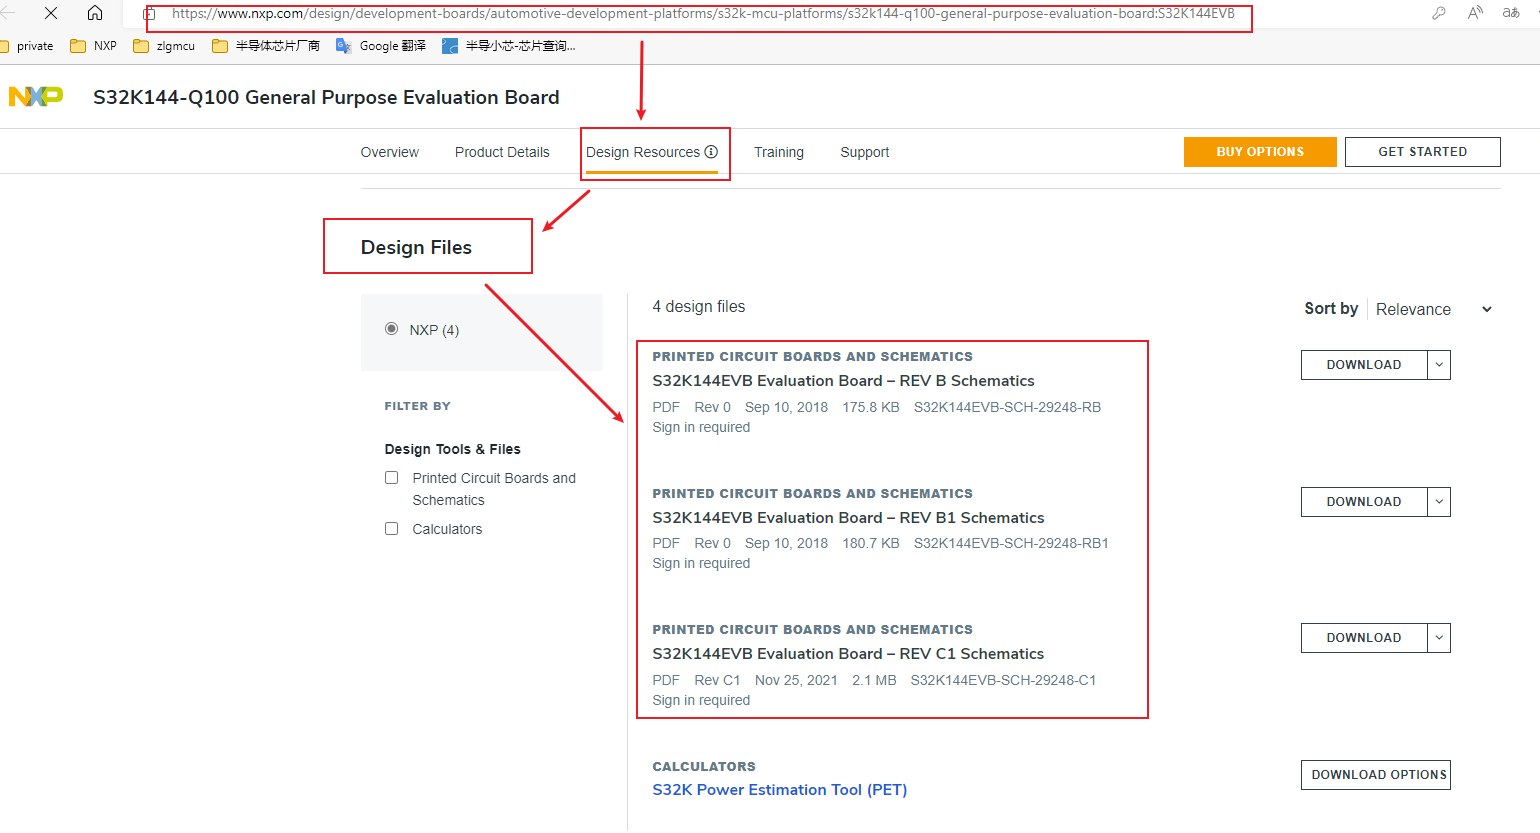
The hardware corresponding to this article is S32K144EVB-Q100, The official website information link is :S32K144EVB: S32K144 Evaluation Board, Hardware information such as schematic diagram is shown in the following figure :
2. Download and install
2.1 S32DS brief introduction
S32 Design Studio for ARM The development environment is mainly for the convenience of user development S32K1xx The birth of the , It also supports KEA series , But the supporting graphic tools Processor Expert Currently only supported S32K1xx series .
This development environment is based on Eclipse IDE、GNU Compiler collection (GCC) and GNU The debugger (GDB) Including open source software , There is no code size limit , And free to use .
S32 Design Studio for ARM At present, there are four versions ,V1.3,V2.0,V2.2,V2018.R1. among V2018.R1 The version has the most patches , Supported by SDK There are also the most versions ,NXP Most of the official website S32K1xx Routines are also based on this version of the development environment . But for just touching S32K1 Little buddy , I still recommend V2.2 edition , Here's why :
- V2.2 Version of the development environment integrates RTM 3.0.0 Version of SDK,2018.R1 The version needs to be patched ( time-consuming ) To use this SDK.
- V2.2 Version can be SDK Update to RTM3.0.3 edition , Repair the RTM3.0.0 Some of the versions bug.
- although S32 Design Studio for S32 Platform 3.x The platform is updated S32K1xx Of RTM 4.0.0 edition , But the graphical configuration tool is changed to Config Tools, There is no relevant introduction Processor Expert many , Novices are not recommended to use .
2.2 S32DS download
- open NXP The website links , As shown below , Registered account , and Login account .
NXP Semiconductors Official Site | Home

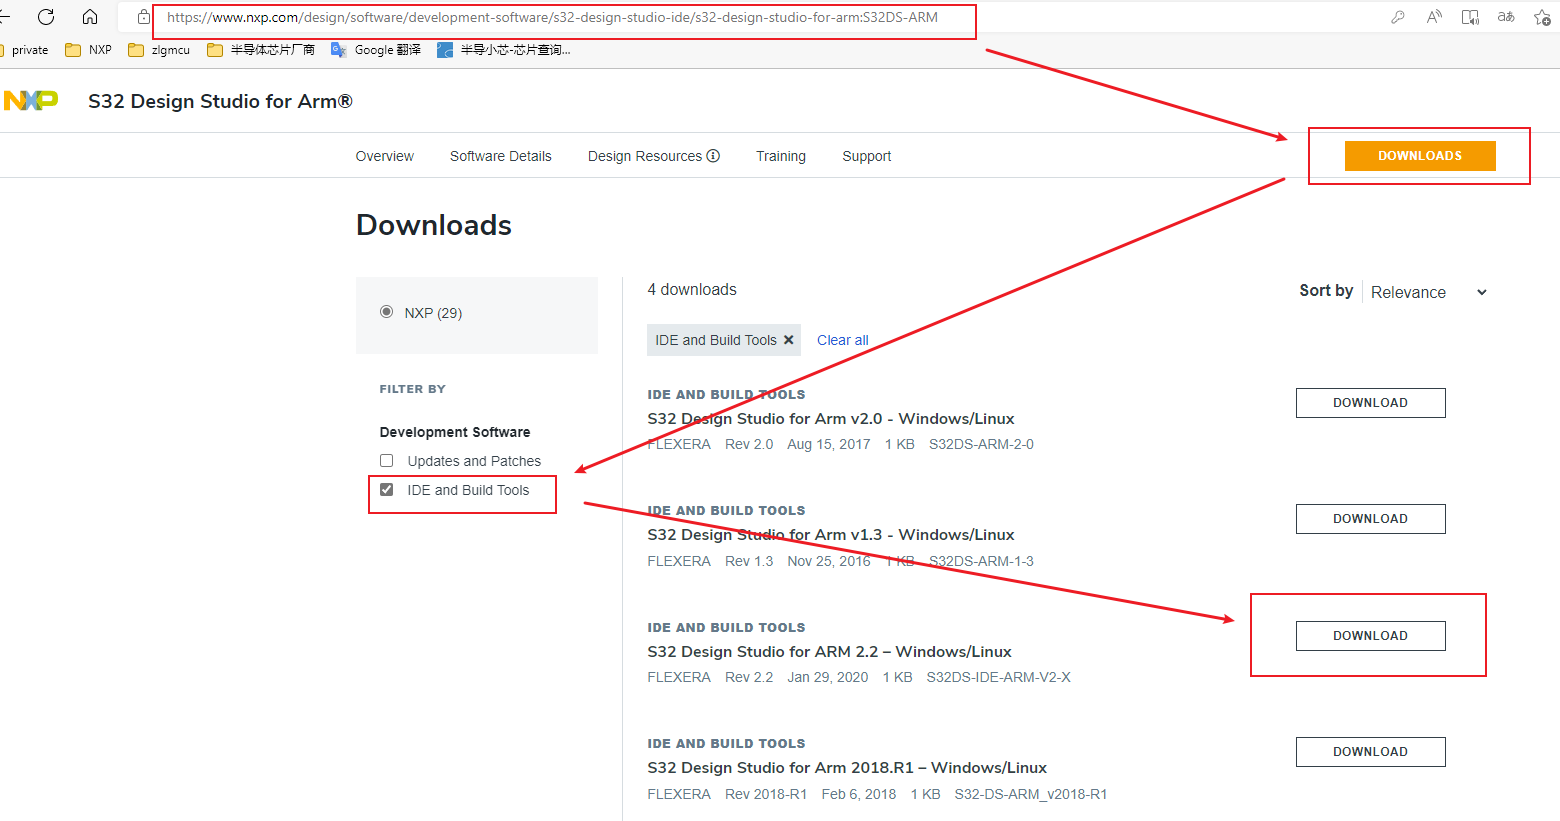
- open S32 Design Studio for ARM Link to the official website of , As shown below :
S32 Design Studio IDE for Arm based MCUs | NXP Semiconductors
- Click on S32 Design Studio for ARM 2.2( Later referred to as" S32DS 2.2) Download link for , As shown in the figure below :
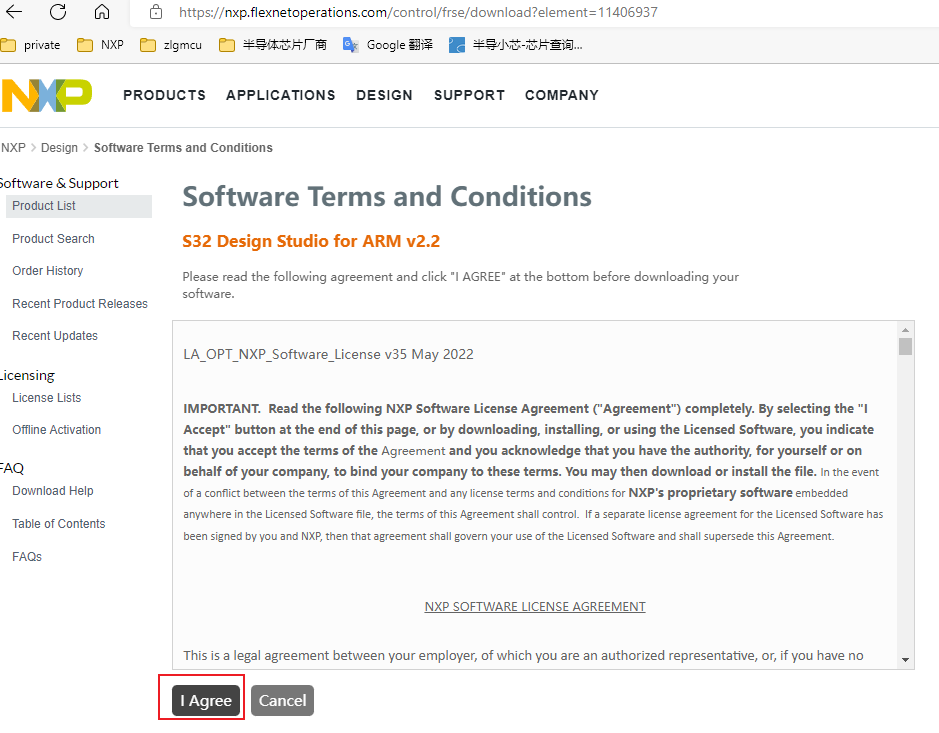
- Click agree on the pop-up installation agreement .
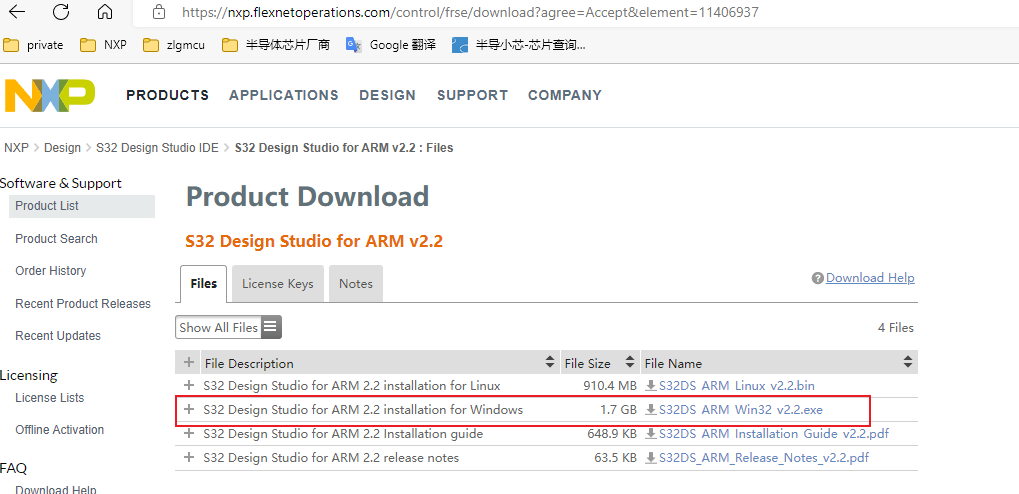
- choice Windows Download the installation package of the platform .
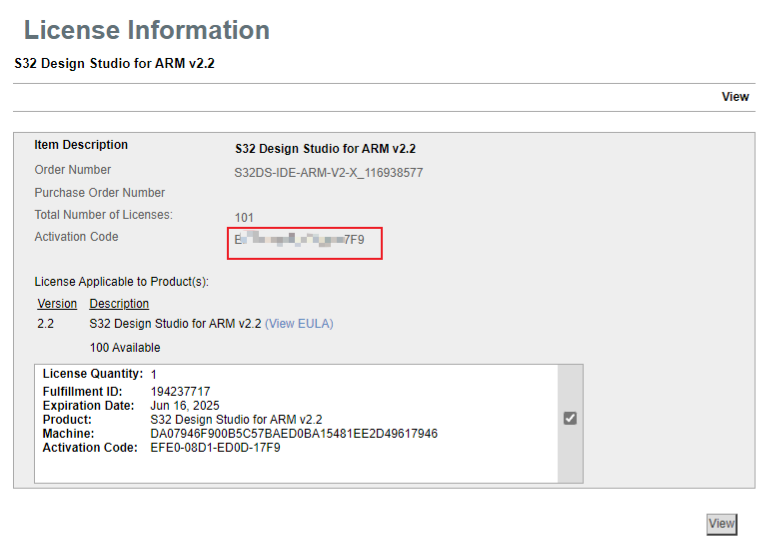
- While downloading the installation package, click License Keys.
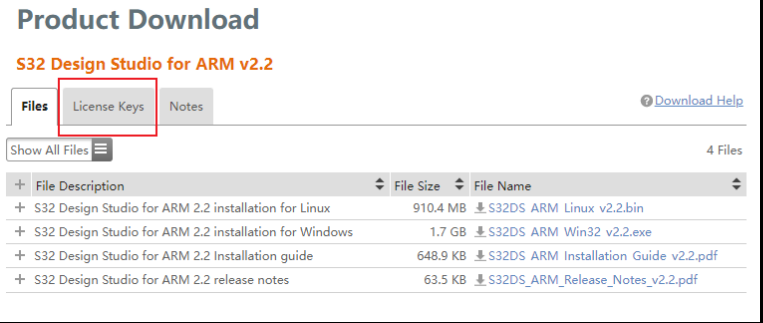
- Save the pop-up activation code , It will be used in later installation . meanwhile ,NXP The activation code will also be sent to the user by email , It's just that sometimes emails don't arrive so quickly .
2.3 S32DS install
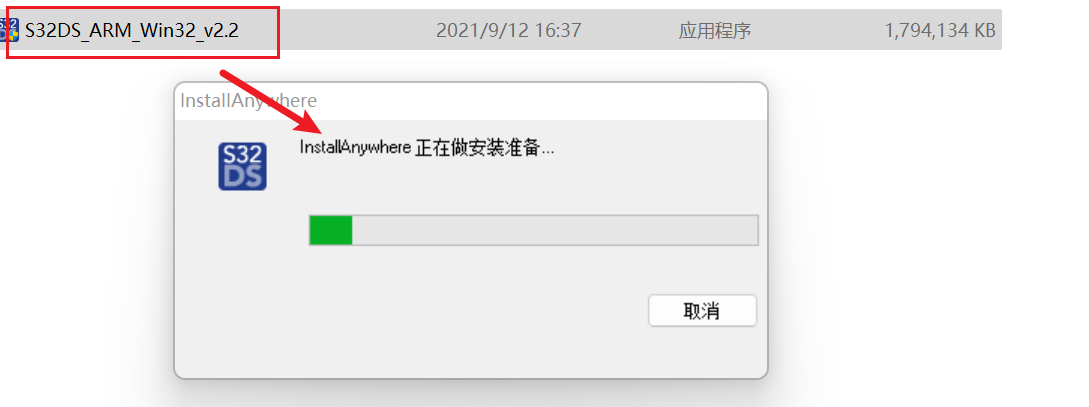
- Click to download the good installation package , Enter the installation preparation interface .
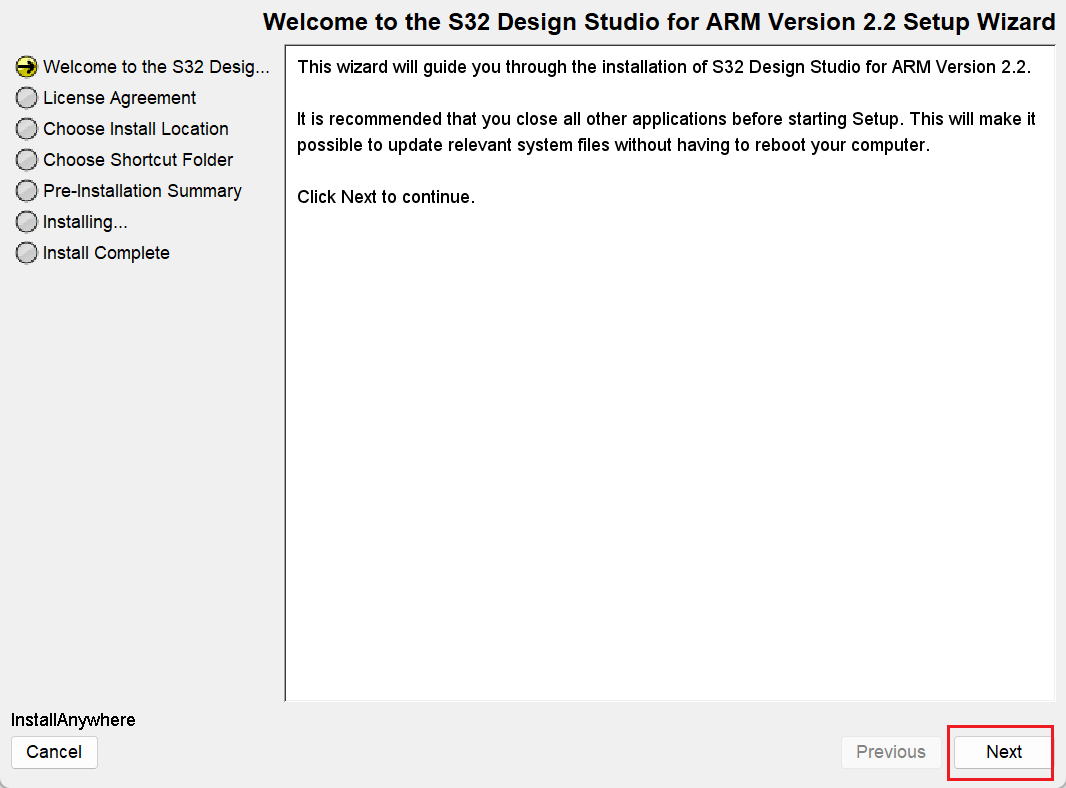
- When the installation is ready , The installation wizard will pop up , Click on Next.
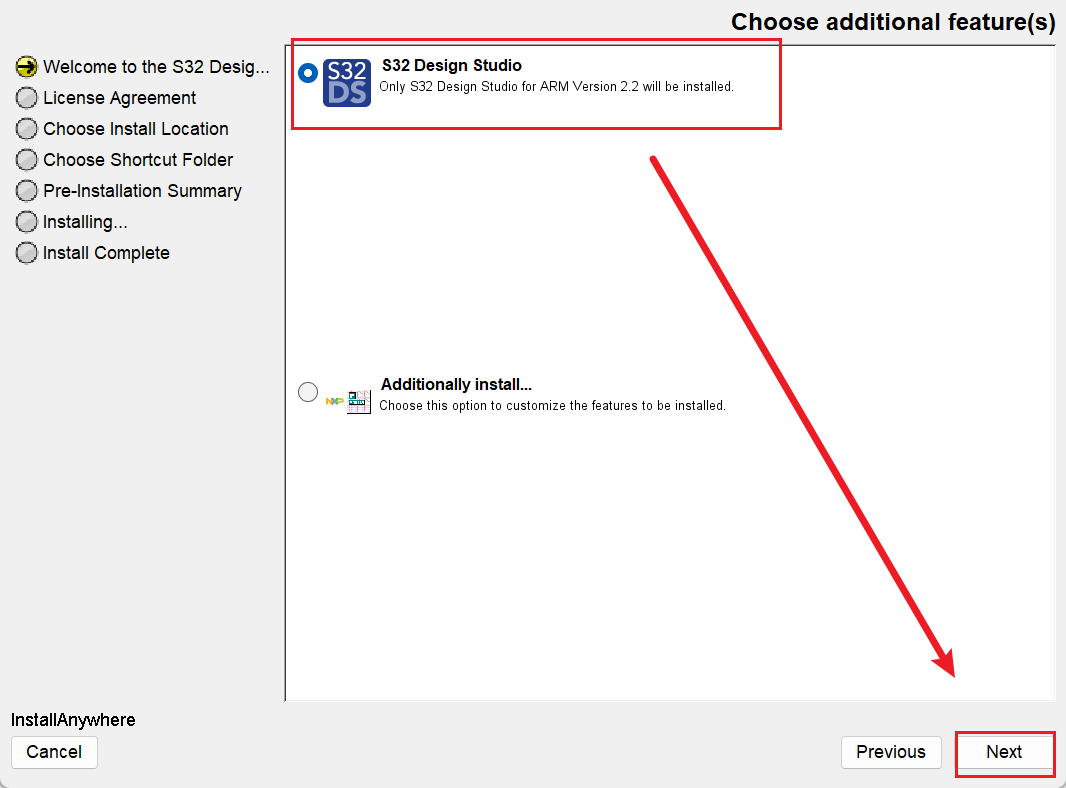
- Select install only S32DS 2.2, Click on Next.
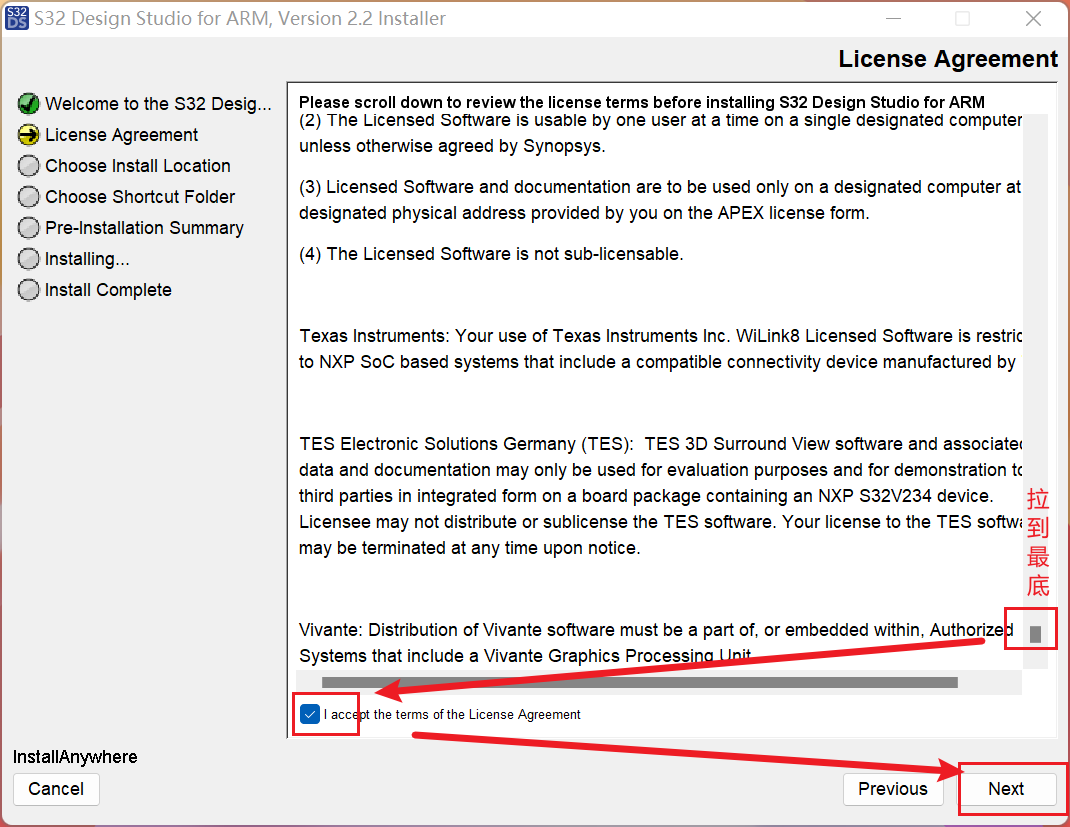
- Pull the installation agreement to the bottom , Check OK , And then click Next.
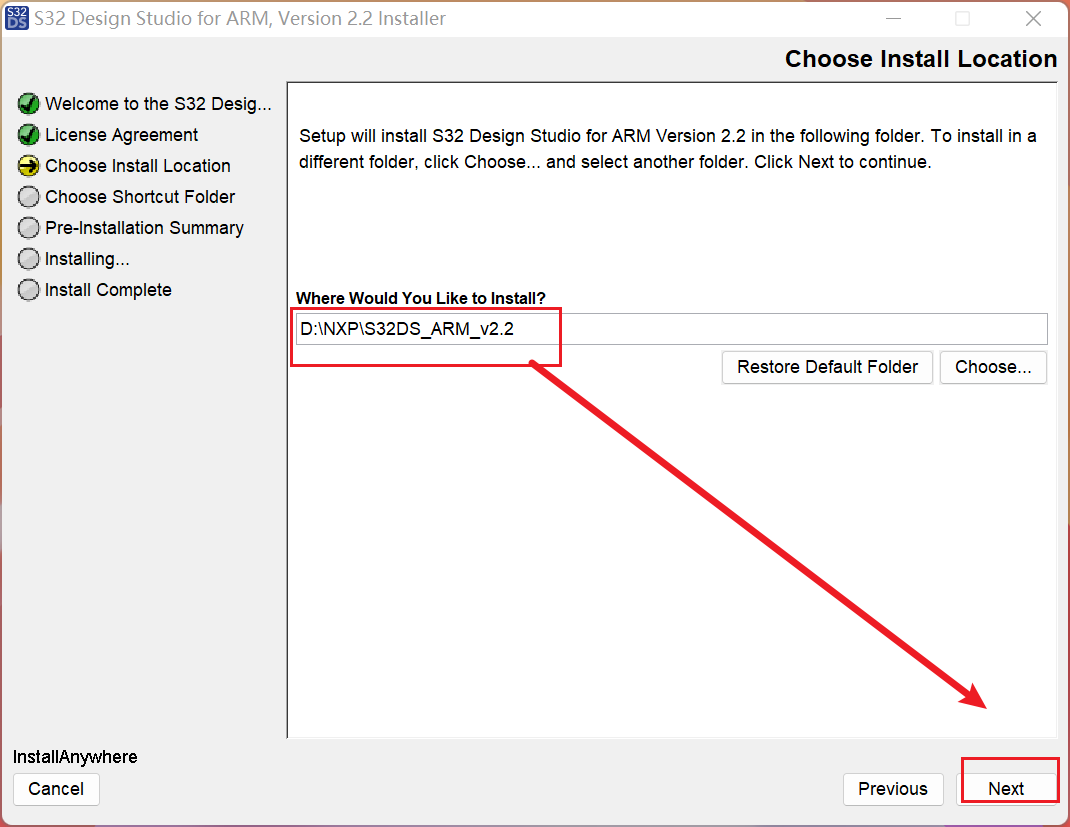
- Select the installation directory , Here I choose D Disk directory , Click on Next.
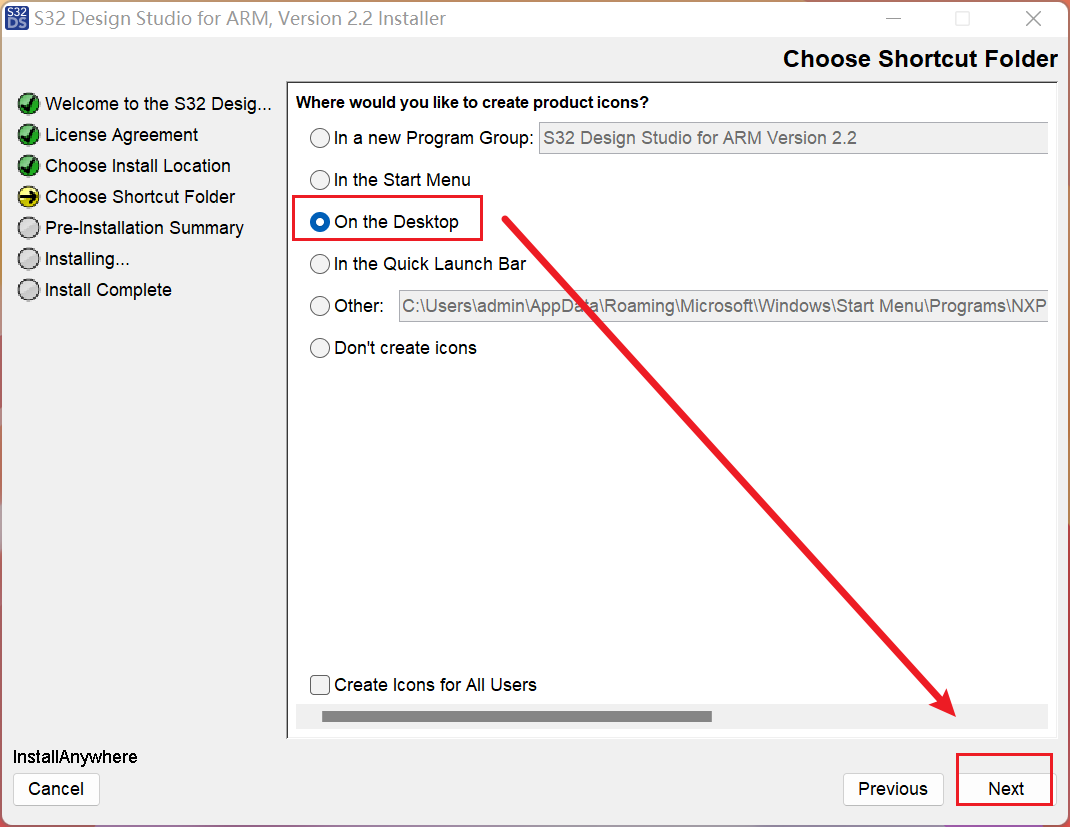
- Select where the icon was created , Click on Next.
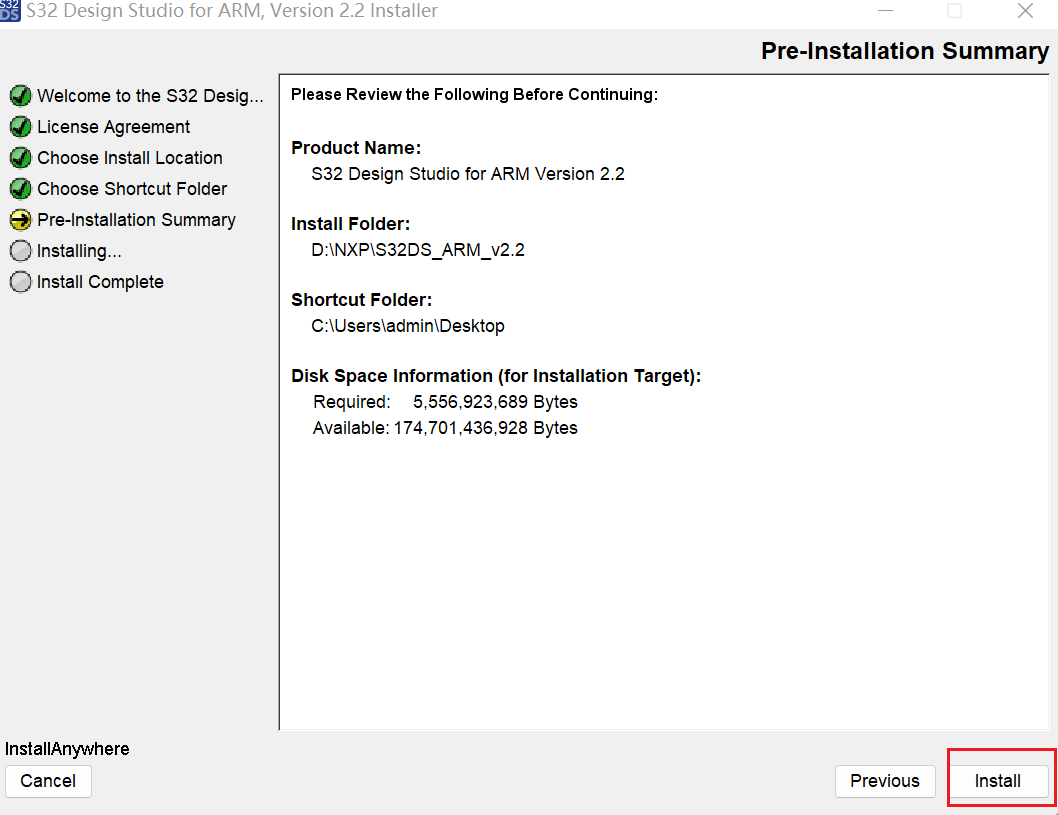
- Click the Install button , Enter the installation process .
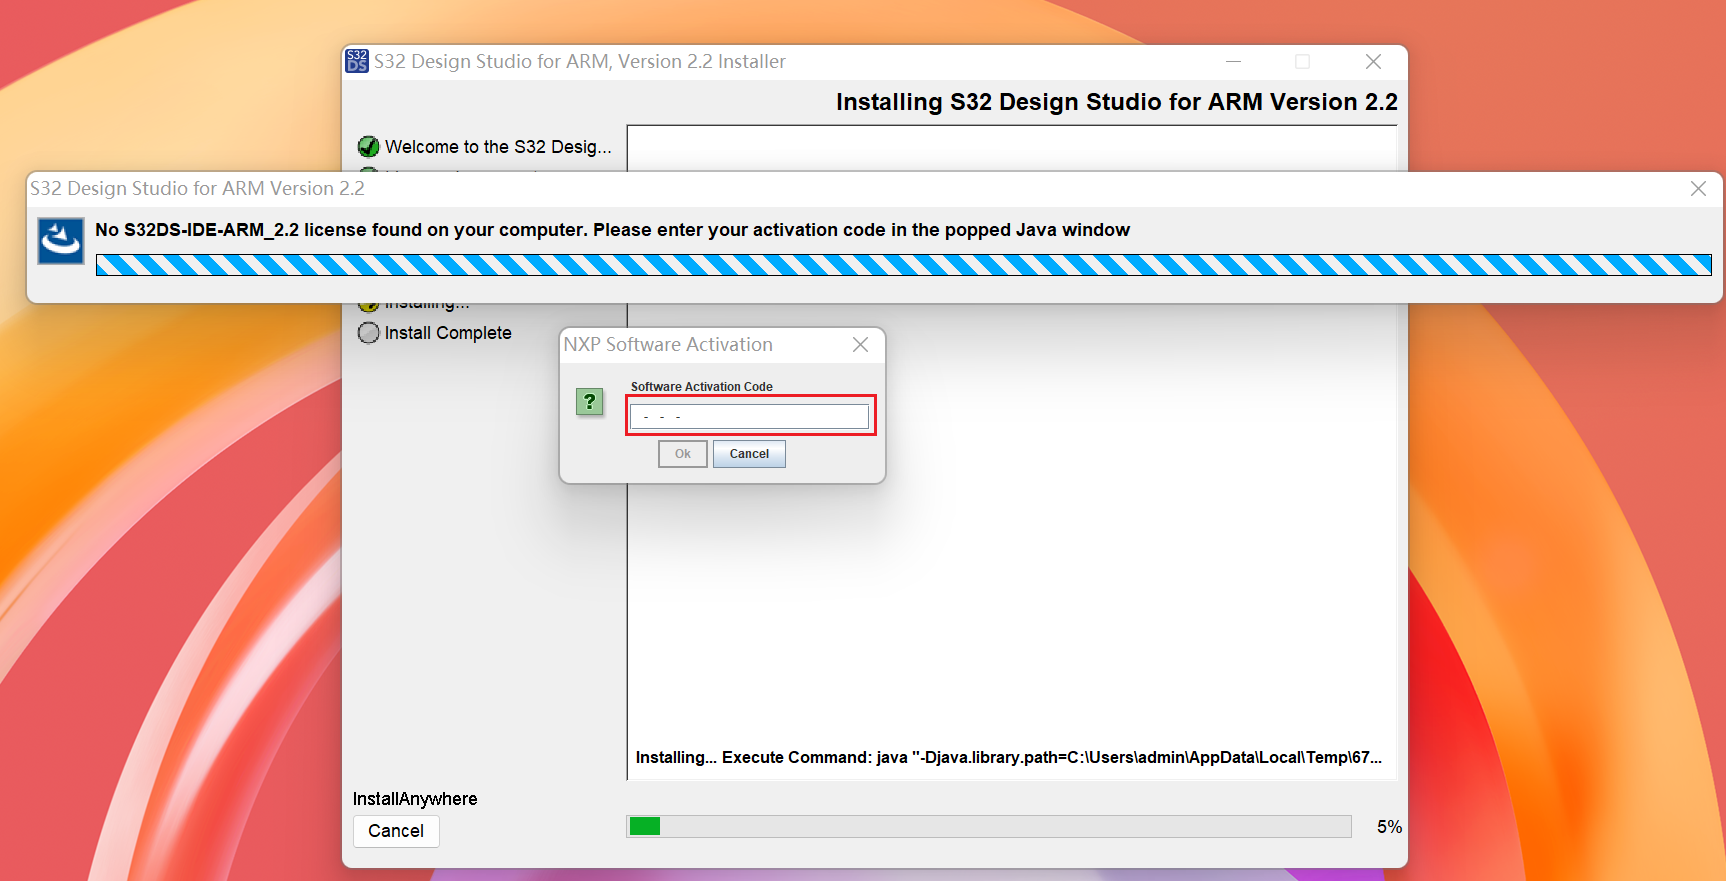
- After a few seconds, the activation interface will pop up , Enter the previously saved activation code , Click on OK.
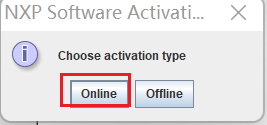
- Choose online activation mode .
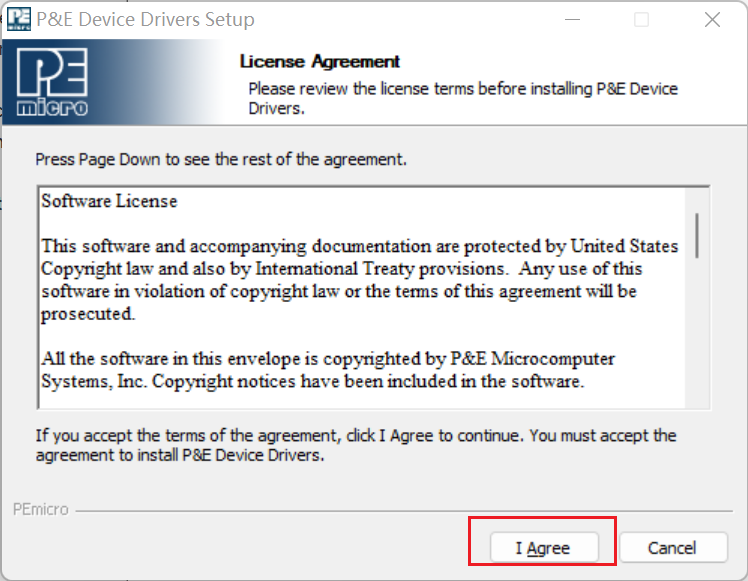
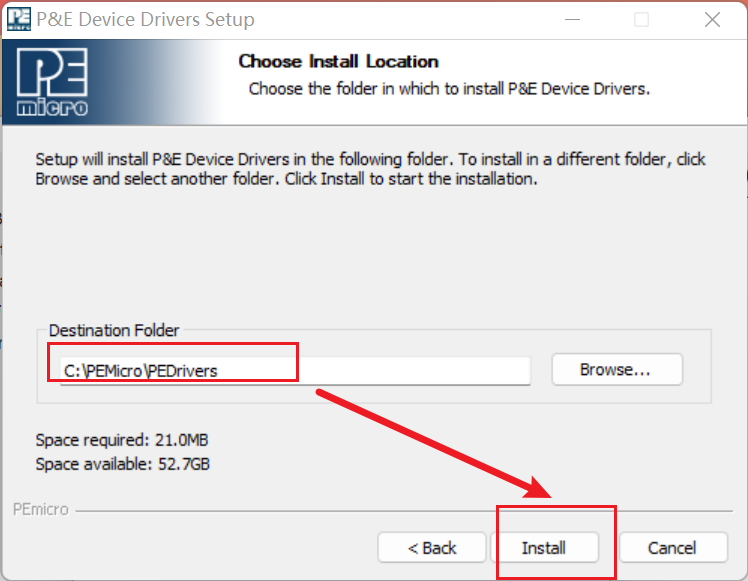
- During installation , The installation will pop up PE Driven interface , Click agree and select the default directory for installation . At the same time to install PE Click Yes in the pop-up window of the driver installation process .
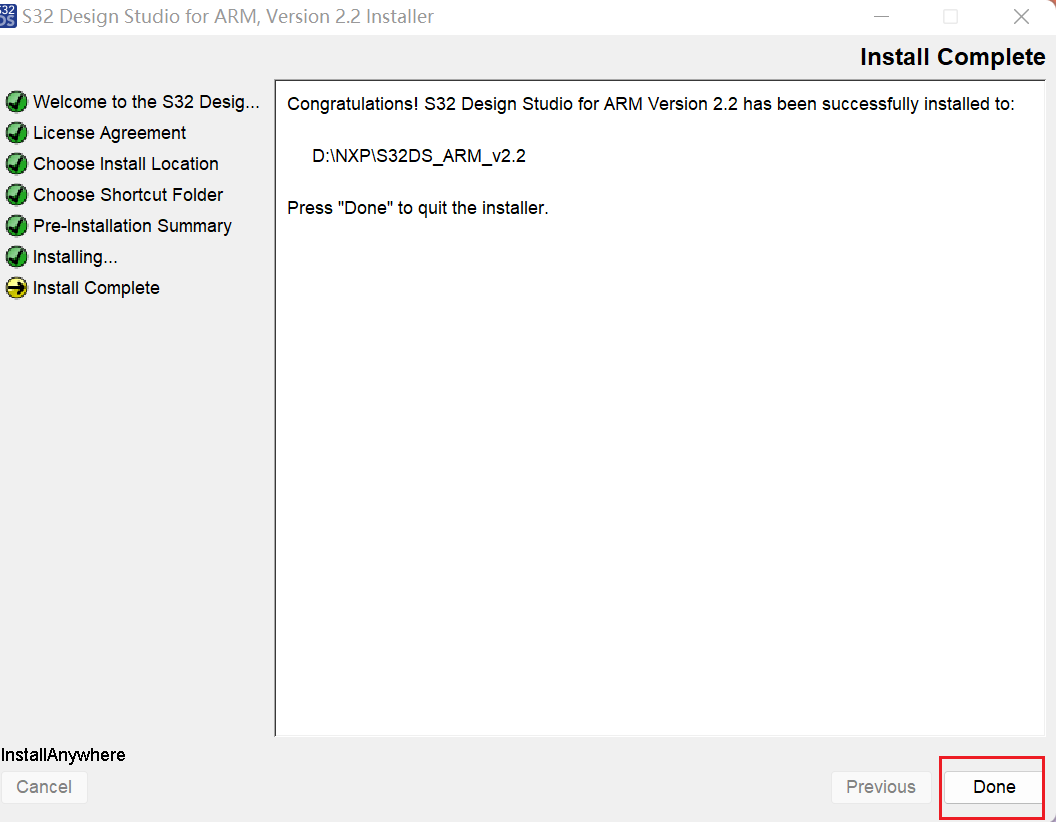
- After installation , Click the Done Installation is complete .
3. New project and import project
3.1 S32DS 2.2 Initial configuration
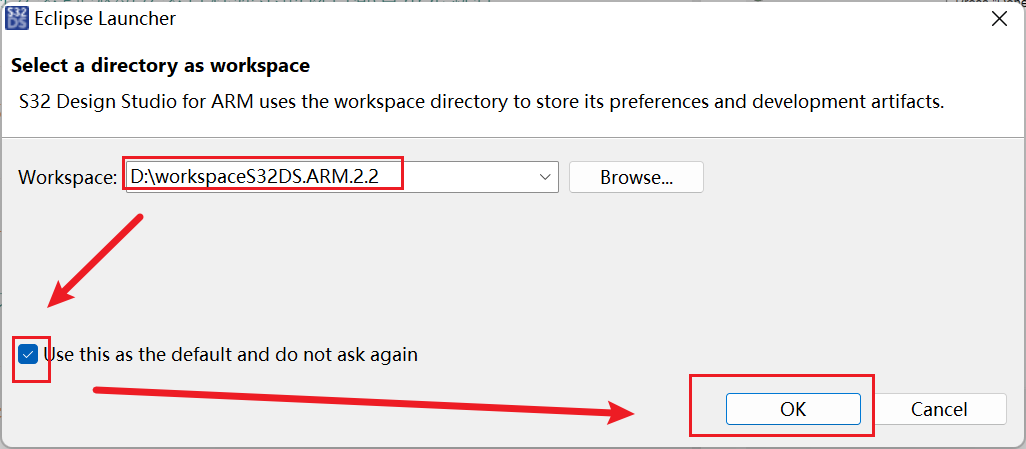
- The first time S32DS 2.2 You will be prompted to select an address as Workspace( Frequent replacement is not recommended ), Projects opened or created later will be automatically placed in this Workspace. It is recommended to choose a disk directory with large free space .
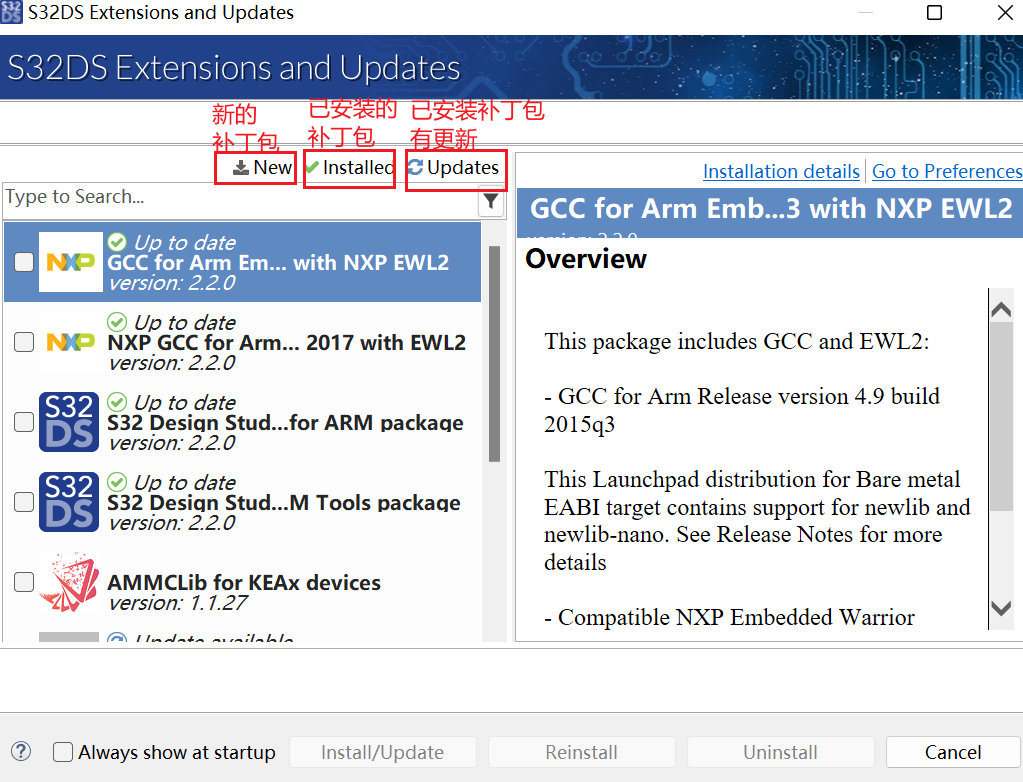
- Choose good WorkSapce after , An update window will pop up , Click the corresponding menu to display the corresponding patch information , As shown in the figure below . If you don't want to pop up this interface every time you open it , Cancel the lower left corner Always show at startup Checked by . There is no need to install a patch this time , Can be closed .
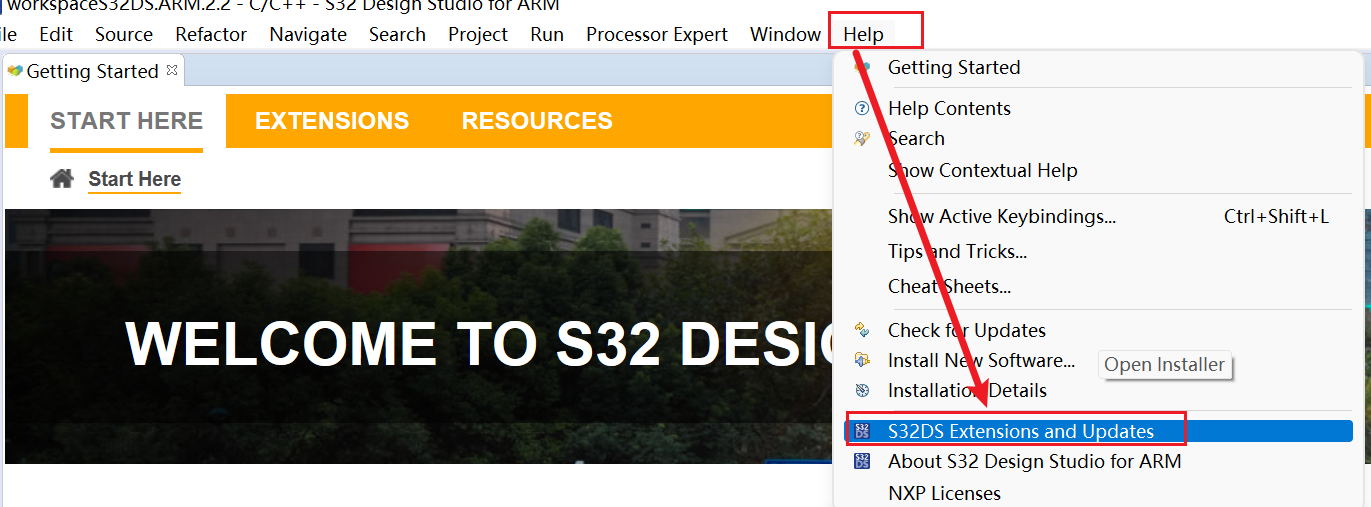
- If you need to update the patch later , In the main interface Help Open the pull-down menu , Here's the picture .
- Getting Started The web page has Create a project And other hyperlinks to common scenes , Click to jump directly to the corresponding interface or corresponding document .

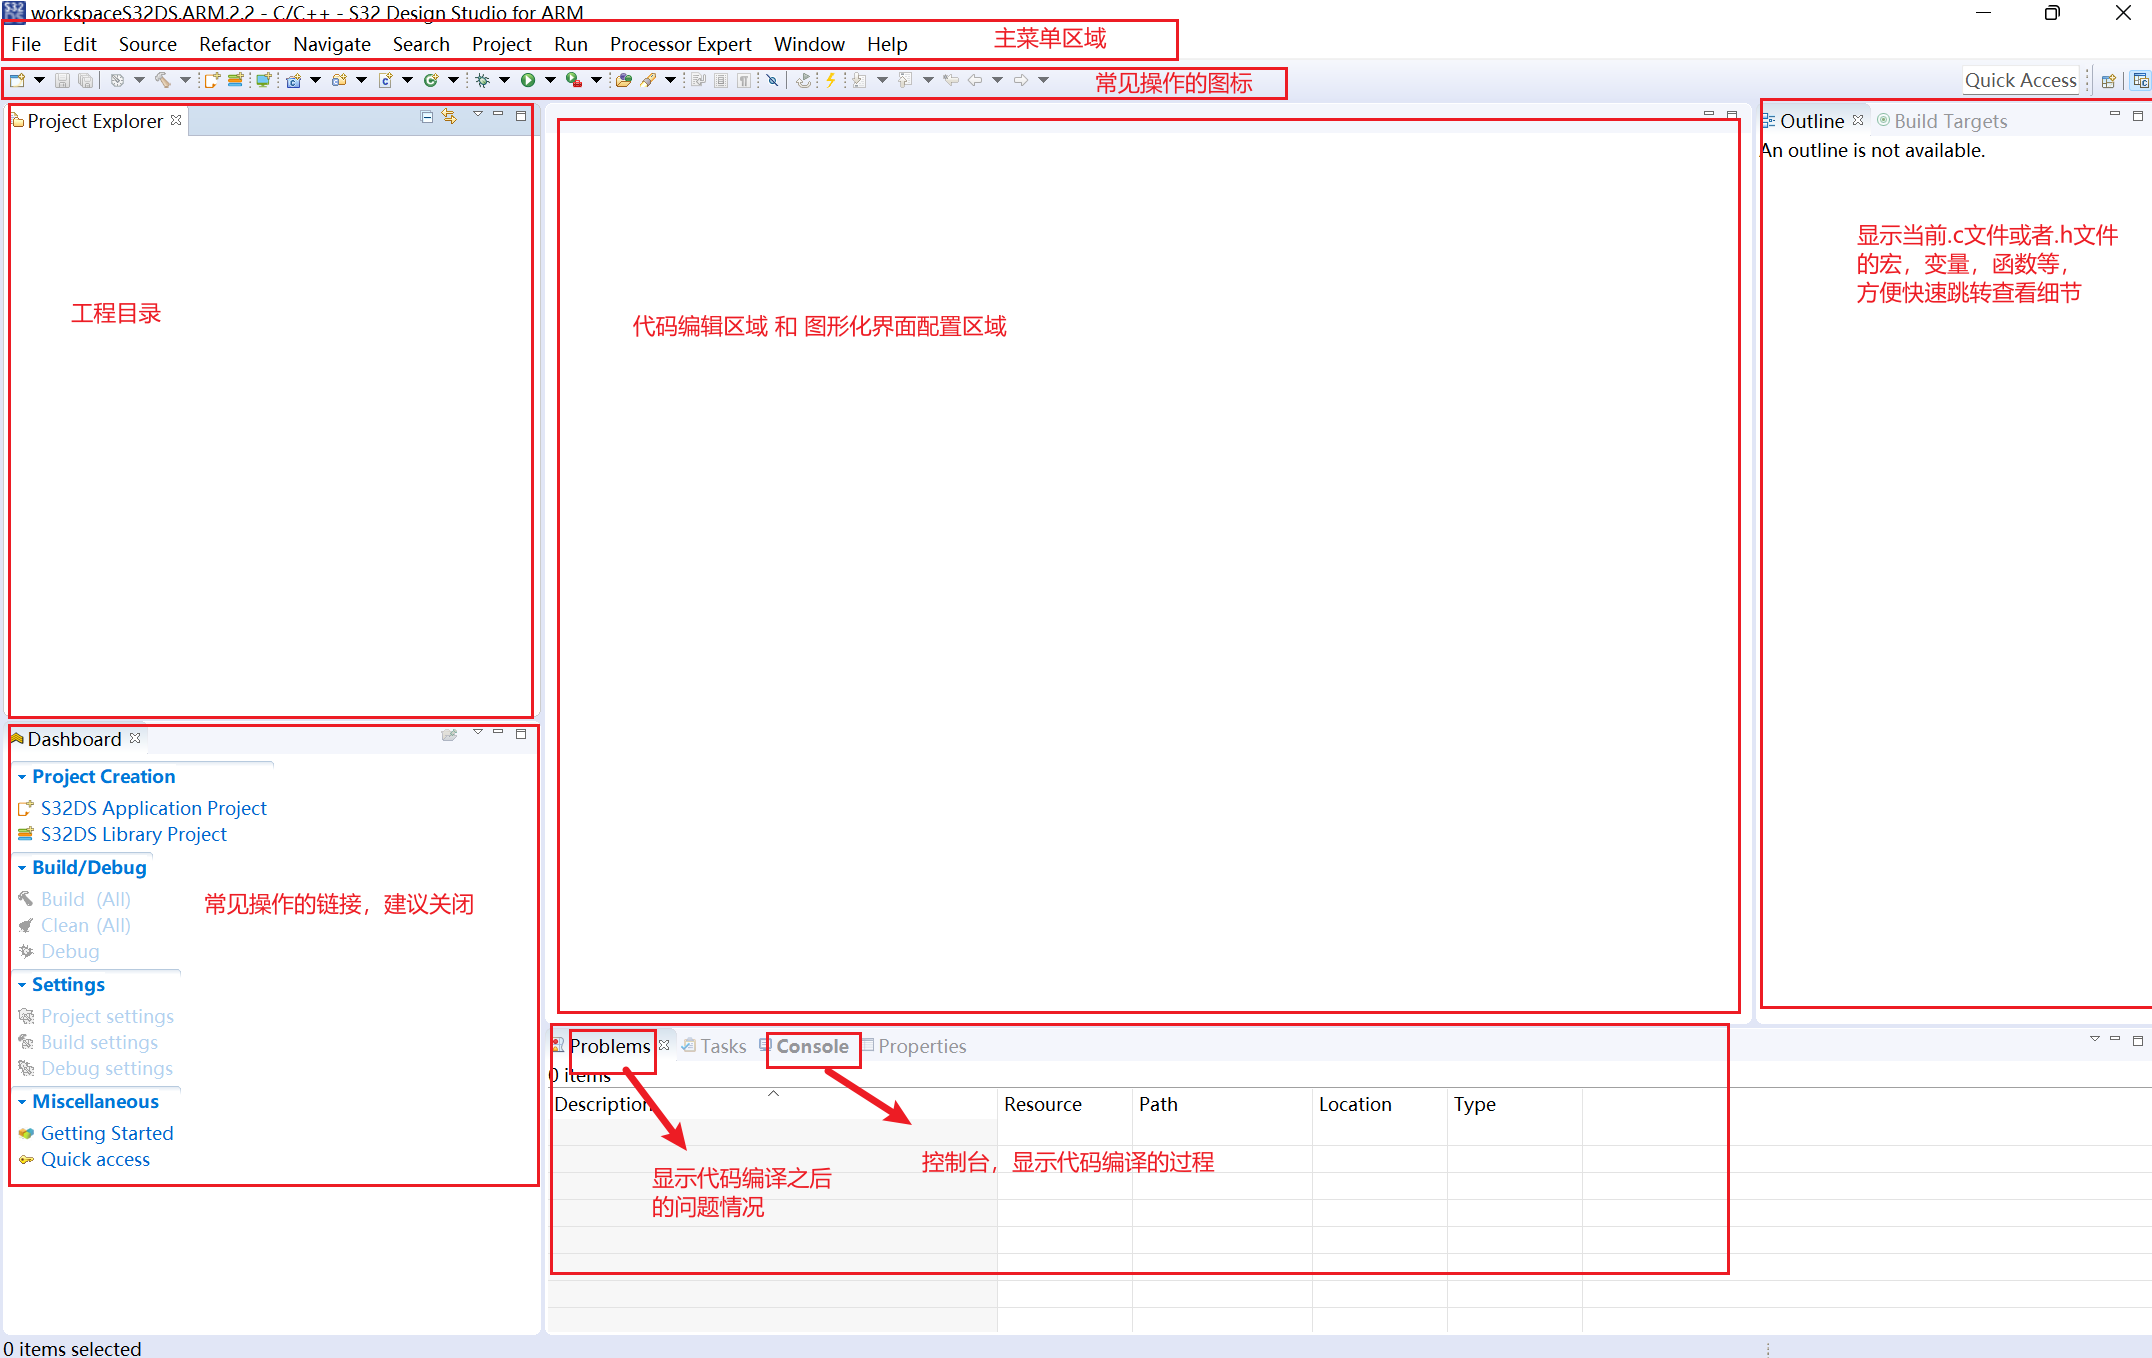
- close Getting Started Interface , Will enter the S32DS 2.2 main interface , The description of the main areas is shown in the figure below :
Get the work done , Next comes the new project .
3.2 New project
There are three types of new projects , As shown below :
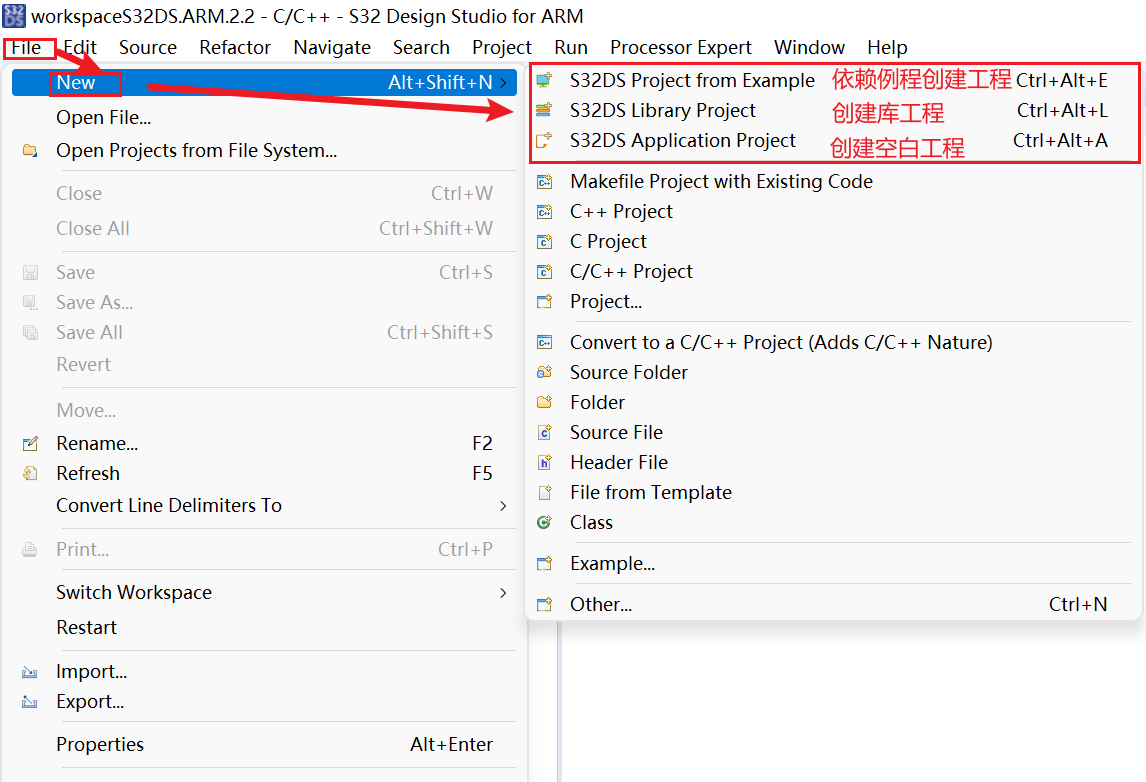
- Rely on routines to create projects ,S32DS 2.2 Bring a lot of S32K1xx routine , You can create projects based on routines that are close to the functionality of the project , It's more friendly to novices .
- Create Library Project , If developed jointly with partners , But it is not convenient to provide source code , You can use this way to create a project .
- Create a blank project , If you don't want to use it NXP Provided SDK, Or need to be right SDK Make some changes , This is the recommended way .
This article focuses on the next way to create a project .
3.2.1 Rely on routines to create projects
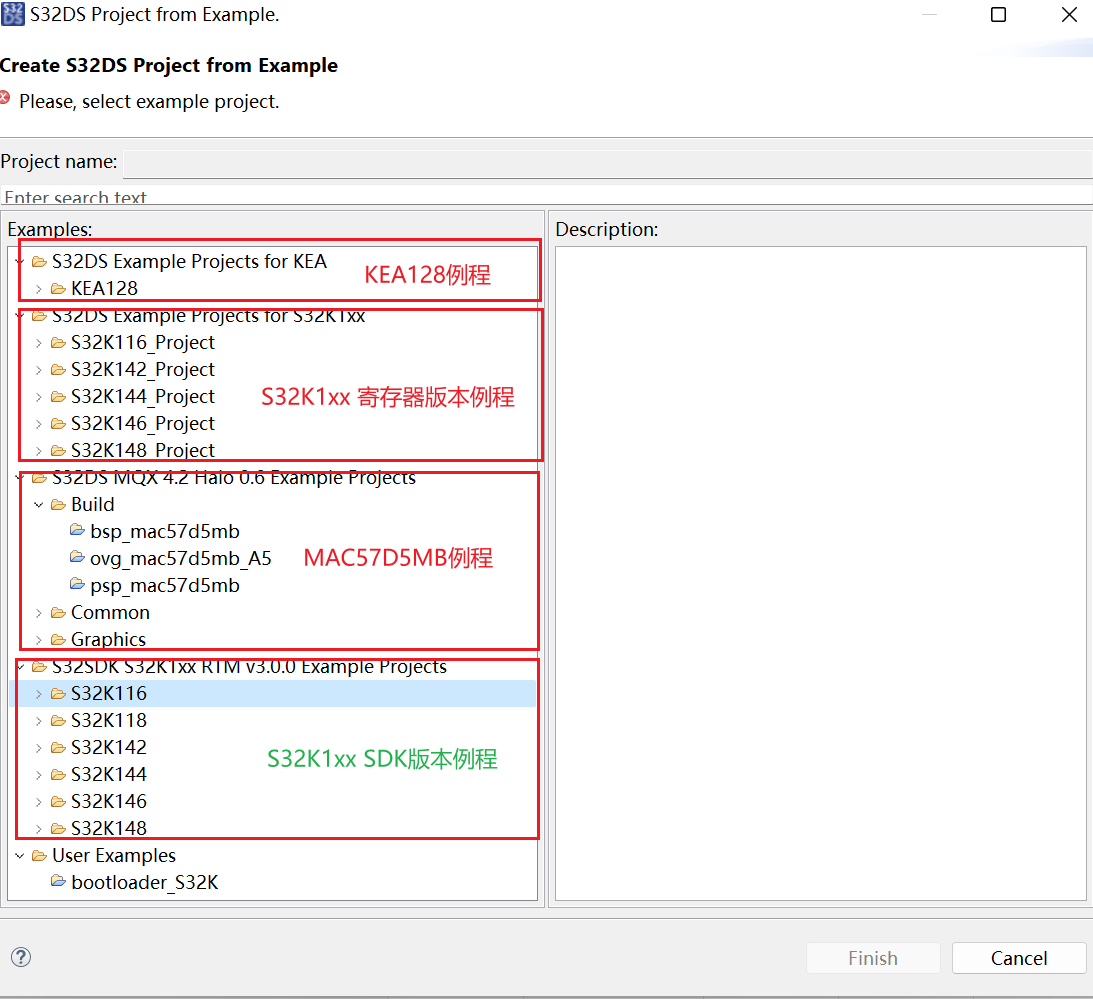
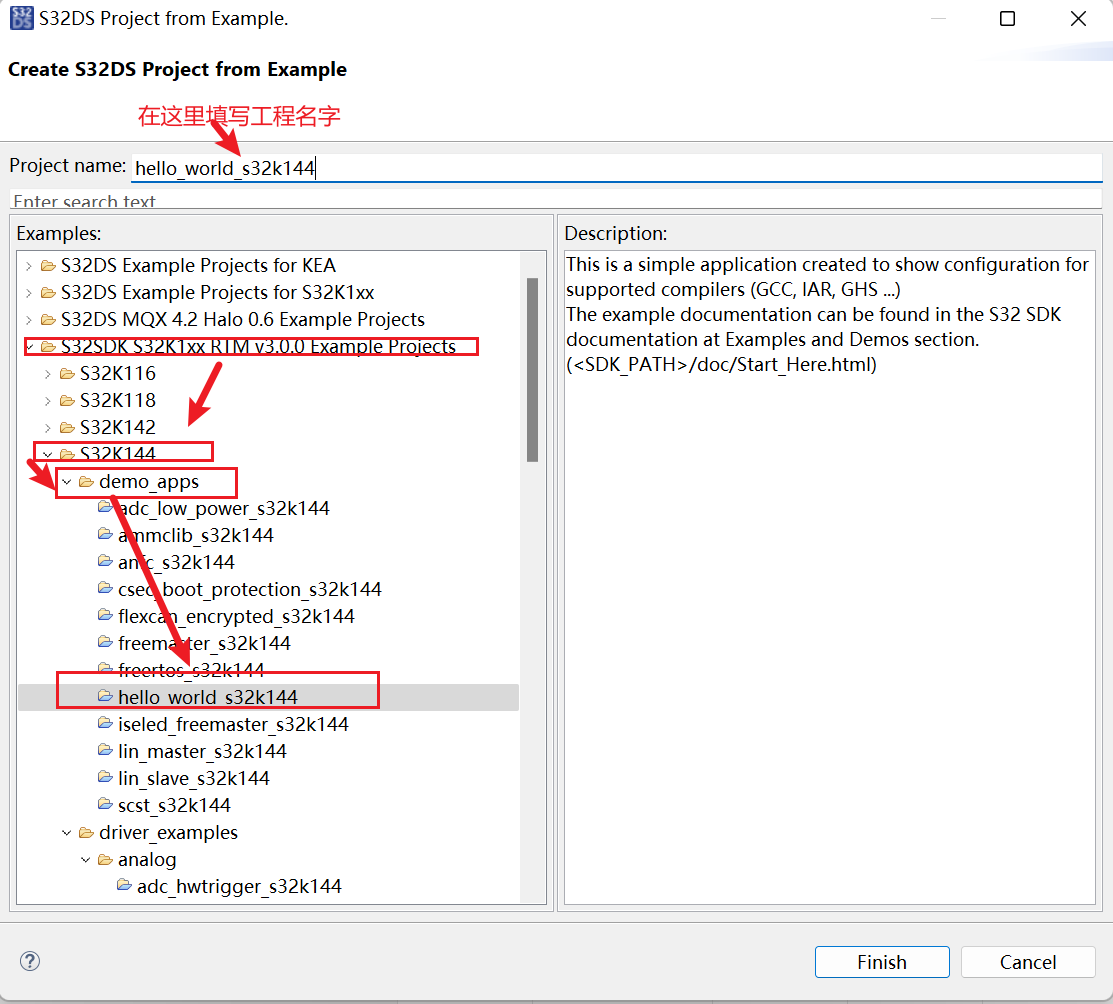
- choice S32DS Prject from Example, You will enter the routine selection interface , As shown in the figure below , Recommended S32K1xx SDK Version routine :
- Choose here hello_world_s32k144 routine , Then fill in the project name , The default project name is used here , And then click Finish Create a project , It should be noted that , The same Workspace You cannot have two or more projects with the same name .
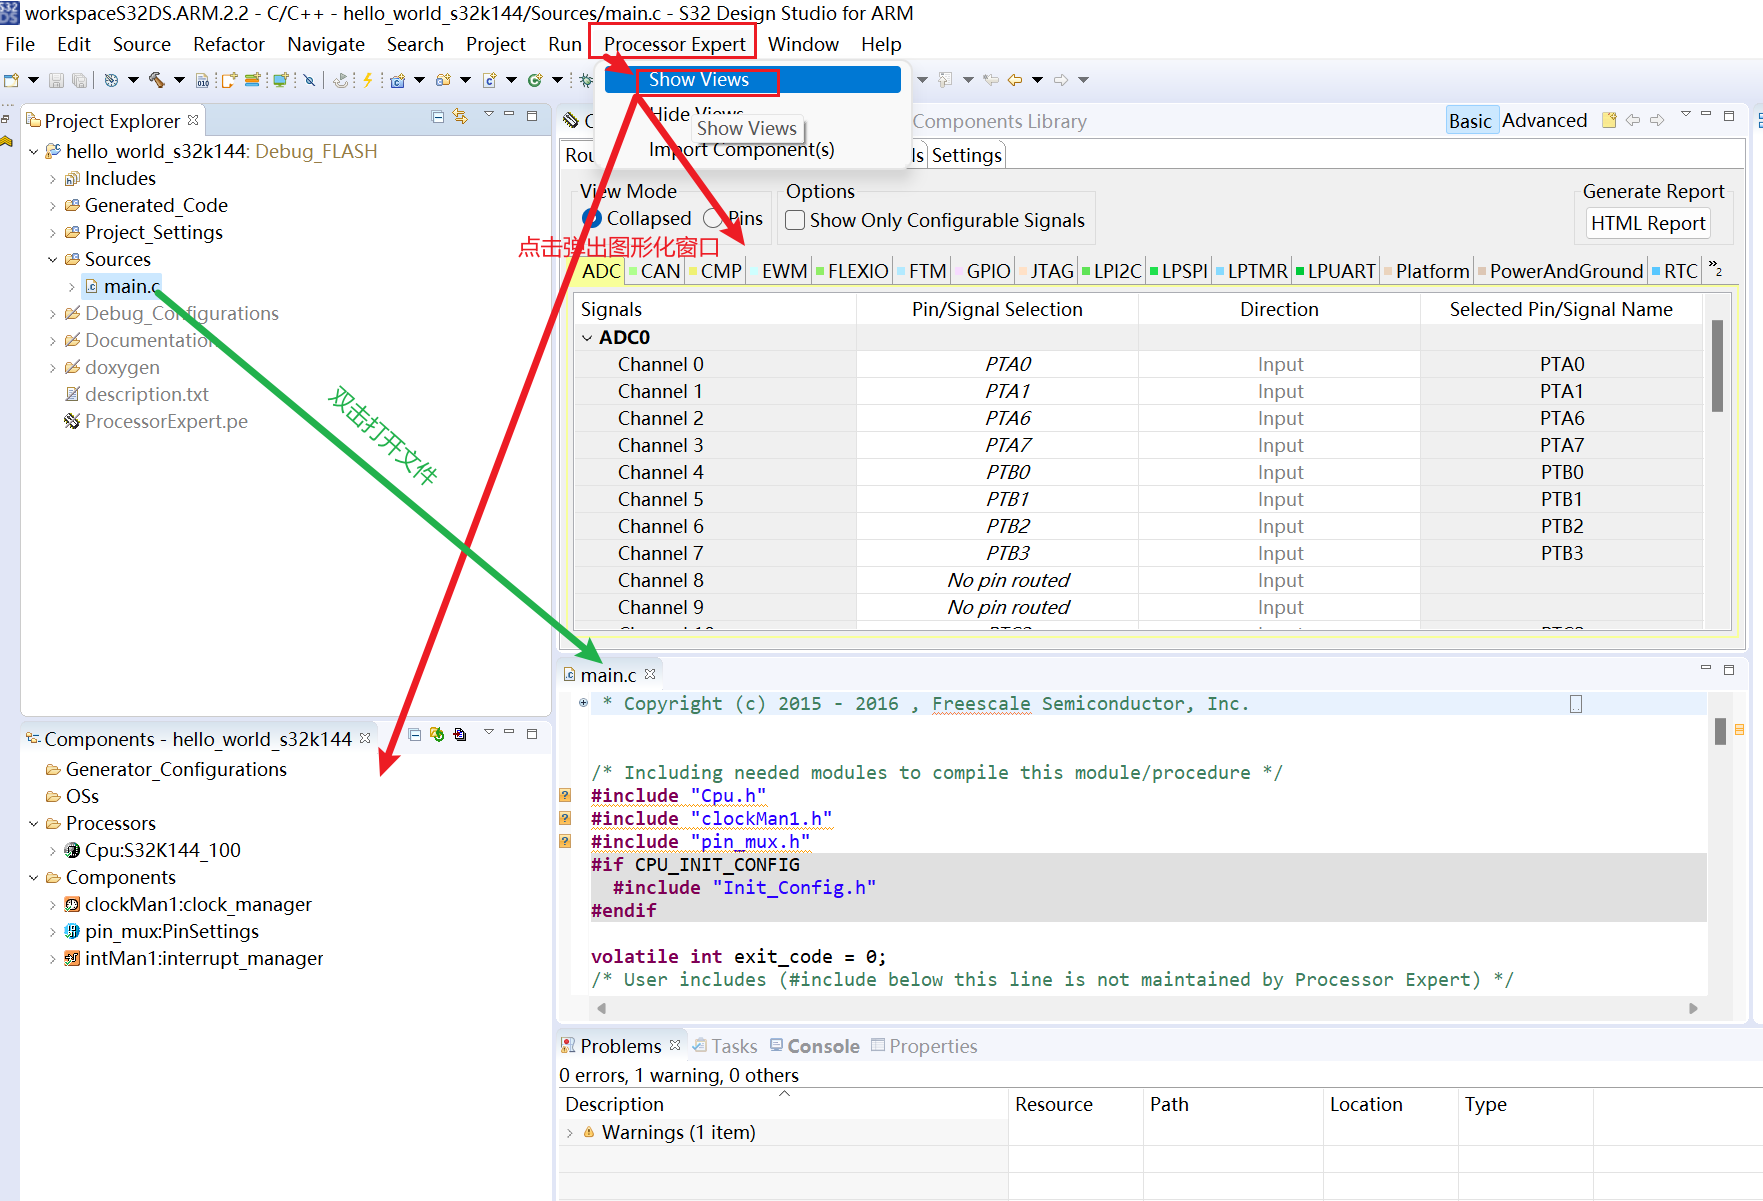
- Click... In the main menu area Processor Expert menu , choice Show Views, Pop up the graphical interface . If the interface position is wrong , You can press and hold the mouse to move the window .
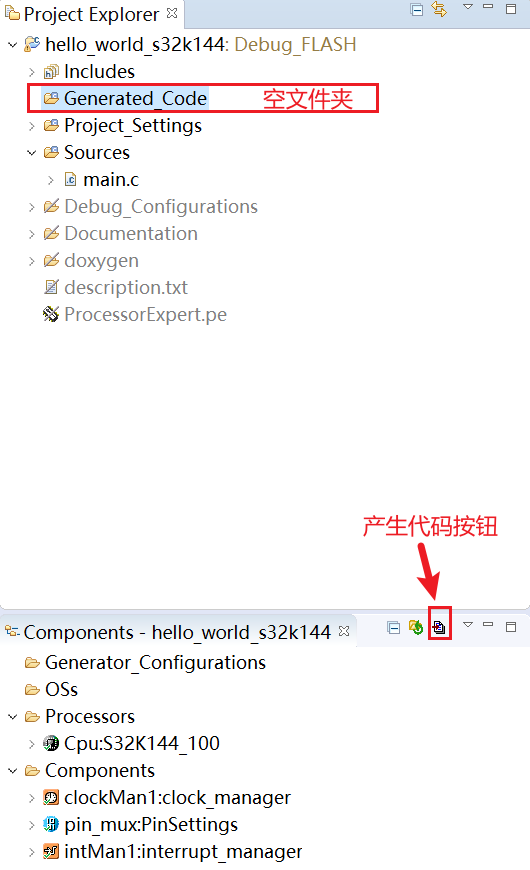
- At this time, under the project directory Generated Code The folder is empty , You need to click... In the graphical component window Generated Processor Expert Code Generating code , As shown in the figure below .
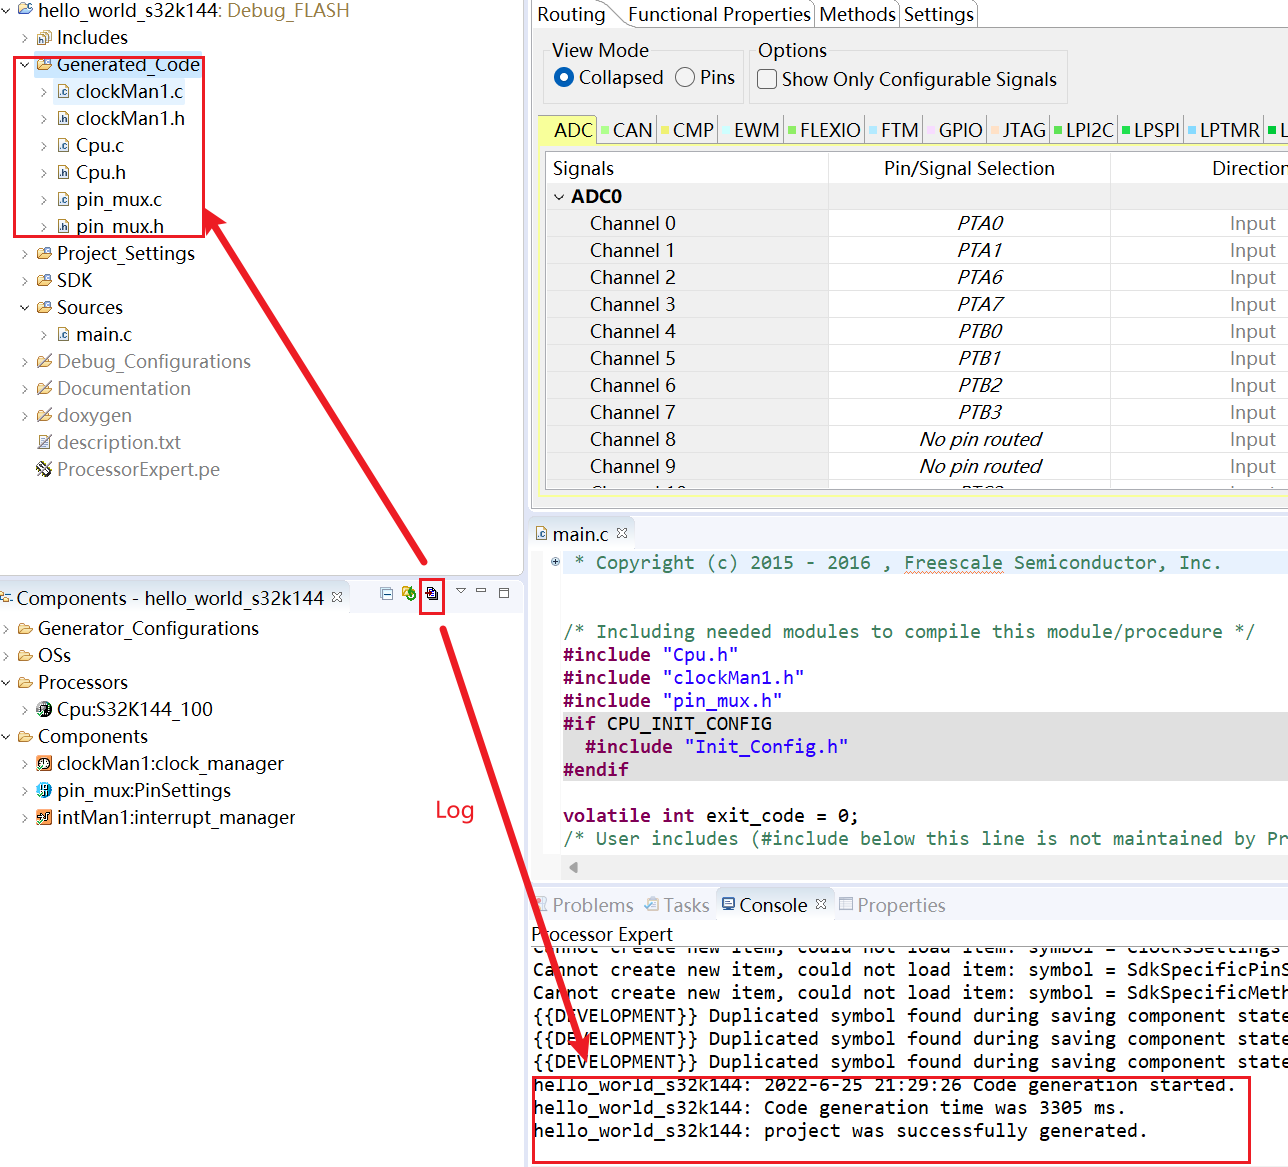
- After a while, you can see the successful code generation on the console Log, meanwhile Generated Code There are also folders .C and .H file .
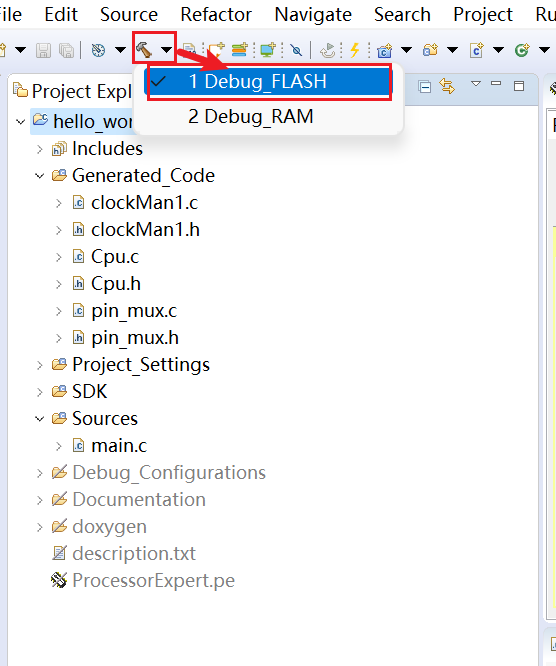
- Click the hammer icon drop-down Debug FLASH, Here's the picture ; Or select the project , Right click selection Build Project, Compile the project .
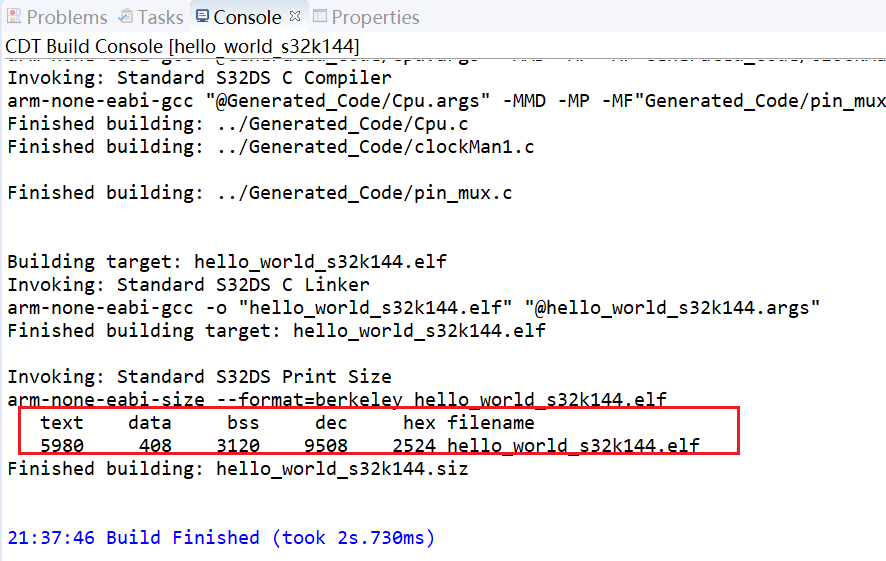
- You can see the name of the generated executable file in the console window , And the occupation of Flash and RAM size , As shown in the figure below .
- The amount of Flash size :text paragraph +data paragraph =6388 byte =6.2KB
- The amount of RAM size :bss paragraph +data paragraph =3528 byte =3.4KB
3.2.2 Create Library Project
Hu Gong's official account has previously introduced based on S32DS 2.0 The creation and use of library project , The following links ,S32DS 2.2 Similar to it , It is recommended to refer to this link for research .
S32DS Use Tips– How to compile, generate and call static libraries (qq.com)
3.2.3 Create a blank project
Close the previously opened project first , And then choose S32DS Application Project, Create a new blank project .
Because the graphical interface takes up more memory , If the computer configuration is not high , To avoid getting stuck , It is recommended to close the unused project .
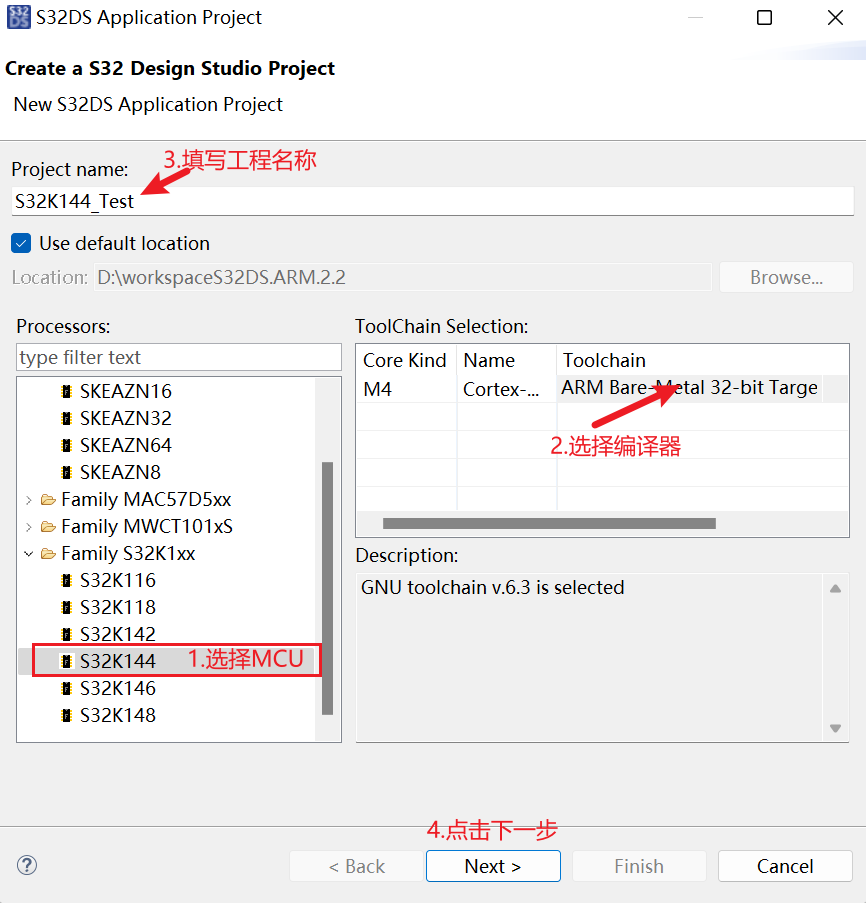
choice MCU Model and compiler , Fill in the project name , Click on Next.
choice SDK Version of , And click the Finish.

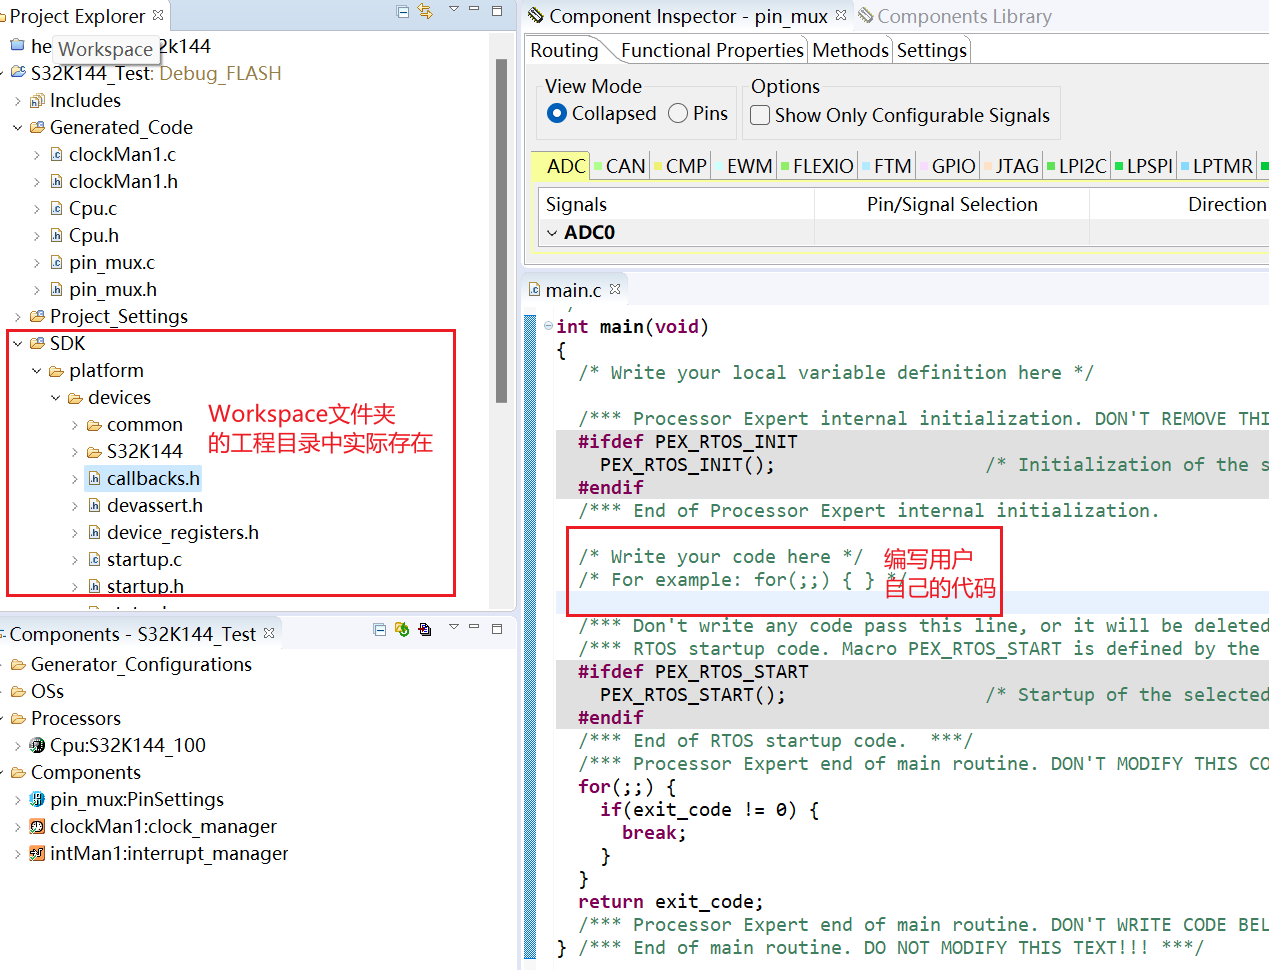
- Wait a minute , The project is created . It should be noted that , Projects created in this way ,Workspace Under the project directory in SDK The files in exist , And the project created in the first way ,Workspace Under the project directory in SDK There are no documents in , Routine is linked to the installation directory SDK Files in .
3.3 Import the project
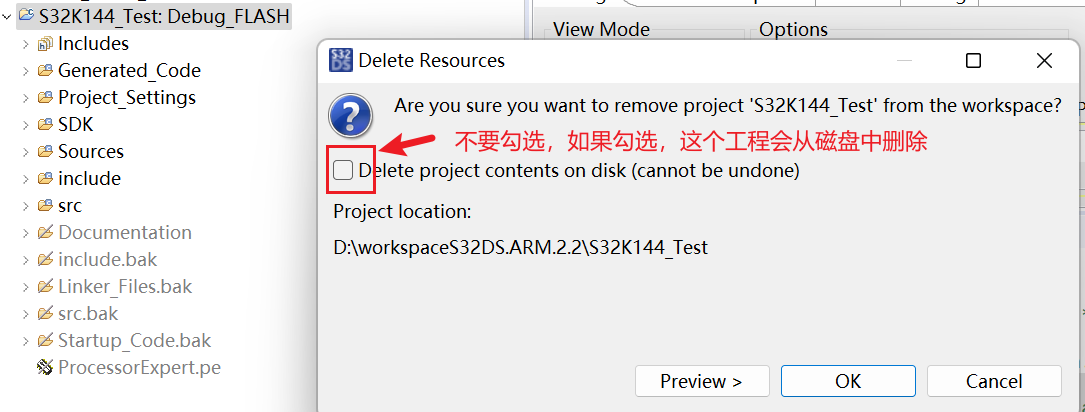
take 3.2.3 Right click the project of the chapter to delete , Do not check disk delete , As shown in the figure below . Prepare for the following demo import project .
3.3.1 Import same S32DS Version of the project
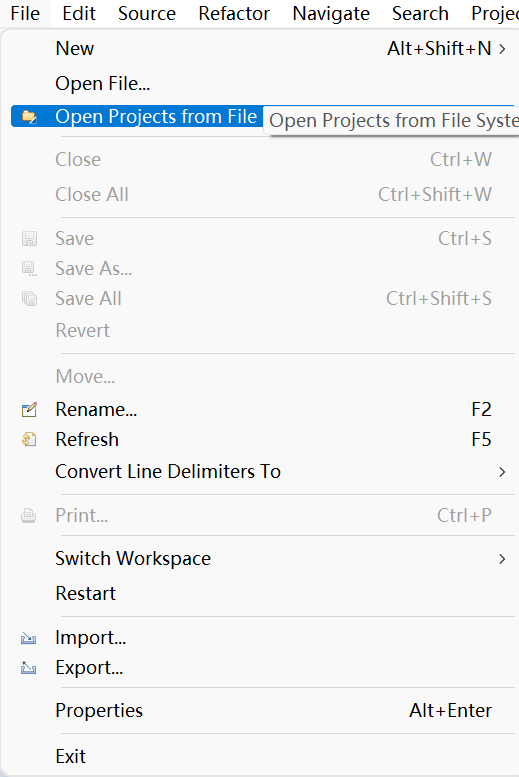
- Click on File menu , Select open project from file .
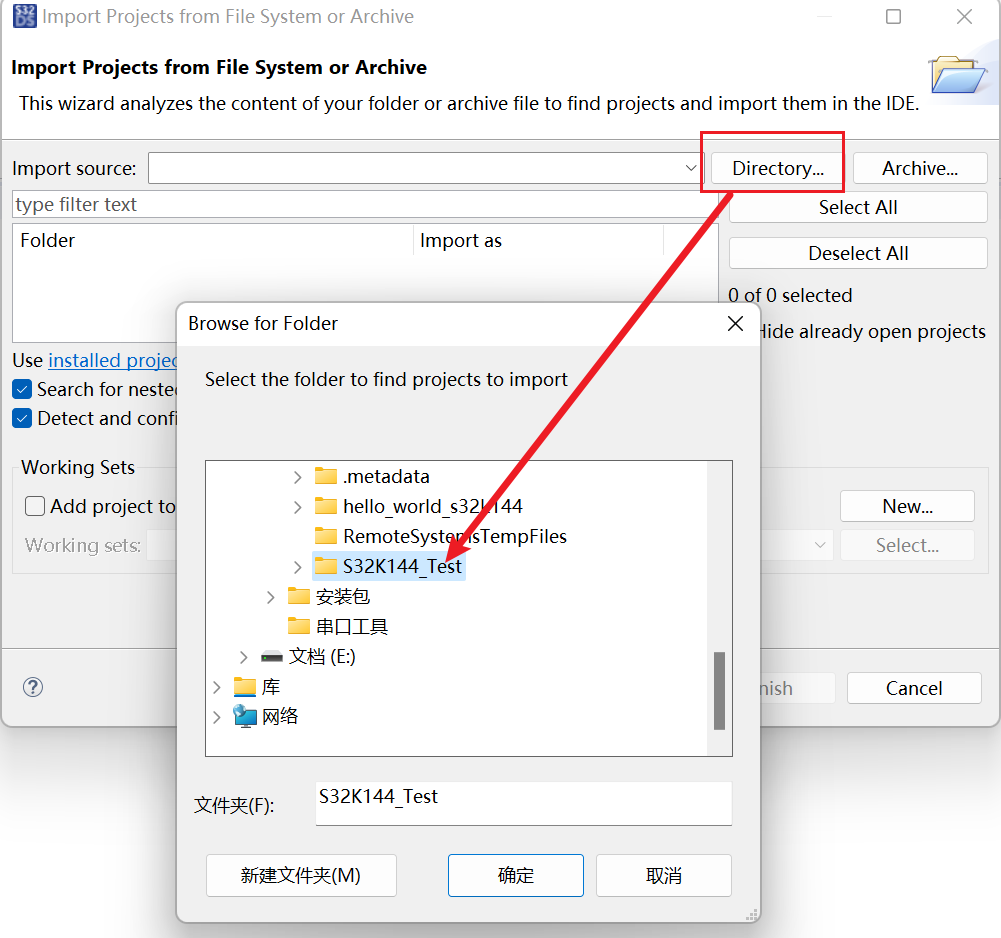
- Click on Directory, Select the project you just deleted , Click on Finish. If you import a compressed package , Just choose Archive.
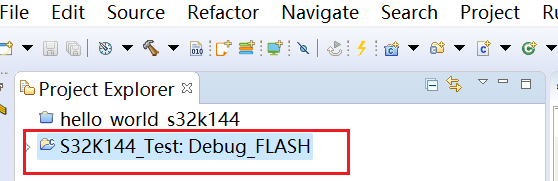
- Wait a minute , The deleted project is imported again Workspace 了 .
3.3.2 Import S32DS 2018.R1 Version of the project
If you need to import 2018.R1 Version of the project , It needs to be used according to the project SDK edition , Choose the appropriate way . It is suggested to refer to the following articles on Hugong wechat official account :
4. Program download and debugging
4.1 Program download
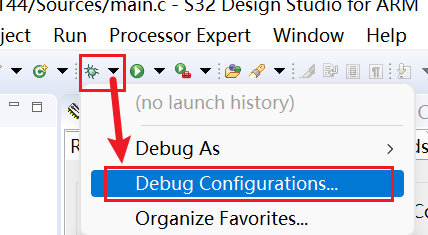
- Close other projects , open 3.2.1 Chapter created project , Select the ladybug icon drop-down menu Debug Configurations, Click on the open .
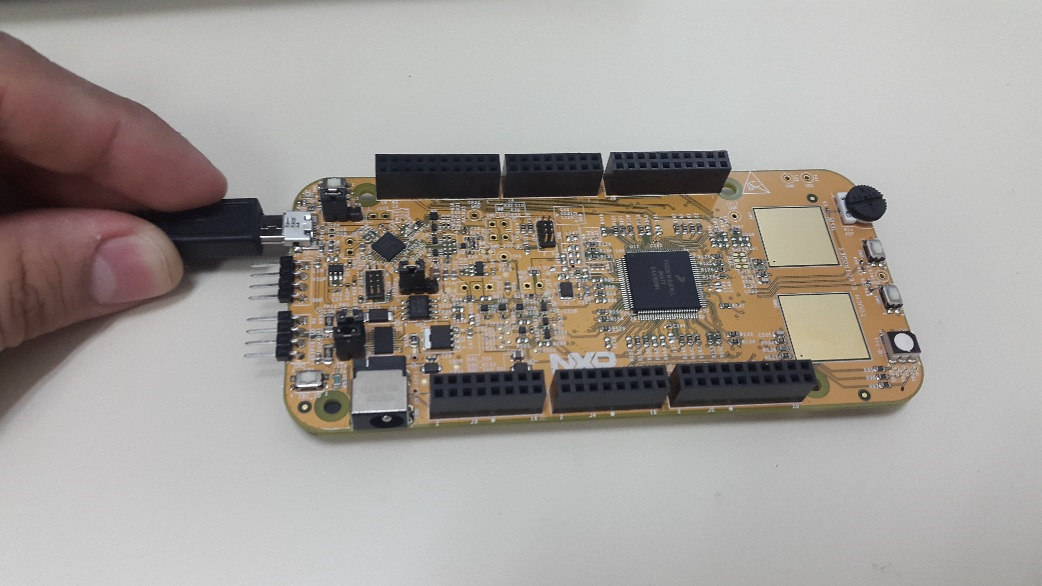
- Pass the development board and computer MicroUSB Connect the harness , Here's the picture .
3. Select the corresponding profile , Check the regulator interface ( The on-board debugger of the development board is OpenSDA), As shown in the figure below , Click on debug.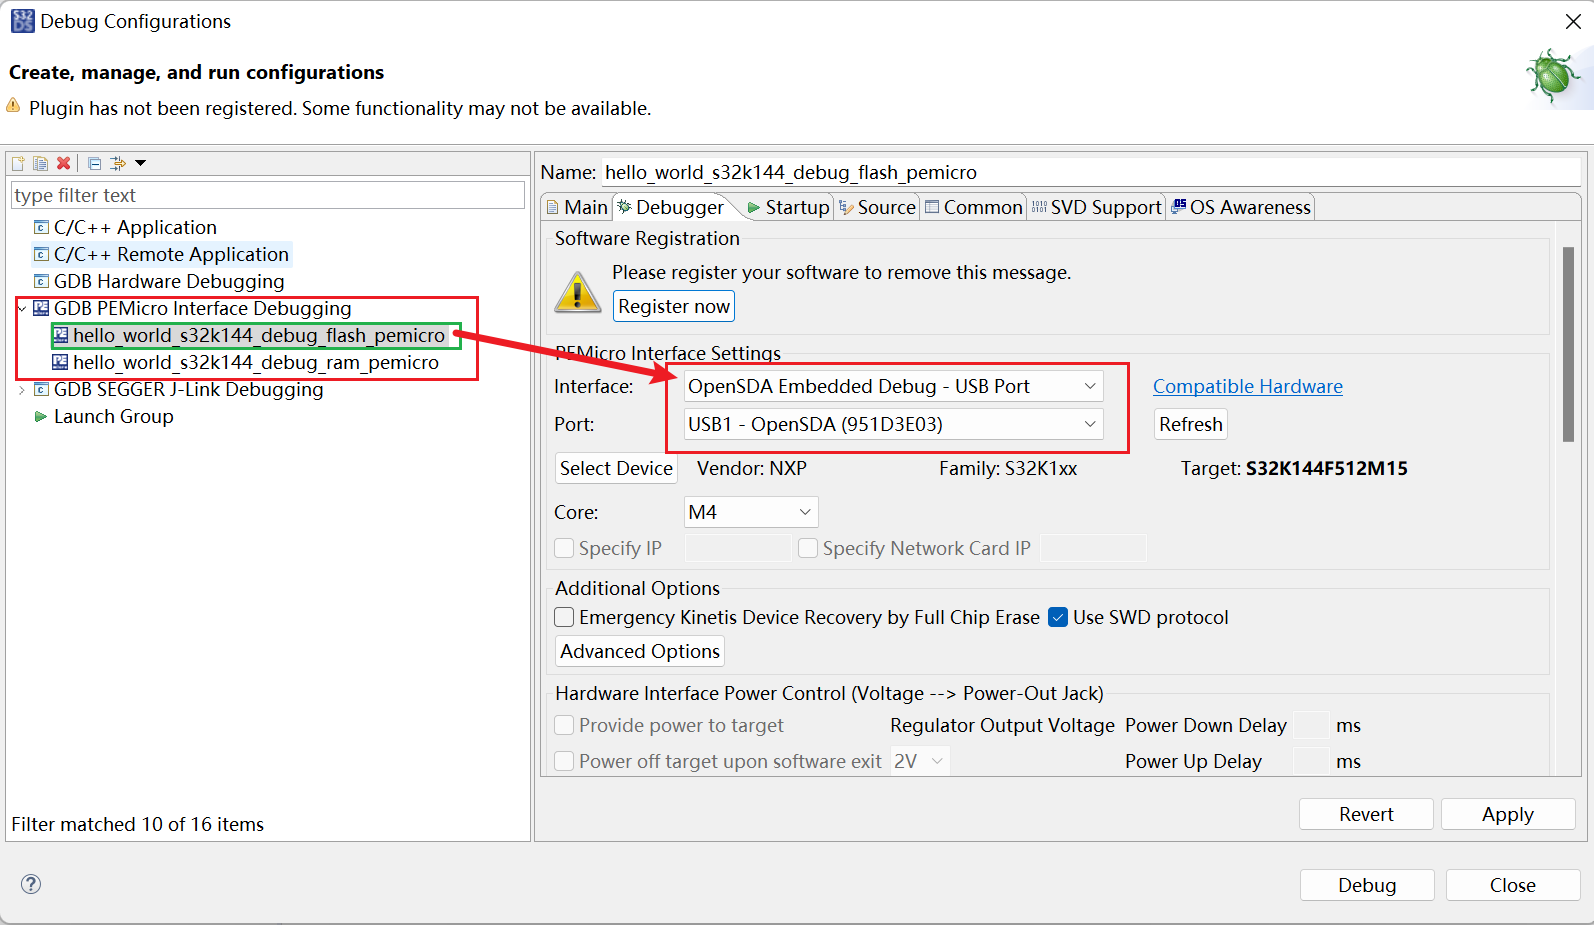
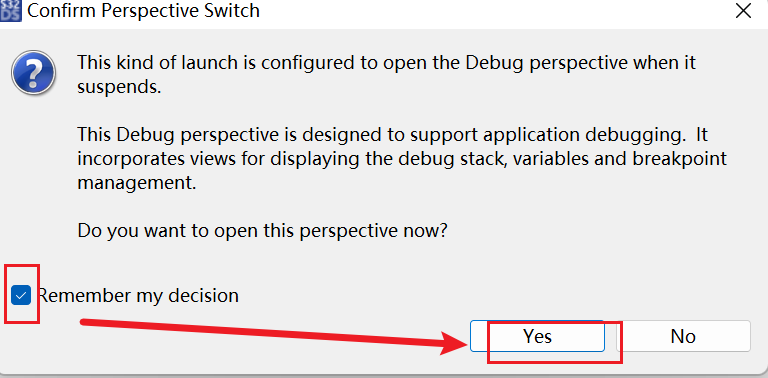
- Select to open the debugging interface in the pop-up window .
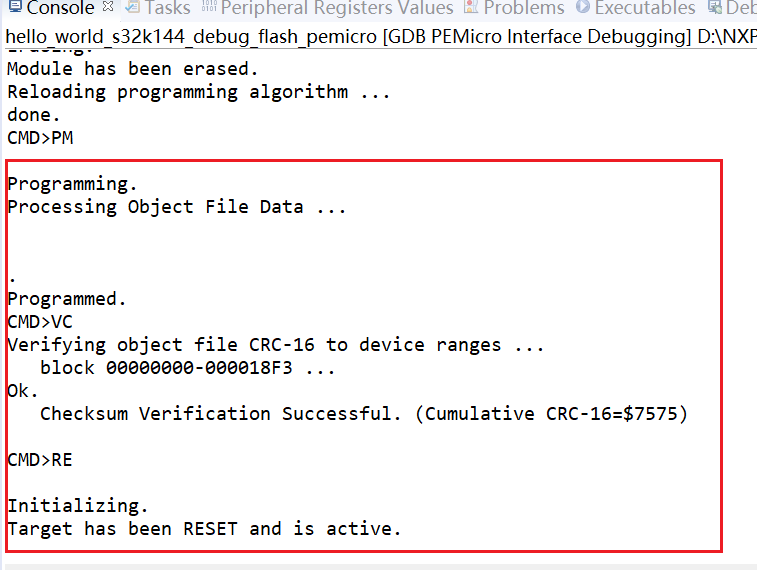
- Then you can see on the console that the program has been downloaded , also MCU Reset .
4.2 Program debugging
- Click the full speed button , Ready to run program , You can see .

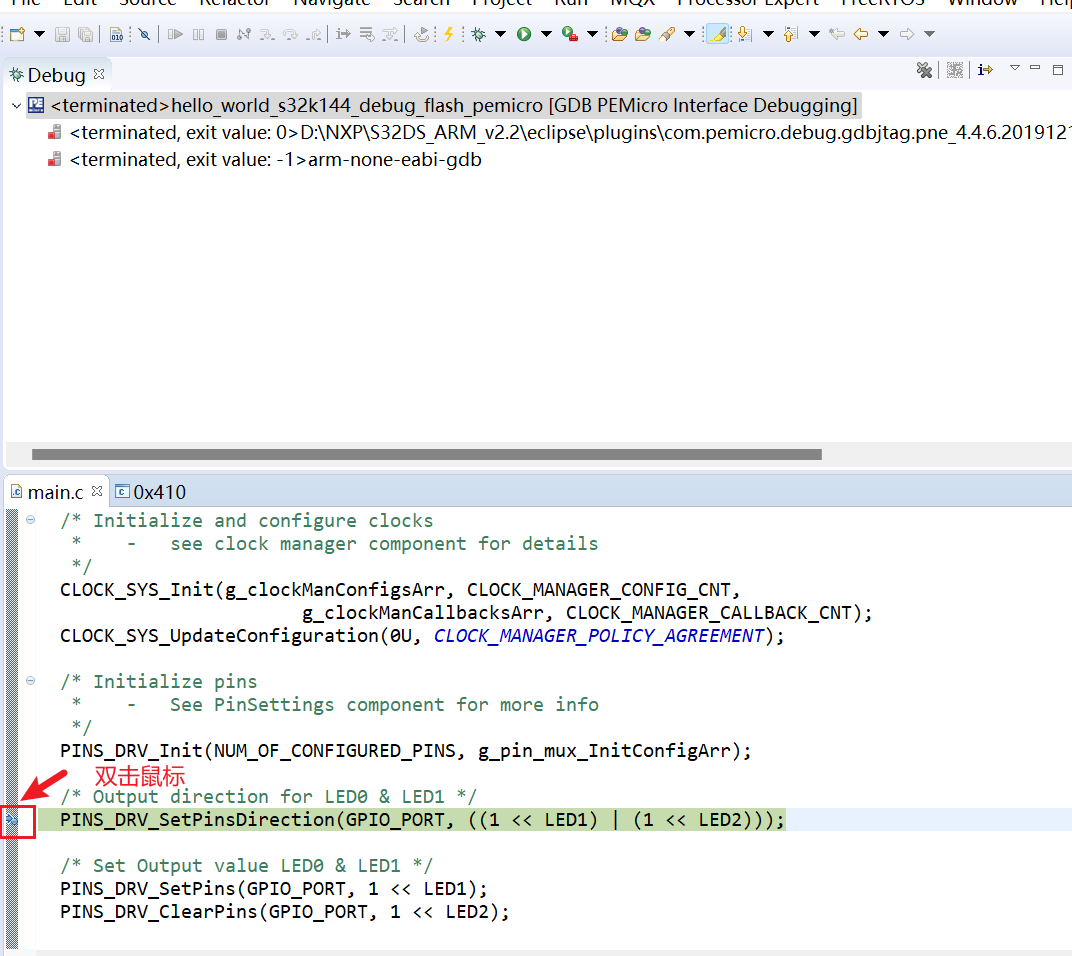
- Double click in front of the number of lines of code that need a break point , This function can be realized . Here's the picture .
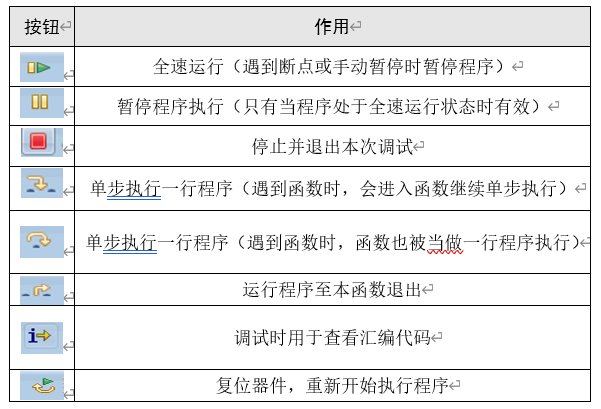
- Debugging related button functions are shown in the figure below .
- If you need to return to the modification program , Stop this debugging , Click on the C/C++ button .

5. Recommended reading
thus ,S32DS The initial use of is over . If you want to learn more about S32DS Use skills , Welcome to the wechat official account of Hugong S32DS Series articles , Links are as follows :
边栏推荐
- Wechat official account solves the cache problem of entering from the customized menu
- 认识ThreadPoolExecutor
- VIM editor knowledge summary
- After Microsoft disables the IE browser, open the IE browser to flash back the solution
- ETCD数据库源码分析——处理Entry记录简要流程
- A mining of edu certificate station
- 高配笔记本使用CAD搬砖时卡死解决记录
- Intelligence test to see idioms guess ancient poems wechat applet source code
- Principle of lazy loading of pictures
- MariaDB的Galera集群应用场景--数据库多主多活
猜你喜欢
Redis入门完整教程:集合详解

Redis: redis message publishing and subscription (understand)
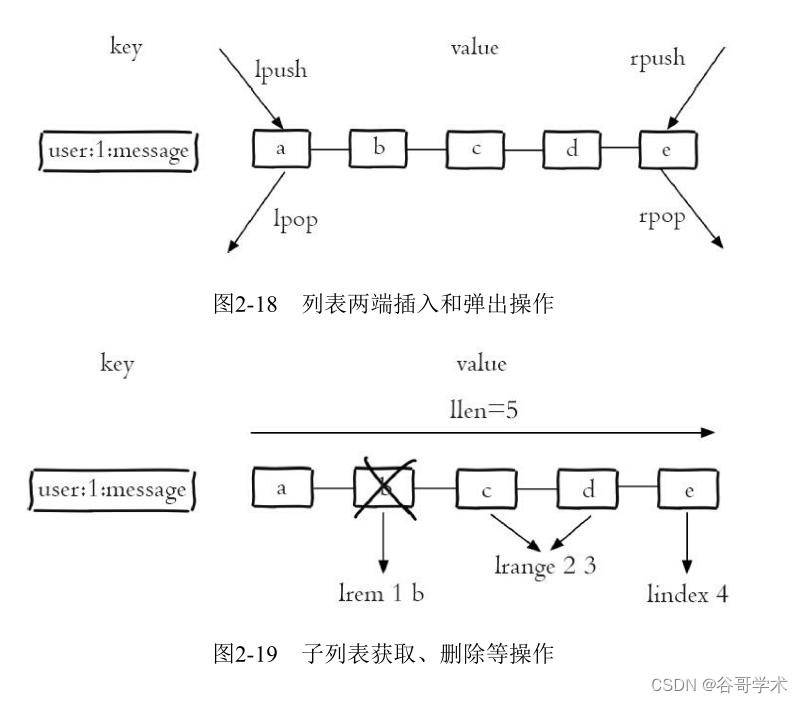
Redis introduction complete tutorial: List explanation
Qt个人学习总结
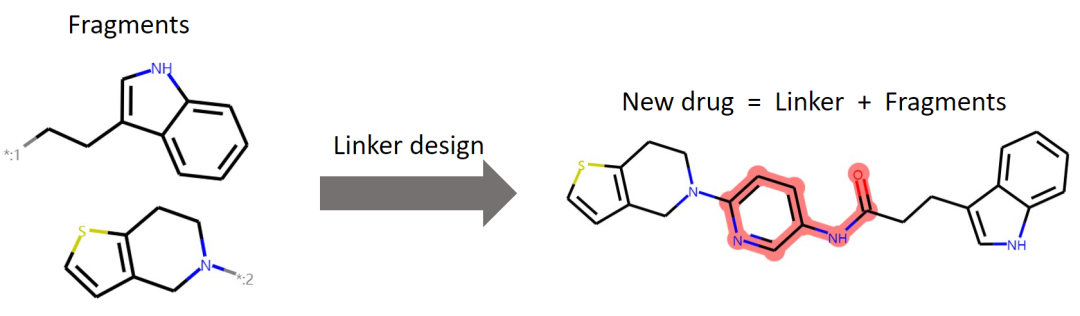
ICML 2022 || 3DLinker: 用于分子链接设计的E(3)等变变分自编码器
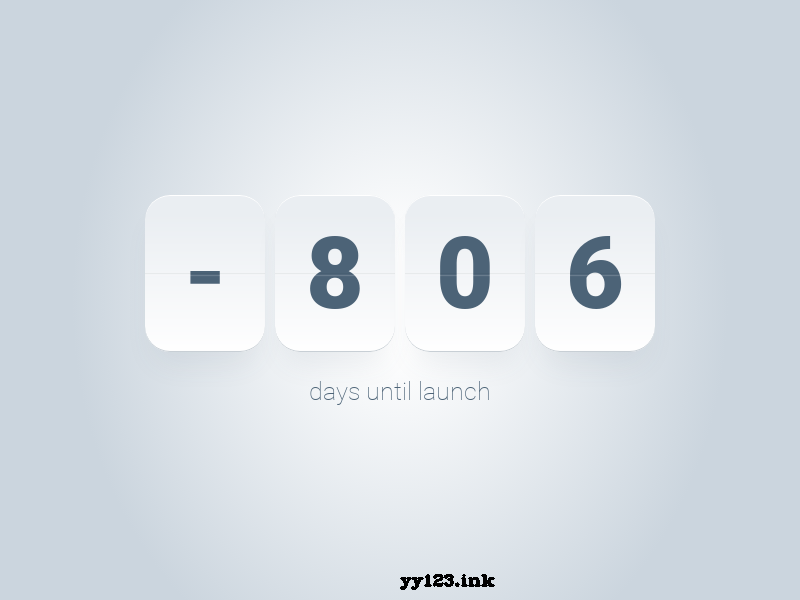
JS card style countdown days

45岁教授,她投出2个超级独角兽
uniapp 除了数字,其他输入无效

A complete tutorial for getting started with redis: redis shell
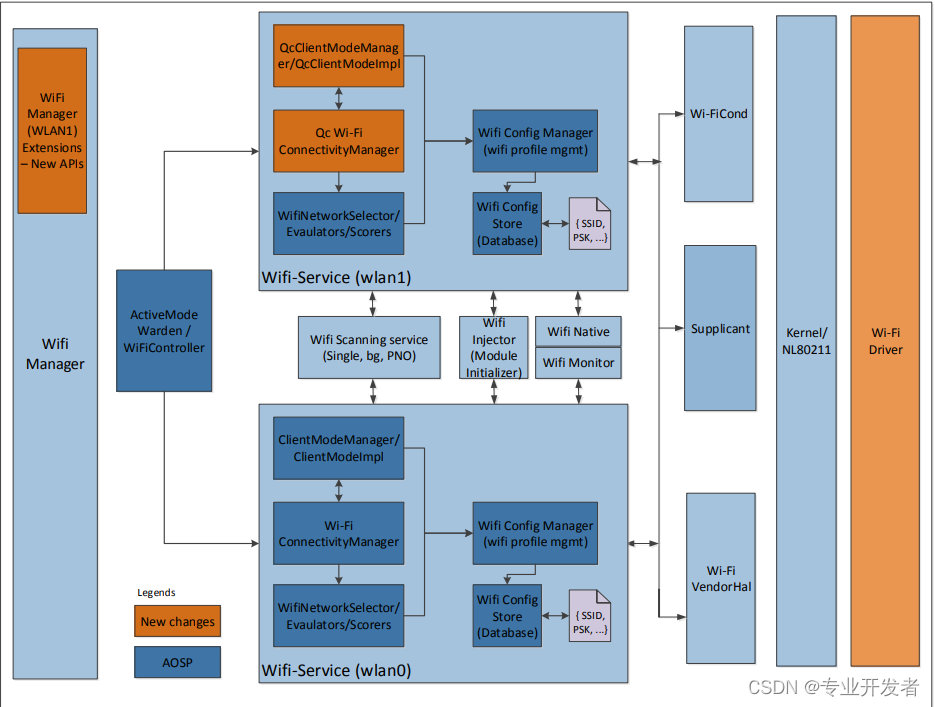
高通WLAN框架学习(30)-- 支持双STA的组件
随机推荐
LIst 相关待整理的知识点
A complete tutorial for getting started with redis: transactions and Lua
华泰证券低佣金的开户链接安全吗?
MariaDB的Galera集群应用场景--数据库多主多活
cout/cerr/clog的区别
【爬虫】数据提取之xpath
Redis getting started complete tutorial: Geo
ETCD数据库源码分析——处理Entry记录简要流程
MySQL数据库备份与恢复--mysqldump命令
The caching feature of docker image and dockerfile
Redis: redis message publishing and subscription (understand)
ScriptableObject
[crawler] XPath for data extraction
uniapp 除了数字,其他输入无效
[Taichi] change pbf2d (position based fluid simulation) of Taiji to pbf3d with minimal modification
Recommended collection: build a cross cloud data warehouse environment, which is particularly dry!
The difference between debug and release
colResizable. JS auto adjust table width plug-in
Redis introduction complete tutorial: List explanation
Qt个人学习总结