当前位置:网站首页>Canoe - the second simulation engineering - xvehicle - 2 panel design (operation)
Canoe - the second simulation engineering - xvehicle - 2 panel design (operation)
2022-07-04 10:50:00 【picoasis】
This article is detailed Xvehicle engineering Panel Detailed operation steps of design , If you want to understand the relevant ideas or principles, please check CANoe- The first 2 A simulation project -XVehicle—2Panel Design ( principle , Ideas )_lamanchas The blog of -CSDN Blog
This article is from 《CANoe Development from entry to mastery 》.
Catalog
Key steps summary
2.3 Engine switch control ( Engine control module )
2.4 Speed control slider ( Engine control module )
2.5 Left 、 Right door control switch ( Door control module )
2.6 Text controls for left and right doors ( Door control module )
3.1 Engine running status display (engine)
3.2 Vehicle speed information display (engine)
3.3 Display the vehicle speed value (engine)
Key steps
- Add system variables ——System Environment——NameSpace:Engine(EngineStateSwitch,EnginSpeedDspMeter,EngineSpeedEntry)
- add to Control panel ——Panel Add the control in charge of control ( Door control , Engine control )
- add to Display panel ——Panel Add the control responsible for display ( Door display , Engine display )
- establish Desktop—— Create a new one DeskTop Tab , hold control Panel window ,Display Panel window ,write window ,Trace Put the windows together , Easy to test and observe .
Control
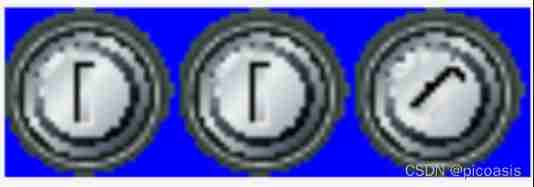
among Panel Pictures used by controls in , The image file location is local C:\Users\Public\Documents\Vector\CANoe\Sample Configurations 12.0.75\Programming, The software is automatically saved in C disc . Different versions CANoe, The name and location of the picture may be different .
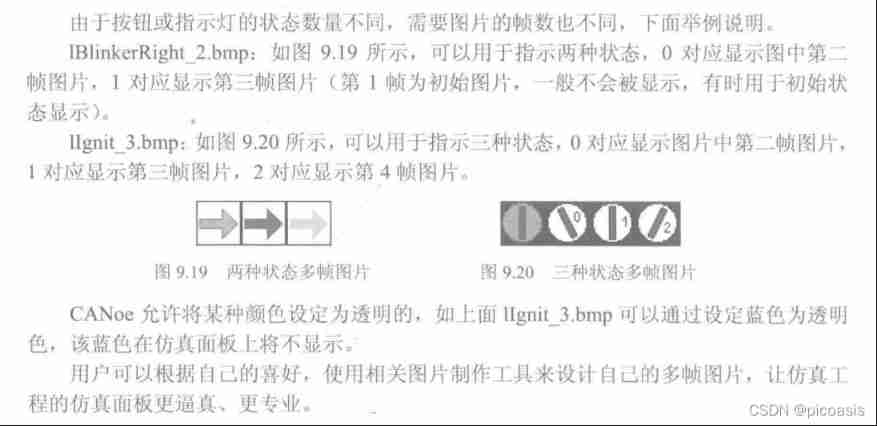
These pictures are multi frame pictures : It is made up of several pictures with the same format , It can realize the dynamic display of button and indicator status .
Step1 Add system variables
In order to achieve X-Vehicle Functions of simulation engineering , The following will be in X-Vechile Add system variables based on the project .
stay CANoe Select... From the main interface Environment→System Variables.
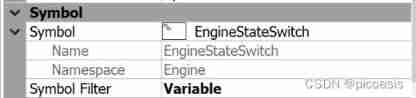
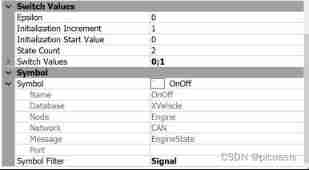
Right click in the upper left window and select New, Create a new one EngineStateSwitch The system variable of , Configure as shown below :
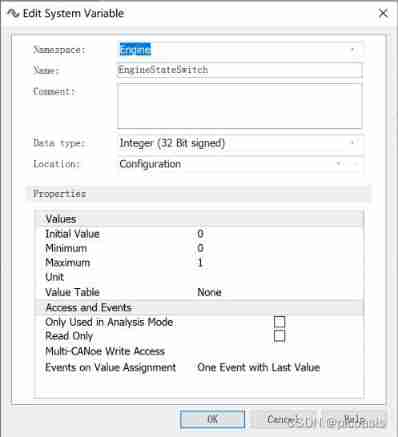
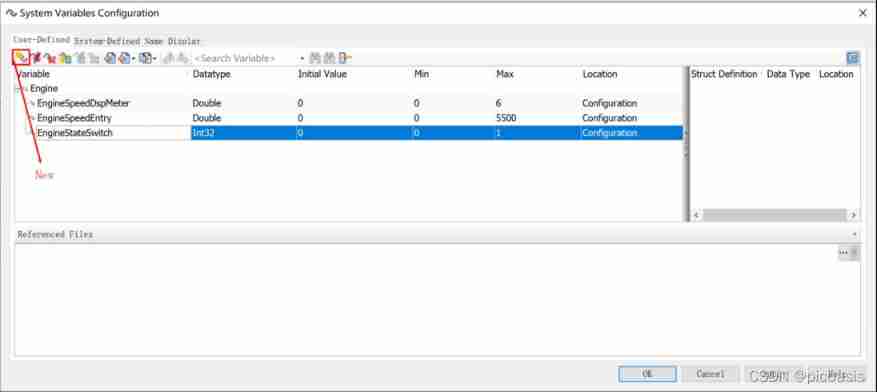
In the figure ,Namespace Medium Engine Represents the name of a set of system variables . Use the same method to create the other two system variables :EngineSpeedDspMeter and EngineSpeedEntry, After creation, see the figure
Step2 add to Control panel
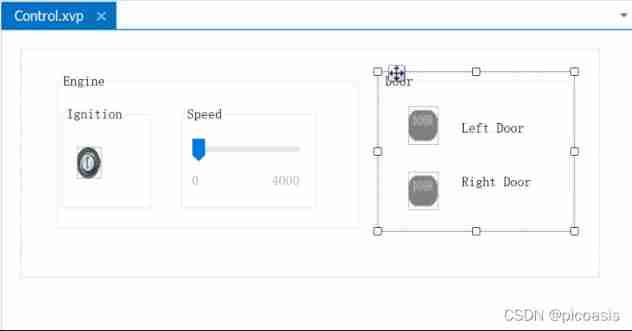
After adding and configuring the panel , The final effect will be as follows Shown :
Next, add and configure step by step .
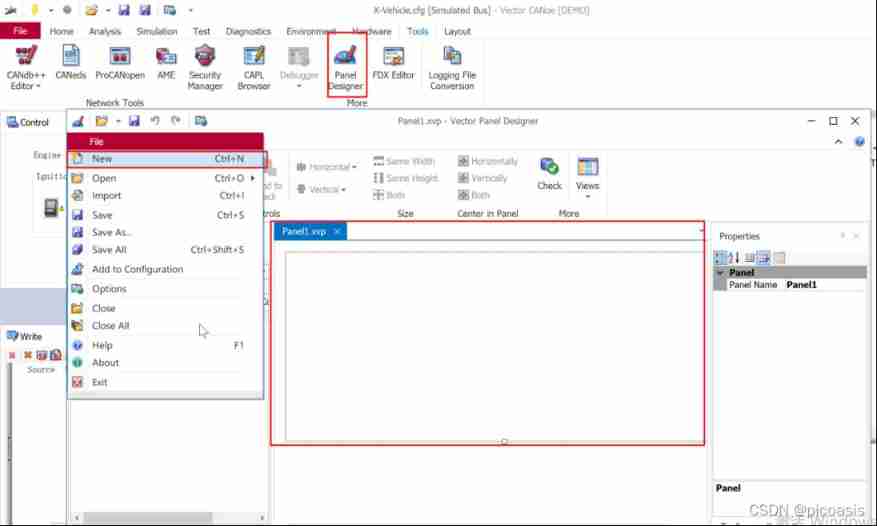
2.1 Create panels
stay Panel Designer Select... On the interface File→New Panel Open a new panel , Stored as Control.panel.
Next, we will add engine control and door control controls to this panel .
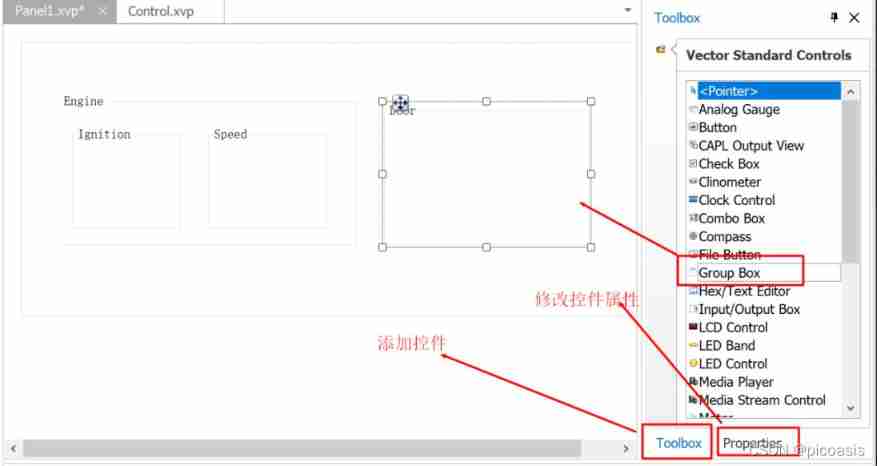
2.2 add to GroupBox
According to the number and size of controls , Readers can tell Panel Make some adjustments to the size of , Simultaneous addition 4 individual Group Box( Combo box ), After reasonable planning , Under the layout effect of the panel
2.3 Engine switch control ( Engine control module )
Add switch
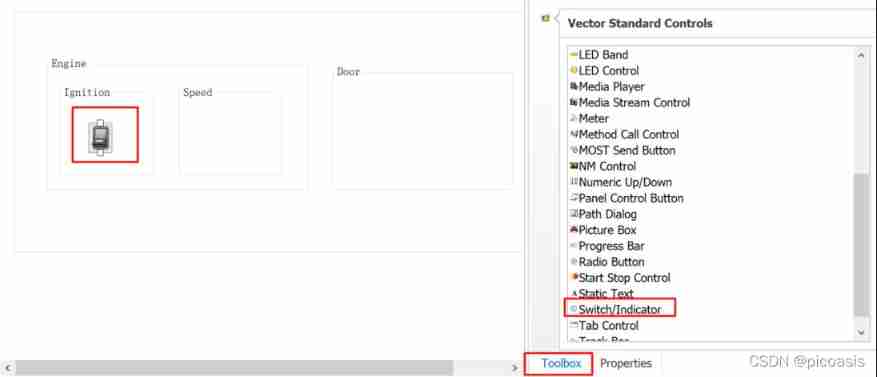
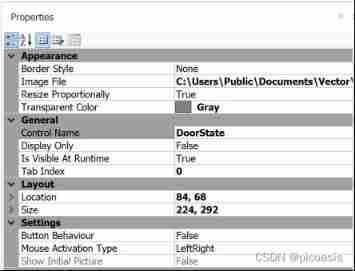
Configuration properties
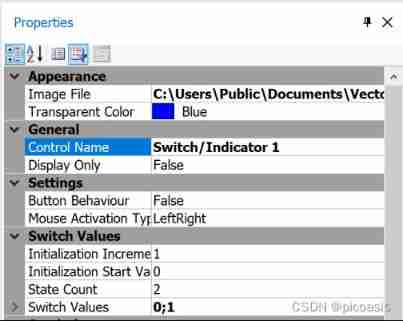
Picture location :C:\Users\Public\Documents\Vector\CANoe\Sample Configurations 12.0.75\Programming\Python\CANoeConfig\Panels\Bitmaps\ControlIgnition.bmp
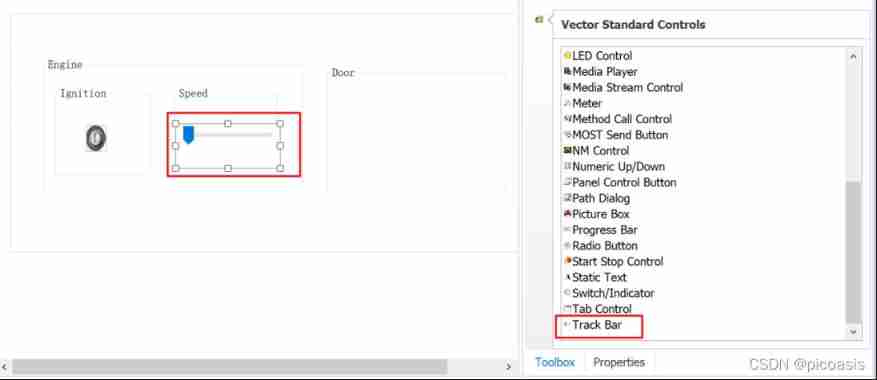
Follow a similar approach , Continue adding two Switch/Indicator、 One Track Bar And two Static Text.
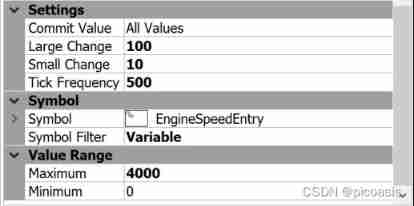
2.4 Speed control slider ( Engine control module )
add controls
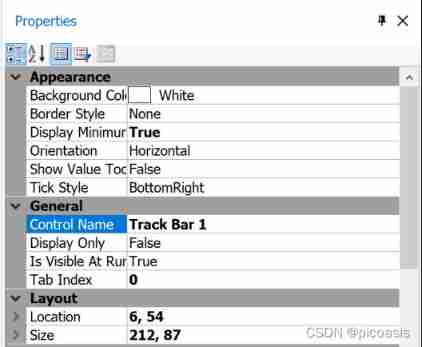
Configure controls
2.5 Left 、 Right door control switch ( Door control module )
add to
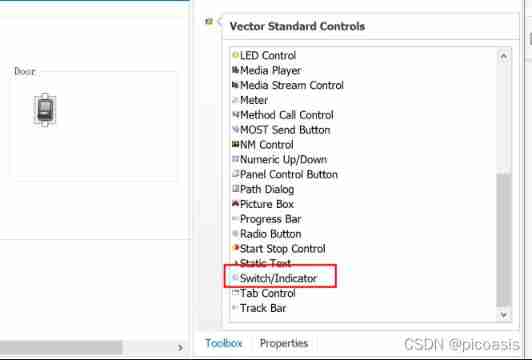
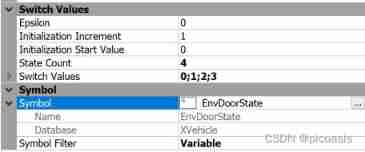
To configure
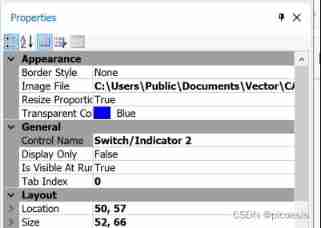
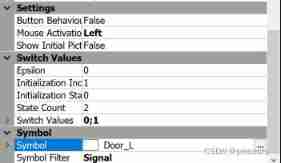
The configuration of left and right doors is different : Right door Association symbol by Door_R, Other same .
Picture file :C:\Users\Public\Documents\Vector\CANoe\Sample Configurations 12.0.75\Programming\Bitmap_Library\Automotive\Switches_2States\lDoorLocked_2.bmp
![]()
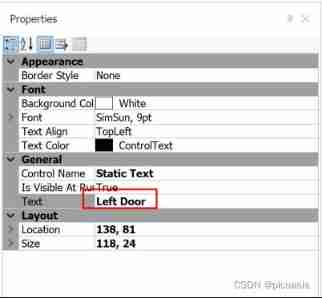
2.6 Text controls for left and right doors ( Door control module )
add to
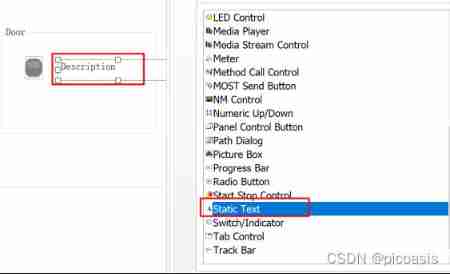
To configure
thus , Control panel configuration is complete .
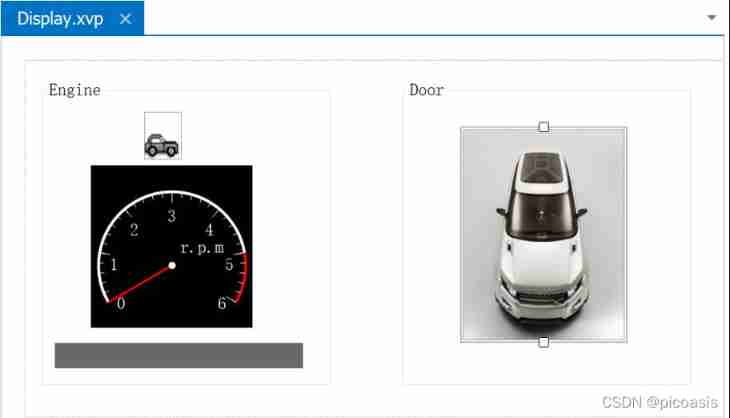
Step3 add to Display panel
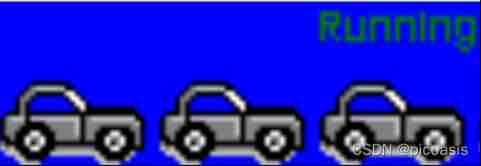
Display The panel will be used to display the switch status of the engine 、 Engine speed and door status .
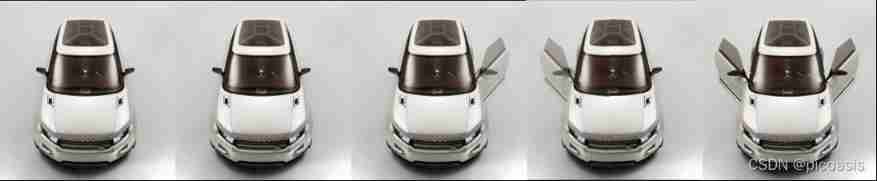
In order to display the engine and door status more vividly , You need to make two multi frame pictures , be used for Switch/Indicator Control Control display effect .
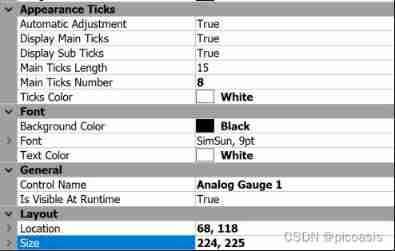
Add configurations in turn Group Box、Switch/Indicator、AnalogGauge1、Static text、Input/Output Box. After the configuration is completed, see the figure below Shown .
GroupBox Set skip .
3.1 Engine running status display (engine)
add to
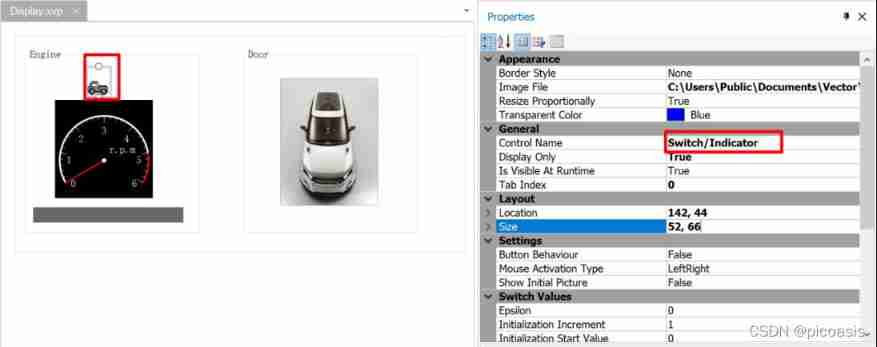
To configure
Picture location :C:\Users\Public\Documents\Vector\CANoe\Sample Configurations 12.0.75\Programming\Python\CANoeConfig\Panels\Bitmaps\DisplayCar.bmp( Different versions CANoe The file name and location may be different )
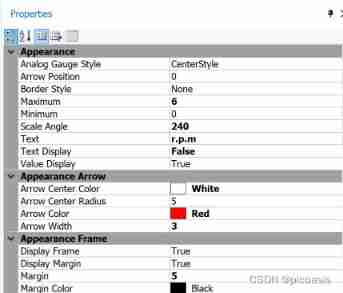
3.2 Vehicle speed information display (engine)
add to
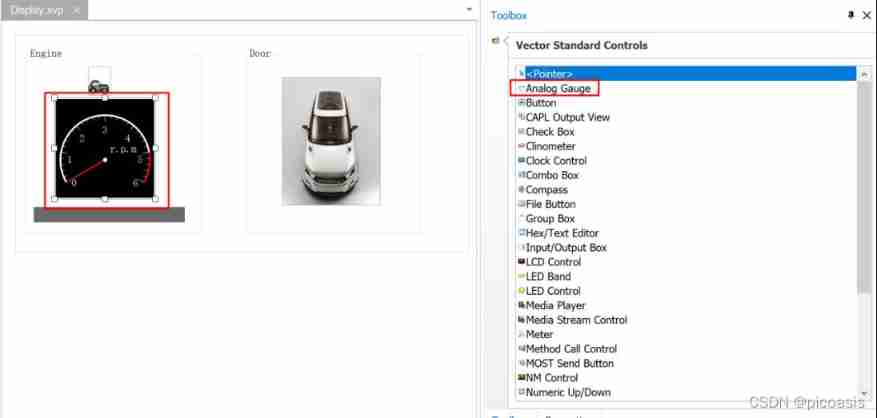
To configure

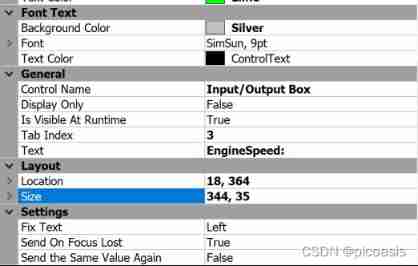
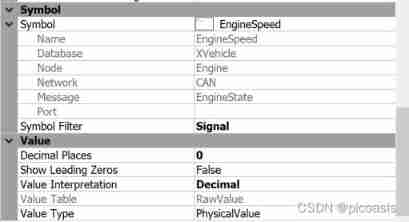
3.3 Display the vehicle speed value (engine)
add to
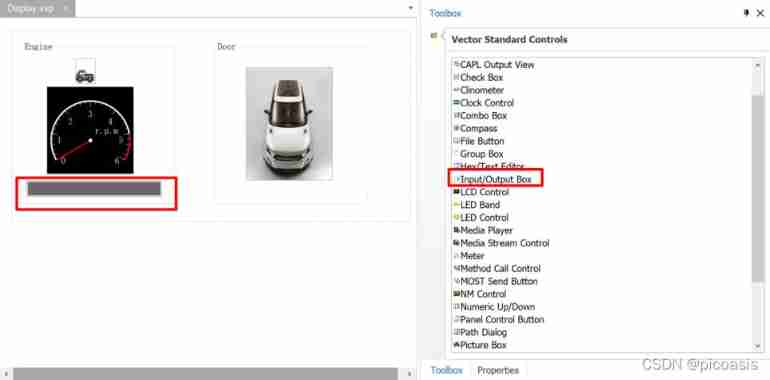
To configure

3.4 Door status display
add to

To configure
among , The picture file cannot be found in the local folder , I made one of the following , Placement position :
C:\Users\Public\Documents\Vector\CANoe\Sample Configurations 12.0.75\Programming\Bitmap_Library\Global\Indicator_2States\iDoorOpenclose.bmp
Step4 establish Desktop
Desktop( desktop ) Allow users to create a configuration to put a certain type of window they often use together , Easy to measure
Try and observe . stay CANoe In the main interface , Right click Desktop The label of , Create a new one called CAN Of
Desktop, take Control and Display Add two panels , And set the window to MDI Windows Pattern .
In order to observe relevant events , At the same time, you can add Write Windows and Trace Window to this Desktop in , Such as
As shown in the figure
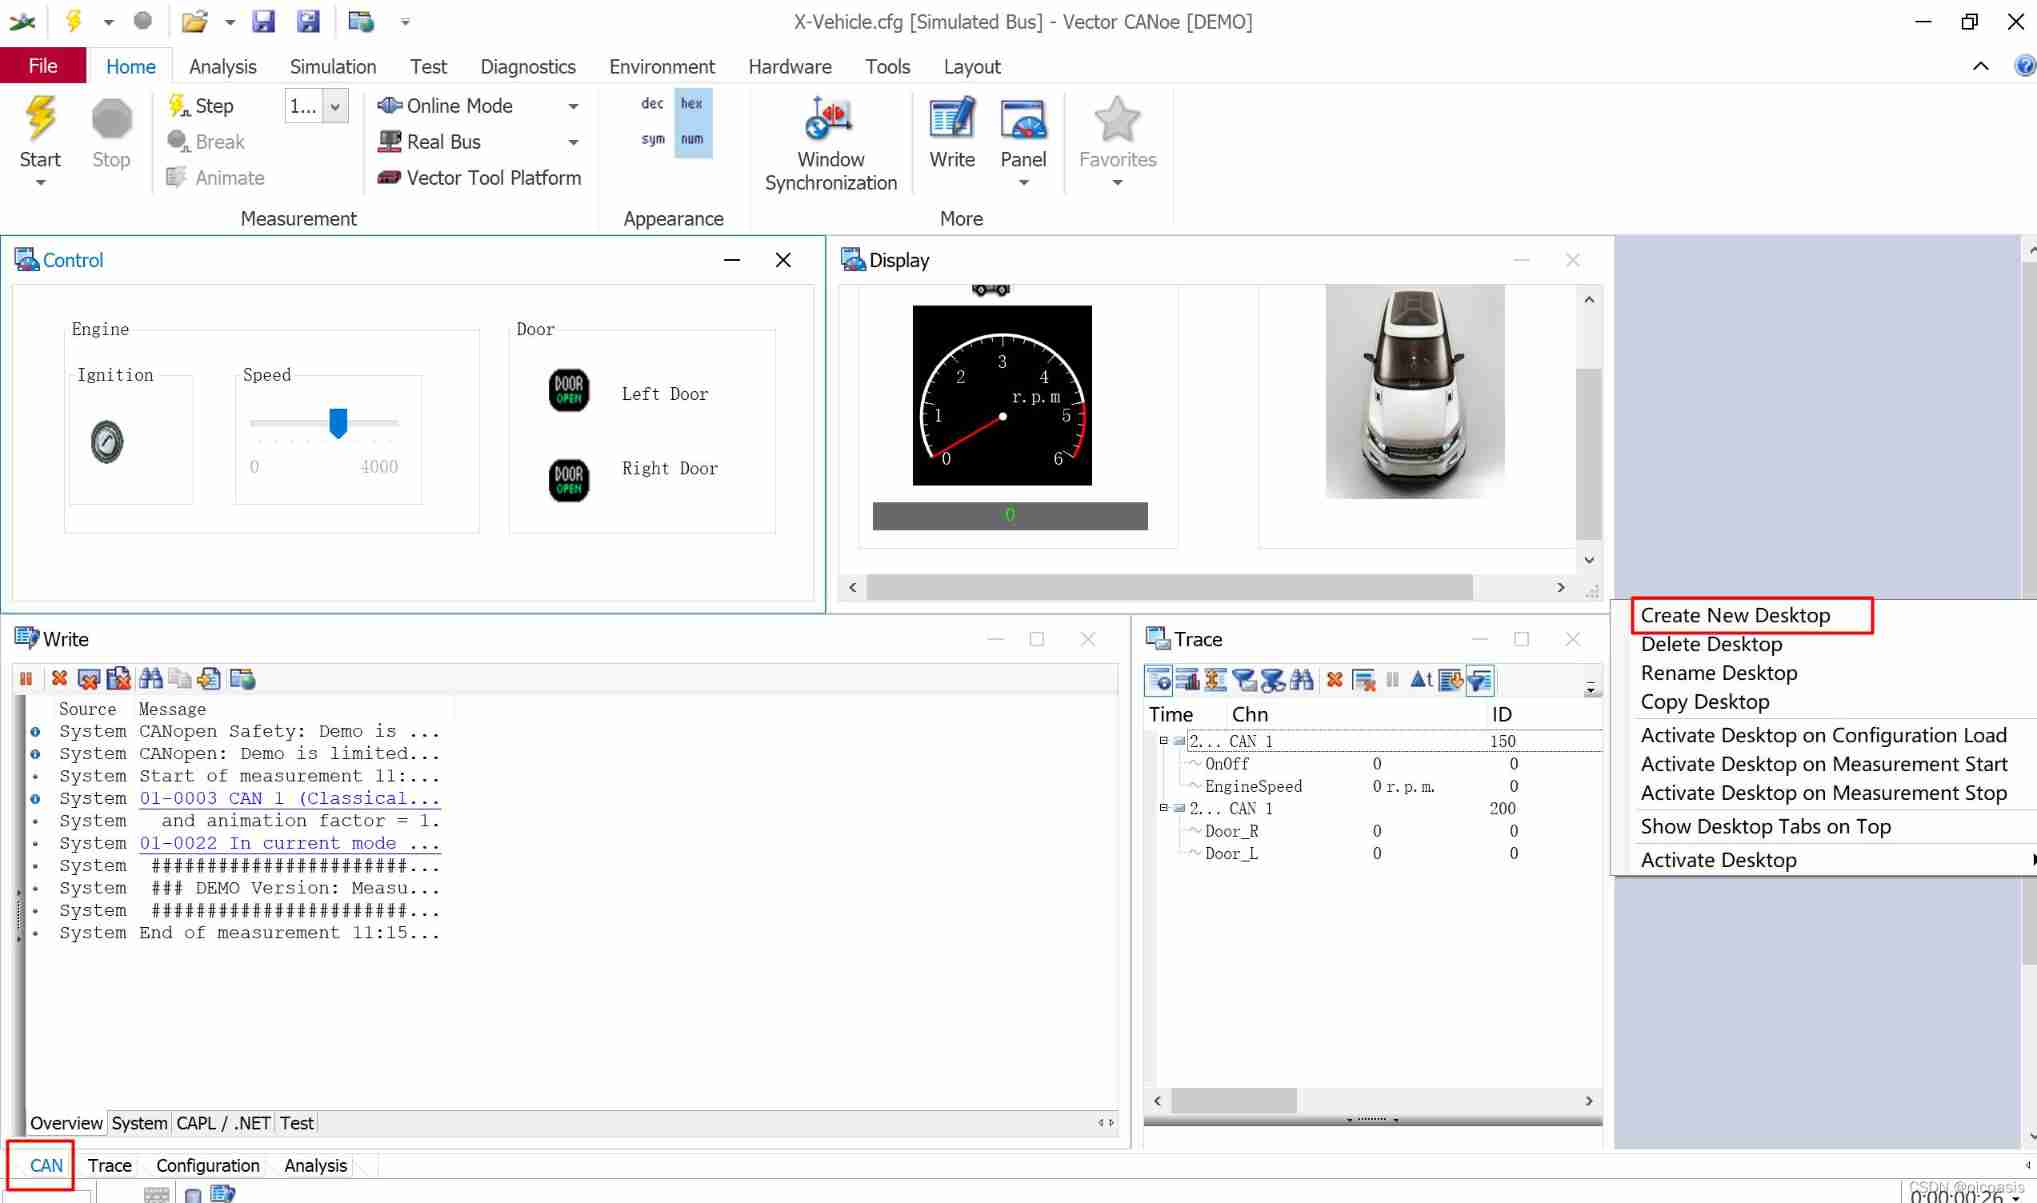
Set each window by MIDI Pattern
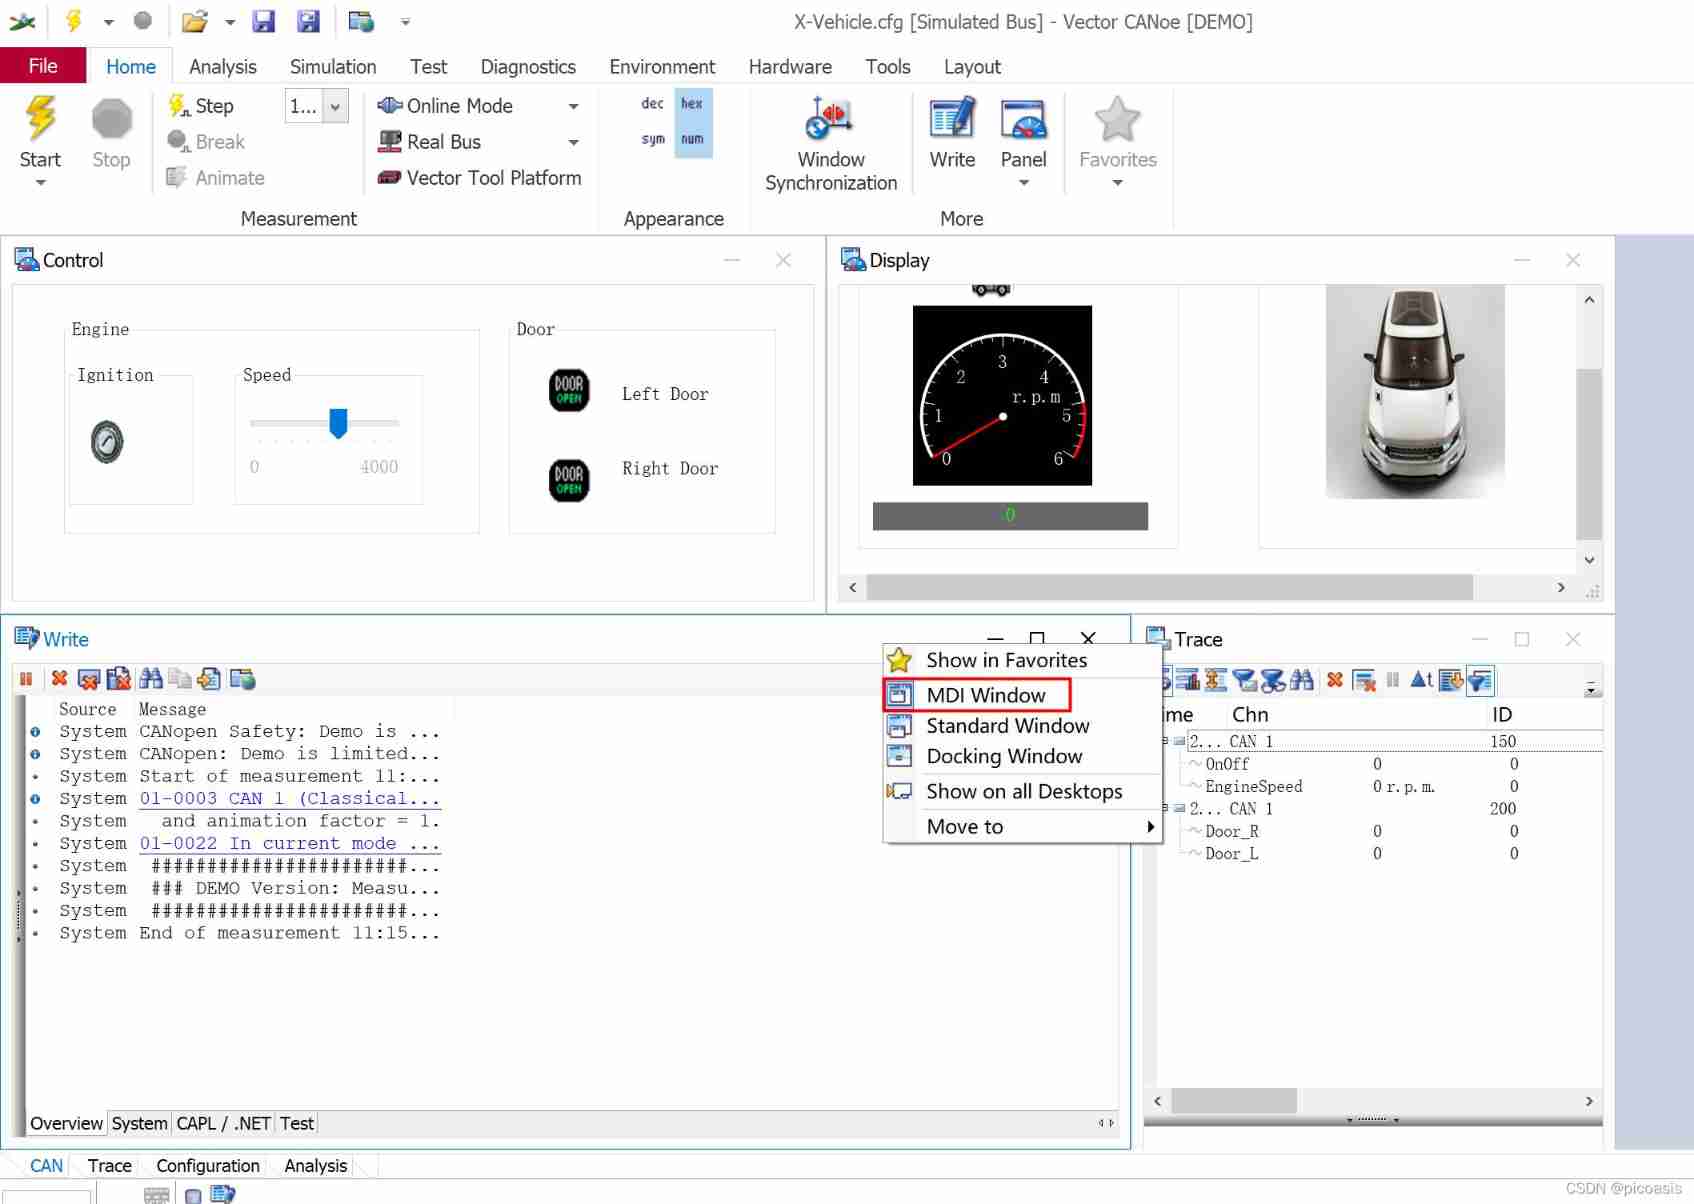
thus ,XVehicle engineering Panel Design complete .
If you run the project at this time , Although it can run , But you will find that most of the functions of simulation have not been realized , This is because simulation engineering does not add implementation functions CAPL Code . Is the next part .
END
边栏推荐
- Unittest+airtest+beatiulreport combine the three to make a beautiful test report
- Const's constant member function after the function; Form, characteristics and use of inline function
- Day7 list and dictionary jobs
- [Galaxy Kirin V10] [desktop] FTP common scene setup
- [Galaxy Kirin V10] [desktop] build NFS to realize disk sharing
- Es advanced series - 1 JVM memory allocation
- Ten key performance indicators of software applications
- OSPF comprehensive experiment
- Advanced order of function
- leetcode1229. Schedule the meeting
猜你喜欢

BGP ---- border gateway routing protocol ----- basic experiment
Personal thoughts on the development of game automation protocol testing tool
RHCE - day one

Static comprehensive experiment ---hcip1

Add t more space to your computer (no need to add hard disk)
Jianzhi offer 04 (implemented in C language)
![[Galaxy Kirin V10] [server] failed to start the network](/img/0f/6d2f321da85bd7437d2b86547bd8b4.jpg)
[Galaxy Kirin V10] [server] failed to start the network
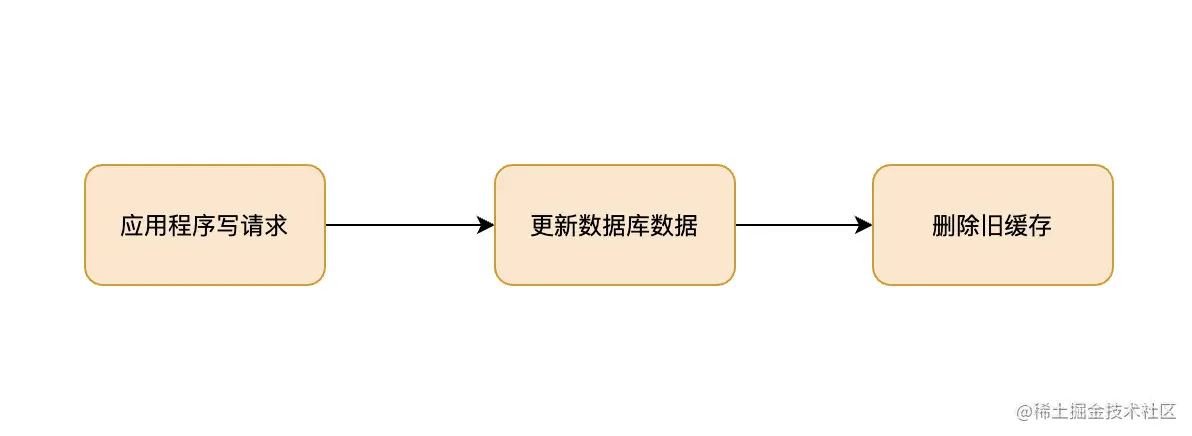
如果不知道這4種緩存模式,敢說懂緩存嗎?

Open the neural network "black box"! Unveil the mystery of machine learning system with natural language
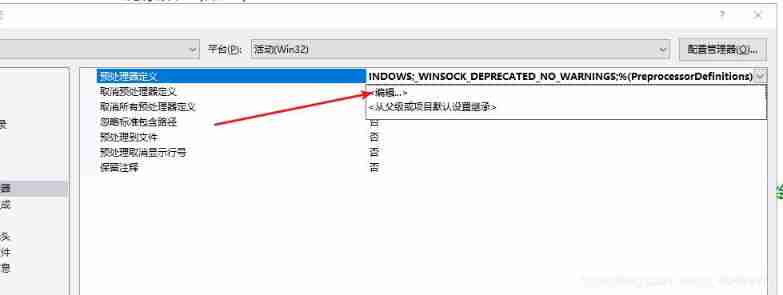
Error C4996 ‘WSAAsyncSelect‘: Use WSAEventSelect() instead or define _ WINSOCK_ DEPRECATED_ NO_ WARN
随机推荐
Jemeter plug-in technology
XMIND installation
[Galaxy Kirin V10] [server] KVM create Bridge
Rhcsa12
Rhsca day 11 operation
leetcode1229. Schedule the meeting
From programmers to large-scale distributed architects, where are you (2)
51 data analysis post
Aike AI frontier promotion (2.14)
[Galaxy Kirin V10] [server] NUMA Technology
C language structure to realize simple address book
Pod management
Rhcsa operation
Jemeter script recording
[Galaxy Kirin V10] [desktop] build NFS to realize disk sharing
20 minutes to learn what XML is_ XML learning notes_ What is an XML file_ Basic grammatical rules_ How to parse
Quick sort (C language)
Snake (C language)
/*Rewrite the program, find the value of the element, and return the iterator 9.13: pointing to the found element. Make sure that the program works correctly when the element you are looking for does
Error C4996 ‘WSAAsyncSelect‘: Use WSAEventSelect() instead or define _ WINSOCK_ DEPRECATED_ NO_ WARN