当前位置:网站首页>Fdog series (4): use the QT framework to imitate QQ to realize the login interface, interface chapter.
Fdog series (4): use the QT framework to imitate QQ to realize the login interface, interface chapter.
2022-07-06 16:52:00 【Flower dog fdog】
List of articles
One . Preface
Fdog The series has been catalogued :
hello , My friends , In the last three articles , We have implemented the registration of a Fdog account number , Including the first html The design of the , Second articles ,html Page response , And the third text message , Database writing and so on , On the preparation of the web side , It's described in three articles , From chapter four , Will enter the Qt Stage , I'm going to start using Qt Continue to create , Lead you to synthesize some knowledge .
First look at the renderings 
The source code of all articles has been packaged and uploaded to github, Seeking stars !
Learn this article , You will learn to :
Customize the title box , Enabling mobility
Hide the taskbar icon , Display the icon in the system tray ( The lower right corner of the system )
Create a right-click menu
The whimsy of textbox
How to add shadow effect to custom border
Pattern design
Etc., etc.
The drop-down box in the picture , And how to get content , Change content , Delete content , I will explain it to you in the fifth function chapter , It also includes getting local login information , Identify whether the user remembers the password , as well as ListWdiget Customize , Pay attention that I'm not lost !
Now let's start !go!
Two . Text
1. create a window , Add basic components
First create a Widget window , Don't create MainWindow window , because MainWindow The window will be the window of our main interface .
Right click on the item , Add new file , Choose Qt Below Qt Designer interface class , Choose to create widget Type of window .
And then we'll do the same , imitation QQ Add the necessary controls .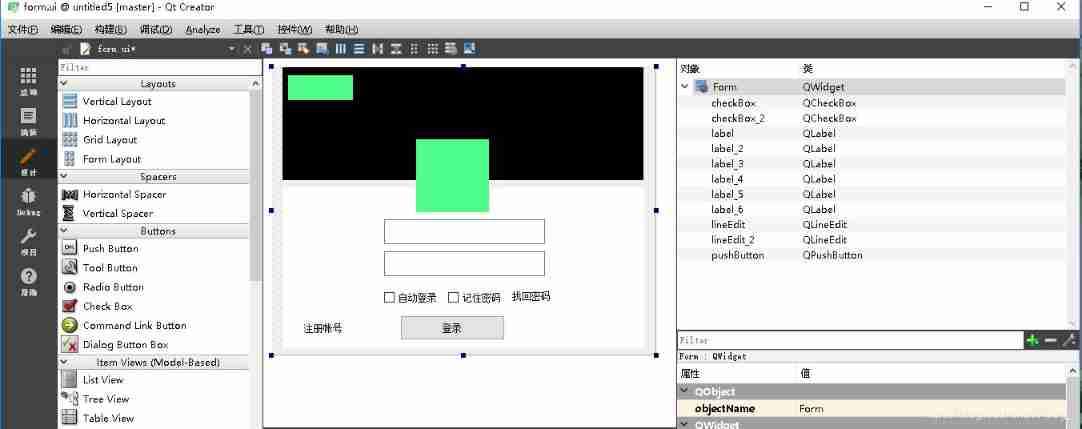
It includes several labels , Button , And text boxes .
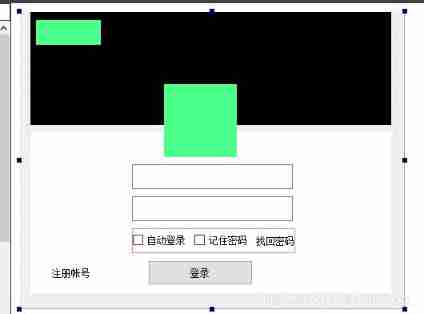
You can see that the one on the right of the three controls below the text box doesn't seem to be very aligned , How to do it? , Give them three plus a horizontal layout to solve the problem , You might say use XY Values can also be conditional , ok , whatever .
Let's pull a horizontal layout , Pull these three controls in , The effect is as follows :
tip :
If you want a control to be particularly long , Or very short , Try setting their maximum and minimum values , If the control , For example, buttons , In the horizontal control, the width will zoom freely , High is not , Why ? You can click the button , Select... On the properties page sizepolicy, You can see the difference between the horizontal strategy and the vertical strategy , That's why , And vertical stretch properties , Set these properties appropriately , It will help you design a better interface .
Now? , Let's click Run , The effect is as follows :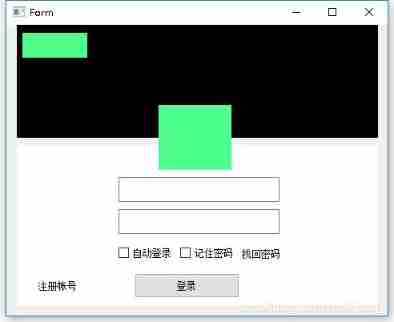
2. Custom title , Hide taskbar title , Realize system tray display
Now we hide the title of the system automatically , Use our custom title , before this , Let's minimize , Close button to achieve , Although you can cut directly to the background ~~~
Also use horizontal layout , Minimize , Maximize button (ToolButton) And the green label on the left in the horizontal layout , If you need a certain distance between two controls in the layout , You can use springs for spacing .
Right click the Min button and the close button , Go to slot , Select select (clicked()) The signal .
void Login::on_toolButton_clicked()// To minimize the
{

    this->hide();
}

void Login::on_toolButton_2_clicked()// close
{

    this->close();
}
And add icons to the buttons , And the label in the upper left corner logo picture , The operation effect is as follows ( The black effect is not obvious , I changed one ):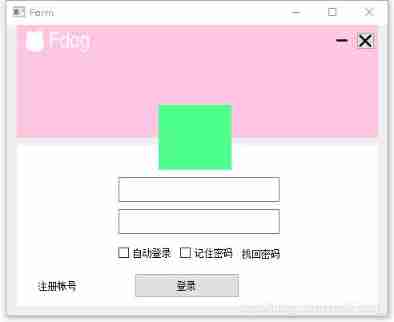
If you add an icon to a button , But it's like the close button with white on the back , You can select... In the button properties autoRaise, Check , You'll see that the background is transparent .
If you don't add resources , I'll teach you , Right-click on the project , Create a new file , Choose Qt Medium Qt Resources file , After creation, there will be one more project list Resources file , Then create a... Under the project folder lib Folder , The picture is in it , And then click Resources, Add existing file , choice lib The picture below is enough .
I forgot the main thing , How to cancel the system title , In the constructor , Set... For the form Flags.
this->setWindowFlags(Qt::SplashScreen|Qt::WindowStaysOnTopHint|Qt::FramelessWindowHint);
Run it 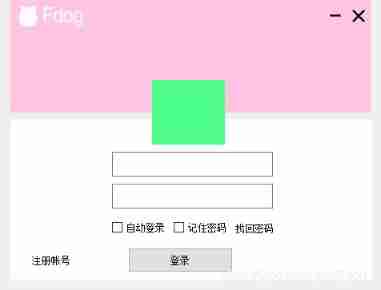
You will find that there is no system title , But there's a big problem here , Did you find that it couldn't move at all ????
Let's deal with it .
Add two header files
#include<QPoint>
#include<QMouseEvent>
Add three functions and two variables to the header file .
	bool isPressedWidget;
	QPoint last;
    void mousePressEvent(QMouseEvent *event);// Mouse click
    void mouseMoveEvent(QMouseEvent *event);// Mouse movement
    void mouseReleaseEvent(QMouseEvent *event);// Mouse release
And implement it
void Login::mousePressEvent(QMouseEvent *event)
{

    isPressedWidget = true; //  The current mouse button is QWidget Instead of other controls laid out on the interface
    last = event->globalPos();
}

void Login::mouseMoveEvent(QMouseEvent *event)
{

    if (isPressedWidget)
        {

            int dx = event->globalX() - last.x();
            int dy = event->globalY() - last.y();
            last = event->globalPos();
            move(x()+dx, y()+dy);
        }
}

void Login::mouseReleaseEvent(QMouseEvent *event)
{

    int dx = event->globalX() - last.x();
    int dy = event->globalY() - last.y();
    move(x()+dx, y()+dy);
    isPressedWidget = false; //  When the mouse is released , Set as false
}
Here is another way to write about mouse movement :Qt Hide the system title bar , Use custom title bar
The operation effect is as follows :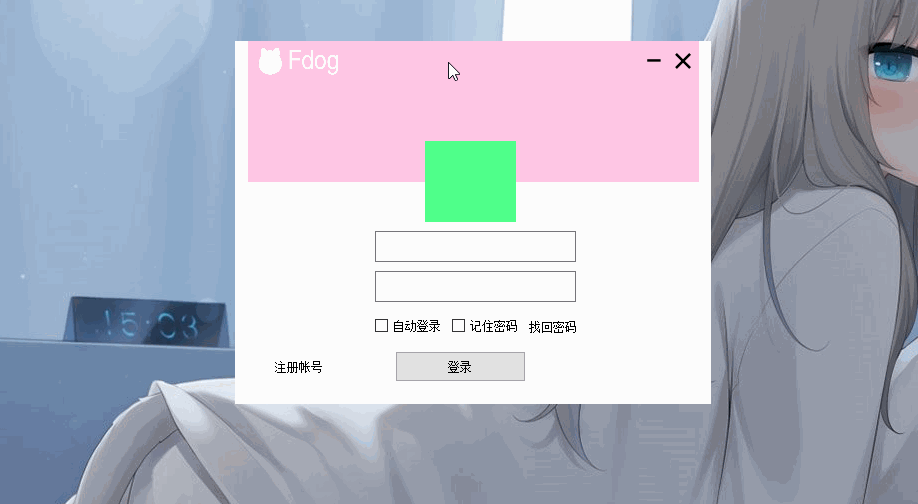
In addition, the taskbar does not display the program title , This is exactly what we want , Now let's add a system tray to this window , and QQ equally , We will work on it in the system tray .
QSystemTrayIcon Class can help us do this .
Create a... In the header file QSystemTrayIcon Class object
QSystemTrayIcon * systemtrayicon; // System tray
cpp It is instantiated in the file
// Initialize the system tray
    systemtrayicon = new QSystemTrayIcon(this);
    QIcon icon = QIcon(":/lib/qusefdogicon.png");
    // Add Icon
    systemtrayicon->setIcon(icon);
    // When the mouse hovers , According to the text
    systemtrayicon->setToolTip(QObject::trUtf8("Fdog"));
    // Show icons
    systemtrayicon->show();
The only drawback is qq There's a right-click menu , We don't have it , Now let's try adding the right-click menu , And to open the main interface and exit function .
Create a menu object , Two action, Two slot functions
#inlcude<QMenu>
QMenu * menu;
QAction *m_pShowAction;
QAction *m_pCloseAction;
private slots:
void showwidget();
void closewidget();
Exemplify it
menu = new QMenu(this);
m_pShowAction = new QAction(" Open the main interface ");
m_pCloseAction = new QAction(" sign out ");
menu->addAction(m_pShowAction);
menu->addSeparator();
menu->addAction(m_pCloseAction);
systemtrayicon->setContextMenu(menu);
connect(m_pShowAction,SIGNAL(triggered(bool)),this,SLOT(showwidget()));
connect(m_pCloseAction,SIGNAL(triggered(bool)),this,SLOT(closewidget()));

void Login::showwidget()
{

    this->show();
}

void Login::closewidget()
{

    this->close();
}
The effect is as follows , Right click , You can choose to open the main interface or exit .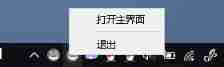
3. Beautify the main interface , The whimsy of textbox
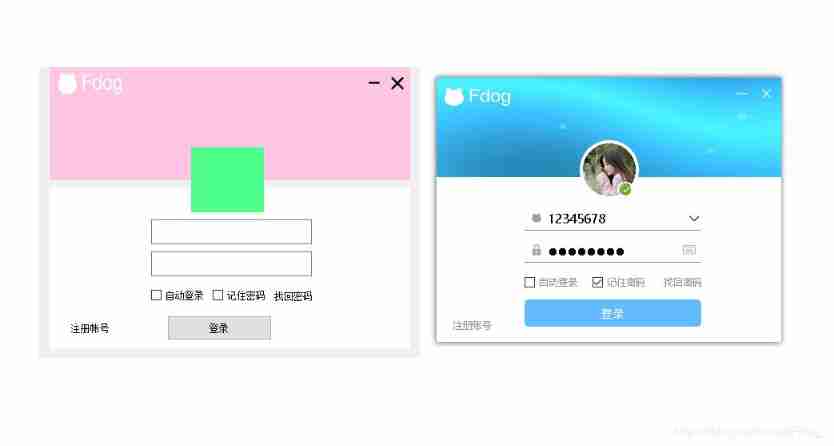
Now? , We focus on beautifying the style , Let's move it from the picture on the left to the right .
For example, a dynamic graph in the upper part , How to display dynamic graph
#include<QMovie>
QMovie * m_movie;
// Load dynamic graph
m_movie = new QMovie(":/lib/mian.gif");// This is the dynamic picture that needs to be played
// Set dynamic graph size
m_si.setWidth(431);
m_si.setHeight(151);
m_movie->setScaledSize(m_si);
// Add dynamic graphs
ui->mian_label->setMovie(m_movie); //mian_label It's a pink label
// Start the animation
m_movie->start();
To set the avatar to a circle, you need to set qss, That's the style sheet , You can right click. label Add the following statement to the avatar change style sheet
border-image: url(:/lib/icon2505897252.png);
border-width:0px;
border-radius:33px;
border-style:solid;
border-color: rgb(255, 255, 255);
Including the white box behind the avatar is the same way .
And then about registering accounts , And automatic login , Remember passwords, labels, buttons, etc , You can set the normal state and mouse suspension state , There's a difference in the depth of the text .
Here's a button example , Set up qss,:hover Represents mouse hover .
#pushButton_2{

color: rgb(149, 149, 149);
}
#pushButton_2:hover{

color: rgb(120, 120, 120);
}
Login button qss beautify
#pushButton{

background-color: rgb(99, 188, 255);
color: rgb(255, 255, 255);
border-radius: 5px;
font-size:14px;
}
#pushButton:hover{

background-color: rgb(99, 170, 255);
color: rgb(255, 255, 255);
border-radius: 5px;

}
#pushButton:pressed{

background-color: rgb(99, 188, 255);
color: rgb(255, 255, 255);
border-radius: 5px;
padding-left:2px;
padding-top:2px;
}
Default button , When we click the button , The text on the button will move to the upper right corner , But when we add custom images , The effect disappears , How to do this , have access to padding-left:2px; padding-top:2px; To achieve .
Here's the main point , The whimsy of textbox .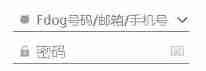
1. How to add default text , Text box properties placeholderText Can be set .
2. How to add an icon to a text box , It's left and right
//Fdog Number text box
QAction * searchAction = new QAction(ui->lineEdit);
searchAction->setIcon(QIcon(":/lib/suo.png"));
ui->lineEdit->addAction(searchAction,QLineEdit::LeadingPosition);// Express action Location ( left ).
// Password text box
QAction * searchAction_2 = new QAction(ui->lineEdit);
searchAction_2->setIcon(QIcon(":/lib/jianpan.png"));
ui->lineEdit->addAction(searchAction_2,QLineEdit::TrailingPosition);// Express action Location ( On the right side ).
QAction * searchAction_3 = new QAction(ui->lineEdit);
searchAction_3->setIcon(QIcon(":/lib/fdog.png"));
ui->lineEdit_2->addAction(searchAction_3,QLineEdit::LeadingPosition);// Express action Location ( left ).
3. How to realize the right drop-down option box , Actually, here's a text box and a combox Drop down list box
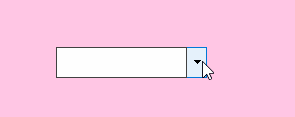
Click the triangle button , Just display the selected content in the text box .
This triangle seems a little ugly , We can give it a replacement
::down-arrow{

border-image: url(:/lib/jietou.png);
}
If you don't know which child controls a control has , You can read this article Child controls look up .
After that, change the left and right sides of the text box and the top edge to white or transparent , Black below , Be accomplished .
border-style:solid;
border-width:1px;
border-top-color: rgba(255, 255, 255, 0);
border-right-color: rgba(255, 255, 255, 0);
border-left-color: rgba(255, 255, 255, 0);
border-bottom-color: rgb(129, 129, 129);
4. Achieve background shadow
up to now , One last question remains , When using the built-in title bar , The window has its own shadow border , But when we cancel the system's own title bar , The borders disappear , How to make a border shadow ? I'll teach you , First, prepare a border shadow map , No, ? Don't worry , Dog, I'm omnipotent ,PS Walk up , Anyway, I am also an excellent person in charge of the poster of the student union .
Create a transparent layer , Then create a white layer , The border should be smaller than the transparent layer , Set layer styles for white layers , In the projection , The parameters are as follows :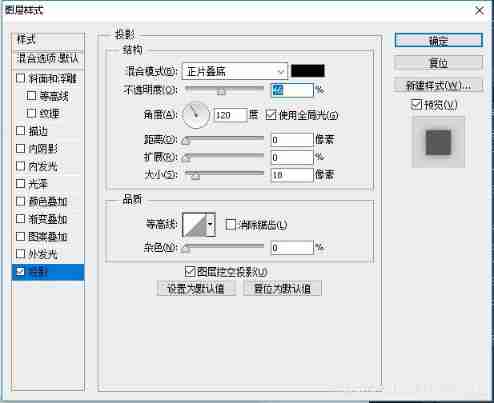
There's a white background on the back for easy observation . And save it as png chart , Remember to hide the white layer behind , Again, pay attention to the distance between the transparent layer and the shadow layer ,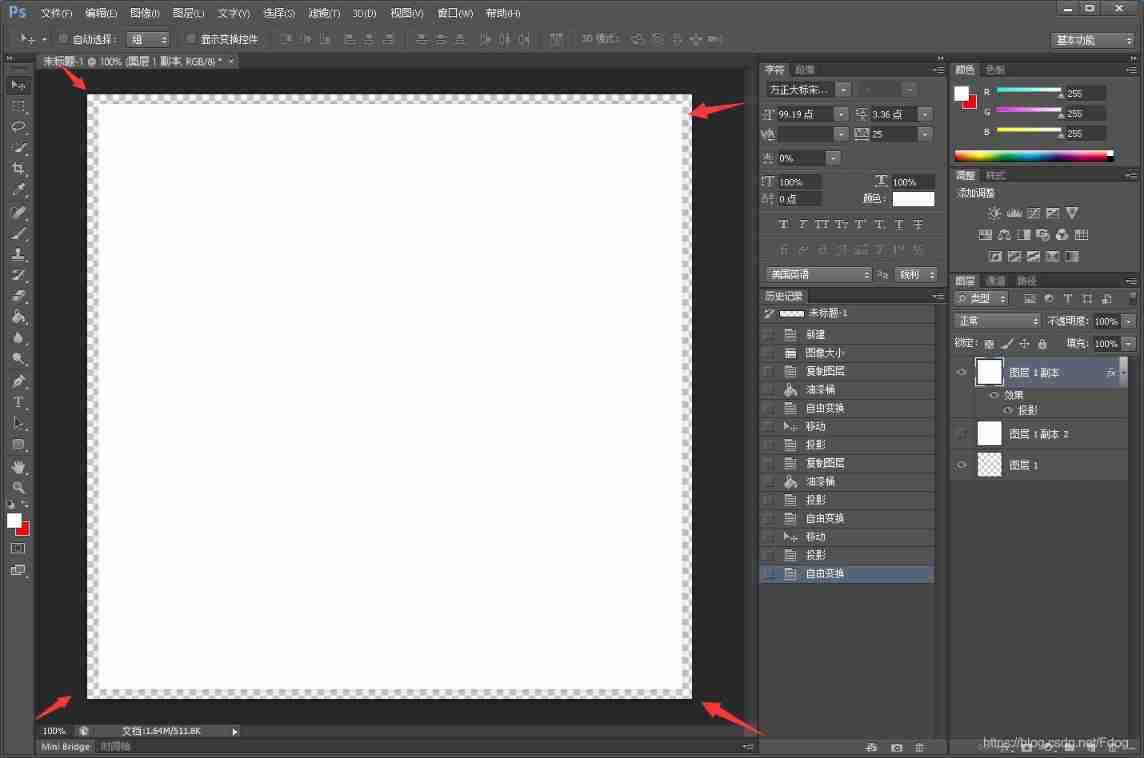
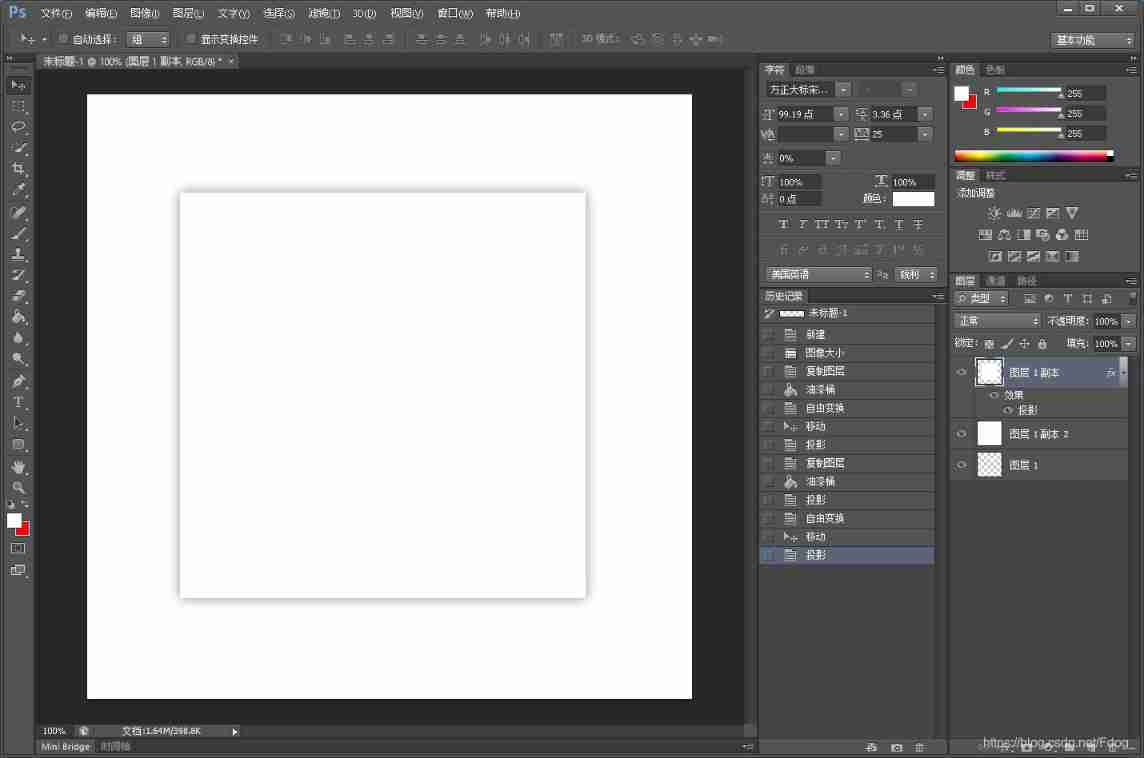
Will arrive qt, Drag one widget, Then drag in all the controls we created except the top-level window , Then set the minimum size and the maximum size , Then give the top window a layout . And set the right margins , This is the blue area in the picture , This blue area is where the shadows are .
Then make the form transparent
    // The form is transparent
    setAttribute(Qt::WA_TranslucentBackground);
rewrite void paintEvent(QPaintEvent *e);
void paintEvent(QPaintEvent *e);

void Login::paintEvent(QPaintEvent *e)
{

    Q_UNUSED(e)
    QPainter painter(this);
    QPixmap pixmap(":/lib/background.png");// A good picture
    qDrawBorderPixmap(&painter, this->rect(), QMargins(0, 0, 0, 0), pixmap);
    QRect rect(this->rect().x()+8, this->rect().y()+8, this->rect().width()-16, this->rect().height()-16);
    painter.fillRect(rect, QColor(255, 255, 255));
}
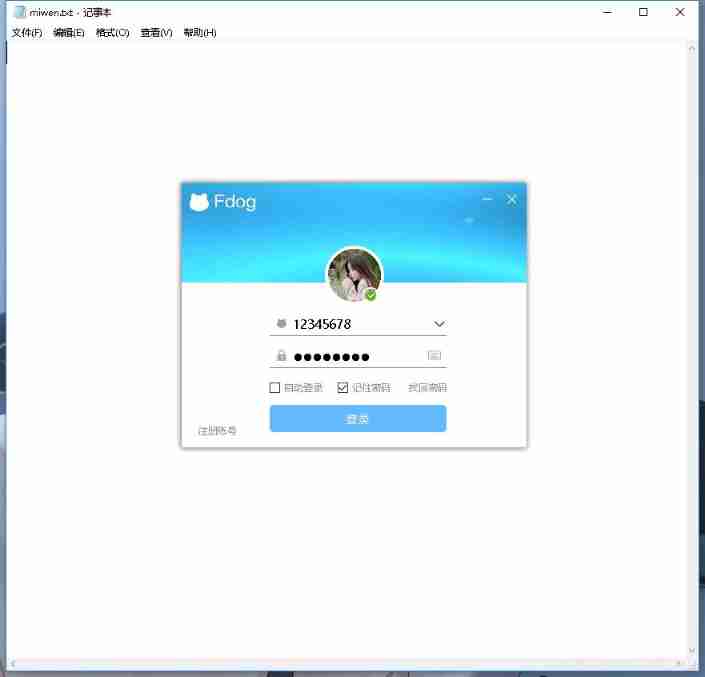

Finally, a beautiful picture , I know how are you 【 Manual formation 】, I saw my beautiful picture , Don't give me a quick compliment , Pay attention ?
Source code and image resources, if you want , You can leave an email in the comments section , You can also add my wechat to get sui2506897252.
边栏推荐
- Chapter 1 overview of MapReduce
- 亮相Google I/O,字节跳动是这样应用Flutter的
- 两个礼拜速成软考中级软件设计师经验
- was unable to send heartbeat
- 第2章 HFDS的Shell操作
- Codeforces Global Round 19
- Business system compatible database oracle/postgresql (opengauss) /mysql Trivia
- J'ai traversé le chemin le plus fou, le circuit cérébral d'un programmeur de saut d'octets
- Simply try the new amp model of deepfacelab (deepfake)
- 谢邀,人在工区,刚交代码,在下字节跳动实习生
猜你喜欢
Mp4 format details
LeetCode 1552. Magnetic force between two balls
7-4 harmonic average
LeetCode 1637. The widest vertical area between two points without any point
~81 long table
The 116 students spent three days reproducing the ByteDance internal real technology project

我走過最迷的路,是字節跳動程序員的腦回路

第三章 MapReduce框架原理
One hundred questions of image processing (11-20)
Data config problem: the reference to entity 'useunicode' must end with ';' delimiter.
随机推荐
~79 Movie card exercise
Solr word segmentation analysis
视频压缩编码和音频压缩编码基本原理
SQL快速入门
(multiple methods, need to continue to see) 7-11 go deep into the tiger's Den
字节跳动开源GAN模型压缩框架,算力最高节省97.8%丨ICCV 2021
Jedis
ffmpeg命令行使用
谢邀,人在工区,刚交代码,在下字节跳动实习生
Shell_ 01_ data processing
Shell_ 06_ Judgment and circulation
Chapter 5 detailed explanation of consumer groups
Codeforces Round #771 (Div. 2)
Spark's RDD (elastic distributed data set) returns a large result set
我走過最迷的路,是字節跳動程序員的腦回路
The most lost road I have ever walked through is the brain circuit of ByteDance programmers
Chapter 5 namenode and secondarynamenode
7-10 punch in strategy
Restful style interface design
字节跳动技术新人培训全记录:校招萌新成长指南