当前位置:网站首页>信息安全实验四:Ip包监视程序实现
信息安全实验四:Ip包监视程序实现
2022-07-07 06:38:00 【一顿吃不饱】
一、实验目的及要求
学生在熟悉网络数据通信原理以及TCP/IP协议结构原理的基础上,运用套接字编程实现的网络封包监视技术,有效地探测在网络上传输的数据包信息,通过对这些信息的分析利用是有助于网络安全维护的。要求:
1.熟悉网络数据通信原理以及TCP/IP协议结构原理。
2.掌握Ip包发送和接收过程。
3.在所学知识的基础上自己确定实验方案,画出流程图,独立编程,实现网络监听程序。
4.对获取的数据包进行简单分析。
二、实验内容
将网卡的工作模式设置为混合模式。获取局域网内的某台(多台)主机的MAC地址,捕获到所有经过网卡的数据包,并可从中分析出协议、IP源地址、IP目标地址、TCP源端口号、TCP目标端口号以及数据包长度等信息。
三、实验环境
运行windows的PC机,具有JAVA、VC(windows)等语言编译环境。
四、实验步骤及结果分析
1. 下载安装WinPcap,WinPcap可以为应用程序提供访问网络底层的能力。它用于windows系统下的直接的网络编程。
2. 下载Jpcap.jar包,用于抓包实验运行,jpcap实际上并非一个真正去实现对数据链路层的控制,而是一个中间件,JPCAP调用winpcap/libpcap,而给JAVA语言提供一个公共的接口,从而实现了平台无关性
3.根据Jpcap.jar包的相关类与方法进行实验编写
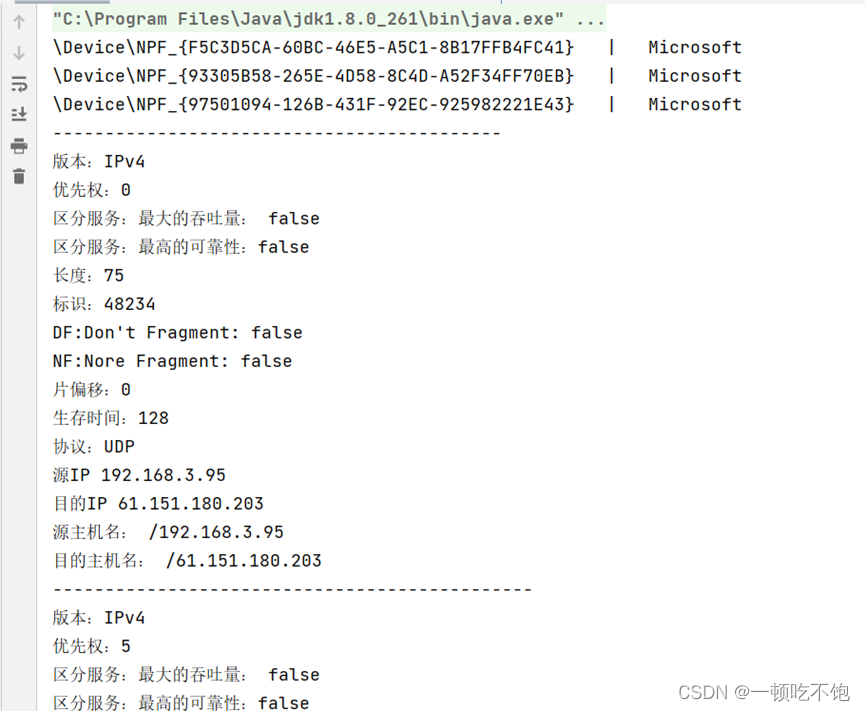
绑定网络设备
NetworkInterface[] devices = JpcapCaptor.getDeviceList();
for (NetworkInterface n : devices) {
System.out.println(n.name + " | " + n.description);
}
进行抓包
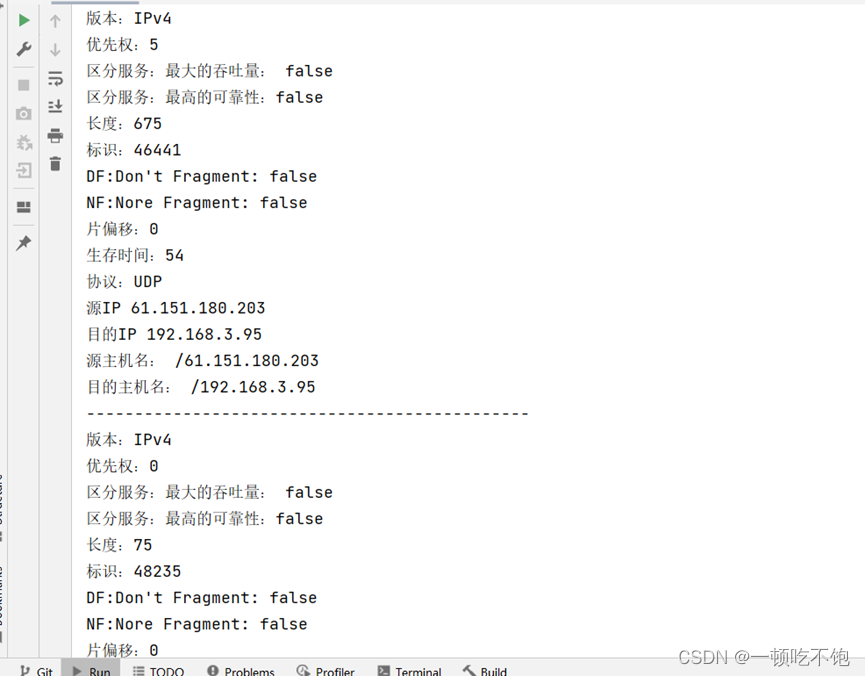
int i = 0; while (i < 10) { Packet packet = jpcap.getPacket(); if (packet instanceof IPPacket && ((IPPacket) packet).version == 4) { i++; IPPacket ip = (IPPacket) packet;//强转 System.out.println("版本:IPv4"); System.out.println("优先权:" + ip.priority); System.out.println("区分服务:最大的吞吐量: " + ip.t_flag); System.out.println("区分服务:最高的可靠性:" + ip.r_flag); System.out.println("长度:" + ip.length); System.out.println("标识:" + ip.ident); System.out.println("DF:Don't Fragment: " + ip.dont_frag); System.out.println("NF:Nore Fragment: " + ip.more_frag); System.out.println("片偏移:" + ip.offset); System.out.println("生存时间:" + ip.hop_limit); String protocol = ""; switch (new Integer(ip.protocol)) { case 1: protocol = "ICMP"; break; case 2: protocol = "IGMP"; break; case 6: protocol = "TCP"; break; case 8: protocol = "EGP"; break; case 9: protocol = "IGP"; break; case 17: protocol = "UDP"; break; case 41: protocol = "IPv6"; break; case 89: protocol = "OSPF"; break; default: break; } System.out.println("协议:" + protocol); System.out.println("源IP " + ip.src_ip.getHostAddress()); System.out.println("目的IP " + ip.dst_ip.getHostAddress()); System.out.println("源主机名: " + ip.src_ip); System.out.println("目的主机名: " + ip.dst_ip); System.out.println("----------------------------------------------"); } }4.实验结果
实验总结:通过本次实验,我了解了网络数据通信原理,掌握了掌握Ip包发送和接收过程,并通过Jpcap.jar包调用winpacp实现访问网络底层的能力,在程序中引用jpcap类中的方法实现了对IP包的监视和分析
边栏推荐
- 2022-06-30 unity core 8 - model import
- Storage of data in memory
- Sublime Text4 download the view in bower and set the shortcut key
- OpenGL 3D graphics rendering
- Panel display technology: LCD and OLED
- JVM 内存结构 详细学习笔记(一)
- Run can start normally, and debug doesn't start or report an error, which seems to be stuck
- NVIC interrupt priority management
- Skill review of test engineer before interview
- Serializer & modelserializer of DRF serialization and deserialization
猜你喜欢
【Istio Network CRD VirtualService、Envoyfilter】
Several stages of PMP preparation study
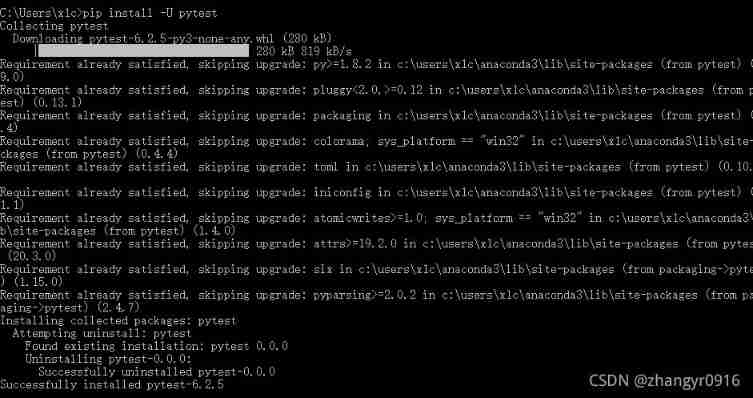
Pytest installation (command line installation)

Three updates to build applications for different types of devices | 2022 i/o key review

Expérience de port série - simple réception et réception de données
Reflections on the way of enterprise IT architecture transformation (Alibaba's China Taiwan strategic thought and architecture practice)

Mysql数据库-锁-学习笔记

PMP Exam Preparation experience systematically improve project management knowledge through learning

JVM garbage collection detailed learning notes (II)
串口實驗——簡單數據收發
随机推荐
How to use Arthas to view class variable values
Reading notes of pyramid principle
On December 8th, 2020, the memory of marketing MRC application suddenly increased, resulting in system oom
Systick滴答定时器
硬核分享:硬件工程师常用工具包
DRF defines views and routes
How does the project manager write the weekly summary and weekly plan?
Interview question: general layout and wiring principles of high-speed PCB
E-commerce campaign Guide
PMP Exam Preparation experience systematically improve project management knowledge through learning
Reflections on the way of enterprise IT architecture transformation (Alibaba's China Taiwan strategic thought and architecture practice)
Postman interface test (II. Set global variables \ sets)
串口实验——简单数据收发
外部中断实现按键实验
Druid monitoring - Introduction to JMX usage and principle
RuntimeError: Calculated padded input size per channel: (1 x 1). Kernel size: (5 x 5). Kernel size c
Postman interface test (I. installation and use)
STM32串口寄存器库函数配置方法
Hard core sharing: a common toolkit for hardware engineers
Do you have any certificates with high gold content?