当前位置:网站首页>Pytorch---使用Pytorch进行图像定位
Pytorch---使用Pytorch进行图像定位
2022-07-02 04:04:00 【水哥很水】
一、代码中的数据集可以通过以下链接获取
二、代码运行环境
Pytorch-gpu==1.10.1
Python==3.8
三、数据集处理代码如下所示
import os
import matplotlib.pyplot as plt
import torch
from torch.utils.data import Dataset, DataLoader
import xml.etree.ElementTree as ET
import numpy as np
from torchvision import transforms
from PIL import Image
from torchvision.utils import draw_bounding_boxes


class PetDataset(Dataset):
    def __init__(self, images_path, labels, transform):
        super(PetDataset, self).__init__()
        self.images_path = images_path
        self.labels = labels
        self.transform = transform

    def __getitem__(self, index):
        img = self.images_path[index]
        pil_img = Image.open(img).convert('RGB')
        img_tensor = self.transform(pil_img)

        label1, label2, label3, label4 = self.labels[index]

        return img_tensor, label1, label2, label3, label4

    def __len__(self):
        return len(self.images_path)


def to_labels(path):
    xml_file = open(path, encoding='utf-8')
    tree = ET.parse(xml_file)
    root = tree.getroot()

    width = float(root.find('size').find('width').text)
    height = float(root.find('size').find('height').text)

    xmin = float(root.find('object').find('bndbox').find('xmin').text) / width
    ymin = float(root.find('object').find('bndbox').find('ymin').text) / height
    xmax = float(root.find('object').find('bndbox').find('xmax').text) / width
    ymax = float(root.find('object').find('bndbox').find('ymax').text) / height

    return [xmin, ymin, xmax, ymax]


def load_data():
    DATASET_PATH = r'/Users/leeakita/Desktop/dataset'
    BATCH_SIZE = 32

    XML_PATH = os.path.join(DATASET_PATH, 'xmls')
    IMAGE_PATH = os.path.join(DATASET_PATH, 'images')

    xml_names = os.listdir(XML_PATH)
    file_names = [name.split('.')[0] for name in xml_names]

    image_paths = [os.path.join(IMAGE_PATH, file_name + '.jpg') for file_name in file_names]
    xml_paths = [os.path.join(XML_PATH, file_name + '.xml') for file_name in file_names]
    labels = [to_labels(xml_path) for xml_path in xml_paths]

    np.random.seed(2022)
    index = np.random.permutation(len(image_paths))

    image_paths = np.array(image_paths)[index]
    labels = np.array(labels)[index]
    labels = labels.astype(np.float32)

    train_split = int(len(image_paths) * 0.8)

    train_images = image_paths[:train_split]
    train_labels = labels[:train_split]

    test_images = image_paths[train_split:]
    test_labels = labels[train_split:]

    transform = transforms.Compose([
        transforms.Resize((224, 224)),
        transforms.ToTensor()
    ])

    train_ds = PetDataset(images_path=train_images, labels=train_labels, transform=transform)
    test_ds = PetDataset(images_path=test_images, labels=test_labels, transform=transform)

    train_dl = DataLoader(dataset=train_ds, batch_size=BATCH_SIZE, shuffle=True)
    test_dl = DataLoader(dataset=test_ds, batch_size=BATCH_SIZE)

    return train_dl, test_dl


if __name__ == '__main__':
    trainn, testt = load_data()
    image, xminn, yminn, xmaxn, ymaxn = next(iter(testt))
    index = 6
    image, xminn, yminn, xmaxn, ymaxn = image[index], xminn[index], yminn[index], xmaxn[index], ymaxn[index]
    boxes = [xminn.item() * 224, yminn.item() * 224, xmaxn.item() * 224, ymaxn.item() * 224]
    boxes = torch.FloatTensor(boxes)
    boxes = boxes.unsqueeze(0)
    result = draw_bounding_boxes(image=torch.as_tensor(data=image * 255, dtype=torch.uint8), boxes=boxes, colors='red')
    plt.imshow(result.permute(1, 2, 0).numpy())
    plt.show()
四、模型的构建代码如下所示
import torch
import torchvision
from torch import nn


class Net(nn.Module):
    def __init__(self):
        super(Net, self).__init__()
        resnet = torchvision.models.resnet101(pretrained=True)
        self.conv_base = nn.Sequential(*list(resnet.children())[:-1])
        self.fc1 = nn.Linear(in_features=resnet.fc.in_features, out_features=1)
        self.fc2 = nn.Linear(in_features=resnet.fc.in_features, out_features=1)
        self.fc3 = nn.Linear(in_features=resnet.fc.in_features, out_features=1)
        self.fc4 = nn.Linear(in_features=resnet.fc.in_features, out_features=1)

    def forward(self, x):
        x = self.conv_base(x)
        x = torch.squeeze(x)
        x1 = self.fc1(x)
        x2 = self.fc2(x)
        x3 = self.fc3(x)
        x4 = self.fc4(x)

        return x1, x2, x3, x4


if __name__ == '__main__':
    model = Net()
五、模型的训练代码如下所示
import numpy as np
import torch
from data_loader import load_data
from model_loader import Net
import tqdm
import os

# 环境变量的配置
devices = torch.device('cuda' if torch.cuda.is_available() else 'cpu')

# 数据的加载
train_dl, test_dl = load_data()

# 模型的加载
model = Net()
model.to(device=devices)

# 训练的相关配置
loss_fn = torch.nn.MSELoss()
optimizer = torch.optim.Adam(params=model.parameters(), lr=0.0001)
lr_scheduler = torch.optim.lr_scheduler.StepLR(optimizer=optimizer, step_size=7, gamma=0.7)

# 开始进行训练
for epoch in range(50):
    model.train()
    train_tqdm = tqdm.tqdm(iterable=train_dl, total=len(train_dl))
    train_tqdm.set_description_str('Train epoch: {:2d}'.format(epoch))
    train_loss_sum = []
    for image, xmin, ymin, xmax, ymax in train_tqdm:
        image, xmin, ymin, xmax, ymax = image.to(devices), xmin.to(devices), ymin.to(devices), xmax.to(
            devices), ymax.to(devices)

        pred_xmin, pred_ymin, pred_xmax, pred_ymax = model(image)
        pred_xmin, pred_ymin, pred_xmax, pred_ymax = pred_xmin.squeeze(), pred_ymin.squeeze(), pred_xmax.squeeze(), pred_ymax.squeeze()

        loss_xmin = loss_fn(pred_xmin, xmin)
        loss_ymin = loss_fn(pred_ymin, ymin)
        loss_xmax = loss_fn(pred_xmax, xmax)
        loss_ymax = loss_fn(pred_ymax, ymax)

        loss = loss_xmin + loss_ymin + loss_xmax + loss_ymax

        optimizer.zero_grad()
        loss.backward()
        optimizer.step()

        with torch.no_grad():
            train_loss_sum.append(loss.item())
        train_tqdm.set_postfix_str('loss is :{:14f}'.format(np.array(train_loss_sum).mean()))
    train_tqdm.close()

    with torch.no_grad():
        model.eval()
        test_tqdm = tqdm.tqdm(iterable=test_dl, total=len(test_dl))
        test_tqdm.set_description_str('Test epoch: {:2d}'.format(epoch))
        test_loss_sum = []
        for image, xmin, ymin, xmax, ymax in test_tqdm:
            image, xmin, ymin, xmax, ymax = image.to(devices), xmin.to(devices), ymin.to(devices), xmax.to(
                devices), ymax.to(devices)

            pred_xmin, pred_ymin, pred_xmax, pred_ymax = model(image)
            pred_xmin, pred_ymin, pred_xmax, pred_ymax = pred_xmin.squeeze(), pred_ymin.squeeze(), pred_xmax.squeeze(), pred_ymax.squeeze()

            loss_xmin = loss_fn(pred_xmin, xmin)
            loss_ymin = loss_fn(pred_ymin, ymin)
            loss_xmax = loss_fn(pred_xmax, xmax)
            loss_ymax = loss_fn(pred_ymax, ymax)

            loss = loss_xmin + loss_ymin + loss_xmax + loss_ymax

            test_loss_sum.append(loss.item())
            test_tqdm.set_postfix_str('loss is :{:14f}'.format(np.array(test_loss_sum).mean()))
        test_tqdm.close()

# 进行模型的保存
if not os.path.exists(os.path.join('model_data')):
    os.mkdir(os.path.join('model_data'))
torch.save(model.state_dict(), os.path.join('model_data', 'model.pth'))
六、模型的预测代码如下所示
import torch
from data_loader import load_data
from model_loader import Net
import os
from torchvision.utils import draw_bounding_boxes
import matplotlib.pyplot as plt

# 数据的加载
train_dl, test_dl = load_data()
image, xmin, ymin, xmax, ymax = next(iter(test_dl))

# 模型的加载
model = Net()
model_state_dict = torch.load(os.path.join('model_data', 'model.pth'), map_location='cpu')
model.load_state_dict(model_state_dict)
model.eval()

# 开始进行预测
index = 0
with torch.no_grad():
    pred_xmin, pred_ymin, pred_xmax, pred_ymax = model(image)
    pred_xmin, pred_ymin, pred_xmax, pred_ymax = pred_xmin[index], pred_ymin[index], pred_xmax[index], pred_ymax[index]
    pre_boxes = [pred_xmin.item() * 224, pred_ymin.item() * 224, pred_xmax.item() * 224, pred_ymax.item() * 224]
    pre_boxes = torch.FloatTensor(pre_boxes)
    pre_boxes = torch.unsqueeze(input=pre_boxes, dim=0)
    label_boxes = [xmin[index].item() * 224, ymin[index].item() * 224, xmax[index].item() * 224,
                   ymax[index].item() * 224]
    label_boxes = torch.FloatTensor(label_boxes)
    label_boxes = torch.unsqueeze(input=label_boxes, dim=0)
    img = image[index]
    img = torch.as_tensor(data=img * 255, dtype=torch.uint8)
    result = draw_bounding_boxes(image=img, boxes=pre_boxes, colors='red')
    result = draw_bounding_boxes(image=result, boxes=label_boxes, colors='blue')
    plt.figure(figsize=(8, 8), dpi=500)
    plt.axis('off')
    plt.imshow(result.permute(1, 2, 0))
    plt.savefig('result.png')
    plt.show()
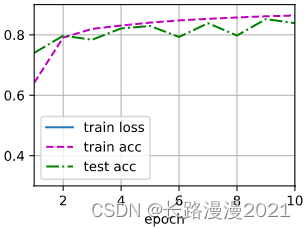
七、代码的运行结果如下所示

边栏推荐
- Wechat applet - realize the countdown of 60 seconds to obtain the mobile verification code (mobile number + verification code login function)
- Wpviewpdf Delphi and Net PDF viewing component
- C语言:逻辑运算和判断选择结构例题
- [personnel density detection] matlab simulation of personnel density detection based on morphological processing and GRNN network
- Suggestions on settlement solution of u standard contract position explosion
- 蓝湖的安装及使用
- 5G时代全面到来,浅谈移动通信的前世今生
- Target free or target specific: a simple and effective zero sample position detection comparative learning method
- 【无线图传】基于FPGA的简易无线图像传输系统verilog开发,matlab辅助验证
- Introduction to vmware workstation and vSphere
猜你喜欢

【IBDFE】基于IBDFE的频域均衡matlab仿真

Spring recruitment of Internet enterprises: Kwai meituan has expanded the most, and the annual salary of technical posts is up to nearly 400000
Blue Bridge Cup single chip microcomputer sixth temperature recorder
Hands on deep learning (II) -- multi layer perceptron
![[untitled]](/img/53/cb61622cfcc73a347d2d5e852a5421.jpg)
[untitled]

Introduction to vmware workstation and vSphere

Hand tear - sort

整理了一份ECS夏日省钱秘籍,这次@老用户快来领走
BiShe cinema ticket purchasing system based on SSM

Fluent icon demo
随机推荐
okcc为什么云呼叫中心比传统呼叫中心更好?
Raspberry pie GPIO pin controls traffic light and buzzer
Introduction to JSON usage scenarios and precautions
Pandora IOT development board learning (RT thread) - Experiment 1 LED flashing experiment (learning notes)
[JS event -- event flow]
Force buckle 540 A single element in an ordered array
The 11th Blue Bridge Cup single chip microcomputer provincial competition
go 分支与循环
【c语言】基础篇学习笔记
Typescript practice for SAP ui5
向数据库中存入数组数据,代码出错怎么解决
[untitled]
The 5th Blue Bridge Cup single chip microcomputer provincial competition
Sorted out an ECS summer money saving secret, this time @ old users come and take it away
Go语言介绍
Spring recruitment of Internet enterprises: Kwai meituan has expanded the most, and the annual salary of technical posts is up to nearly 400000
WPViewPDF Delphi 和 .NET 的 PDF 查看组件
How should the team choose the feature branch development mode or trunk development mode?
Basic operations of MySQL database (based on tables)
How to solve the problem that objects cannot be deleted in Editor Mode