当前位置:网站首页>QT creator add JSON based Wizard
QT creator add JSON based Wizard
2022-07-07 23:53:00 【Raring_ Ringtail】
Qt Creator Add based on JSON Wizard for
This article is translated from :https://doc.qt.io/qtcreator/creator-project-wizards-json.html
Qt Creator The wizard template will be found in the system shared directory and user settings folder , As in the Find the location of the wizard template That's what it says .
be based on JSON The folder where the wizard template is located contains a folder named wizard.json Of JSON Configuration files and required template files . The configuration file contains wizard specific information : Variables used 、 Wizard pages and generators used to create files .
To create a customized wizard template , You can change the name of a template folder and copy it to the system shared directory or user settings folder . If you want to use qmake To create a wizard and combine the wizard with Qt Creator Integrate , Please copy to the system shared folder . In addition, you can also create subdirectories under the user settings folder . Standard wizards are grouped into subfolders by type , But you can also add your wizard folder to any folder you like . The hierarchy of folders does not affect the order in which the wizard displays .
To share your wizard template with other users , You can create a compressed file of the wizard folder and prompt the user to extract the compressed file to Qt Creator In the directory of the search wizard .
In order to facilitate the development of the wizard , We suggest you start Qt Creator When using -customwizard-verbose Parameters , To receive Qt Creator Find and parse wizard.json Confirmation message sent when document . The detailed mode will display the information of syntax error , This is the most common error you encounter when editing the wizard . More information about detailed patterns , Please check out Detailed output .
in addition , by Inspect and Factory.Reset Setting the shortcut key can start the check of fields and variables in the wizard and can be done without restarting Qt Creator Enables the wizard to File > New File or Project Are listed in . More about , Please check out Some skills of wizard development .
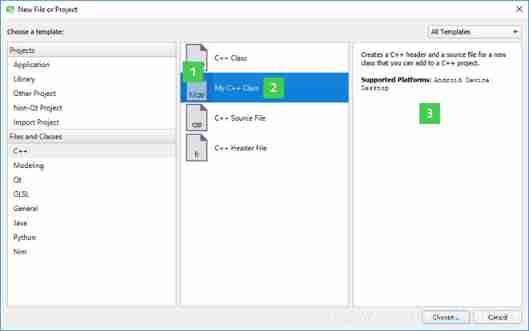
Qt Creator The wizard it finds will be displayed in New File or Project In the dialog box . Each wizard will display an icon (1)、 name (2) And related description information (3).
Integrate wizards into Qt Creator in
In order to integrate the wizard into Qt Creator And regard it as Qt Creator Part of , You need to put the wizard file in Qt Creator Source code . Then choose Build > Run qmake In this way, the newly added wizard file will start from Qt Creator Copy the source folder to Qt Creator Build the folder and make it the next version Qt Creator Part of .
If you don't run qmake, Then your new wizard will not display , Because it doesn't exist in the new build you run Qt Creator In the build folder of ,qmake No notification make Recently, new files have been added .
Generally speaking ,qmake Will be copied from the source folder to the subfolder in the build folder ( Check whether there are subfolders of the wizard at run time ) The file under generates a fixed list . So every time the name or location of these files changes , You all need to run qmake Or execution **Factory.Reset **.
Use variables in the wizard
You can use string 、JSON The configuration file 、 Variables are used in the template source file (%\{<variableName>\}). Some variables have been predefined in the wizard . You can wizard.json In the document options Partly by defining the key name and value of the variable , To introduce new variables for later use .
There is a special kind of variable %\{JS:<JavaScript expression>\} , It will be given JavaScript The expression evaluates and converts the result to a string . stay JavaScript In the expression, you can use the wizard through value('<variableName>') Formally defined variables . Back to JavaScript The type of the object is the type of the value of the variable , Can be a string 、 list 、 Dictionary or Boolean .
It is common to get a string when you expect a Boolean value , Empty string and string "false" Will be treated as false The rest will be treated as true .
Localization of wizards
If the name of a setting is tr Prefix start , Its value is visible to the user and will be translated . If this new wizard is included in Qt Creator In the source code , These translatable strings will appear in Qt Creator Translated documents can also be used as Qt Creator Part of is translated . Another way is , You can write the translation in the following grammar .json In file :
"trDisplayName": {
     "C": "default", "en_US": "english", "de_DE": "deutsch" }
for example :
"trDisplayName": {
     "C": "Project Location", "en_US": "Project Location", "de_DE": "Projekt Verzeichnis" }
creation wizard
Qt Creator Add classes in 、 File and project wizard . You can create your own wizards based on them . We use C++ Wizards to explain the process of creating wizards and .json The meaning of fragments and settings in the file .
In this example , We create a wizard folder in the shared directory , And integrate it into Qt Creator Building the system , So it can be built as part of Qt Creator Binaries are deployed together .
More information about pages and widgets that can be added and their supported properties , Please see the Available pages and Available form widgets .
Create one based on JSON Of C++ Steps of class wizard :
With
-customwizard-verboseParameter startup Qt Creator, In order to receive feedback during the wizard development . For more information, please see Detailed output .by Inspect and Factory.Reset Set shortcut key , It's like Some skills of wizard development As mentioned in .
Copy
share/qtcreator/templates/wizards/classes/cppAnd rename it . for example :share/qtcreator/templates/wizards/classes/mycppUse Factory.Reset Let the wizard in File > New File or Project Without restarting Qt Creator.
Open the wizard configuration file wizard.json And edit :
The following settings determine the type of wizard and its display in the New File or Project Location in the dialog :
"version": 1, "supportedProjectTypes": [ ], "id": "A.Class", "category": "O.C++",versionIs the version of the file content . Do not change this value .supportedProjectTypesIs an optional setting item . When adding a new build target to an existing project , It can be used in the filter wizard . for example : When to an existing qmake When adding a new build target to the project , Only those that can generate qmake Guide to the project .Possible values are Qt Creator Supported build systems , or UNKNOWN_PROJECT If the build system is not specified as one of the following :
- AutotoolsProjectManager.AutotoolsProject
- CMakeProjectManager.CMakeProject
- GenericProjectManager.GenericProject
- PythonProject
- Qbs.QbsProject
- Qt4ProjectManager.Qt4Project(qmake project)
- QmlProjectManager.QmlProject
idIs the only identifier of your guide . The guides arecategoryAccording to theidIn alphabetical order . You can use a leading letter to specify the location of the wizard . You must always change this value . for example :B.MyClass.This information can be found in the wizard through
%\{id\}get .categoryIs the category that stores the wizard in the list . You can use the leading letter to specify in New File or Project The position of the category in the dialog box in the listThis information can be found in the wizard through
%\{category\}get .
The following settings specify the display in New File or Project Icons and text in the dialog :
"trDescription": "Creates a C++ header and a source file for a new class that you can add to a C++ project.", "trDisplayName": "C++ Class", "trDisplayCategory": "C++", "icon": "../../global/genericfilewizard.png", "enabled": "%{JS: value('Plugins').indexOf('CppEditor') >= 0}",trDescription: WhentrDisplayCategoryAfter being selected ,trDescriptionDisplayed in the rightmost panel .This information can be found in the wizard through
%\{trDescription\}obtain .trDisplayName: WhentrDisplayCategoryAfter being selected ,trDisplayNameDisplayed in the middle panel .This information can be found in the wizard through
%\{trDisplayName\}obtain .trDisplayCategoryDisplayed in the New File or Project In the dialog box Projects below .This information can be found in the wizard through
%\{trDisplayCategory\}obtain .icon: WhentrDisplayCategoryAfter being selected , On the middle panel ,iconDisplayed in thetrDisplayNameOn the edge . We recommend that you specify a connection withwizard.jsonRelative path , But you can also use absolute paths .imageSpecify a path to the picture ( For example, a screenshot ), The picture is shown intrDescriptionBelow .featuresRequiredSpecify the Qt Creator characteristic . If a required feature is missing , The wizard will be hidden . for example : If you don't have a build kit, you need it Qt edition , Then based on qmake Your wizard will be hidden .Please use
enabledIf you need to express more complex logic to decide whether your wizard is available .This information can be found in the wizard through
%\{RequiredFeatures\}obtain .featuresPreferredSpecify the default build (build) And operation (run) The suite of (kits).This information can be found in the wizard through
%\{PreferredFeatures\}obtain .platformIndependentIs set totrueIf the wizard supports all platforms . Default tofalse.enableCan be infeaturesRequiredAfter checking, decide whether a wizard can be listed in Files > New File or Project in .The default value is
true.
optionsThe section contains a number of keys (key) And the value (value) Property . In addition to predefined variables , You can also define your own variables , Use in configuration files and template source files . for example : The following variables are being created C++ Class is used in the wizard :"options": [ { "key": "TargetPath", "value": "%{Path}" }, { "key": "HdrPath", "value": "%{Path}/%{HdrFileName}" }, { "key": "SrcPath", "value": "%{Path}/%{SrcFileName}" }, { "key": "CN", "value": "%{JS: Cpp.className(value('Class'))}" }, { "key": "Base", "value": "%{JS: value('BaseCB') === '' ? value('BaseEdit') : value('BaseCB')}" }, { "key": "isQObject", "value": "%{JS: (value('Base') === 'QObject' || value('Base') === 'QWidget' || value('Base') === 'QMainWindow' || value('Base') === 'QDeclarativeItem' || value('Base') === 'QQuickItem' ) ? 'true' : 'false'}" }, { "key": "GUARD", "value": "%{JS: Cpp.classToHeaderGuard(value('Class'), Util.suffix(value('HdrFileName'))}" }, { "key": "SharedDataInit", "value": "%{JS: value('IncludeQSharedData') ? 'data(new %{CN}Data)' : '' }" } ],This part is optional . More examples of variables , Please check the in other wizards
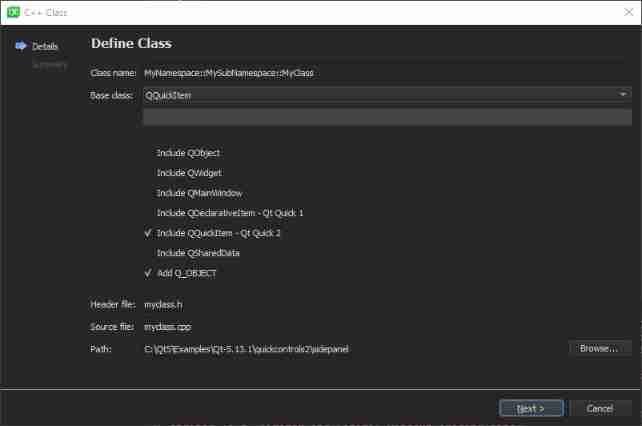
wizard.jsonfile .pageSection specifies the wizard page . The use of wizard pages depends on the type of wizard . You can add standard pages to the wizard or create new pages using available widgets . The following settings specify the displayed name 、 Title and page type :"pages": [ { "trDisplayName": "Define Class", "trShortTitle": "Details", "typeId": "Fields", "data" : [ { "name": "Class", "trDisplayName": "Class name:", "mandatory": true, "type": "LineEdit", "data": { "validator": "(?:(?:[a-zA-Z_][a-zA-Z_0-9]*::)+[a-zA-Z_][a-zA-Z_0-9]*|)" } }, ... ]typeIdSpecifies where the page is used ::Fields,File,Form,Kits,Project,VcsConfiguration,VcsCommandstillSummary.Pages used in code ID Full name , from
typeIdPrefix and"PE.Wizard.Page."It's a combination of .For more information about the page, please check Available pages .
trDisplayNameSpecifies the page title . By default , Use page title .trShortTitleSpecify the title of the wizard sidebar . By default , Use page title .trSubTitleSpecify the subtitle of the page . By default , Use page title .indexIs a designated page ID The integer value . If not set , Will automatically assign values .enabledbytrueDisplay the page when , byfalseHide the page when .dataSpecifies the contents of the wizard page . stay C++ In the guide , It specifies oneFieldsPage and aSummarypage .FieldsPage containsCheckBox,ComboBox,LineEdit,PathChooser, as well asSpacerForm part . More information about Form Widgets , Please check out Available form widgets .
generatorsSection specifies the files to be added to the project :
"generators": [ { "typeId": "File", "data": [ { "source": "file.h", "target": "%{HdrPath}", "openInEditor": true }, { "source": "file.cpp", "target": "%{SrcPath}", "openInEditor": true } ]typeIdSpecifies the type of generator . Currently only supportedFileorScannergenerator .dataAllows further setup of the generator .
Values available in the wizard
except wizard.json File's own properties ( see creation wizard part ),Qt Creator Some of the information in is all based on JSON Wizards are available .
WizardDiryeswizard.jsonThe absolute path to the file .FeaturesListed through Qt Creator All available features of any configured buildPluginsIncluded in Qt Creator List of all plug-ins running in the current instance .PlatformIncluded in File > New File or Project The platform selected in the dialog box . The value can be empty .
The following information is only available when the wizard is Projects Only when the context menu node in the view is activated :
InitialPathThe path to the selected node .ProjectExplorer.Profile.IdsIt contains a series of Building Kits configured for the project where the selected node is located .
Available pages
You can wizard.json Of documents page Add some predefined pages to your wizard
Domain page
A domain page typeId The value is Field And contains widgets . More about the definition of widgets , Please have a look at Available form widgets .
"pages":
[
    {

        "trDisplayName": "Define Class",
        "trShortTitle": "Details",
        "typeId": "Fields",
        "data" :
        [
            {

                "name": "Class",
                "trDisplayName": "Class name:",
                "mandatory": true,
                "type": "LineEdit",
                "data": {
         "validator": "(?:(?:[a-zA-Z_][a-zA-Z_0-9]*::)+[a-zA-Z_][a-zA-Z_0-9]*|)" }
            },
            ...
],
Document page
A file page typeId The value is File. You can omit data Key or assign it an empty object .
{

    "trDisplayName": "Location",
    "trShortTitle": "Location",
    "typeId": "File"
},
This page calculates InitialFileName and InitialPath To set the initial path and file name . This page has TargetPath Set as the full path of the created file .
Table page
A table page typeId The value is Form. You can omit data Key or assign it an empty object .
{

    "trDisplayName": "Choose a Form Template",
    "trShortTitle": "Form Template",
    "typeId": "Form"
},
This page puts FormContents Set to a string array with table contents .
Build suite page
A build suite page typeId The value is Kits. A build suite page data Section contains an object with the following settings :
projectFilePath: Path to project file .requiredFeatures: A series of strings or objects , Describe the features that must be provided by a build suite listed on the page .When this setting item is filled with a string , Then this feature must be set . When using an installed object , The following settings will be checked :
- ``feature
: Must be a string ( It contains%{<VariableName}` Will be expanded ). condition: Must be able to be evaluated astrueorfalse, Can be used to turn off properties in the list
- ``feature
preferredFeatures: AndrequiredFeaturesThe required format is the same . Anything meets all inpreferredFeaturesConditions listed in ( To be satisfied requiredFeatures) Build suite for Will be pre selected on this page .
{

    "trDisplayName": "Kit Selection",
    "trShortTitle": "Kits",
    "typeId": "Kits",
    "enabled": "%{IsTopLevelProject}",
    "data": {
     "projectFilePath": "%{ProFileName}" }
},
For this page %\{Platform\} To set in File > New File or Project Platform selected in .
Engineering page
A project page typeId The value is Project. It does not contain data Or in data Contains only one that will be displayed on the generated page trDescription Property object . trDescription The default value is %\{trDescription\}, namely wizard.json In the document trDescription Information populated by the domain .
{

    "trDisplayName": "Project Location",
    "trShortTitle": "Location",
    "typeId": "Project",
    "data": {
     "trDescription": "A description of the wizard" }
},
This page uses InitialPath To set the initial path of the project . This page is set ProjectDirectory and TargetPath For the project folder
Overview page
An overview page typeId The value of is Summary. It does not contain data or data There is only one empty object in .
{

    "trDisplayName": "Project Management",
    "trShortTitle": "Summary",
    "typeId": "Summary"
}
If this is a top-level project, set IsSubproject Is an empty string , If it is a subproject, set it to yes. Set up VersionControl For the version control system used ID .
Version control system command page
This page sets some version control operations and displays the results .
Of this page data Part is an object with the following keys :
vcsIdVersion control system used id .trRunMessage: The message displayed when the version control system is running .extraArguments: Passed to version controlcheckoutAdditional parameters of a command consisting of a string or a group of strings .repository: Checked out from the version control system URL.baseDirectory: Run the checkout operation in this folder .checkoutName: Create a subfolder to store the checked out dataextraJobs: An object that defines a series of additional commands to run after initializing the checkout operation . This can be used to customize the warehouse after initialization , For example, add additional remote warehouses or set the configuration variables of the version control system .Every
extraJobDefined by the object with the following settings :skipIfEmpty: If set totrueNull parameters will be silently removed from the command to be executed . The default istrue.directory: The folder of the command to be run . The default value isbaseDirectory.command: The command to be run .arguments: Pass tocommandParameters of .timeOutFactor: Provide a longer running time than the default timeout for running long commands .enabled: Used to decide whether to run this task .
Version control system configuration page
This page requires the user to configure a version control system and enable it only after the configuration is successful Next Button .
Of this page data Part of it has a vcsId The object of the key . It defines the version control system that will be configured to use .
Available form widgets
You can add the following widgets to a domain page :
- Check box (Check Box)
- Combo box (Combo Box)
- label (Label)
- Line editor (Line Edit)
- Path selector (Path Chooser)
- Spacer (Spacer)
- Text editor (Text Edit)
Be careful : The wizard supports only the settings mentioned below .
Specify settings for each widget :
name: Specify the name of the widget . This name is used as the variable name , Used to get the value .trDisplayName: Appoint UI Label text displayed on ( IfspanNot fortrue).type: Specify the type of widget :CheckBox,ComboBox,Label,LineEdit,PathChooser,Spacer, andTextEdit.trToolTip: Specify a tooltip , When the mouse hovers in the corresponding area, it will display .isComplete: Used to determine the wizardNextButtons available or unavailable . All domains must put theirisCompleteSet totrueIn order to makeNextButton available . This setting defaults totrue.trIncompleteMessage: When the domainisCompletebyfalseThis message appears when .data: Specify the settings for the widget :visible: When the widget is visibletrue, Otherwisefalse. The default istrue.enabled: When the widget is enabledtrue, Otherwisefalse. The default istrue.mandatory: If the widget must have a value to openNextButtontrue. The default istrue.span: Used to hide labels and expand tables . The default isfalse. For more information, see Use variables in the wizard .
Additional settings for specific widgets are described below .
Check box (Check Box)
{

    "name": "IncludeQObject",
    "trDisplayName": "Include QObject",
    "type": "CheckBox",
    "data":
    {

        "checkedValue": "QObject",
        "uncheckedValue": "",
        "checked": "%{JS: value('BaseCB') === 'QObject' ? 'true' : 'false'}"
    }
},
checkedValue: Specify the value to set when the check box is enabled . The default istrue.uncheckedValue: Specify the value to set when the check box is not enabled . The default isfalse.checked: If the check box is enabled, it is set totrue, Otherwise, it is set tofalse.
list (List)
Be careful : Combo box (Combo Box) And a list of icons (Icon List) Types are variants of list types , So they have the same properties .
{

    "name": "BaseCB",
    "trDisplayName": "Base class:",
    "type": "ComboBox",
    "data":
    {

        "items": [ {
     "trKey": "<Custom>", "value": "" },
                   "QObject", "QWidget", "QMainWindow", "QDeclarativeItem", "QQuickItem" ]
    }
},
or
{

    "name": "ChosenBuildSystem",
    "trDisplayName": "Choose your build system:",
    "type": "IconList",
    "data":
    {

        "items": [
            {
     "trKey": "Qbs", "value": "qbs", "icon": "qbs_icon.png", "trToolTip": "Building with Qbs." },
            {
     "trKey": "QMake", "value": "qmake", "icon": "qmake_icon.png", "trToolTip": "Building with QMake." }
        ]
    }
},
items: Specify a series of items to put into the example table type . The list can contain JSON Object and plain text string . about JSON object , DefinitiontrKeyandvalueYes ,trKeyIs a user visible item ,valueIt contains relevant data . in addition , You can use it.iconTo specify an icon for a list item , usetrToolTipTo specify a tooltip .index: Specifies the index number selected when the list is enabled . The default is 0.disabledIndex: Specifies the index number displayed when the list is not enabled .
label (Label)
{

    "name": "LabelQQC_2_0",
    "type": "Label",
    "span": true,
    "visible": "%{JS: value('CS') === 'QQC_2_0'}",
    "data":
    {

        "wordWrap": true,
        "trText": "Creates a deployable Qt Quick 2 application using Qt Quick Controls.",
    }
},
wordWrap: Set totrueTo enable word wrap . The default isfalse.trText: Include the label text to display .
Line editor (Line Edit)
{

    "name": "Class",
    "trDisplayName": "Class name:",
    "mandatory": true,
    "type": "LineEdit",
    "data": {
     "validator": "(?:(?:[a-zA-Z_][a-zA-Z_0-9]*::)+[a-zA-Z_][a-zA-Z_0-9]*|)" }
},
{

    "name": "BaseEdit",
    "type": "LineEdit",
    "enabled": "%{JS: value('BaseCB') === '' ? 'true' : 'false'}",
    "mandatory": false,
    "data":
    {

        "trText": "%{BaseCB}",
        "trDisabledText": "%{BaseCB}"
    }
},
trText: Specifies the default text to display .trDisabledText: Specifies the text displayed in the disabled section .trPlaceholder: Specify placeholders .validator: To specify a QRegularExpression To verify the input of the line editor .fixup: Specify a variable to improve the string . for example : Change the first letter in the line editor to uppercase .isPassword: A Boolean value , Used to specify whether the line editor contains passwords , If yes, the input will be masked .
Path selector (Path Chooser)
{

    "name": "Path",
    "type": "PathChooser",
    "trDisplayName": "Path:",
    "mandatory": true,
    "data":
    {

        "kind": "existingDirectory",
        "basePath": "%{InitialPath}",
        "path": "%{InitialPath}"
    }
},
path: Specify the selected path .basePath: Specify the relative basic path when querying .kind: Define the type to find :existingDirectory,directory,file,saveFile,existingCommand,command, orany.
Spacer (Spacer)
{

    "name": "Sp1",
    "type": "Spacer",
    "data":
    {

        "factor": 2
    }
},
factor The setting item specifies the factor to multiply the layout spacing for this spacer ( Integers )
Text editor (Text Edit)
{

    "name": "TextField",
    "type": "TextEdit",
    "data" :
    {

        "trText": "This is some text",
        "richText": true
    }
}
trText: Used to specify whether the text is displayed .trDisabledText: Used to specify the text to be displayed when the text editor is disabled .richText: Set totrueSupport rich text , Set tofalseRich text is not supported .
Available generators
about JSON The wizard ,Qt Creator Two different generators are supported .
File generator
A file generator expects its data There are a series of objects in the domain , Each object defines one to be processed and copied to %\{TargetPath\} ( Or anywhere else ) The file of .
Each file object has the following settings :
sourceSpecify the template file relative towizard.jsonThe path and file name of the directory where the file is located .If not set
source, Then it will be assumed thattargetThe file giving the file name is generated in other ways . It's very useful , for example : After checking out the data from the version control system, specify the correct file to open as a project .targetSpecify the location of the generated file , Absolute path and relative%{TargetPath}All paths are ok , It is usually set in a wizard page .openInEditorIf it is set totrueThen open the file with the appropriate editor . The default isfalse.openAsProjectIf set totrueIt's in Qt Creator Open the project file in . The default isfalse.isBinaryIf it is set totrueTreat the file as binary , And prevent replacement . The default isfalse.conditionIfconditionreturntrueThen generate the file . The default istrue. More about , Please check out Use variables in the wizard .
Scan generator
A scan generator scans %\{TargetPath\} , And produce a series of documents found from there .
Scan generator in its data An object with the following settings is required in the domain :
binaryPatternIs a regular expression used to match all found file names . Any matching files will be marked as binary files , Template substitution will skip this file . The default is empty. , So no files will be marked as binary files .subdirectoryPatternsIs a series of regular expression templates . Any folder that matches any of these templates will be scanned as the top-level folder . The default is empty. , So no subfolders are scanned .
Welcome to my official account. : Notes on Jiangda
边栏推荐
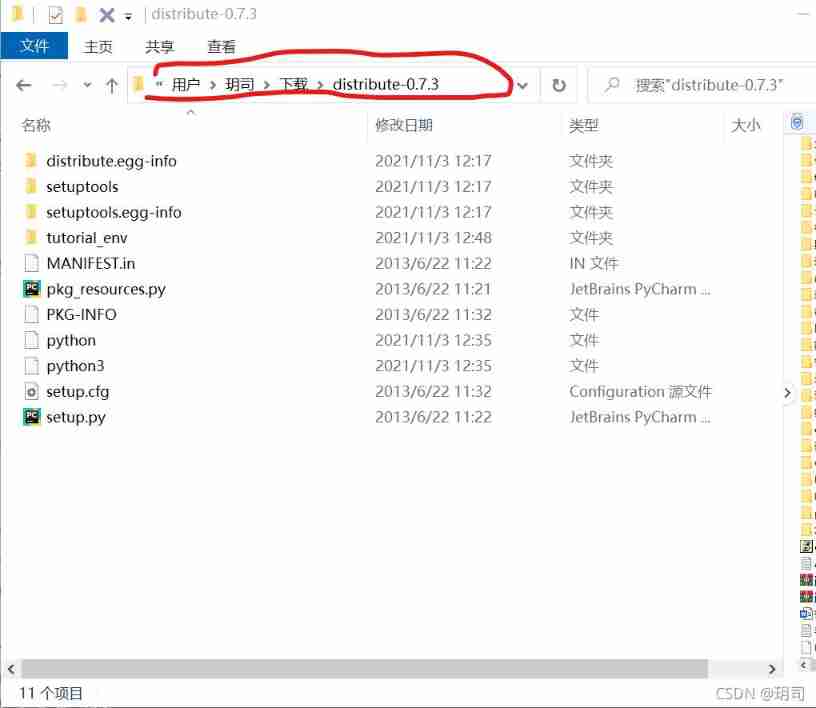
- One click free translation of more than 300 pages of PDF documents
- Oracle statistics by time
- Codeworks 5 questions per day (average 1500) - day 8
- gorm 关联关系小结
- ASP. Net open web page
- 神奇快速幂
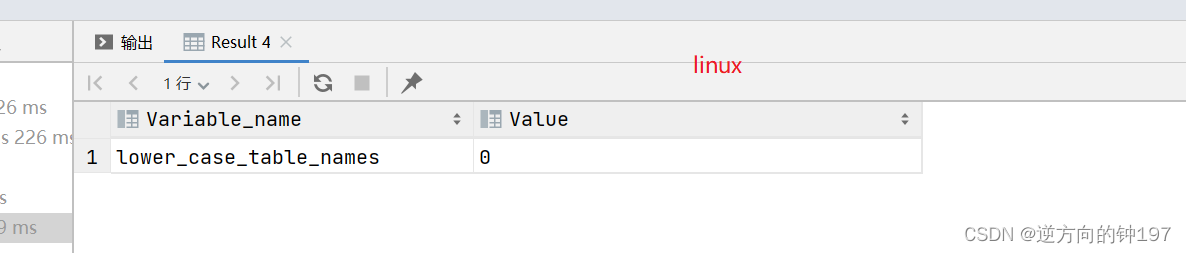
- SQL connection problem after downloading (2)
- May day d-light
- MySQL Architecture
- Problems faced when connecting to sqlserver after downloading (I)
猜你喜欢
平衡二叉樹【AVL樹】——插入、删除
一键免费翻译300多页的pdf文档

35岁那年,我做了一个面临失业的决定
MySQL Architecture

The file format and extension of XLS do not match
![[path planning] use the vertical distance limit method and Bessel to optimize the path of a star](/img/0b/e21f7ded7c854272e8cb631ff0154e.png)
[path planning] use the vertical distance limit method and Bessel to optimize the path of a star

数据湖(十五):Spark与Iceberg整合写操作
一个测试工程师的7年感悟 ---- 致在一路独行的你(别放弃)
Flash download setup
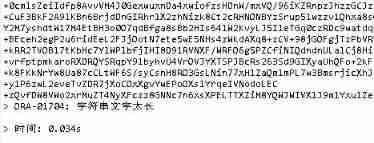
Ora-01741 and ora-01704
随机推荐
Restricted linear table
Dataguard 主备清理归档设置
Enterprise application demand-oriented development of human resources department, employee attendance records and paid wages business process cases
ASP. Net open web page
[path planning] use the vertical distance limit method and Bessel to optimize the path of a star
一键免费翻译300多页的pdf文档
快速回复二极管整流特性
Pycharm basic settings latest version 2022
Come on, brother
激光slam学习(2D/3D、偏实践)
Dependency injection 2 advantage lifecycle
数据库面试题+解析
AWS AWS help error
Where are you going
蓝桥ROS中使用fishros一键安装
@Configuration注解的详细介绍
一个测试工程师的7年感悟 ---- 致在一路独行的你(别放弃)
ping报错:未知的名称或服务
Connect diodes in series to improve voltage withstand
Binary sort tree [BST] - create, find, delete, output