当前位置:网站首页>Kubesphere - build MySQL master-slave replication structure
Kubesphere - build MySQL master-slave replication structure
2022-07-03 06:06:00 【Xiao bichao】
One 、KubeSphere
In the last article, we introduced KubeSphere Implementation of multi tenant scenario , In this article, we use KubeSphere build mysql The master-slave structure of , Here is the address of the last article :
Before the experiment , Please make sure that the installation is complete k8s And kubesphere Environmental Science :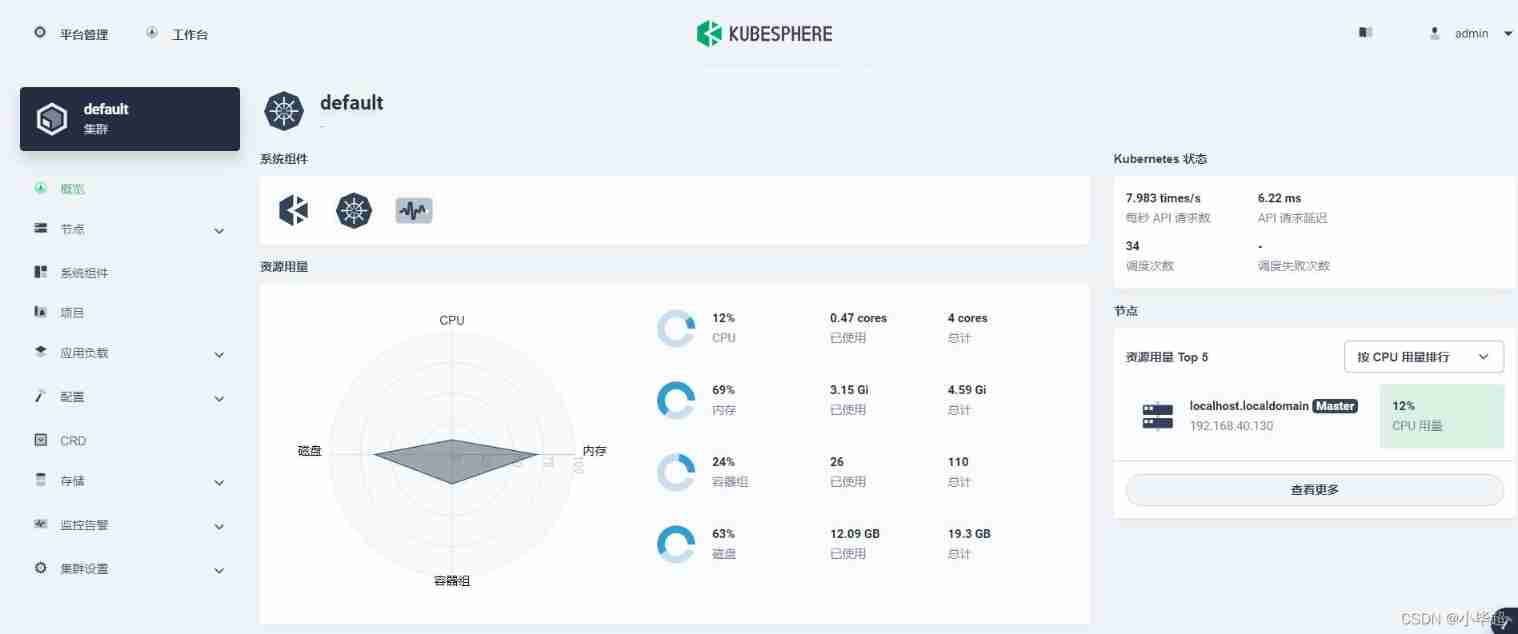
Two 、mysql Main node construction
establish PVC Storage volume
First, create the storage volume of the primary node PVC, Store the data files generated by the master node :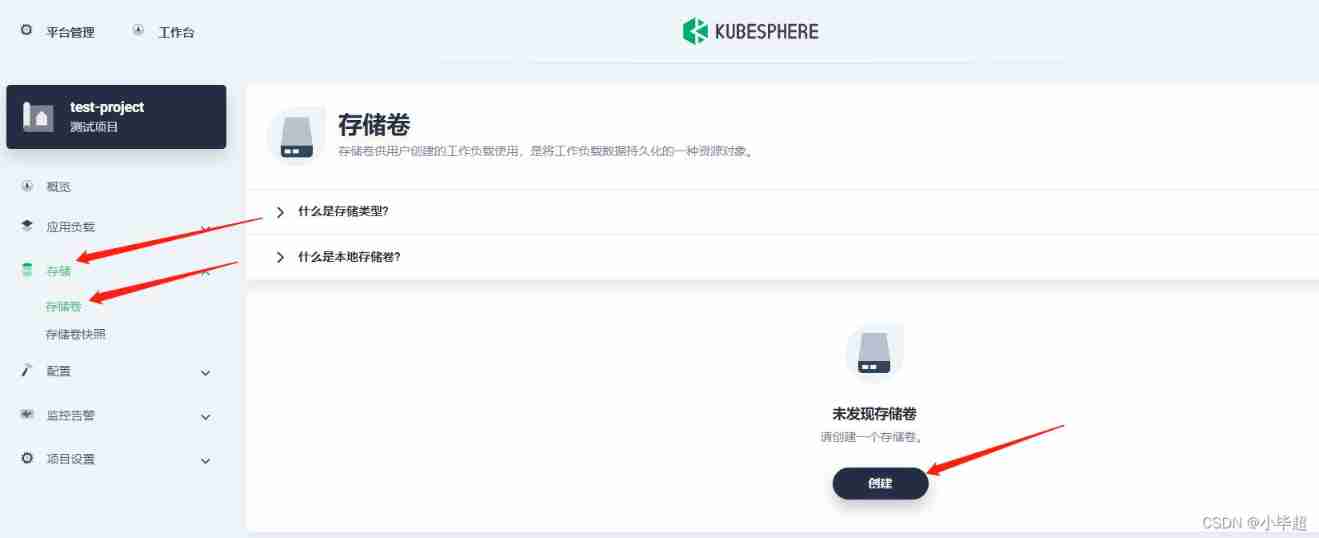
Give the configuration file a name and description :
choice Storage mode and size , Then next, create Just Create a master node PVC 了 :

establish my.cnf Prepare a dictionary
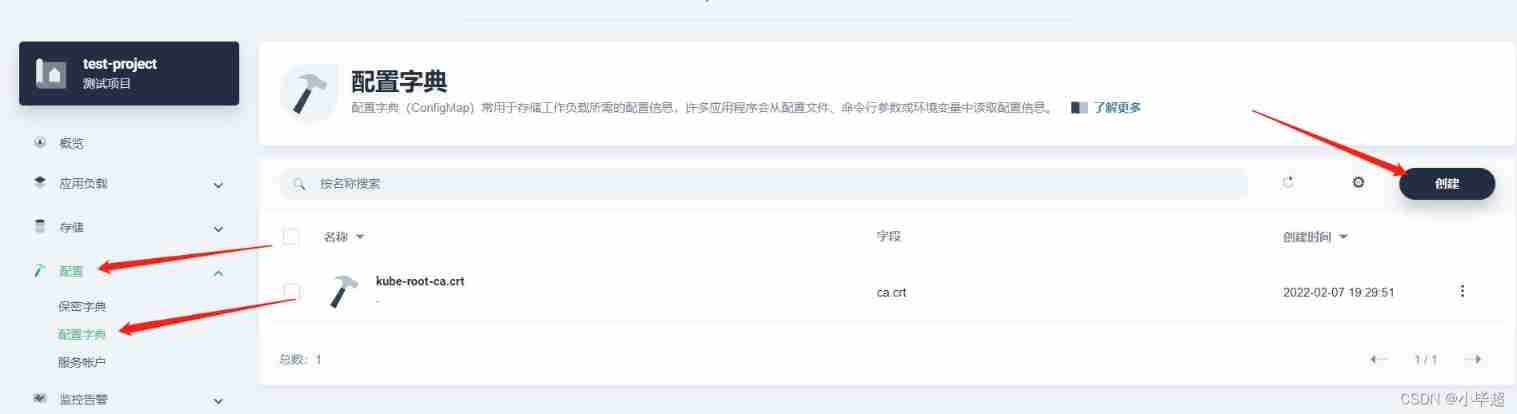
Name the preparation , And then the next step , Click add data :
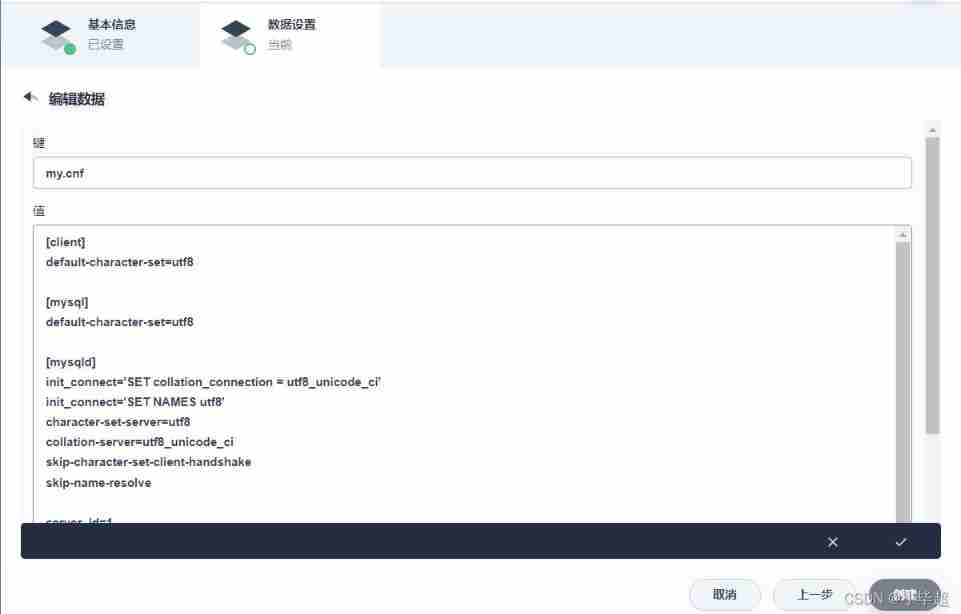
Key can be written my.cnf It is iconic , Values can be filled in the following , Pay attention to change it to your own database name :
[client]
default-character-set=utf8

[mysql]
default-character-set=utf8

[mysqld]
init_connect='SET collation_connection = utf8_unicode_ci'
init_connect='SET NAMES utf8'
character-set-server=utf8
collation-server=utf8_unicode_ci
skip-character-set-client-handshake
skip-name-resolve

server_id=1
log-bin=mysql-bin
# Is it read-only   0=false   1=true
read-only=0

# Databases that need to be synchronized
binlog-do-db=test_db
#binlog-do-db=test_db1

# Exclude synchronized databases
replicate-ignore-db=mysql
replicate-ignore-db=sys
replicate-ignore-db=performance_schema
replicate-ignore-db=information_schema
Then create :
establish mysql master service

Choose stateful Services , You can use headless Generate a stable domain name in k8s Use in cluster :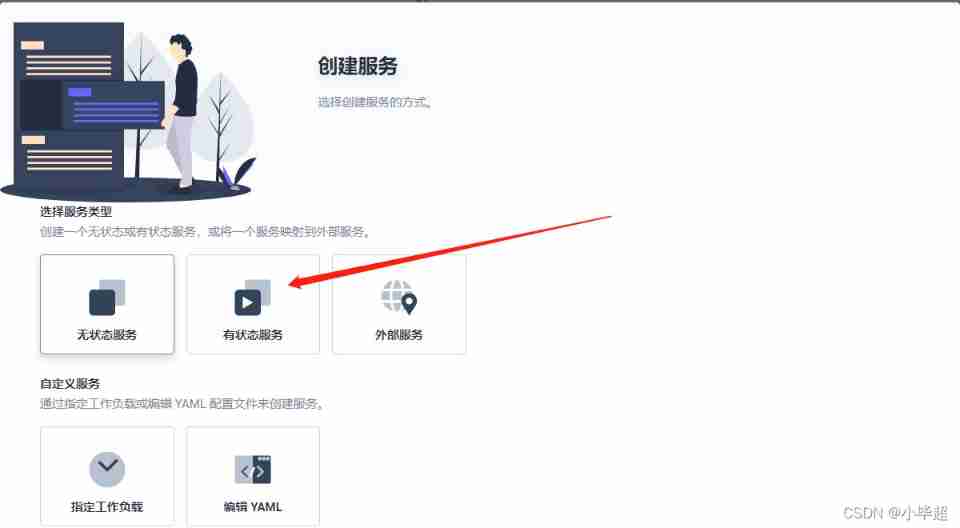
Also name the service :
Let's choose mysql:5.7 Version of , Use the default port :
The following can be true of cpu And memory , It mainly depends on the preparation of your service , Add... Below root Environment variable for user password :MYSQL_ROOT_PASSWORD
Passwords can be used by referencing confidential dictionaries , It's written directly here .
Next, choose to hang on the storage volume :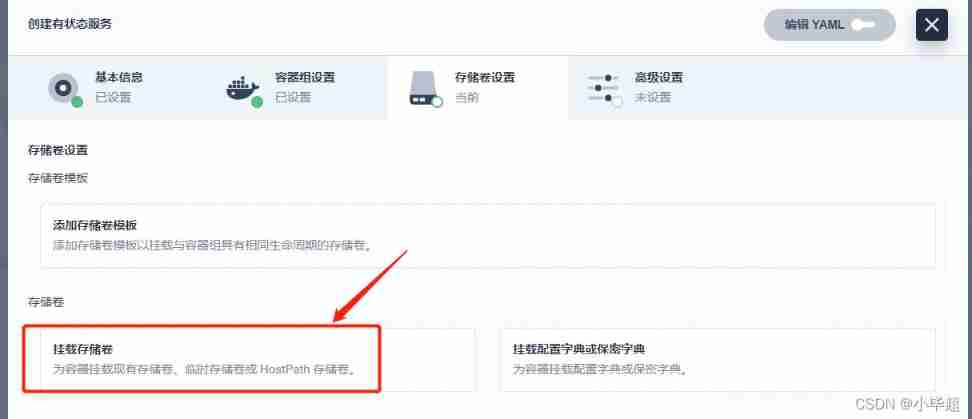
Hanging on PVC It's the one created above PVC, Read write mode , The mount directory is :/var/lib/mysql
Then you need to hang it on my.cnf Configuration files :
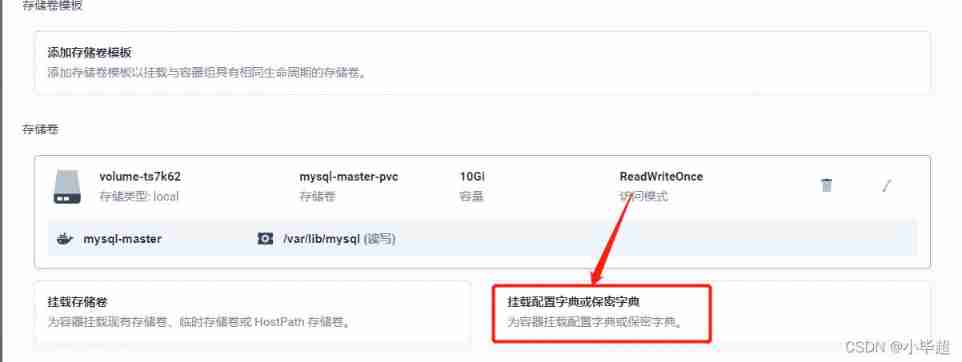
Or choose the configuration dictionary created above , Hang in the directory as /etc/mysql Under the my.cnf file :
And then the next step , Click create to create mysql service :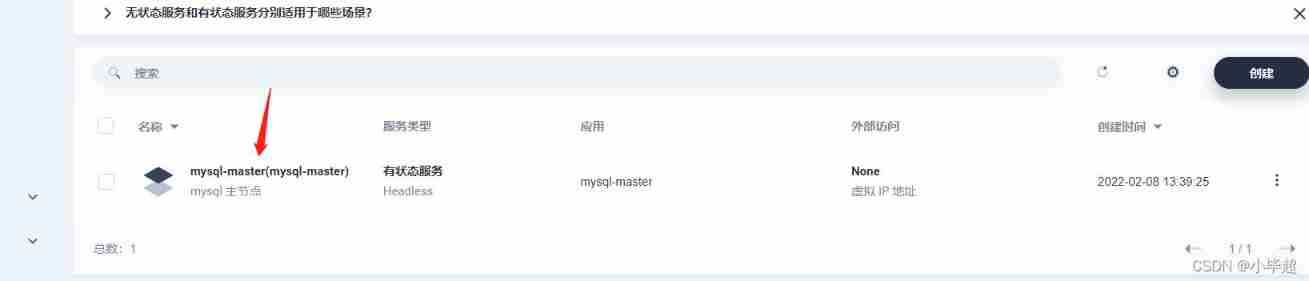
You can click to enter , The container list , The terminal that can enter the container :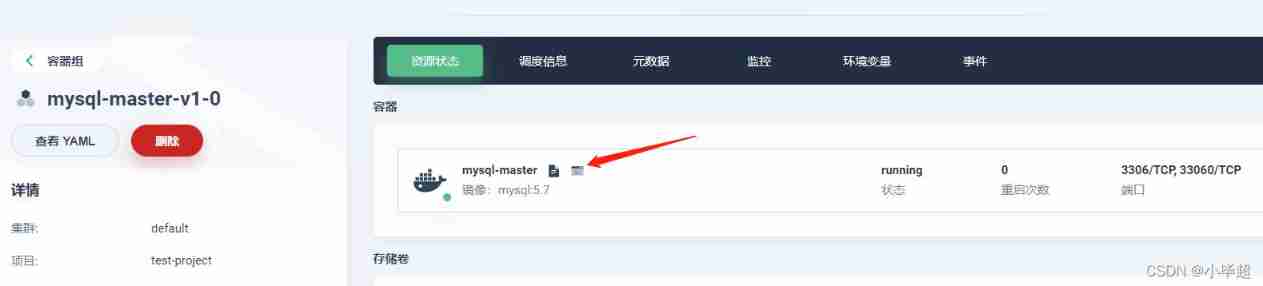
Here you can enter the just created mysql in :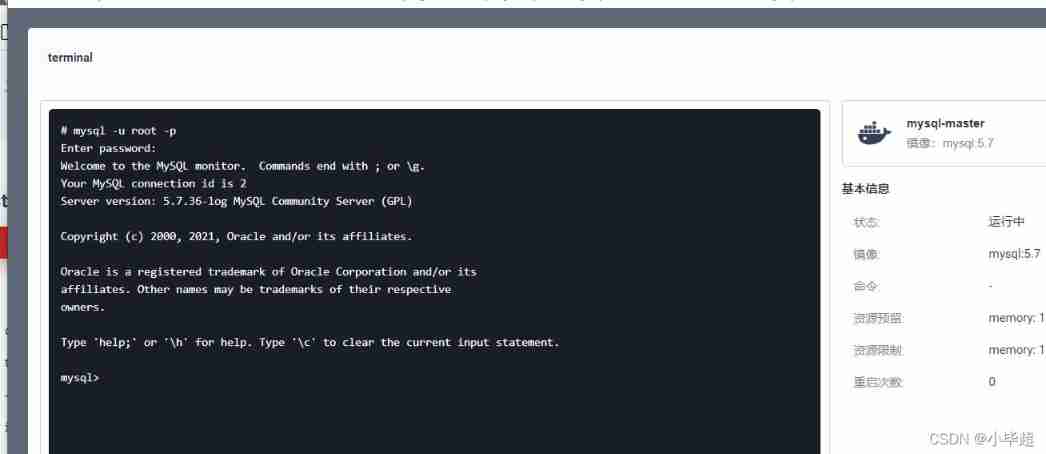
It is said above that if there is a state, it will pass headless Created a stable domain name , You can see in the service details :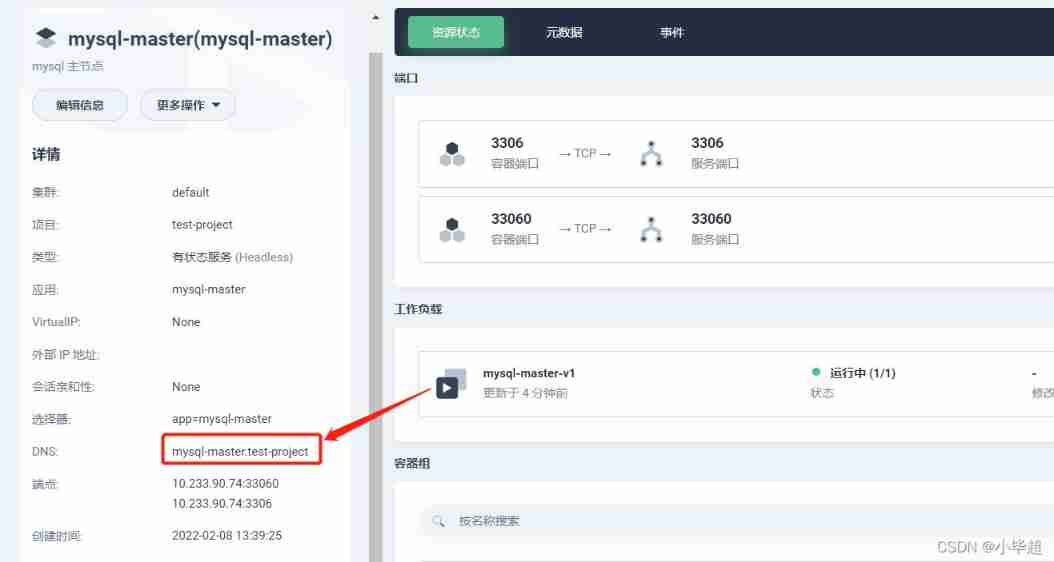
The domain name is mysql-master.test-project This needs to be recorded , You need to use .
3、 ... and 、mysql Build from node
The construction process of the slave node is the same as that of the master node above , First create a slave node PVC, Then create a slave node my.cnf Configuration dictionary , Also create stateful Services , And select mysql:5.7 Image of version , And reference the... Of the slave node PVC And from the node my.cnf Prepare a dictionary :
PVC Storage volume :

my.cnf Prepare a dictionary :

Preparation content , And the master node only server_id Different :
[client]
default-character-set=utf8

[mysql]
default-character-set=utf8

[mysqld]
init_connect='SET collation_connection = utf8_unicode_ci'
init_connect='SET NAMES utf8'
character-set-server=utf8
collation-server=utf8_unicode_ci
skip-character-set-client-handshake
skip-name-resolve

server_id=2
log-bin=mysql-bin
# Is it read-only   0=false   1=true
read-only=1


# Table data that needs to be synchronized
binlog-do-db=test_db
#binlog-do-db=test_db1

# Exclude synchronized table data
replicate-ignore-db=mysql
replicate-ignore-db=sys
replicate-ignore-db=performance_schema
replicate-ignore-db=information_schema
establish slave service :

3、 ... and 、mysql Master slave configuration
Master node configuration
First enter the terminal of the master node , Get into mysql in , Create a user for the slave node :
GRANT REPLICATION SLAVE ON *.* TO 'slave'@'%' IDENTIFIED BY 'slave123';

View the status of the master node , among File Columns need to be recorded :
SHOW MASTER STATUS;
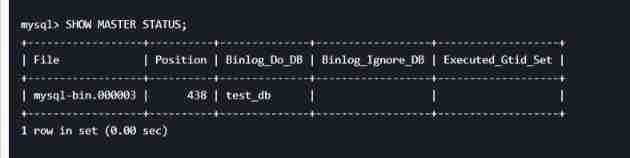
Here is mysql-bin.000003 Later, the slave node will synchronize this log file :
Configure from node
Enter the terminal of the slave node , Enter again mysql in , First, join the synchronization of the master node :
CHANGE MASTER TO MASTER_HOST='mysql-master.test-project',MASTER_USER='slave',MASTER_PASSWORD='slave123',MASTER_LOG_FILE='mysql-bin.000003',MASTER_LOG_POS=0,MASTER_PORT=3306;
Notice the mysql-master.test-project and mysql-bin.000003 , All of them are in the master node above :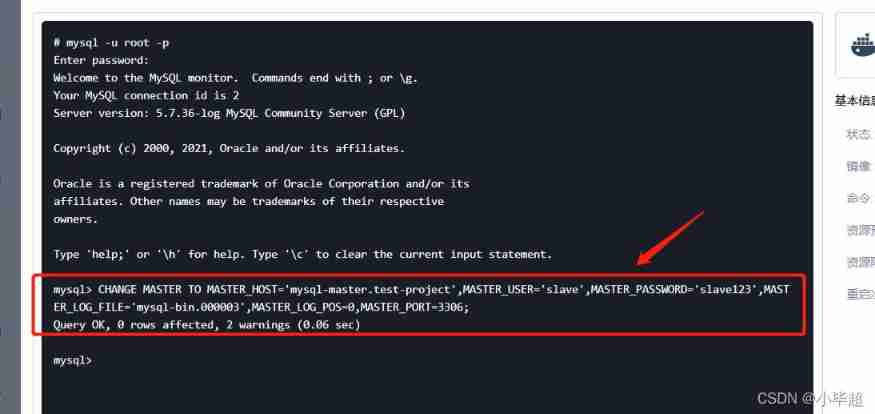
Start syncing :
start slave;

View the status of synchronization :
show slave status\G;

Synchronization has been started , Next, test whether the master-slave synchronization is normal :
Four 、 Test master and slave
First create in the master node test_db database , And test_table surface , And write some test data :
create database test_db;
CREATE TABLE `test_table`  (
  `id` int(11) NOT NULL AUTO_INCREMENT,
  `name` varchar(255) CHARACTER SET utf8mb4 COLLATE utf8mb4_general_ci NULL DEFAULT NULL,
  PRIMARY KEY (`id`) USING BTREE
) ENGINE = InnoDB AUTO_INCREMENT = 3 CHARACTER SET = utf8mb4 COLLATE = utf8mb4_general_ci ROW_FORMAT = Dynamic;
INSERT INTO `test_db`.`test_table`(`id`, `name`) VALUES (1, 'test1');
INSERT INTO `test_db`.`test_table`(`id`, `name`) VALUES (2, 'test2');
View from the node :


Love little buddy can pay attention to my personal WeChat official account. , Get more learning materials !
边栏推荐
- Life is a process of continuous learning
- Apt update and apt upgrade commands - what is the difference?
- 1. 兩數之和
- Why should there be a firewall? This time xiaowai has something to say!!!
- [teacher Zhao Yuqiang] use Oracle's tracking file
- Synthetic keyword and NBAC mechanism
- Method of finding prime number
- Sorry, this user does not exist!
- Intel's new GPU patent shows that its graphics card products will use MCM Packaging Technology
- Jedis source code analysis (II): jediscluster module source code analysis
猜你喜欢
Kubernetes notes (IX) kubernetes application encapsulation and expansion
Maximum likelihood estimation, divergence, cross entropy

SVN分支管理

Bernoulli distribution, binomial distribution and Poisson distribution, and the relationship between maximum likelihood (incomplete)

项目总结--2(Jsoup的基本使用)

Why is the website slow to open?
Kubernetes notes (VII) kuberetes scheduling

智牛股--03

pytorch 多分类中的损失函数
![[set theory] relational closure (reflexive closure | symmetric closure | transitive closure)](/img/c8/2995c503e9dabae4e2cc704449e04f.jpg)
[set theory] relational closure (reflexive closure | symmetric closure | transitive closure)
随机推荐
Multithreading and high concurrency (7) -- from reentrantlock to AQS source code (20000 words, one understanding AQS)
[advanced pointer (2)] | [function pointer, function pointer array, callback function] key analysis + code explanation
pytorch DataLoader实现miniBatch(未完成)
Jackson: what if there is a lack of property- Jackson: What happens if a property is missing?
Installation du plug - in CAD et chargement automatique DLL, Arx
[teacher Zhao Yuqiang] use the catalog database of Oracle
[trivia of two-dimensional array application] | [simple version] [detailed steps + code]
卷积神经网络CNN中的卷积操作详解
There is no one of the necessary magic skills PXE for old drivers to install!!!
Simple handwritten ORM framework
Strategy pattern: encapsulate changes and respond flexibly to changes in requirements
[branch and cycle] | | super long detailed explanation + code analysis + a trick game
Cesium entity(entities) 实体删除方法
[minesweeping of two-dimensional array application] | [simple version] [detailed steps + code]
Redhat7 system root user password cracking
Bernoulli distribution, binomial distribution and Poisson distribution, and the relationship between maximum likelihood (incomplete)
Why should there be a firewall? This time xiaowai has something to say!!!
BeanDefinitionRegistryPostProcessor
Analysis of Clickhouse mergetree principle
Pytorch dataloader implements minibatch (incomplete)