当前位置:网站首页>Keras crash Guide
Keras crash Guide
2022-07-05 16:44:00 【Small margin, rush】
Reference resources B Stand Mo fan python
brief introduction
Keras By pure python Based on theano/tensorflow Deep learning framework . Keras It's a high-level neural network API
install
- In the installation Keras Before , It needs to be confirmed that it has been installed Numpy and Scipy.
- because Keras Is based on Tensorflow perhaps Theano Of . So you can install it yourself first Tensorflow perhaps Theano.
- install Keras.
pip3 install keras
compatible
Keras Can be based on two Backend, One is Theano, One is Tensorflow
adopt import keras Inquire about
modify Backend :json- stay python In the code import keras Add an environment variable modification statement before :
import os
os.environ['KERAS_BACKEND']='theano'
Return to
Neural networks can be used to simulate regression problems
models.Sequential, It is used to build the neural layer layer by layer ; layers.Dense It means that this neural layer is a fully connected layer .
import numpy as np
np.random.seed(1337)  # for reproducibility
from keras.models import Sequential
from keras.layers import Dense
import matplotlib.pyplot as plt #  Visualization module

# create some data
X = np.linspace(-1, 1, 200)
np.random.shuffle(X)    # randomize the data
Y = 0.5 * X + 2 + np.random.normal(0, 0.05, (200, ))
# plot data
plt.scatter(X, Y)
plt.show()

X_train, Y_train = X[:160], Y[:160]     # train  front  160 data points
X_test, Y_test = X[160:], Y[160:]       # test  after  40 data points
And then use Sequential establish model, Reuse model.add Add neural layer , Added is Dense Fully connected nerve layer .
Use... During training model.train_on_batch Batch by batch training X_train, Y_train. The default return value is cost
Test the model The function used is model.evaluate
model = Sequential()
model.add(Dense(output_dim=1, input_dim=1))
# choose loss function and optimizing method
model.compile(loss='mse', optimizer='sgd')


# training
print('Training -----------')
for step in range(301):
    cost = model.train_on_batch(X_train, Y_train)
    if step % 100 == 0:
        print('train cost: ', cost)


# test
print('\nTesting ------------')
cost = model.evaluate(X_test, Y_test, batch_size=40)
print('test cost:', cost)
W, b = model.layers[0].get_weights()
print('Weights=', W, '\nbiases=', b)
classification
Data preprocessing -
Related to the package
models.Sequential, It is used to build the neural layer layer by layer ;layers.DenseIt means that this neural layer is a fully connected layer .layers.ActivationExcitation function .optimizers.RMSpropThe optimizer usesRMSprop, Accelerating neural network training method .
The first paragraph is to add Dense Nerve layer .32 Is the dimension of the output ,784 It's the dimension of input . The data from the first layer is 32 individual feature, To the excitation unit , The excitation function uses relu function . After the excitation function , It becomes nonlinear data . Then pass this data to the next nerve layer , This Dense We define it as 10 Output feature. Then enter it into the following softmax function , Used to classify .
use RMSprop As an optimizer , Its parameters include learning rate, etc , use model.compile Excitation neural network
# Another way to build your neural net
model = Sequential([
    Dense(32, input_dim=784),
    Activation('relu'),
    Dense(10),
    Activation('softmax'),
])


# Another way to define your optimizer
rmsprop = RMSprop(lr=0.001, rho=0.9, epsilon=1e-08, decay=0.0)

# We add metrics to get more results you want to see
model.compile(optimizer=rmsprop,
              loss='categorical_crossentropy',
              metrics=['accuracy'])
CNN
The first is data preprocessing and model Set up . Then add the first convolution , The number of filters is 32, Size is 5*5,Padding The method is same That is, do not change the length and broadband of data .
model.add(Convolution2D(
    batch_input_shape=(64, 1, 28, 28),
    filters=32,
    kernel_size=5,
    strides=1,
    padding='same',      # Padding method
    data_format='channels_first',
))
model.add(Activation('relu'))
first floor pooling( Pooling , Down sampling ), The length and width of the resolution are reduced by half , Output data shape by (32,14,14)
model.add(MaxPooling2D(
    pool_size=2,
    strides=2,
    padding='same',    # Padding method
    data_format='channels_first',
))
Add the second convolution layer and pool layer
model.add(Convolution2D(64, 5, strides=1, padding='same', data_format='channels_first'))
model.add(Activation('relu'))
model.add(MaxPooling2D(2, 2, 'same', data_format='channels_first'))
After the above processing, the data shape by (64,7,7), You need to flatten the data into one dimension , Then add the full connection layer and output layer . Set up adam An optimization method ,loss function , metrics Method to observe the output
model.add(Flatten())
model.add(Dense(1024))
model.add(Activation('relu'))


model.add(Dense(10))
model.add(Activation('softmax'))

model.compile(optimizer=adam,
              loss='categorical_crossentropy',
              metrics=['accuracy'])
Self encoder

Neural networks need to accept a lot of input information , For example, when the input information is HD picture , The amount of input information can reach tens of millions , It is a hard work to let neural network learn directly from tens of millions of information sources
The self encoder makes the original data white X Compress , decompression Black X, Then by contrasting black and white X , Find out the prediction error , Carry out reverse transmission , Gradually improve the accuracy of self coding
# in order to plot in a 2D figure
encoding_dim = 2 #encoding_dim, Dimensions to be compressed .

# this is our input placeholder
input_img = Input(shape=(784,))
establish encoded and decoded , Reuse autoencoder Put the two together . For training autoencoder
# encoder layers
encoded = Dense(128, activation='relu')(input_img)
encoded = Dense(64, activation='relu')(encoded)
encoded = Dense(10, activation='relu')(encoded)
encoder_output = Dense(encoding_dim)(encoded)

# decoder layers
decoded = Dense(10, activation='relu')(encoder_output)
decoded = Dense(64, activation='relu')(decoded)
decoded = Dense(128, activation='relu')(decoded)
decoded = Dense(784, activation='tanh')(decoded)

# construct the autoencoder model
autoencoder = Model(input=input_img, output=decoded)
The next step is to compile the self coding model , The optimizer uses adam, The loss function uses mse.
# compile autoencoder
autoencoder.compile(optimizer='adam', loss='mse')
Save extraction
After training the model , You can print the predicted results , Next, save the model .
Only one line of code is needed when saving model.save, Add another name to it and you can use h5 Save the format of .
# save
print('test before save: ', model.predict(X_test[0:2]))
model.save('my_model.h5')   # HDF5 file, you have to pip3 install h5py if don't have it
del model  # deletes the existing model

"""
test before save:  [[ 1.87243938] [ 2.20500779]]
"""
Import model
# load
model = load_model('my_model.h5')
print('test after load: ', model.predict(X_test[0:2]))
边栏推荐
- How was the middle table destroyed?
- 利用GrayLog告警功能实现钉钉群机器人定时工作提醒
- Spring Festival Limited "forget trouble in the year of the ox" gift bag waiting for you to pick it up~
- [echart] resize lodash 实现窗口缩放时图表自适应
- [deep learning] [original] let yolov6-0.1.0 support the txt reading dataset mode of yolov5
- Single merchant v4.4 has the same original intention and strength!
- [echart] resize lodash to realize chart adaptation when window is zoomed
- 践行自主可控3.0,真正开创中国人自己的开源事业
- Explain in detail the functions and underlying implementation logic of the groups sets statement in SQL
- How to set the WiFi password of the router on the computer
猜你喜欢

ES6 drill down - ES6 generator function
![[61dctf]fm](/img/22/3e4e3f1679a27d8b905684bb709905.png)
[61dctf]fm
数据湖(十四):Spark与Iceberg整合查询操作
Get ready for the pre-season card game MotoGP ignition champions!
Enter a command with the keyboard
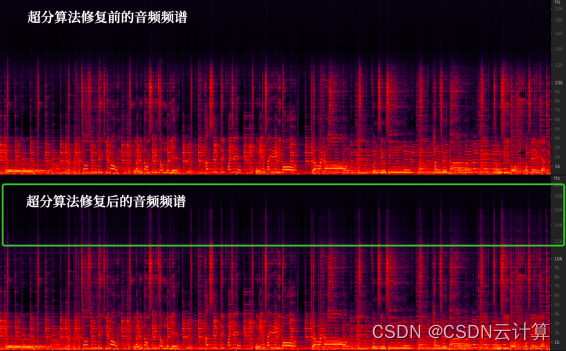
清晰还原31年前现场,火山引擎超清修复Beyond经典演唱会
2020-2022两周年创作纪念日

迁移/home分区
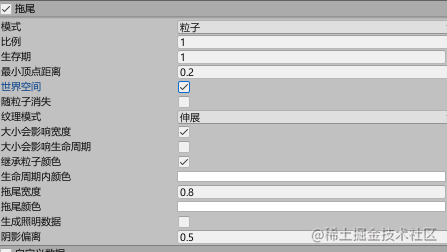
If you can't afford a real cat, you can use code to suck cats -unity particles to draw cats
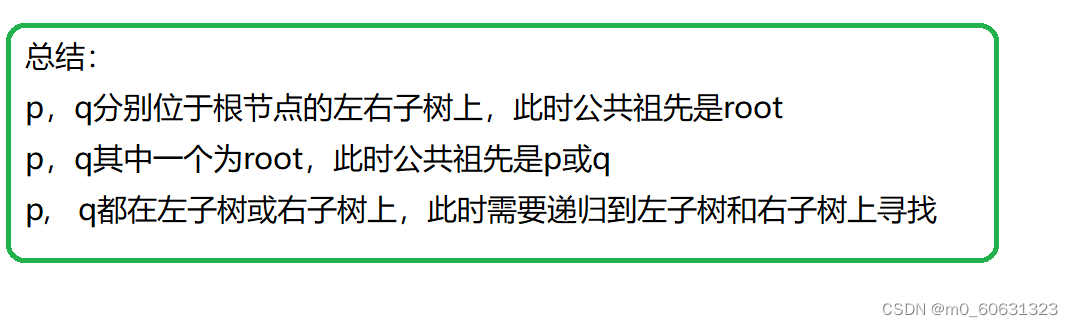
二叉树相关OJ题
随机推荐
Sentinel flow guard
《21天精通TypeScript-3》-安装搭建TypeScript开发环境.md
Data access - entityframework integration
Pspnet | semantic segmentation and scene analysis
Reduce the cost by 40%! Container practice of redis multi tenant cluster
The difference between searching forward index and inverted index
2020-2022两周年创作纪念日
[js] 技巧 简化if 判空
公司自用的国产API管理神器
How to uninstall MySQL cleanly
[es6] 模板字符串内添加if判断或添加三元运算符判断
Data verification before and after JSON to map -- custom UDF
Mongodb getting started Tutorial Part 04 mongodb client
Global Data Center released DC brain system, enabling intelligent operation and management through science and technology
搜索 正排索引 和 倒排索引 区别
利用GrayLog告警功能实现钉钉群机器人定时工作提醒
[deep learning] [original] let yolov6-0.1.0 support the txt reading dataset mode of yolov5
How to use FRP intranet penetration +teamviewer to quickly connect to the intranet host at home when mobile office
Apiccloud cloud debugging solution
新春限定丨“牛年忘烦”礼包等你来领~