For pure white to learn to use
VMWare The operation process is similar , May refer to Use VMWare install CentOS System
1. Install the software :
1.1 download : Oracle VM VirtualBox 6.1.16 or Other versions
1.2 Double click setup
1.3 Modify installation path
- Do not install to the system disk (C:/)
- Other defaults are ok
2.virtualbox Install the system
2.1 Download what needs to be installed iso Image file
CentOS-7-x86_64-DVD-2003.iso
win10 official
2.2 open virtualbox

2.3 Click on the tab 【 control 】→【 newly build 】

2.4 New virtual computer
2.4.1 Virtual computer name and system type
- name : Fill in at will , The name used to display in the manager
- Folder : The directory where the virtual system files are stored , The default can be
- type : Select the type of system you are going to install , Such as Windows、Linux
- edition : Select the version of the system you are going to install , Such as win10、RedHat

2.4.2 Memory size
- Set the memory allocated to the virtual machine , The default can be

2.4.3 Virtual hard disk
- Default “ Now create a virtual hard disk ” that will do

2.4.3.1 Virtual hard disk file type
- The default can be

2.4.3.2 Stored on a physical hard disk
- Default , Dynamic allocation

2.4.3.3 File location and size
- file location : Just use the default
- Virtual hard disk size : Decide according to your needs
2.4.4 Click on 【 establish 】
2.5 Import the CD file of the installation system
2.5.1 Set up
- After building a new virtual computer , Will jump back to virtualbox The manager interface of
- Right click the name of the virtual computer you just created
- Click on 【 Set up 】

2.5.2 Select the virtual disk
- In turn, click 【 Storage 】→【 No disks 】→【 Blue disc icon 】→【 Select the virtual disk 】

- Find the system to install iso File and open
- Click on the 【ok】
2.6 Start virtual machine
- Right click the virtual computer name
- choice 【 start-up 】→【 Normal start 】
- After startup, the option of the selection disk will pop up , Just cancel
2.7 Start installing system configuration
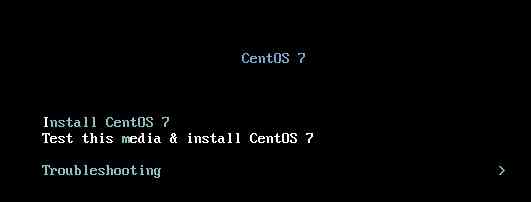
2.7.1 choice “Install CentOS7”
- Need to enter the interface with the direction key control
2.7.2 Choose language and input method
- The default can be
- If you need Chinese, you can input "chinese", In the choice

2.7.3 Installation position
- The installation system will use a yellow triangle to indicate which options you must modify or confirm

- If you need to adjust the partition , You can choose from below “ I want to configure the partition ”
- otherwise , Just click finish

2.7.4 Software selection
- The system default is minimum installation , No graphic desktop available , Only command line operations

If you need a graphical desktop , Will be in “ Software selection ” Choose a package with a desktop , Such as “ belt GUI Server for ”
- Software package for desktop system : “ belt GUI Server for ”、“GNOME desktop ”、“KDE Plasma Workspaces”

2.7.5 Network and hostname
- The default can be
- In this item, you can configure the host name and network of the virtual machine

2.7.6 Start installation
2.8 Start installation
2.8.1 User Settings
System requirements must be root User set password
- root The user's password requirements are “ Letter 、 Numbers ” The complex requirements of such combinations
- If the password set does not meet the requirements , You need to click 2 Time 【 complete 】 Can only be
The system requires at least one regular user to be created
- You can leave it off for the time being

2.8.2 Wait for installation to complete
- It's probably going to take 10 A few minutes , Different host performance, different completion time

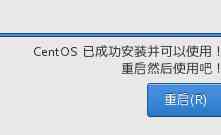
2.8.3 installation is complete
- Click... After installation 【 restart 】

2.8.4 Complete the configuration
- After restart, you will ask to accept “ The license ”

- Complete the configuration
3. welcome
3.1 Choice language
- Direct point 【 Forward 】
3.2 Select input method
- Direct point 【 Forward 】
3.3 privacy
- continue 【 Forward 】
3.4 The time zone
- Input "shanghai", Choose the pop-up “ Shanghai , Shanghai , China ”
- Click on 【 Forward 】
3.5 Connect to your online account
- Click on 【 skip 】
3.6 About you
- If the front is set root Password time , If you don't create an ordinary user, you will ask to create
- Click on 【 Forward 】
3.7 Set the password
- Set the password of the front user
- Click on 【 Forward 】
3.8 Be on it
- Click on 【 Start using 】
3.9 Getting Started
- When you enter the desktop with graphics for the first time, you will be prompted to help with the graphical desktop
- Can be closed
4. Complete the installation , Access to desktop


