当前位置:网站首页>Dayu200 experience officer MPPT photovoltaic power generation project dayu200, hi3861, Huawei cloud iotda
Dayu200 experience officer MPPT photovoltaic power generation project dayu200, hi3861, Huawei cloud iotda
2022-07-07 22:06:00 【51CTO】
One 、 Project introduction
The energy crisis is becoming more and more serious , It is imperative to develop new energy . Photovoltaic power generation is a good choice , However, photoelectric conversion efficiency has always been a major problem perplexing the development of the industry . The project passed MPPT Full name “ Maximum power point tracking ”(Maximum Power Point Tracking) Real time detection of the generation voltage of the solar panel , And track the maximum voltage and current value (VI), Make the system output power at maximum power . Use 300W The photovoltaic solar panel is 4 strand 12V Lithium iron phosphate battery for charging . The basic functions have been realized , Equipment code in the project 、 Application side code 、 Schematic diagrams, etc. will be all open source ,PCB The circuit is still under debugging .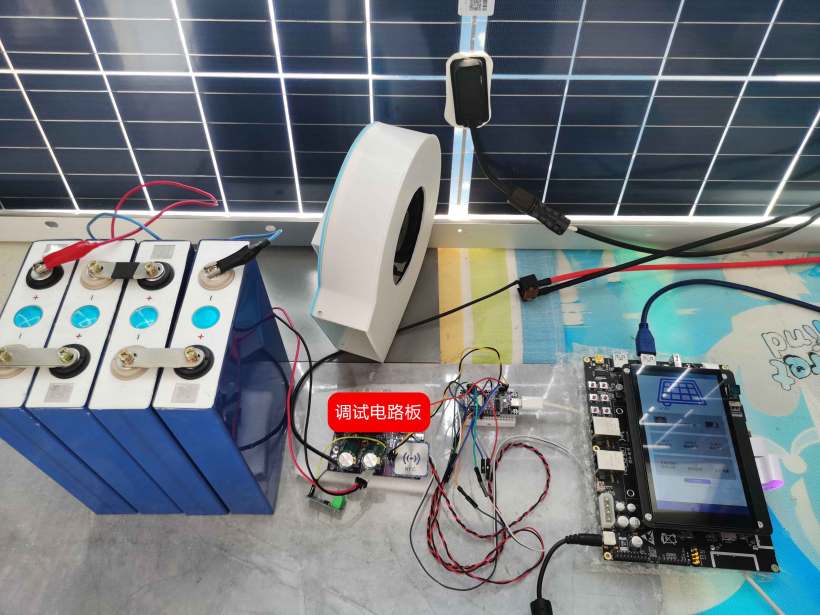
The system is divided into three parts :
Video presentation address : https://ost.51cto.com/show/14366
Application end :
OpenHarmony Application end : Use moisturizing DAYU200 Development board , be based on ArkUI/eTS Development framework , Realize the application end of photovoltaic power generation controller , It can monitor the status of photovoltaic controller equipment in real time . And synchronize the device data to Huawei cloud IotDA, It can realize the state detection and control of Wan equipment .
HarmonyOS Application end : Use HarmonyOS Atomized service capability , Application installation free . Support NFC Touch the distribution network (NAN+SoftAP), The distribution network successfully pulls up the device control page . The equipment control module is the same as OpenHarmony Application end . At the same time, provide service cards , Important device information can be added to the desktop , Easy to view anytime, anywhere .
Device end :
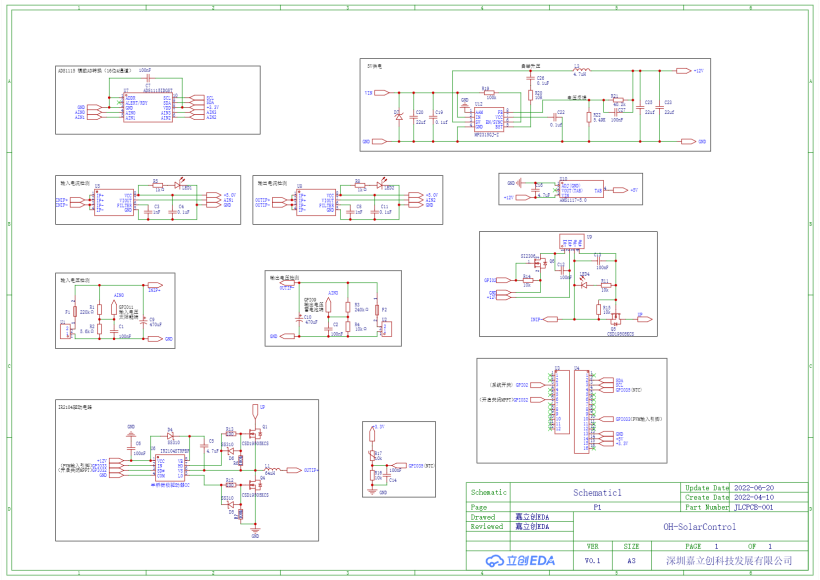
The equipment end is a solar charging and discharging controller , The input terminal is connected to the solar photovoltaic panel , The output terminal is connected to energy storage equipment such as lithium battery . The main control chip adopts Hi3861, The core algorithm adopts MPPT“ Maximum power point tracking ”(Maximum Power Point Tracking), It can significantly improve the power generation efficiency of solar photovoltaic panels . Schematic diagram is as follows :
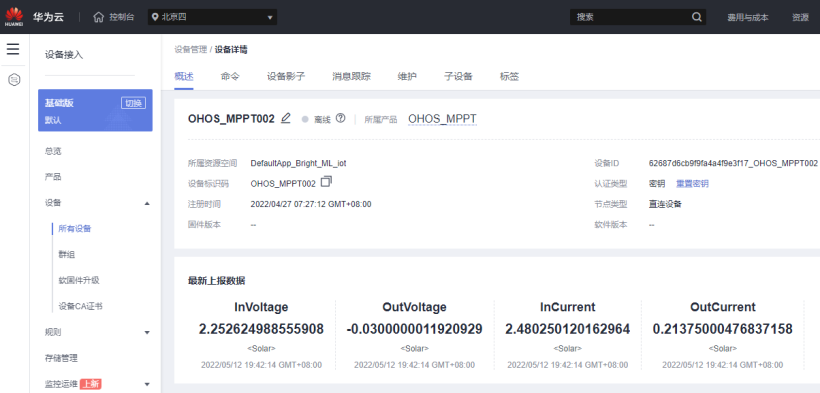
Cloud :
Cloud access Hua Wei Yun IotDA, Responsible for equipment data collection , Issue commands to the device .
Two 、 Project directory
project gitee Address : https://gitee.com/liangzili/oh-solar-control
3、 ... and 、 Device code
Functions realized by the device :
1.NFC One key distribution network
Obtain the input and output current and voltage of the device .
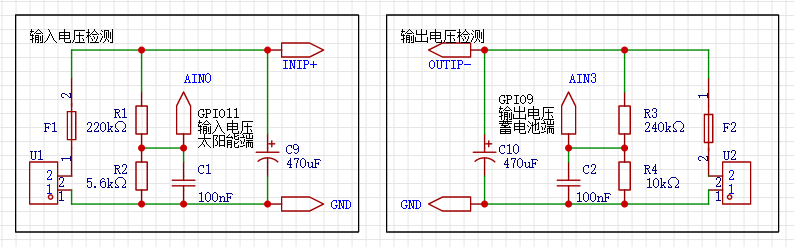

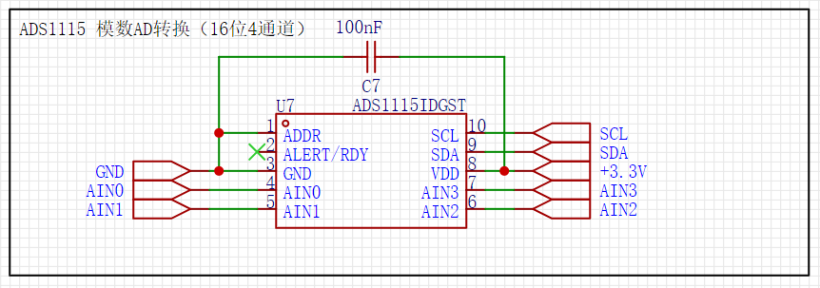
In the schematic diagram , At the solar input , The lithium battery is terminated with a voltage dividing resistor . Separate access to ADS1115 Of AIN0 and AIN3 Interface .
1.OpenHarmony_Firmware\OH_SolarControl\ADS1X15Migrated under the folder ADS1X15 Arduino End drive code to OpenHarmony. Current detection uses ACS712 modular , Access ADS1115 Of AIN1 and AIN2 Interface ,ADS1115 adopt I2C Module and Hi3861 Communications . The main access codes are as follows :Temperature control
When the system temperature is too high , Automatically shut down the system . Use NTC100K The temperature sensor , because Hi3861 System resources are relatively limited , Therefore, the temperature value is calculated by using the binary look-up table method , The key codes are as follows :
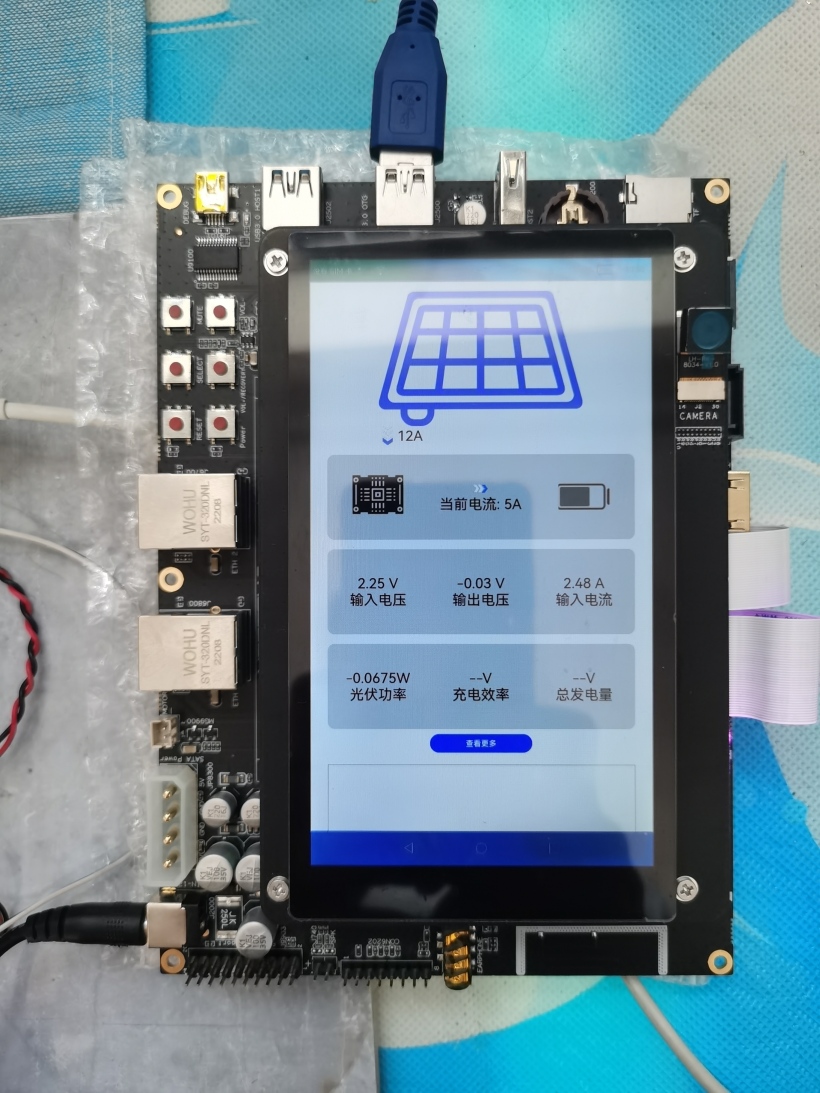
OLED Show
Display the real-time operation status of the system , The relevant code is contained in
1.OpenHarmony_Firmware\OH_SolarControl\ssd1306Under the foldermqtt Access to Huawei cloud
Four 、OpenHarmony Application side code
Interface implementation
Page using ets Compiling , The main codes are as follows :
Http visit
Connecting Huawei cloud IotDA Need to use get、post Request cloud data , Send request configuration code :
Hua Wei Yun API Interface
obtain IAM user Token Interface , This interface can be used through user name and password ma To obtain IAM user Token.
Query device shadow data interface , Query the device shadow information of the specified device by calling this interface , The relevant code is as follows
5、 ... and 、HarmonyOS Application side code
HarmonyOS The application side can be used directly DevEco Studio Self contained OneHop Templates , Need to install DevEco Studio 3.0.0.800 Beta2 for HarmonyOS

I have written this part in my previous article , I won't go into that here , Original link Touch to achieve - Open source basic software community -51CTO.COM
The application side code is divided into two modules ,entry and control,entry The module is responsible for the equipment distribution network ,control The module is responsible for equipment data acquisition and equipment control .
entry Distribution network module
By default, the distribution network in the template uses NAN Distribution network mode , The success rate of distribution network is relatively poor , Can increase SoftAP Distribution network mode , Two modes of distribution network , Increase the success rate of equipment distribution . The first change getWifiInfo() function .
discoverDevice() The function is decomposed into NAN、SoftAP Two ways
There are also two ways to connect devices :
The distribution network function needs to be modified in the same way , Other distribution modes are basically unchanged .
Distribution network in two ways , The success rate of distribution network will increase a lot , This method refers to OpenHarmony-SIG/knowledge Examples of smart home development . This warehouse provides many OpenHarmony Examples of IOT devices , Interested partners , You can study it carefully .
control Control module
New equipment is defined in 3.HarmonyOS_APP/SolarControl/entry/src/main/java/com/zml/solarcontrol/MainAbility.java. When entry When the module is successfully distributed , Will pull up control Module interface and will productName Pass the parameters together .
Add a new device under the control module SOLAR, Resources are contained in 3.HarmonyOS_APP/SolarControl/control/src/main/js/default/common/SOLAR Under the folder , The configuration file is contained in 3.HarmonyOS_APP/SolarControl/control/src/main/resources/rawfile/SOLAR Under the folder .
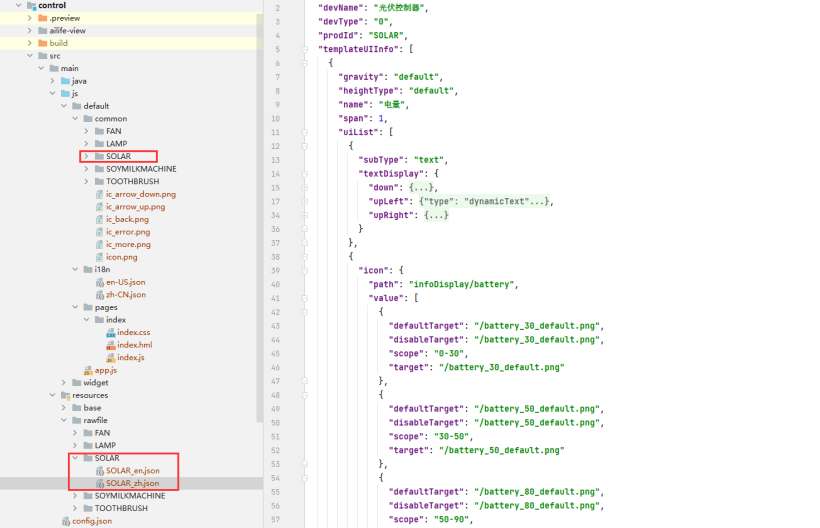
The configuration process is as follows :
At present, the basic framework of the project has been realized , Some functions are still being improved , We will continue to update the document in the near future .
Want to know more about open source , Please visit :
边栏推荐
- What is the difference between the three values of null Nan undefined in JS
- Embedded development: how to choose the right RTOS for the project?
- 【colmap】稀疏重建转为MVSNet格式输入
- 使用 CustomPaint 绘制基本图形
- Ten thousand word summary data storage, three knowledge points
- DNS series (I): why does the updated DNS record not take effect?
- Ant destination multiple selection
- 【Azure微服务 Service Fabric 】因证书过期导致Service Fabric集群挂掉(升级无法完成,节点不可用)
- Interview question 01.02 Determine whether it is character rearrangement - auxiliary array algorithm
- Goal: do not exclude yaml syntax. Try to get started quickly
猜你喜欢
How to turn on win11 game mode? How to turn on game mode in win11
Win11如何解禁键盘?Win11解禁键盘的方法
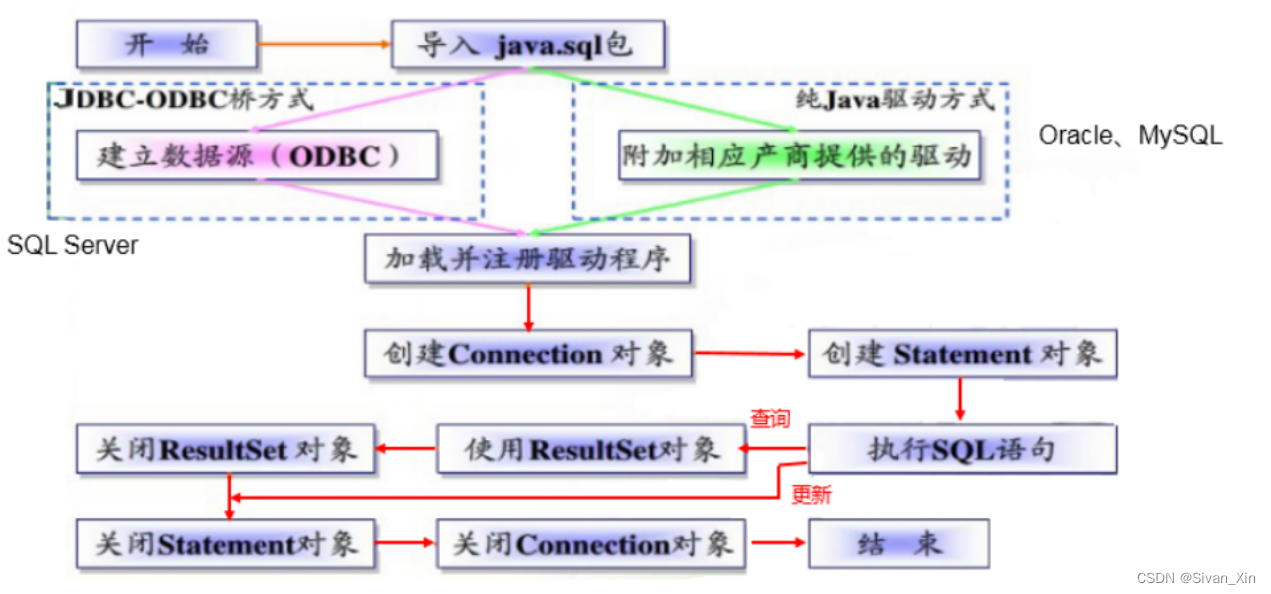
【JDBC Part 1】概述、获取连接、CRUD
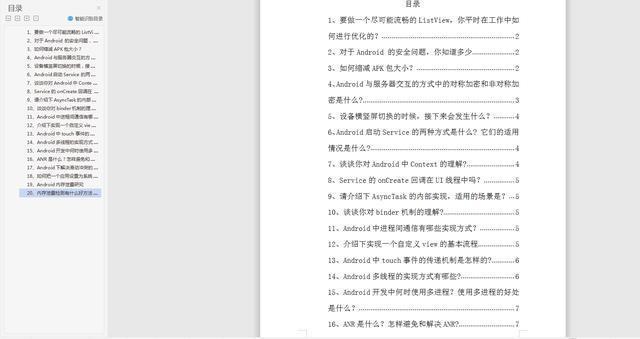
ByteDance Android interview, summary of knowledge points + analysis of interview questions

QT compile IOT management platform 39 alarm linkage
你可曾迷茫?曾经的测试/开发程序员,懵懂的小菜C鸟升级......
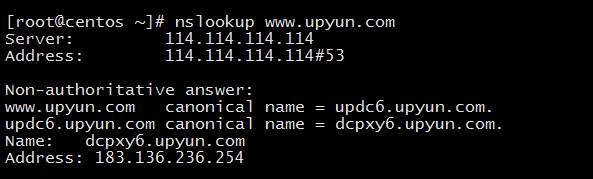
DNS series (I): why does the updated DNS record not take effect?

Pre sale 179000, hengchi 5 can fire? Product power online depends on how it is sold
How does win11 unblock the keyboard? Method of unlocking keyboard in win11
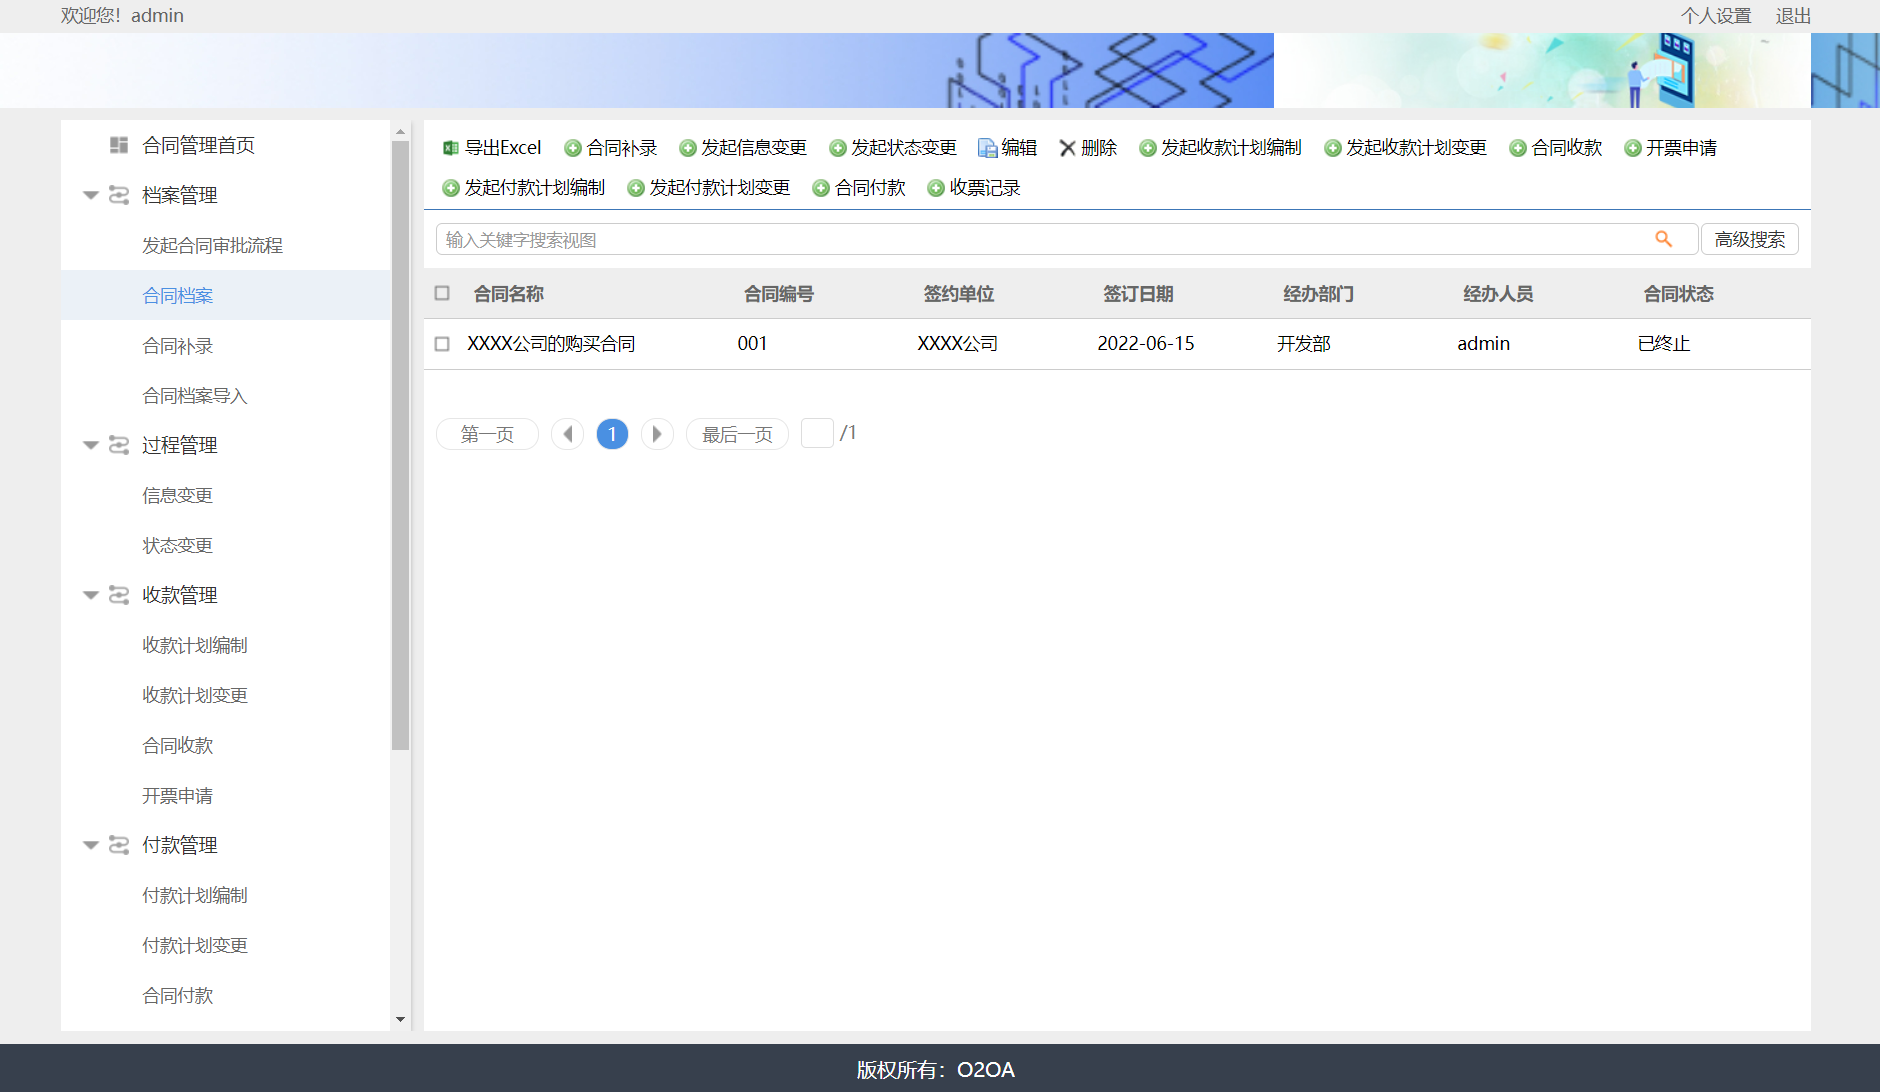
Open source OA development platform: contract management user manual
随机推荐
Jerry's power on automatic pairing [chapter]
Pre sale 179000, hengchi 5 can fire? Product power online depends on how it is sold
建立自己的网站(18)
Use camunda to do workflow design and reject operations
Win11游戏模式怎么开启?Win11开启游戏模式的方法
Dry goods sharing | devaxpress v22.1 original help document download collection
What stocks can a new account holder buy? Is the stock trading account safe
#DAYU200体验官#MPPT光伏发电项目 DAYU200、Hi3861、华为云IotDA
使用 CustomPaint 绘制基本图形
Validutil, "Rethinking the setting of semi supervised learning on graphs"
L2: current situation, prospects and pain points of ZK Rollup
Interview question 01.02 Determine whether it is character rearrangement - auxiliary array algorithm
Demon daddy A3 stage near normal speed speech flow initial contact
The maximum number of meetings you can attend [greedy + priority queue]
怎样写一个增广矩阵到txt文件中
[open source] Net ORM accessing Firebird database
NVR硬盤錄像機通過國標GB28181協議接入EasyCVR,設備通道信息不顯示是什麼原因?
What is the difference between the three values of null Nan undefined in JS
Lingyun going to sea | saihe & Huawei cloud: jointly help the sustainable development of cross-border e-commerce industry
How polardb-x does distributed database hotspot analysis