This film only records the personal replacement equipment configuration system terminal The process , Personally feel Mac The terminal of the system is enough for daily use , I used to iTem2, Pretty good also , Individual be fond of , To enter the body :
function
- Syntax highlighting
- Command line tab completion
- Automatic prompt
- Show Git Warehouse status
- And of course, there's a beautiful interface
The color scheme
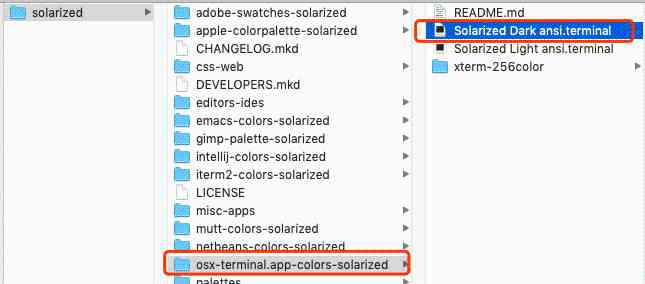
Use Solarized Click on the theme color scheme of Download link on official website :
Click here to download latest version
Get the unzip Directory : Double click installation Solarized Dark ansi.terminal
install oh-my-zsh
Use crul install :
sh -c "$(curl -fsSL https://raw.github.com/robbyrussell/oh-my-zsh/master/tools/install.sh)"
Or use wget:
`sh -c "$(wget https://raw.githubusercontent.com/robbyrussell/oh-my-zsh/master/tools/install.sh -O -)"
The theme
After successful installation , use vim( Or find it in the root directory and ) Open hidden file .zshrc , Change the theme to agnoster:
ZSH_THEME="agnoster"
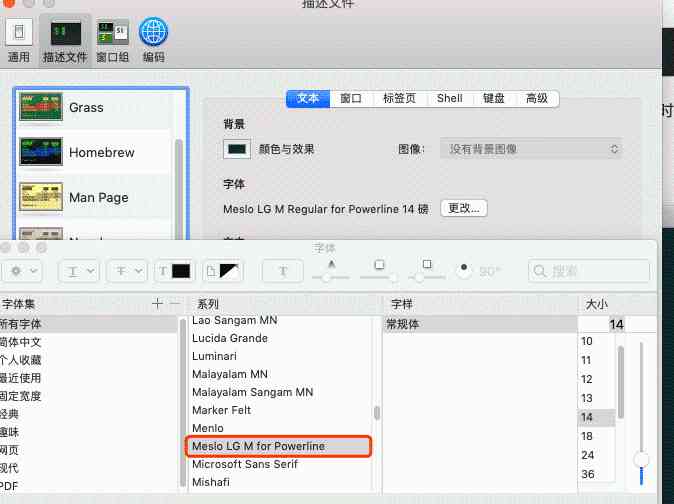
application agnoster This theme needs special font support , Otherwise, there will be disorder , Now let's configure the font :
-
Download and install Meslo typeface
-
stay terminal Application in Meslo typeface :
agnoster A theme for most people , My personal use is ys, You can go to oh-my-zsh Choose other topics on the official website
Automatic prompt command configuration
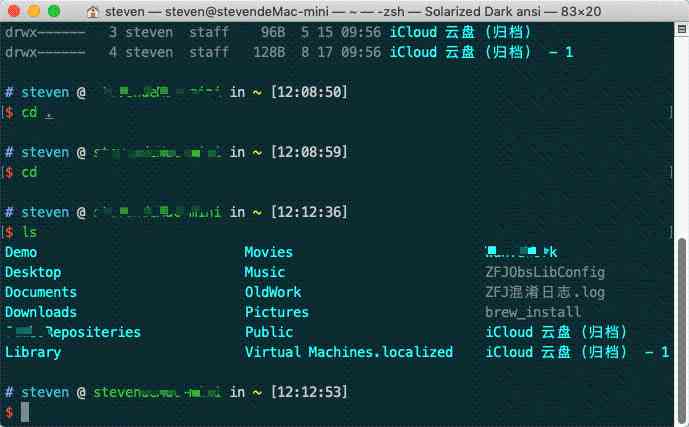
- effect :
When we type the command , The terminal will automatically prompt you for the following commands that you may enter , Now press → You can output these commands , Very convenient , Pictured :

- The automatic prompt function is as follows :
1. Clone warehouse to local ~/.oh-my-zsh/custom/plugins Under the path
cd ~/.oh-my-zsh/custom/plugins
git clone https://github.com/zsh-users/zsh-autosuggestions.git
2. use vim( Or find it in the root directory and ) open .zshrc file , Find the plug-in settings command , The default is plugins=(git) , Let's change it to :
plugins=(zsh-autosuggestions git)

Syntax highlighting configuration
1. Use homebrew install zsh-syntax-highlighting plug-in unit .
brew install zsh-syntax-highlighting
2. To configure .zshrc file , Insert a row .
source /usr/local/share/zsh-syntax-highlighting/zsh-syntax-highlighting.zsh
3. Enter the command .
source ~/.zshrc
PS:
install homebrew Package management tools :
1. Download source to local
curl -fsSL https://raw.githubusercontent.com/Homebrew/install/master/install >> brew_install
2. Modify image source
take
BREW_REPO = "https://github.com/Homebrew/brew".freeze
It is amended as follows ( If it's not found CORE_TAP_REPO Copy it directly )
BREW_REPO = "https://mirrors.tuna.tsinghua.edu.cn/git/homebrew/brew.git".freeze
CORE_TAP_REPO = "https://mirrors.tuna.tsinghua.edu.cn/git/homebrew/homebrew-core.git".freeze
3. Console input
/usr/bin/ruby brew_install
This is the source of the Chinese Academy of Sciences , There may be
fatal: early EOF
fatal: index-pack failed
Error: Failure while executing; `git clone https://github.com/Homebrew/homebrew-core /usr/local/Homebrew/Library/Taps/homebrew/homebrew-core --depth=1` exited with 128.
Error: Failure while executing; `/usr/local/bin/brew tap homebrew/core` exited with 1.
Failed during: /usr/local/bin/brew update --force
You need to perform
git clone git://mirrors.ustc.edu.cn/homebrew-core.git/ /usr/local/Homebrew/Library/Taps/homebrew/homebrew-core --depth=1
4. homebrew-core The image address of the Chinese Academy of Sciences is also set as the domestic image of the Chinese Academy of Sciences
cd "$(brew --repo)"

git remote set-url origin https://mirrors.ustc.edu.cn/brew.git

cd "$(brew --repo)/Library/Taps/homebrew/homebrew-core"

git remote set-url origin https://mirrors.ustc.edu.cn/homebrew-core.git

//  to update
brew update
Security and privacy -> Any source
sudo spctl --master-disable
Set the number of units password
pwpolicy -clearaccountpolicies