当前位置:网站首页>Conscience summary! Jupyter notebook from Xiaobai to master, the nanny tutorial is coming!
Conscience summary! Jupyter notebook from Xiaobai to master, the nanny tutorial is coming!
2022-07-02 19:41:00 【Novice learn Python】

from : Youer cottage
Hello everyone , I'm a rookie !
Today, I'd like to share an article with you About data science tools Jupyter Notebook Of Quick start and tutorial , You can compare and learn :
One 、 What is? Jupyter Notebook?
1. brief introduction
Jupyter Notebook Is a web based application for interactive computing . It can be applied to the whole process of calculation : Development 、 Documentation 、 Run the code and display the results .——Jupyter Notebook The official introduction
In short ,Jupyter Notebook It's in the form of a web page , It can be in the web page 「 direct 」 Write and run code , The running results of the code will also be displayed directly under the code block . Such as in the process of programming need to write documentation , It can be written directly in the same page , Convenient for timely explanation and explanation .
2. Part of the
① Web applications
Web application is based on web form 、 Combined with the preparation of documentation 、 The mathematical formula 、 Interactive computing and other rich media tools .「 in short , Web application is a tool that can realize various functions .」
② file
namely Jupyter Notebook All interactive computing in 、 Document the instructions 、 The mathematical formula 、 Images and other rich media forms of input and output , It's all in the form of documents .
These documents are saved with the suffix .ipynb Of JSON Format file , Not only is it easy to version control , It's also easy to share .
Besides , Documents can also be exported as :HTML、LaTeX、PDF Equiform .
3. Jupyter Notebook The main characteristics of
Programming with 「 Syntax highlighting 」、 Indent 、tab The function of complement .
You can run the code directly through the browser , At the same time, the running result is displayed under the code block .
Display the calculation results in rich media format . Rich media formats include :HTML,LaTeX,PNG,SVG etc. .
When writing instruction documents or statements to code , Support Markdown grammar .
Support use LaTeX Write a mathematical note .
Two 、 install Jupyter Notebook
0. Try it first , Decide again
If you read the above right Jupyter Notebook You still can't decide whether your introduction is suitable for you , Then don't worry , You can start with 「 Installation free trial experience 」 once , Then make a decision .
It is worth noting that , The official simultaneous trial is limited , If you click the link, the page you enter is shown in the figure below , Then don't worry , Try again later .
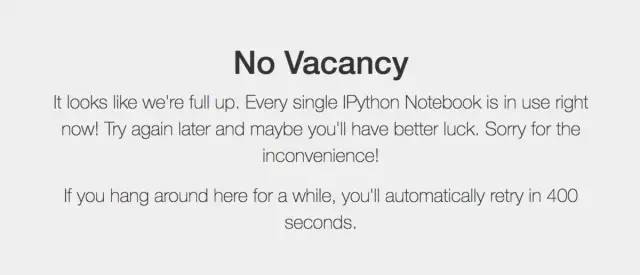
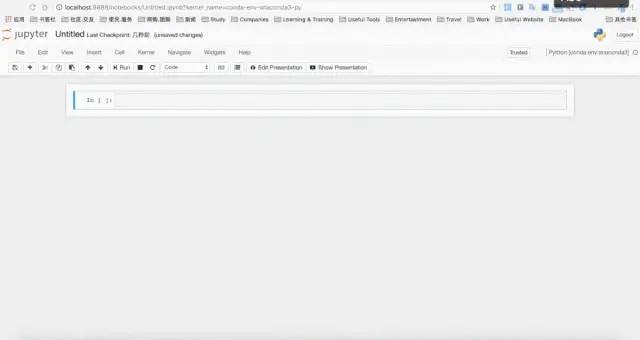
If you are lucky enough , Then you will see the following interface , You can start to experience .
main interface

Edit page

1. install
① Installation premise
install Jupyter Notebook The premise is to install Python(3.3 Version and above , or 2.7 edition ).
② Use Anaconda install
If you are little white , Then I suggest you install Anaconda To solve Jupyter Notebook Installation problems , because Anaconda Has been automatically installed for you Jupter Notebook And other tools , also python In more than 180 Science packs and their dependencies .
You can go through Anaconda Choose to download from the official download page of ;
Routinely , Installed Anaconda It has been automatically installed for you when you release Jupyter Notebook Of , But if it's not installed automatically , Then at the terminal (Linux or macOS Of “ terminal ”,Windows Of “Anaconda Prompt”, Hereinafter referred to as “ terminal ”) Enter the following command to install :
conda install jupyter notebook③ Use pip Command to install
If you are experienced Python The player , Want to try pip Command to install Jupyter Notebook, Then please take a look at the following steps ! The next commands are input in the terminal !
hold pip Upgrade to the latest version
pip install --upgrade pipBe careful : The old version of pip In the installation Jupyter Notebook In the process or facing the problem that dependencies cannot be installed synchronously . therefore 「 Strongly recommended 」 The first pip Upgrade to the latest version .
install Jupyter Notebook
pip install jupyter3、 ... and 、 function Jupyter Notebook
0. help
If you have any jupyter notebook Command questions , Consider checking the official help documentation , The order is as follows :
jupyter notebook --helpor
jupyter notebook -h1. start-up
① The default port starts
Enter the following command in the terminal :
jupyter notebookAfter executing the command , A series of messages will be displayed in the terminal notebook Server information , At the same time, the browser will start automatically Jupyter Notebook.
The contents displayed on the terminal during startup are as follows :
$ jupyter notebook
[I 08:58:24.417 NotebookApp] Serving notebooks from local directory: /Users/catherine
[I 08:58:24.417 NotebookApp] 0 active kernels
[I 08:58:24.417 NotebookApp] The Jupyter Notebook is running at: http://localhost:8888/
[I 08:58:24.417 NotebookApp] Use Control-C to stop this server and shut down all kernels (twice to skip confirmation).
Be careful : After the Jupyter Notebook All operations , Please keep the terminal 「 Do not shut down. 」, Because once the terminal is turned off , It will disconnect the link with the local server , You will not be able to Jupyter Notebook Other operations in .
By default, the browser address bar will display :http://localhost:8888. among ,“localhost” It means the machine ,“8888” It's the port number .

If you 「 meanwhile 」 Several Jupyter Notebook, Due to the default port “8888” occupied , Therefore, the number in the address bar will start from “8888” rise , Start one more Jupyter Notebook The number is added 1, Such as “8889”、“8890”……
② Specify the port to start
If you want to customize the port number to start Jupyter Notebook, You can enter the following commands in the terminal :
jupyter notebook --port <port_number> among ,“<port_number>” Is a custom port number , Write it directly in the form of numbers in the command , No angle brackets around numbers “<>”. Such as :jupyter notebook --port 9999, That is, when the port number is “9999” The server starts Jupyter Notebook.
③ Start the server without opening the browser
If you just want to start Jupyter Notebook But I'm not going to go to the main page right away , Then you don't need to start the browser immediately . Input in the terminal :
jupyter notebook --no-browserhere , The started server information will be displayed on the terminal , And after the server starts , Show the link to open the browser page . When you need to launch a browser page , Just copy the link , And paste it in the address bar of the browser , Tap enter to change to your Jupyter Notebook page .

In the example figure, I started multiple at the same time when I finished the above content Jupyter Notebook, So show me “8888” Port number occupied , Finally assigned to me is “8889”.
2. The main page
① Main page content
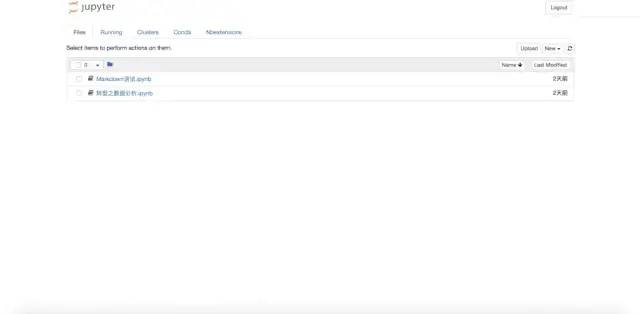
After executing the start command , The browser will go to Notebook Main page , As shown in the figure below .

If the folder in your homepage is different from mine , Or you're wondering why there are so many folders inside the first startup , Don't worry about , The folders here are all directory files in your home directory . You can execute the following in the terminal 2 Step to see :
① cd or cd - or cd ~ or cd /Users/
This command will enter your home directory .
“<user_name>” Is the user name . No angle brackets around the user name “<>”.
② ls
This command will display the files in your home directory .
② Set up Jupyter Notebook File storage location
If you don't want to put the future in Jupyter Notebook All documents written in are saved directly in the home directory , Then you need to modify Jupyter Notebook File storage path .
⑴ Create folder / Catalog
Windows The user is trying to store Jupyter Notebook Of documents 「 disk 」 in 「 New folder 」 And name the folder ; Double click to enter the folder , Then copy the path in the address bar .
Linux/macOS The user is trying to store Jupyter Notebook The location of the file 「 Create directory 」 And name the directory , The order is :
mkdir; Entry directory , The order is :cd; View the path to the directory , The order is :pwd; Copy the path .Be careful :“<directory_name>” The custom directory name is . No angle brackets around the directory name “<>”.
⑵ Profile path
A convenient command to get the path of the configuration file :
jupyter notebook --generate-configBe careful : Although this command can be used to view the path of the configuration file , But the main purpose is whether to set the configuration file under this path 「 Replace 」 by 「 Default profile 」. If this is your first inquiry , that 「 Maybe 」 The following prompt will not appear ; If the file already exists or has been modified , After using this command, you will be asked “Overwrite /Users/raxxie/.jupyter/jupyter_notebook_config.py with default config? [y/N]”, namely “ Overwrite the files in this path with the default configuration file ?”, If the “y”, Then complete the coverage , Then all previous modifications will be invalidated ; If it's just to query the path , Then be sure to enter “N”.

Under normal circumstances ,Windows and Linux/macOS The path where the configuration file is located and the name of the configuration file are as follows :
Windows System configuration file path :
C:\Users\\.jupyter\Linux/macOS System configuration file path :
/Users//.jupyter/or~/.jupyter/Profile name :
jupyter_notebook_config.pyBe careful :
① “<user_name>” For your user name . No angle brackets around the user name “<>”.
② Windows and Linux/macOS The storage path of the system configuration file is actually the same , It's just that the system is different , It's just in different forms .
③ Windows and Linux/macOS The configuration file of the system is the same . File name to “.py” ending , yes Python The executable of .
④ If you don't go to the location of the configuration file in one step , Instead, go into the folder layer by layer / The directory , So when you enter the home directory , use ls The command will find that “.jupyter” Folder / Catalog . This is because those who use “.” The first directories are hidden files , You can go through ls -a Command to view all hidden files in the current location .
⑶ Modify the configuration file
Windows Users of the system can use document editing tools or IDE open “jupyter_notebook_config.py” File and edit . Common document editing tools and IDE There is a notepad 、Notepad++、vim、Sublime Text、PyCharm etc. . among ,vim There is no graphic interface , Is a steep learning curve editor , Other tools are not described here , Because it's relatively easy to get started . adopt vim To modify the configuration file, please continue to read .
Linux/macOS Users of the system suggest calling directly through the terminal vim To modify the configuration file . The specific operation steps are as follows :
⒜ Open profile
Open the terminal , Enter the command :
vim ~/.jupyter/jupyter_notebook_config.py
vim Open profile
After executing the above command, you will enter the configuration file .
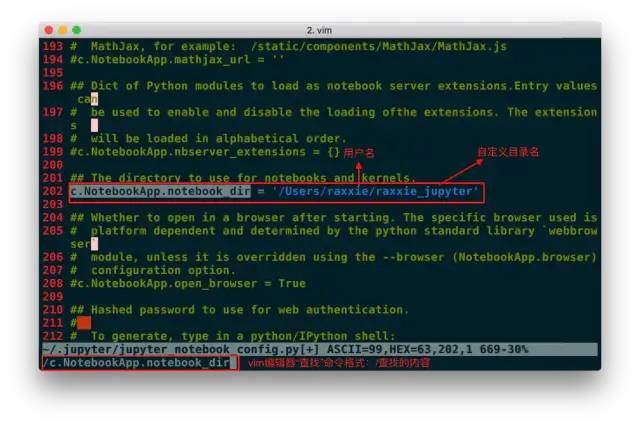
⒝ Search for keywords
Search for keywords after entering the configuration file “c.NotebookApp.notebook_dir”. The search method is as follows :
Do not press other keys after entering the configuration file , use 「 Half width in English 」 Direct input /c.NotebookApp.notebook_dir, At this time, the search keywords have been highlighted in the document , Press enter , The cursor switches from the bottom to the first letter of the searched keyword in the body of the document .
⒞ Edit profile
Press 「 A lowercase letter i」 Enter edit mode , The bottom appears “--INSERT--” It indicates that you have successfully entered editing mode . Use the arrow keys to position the cursor on the second single quotation mark ( Which character is the cursor positioned on , Start typing just before this character ), hold “⑴ Create folder / Catalog ” Paste the path copied in step here .
⒟ uncomment
Put the beginning of the line ** Well No (#)** Delete . Because the profile is Python The executable of , stay Python in , Well No (#) Notation , That is, the command line will not be executed during compilation , So in order for the changes to take effect , You need to delete the pound sign (#).
⒠ Save configuration file
According to the first ESC key , Exit from edit mode , Go back to command mode .
Reuse 「 Half width in English 」 Direct input :wq, Press enter to save and exit the configuration file successfully .
Be careful :
「 The colon (:)」 Be sure to have , And also 「 Half width in English 」.
w: preservation .
q: sign out .
⒡ verification
Enter command in terminal jupyter notebook open Jupyter Notebook, At this point, you will see a refreshing interface , Congratulations !

⒢ Be careful
All the above commands are in 「 Half width in English 」 Format input , If there is an error , Please check these two conditions strictly ,「 english 」 And 「 Half angle 」.
Here we only introduce vim How the editor modifies the configuration file , No, right vim Explain the detailed use of the editor , So there's no need to know vim How to use the editor , Just follow the above steps and you will be able to successfully complete the modification !
It is recommended to learn when you have time and experience vim Use of editor . This powerful editor will become a sharp weapon in your future work .
Four 、Jupyter Notebook Basic use of
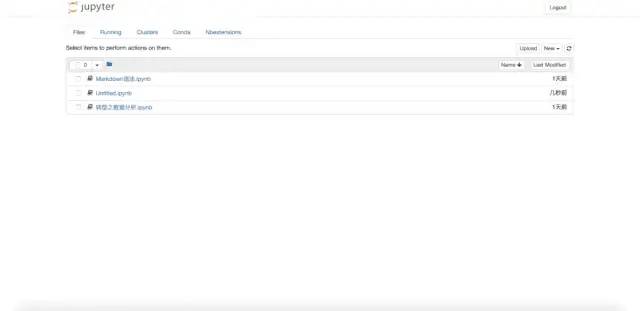
1. Files page

At this time, there should be no... In your interface “Conda” and “Nbextensions” category . Don't worry , These two categories will be in “ 5、 ... and 、 Expand functions ” Medium “1. relation Jupyter Notebook and conda Environment and package ——‘nb_conda’” and “2.Markdown Generate Directory ” Install in .
Files Pages are used to manage and create categories related to files .
For existing files , You can check the file , Copy the selected file 、 rename 、 Move 、 download 、 see 、 Edit and delete operations .
meanwhile , Or as needed , stay “New” Select the environment where you want to create the file from the drop-down list , Create “ipynb” Format notebook 、“txt” The format of the document 、 Terminal or folder . If the environment you created does not appear in the drop-down list , Then you need to go to “ 5、 ... and 、 Expand functions ” Medium “1. relation Jupyter Notebook and conda Environment and package ——‘nb_conda’” and “ 6、 ... and 、 Add the kernel ——‘ipykernel’” Solve this problem in .
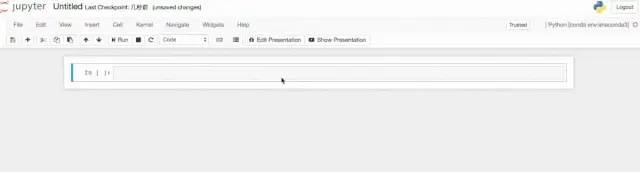
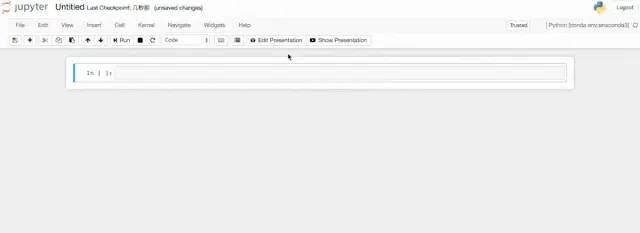
① Basic operation of notebook

The figure above shows the basic structure and functions of the notebook . According to the annotations in the figure, most of the usage problems can be solved !
The use of the toolbar is as intuitive as the annotation in the figure , There is no more explanation here . One thing to note is that “ The state of the cell ”, Yes Code,Markdown,Heading,Raw NBconvert. among , The most commonly used are the first two , Code status ,Markdown Write status .Jupyter Notebook It has been cancelled Heading state , The Title Cell . In its place Markdown From level one to level six . and Raw NBconvert It is rarely used at present , I won't explain too much here .
The menu bar covers all the functions of the notebook , Even if it's a toolbar , You can also find it in the category of the menu bar . However , Not all functions are commonly used , such as Widgets,Navigate.Kernel Use of categories , Mainly the operation of the kernel , Like interruptions 、 restart 、 Connect 、 close 、 Switch kernel, etc , Because we have selected the kernel when creating the notebook , Therefore, the operation of switching the kernel is convenient for us to switch to the kernel environment we want when using the notebook . Due to relatively conventional functions , It's very convenient to try to use the function of notebook according to the notes in the figure , So I won't explain it in detail .
② There are two ways to rename a notebook
⑴ Rename inside the notebook
When using a notebook , You can rename it directly inside . On the top left “Jupyter” Next to the icon is the default title of the program “Untitled”, Click on “Untitled” Then enter the self drawn title in the pop-up dialog box , Click on “Rename” The Rename is complete .
⑵ Rename the outside of the notebook
If you forget to rename your notebook when using it , And has been saved and exited to “Files” Interface , It's in “Files” Check the file to be renamed in the interface , Click on “Rename” Then directly enter the self-made title .
⑶ demonstration

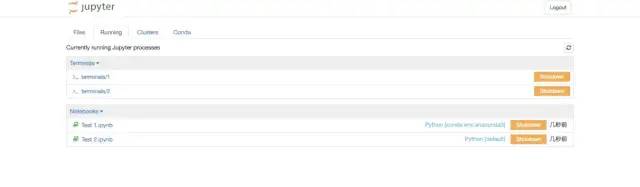
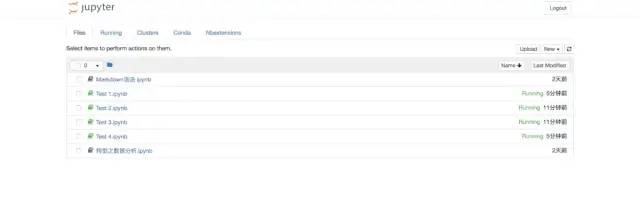
2. Running page
Running The page mainly shows the currently running terminals and “ipynb” Format notebook . If you want to close the open terminal and “ipynb” Format notebook , You can't exit the program completely just by closing its page , Need to be in Running Click its corresponding... On the page “Shutdown”. More closing methods can be found in “ 8、 ... and 、 Close and exit ” Medium “1. Turn off the laptop and terminal ”
3. Clusters page
Clusters tab is now provided by IPython parallel. See 'IPython parallel' for installation details.
*
Clusters The category has now been changed from IPython parallel docking , And due to the low frequency of use at this stage , Therefore, no detailed description will be made here , For more information, visit IPython parallel Official website .
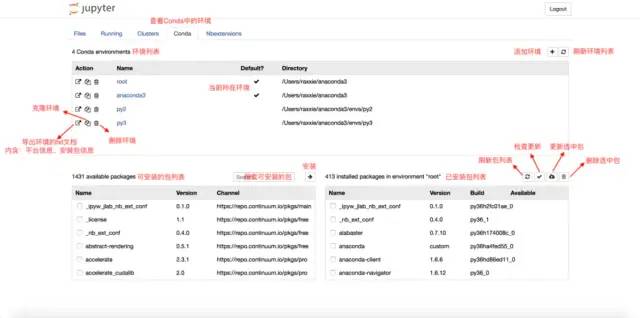
4. Conda page
Conda The page is mainly Jupyter Notebook And Conda After the association, the Conda A page tool for direct operation and management of environment and package . For details, please refer to “ 5、 ... and 、 Expand functions ” Medium “1. relation Jupyter Notebook and conda Environment and package ——‘nb_conda’”. This is currently used Jupyter Notebook A necessary part of , So be sure to check .
5. Nbextensions page

Nbextensions The page provides multiple Jupyter Notebook Plug in for , Make it more powerful . The main plug-ins used in this page are nb_conda,nb_present,Table of Contents(2). We don't need to fully master these functions , You don't need to install all the extensions , According to the learning ideas provided in this document , We just need to install Talbe of Contents(2) that will do , This function can be Markdown Documents provide directory navigation , It is convenient for us to write documents . Please refer to the installation instructions “ 5、 ... and 、 Expand functions ” Medium “2.Markdown Generate Directory ”.
5、 ... and 、 Expand functions
1. relation Jupyter Notebook and conda Environment and package ——“nb_conda”*
① install
conda install nb_condaThe execution of the above command can make you conda Create an environment with Jupyter Notebook Related to , It's convenient for you to Jupyter Notebook In use , Create notebooks to work in different environments .
② Use
Can be in Conda Under the category of conda Environment and package for a series of operations .
conda category It can be in the notebook “Kernel” In the category “Change kernel” Switch kernel .

Switch kernel
③ uninstall
canda remove nb_condaExecute the above command to uninstall nb_conda package .
2. Markdown Generate Directory
Different from Youdao cloud notes Markdown compiler ,Jupyter Notebook Unable to Markdown Documents add directories through specific syntax , Therefore, you need to install extensions to add directories .
conda install -c conda-forge jupyter_contrib_nbextensionsAfter execution of the above order , start-up Jupyter Notebook, You will find that there are too many navigation bars “Nbextensions” Category of , Click on “Nbextensions”, Check “Table of Contents ⑵”
nbextensions After that Jupyter Notebook Use in Markdown, Click the icon below to use .

Add a directory
3. Markdown Set up links in the text and locate
In the use of Markdown When editing a document , It is inevitable to encounter the need to set links in the text , Locate elsewhere in the document for easy viewing . because Markdown Can be perfectly compatible html grammar , Therefore, this function can be realized through html In grammar “a label ” Index usage to achieve .
The syntax is as follows :
[ Add the body of the link ](# Custom index words )
<a id= Custom index words > Jump tips </a>
Be careful :
All symbols in the grammatical format are 「 Half width in English 」.
“ Custom index words ” Best in English , Longer words can be underlined .
“a label ” Appear in the position of the article you want to jump to ,html Except for single label, all labels shall comply with “ Have a head (
) There must be a tail ()” Principles . Between the head and the tail “ Jump tips ” It's optional .“a label ” Medium “id” The value is set when adding a link to the body “ Custom index value ”, Through here “id” The value of realizes the function of jumping from the link of the text to the specified position .
example :
1. There are jump hints
2. No jump prompt

4. Load the specified web page source code
① Use scenarios
Want to be in Jupyter Notebook Directly load the source code of the specified website into the notebook .
② Method
Execute the following command :
%load URLamong ,URL Specify the address of the web site for .
③ example
5. Load local Python file
① Use scenarios
Want to be in Jupyter Notebook Load local Python File and execute the file code .
② Method
Execute the following command :
%load Python The absolute path to the file ③ Be careful
Python The suffix of the file is “.py”.
“%load” In the heel Python Of documents 「 Absolute path 」.
After typing the command , Can press
CTRL enterTo execute an order . First execution , It's going to be local Python Load the contents of the file into the cell . here ,Jupyter Notebook Will automatically “%load” Command comment out ( That is, add a well number in front of “#”), So that the command is not repeated when executing the loaded file code ; Second execution , Is the code that executes the loaded file .
④ example

6. Run the local server directly Python file
① Use scenarios
Do not want to be in Jupyter Notebook Load local data in the cell of Python file , Want to run directly .
② Method
Carry out orders :
%run Python The absolute path to the file or
!python3 Python The absolute path to the file or
!python Python The absolute path to the file ③ Be careful
Python The suffix of the file is “.py”.
“%run” In the heel Python Of documents 「 Absolute path 」.
“!python3” Used to perform Python 3.x Version code .
“!python” Used to perform Python 2.x Version code .
“!python3” and “!python” Belong to
!shell commandThe use of grammar , That is to say Jupyter Notebook In the implementation of shell The syntax of the command .After typing the command , Can press
CTRL enterTo execute an order , Local... Will not be displayed during execution Python The content of the document , Directly display the operation results .
④ example

7. stay Jupyter Notebook Get the current location in
① Use scenarios
Want to be in Jupyter Notebook Get the current location in 「 Absolute path 」.
② Method
%pwdor
!pwd③ Be careful
The location obtained is the current location Jupyter Notebook The location of the notebook created in , And the position is 「 Absolute path 」.
“!pwd” Belong to
!shell commandThe use of grammar , That is to say Jupyter Notebook In the implementation of shell The syntax of the command .
④ example
8. stay Jupyter Notebook Use shell command
① Method 1 —— In the cell of the notebook
⑴ grammar
!shell command stay Jupyter Notebook Use English exclamation marks in the notebook cells in “!” Followed by shell Orders can be executed shell command .
⑵ example
② Method 2 —— stay Jupyter Notebook New terminal in
⑴ Starting method
stay Jupyter Notebook main interface , namely “File” Click... In the interface “New”; stay “New” Click in the drop-down box “Terminal” That is, a new terminal . At this time, the terminal location is in your home directory , Can pass pwd Command to query the absolute path of the current location .
⑵ Close method
stay Jupyter Notebook Of “Running” In the interface “Terminals” You can see the running Terminal in the category , Click on the following “Shutdown” You can turn off the terminal .
⑶ example
9. Hide notebook input cells
① Use scenarios
stay Jupyter Notebook In your notebook, whether writing documents or programming , All have input (In []) And the output (Out []). When we write code or documents that use more cells , Sometimes we just want to focus on the output content and don't look at the input content for the time being , In this case, you need to hide the input cells and only show the output cells .
② Method 1
⑴ Code
from IPython.display import display
from IPython.display import HTML
import IPython.core.display as di # Example: di.display_html('<h3>%s:</h3>' % str, raw=True)

#  The purpose of this line of code is : When a document is used as HTML Format output , The input cells will be hidden by default .
di.display_html('<script>jQuery(function() {if (jQuery("body.notebook_app").length == 0) { jQuery(".input_area").toggle(); jQuery(".prompt").toggle();}});</script>', raw=True)

#  This line of code will be added “Toggle code” Button to switch “ hide / Show ” Enter cell .
di.display_html('''<button onclick="jQuery('.input_area').toggle(); jQuery('.prompt').toggle();">Toggle code</button>''', raw=True)
Enter the above code in the first cell of the notebook , And then execute , You can use... In this document “ hide / Show ” Enter cell function .
defects : This method is not very suitable for Markdown Cell .
⑵ example

③ Method 2
⑴ Code
from IPython.display import HTML

HTML('''<script>
code_show=true;
function code_toggle() {
 if (code_show){
 $('div.input').hide();
 } else {
 $('div.input').show();
 }
 code_show = !code_show
}
$( document ).ready(code_toggle);
</script>
<form action="javascript:code_toggle()"><input type="submit" value="Click here to toggle on/off the raw code."></form>''')
Enter the above code in the first cell of the notebook , And then execute , You can use... In this document “ hide / Show ” Enter cell function .
defects : This method is not very suitable for Markdown Cell .
⑵ example

10. Magic command
At present, there are not too many magic commands , Therefore, for the time being, please refer to the documents on the official website .
6、 ... and 、 Add the kernel ——“ipykernel” *
1. Use scenarios
Scene one : Use different versions of Python Work on , stay Jupyter Notebook Cannot switch in , namely “New” The required environment cannot be used in the drop-down menu of .
Scene two : Created different virtual environments ( Maybe have the same Python Version, but the package installed is different ), stay Jupyter Notebook Cannot switch in , namely “New” The required environment cannot be used in the drop-down menu of .
Next, we will use “ Command line mode ” and “ GUI mode ” To solve the problems of the above two scenarios . seeing the name of a thing one thinks of its function ,“ Command line mode ” That is to solve the problem step by step by executing commands in the terminal ;“ GUI mode ” It's through Jupyter Notebook Solve the above problems by clicking the mouse on the web page .
“ Command line mode ” It seems complicated , And it also divides the use scenarios , But solving the problem in this way can better understand the working principle , such as , What is the command corresponding to each step of operation , And what purpose is the execution of the command to achieve , These may be completed by a click action encapsulated in the graphical interface . For friends who want to know more about its operation process , You can read down .
2. The command line mode of the solution
① Use different versions of Python
⑴ stay Python 3 Created in Python 2 kernel
⒜ pip install
First installation Python 2 Of ipykernel package .
python2 -m pip install ipykernelAgain 「 The current user 」 install Python 2 The kernel of (ipykernel).
python2 -m ipykernel install --userBe careful :“--user” Parameter means that it is installed for the current user , Instead of system wide installation .
⒝ conda install
First create Python Version is 2.x And ipykernel The new environment , among “<env_name>” Name the custom environment , No angle brackets around the environment name “<>”.
conda create -n <env_name> python=2 ipykernelThen switch to the newly created environment .
Windows: activate <env_name>
Linux/macOS: source activate <env_name>
by 「 The current user 」 install Python 2 The kernel of (ipykernel).
python2 -m ipykernel install --userBe careful :“--user” Parameter means that it is installed for the current user , Instead of system wide installation .
⑵ stay Python 2 Created in Python 3 kernel
⒜ pip install
First installation Python 3 Of ipykernel package .
python3 -m pip install ipykernelAgain 「 The current user 」 install Python 2 The kernel of (ipykernel).
python3 -m ipykernel install --userBe careful :“--user” Parameter means that it is installed for the current user , Instead of system wide installation .
⒝ conda install
First create Python Version is 3.x And ipykernel The new environment , among “<env_name>” Name the custom environment , No angle brackets around the environment name “<>”.
conda create -n <env_name> python=3 ipykernelThen switch to the newly created environment .
Windows: activate <env_name>
Linux/macOS: source activate <env_name>
by 「 The current user 」 install Python 3 The kernel of (ipykernel).
python3 -m ipykernel install --userBe careful :“--user” Parameter means that it is installed for the current user , Instead of system wide installation .
② Create kernels for different environments
⑴ Switch to the environment where the kernel needs to be installed
Windows: activate <env_name>
Linux/macOS: source activate <env_name>
Be careful :“<env_name>” Is the name of the environment where the kernel needs to be installed , No angle brackets around the environment name “<>”.
⑵ Check whether the environment has ipykernel package
conda listExecute the above command to view the packages installed in the current environment , If not installed ipykernel package , Then execute the installation command ; Otherwise proceed to the next step .
conda install ipykernel⑶ Install... For the current user in the current environment Python kernel
If the environment Python Version is 2.x, Then execute the command :
python2 -m ipykernel install --user --name <env_name> --display-name "<notebook_name>"If the environment Python Version is 3.x, Then execute the command :
python3 -m ipykernel install --user --name <env_name> --display-name "<notebook_name>"Be careful :
“<env_name>” Is the name of the current environment . No angle brackets around the environment name “<>”.
“<notebook_name>” For custom display in Jupyter Notebook The name of the . There are no angle brackets around the name “<>”, but 「 Double quotation marks must be added 」.
“--name” The value of the parameter , namely “<env_name>” yes Jupyter For internal use , The storage path of its directory is
~/Library/Jupyter/kernels/. If the defined name already exists in the path , Then the contents of the directory with this name will be automatically overwritten .“--display-name” The value of the parameter is displayed in Jupyter Notebook The name in the menu .
⑷ test
Use command jupyter notebook start-up Jupyter Notebook; stay “Files” Under the “New” The drop-down box will find you in the ⑶ Custom name in step , here , You can enjoy yourself in Jupyter Notebook Switch environment in , Create notebooks to work and study in different environments !
3. Graphical interface mode of solution
① You created a new environment , But I found it in Jupyter Notebook Of “New” This environment cannot be found in , Cannot create notebook in this environment .

② Get into Jupyter Notebook → Conda → stay “Conda environment” Click you want to add ipykernel Package environment → Enter... In the search box at the bottom left “ipykernel” → Check “ipykernel” → Click... Next to the search box “→” arrow → Installation completed → Find... In the lower right box “ipykernel” The installation is successful .

③ At terminal CTRL C close Jupyter Notebook Then restart your server Jupyter Notebook, stay “File” Of “New” You can find your environment in the drop-down list of .

7、 ... and 、Jupyter Notebook Shortcut key
1. Mac And Windows Special key comparison table
| Symbol | Mac Key | Windows Key |
|---|---|---|
| ⌘ | command | nothing |
| ⌃ | control | ctrl |
| ⌥ | option | alt |
| ⇧ | shift | shift |
| return | return | |
| ␣ | space | space |
| ⇥ | tab | tab |
| ⌫ | delete | backspace |
| ⌦ | fn delete | delete |
| - | - | - |
2. Jupyter Notebook Two modes of notebook
① Command mode
Command mode combines keyboard commands with Jupyter Notebook Combination of notebook commands , You can run notebook commands through the combination of different keys on the keyboard .
Press
escKey to enter command mode .In command mode , The cell border is gray , And the left border line is blue thick line .

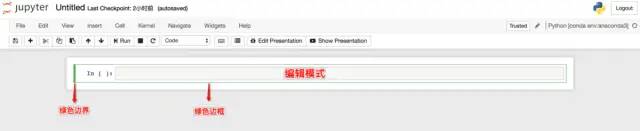
② Edit mode
Edit mode allows you to edit code or documents within cells .
Press
enterorreturnKey to enter edit mode .In edit mode , Both the cell border and the left border line are green .
3. Shortcut keys for two modes
① Command mode
| Shortcut key | purpose |
|---|---|
| F | Find and replace |
| Enter edit mode | |
| ⌘⇧F | Open the command palette |
| ⌘⇧P | Open the command palette |
| P | Open the command palette |
| ⇧ | Run the current cell and select the next cell |
| ⌃ | Run the selected cell |
| ⌥ | Run the current cell and insert the cell below |
| Y | Switch the cell to code state |
| M | Switch the cell to markdown state |
| R | Switch the cell to raw state |
| 1 | Set the cell to the first level title |
| 2 | Set the cell as a secondary title |
| 3 | Set the cell to a three-level title |
| 4 | Set the cell to a four level title |
| 5 | Set the cell to a five level title |
| 6 | Set the cell to a six level title |
| ↑ | Select the upper cell |
| K | Select the upper cell |
| ↓ | Select the lower cell |
| J | Select the lower cell |
| ⇧K | Select more cells up |
| ⇧↑ | Select more cells up |
| ⇧J | Select multiple cells down |
| ⇧↓ | Select multiple cells down |
| A | Insert cells above |
| B | Insert cells below |
| X | Cut the selected cell |
| C | Copy selected cells |
| ⇧V | Paste into the upper cell |
| V | Paste into the lower cell |
| Z | Undo delete |
| D, D | Delete selected cells |
| ⇧M | Merge selected cells , If you select one directly, it will be merged with the next cell |
| ⌘S | preservation |
| S | preservation |
| L | Convert line number |
| O | Conversion output |
| ⇧O | Convert scrolling output |
| H | Show shortcut help |
| I, I | interrupt Notebook kernel |
| O, O | restart Notebook kernel |
| esc | Close page |
| Q | Close page |
| ⇧L | Convert all cell line numbers and the settings remain valid |
| ⇧␣ | Scroll up |
| ␣ | Scroll down |
② Edit mode
| Mac Shortcut key | Windows Shortcut key | purpose |
|---|---|---|
| ⇥ | ⇥ | Code completion or indentation |
| ⇧⇥ | ⇧⇥ | Tips |
| ⌘] | ⌃] | To indent backward |
| ⌘[ | ⌃[ | To indent forward |
| ⌘A | ⌃A | Future generations |
| ⌘Z | ⌃Z | revoke |
| ⌘/ | notes | |
| ⌘D | Delete this line | |
| ⌘U | revoke | |
| ⌘↑ | ⌃↑ | The cursor jumps to the starting position of the cell |
| ⌘↓ | ⌃↓ | The cursor jumps to the final position of the cell |
| ⌥← | ⌃← | Move the cursor one word to the left |
| ⌥→ | ⌃→ | Move the cursor one word to the right |
| ⌥⌫ | ⌃⌫ | Delete the previous word |
| ⌥⌦ | ⌃⌦ | Delete the next word |
| ⌘⇧Z | ⌃Y | redo |
| ⌘⇧U | ⌃⇧Z | redo |
| ⌘⌫ | ⌃⌫ | Delete the content to the left of the cursor in this line |
| ⌘⌦ | ⌃⌦ | Delete the content to the right of the cursor in this line |
| ⌃M | ⌃M | Enter command mode |
| esc | esc | Enter command mode |
| ⌘⇧F | Open the command palette | |
| ⌘⇧P | Open the command palette | |
| ⇧ | ⇧ | Run the current cell and select the next cell |
| ⌃ | ⌃ | Run the selected cell |
| ⌥ | ⌥ | Run the current cell and insert the cell below |
| ⌃⇧- | ⌃⇧- | Split the cell at the cursor position |
| ⌘S | ⌃S | preservation |
| ↓ | ↓ | Move cursor down |
| ↑ | ↑ | Move the cursor up |
4. View and edit shortcuts
① Check out the shortcuts
① Get into Jupyter Notebook main interface “File” in .
② stay “New” Select the environment from the drop-down list to create a notebook .
③ Click on “Help”.
④ Click on “Keyboard Shortcuts”.
② Edit shortcut
⑴ Method 1
① Get into Jupyter Notebook main interface “File” in .
② stay “New” Select the environment from the drop-down list to create a notebook .
③ Click on “Help”.
④ Click on “Keyboard Shortcuts”.
⑤ In the pop-up dialog box “Command Mode (press Esc to enable)” Side Click “Edit Shortcuts” Button .
⑵ Method 2
① Get into Jupyter Notebook main interface “File” in .
② stay “New” Select the environment from the drop-down list to create a notebook .
③ Click on “Help”.
④ Click on “Edit Keyboard Shortcuts”.
③ example
8、 ... and 、 Close and exit
1. Turn off the laptop and terminal
When we're in Jupyter Notebook When a terminal or notebook is created in , A new window will pop up to run the terminal or notebook . When we want to exit the terminal or notebook after using it , only 「 Close page 」 You can't end the program , Therefore, we need to turn it off completely through the following steps .
① Method 1
⑴ Get into “Files” page .
⑵ Check the... You want to close “ipynb” The notebook . The icon of the running notebook is green , And the back is marked with “Running” The words... ; The icon of the closed notebook is gray .
⑶ Click the yellow... At the top “Shutdown” Button .
⑷ Successfully closed the notebook .
Be careful : This method can only close the notebook , Unable to close the terminal .
② Method 2
⑴ Get into “Running” page .
⑵ The first column is “Terminals”, That is, all running terminals will display ; The second column is “Notebooks”, That is, all running “ipynb” Notebooks will be displayed here .
⑶ Click the terminal or notebook you want to close, and then click yellow “Shutdown” Button .
⑷ Successfully shut down the terminal or notebook .
Be careful : This method can close any running terminal and notebook .
③ Be careful
⑴ Only “ipynb” Notebooks and terminals need the above methods to end their operation .
⑵ “txt” file , namely “New” In the drop-down list “Text File”, as well as “Folder” Just close the page where the program is running, and the operation will end , It is not necessary to close... Through the above steps .
④ demonstration
2. sign out Jupyter Notebook Program
If you want to quit Jupyter Notebook Program , You can't exit just by closing the web page , Because when you open Jupyter Notebook when , It's actually the server that started it .
You can try closing the page , And open a new browser page , Enter the previous address into the address bar , Then jump to the page , You will find that you have entered the just now “ close ” Of Jupyter Notebook page .
If you forget the address of the page you just closed , Can be started at Jupyter Notebook Find the address in your terminal , Copy and paste into the address bar of the new browser page , You will find that you can also enter the page you just closed .
therefore , Want to quit completely Jupyter Notebook, Need to shut down its server . Just press... On the terminal it starts :
Mac user :
control cWindows user :
ctrl c
Then it will prompt on the terminal :“Shutdown this notebook server (y/[n])?” Input y You can turn off the server , This is a complete exit Jupyter Notebook Program . here , If you want to access by entering the URL of the page you just closed Jupyter Notebook You will see the error report page .
 Recommended reading :
 introduction :  The most complete zero Foundation Python The problem of   |  Zero Basics 8 Months Python  |  Actual project  | learn Python That's the shortcut
 dried food : A short comment on crawling Douban , The movie 《 The rest of us 》 | 38 year NBA Best player analysis  |    From people's expectation to public praise ! Tang Dynasty detective 3 disappointing   |  Laugh at the story of the new Yitian dragon slaying  |  Riddle answer King  | use Python Make a massive sketch of my little sister  | Mission impossible is so hot , I use machine learning to make a mini recommendation system movie
 Interest : Pinball game   |  squared paper for practicing calligraphy   |  Beautiful flowers  |  Two hundred lines Python《 Cool run every day 》 game !
AI:  A robot that can write poetry  |  Color the picture  |  Forecast revenue  |  Mission impossible is so hot , I use machine learning to make a mini recommendation system movie
 Gadget : Pdf turn Word, Easily handle forms and watermarks ! |  One touch html Save the page as pdf!|   bye PDF Withdrawal charges ! |  use 90 Lines of code create the strongest PDF converter ,word、PPT、excel、markdown、html One click conversion  |  Make a nail low-cost ticket reminder ! |60 Line of code to do a voice wallpaper switcher, look at my little sister every day !|
Annual hot money copy
3). Premiere billions , Hot all over the net , I analyzed 《 My sister 》, Discovered the secrets
4).80 Line code ! use Python Make a dorai A Dream separation
5). What you have to master 20 individual python Code , short , Useful
7). I summed up 80 page 《 Rookie Science Python Select dry goods .pdf》, Is dry
8). bye Python! I have to learn Go 了 !2500 Word depth analysis !
Click to read the original , see B My station 20 A video !
边栏推荐
- KT148A语音芯片ic的开发常见问题以及描述
- Use cheat engine to modify money, life and stars in Kingdom rush
- JASMINER X4 1U深度拆解,揭开高效省电背后的秘密
- Windows2008r2 installing php7.4.30 requires localsystem to start the application pool, otherwise 500 error fastcgi process exits unexpectedly
- AcWing 1129. 热浪 题解(最短路—spfa)
- [ERP software] what are the dangers of the secondary development of ERP system?
- AcWing 903. Expensive bride price solution (the shortest path - building map, Dijkstra)
- 解决方案:VS2017 无法打开源文件 stdio.h main.h 等头文件[通俗易懂]
- Yes, that's it!
- checklistbox控件用法总结
猜你喜欢
Reading notes of "the way to clean structure" (Part 2)
Data dimensionality reduction factor analysis

注解开发方式下AutowiredAnnotationBeanPostProcessor的注册时机
冒泡排序数组
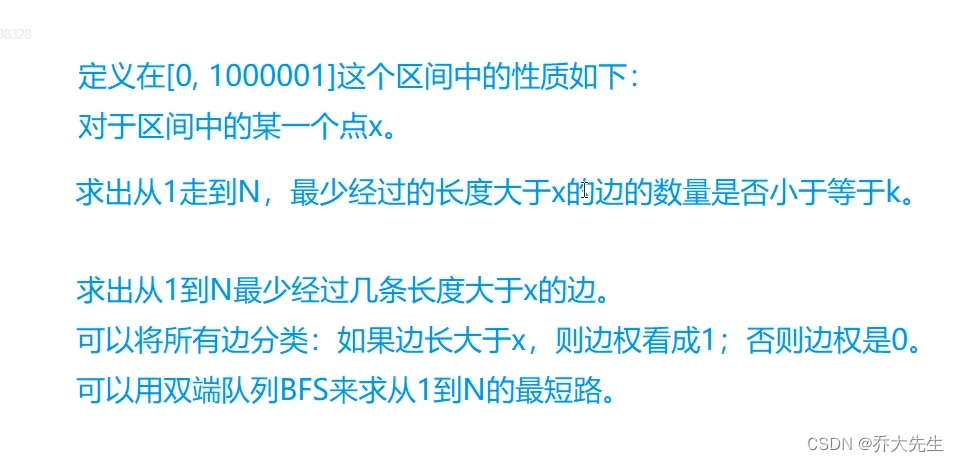
AcWing 340. 通信线路 题解(二分+双端队列BFS求最短路)
Educational Codeforces Round 129 (Rated for Div. 2) 补题题解
![[error record] problems related to the installation of the shuttle environment (follow-up error handling after executing the shuttle doctor command)](/img/c1/a00425f2e1824a50644c8fbb15fe38.jpg)
[error record] problems related to the installation of the shuttle environment (follow-up error handling after executing the shuttle doctor command)

Zabbix5 client installation and configuration

Data Lake (XII): integration of spark3.1.2 and iceberg0.12.1
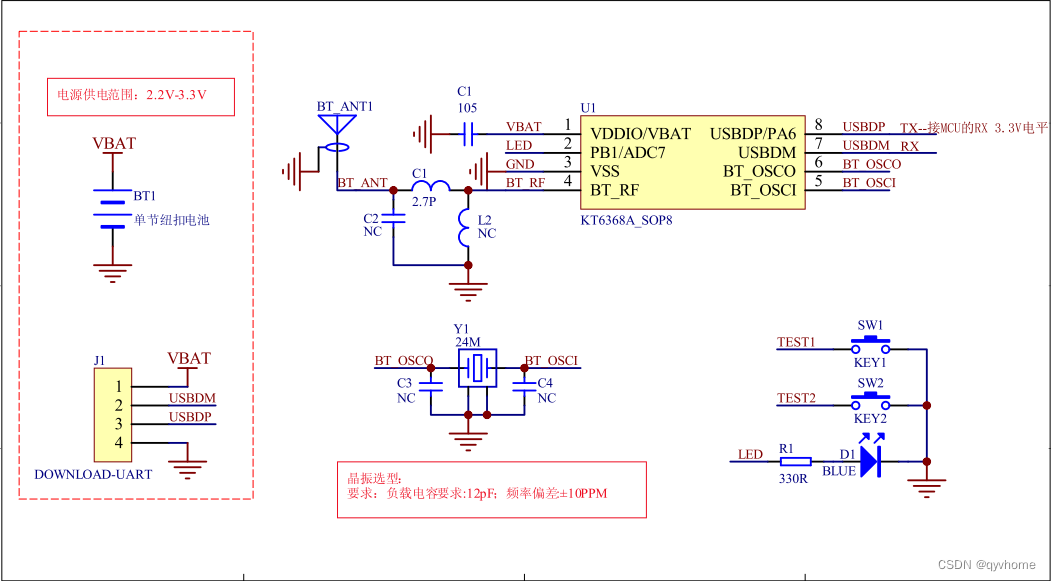
蓝牙芯片ble是什么,以及该如何选型,后续技术发展的路径是什么
随机推荐
AcWing 1131. 拯救大兵瑞恩 题解(最短路)
安装单机redis详细教程
LeetCode 0871. Minimum refueling times - similar to poj2431 jungle adventure
嵌入式(PLD) 系列,EPF10K50RC240-3N 可编程逻辑器件
A4988 drive stepper motor "recommended collection"
AcWing 342. Road and route problem solving (shortest path, topological sorting)
职场四象限法则:时间管理四象限与职场沟通四象限「建议收藏」
高并发下如何避免产生重复数据?
Web2.0 giants have deployed VC, and tiger Dao VC may become a shortcut to Web3
AcWing 383. 观光 题解(最短路)
AcWing 1126. 最小花费 题解(最短路—dijkstra)
冒泡排序数组
AcWing 181. 回转游戏 题解(搜索—IDA*搜索)
数据湖(十二):Spark3.1.2与Iceberg0.12.1整合
Istio部署:快速上手微服务,
Solution: vs2017 cannot open the source file stdio h main. H header document [easy to understand]
RPD出品:Superpower Squad 保姆级攻略
《重构:改善既有代码的设计》读书笔记(上)
《架构整洁之道》读书笔记(下)
AcWing 1135. 新年好 题解(最短路+搜索)