当前位置:网站首页>有趣的opencv-记录图片二值化和相似度实现
有趣的opencv-记录图片二值化和相似度实现
2022-08-03 20:31:00 【公众号:arigeweixin】
一、背景:
前面的文章提到,要实现两个功能
实现数字识别 实现图标识别
前面的文章已经已经实现了数字的识别,但是发现识别率比较低,并且识别的错误率也比较高。考虑是因为背景比较复杂影响了识别效果,本文主要解决复杂背景的简化,以及图片的对比
二、目标:
通过opencv对图片处理,使背景和内容有更加明显的差异,即二值化 通过opencv对比二值化后的图片的相似度,来识别图标
三、实现过程:
opencv的集成
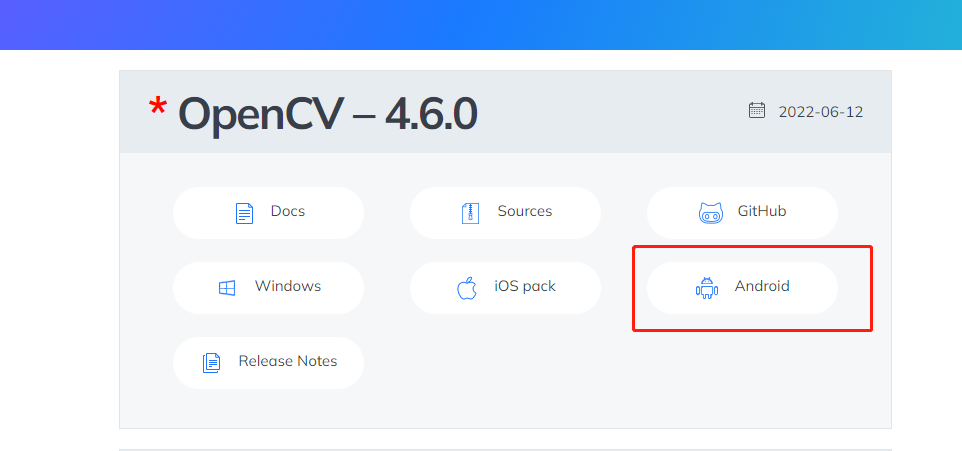
1. 下载opencv对应的版本 https://opencv.org/releases/
我使用了最新的4.6.0 的版本
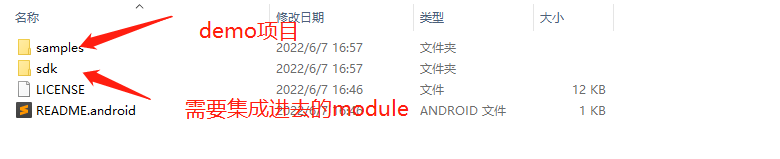
2. 解压下载的zip得到demo和需要集成的module
3. 接入自己的项目
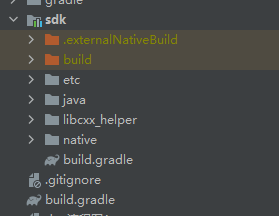
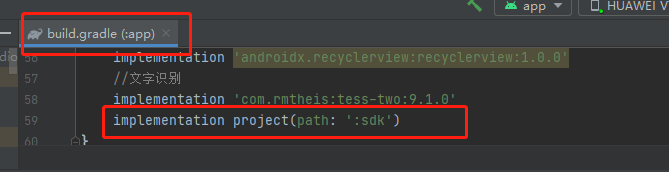
3.1、将2中得到的sdk作为一个独立module放到项目中
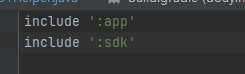
3.2、在项目的setting.gradle中引入sdk module
3.3、 在使用opencv的module中引入sdk module
4. 编译使用
至此集成算是完成了,但是因为这个使用了ndk相关的功能,如果本地没有ndk环境的话,可能需要处理下环境问题,这里不再赘述
二值化处理
1. 先上代码
    public static Bitmap createBitmap(Bitmap bitmap) {
        Mat src = new Mat();
        Utils.bitmapToMat(bitmap, src); //将bitmap转换为Mat
        Mat thresholdImage = new Mat(src.size(), src.type()); //这个二值图像用于找出关键信息的图像

        //将图像转换为灰度图像
        Imgproc.cvtColor(src, thresholdImage, Imgproc.COLOR_RGBA2GRAY);

        //将图像转换为边缘二值图像
        Imgproc.threshold(thresholdImage,thresholdImage,10.0,255.0, Imgproc.THRESH_BINARY_INV|Imgproc.THRESH_OTSU);

        Bitmap binaryBitmap = Bitmap.createBitmap(bitmap.getWidth(), bitmap.getHeight(), bitmap.getConfig());
        Utils.matToBitmap(thresholdImage, binaryBitmap);
        return binaryBitmap;
    }
2. 步骤拆解
2.1、先将bitmap转为 Mat方便opencv进行操作
2.2、 调用 Imgproc.cvtColor(src, thresholdImage, Imgproc.COLOR_RGBA2GRAY); 将图像转为灰度图像
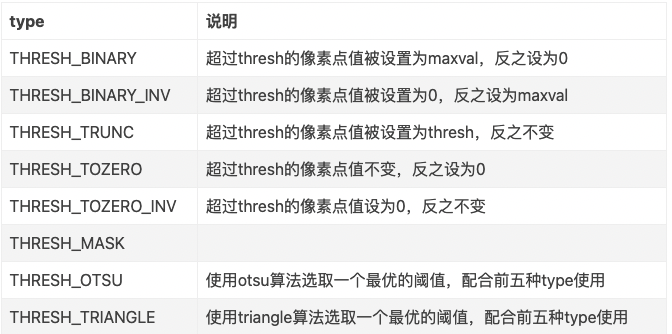
2.3、 调用 ` Imgproc.threshold(thresholdImage,thresholdImage,10.0,255.0, Imgproc.THRESH_BINARY_INV|Imgproc.THRESH_OTSU);
` 将图像转为二值图像。 这个方法非常的重要,在这里专门说一下
1. 第一个参数是图像来源
2. 第二个参数是输出的图像
3. 是一个标准。每个像素点会和这个标准比较。这个会和最后一个参数关联在一起使用。
4. 在符合第三个参数的标准的情况下,要赋予的值
5. 第五参数控制第三、第四个参数的使用情况
3. 效果展示


相似度处理
1. 上代码
     public static Double similarity(Bitmap bitmap1, Bitmap bitmap2){
            // 计算每张图片的特征点
            MatOfKeyPoint descriptors1 = computeDescriptors(bitmap1);
            MatOfKeyPoint descriptors2 = computeDescriptors(bitmap2);
            // 比较两张图片的特征点
            DescriptorMatcher descriptorMatcher = DescriptorMatcher.create(DescriptorMatcher.FLANNBASED);
            List<MatOfDMatch> matches =new  ArrayList();
            // 计算大图中包含多少小图的特征点。
            // 如果计算小图中包含多少大图的特征点,结果会不准确。
            // 比如:若小图中的 50 个点都包含在大图中的 100 个特征点中,则计算出的相似度为 100%,显然不符合我们的预期
            if (bitmap1.getByteCount() > bitmap2.getByteCount() ) {
                descriptorMatcher.knnMatch(descriptors1, descriptors2, matches, 2);
            } else {
                descriptorMatcher.knnMatch(descriptors2, descriptors1, matches, 2);
            }
            Log.i("~~~", "matches.size: ${matches.size}");
            if (matches.isEmpty()) return 0.00;
            // 获取匹配的特征点数量
            int matchCount = 0;
            // 邻近距离阀值,这里设置为 0.7,该值可自行调整
            float nndrRatio = 0.7f;
            for (MatOfDMatch match:matches) {

                DMatch[] array = match.toArray();
                // 用邻近距离比值法(NNDR)计算匹配点数
                if (array[0].distance <= array[1].distance * nndrRatio) {
                    matchCount++;
                }
            }
            Log.i("~~~", "matchCount: $matchCount");
            return Double.valueOf(matchCount/ matches.size());
        }
2. 步骤拆解
2.1、 找到两个图片的特征点
   private static MatOfKeyPoint computeDescriptors(Bitmap bitmap){
            Mat mat = new Mat();
            Utils.bitmapToMat(bitmap, mat);
            MatOfKeyPoint keyPoints = new MatOfKeyPoint();
            siftDetector.detect(mat, keyPoints);
            MatOfKeyPoint descriptors = new MatOfKeyPoint();
            // 计算图片的特征点
            siftDetector.compute(mat, keyPoints, descriptors);
            return descriptors;
        }
2.2、 选取合适的匹配模式
2.3、避免 大图中包含小图导致认为小图完全匹配大图的场景,所以对大小进行判断,用大图和小图比。
2.4、 选取一个邻近距离阈值
2.5、 比较两个图的特征值的差异,,将差值符合阈值的个数记录
2.6、 符合阈值的个数,比上总特征数,得到匹配率
总结
opencv提供了一整套非常完善的api,可以解决我们遇到的绝大部分场景,大家可以多看文档,学习起来。
关注公众号: arigeweixin ,取得更多联系

边栏推荐
猜你喜欢


随机推荐
Kubernetes资源编排系列之三: Kustomize篇 作者 艄公(杨京华) 雪尧(郭耀星)
MySQL Basics
不知道这4种缓存模式,敢说懂缓存吗?
ES6 - Arrow Functions
【飞控开发高级教程4】疯壳·开源编队无人机-360 度翻滚
若依集成easyexcel实现excel表格增强
ES6简介及let、var、const区别
Use ControlTemplate or Style from resource file in WPF .cs and find the control
自定义form表单验证
迪赛智慧数——柱状图(多色柱状图):2021年我国城市住户存款排名
C51 存储类型与存储模式
ES6--剩余参数
头条服务端一面经典10道面试题解析
Go语言类型与接口的关系
涨薪5K必学高并发核心编程,限流原理与实战,分布式计数器限流
RNA核糖核酸修饰RNA-HiLyte FluorTM 405荧光染料|RNA-HiLyte FluorTM 405
leetcode 268. Missing Numbers (XOR!!)
直播平台怎么搭建,针对输入框的各种组件
LeetCode 899. 有序队列
leetcode 2119. 反转两次的数字