当前位置:网站首页>An introduction to basic tools for selecting line tools (package church)
An introduction to basic tools for selecting line tools (package church)
2022-08-03 13:02:00 【Rainwing Light Dust】
 上节说了An的安装及基本操作,从这节开始,Let's introduce the use of the basic tools.
文章目录
一、Selection tool and line tool
(1)选择工具
Let's create a new stage first:
![[外链图片转存失败,源站可能有防盗链机制,建议将图片保存下来直接上传(img-F2wr0zDE-1658975048428)(D:\Typora图片\image-20220727224622605.png)]](/img/b5/8ee9dadac4477a723a9331a018074c.png)
【选择工具】:
![[外链图片转存失败,源站可能有防盗链机制,建议将图片保存下来直接上传(img-N9BNLARN-1658975048429)(D:\Typora图片\image-20220727224717392.png)]](/img/87/efce36db336145b6ce69e2ecb61d8b.png)
选择工具All objects on the stage can be selected,进行移动/框选.
选择工具快捷方式是V.(Shortcuts are only available in 英文输入法上才能使用)
(2)线条工具
【线条工具】:
![[外链图片转存失败,源站可能有防盗链机制,建议将图片保存下来直接上传(img-L0U21FtC-1658975048429)(D:\Typora图片\image-20220727224846240.png)]](/img/57/362c023886f7457585cbc9f47fed8d.png)
线条工具Used to draw people/场景/临摹.
线条工具快捷方式是N.(Shortcuts are only available in 英文输入法上才能使用)
(3)图层
【图层】:
![[外链图片转存失败,源站可能有防盗链机制,建议将图片保存下来直接上传(img-5xNZITcc-1658975048430)(D:\Typora图片\image-20220727224951360.png)]](/img/5a/4b47235369bb9e79a42cc1c172ddc4.png)
图层Each object can be layered.
A layer can have one or more objects.
Objects can be occluded between objects,但不受影响.
Objects in the previous layer can hide objects in the next layer.
二、演示
Now it is time to imitate a rough figure.
来体会一下【选择工具】与【线条工具】.
(1)Drag and drop an image
用【选择工具】It can be moved.(Ctrl+鼠标滚轮Zoom in and out of the stage)
![[外链图片转存失败,源站可能有防盗链机制,建议将图片保存下来直接上传(img-s2je5GDA-1658975048430)(D:\Typora图片\image-20220727225949939.png)]](/img/88/b762ccdfb128b4431864ffe4a0bd38.png)
If you want to zoom in/缩小图片,可以使用【任意变形工具】:
![[外链图片转存失败,源站可能有防盗链机制,建议将图片保存下来直接上传(img-yj4YuupB-1658975048430)(D:\Typora图片\image-20220727230155506.png)]](/img/f0/0719a4a15e4b9514a93d11f5bae949.png)
任意变形工具使用的时候,按住Alt键从中心等比例缩放,按住Shift键固定一点等比例缩放.
(2)打散
用【选择工具】选中图片,然后Ctrl+B打散:
![[外链图片转存失败,源站可能有防盗链机制,建议将图片保存下来直接上传(img-p1ThdVPH-1658975048431)(D:\Typora图片\image-20220727230421708.png)]](/img/ec/15f2ae6b9a399a5b7ebce95d657434.png)
如果图片太大,only want part of it.可以用【选择工具】Frame the parts you don't need,按Delete删除.
(3)Change the layer name and lock it
双击图层Make name changes.
![[外链图片转存失败,源站可能有防盗链机制,建议将图片保存下来直接上传(img-9ah6WqxW-1658975048432)(D:\Typora图片\image-20220727230656939.png)]](/img/cd/e33a221626cdf2bee35884ee35ab94.png)
这里命名为“卡卡西”.
然后将图层锁住(Just click this little lock),锁住之后,Layers cannot be moved.
![[外链图片转存失败,源站可能有防盗链机制,建议将图片保存下来直接上传(img-DZAGTnk9-1658975048433)(D:\Typora图片\image-20220727230859720.png)]](/img/4d/98d906f78331727ecdbcc0ff938844.png)
If you are not sure whether to lock the layer,Layers can be dragged with the selection tool,See if it moves.
注意这个小眼睛,Click to turn off the layer(You can't see the layers),Click again to see the layer again.
![[外链图片转存失败,源站可能有防盗链机制,建议将图片保存下来直接上传(img-fAFMTG02-1658975048433)(D:\Typora图片\image-20220727231109218.png)]](/img/25/24af48ef34354b46a2c628ad4e7dda.png)
(4)新建图层
Click on this Oda glyph,新建图层:
![[外链图片转存失败,源站可能有防盗链机制,建议将图片保存下来直接上传(img-N2osFwJM-1658975048435)(D:\Typora图片\image-20220727231206973.png)]](/img/f0/ce73a53315369309ce7953eada0ca8.png)
We will draw on this layer.
(5)draw head shape
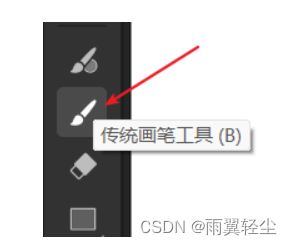
点击【线条工具】,进行临摹.
The property bar can change the thickness and color of the line.
![[外链图片转存失败,源站可能有防盗链机制,建议将图片保存下来直接上传(img-oJTPdE3T-1658975048435)(D:\Typora图片\image-20220727231453404.png)]](/img/18/2636cccfb82c87f044db2a62fe2e50.png)
Here we choose blue for copying.
按住鼠标左键拖动,画出一条直线.
![[外链图片转存失败,源站可能有防盗链机制,建议将图片保存下来直接上传(img-pmIxQFXR-1658975048436)(D:\Typora图片\image-20220727231656497.png)]](/img/c0/068cd1cba8f49ec20fe94d1f2e8e2f.png)
当【选择工具】接近【线条工具】when the line is drawn,
An arc appears below the mouse's arrow,means yesMove the line/拖拽.(Screenshots cannot display mouse arrows,There is no demo here)
![[外链图片转存失败,源站可能有防盗链机制,建议将图片保存下来直接上传(img-BZgp8rO4-1658975048436)(D:\Typora图片\image-20220727232005201.png)]](/img/d9/aa57fb96a17cfd592e9cc782d4d453.png)
注意Use shortcut keys flexibly,This will increase the drawing efficiency!
补充:
<1> 画一条线,When another line is connected to it,will give the first line打断.
比如,At this point the two lines intersect:
![[外链图片转存失败,源站可能有防盗链机制,建议将图片保存下来直接上传(img-KpUeKXmm-1658975048436)(D:\Typora图片\image-20220727232637548.png)]](/img/15/51115a47180f1eb6b29830d263aa6a.png)
我们用【选择工具】when adjusting the line,会发现,The line after that,被交点分割了(It is divided into upper and lower lines).
When we move the second line,Such changes will occur:
![[外链图片转存失败,源站可能有防盗链机制,建议将图片保存下来直接上传(img-NlvCk6aI-1658975048437)(D:\Typora图片\image-20220727232849026.png)]](/img/e4/f37a952797547f55cc2da5be1f3e02.png)
Still do not understand,可以自己去试一试.
那如何解决呢?
我们Place the mouse over the intersection of the two lines,A button will appear below the mouse arrow直角(∟).
When there is a right angle,You can adjust it again.(Specifically try it yourself,The two lines are moving together,When to use it depends on the situation)
![[外链图片转存失败,源站可能有防盗链机制,建议将图片保存下来直接上传(img-f0iBYZaV-1658975048437)(D:\Typora图片\image-20220727233401100.png)]](/img/15/548f8eef93bd3d57417d04ec24b07a.png)
<2> When the two are not right,It can be stretched with the selection tool.
如:
At this point there is a blue line here,We trace with green lines.
![[外链图片转存失败,源站可能有防盗链机制,建议将图片保存下来直接上传(img-CyTigjpV-1658975048438)(D:\Typora图片\image-20220728095558242.png)]](/img/4b/e7685e405fbe30388a7db56005d66e.png)
You will find that there is no overlap below.
![[外链图片转存失败,源站可能有防盗链机制,建议将图片保存下来直接上传(img-ZroeUF5n-1658975048438)(D:\Typora图片\image-20220728095638897.png)]](/img/b6/bdf7d6efb8f1a0bcac62c861114b58.png)
This is where fine-tuning comes in.
先用【选择工具】Check the top line box.
![[外链图片转存失败,源站可能有防盗链机制,建议将图片保存下来直接上传(img-KI6WfsY1-1658975048438)(D:\Typora图片\image-20220728095749004.png)]](/img/f2/9a88c7aee8dce4a86a56bd065b87bd.png)
You can see the section selected above,Spots appear.此时The upper and lower parts of the line have been split into two parts.
![[外链图片转存失败,源站可能有防盗链机制,建议将图片保存下来直接上传(img-WJiN216F-1658975048439)(D:\Typora图片\image-20220728095927046.png)]](/img/0d/f8481afa16513aee9592c580ad1931.png)
然后再用【选择工具】Stretch the lower line.
![[外链图片转存失败,源站可能有防盗链机制,建议将图片保存下来直接上传(img-psl9tgd8-1658975048443)(D:\Typora图片\image-20220728100044440.png)]](/img/b2/b9feb2fd709a1d7fb9d583bedcc272.png)
Split a line into two lines as an adjustment,But the two lines are continuous.
<3> Pay attention to draw lines to connect the interface,Otherwise, when filling the color, it is not very good to fill.
![[外链图片转存失败,源站可能有防盗链机制,建议将图片保存下来直接上传(img-rEfnF4Hr-1658975048444)(D:\Typora图片\image-20220728101141406.png)]](/img/36/0734e1ae7bd48dc2684f2ed6ffa315.png)
<4> 关于线条的问题
1.If the drawn lines are too short,可以用【选择工具】Drag and drop the endpoint/拉伸/倾斜(If you make a mistake, you can use the shortcut keyCtrl+Z取消).
2.If there are too many lines,可以用【选择工具】Check the extra boxes,然后按Delete键删除它.
![[外链图片转存失败,源站可能有防盗链机制,建议将图片保存下来直接上传(img-bYMnimP2-1658975048444)(D:\Typora图片\image-20220728101009601.png)]](/img/42/a848cb21a51fe25cca0e959e889f8b.png)
After several operations above,We can roughly draw the head shape of the character.
I have an example here:
![[外链图片转存失败,源站可能有防盗链机制,建议将图片保存下来直接上传(img-f2rQmRsO-1658975048444)(D:\Typora图片\image-20220728101502032.png)]](/img/3d/d504ec10c783e4d422fcc700fb8a97.png)
We turn off the small eyes of the original image layer.(点一下就好)
![[外链图片转存失败,源站可能有防盗链机制,建议将图片保存下来直接上传(img-IjUBuUdm-1658975048445)(D:\Typora图片\image-20220728101550002.png)]](/img/72/8d4b1e0184ee0494c27b1f460b0d01.png)
Then you can see the general appearance of our drawing layer:
![[外链图片转存失败,源站可能有防盗链机制,建议将图片保存下来直接上传(img-yfrWgeIC-1658975048445)(D:\Typora图片\image-20220728101623284.png)]](/img/a2/effa2ad6185e2645826ade09e3541c.png)
(6)绘制脸型
Next we create a new layer.
![[外链图片转存失败,源站可能有防盗链机制,建议将图片保存下来直接上传(img-7C7eQ5VV-1658975048445)(D:\Typora图片\image-20220728101725565.png)]](/img/59/83010c70a5bce69199ca01c70c28ac.png)
可以看到,Next to the new layer空心的,This means that the layer has no objects or shapes.
![[外链图片转存失败,源站可能有防盗链机制,建议将图片保存下来直接上传(img-yRrWdZmJ-1658975048446)(D:\Typora图片\image-20220728101845347.png)]](/img/e5/538e13647df2682ef95278e1318e2d.png)
The general painting process is the same as above,No more demonstrations.
Ok,The selection tool and the line tool are still very simple,I believe everyone can master it quickly.
I'm not going to put basic tool usage in one article here,Long stories will inevitably get boring.
那么,Interested friends remember to read the next article~

边栏推荐
- R language ggplot2 visualization: use the patchwork bag plot_layout function will be more visual image together, ncol parameter specifies the number of rows, specify byrow parameters configuration dia
- Filebeat 如何保持文件状态?
- [Verilog] HDLBits Problem Solution - Circuits/Sequential Logic/Latches and Flip-Flops
- 【必读要点】Pod控制器Deployment更新、回退详解
- Unsupervised learning KMeans notes and examples
- An工具介绍之摄像头
- An基本工具介绍之选择线条工具(包教会)
- Kubernetes 网络入门
- 查看GCC版本_qt版本
- GameFi 行业下滑但未出局| June Report
猜你喜欢
leetcode 11. 盛最多水的容器
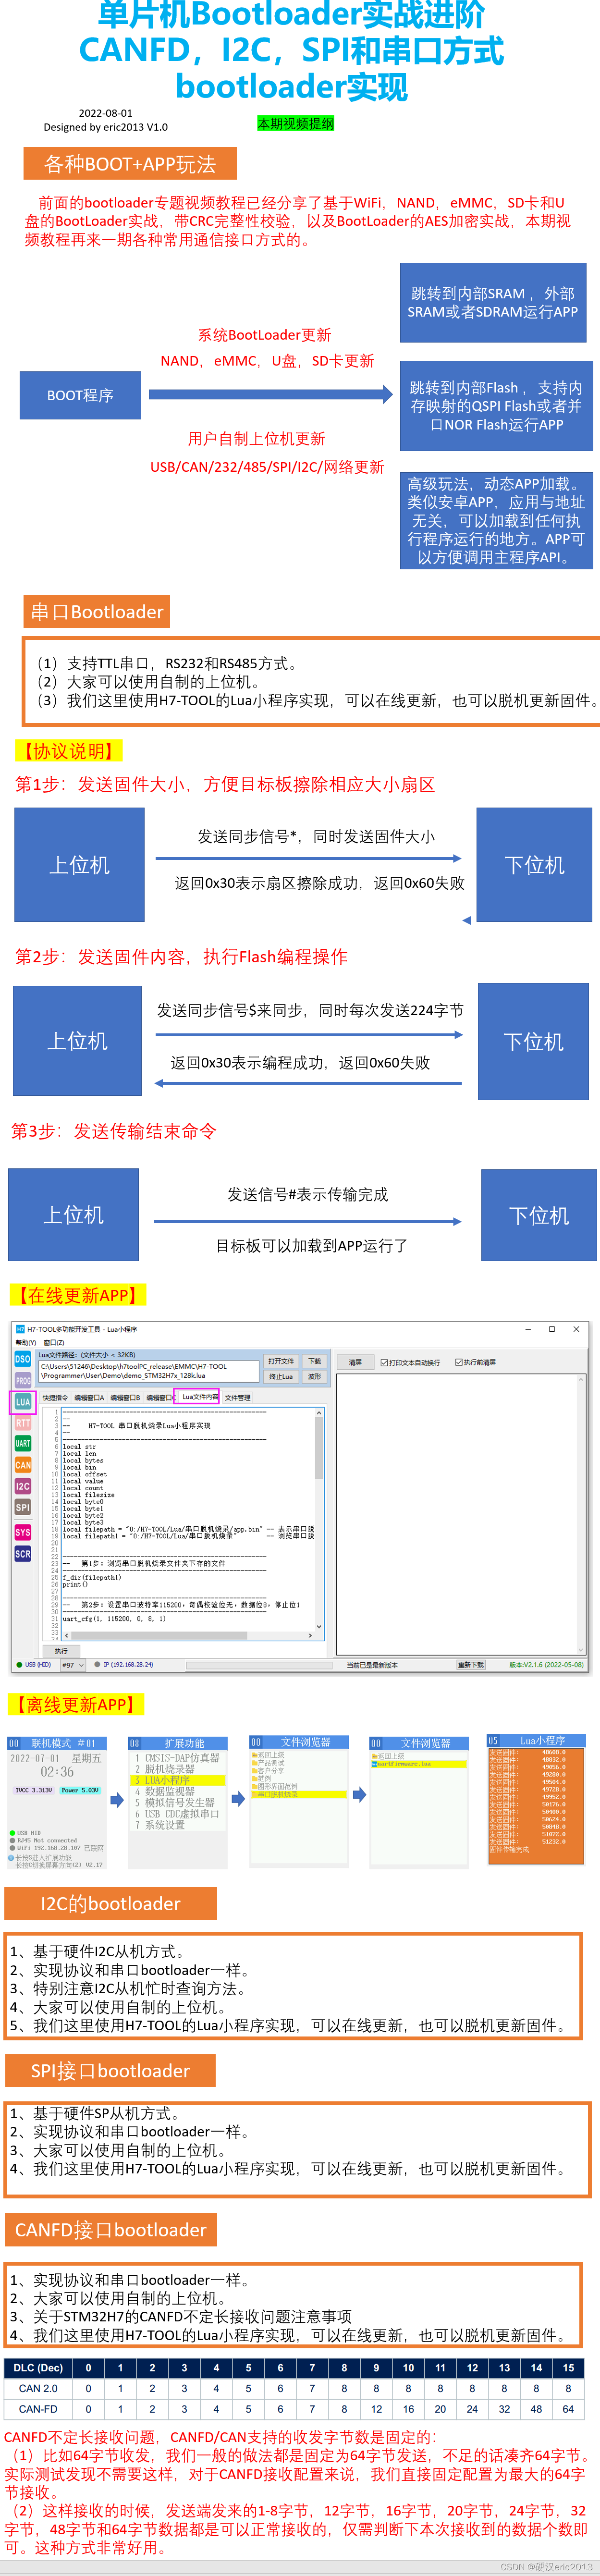
【实战技能】单片机bootloader的CANFD,I2C,SPI和串口方式更新APP视频教程(2022-08-01)
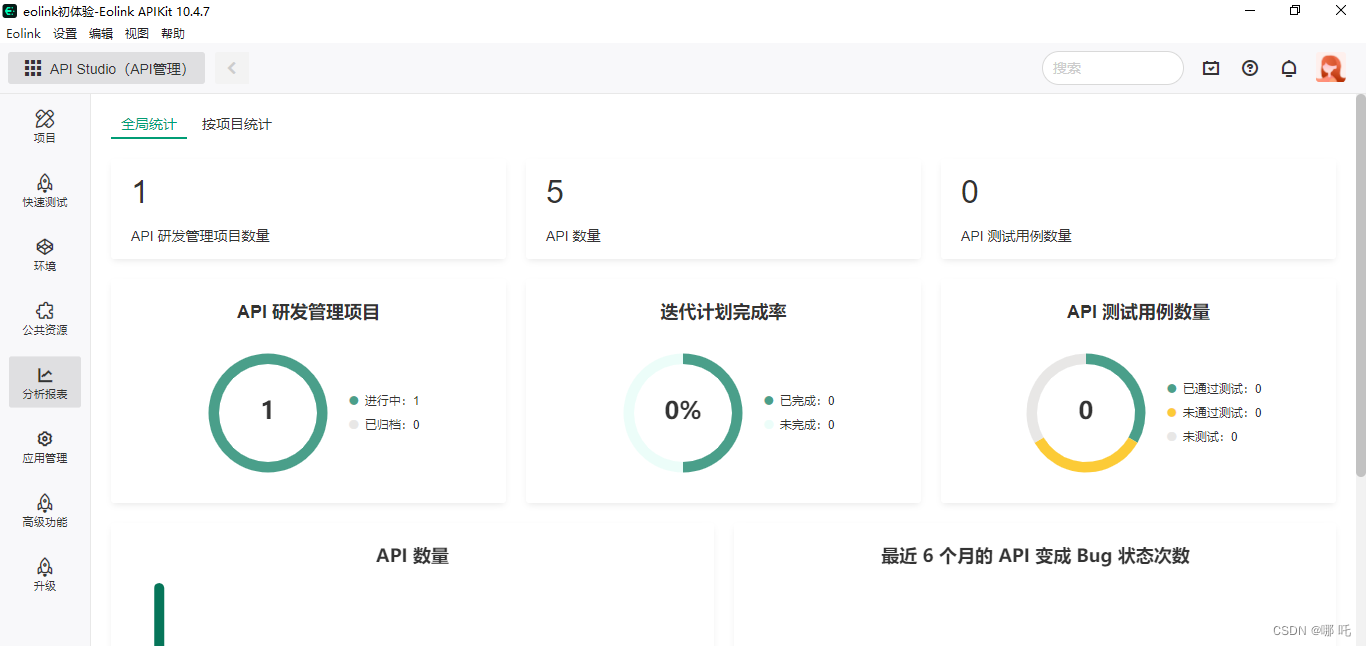
为什么越来越多的开发者放弃使用Postman,而选择Eolink?

Station B responded that "HR said that core users are all Loser": the interviewer was persuaded to quit at the end of last year and will learn lessons to strengthen management

图像融合DDcGAN学习笔记

链游NFT元宇宙游戏系统开发技术方案及源码

【蓝桥杯选拔赛真题48】Scratch跳舞机游戏 少儿编程scratch蓝桥杯选拔赛真题讲解
Image fusion DDcGAN study notes
An工具介绍之钢笔工具、铅笔工具与画笔工具
Apache APISIX 2.15 版本发布,为插件增加更多灵活性
随机推荐
浅谈低代码平台远程组件加载方案
使用 %Status 值
YOLOv5 training data prompts No labels found, with_suffix is used, WARNING: Ignoring corrupted image and/or label appears during yolov5 training
利用pgsql插件PostGIS 实现地理坐标系数据转换
利用ChangeStream实现Amazon DocumentDB表级别容灾复制
类型转换、常用运算符
论文理解:“Gradient-enhanced physics-informed neural networks for forwardand inverse PDE problems“
B站回应“HR 称核心用户都是 Loser”:该面试官去年底已被劝退,会吸取教训加强管理
图像融合SDDGAN文章学习
15. PARTITIONS「建议收藏」
awk入门教程
浅谈程序员的职业操守
类和对象(中下)
从器件物理级提升到电路级
Secure Custom Web Application Login
博客记录生活
Random forest project combat - temperature prediction
AMS simulation
期货开户中常见问题汇总
如何免费获得一个市全年的气象数据?降雨量气温湿度太阳辐射等等数据