当前位置:网站首页>WeChat applet cloud development | personal blog applet
WeChat applet cloud development | personal blog applet
2022-08-01 20:33:00 【orange!】
文章目录
1.前言
这篇文章详细的介绍了个人博客小程序的云开发流程,包括博客展示页面,添加博客页面的创建,以及云函数的上传,数据库的创建和使用.同时使用到了form,text等组件以及使用富文本添加博客.
本程序所有数据都存储在云开发里面,不需要开发者自己的服务器.功能包括:云数据库,云函数,云存储等,是一个小程序项目学习的保姆级教程!欢迎大家学习.

2.Blog homepage data display
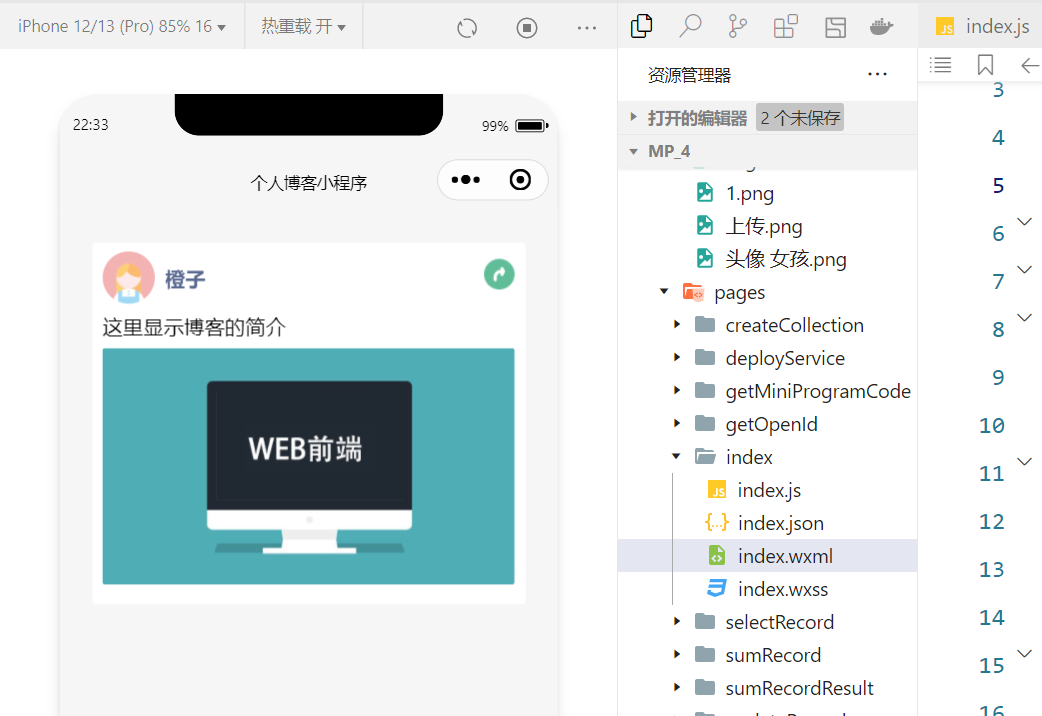
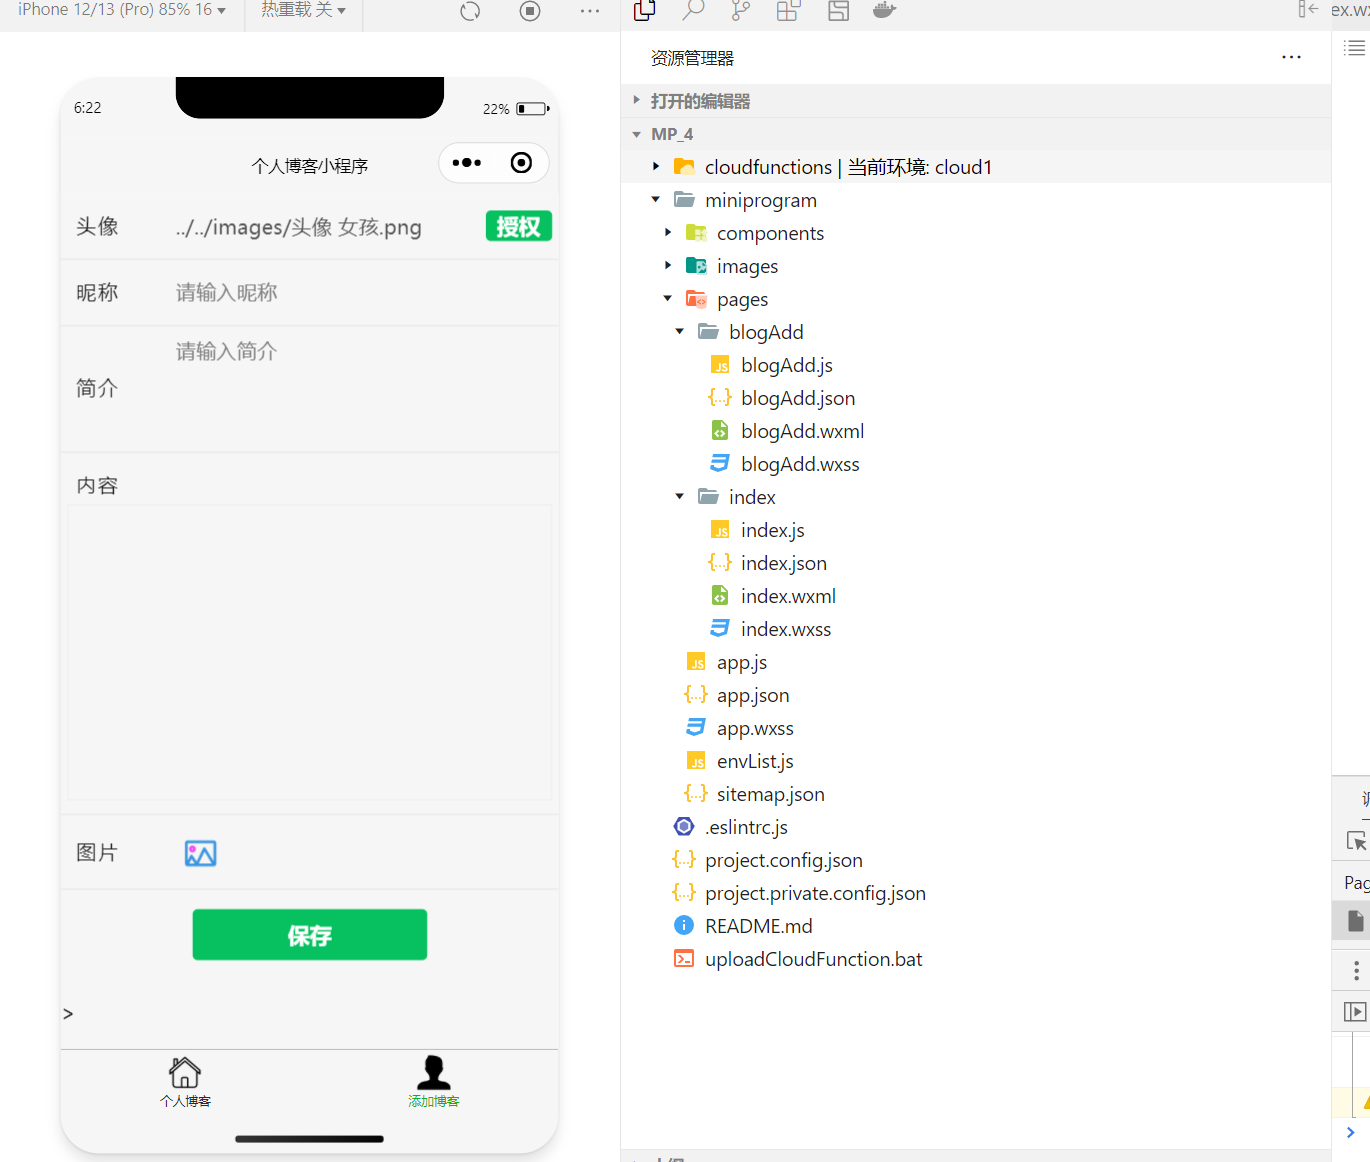
首先,我们设计博客展示的静态页面.每篇博客包含头像,昵称,简介,内容,图片等数据组成,我们将其设计为一个方块展示,并且每个方块使用flex布局样式.整体布局分为两个结构,上下结构:上面显示用户信息下面显示博客.左右结构:显示用户头像昵称等.
- 修改小程序的标题:
"navigationBarTitleText": "个人博客小程序",
- 设置博客页面结构:
  <!--博客展示-->

  <view class="blog-block">
    <view class="blog-card">
      <view class="blog-user">
        <image class="avatar" src="../../images/头像 女孩.png"></image>
        <view class="username">橙子</view>
        <button open-type="share" style="width: 60rpx;">
          <image class="icon-share" src="../../images/上传.png"></image>
        </button>
      </view>
      <view class="blog-item">
        <view class="blog-user">这里显示博客的简介</view>
        <view class="image-block">
          <image src="../../images/1.png" mode="widthFix"></image>
        </view>
      </view>
    </view>
  </view>
- 设置博客页面样式:
/**部分样式代码展示*/
.blog-block{

  margin-bottom: 30rpx;
  padding: 20rpx;
}

.blog-card {

  margin-top: 30rpx;
  padding-bottom: 30rpx;
  width: 100%;
  display: flex;
  flex-direction: column;
  align-items: center;
  background-color: #fff;
  border-radius: 6rpx;
}

.blog-item {

  width: 95%;
}
- 效果展示:
3.使用data中的数据渲染博客展示
上面我们已经做好了静态页面,接下来通过index.js中的data的数据来渲染页面的显示,首先来定义blogs的数据结构,包含了以下的字段来实现数据动态绑定:
    blogs:[{

      avatar:"../../images/头像 女孩.png",
      name:"橙子",
      brief:"这里显示博客的简介",
      content:"博客的内容",
      img:"../../images/1.png",
      time:10000
    }
    ]
在wxml文件中修改代码实现数据动态绑定,同时可以使用for循环来渲染多篇博客的显示,此时的item指的是blogs里面的每一个对象.方法如下:
<image src="{
     {item.img}}" mode="widthFix"></image>
这样就实现了数据的动态绑定,但是数据是写死的,只能在程序中维护数据,所以我们就要创建云数据库,把数据记录放在程序后端服务器.
4.使用云数据库创建集合blogs
创建云数据库的目的是为了将博客的数据放到云开发的云数据库中,方便维护!云数据库在云开发控制台中创建: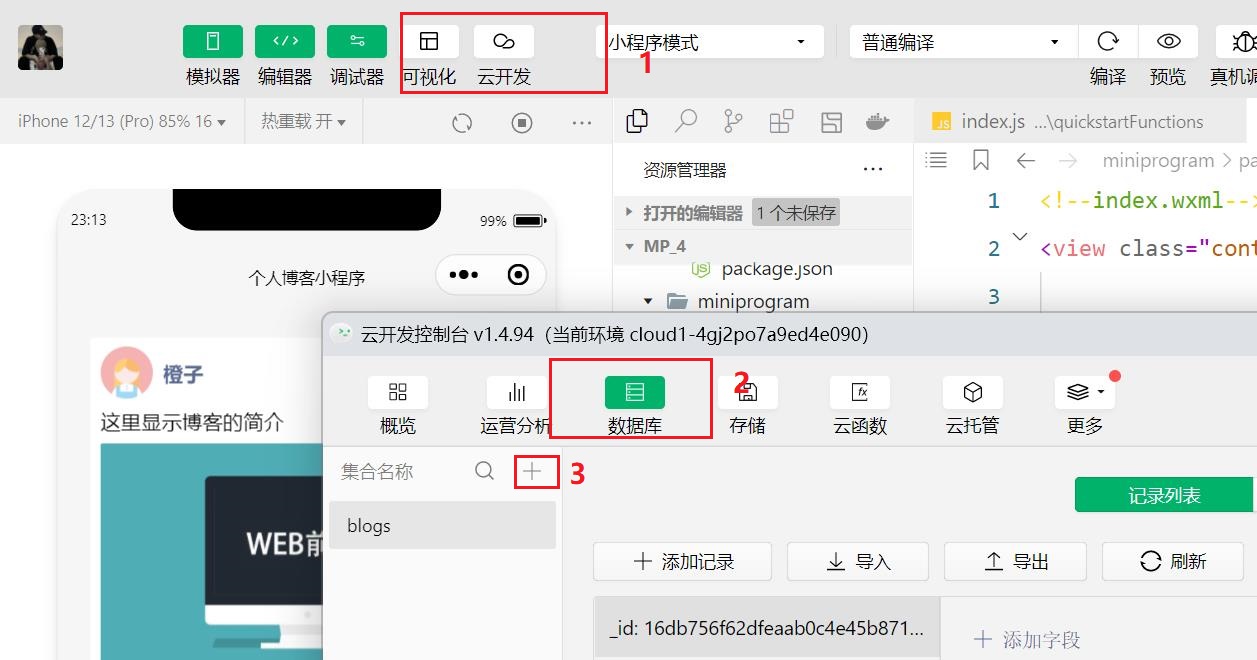
这里创建了一个blogs集合用于存储数据,系统会自动生成一个id作为主键.这时可以在这里添加数据记录.
5.读取数据库中的数据
创建好云数据库以后我们就要实现数据的读取,这里分为三个步骤:1.和数据库建立链接.2. 找到读取数据的集合. 3.读取所需数据.
初始化数据库:
const db =wx.cloud.database()
读取数据并将data赋值给blogs:
     db.collection("blogs").get({

        success:res=>{

          this.setData({

            blogs:res.data
          })
        }
      })
这样我们就实现了将云数据库的数据渲染到前端页面,但是这样我们还是没有提供前端添加博客的功能,于是,下一步我们要添加一个页面,用于用户添加博客!
6.创建添加博客页面
下一步我们将添加一个新的页面用于用户添加博客,并且设置tabBar.创建方法:右击Pages选择新建文件夹,命名为blogAdd,右击新创建的文件夹选择新建文件,命名为blogAdd,注意两者名字要相同!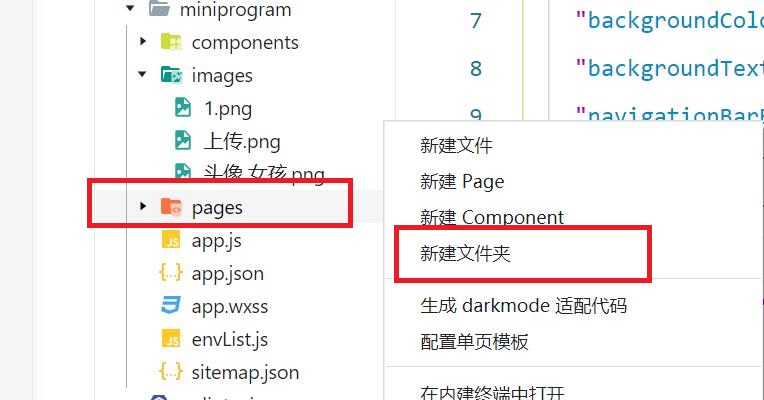
下一步添加tabBar,在app.json文件中tabBar对象的list属性中添加:
 {

        "pagePath": "pages/blogAdd/blogAdd",
        "iconPath": "images/user.png",
        "selectedIconPath": "images/user-active.png",
        "text": "添加博客"
      }
其中iconPath中添加tabBar未选中时的图标,selectedIconPath中添加选中时的图标.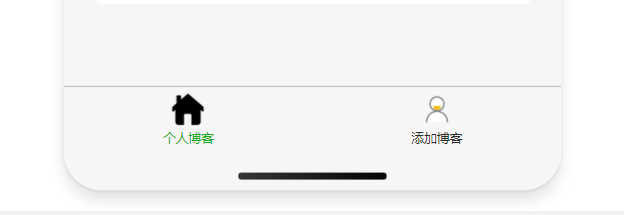
添加了新的页面以后,为了方便调试,此时可以添加编译模式,修改启动页面,下次编译就直接跳转到修改的页面而不是首页.
7.Blog add page style design
The next thing to be done is the layout style and functional implementation of the page.主要使用到了form组件,input组件,textarea组件以及rich-text组件等.
Let's do the static page added by the blog first,给页面添加label组件,input组件,button组件,textarea组件等:
<!--头像(Later, it is set to automatically obtain the WeChat avatar)-->
  <view class="form-group">
    <label class="form-label">头像</label>
    <input value="../../images/头像 女孩.png" name="avatar" class="form-control" placeholder="请输入头像" />
    <button type="primary" bindtap="onGetUserProfile" style="width:100rpx;padding:0rpx;margin:0rpx;">授权</button>
  </view>
<!--内容(Use rich text input later)-->
  <view class="form-group form-column">
    <label class="form-label">内容</label>
    <editor class="form-editor"></editor>
  </view>
<!--按钮提交-->
  <view style="margin-top:30rpx;margin-bottom:60rpx;">
    <button type="primary" form-type="submit">保存</button>
  </view>
Some styles of this page are displayed:
.form-group {

  padding: 20rpx 10rpx;
  display: flex;
  flex-direction: row;
  align-items: center;
  border-bottom: 1rpx solid #dfdfdf;
}

.form-label {

  color: #191919;
  width: 150rpx;
  padding-left: 15rpx;
  height: 60rpx;
  line-height: 60rpx;
  letter-spacing: 1rpx;
}

.form-title{

  font-size: 32rpx;
  color: #7f7f7f;
  width: 100%;
}
效果展示:
8.总结
The blog display page has now been implemented,The style layout of the blog add page,It mainly uses some basic knowledge of WeChat applet cloud development,The next article we want to achieveform表单提交数据,The use of rich text editor in applet,Preview and selection of local images and some related operations of cloud functions.
边栏推荐
- 研究生新同学,牛人看英文文献的经验,值得你收藏
- 面试官:大量请求 Redis 不存在的数据,从而打倒数据库,有什么方案?
- LTE time domain and frequency domain resources
- 虚拟机的IP地址自动变为127.0.0.1
- 任务调度线程池-应用定时任务
- 第56章 业务逻辑之物流/配送实体定义
- 作为程序员你应该会的软件
- 【多任务优化】DWA、DTP、Gradnorm(CVPR 2019、ECCV 2018、 ICML 2018)
- Failed to re-init queues : Illegal queue capacity setting (abs-capacity=0.6) > (abs-maximum-capacity
- The configuration manual for the secondary development of the XE training system of the missing moment document system
猜你喜欢


随机推荐
Determine a binary tree given inorder traversal and another traversal method
Different operating with different locks, rounding
【Untitled】
WhatsApp群发实战分享——WhatsApp Business API账号
线程池处理异常的方法
用户体验好的Button,在手机上不应该有Hover态
Use WeChat official account to send information to designated WeChat users
面试突击70:什么是粘包和半包?怎么解决?
SIPp 安装及使用
给定中序遍历和另外一种遍历方法确定一棵二叉树
Redis 做签到统计
Buttons with good user experience should not have hover state on mobile phones
面试官:大量请求 Redis 不存在的数据,从而打倒数据库,有什么方案?
【多任务优化】DWA、DTP、Gradnorm(CVPR 2019、ECCV 2018、 ICML 2018)
多线程之生产者与消费者
微信小程序云开发|个人博客小程序
【kali-信息收集】(1.6)服务的指纹识别:Nmap、Amap
二维、三维、四维矩阵每个维度含义解释
不同的操作加不同的锁详解
研究生新同学,牛人看英文文献的经验,值得你收藏