当前位置:网站首页>Iterm2 configuration and beautification
Iterm2 configuration and beautification
2020-11-08 20:13:00 【anchovies】
Because of the new computer , Software and environment need to be reconfigured , It's about iTerm2 The configuration and beautification of finishing an article out , It's convenient for your future work , Also for you to provide some reference , You are welcome to point out the mistakes , If you have a good plug-in or good color, you are welcome to share
install iTerm2
First , download iTerm2 To replace the default terminal .
What is? iTerm2?
iTerm2 is a replacement for Terminal and the successor to iTerm. It works on Macs with macOS 10.12 or newer. iTerm2 brings the terminal into the modern age with features you never knew you always wanted.
iTerm2 It's a replacement for the default terminal , Also present Mac The best terminal tool under the system , It's a combination of beauty and efficiency .
The migration configuration ( Optional )
Because I used to be Mac platform , So there are some configurations that you can use in the ITerm From inside out , In fact, reconfiguration is the same , No impact .
On the original computer iterm Export configuration : 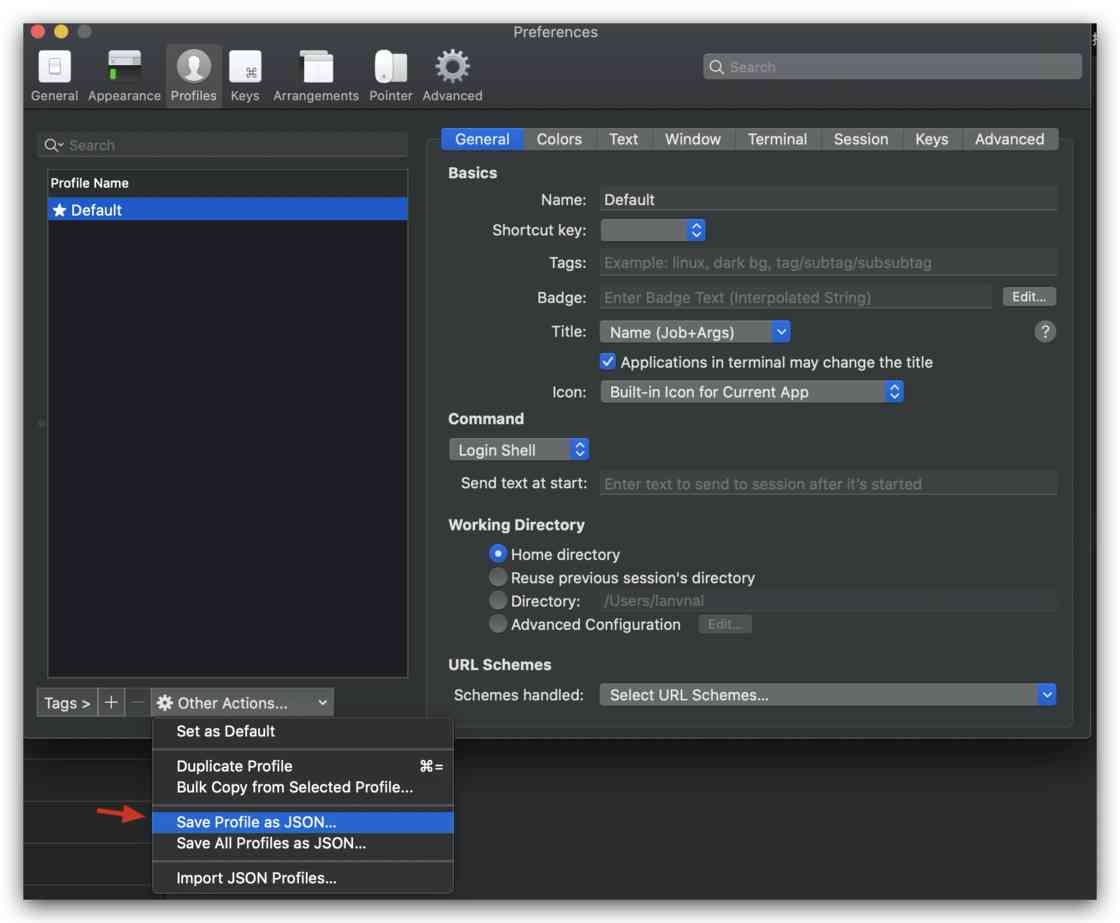
Export configuration
Then import it into your new computer : 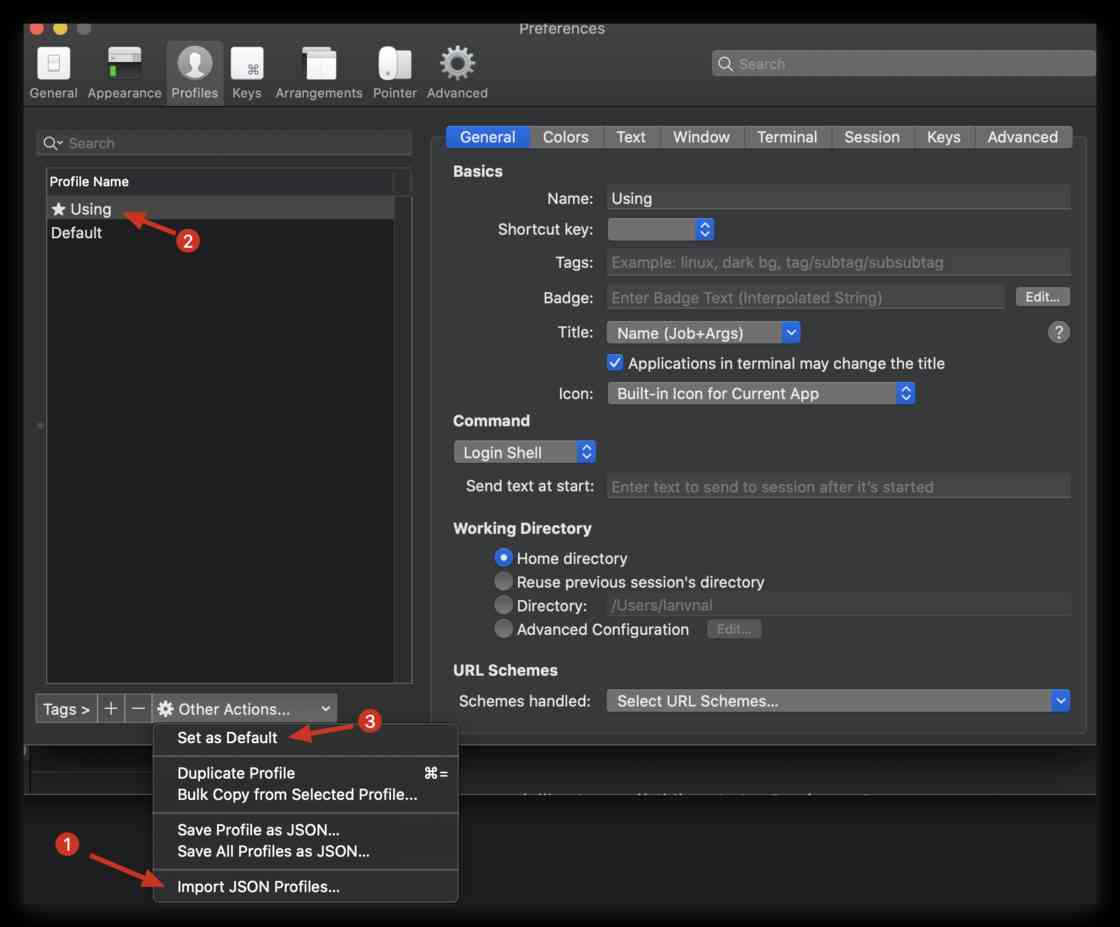 Pictured above import JSON Profiles, Then set it to the default configuration .
Import and use
adjustment Status Bar
take iTerm2 Bring their own theme It is amended as follows Minimal ( Preferences-Appearance-General-Theme ) To achieve the immersive effect of the top bar
Can be in Profiles tab ,Session At the bottom of the page, you can see the opening options .Status bar enabled Options , Check to open . Click... On the right Configure Status Bar Button to set the display content .
You can see that there is a lot to show , Drag the content to be displayed above to the bottom Active Components Areas are added .
stay Preference Click in the page Appearance tab , You can set Status bar The location of , modify Status bar location, I'll change it to Bottom Bottom .
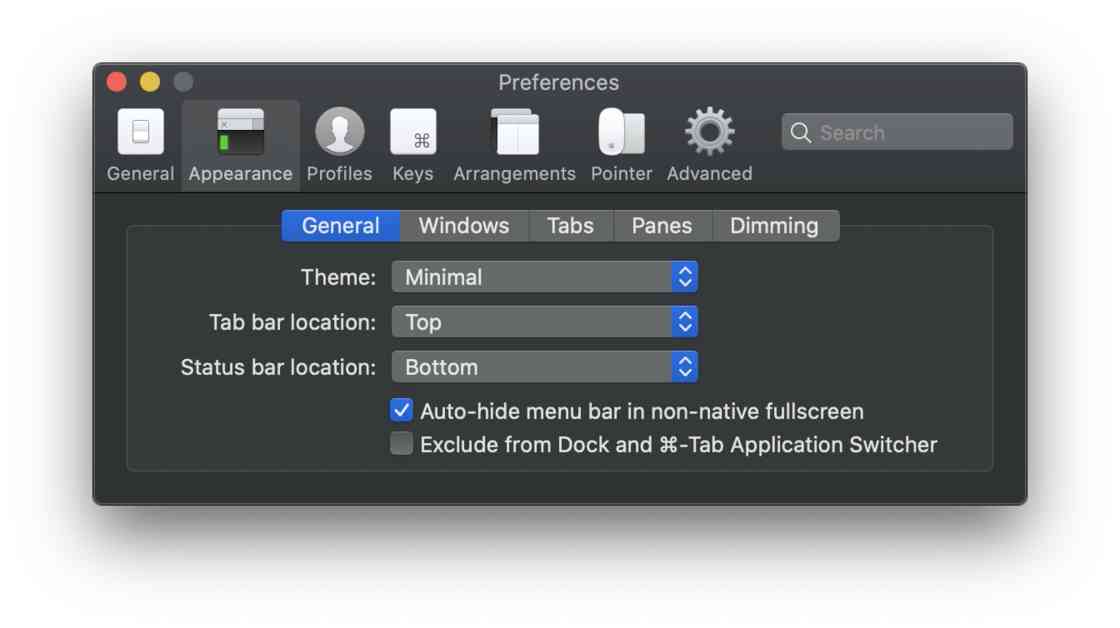
Set location Status bar effect : 
The content displayed can also be adjusted by itself :
Status bar Adjust the
Change color matching ( Optional )
I prefer Dracula The color scheme , Include VS Code It's all about this color scheme .
https://draculatheme.com/iterm/
Decompress and replace Preferences-Profiles-Color-Color Presets-Import
Set up zsh The theme
Configure theme :
It just needs to be modified .zshrc In the document ZSH_THEME="xx" Attribute is enough .
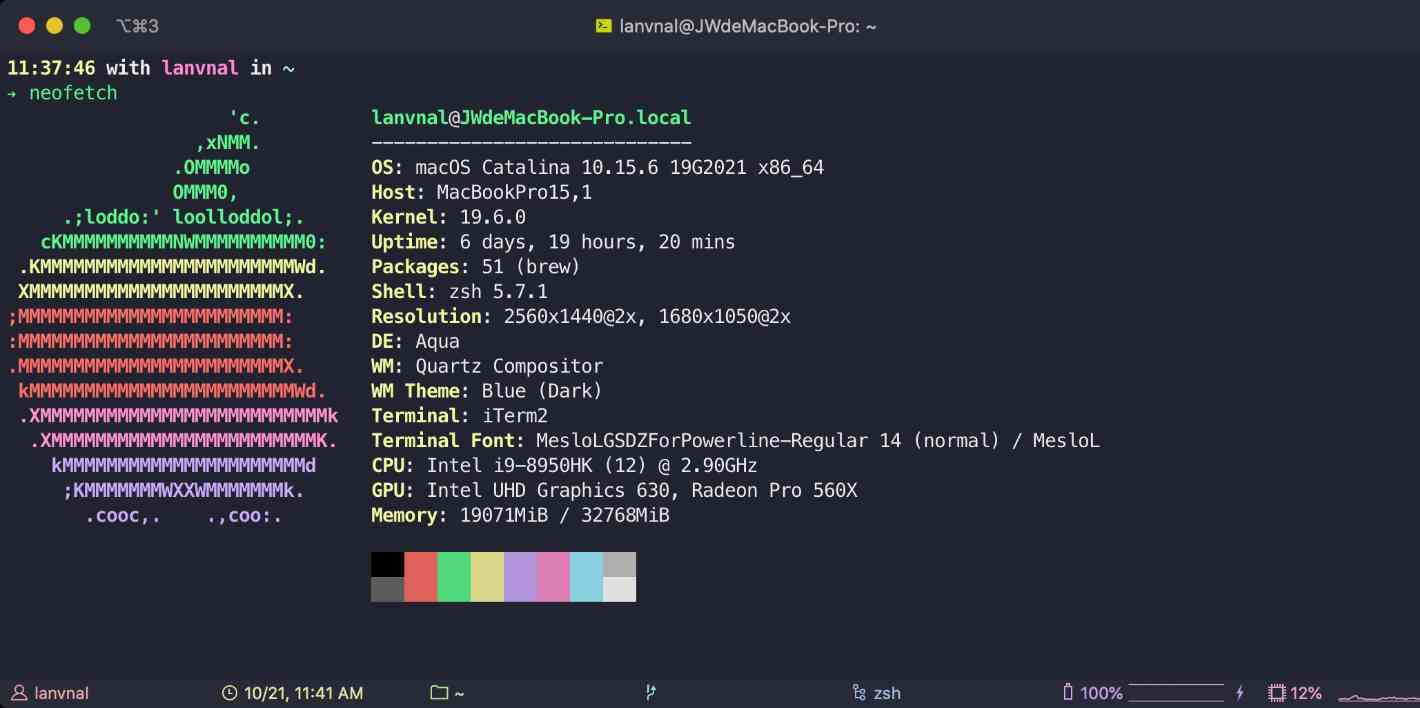
The theme I'm using right now is :spaceship
according to github The method configuration in the project description is enough , Or refer to the topic configuration below
Premise :
Installed zsh Installed powerline typeface Installation method reference :https://github.com/powerline/fonts
And then put iTerm The font of is set to powerline, Include Font and Non-ASCII Font
Set the font
Download the theme file :
git clone https://github.com/denysdovhan/spaceship-prompt.git "$ZSH_CUSTOM/themes/spaceship-prompt" --depth=1
Create a soft connection
ln -s "$ZSH_CUSTOM/themes/spaceship-prompt/spaceship.zsh-theme" "$ZSH_CUSTOM/themes/spaceship.zsh-theme"
modify zsh To configure
vim ~/.zshrc
modify :
ZSH_THEME="spaceship"
take effect :
source ~/.zshrc
Then there are some configuration of the theme , Refer to this file for configuration instructions :
https://github.com/denysdovhan/spaceship-prompt/blob/master/docs/Options.md
Specific configuration shows what content , According to the document in ./zshrc Just add it in . Here's my configuration :
PS: Color values refer to this https://upload.wikimedia.org/wikipedia/commons/1/15/Xterm_256color_chart.svg
My configuration
Set the display time
SPACESHIP_TIME_SHOW="true"
Set display user name , And change the color of the user name to macho pink
SPACESHIP_USER_SHOW="always"
SPACESHIP_USER_COLOR="212"
The subject corresponds to the address :
https://github.com/denysdovhan/spaceship-prompt
Set up Oh-My-Zsh
What is? Oh-My-Zsh?
Oh My Zsh Is a community driven command line tool , It's based on zsh Command line , Provides theme configuration , Plug-in mechanism , Greatly improved playability ( use ) sex . Improving efficiency can also make people happy hhh
Website :https://ohmyz.sh/
Enter the following command :
curl The way
sh -c "$(curl -fsSL https://raw.githubusercontent.com/ohmyzsh/ohmyzsh/master/tools/install.sh)"
Or use wget:
sh -c "$(wget https://raw.githubusercontent.com/robbyrussell/oh-my-zsh/master/tools/install.sh -O -)"
To configure Oh-My-Zsh Configuration command auto prompt About the configuration of plug-ins , If you want to see which plug-ins are currently installed , Can be in .zshrc Mid search plugins keyword , Get the following , It's also the configuration content in my old computer :
plugins=(
  git
  autojump
  zsh-autosuggestion
  zsh-syntax-highlighting
)
About command prompts
When we type commands , The terminal will automatically prompt you for the following commands that you may enter , Now press → You can output these commands , Very convenient .
The effect can be referred to GitHub Video in project description
Project address :https://github.com/zsh-users/zsh-autosuggestions
-
1、 Clone the project locally $ZSH_CUSTOM/plugins Under the path ` The default is ·~/.oh-my-zsh/custom/plugins
git clone https://github.com/zsh-users/zsh-autosuggestions ${ZSH_CUSTOM:-~/.oh-my-zsh/custom}/plugins/zsh-autosuggestions -
2、 edit
~/.zshrcThe configuration file , Add to plugins In the listplugins=(zsh-autosuggestion) -
3、 Open a new terminal window to view the effect
Automatic prompt
If you don't see the effect of the prompt in the end, it may be a color configuration problem , Reference resources GitHub The modification method in the project description is used to modify the configuration
Configure syntax highlighting Project address :https://github.com/zsh-users/zsh-syntax-highlighting
Installation method :
Recommended HomeBrew Installation :
- 1、brew install
brew install zsh-syntax-highlighting
brew Project address of  https://brew.sh/
-
2、 stay
~/.zshrcThe tail , Insert a row :source /usr/local/share/zsh-syntax-highlighting/zsh-syntax-highlighting.zsh
vim in Use it directly shift+g The last line you can jump to
-
3、 Effective configuration
source ~/.zshrc
To configure autojump
effect : Realize fast directory jump , Which directory do you want to go to directly j + Directory name ( You don't even have to lose everything ), Don't use frequent cd 了 Project address :https://github.com/wting/autojump
Installation method :
-
1、brew install
brew install autojump -
2、 modify
~/.zshrcfile , Add to plugins Configure the list and append the following to the end :[ -f /usr/local/etc/profile.d/autojump.sh ] && . /usr/local/etc/profile.d/autojump.shplugins Don't forget to add autojump:
plugins=(
   git
   zsh-autosuggestion
  autojump
)
then source Make him effective
PS: stay brew There will be a prompt output after installation , Follow the prompts to configure :
Add the following line to your ~/.bash_profile or ~/.zshrc file (and remember
to source the file to update your current session):
  [ -f /usr/local/etc/profile.d/autojump.sh ] && . /usr/local/etc/profile.d/autojump.sh

If you use the Fish shell then add the following line to your ~/.config/fish/config.fish:
  [ -f /usr/local/share/autojump/autojump.fish ]; and source /usr/local/share/autojump/autojump.fish

zsh completions have been installed to:
  /usr/local/share/zsh/site-functions
summary
This is my favorite color matching and beautification scheme at present , There are also some holes in the configuration process , There are some problems , It is concluded in this article , Of course , Colors and plugins have their own preferences , Welcome to leave a message
版权声明
本文为[anchovies]所创,转载请带上原文链接,感谢
边栏推荐
- 简明 VIM 练级攻略
- 使用基于GAN的过采样技术提高非平衡COVID-19死亡率预测的模型准确性
- [elastic search technology sharing] - ten pictures to show you the principle of ES! Understand why to say: ES is quasi real time!
- net.sf.json . jsonobject's format processing of time stamp
- 存储过程动态查询处理方法
- Interesting article sharing: what is the difference between C language and C + +, C?
- Express framework
- Process thread coroutine
- Deep copy
- 如何将PyTorch Lightning模型部署到生产中
猜你喜欢

解决IE、firefox浏览器下JS的new Date()的值为Invalid Date、NaN-NaN的问题
experiment
CMS垃圾收集器

Creating a text cloud or label cloud in Python
I used Python to find out all the people who deleted my wechat and deleted them automatically
Express框架
Summary of interface test case ideas

VirtualBox安装centos7
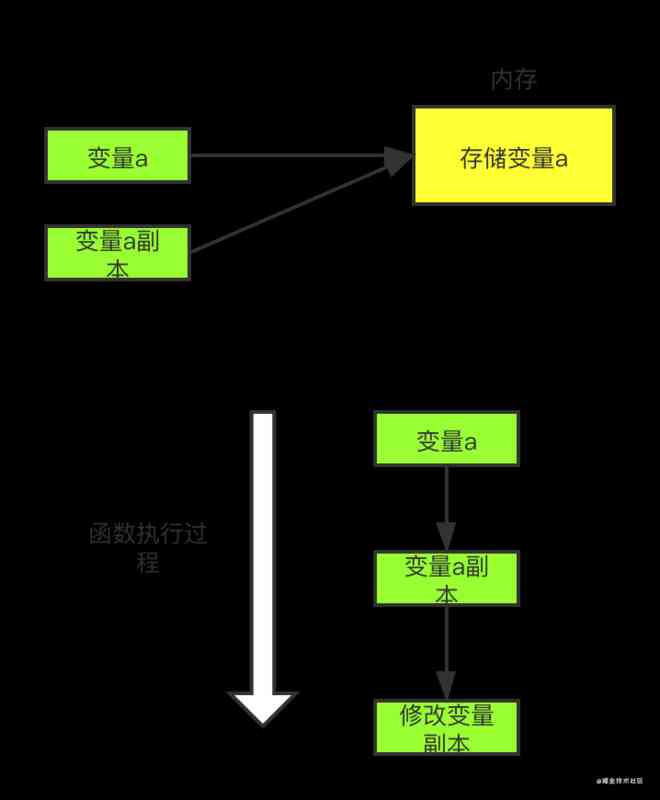
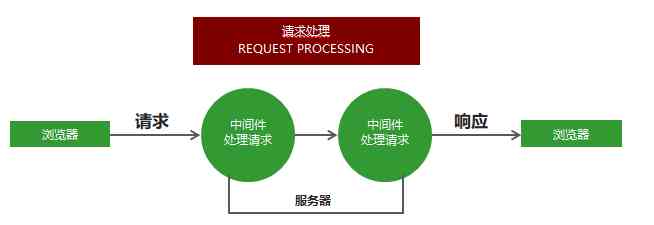
Is parameter passing in go language transfer value or reference?
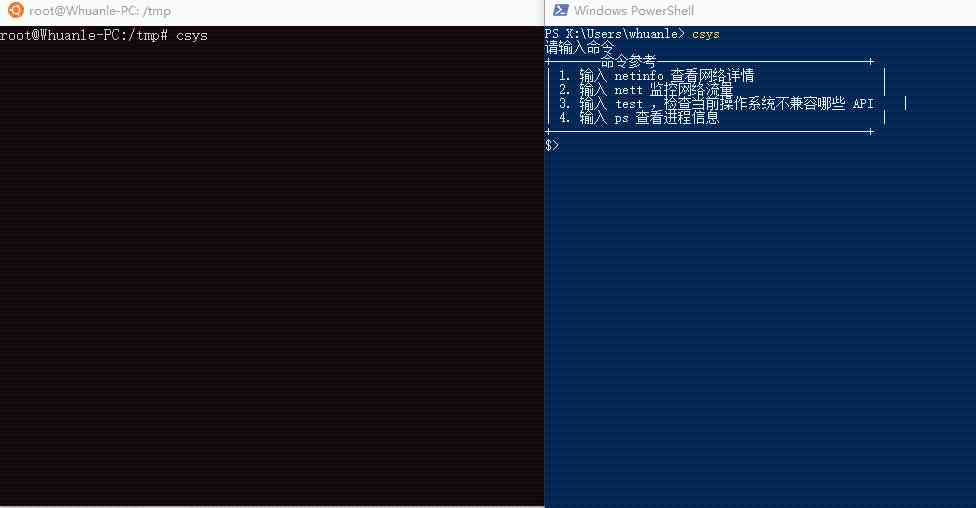
.NET Core 跨平台资源监控库及 dotnet tool 小工具
随机推荐
Dynamic programming: maximum subarray
experiment
动态规划设计:最大子数组
深拷贝
Learn volatile, you change your mind, I see
LeetCode 45 跳跃游戏II
. net core cross platform resource monitoring library and dotnet tool
PHP generates unique strings
寻找性能更优秀的动态 Getter 和 Setter 方案
Mongodb add delete modify query operation
如果把编程语言当武功绝学!C++是九阴真经,那程序员呢?
接口测试工具Eolinker进行post请求
微信小程序相关
Flink系列(0)——准备篇(流处理基础)
不是程序员,代码也不能太丑!python官方书写规范:任何人都该了解的 pep8
实验一作业
动态规划之子序列问题解题模板
Simulink中封装子系统
If the programming language as martial arts unique! C++ is Jiu Yin Jing. What about programmers?
在Python中创建文字云或标签云