当前位置:网站首页>Cloudcompare - point cloud slice
Cloudcompare - point cloud slice
2022-07-05 13:15:00 【Dianyunxia】
Catalog
1. Section extraction function
Use Tools > Segmentation > Cross Section Access this tool .
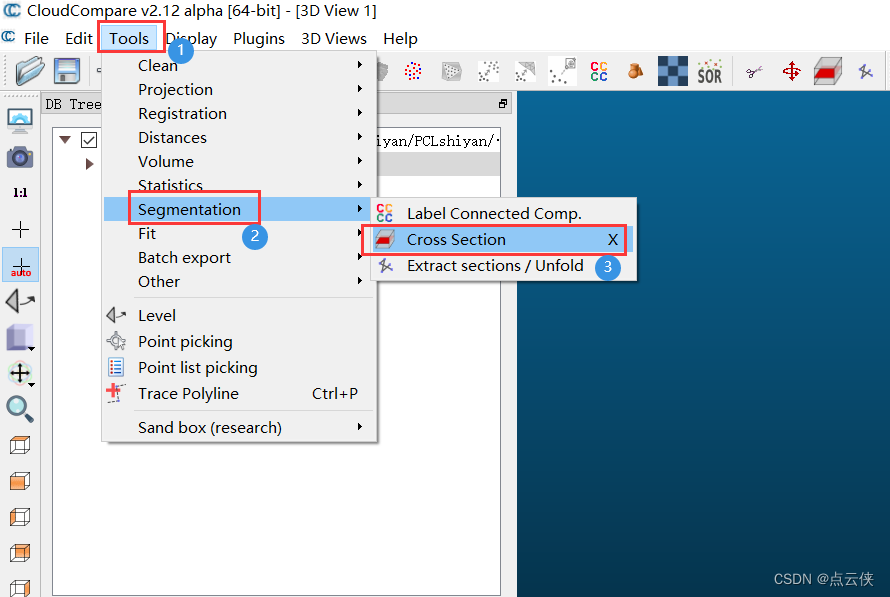
This tool allows users to define clipping boxes around a given cloud ( Interactive or non interactive ). for example , You can adjust the range and direction of the box to split the cloud . Besides , The tool can also :
- The process of repeating segmentation in one or more dimensions ( Extract multiple for the instance “ section ”)
- Extract polygon contour in each slice
Select a point cloud and start the interface of the tool as follows :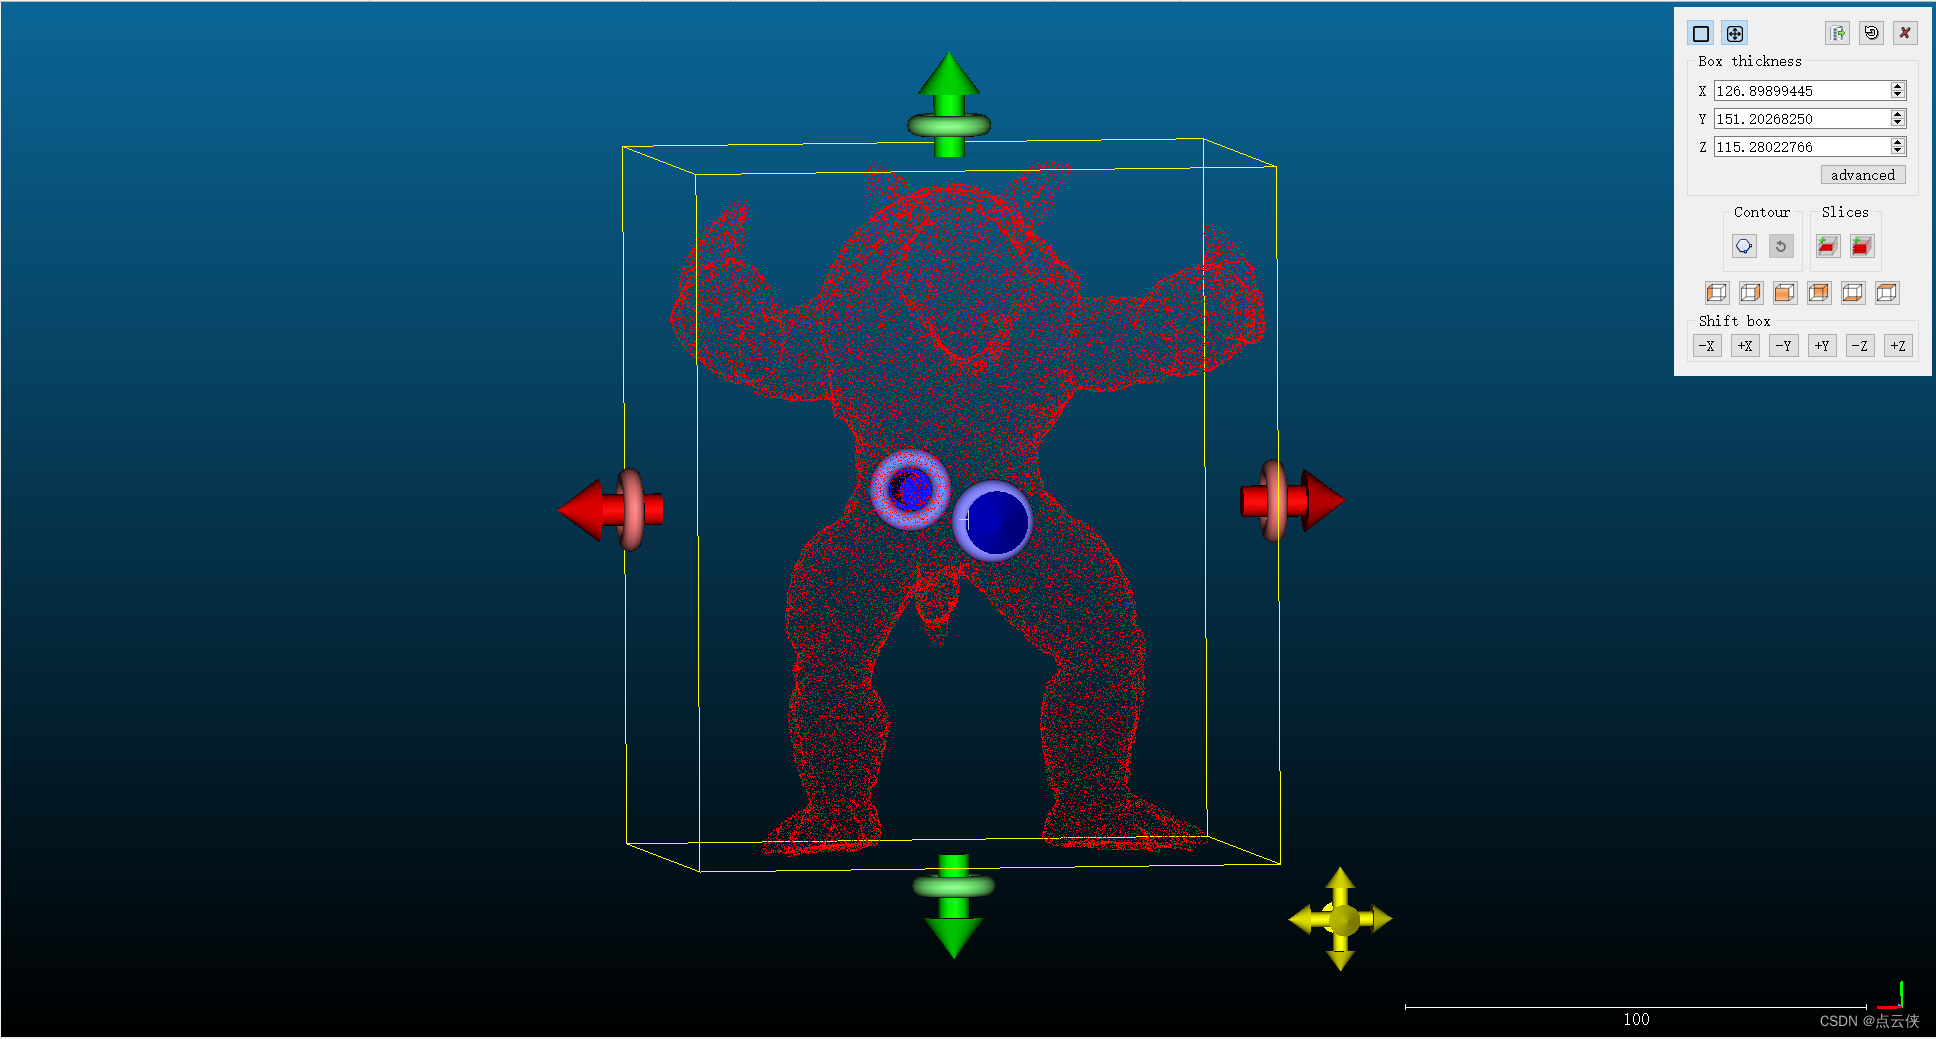
It should be noted that : The initial crop box here ( That is, the yellow line in the figure ) It is the bounding box of point cloud
Edit crop box :
You can edit the crop box in various ways , You can drag the bright red in an interactive way , Green and blue arrows and rings , Directly in 3D Move the boundary of the clipping box in the view . The arrow tip is used to push and pull the cutting frame surface , The ring can be used to rotate the box around the arrow axis . The lower left corner ( yellow ) The interactive device of can be used to move the whole box .
The following buttons in the upper right corner can cancel or display the clipping box and arrow .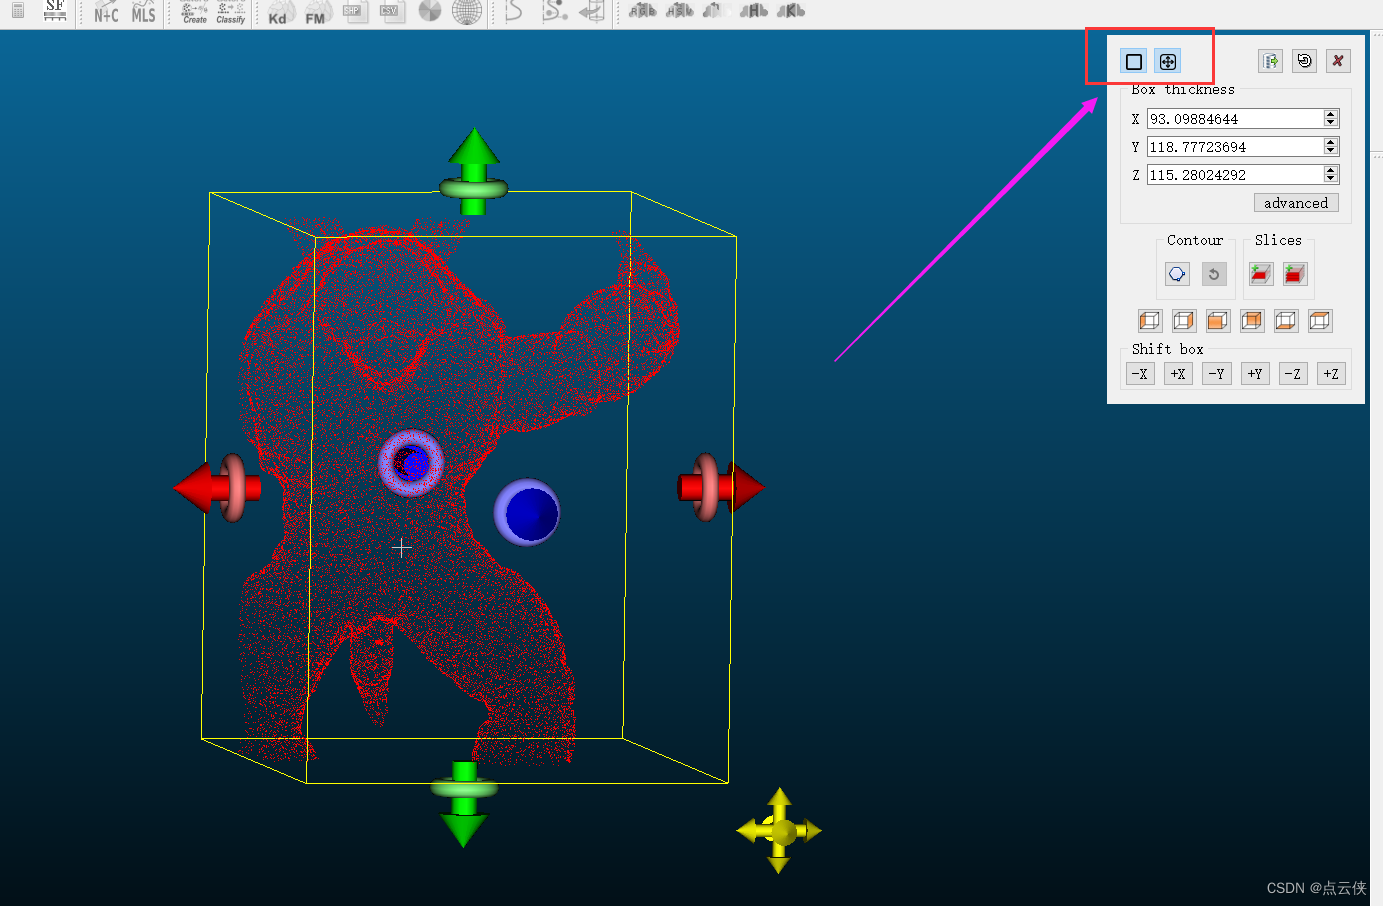
You can also use “X”,“Y” and “Z” Field directly edit the size of the clipping box ( Width , Depth and height ). You can also use the buttons at the bottom of the dialog (“Shift box” frame ) Move the box in all directions . The box will move by the same amount as the box width in this dimension . Last , If more control is needed , You can click “advanced” Button . Will appear “ standard ”3D Box version dialog .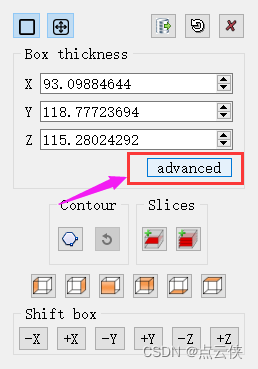
Set the box position in the space in various ways ( for example , Even force the box to be a cube ).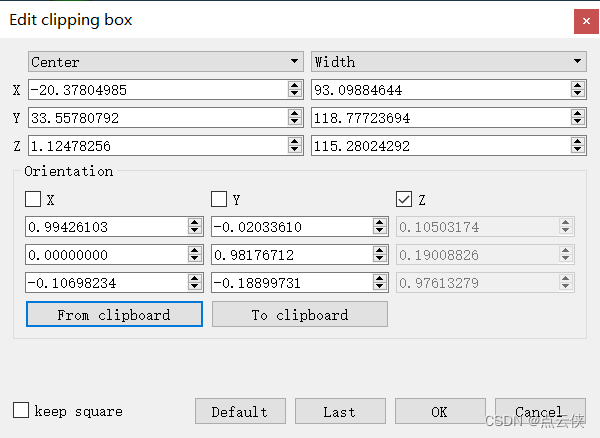
visualization :
You can adjust the view with one button 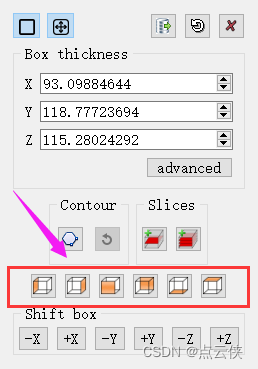
2. Extract a single slice
Click the following button , Points in the clipping box can be extracted .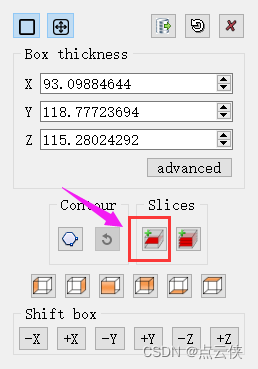
3. Extract a single contour
Click the following button , Extract the boundary contour .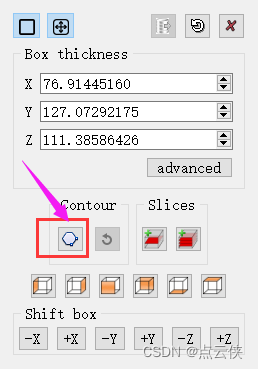
The main parameters and functions are as follows 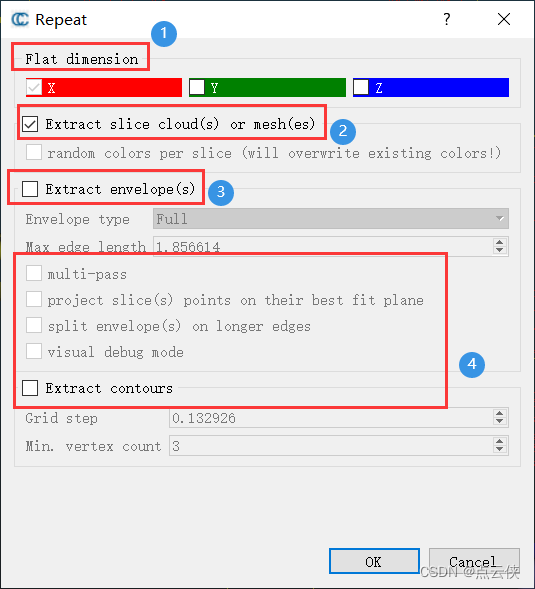
Necessary parameters
flat dimension: Plane size , Automatically set according to the current section sizemaximum edge length: Maximum side length , As a result of “ Concave bag ” Algorithm extracts contour . The only parameter of this tool is that of a single edge “ Maximum size ”. The algorithm starts with the convex hull of the slice point . As long as the edge is longer than the specified “ Maximum length ”, The algorithm will try to segment it using another nearby point . In this way, the outline will be closer to the point cloud . So the smaller the parameter is , The tighter the contour .
The other options
project slice(s) points on their best fit plane: Contour extraction is in 2D Finished in the plane ,CloudCompare The slice plane size is not used as the projection plane , Instead, the point is projected onto the best fit plane ( This is for very thick slices , It usually works better ).split contour(s) on longer edges::CloudCompare Can be longer than at each edge “ Maximum side length ” Parameter when dividing contour . under these circumstances , You can generate multiple non closed polylines instead of a single closed contour .visual debug mode: Used to display debugging results .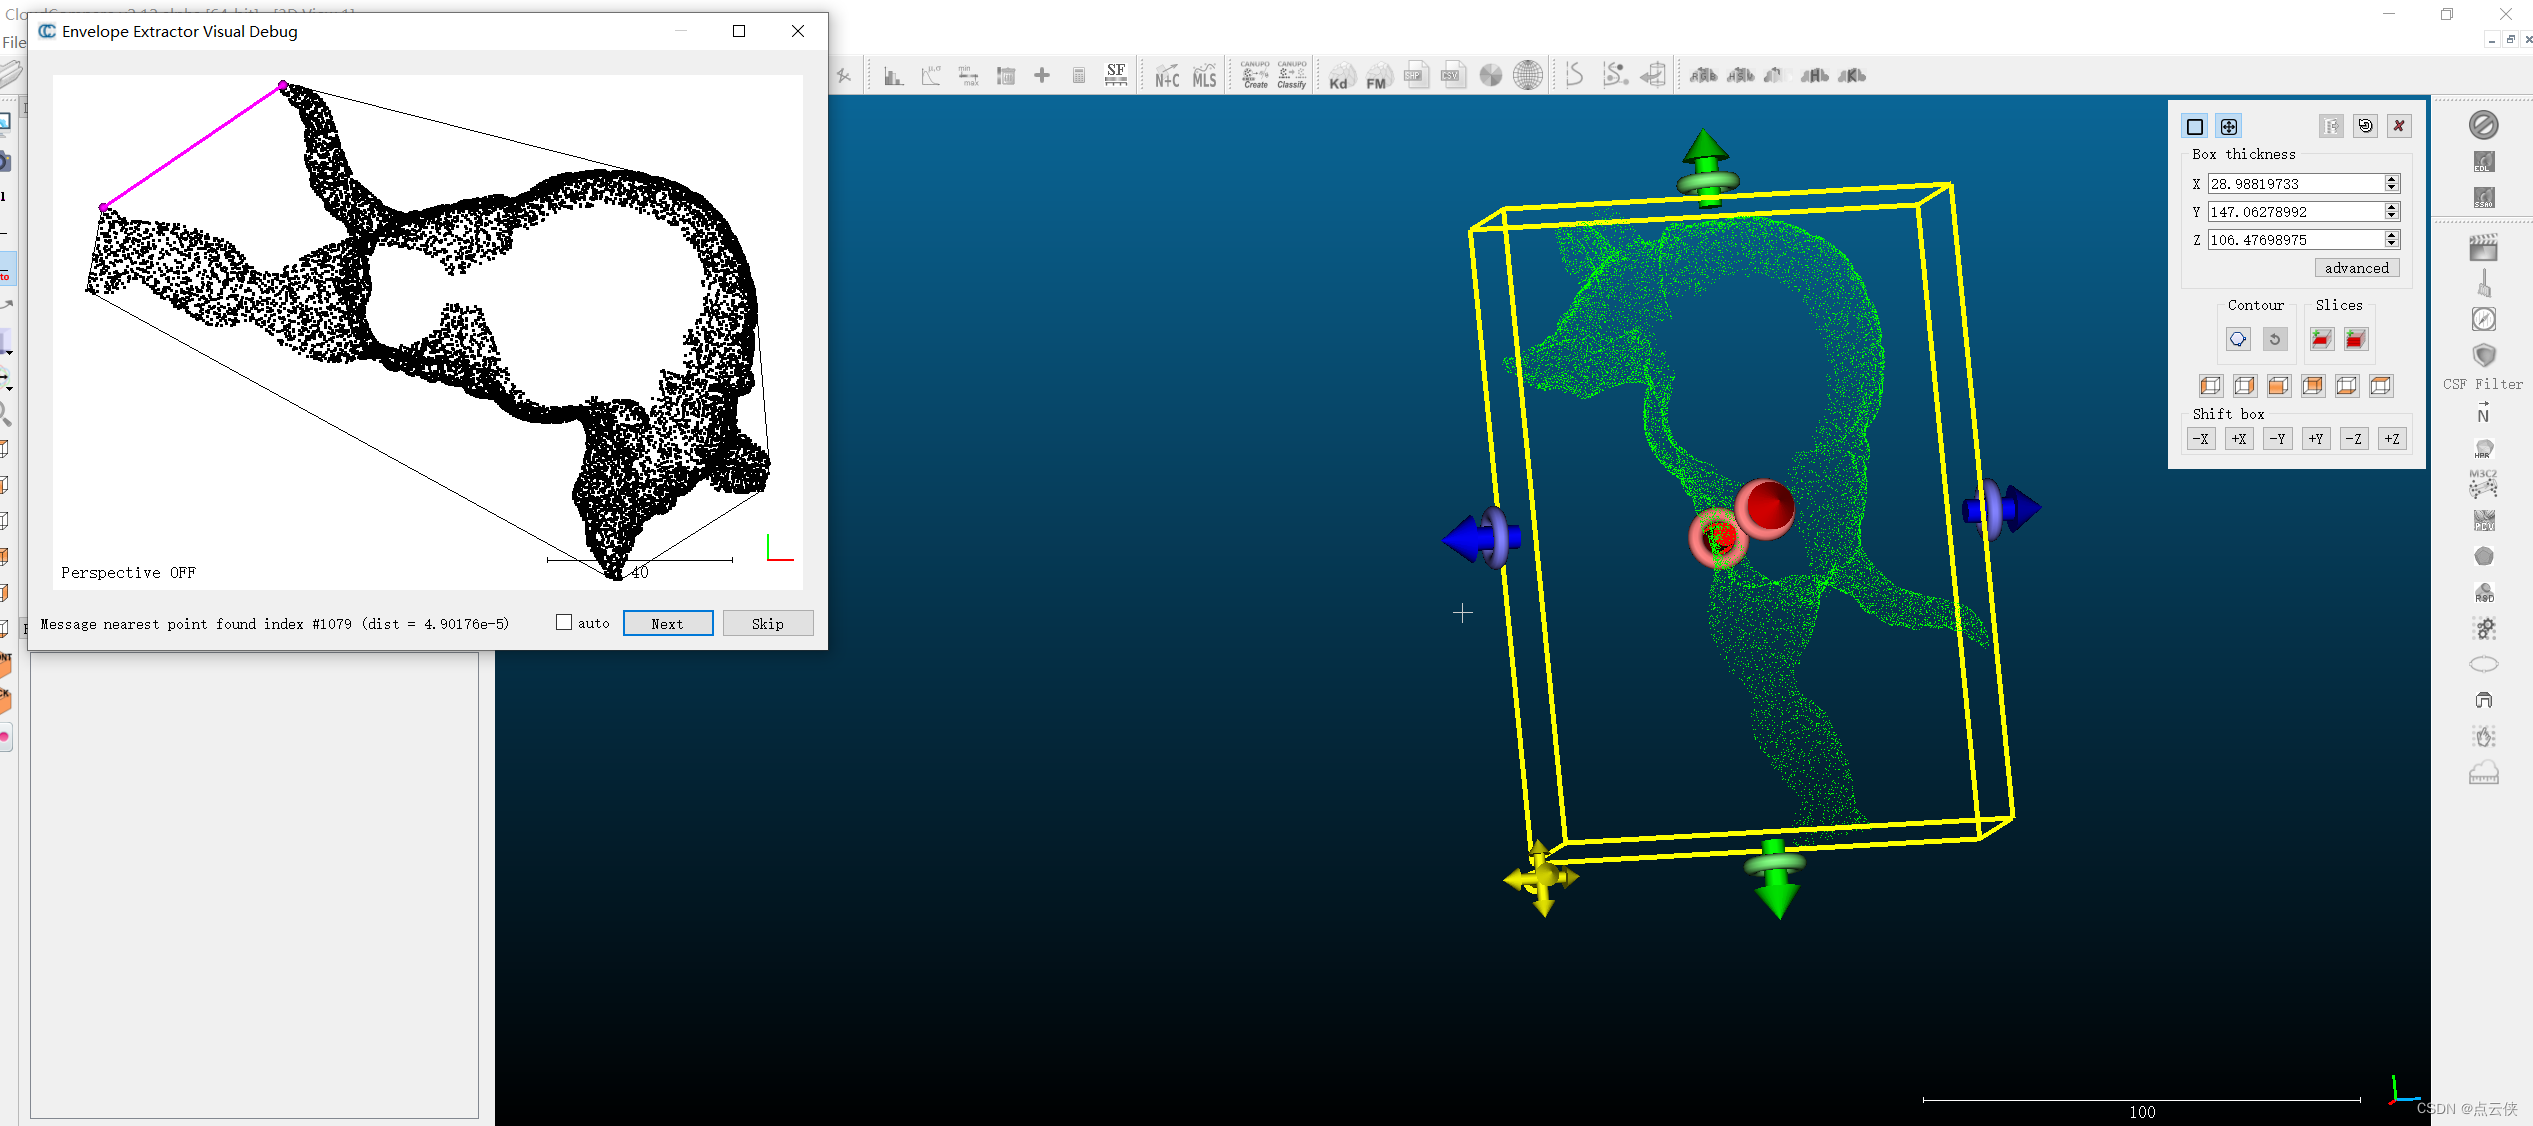
4. Extract multiple slices
The button shown in the figure below is to realize multiple slice extraction 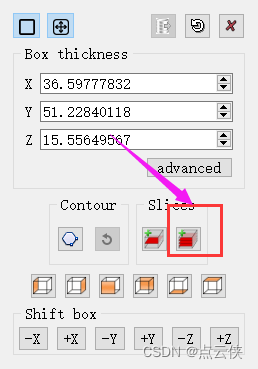
Most of the parameters in this dialog are related to “ Extract a single contour ” The dialog box is the same .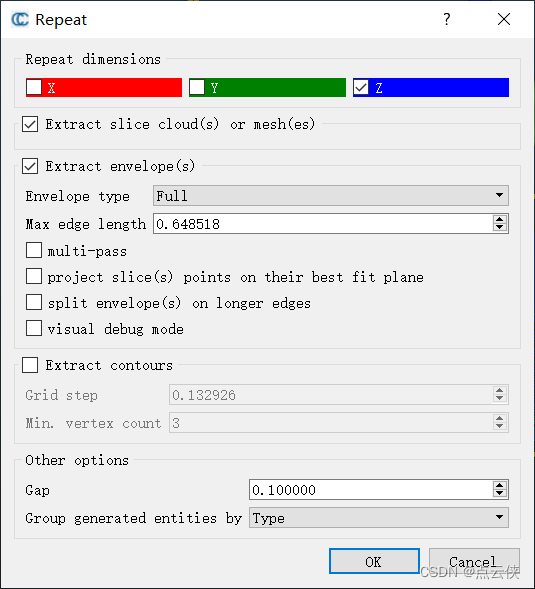
however , The user must clearly specify whether he wants to generate the contour ( Choose “Extract contour(s)” Check box to enable ). Otherwise, only slices will be generated .
Other parameters are :
Repeat dimension: Set the extracted latitude ( By default , Only check “ Plane ” dimension ).Gap: Gap distance between adjacent slices .
The specific operation is as follows :
5. Related codes
[1] PCL Convex polygon boundary extraction of plane point cloud
[2] PCL Concave polygon boundary extraction of plane point cloud
[3] PCL Point cloud slice
[4] Open3D Point cloud slice
边栏推荐
- Simple page request and parsing cases
- 从外卖点单浅谈伪需求
- 【Hot100】34. 在排序数组中查找元素的第一个和最后一个位置
- Write API documents first or code first?
- 潘多拉 IOT 开发板学习(HAL 库)—— 实验7 窗口看门狗实验(学习笔记)
- 程序员成长第八篇:做好测试工作
- Go array and slice
- Flutter draws animation effects of wave movement, curves and line graphs
- ABAP editor in SAP segw transaction code
- Reflection and imagination on the notation like tool
猜你喜欢

go 数组与切片
Word document injection (tracking word documents) incomplete

精彩速递|腾讯云数据库6月刊
Small case of function transfer parameters

潘多拉 IOT 开发板学习(HAL 库)—— 实验7 窗口看门狗实验(学习笔记)
![[深度学习论文笔记]TransBTSV2: Wider Instead of Deeper Transformer for Medical Image Segmentation](/img/70/6de0346df8527af6c88db1ff89947b.png)
[深度学习论文笔记]TransBTSV2: Wider Instead of Deeper Transformer for Medical Image Segmentation
It's too convenient. You can complete the code release and approval by nailing it!
ASEMI整流桥HD06参数,HD06图片,HD06应用
【每日一题】1200. 最小绝对差
MySQL giant pit: update updates should be judged with caution by affecting the number of rows!!!
随机推荐
There is no monitoring and no operation and maintenance. The following is the commonly used script monitoring in monitoring
Small case of function transfer parameters
The solution of outputting 64 bits from printf format%lld of cross platform (32bit and 64bit)
Shandong University Summer Training - 20220620
Introduction to sap ui5 dynamicpage control
MySQL 巨坑:update 更新慎用影响行数做判断!!!
About the single step debugging of whether SAP ui5 floating footer is displayed or not and the benefits of using SAP ui5
Get you started with Apache pseudo static configuration
go 字符串操作
ABAP editor in SAP segw transaction code
先写API文档还是先写代码?
函数的默认参数&函数参数的多种方法
聊聊异步编程的 7 种实现方式
数据湖(七):Iceberg概念及回顾什么是数据湖
Introduction to sap ui5 flexiblecolumnlayout control
SAE international strategic investment geometry partner
Laravel document reading notes -mews/captcha use (verification code function)
Apicloud studio3 API management and debugging tutorial
155. 最小栈
Cf:a. the third three number problem