Image download 、 Domain name resolution 、 Time synchronization please click Alibaba cloud open source image station
One 、 Deploy zabbix proxy server
The role of distributed monitoring :
- Share responsibility server Centralized pressure
- Solve the problem of network delay between multiple computer rooms

bsystemctl disable --now firewalld
setenforce 0
hostnamectl set-hostname zbx-proxy


1.1、 Set up zabbix Download source , install zabbix-proxy
rpm -ivh https://mirrors.aliyun.com/zabbix/zabbix/5.0/rhel/7/x86_64/zabbix-release-5.0-1.el7.noarch.rpm

cd /etc/yum.repos.d
sed -i 's#http://repo.zabbix.com#https://mirrors.aliyun.com/zabbix#' /etc/yum.repos.d/zabbix.repo

yum install -y zabbix-proxy-mysql zabbix-get


1.2、 install zabbix The required database
yum install -y mariadb-server mariadb

systemctl enable --now mariadb

mysql_secure_installation         # Initialize database , And set the password , Such as  abc123


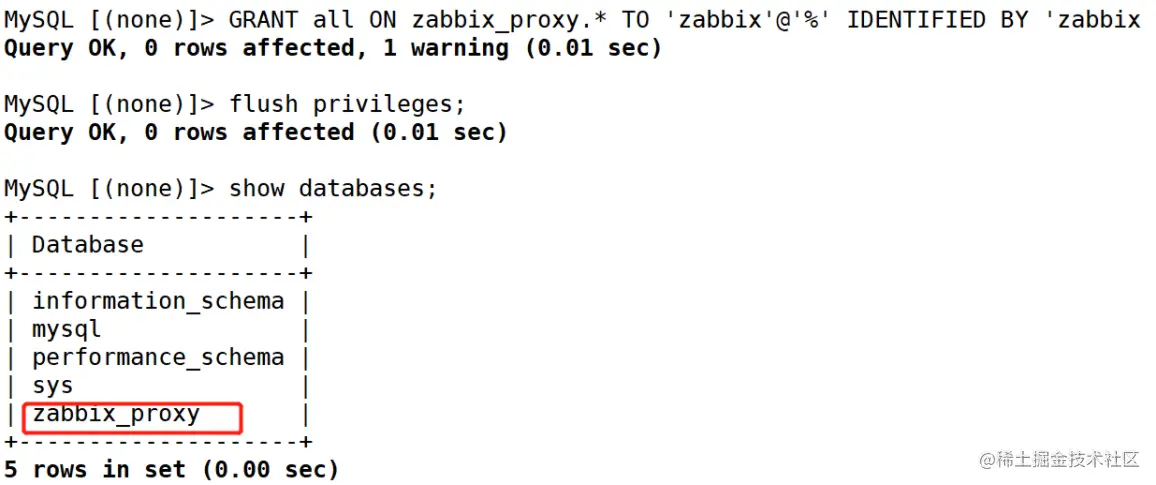
1.3、 Add database users , as well as zabbix Required database information
mysql -u root -pabc123

CREATE DATABASE zabbix_proxy character set utf8 collate utf8_bin;
GRANT all ON zabbix_proxy.* TO 'zabbix'@'%' IDENTIFIED BY 'zabbix';
flush privileges;
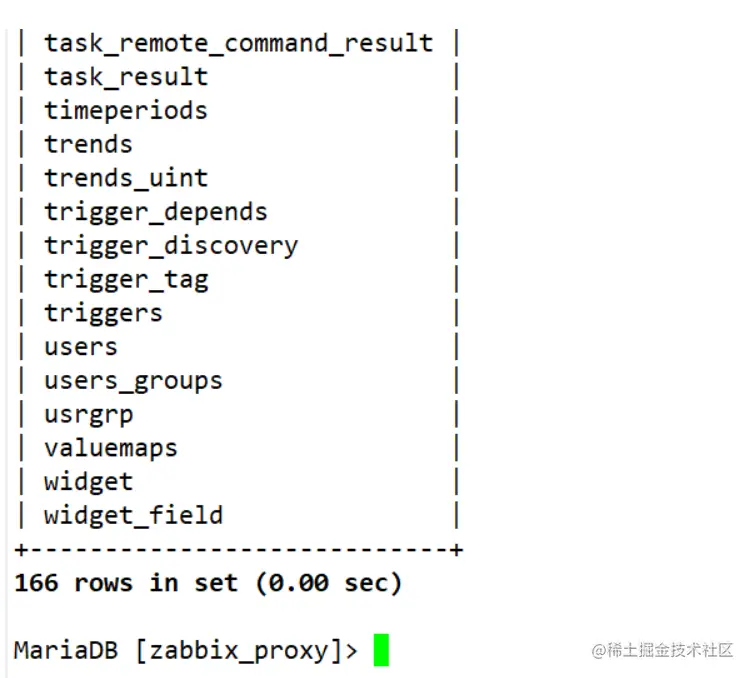
1.4、 Import database information
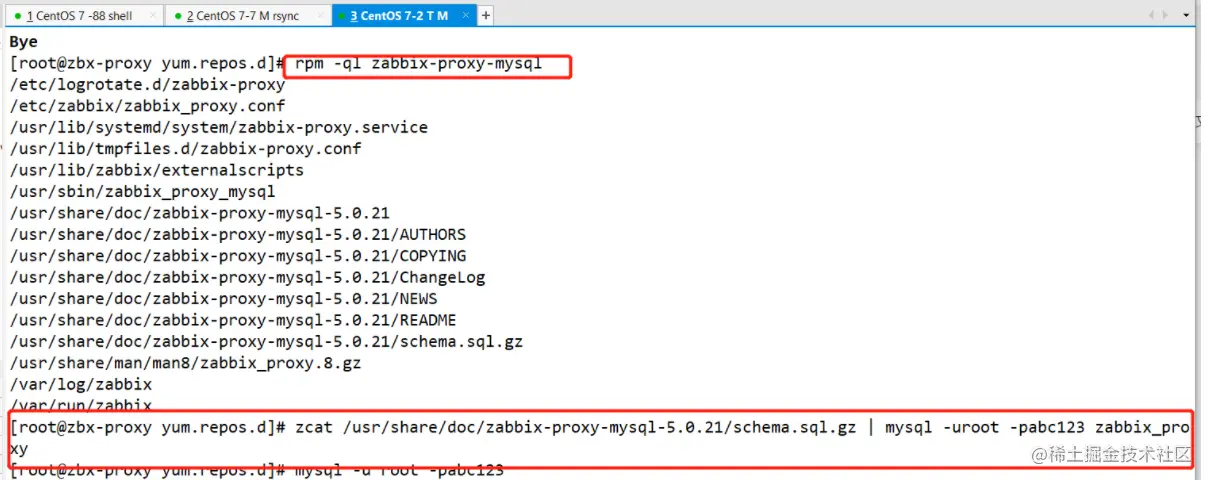
rpm -ql zabbix-proxy-mysql 		# Inquire about  sql  The location of the file

zcat /usr/share/doc/zabbix-proxy-mysql-5.0.15/schema.sql.gz | mysql -uroot -pabc123 zabbix_proxy
1.5、 modify zabbix-proxy The configuration file
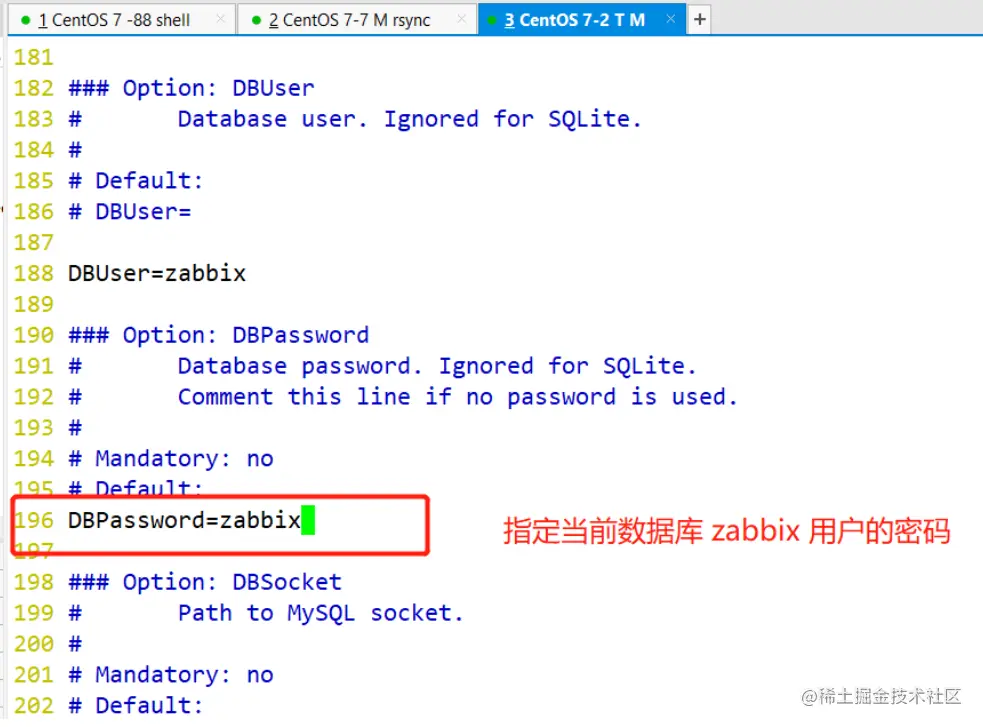
vim /etc/zabbix/zabbix_proxy.conf
Server=192.168.80.20				#30 That's ok , Appoint  zabbix  Server side  IP  Address
Hostname=zbx-proxy					#49 That's ok , Specify the current  zabbix  The host name of the proxy server
DBPassword=zabbix					#196 That's ok , Specify the current database  zabbix  User's password


1.6、 start-up zabbix-proxy
systemctl start zabbix-proxy
systemctl enable zabbix-proxy
1.7、 Configure on all hosts hosts analysis
vim /etc/hosts
192.168.80.20 zbx-server
192.168.80.30 zbx-agent01
192.168.80.13 zbx-proxy

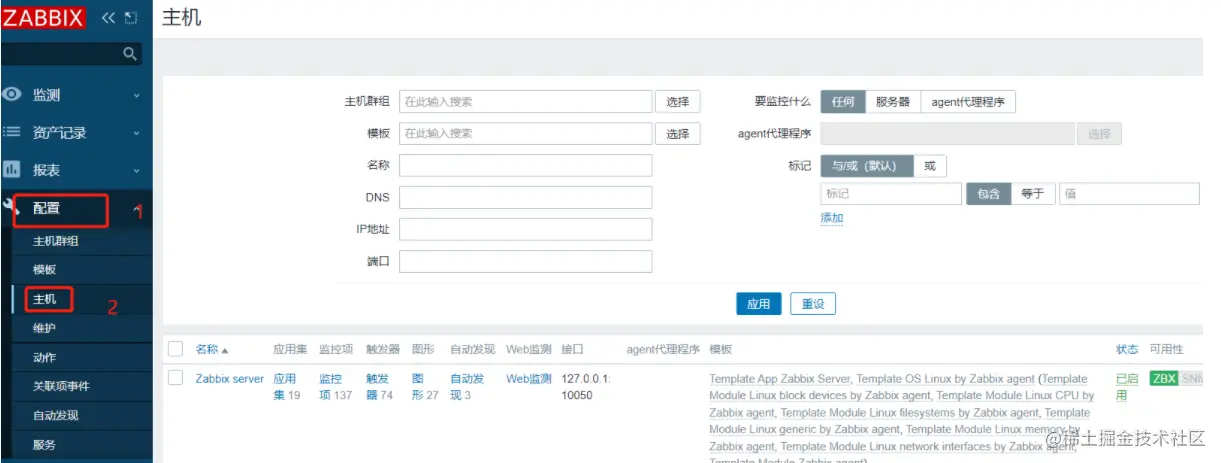
1.8、 stay Web Configuration page agent agent
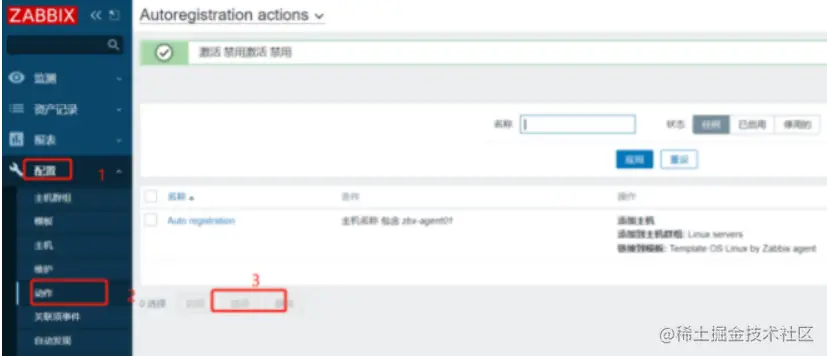
 Click on the left menu bar 【 To configure 】 Medium 【 action 】, Check the automatic registration rules , Click on   Ban
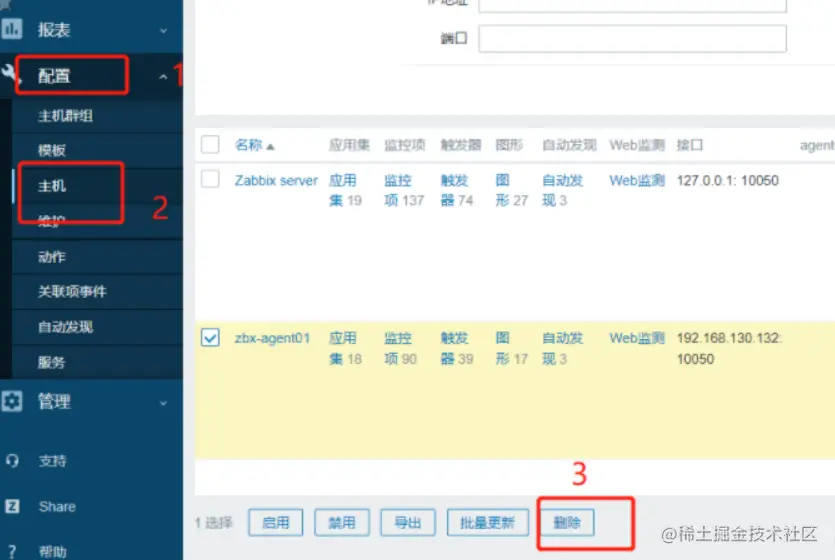
 Click on the left menu bar 【 To configure 】 Medium 【 host 】, Check the original client host , Click on   Delete
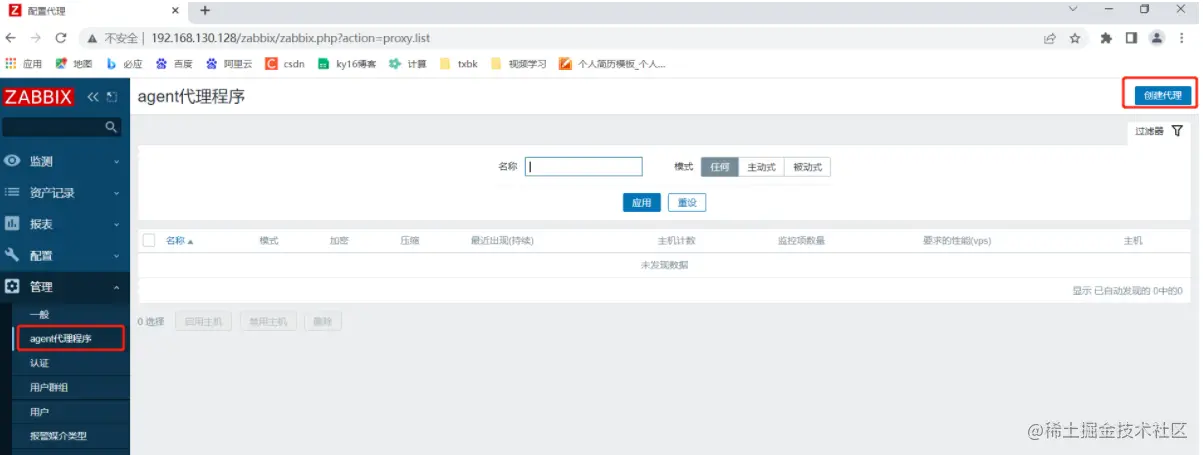
 Click on the left menu bar 【 management 】 Medium 【agent agent 】, Click on 【 To create the agent 】
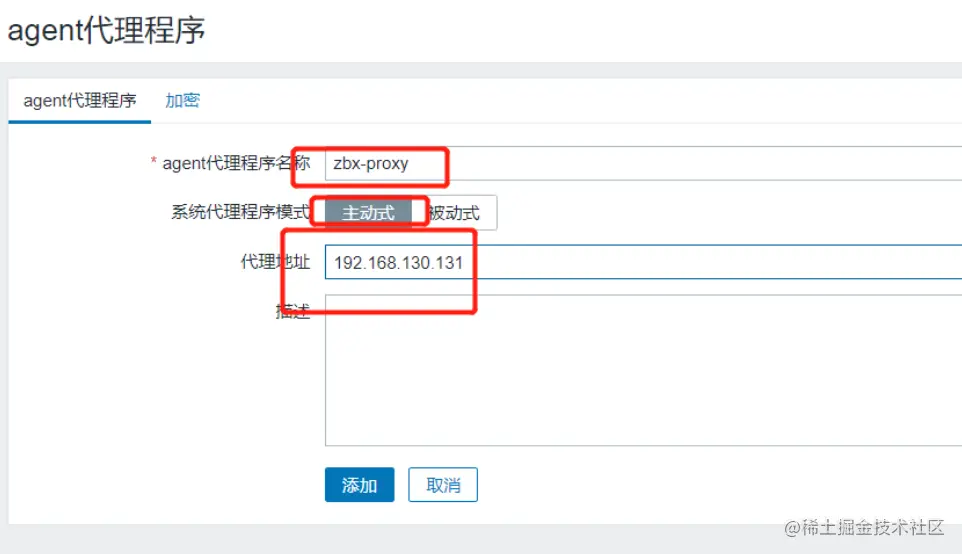
【agent Agent name 】 Set to  zbx-proxy
【 System agent mode 】 choice   Active
【 Agency address 】 Set to  192.168.130.131
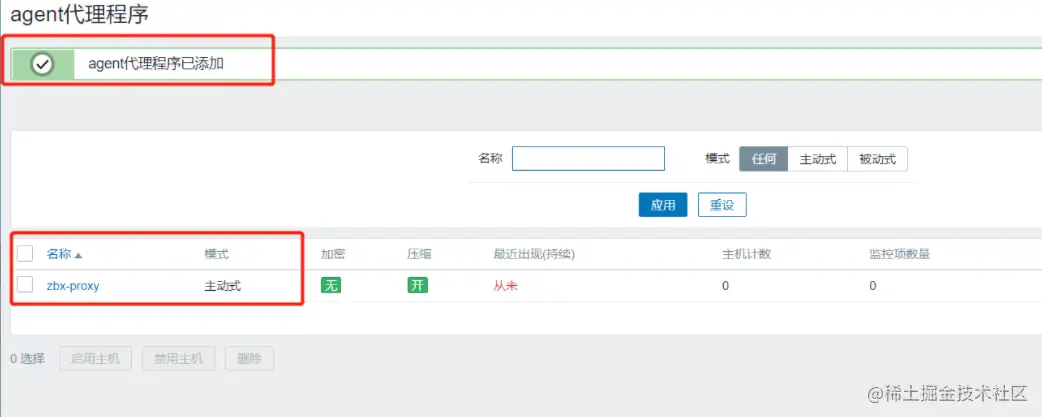
 Click on  【 add to 】
Two 、 To configure agent Use proxy
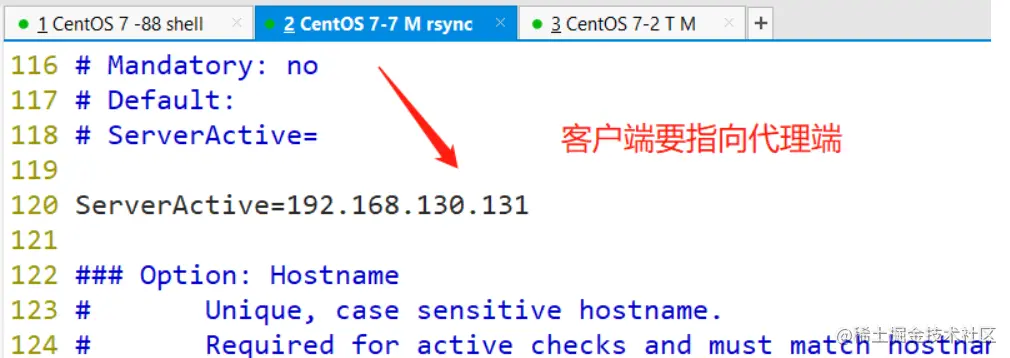
2.1、 Modify... On the client side agent2 The configuration file
vim /etc/zabbix/zabbix_agent2.conf
......
Server=192.168.80.13			#80 That's ok , Appoint  zabbix  Proxy server  IP  Address
ServerActive=192.168.80.13		#120 That's ok , Appoint  zabbix  Proxy server  IP  Address

2.2、 stay Web Configuration page
 Click on the left menu bar 【 To configure 】 Medium 【 host 】, Click on 【 Create a host 】
【 Host name 】 Set to  zbx-agent01
【 Visible name 】 Set to  zbx-agent01
【 group 】 choice  Linux server
【Interfaces】 Of 【IP Address 】 Set to  192.168.80.30
【 from agent Agent monitoring 】 choice  zbx-proxy

 Then click on the menu bar above 【 Templates 】
【Link new tamplates】 Search for  Linux , choice  Template OS Linux by Zabbix agent
 Click on  【 add to 】
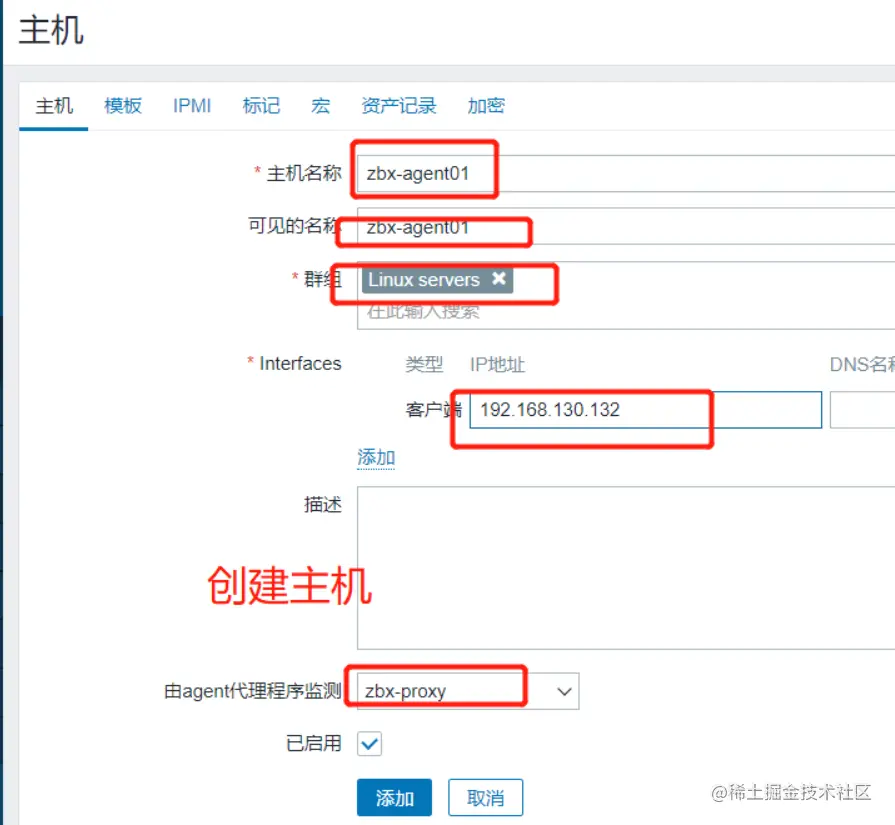
2.3、 Restart the service on the client and proxy server respectively
systemctl restart zabbix-agent2

systemctl restart zabbix-proxy

 Click on the left menu bar 【 To configure 】 Medium 【 host 】 Refresh , Check whether the monitoring status of the client host is normal

 Check the log on the server
tail -f /var/log/zabbix/zabbix_proxy.log

3、 ... and 、 Set up zabbix-snmp monitor
SNMP, Simple network management protocol
3.1、 Server installation snmp Monitoring program
yum install -y net-snmp net-snmp-utils
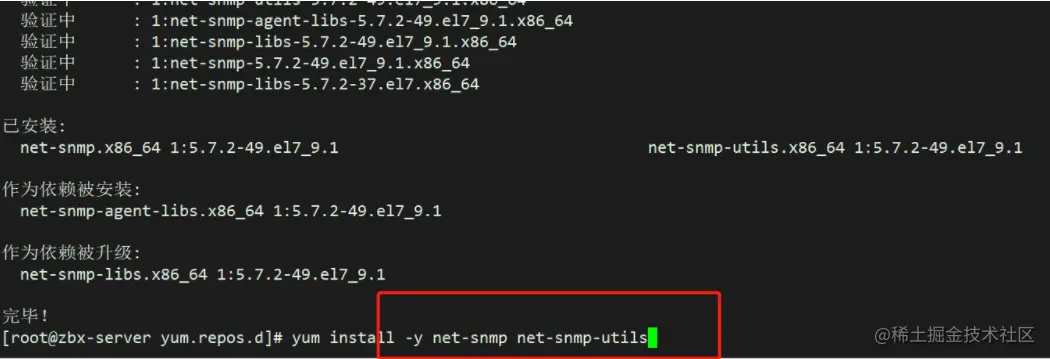
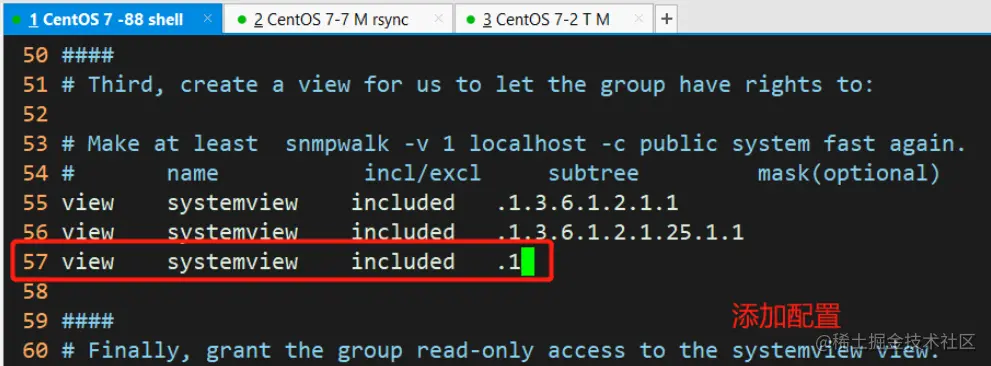
3.2、 modify snmp Configuration file for , And start the service
vim /etc/snmp/snmpd.conf
......
view    systemview    included   .1				#57 That's ok , Add this configuration

systemctl start snmpd


3.3、 Use snmp Command test
snmpwalk -v 2c -c public 127.0.0.1 sysname
SNMPv2-MIB::sysName.0 = STRING: zbx-server
-------------------------------------------------------
–v 1|2c|3: Appoint SNMP Protocol version
–c: Specify the community string
sysname: by  snmp  Of  key
-------------------------------------------------------
3.4、 stay Web Configuration page snmp Mode monitoring
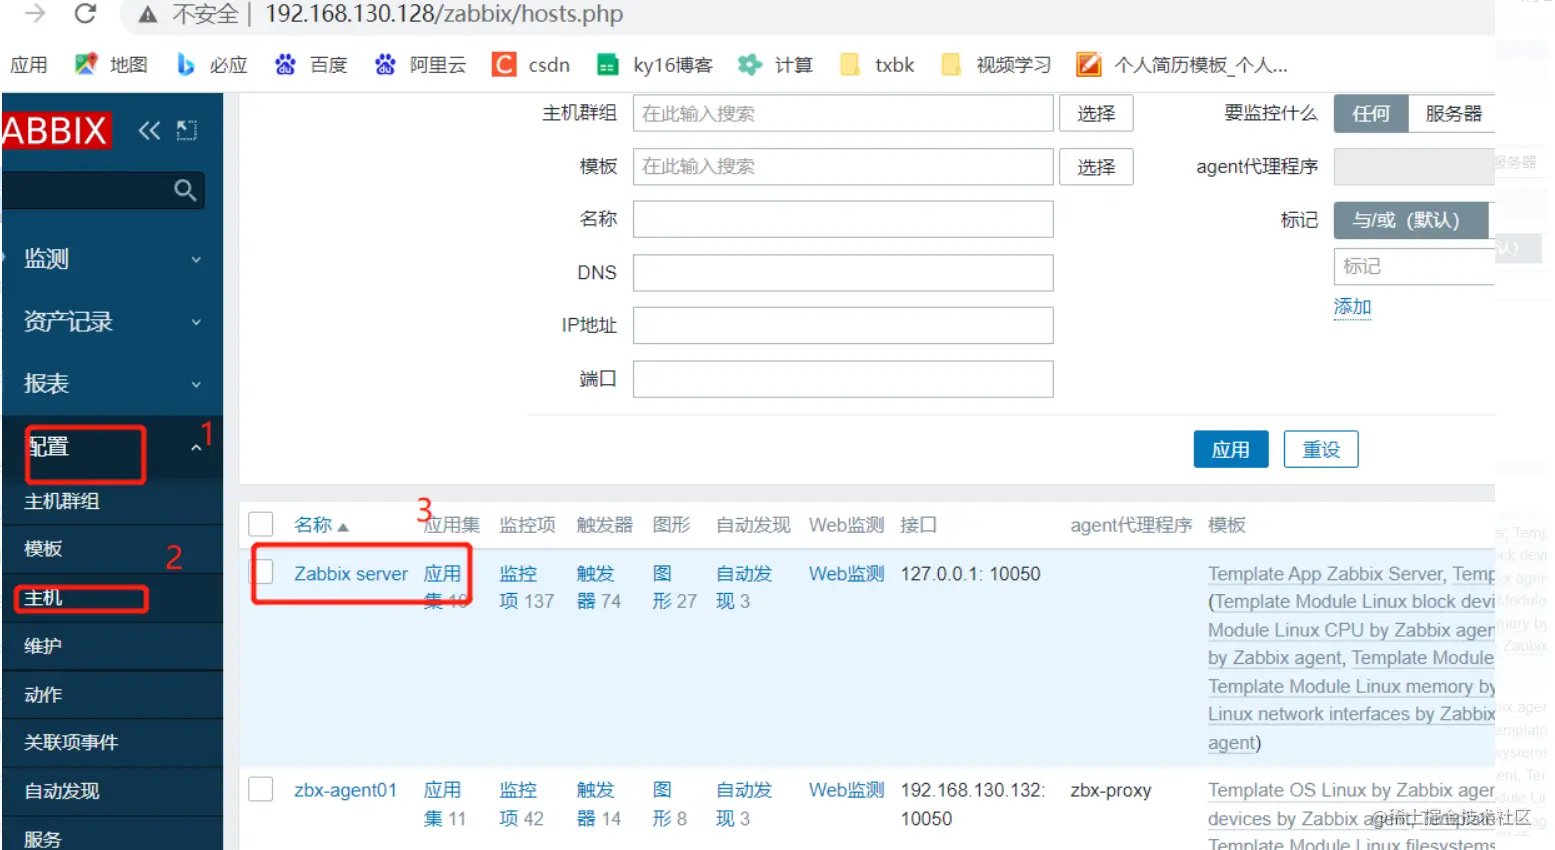
 Click on the left menu bar 【 To configure 】 Medium 【 host 】, Click on  Zabbix server
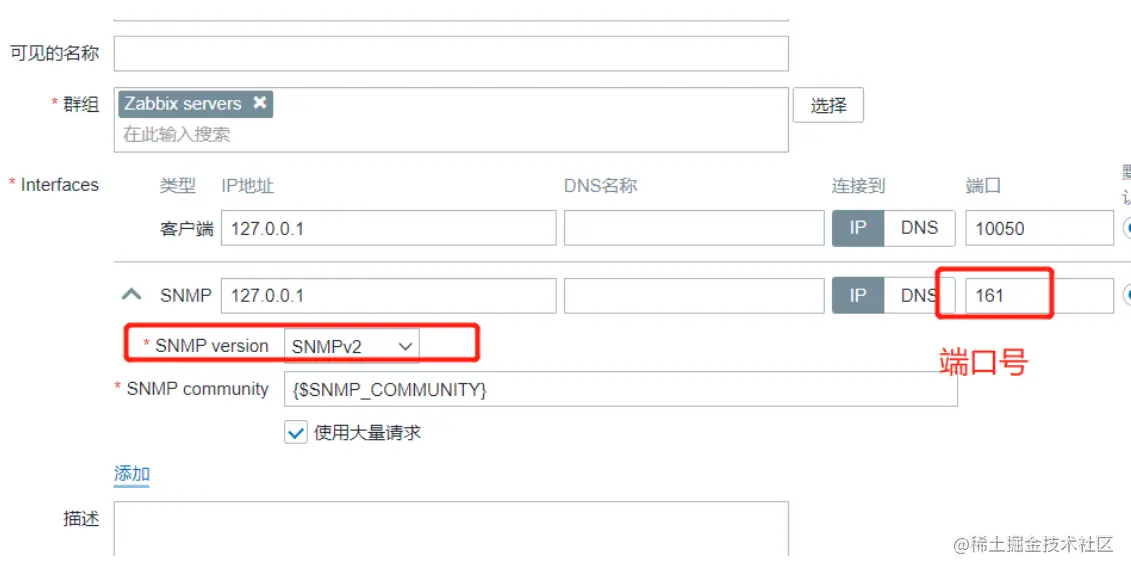
【Interfaces】 Click on 【 add to 】 choice  SNMP , The port is set to  161
 Click on the menu bar above 【 Templates 】,【 Linked templates 】 All in  agent  Select the template to unlink and clean up
 And then 【Link new templates】 Mid search  Linux SNMP, choice  Template OS Linux SNMP
 Click on  【 to update 】, Wait a while  Zabbix server	 The availability of becomes  SNMP  Monitoring mode .


In this paper, from :https://juejin.cn/post/7116473286535413797


