当前位置:网站首页>The master teaches you the 3D real-time character production process, the game modeling process sharing
The master teaches you the 3D real-time character production process, the game modeling process sharing
2022-08-04 23:50:00 【3D modeling morning】
ZBrush&Mari中的第一步
在ZBrush中,I started with a low poly base model,This model matches the original scale and body shape.

接下来,我们在进入Marvelous Designer之前,要对ZBrushDo a quick styling,to see how our clothes look on the body/贴合度:
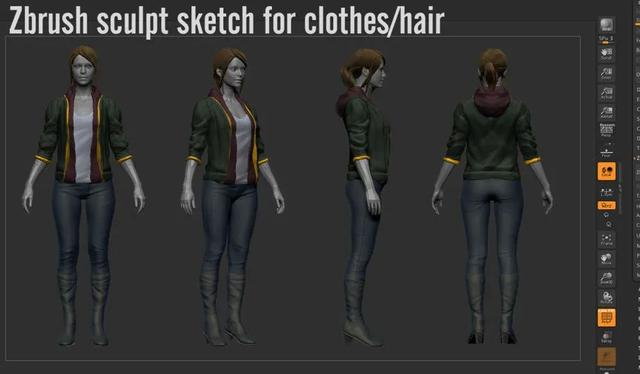
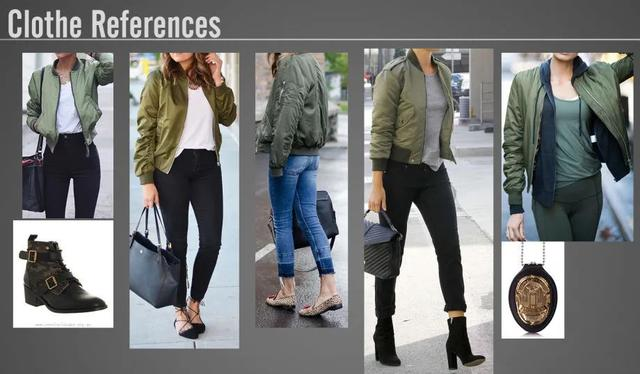
As for the fabric part,I did some research on the reference,This finds the part I need.The main thing is to do proper research on specific patterns,Then I start right awayMarvelous里去.
3
从Marvelous导出到ZBrush
The only problem I'm having is with Marvelous DesignerExport related.Because this is my problem when combining and rebuilding the wiring,I used character artistYuri Alexandera way to share.He imports separate adjacent parts,And give thickness by group.Then finally combine them.
到第三周,我已经把MarvelousImported cloth simulated in ZBrush.The inside of the hoodie is invisible,So I just deleted it,因为没什么用.
4
Search for header references
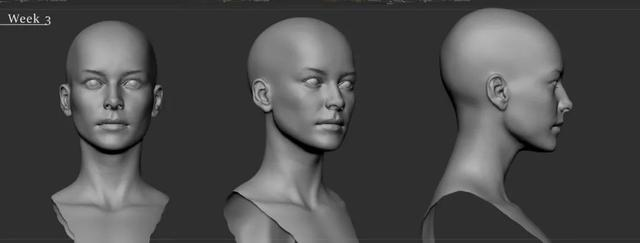
Because this is a period10周的课程,Need to learn new software,So the teacher asked us to complete only the bust.然而,I spend every day after get off work8hours to make this character,即便如此,I am only in the first11周才完成!
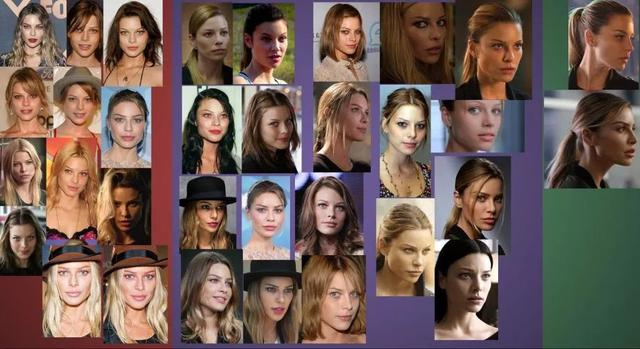
for similarity,I rounded up my selection of actress Lauren·Lots of references for Deman.I don't want it100%相似,So I decided to ignore certain features,For example lips,下巴等.
I divided the head reference into the front,Three-quarter angle and sides:
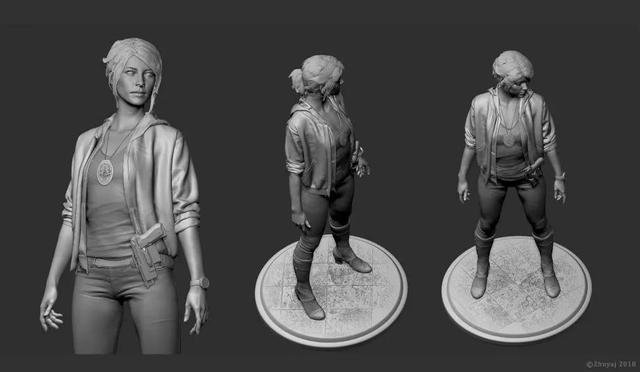
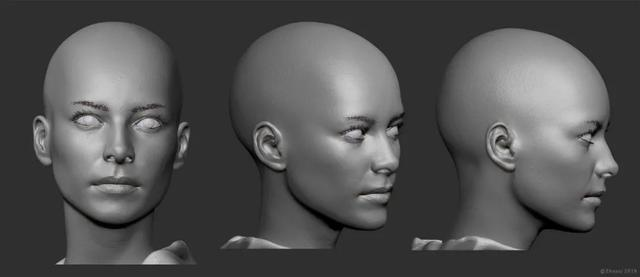
基础雕刻:
With pore details:
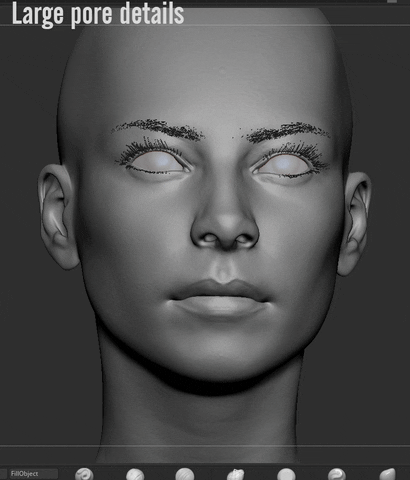
在Mari里,我使用XYZDisplacement Pore Projection.There are many tutorials on how toPhotoshopThe three main Pore Displacement maps are split into RGB通道,然后再在Marito project them onto the model.之后,You only need to take threeMariThe displacement map is imported backZBrushas a layer,This way you can find the perfect balance of the mix.
5
Create hair
I watched a tutorial on real-time fur.The process started at Maya里生成XgenHair is used for texture material.hair inZBrush包括四层.就时间而言,This is probably the most tedious task.我花了大约4天的时间,Put each hair inZBrushplaced in.
快速制作PhotoshopConcept sketch to imagine the direction of the hair:
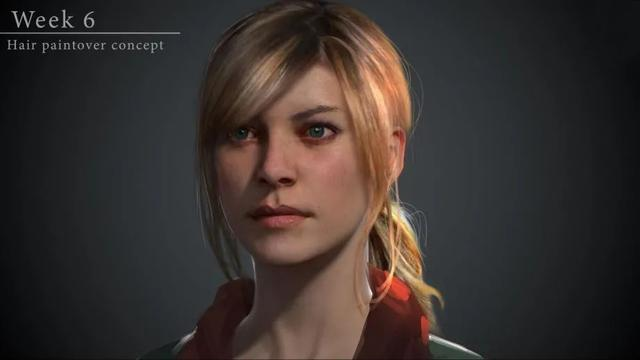
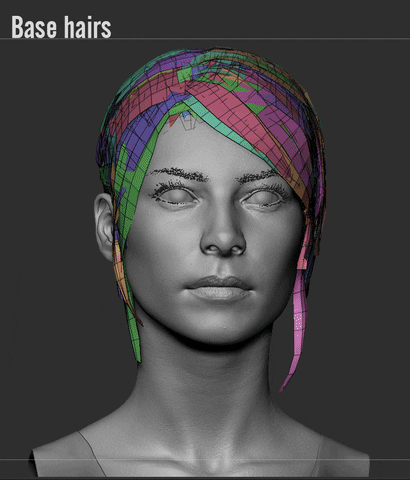
就像我说的,Arranging hair manually is tedious,So when I found outMayaThere is a plugin that can do this,I feel like a fool……
Just heavy,Because I want the hair to look better when it is finally rendered,So I made it thicker,Two pieces on the lower side.
6
纹理材质
我用Substance Painterto make texture materials.Substance PainterThere is already a nice library of materials,Sufficient for everyday clothing and hard surfaces,So I didn't create any other custom materials.I just used the preset materials,Adjust the variables to get the effect I want:

基本上,The method I use is makeID贴图,Then apply the material to every part of all my clothing parts.This jacket animation is a great example,Because it has severalID颜色分区,And by adding custom materials,效果也很好.
in order to get the final render(such as jackets)呈现某种效果,Make sure that Metallicity Mapping and Anisotropy settings are enabled,Just like you do your hair.It allows you to adjust reflections,to get a better gloss.
7
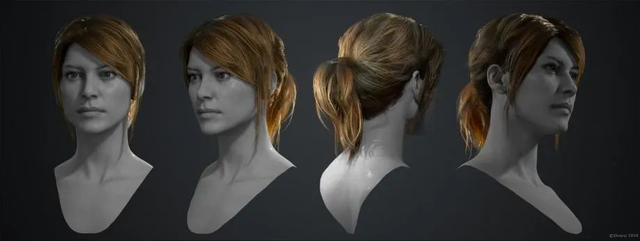
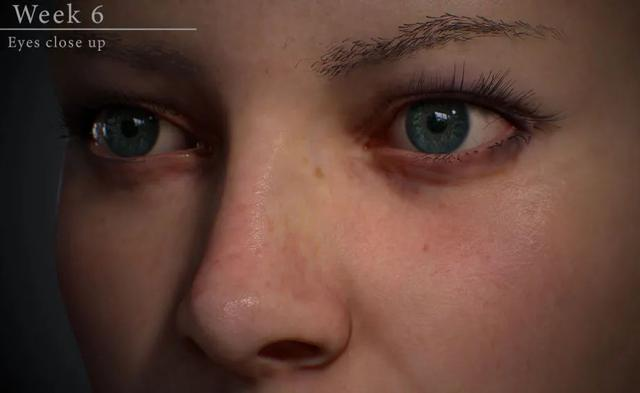
绘制脸部
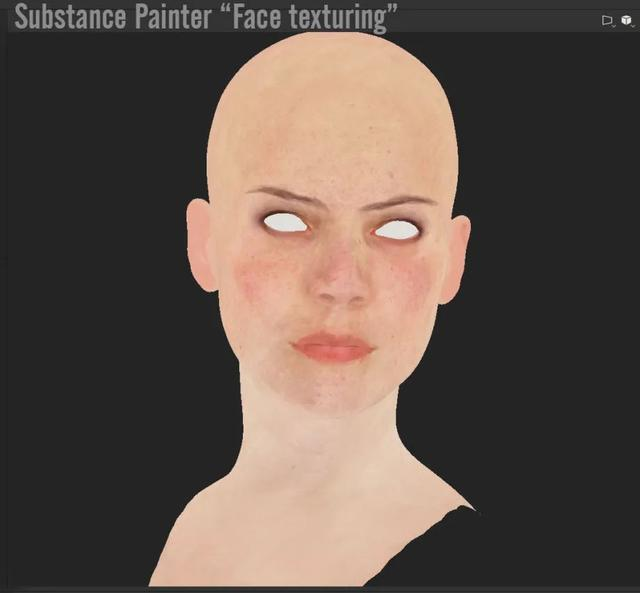
首先,我从Mari的XYZAlbedo map projection begins,Then import it againSubstance PainterDo the final hand drawing.
I drew the head in particular,Because it is more complicated than clothes,Make sure that the main color gradations of the face are appropriate,And I also added details with some speckled brushes.我喜欢在ZBrush中烘焙normal和AO贴图,而不是在PainterBake and export in batches,Just like with clothes.最后,Thanks to higher resolution textures(例如16k),The face is better controlled,It's also more refined.我收集和整理了很多这方面的视频教程,并且每天晚上都会无偿的讲3D游戏建模直播课,我讲的基本上通俗易懂,充满了土鳖般的风趣,有想学这一门技术的小伙伴,可以正儿八经的来学习和搞资源了,到我的3DModeling tutorial community(裙),它开头的一组数字是:344,中间的一组数字是:704,结尾的数字是:204. 把以上三组数字按照先后顺序组合起来即可.想提升自己的实力,就得多交流,只有不断吸收别人的优点,才能成就自己的强大.
8
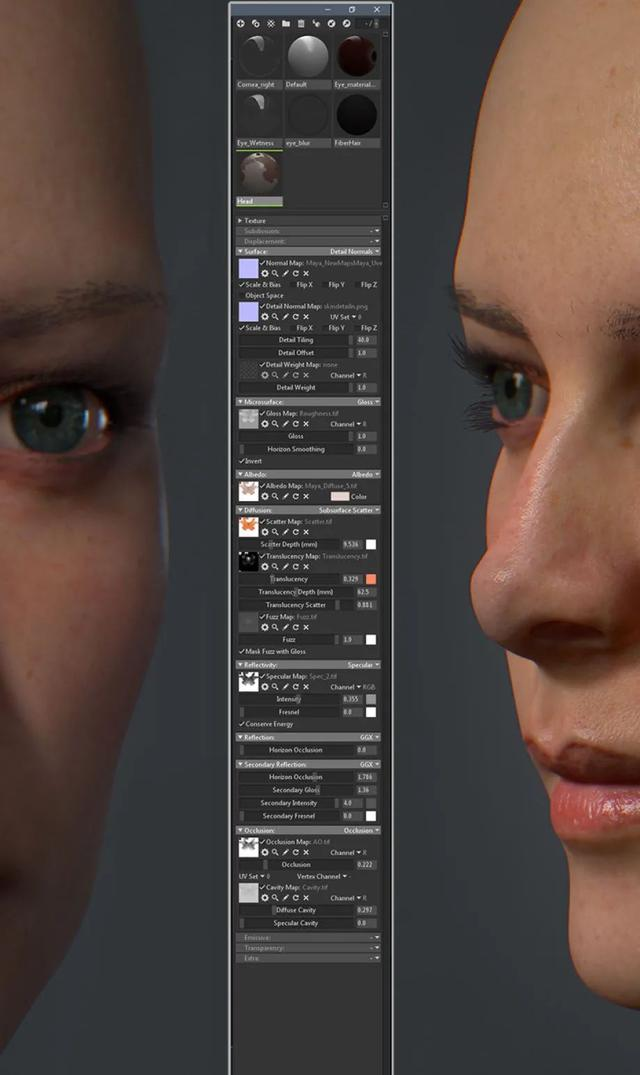
PBR材质
Skin color textures are more difficult to get right,Especially since this is my first time using itMarmoset,And also trying to figure out how everything works.我在MarmosetRepeatedly scaling the size of the graphic,Adjust shader variables,Plus post-processing,to get a better look and feel.
Attach some of meMarmosetA picture of the material settings:
9
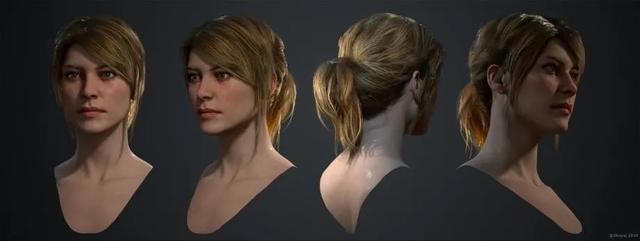
Rendering and lighting
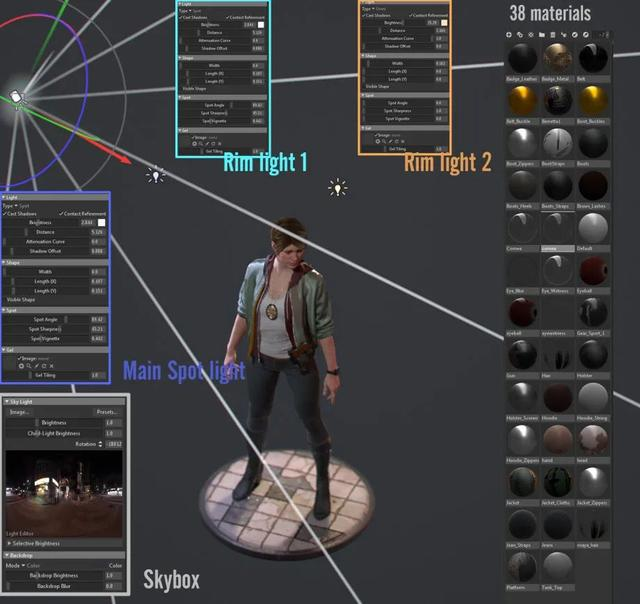
As for the final composite render,I turned the render settings to max,Take a cutMarmoset中的图.照明,I chose to use a classic spotlight,And add two edge lights at the back to assist.Because I want the final atmosphere to be darker,Kind of scary,So I use a more suitable skylight.
The attached image showsMarmosetSome settings for light and skin shaders: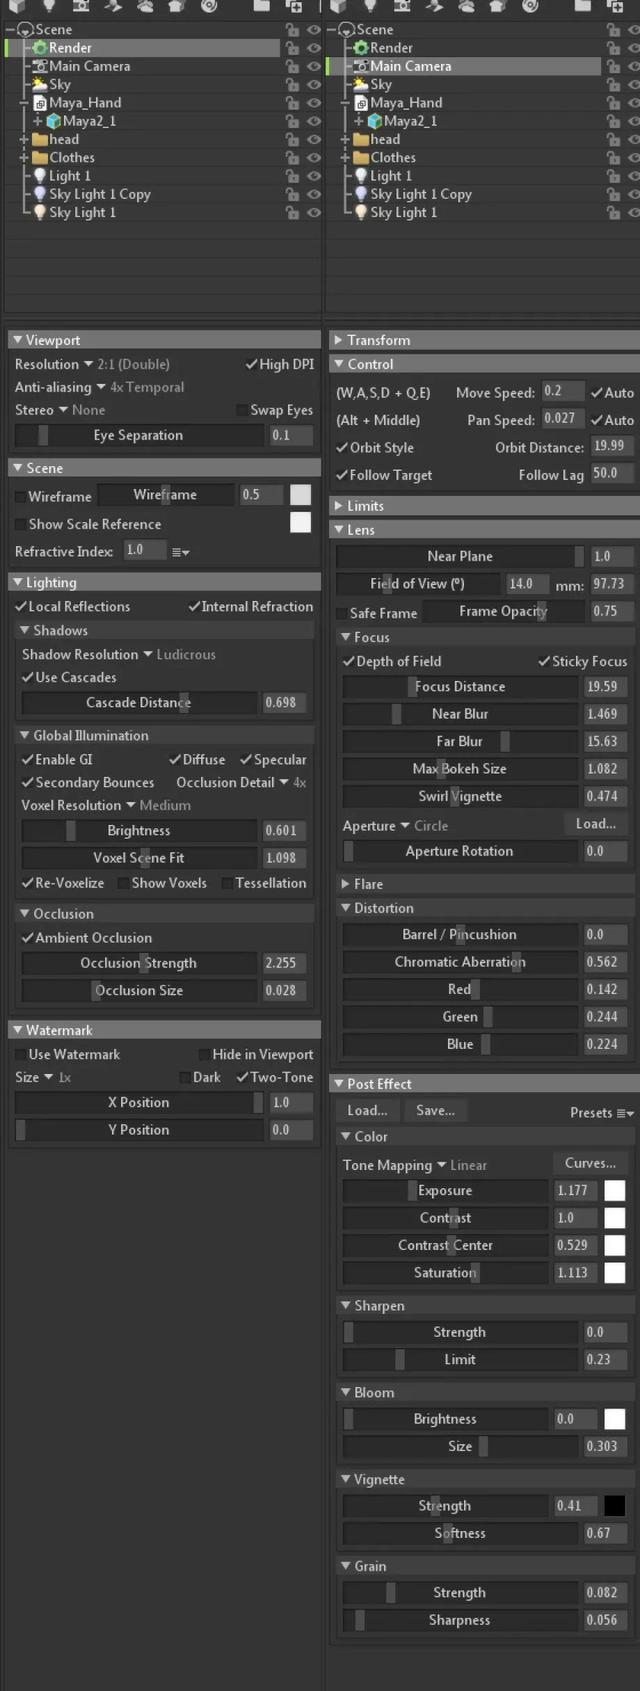
最 后
I had a lot of fun creating this character and learning brand new software and processes.和2Dcompared to art,It's definitely a big step forward in time management and technology.I'm happy as long as I find the right tutorial,问对的人,I can basically teach myself anything.The only problem is that everyone has their own steps and ways,So this also shows how broad the field is.
![[图片上传失败...(image-ef3637-1659601431362)]](/img/21/f7ed8fe54fc75b3927538f382aebcf.png)
边栏推荐
猜你喜欢


![[Cultivation of internal skills of string functions] strlen + strstr + strtok + strerror (3)](/img/96/946bbef52bd017ac6142c6b7485a86.png)
![情侣牵手[贪心 & 抽象]](/img/7d/1cafc000dc58f1c5e2e92150be7953.png)
随机推荐
三、实战---爬取百度指定词条所对应的结果页面(一个简单的页面采集器)
未上市就“一举成名”,空间媲美途昂,安全、舒适一个不落
MVCC是什么
PZK学C语言之字符串函数(一)
node中package解析、npm 命令行npm详解,node中的common模块化,npm、nrm两种方式查看源和切换镜像
小黑leetcode冲浪:94. 二叉树的中序遍历
请你说一下final关键字以及static关键字
【七夕快乐篇】Nacos是如何实现服务注册功能的?
10 个关于 Promise 和 setTimeout 知识的面试题,通过图解一次说透彻
MYS-6ULX-IOT 开发板测评——使用 Yocto 添加软件包
上课笔记(6)(2)——#742. 周末舞会
【数据挖掘概论】数据挖掘的简单描述
【CVA估值训练营】财务建模指南——第一讲
Privacy Computing Overview
七牛云图片上传
The role of the annotation @ EnableAutoConfiguration and how to use
npm基本操作及命令详解
【LeetCode】Summary of Two Pointer Problems
Mysql based
Nuclei(二)进阶——深入理解workflows、Matchers和Extractors