当前位置:网站首页>[Beijing Xunwei] i.mx6ull development board porting Debian file system
[Beijing Xunwei] i.mx6ull development board porting Debian file system
2022-07-04 20:17:00 【XunWei Electronics】
【 Beijing Xunwei 】i.MX6ULL transplant Debian file system
This tutorial will lead you to electronic transplantation in Xunwei Debian File system to i.MX6ULL On the terminator development board .

1 install Qemu and Debootstrap
Because we are Ubuntu Built on debian File system , So install these two tools and we use them directly apt-get The command is can . The order is as follows :
apt-get install binfmt-support qemu qemu-user-static debootstrap
As shown in the figure below :

2 extract Debain file system
To extract the file system, we use debootstrap command , We can execute the following order from debian Get the file system from the download source :
debootstrap --arch=armhf --foreign buster root https://mirrors.tuna.tsinghua.edu.cn/debian/
Command parameter parsing :
arch It specifies CPU framework
buster yes debian Version number . The latest is 10
foreign: This parameter needs to be specified when it is different from the host Architecture , Only do initialization unpacking
root: The folder to hold the file system
https://mirrors.tuna.tsinghua.edu.cn/debian/ It's a download source
As shown in the figure below :

The extraction time is long , Probably 10 About minutes , Everybody wait patiently , Successful extraction shows that linux Directory tree for , As shown in the figure below , If you fail to extract , You can extract a few more times , Or change the network :

3 Perfect the file system
Perfect the file system. Here we're going to use qemu, Why use qemu Well , Because we're in X86 Virtual machine operation , Not perfect arm File system , So we're going to use qemu To simulate the arm Environment .
(1)
Copy qemu-arm-static Just arrived at the basic building system , Use command
cp /usr/bin/qemu-arm-static root/usr/bin
As shown in the figure below :

(2)
Initialize file system
Carry out orders :
DEBIAN_FRONTEND=noninteractive
DEBCONF_NONINTERACTIVE_SEEN=true
LC_ALL=C
LANGUAGE=C
LANG=C chroot root debootstrap/debootstrap --second-stage
This command initializes the file system , As shown in the figure below :

Probably need 20 About minutes , Just wait patiently .
The initialization is successful, as shown in the following figure :

(3) Use command chroot root, Go to our initialized file system , As shown in the figure below :

(4) Use the command to create the following ,
echo "proc /proc proc defaults 0 0" >> etc/fstab
mkdir -p usr/share/man/man1/
mknod dev/console c 5 1
As shown in the figure below :

(5) Update download source , Use command vi /etc/apt/sources.list open source.list file , Then replace it with the following ,
deb http://mirrors.ustc.edu.cn/debian stable main contrib non-free
# deb-src http://mirrors.ustc.edu.cn/debian stable main contrib non-free
deb http://mirrors.ustc.edu.cn/debian stable-updates main contrib non-free
# deb-src http://mirrors.ustc.edu.cn/debian stable-updates main contrib non-free
# deb http://mirrors.ustc.edu.cn/debian stable-proposed-updates main contrib non-free
# deb-src http://mirrors.ustc.edu.cn/debian stable-proposed-updates main contrib non-free
Then save to exit , Use command apt-get update Lower source , As shown in the figure below :

(6) Use command apt-get install vim install vim Software , As shown in the figure below :

(7)
Create a new user , Use command adduser user, It's a password , The password for topeet, As shown in the figure below :

(8) Set up root password , Use command passwd root, The password for topeet, As shown in the figure below :

(9) Set up Ethernet , Enter the following command :
echo "auto eth0" > /etc/network/interfaces.d/eth0
echo "iface eth0 inet dhcp" >> /etc/network/interfaces.d/eth0
As shown in the figure below :

(10) because ull The performance of is relatively weak , So we won't install the desktop , Use it directly exit sign out qemu Just the environment , As shown in the figure below :

4 Package file system
Enter debian File system directory . Direct use command tar -cjf rootfs.tar.bz2 ./* that will do , As shown in the figure below :

5 Burning verification
Put the file system we packed into the burners , Other images can use the original one , Just replace the file system , And then burn the test , Start successfully as shown in the figure below ( No interface ) Shown :

边栏推荐
- kotlin 条件控制
- Creation of JVM family objects
- In operation (i.e. included in) usage of SSRs filter
- HDU 6440 2018 Chinese college student program design network competition
- kotlin 继承
- 1006 sign in and sign out (25 points) (PAT class a)
- HDU 1097 A hard puzzle
- Cbcgpprogressdlgctrl progress bar used by BCG
- Niuke Xiaobai month race 7 e applese's super ability
- 2022 Health Exhibition, health exhibition, Beijing Great Health Exhibition and health industry exhibition were held in November
猜你喜欢
HMM hidden Markov model and code implementation
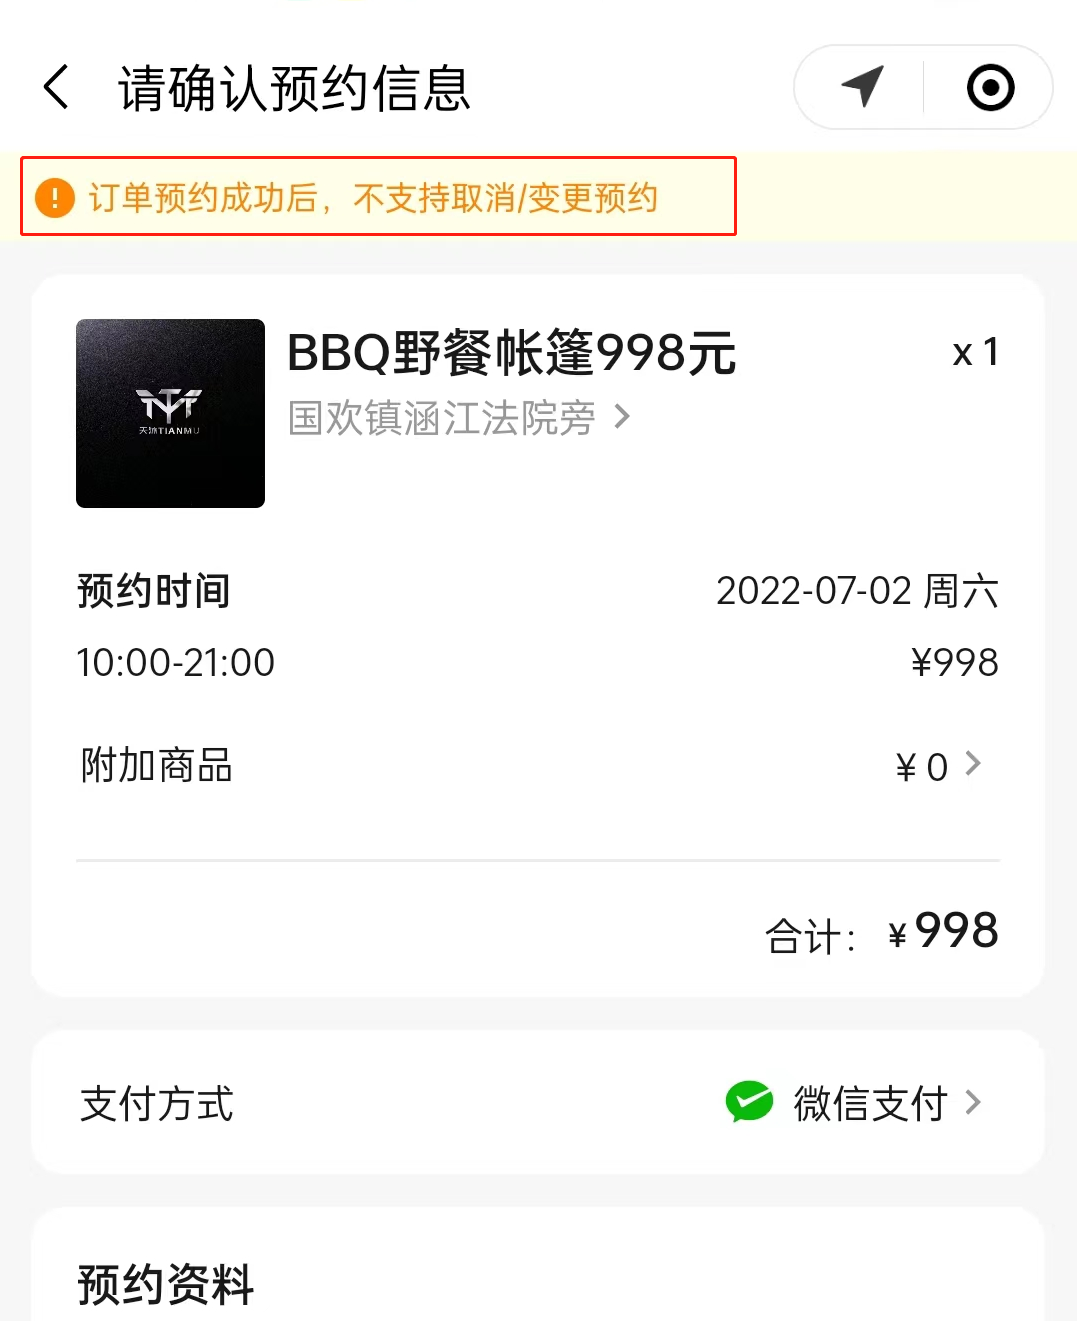
In the first month of its launch, the tourist praise rate of this campsite was as high as 99.9%! How did he do it?
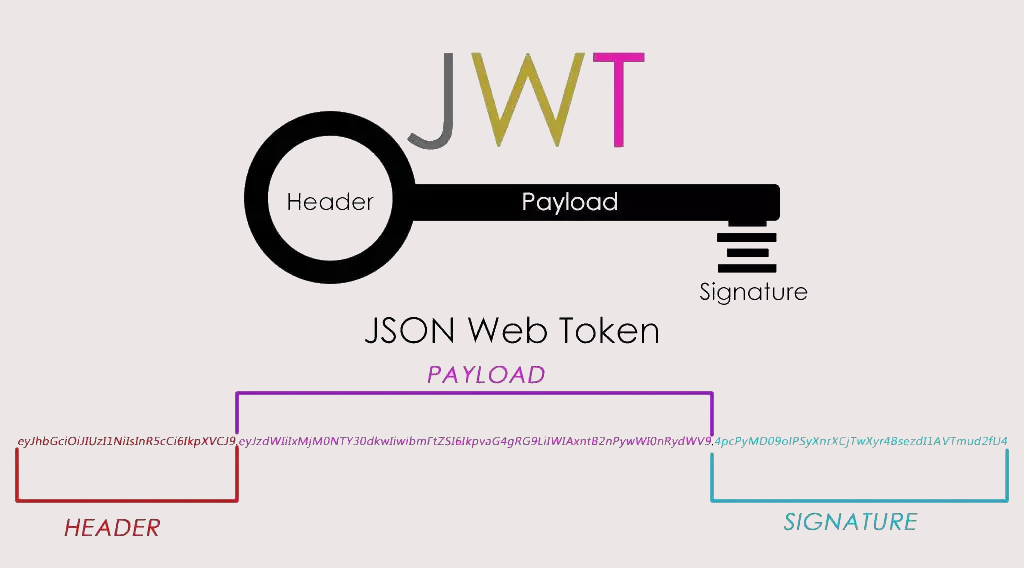
Actual combat simulation │ JWT login authentication

什么叫内卷?

做社交媒体营销应该注意些什么?Shopline卖家的成功秘笈在这里!
Chrome开发工具:VMxxx文件是什么鬼
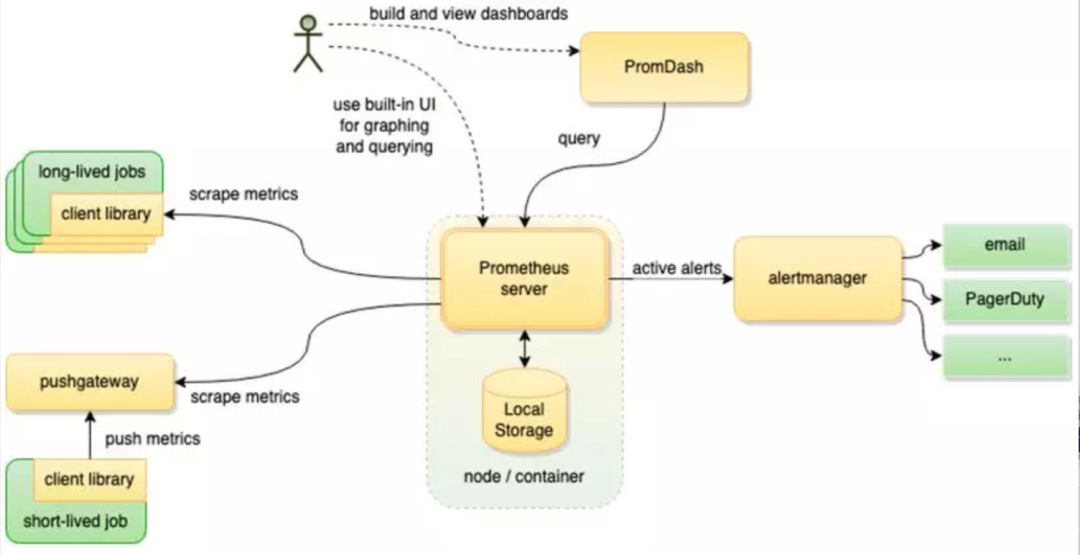
The company needs to be monitored. How do ZABBIX and Prometheus choose? That's the right choice!

Creation of JVM family objects
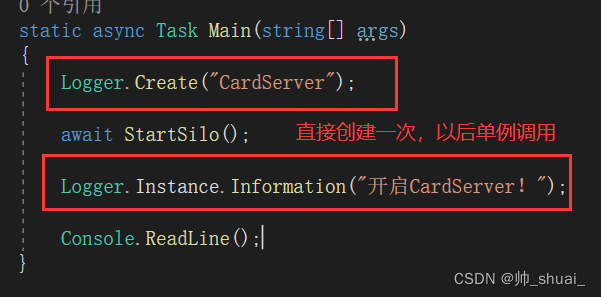
C server log module
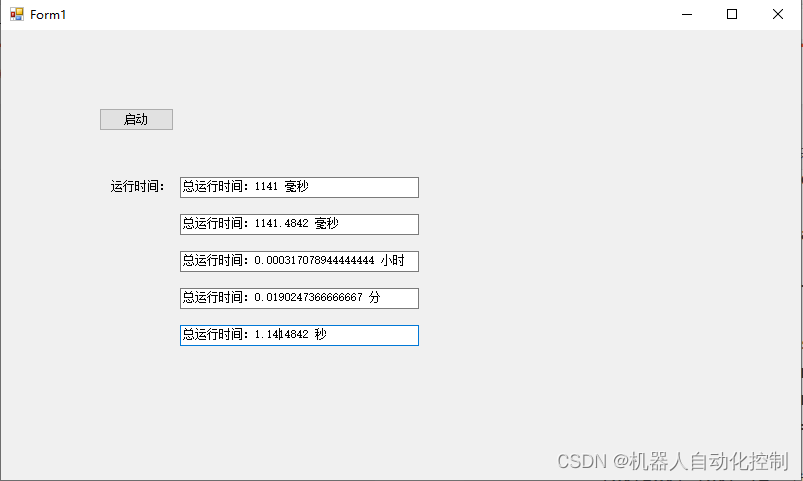
C# 使用StopWatch测量程序运行时间
随机推荐
In the first month of its launch, the tourist praise rate of this campsite was as high as 99.9%! How did he do it?
92. (cesium chapter) cesium building layering
Find the nth power of 2
Pytoch learning (4)
Delete the characters with the least number of occurrences in the string [JS, map sorting, regular]
Chrome development tool: what the hell is vmxxx file
HDU 1097 A hard puzzle
1002. A+b for Polynomials (25) (PAT class a)
Dark horse programmer - software testing - stage 08 2-linux and database-23-30-process port related, modify file permissions, obtain port number information, program and process related operations, Li
华为nova 10系列支持应用安全检测功能 筑牢手机安全防火墙
Swagger suddenly went crazy
紫光展锐完成全球首个 5G R17 IoT NTN 卫星物联网上星实测
Creation of JVM family objects
English grammar_ Noun - use
同事的接口文档我每次看着就头大,毛病多多。。。
Neural network IOT platform construction (IOT platform construction practical tutorial)
Prometheus installation
B2B mall system development of electronic components: an example of enabling enterprises to build standardized purchase, sale and inventory processes
多表操作-外连接查询
Key rendering paths for performance optimization