当前位置:网站首页>Using nocalhost to develop microservice application on rainbow
Using nocalhost to develop microservice application on rainbow
2022-07-07 08:19:00 【Rainbond】
This article will show you how to use Nocalhost Rapid development of Rainbond Development process and practical operation steps of microservice application on .
Nocalhost Can be directly in Kubernetes Development and application in ,Rainbond Rapid deployment of microservice projects , No need to write Yaml,Nocalhost combination Rainbond Accelerate our microservice development efficiency .
One . brief introduction
Nocalhost Is an open source based on IDE Cloud native application development tools :
- Directly in Kubernetes Build... In a cluster 、 Testing and debugging applications
- Provide easy to use IDE plug-in unit ( Support VS Code and JetBrains), Even in Kubernetes Development and debugging in the cluster ,Nocalhost It can also maintain the same development experience as local development
- Use instant file synchronization for development : Instantly synchronize your code changes to the remote container , There is no need to rebuild the image or restart the container .
Rainbond It is a cloud native application management platform :
- Easy to use , You don't need to understand containers 、Kubernetes And underlying complex technologies , Support management of multiple Kubernetes colony , And manage the whole life cycle of enterprise applications . The main functions include application development environment 、 Application market 、 Microservice architecture 、 Application delivery 、 Application operation and maintenance 、 Application level multi cloud management, etc .
Two . Local + Rainbond Develop microservices
We used to be here + Rainbond When developing microservices , The modules to be developed are run locally , Other modules run on Rainbond On , We go through Rainbond Gateway to communicate with the local 、 Joint tune .
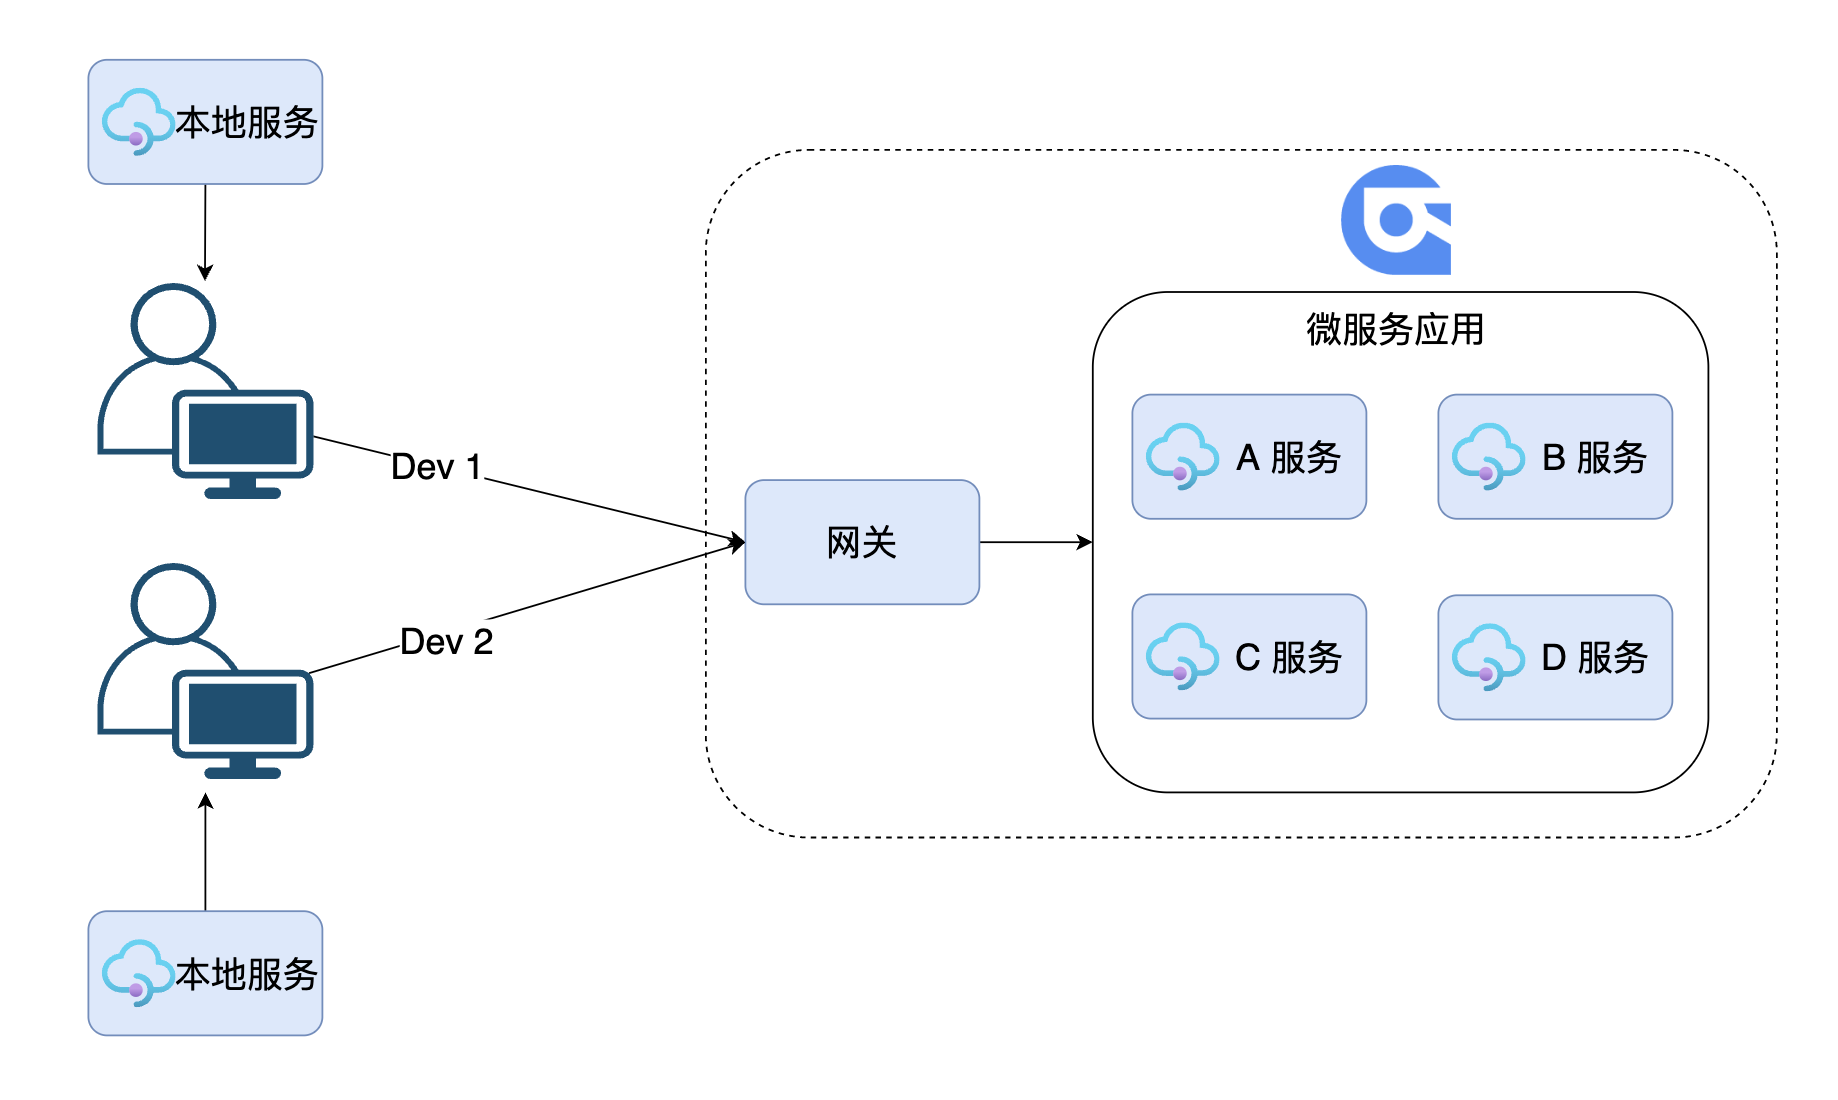
There will be some problems :
- It is difficult for many people to develop joint commissioning
- Local environment differentiation
- Cannot go through the registry (Nacos) Call other microservices
- long-range Debug More difficult
- Limited by local resources
3、 ... and . Use Nocalhost + Rainbond Develop microservices
Now let's go through Nocalhost + Rainbond When developing microservices , All services are running on Rainbond On , When it comes to development, local Vscode Go straight to Rainbond In the component , And synchronize with the local code in real time Rainbond In the component . When multiple people develop joint commissioning , It can be done by Rainbond Built in Service Mesh Conduct joint commissioning between services .
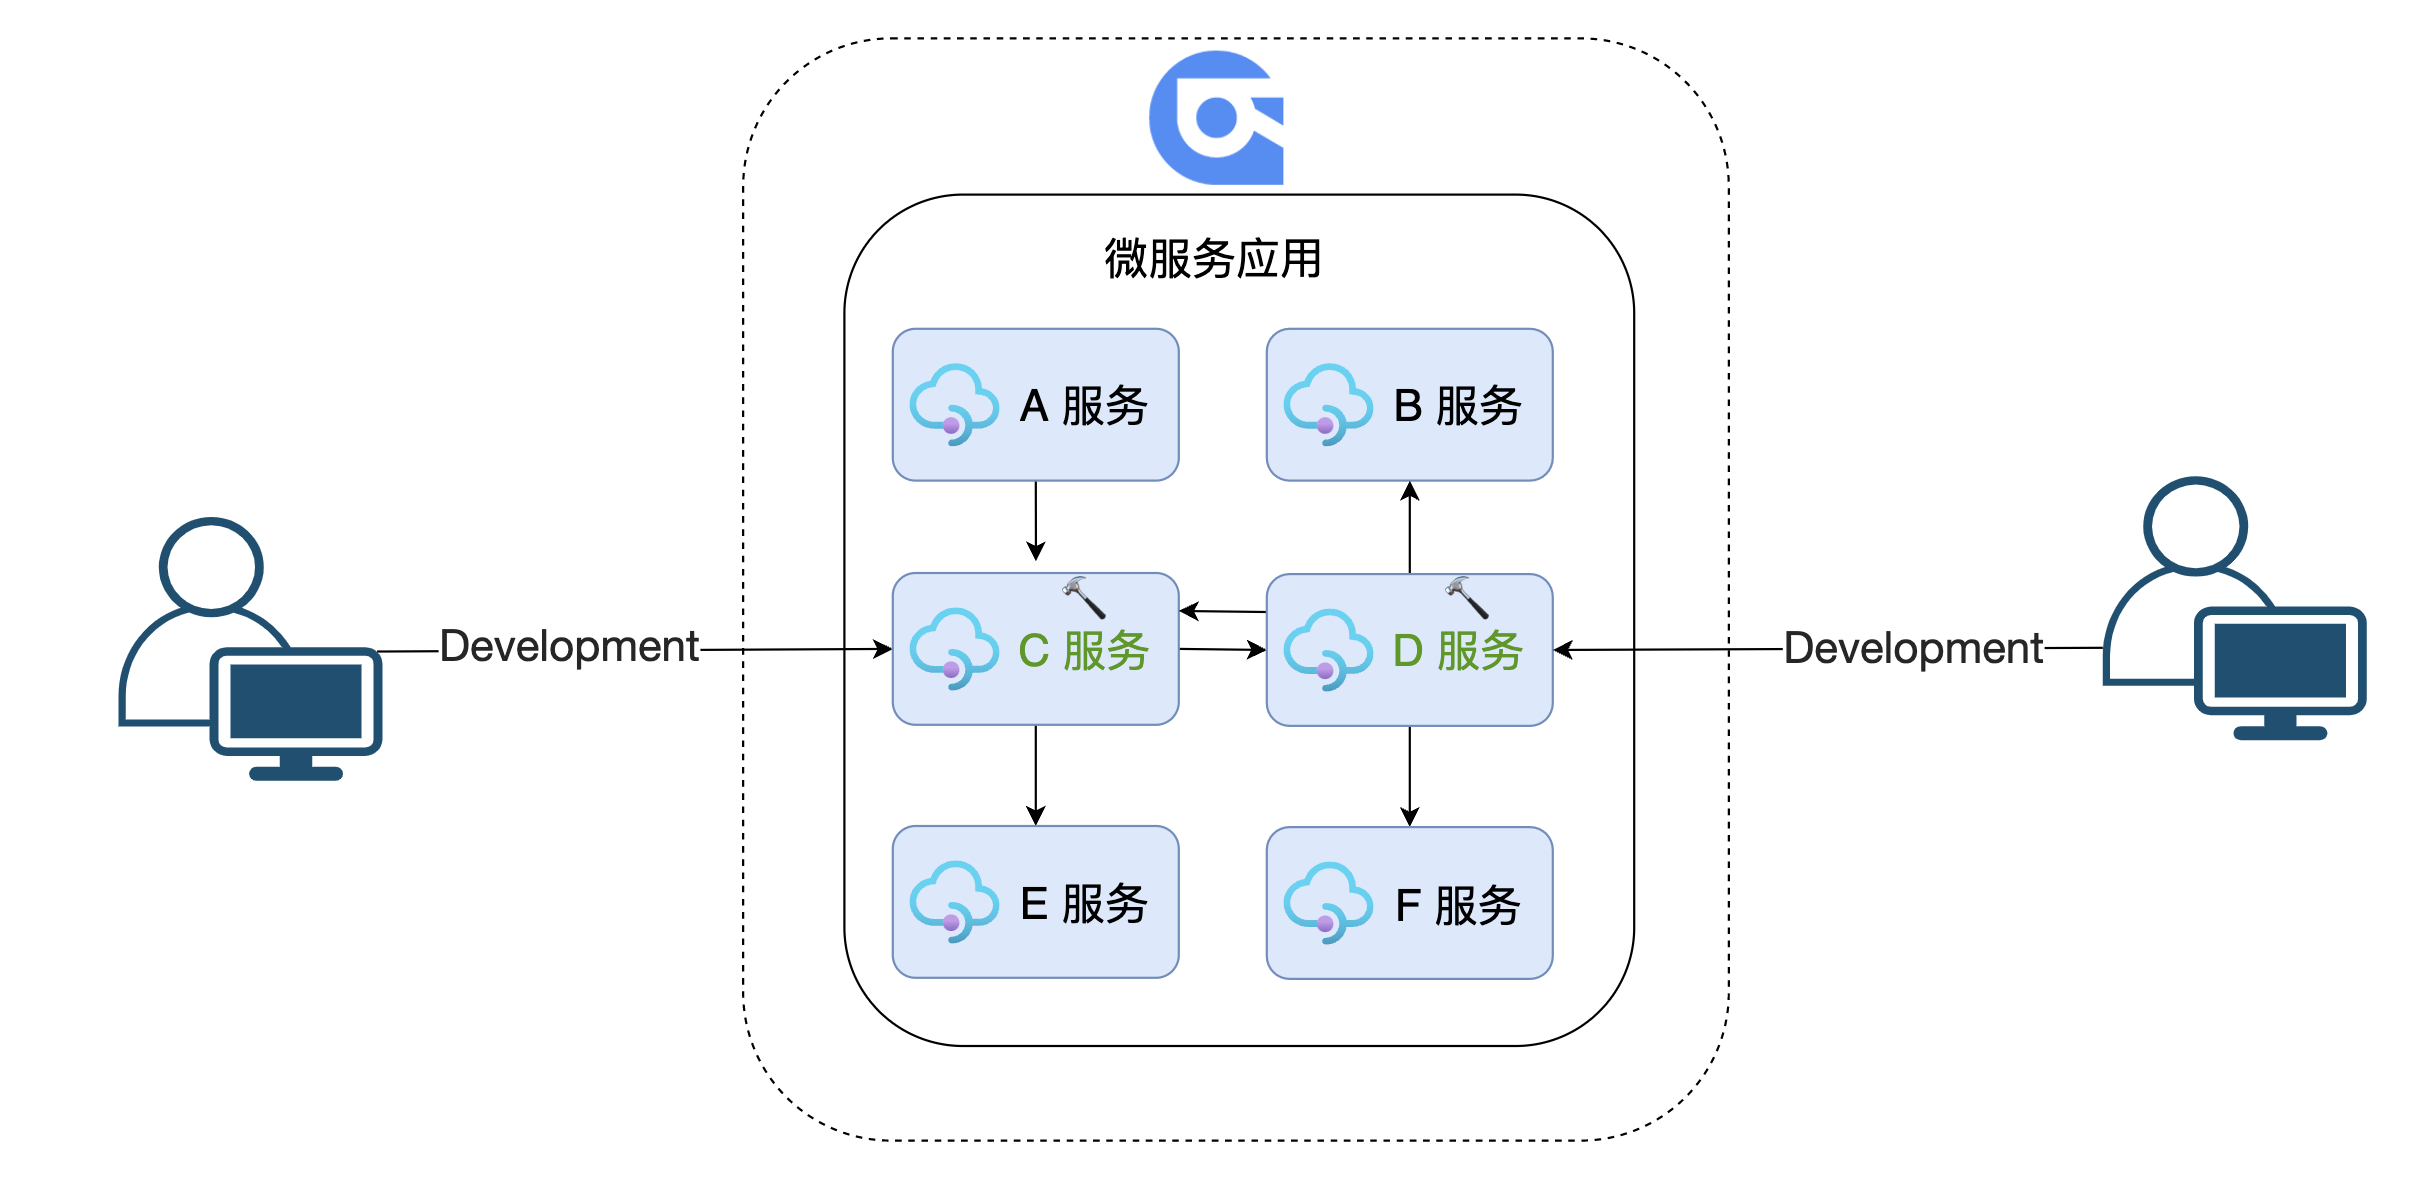
Use Nocalhost Development , It can solve the problems encountered in local development :
- Multi person joint commissioning and development is more convenient
- Services are running on Rainbond On , No longer limited to local
- Closer to the production environment
- long-range Debug
- Through the registry (Nacos) Call other microservice components
Four . Practice the steps
Nocalhost Currently, two development modes are supported :
- Repliace DevMode
- Duplicate DevMode
This article will mainly introduce Replace DevMode, When entering Replace DevMode when ,Nocalhost Would be right Components Do the following :
Reduce the number of copies to 1
Replace the container image with the development image
Add one more sidecar Containers .
Forward a local port to the file synchronization server .
Start the local file synchronization client .
Open the remote terminal .
4.1 install Nocalhost plug-in unit
Nocalhost Support VScodeJetBrains , Here we mainly introduce VScode Plug in installation Refer to the official website .
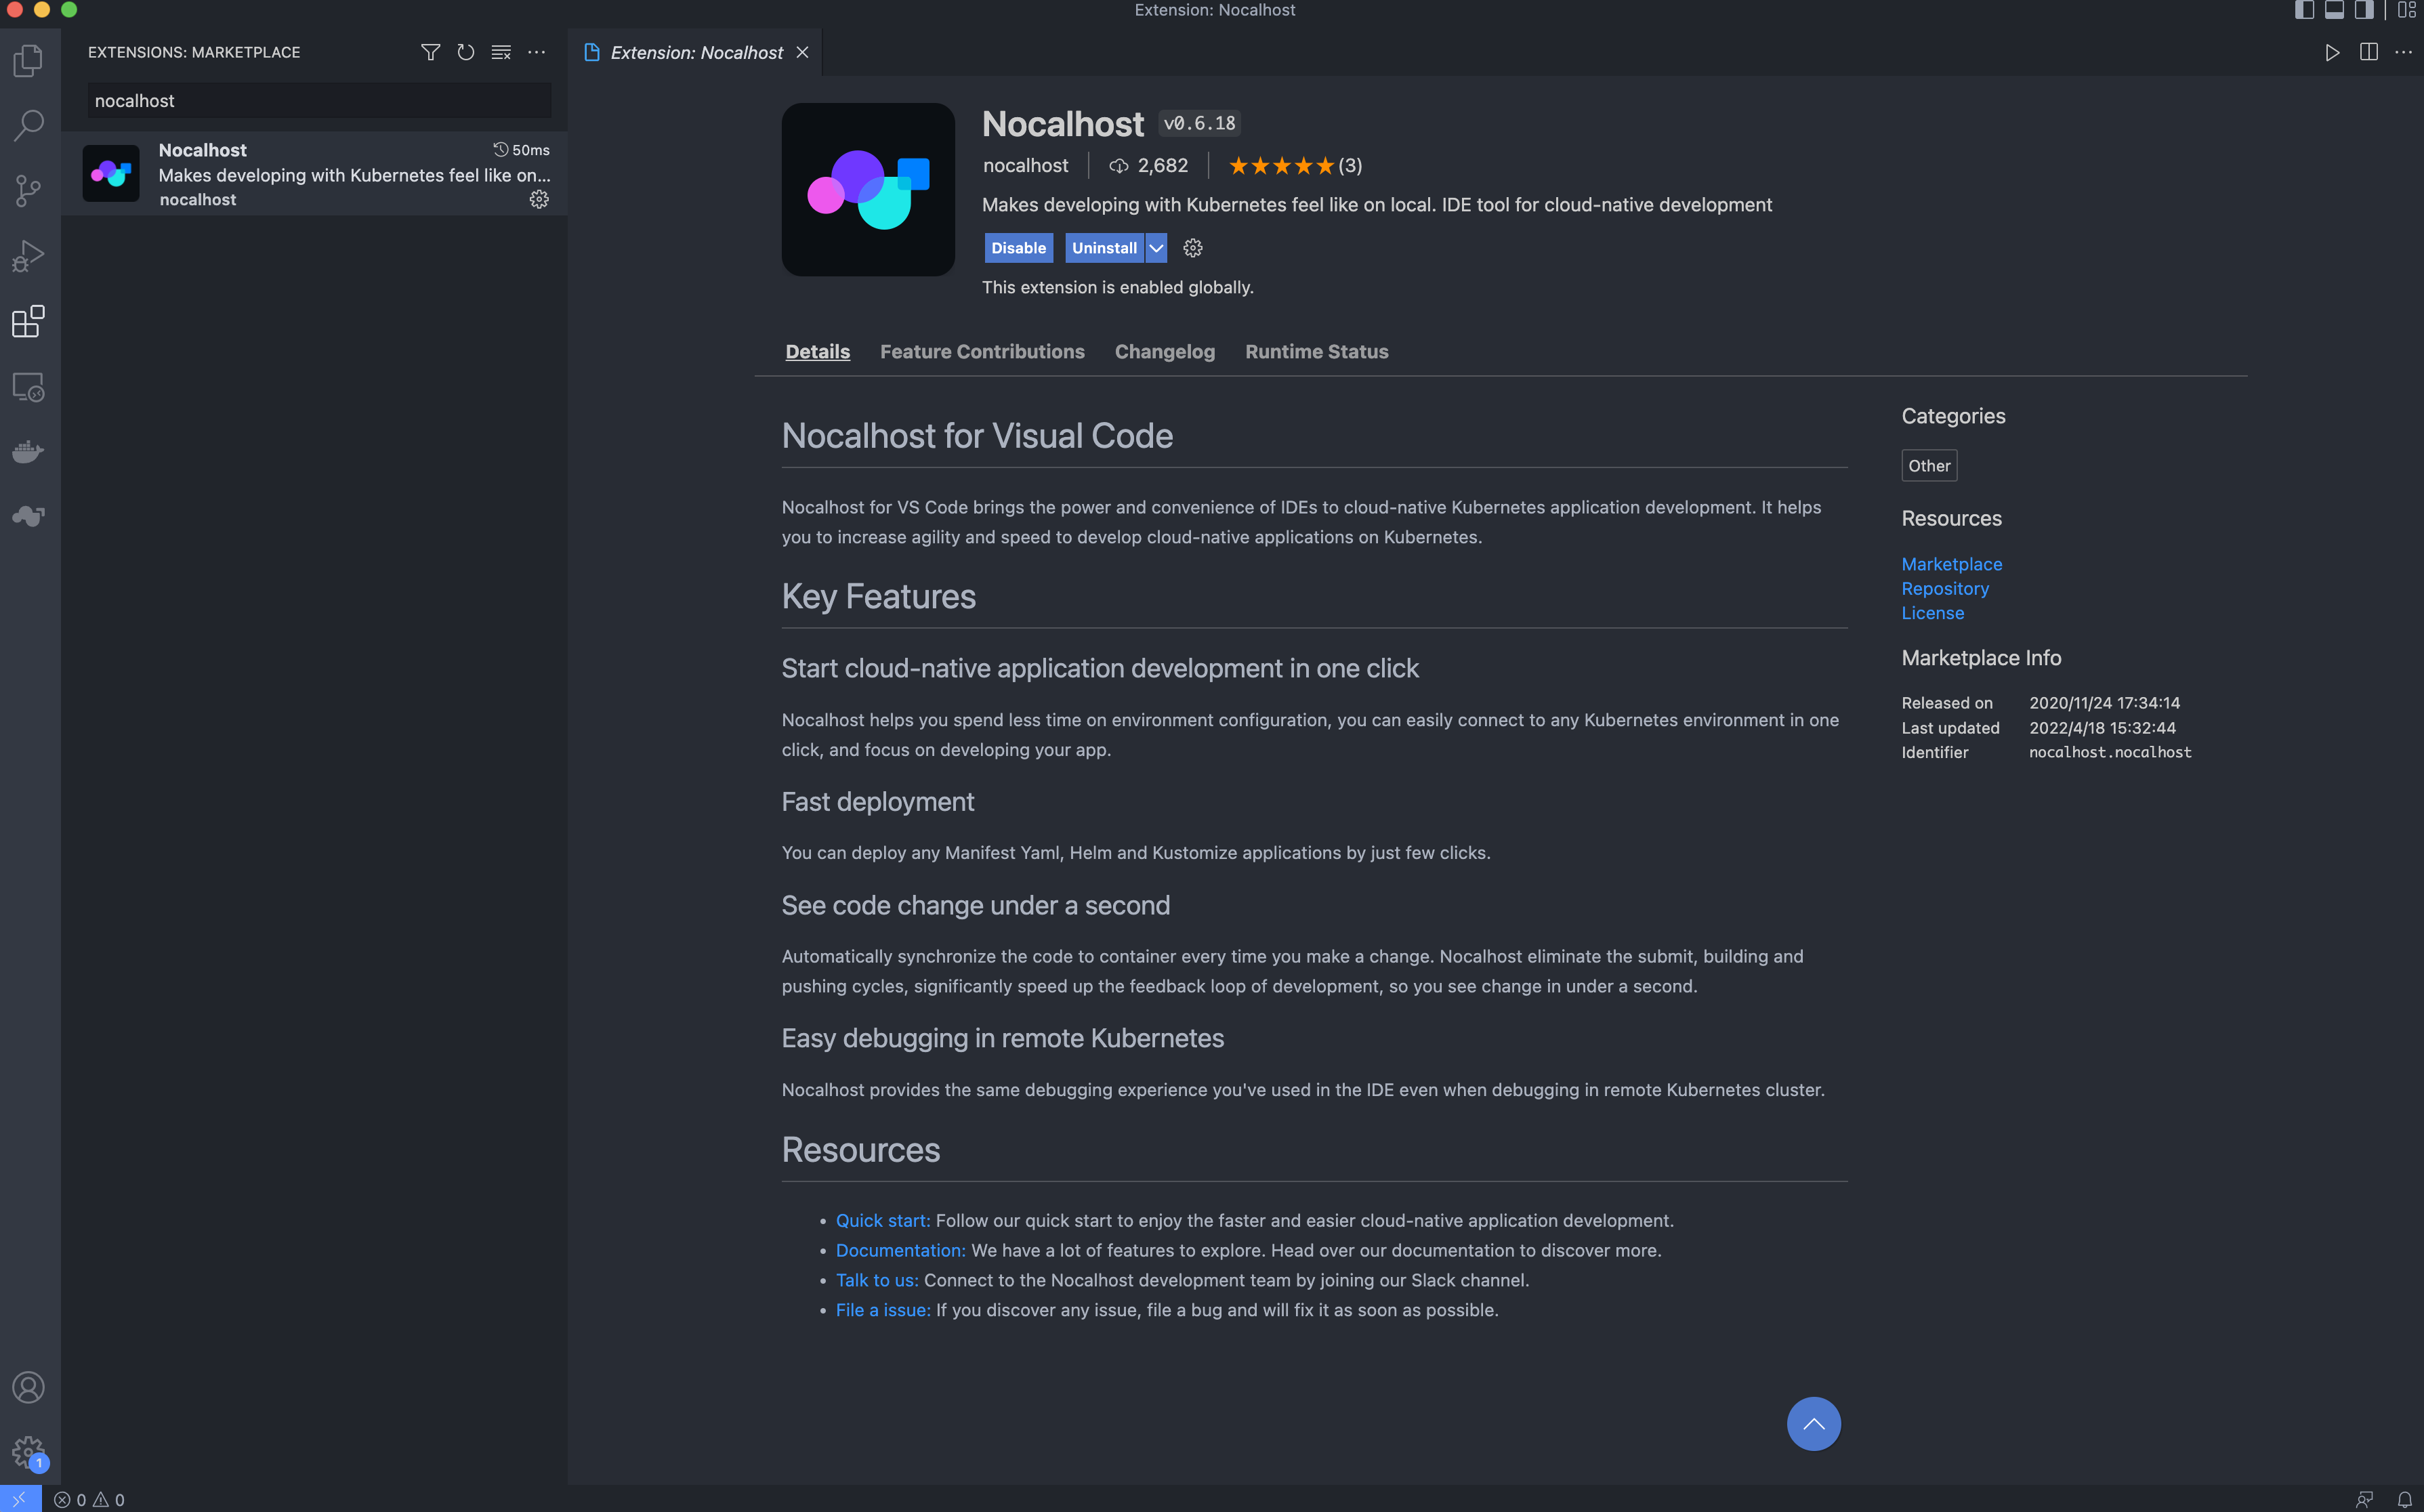
- open VScode, Click on the left
ExtensionButton Icon
Icon - Type in the search box
NocalhostchoiceNocalhost plug-in unit, And click the Install Button
4.2 install Rainbond
We choose Host based installation Rainbond
4.3 Nocalhost docking Rainbond colony
- obtain
kubeconfigfile , Get into Rainbond Cluster view -> Click node configuration -> kubeconfig
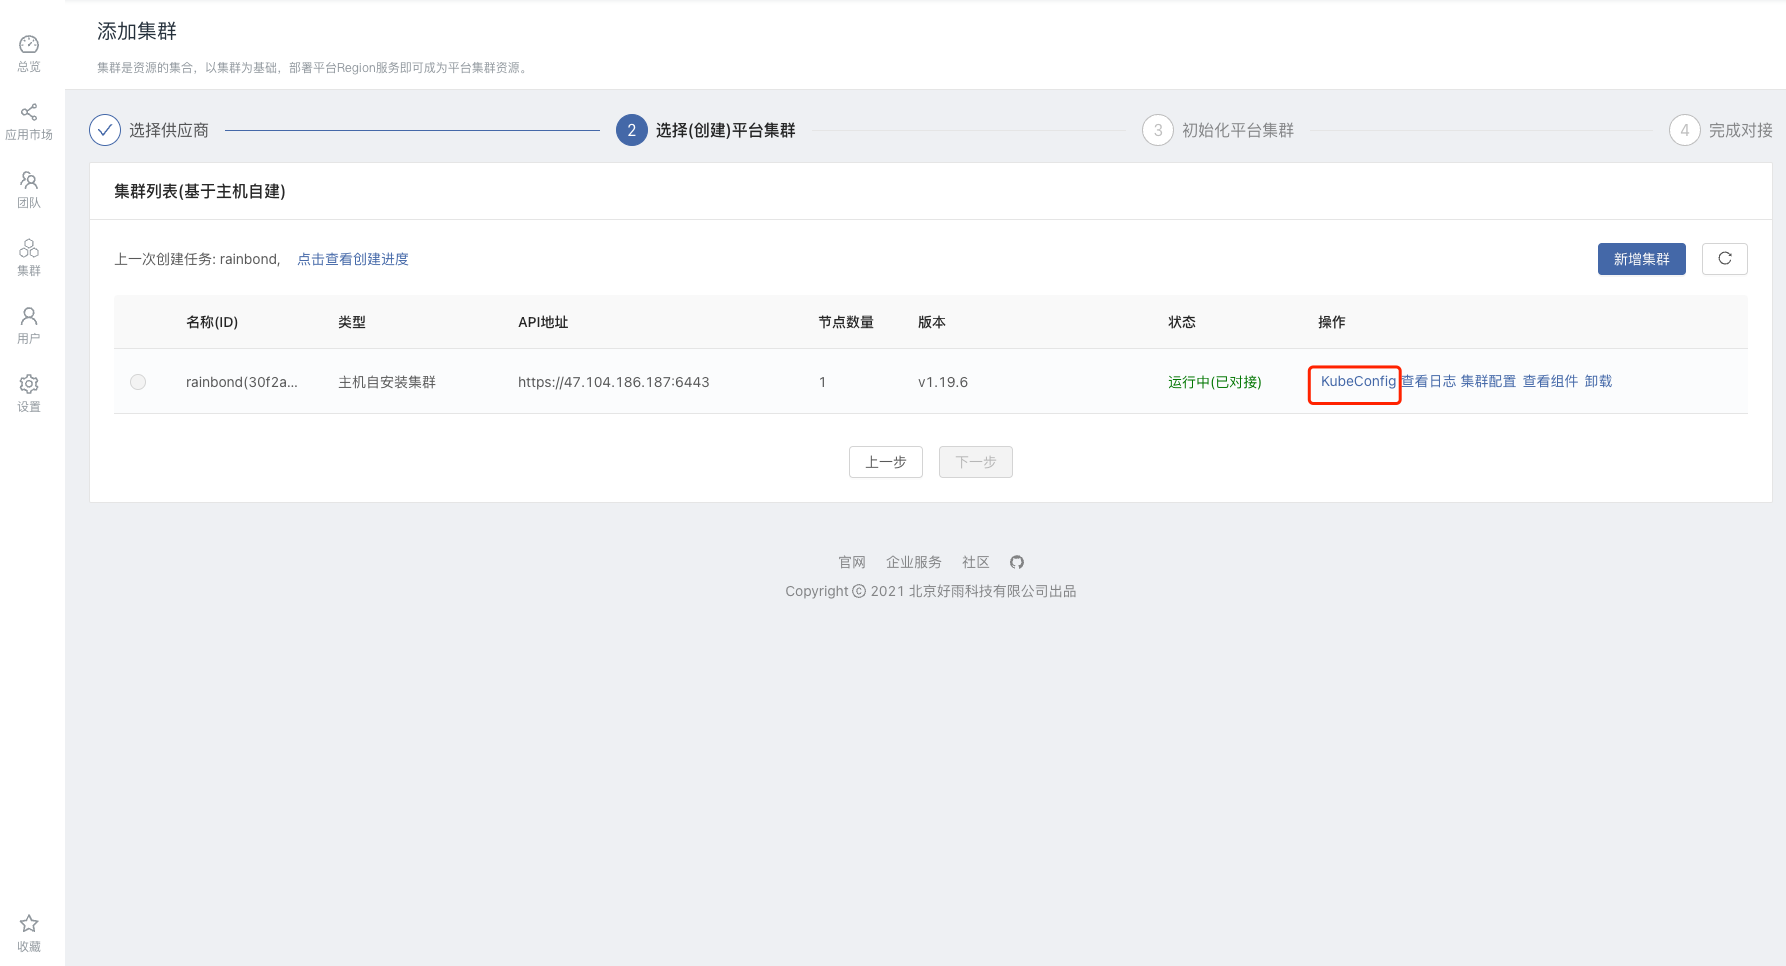
We will
kubeconfigCopy the file locally and save it asyamlfile .open Vscode, Click button
, open Nocalhost plug-in unit , choice Connect to Cluster, Choose us
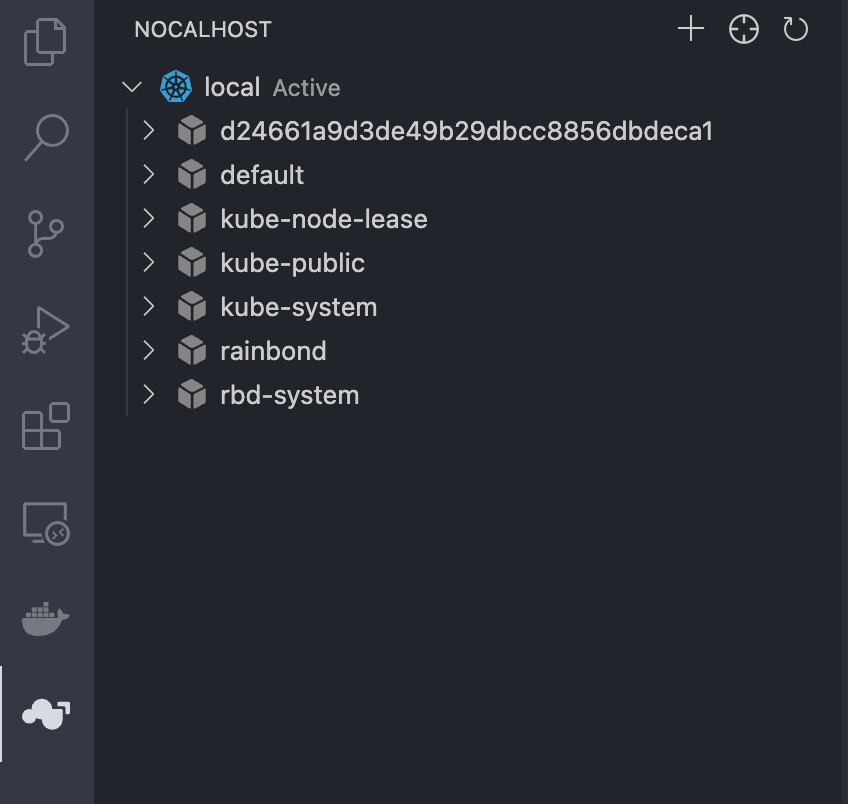
kubeconfigPath to file , Click on Add Cluster, Add clusters .When I'm done , Here's the picture :
4.4 stay Rainbond Upper Department Spring Cloud Microservices
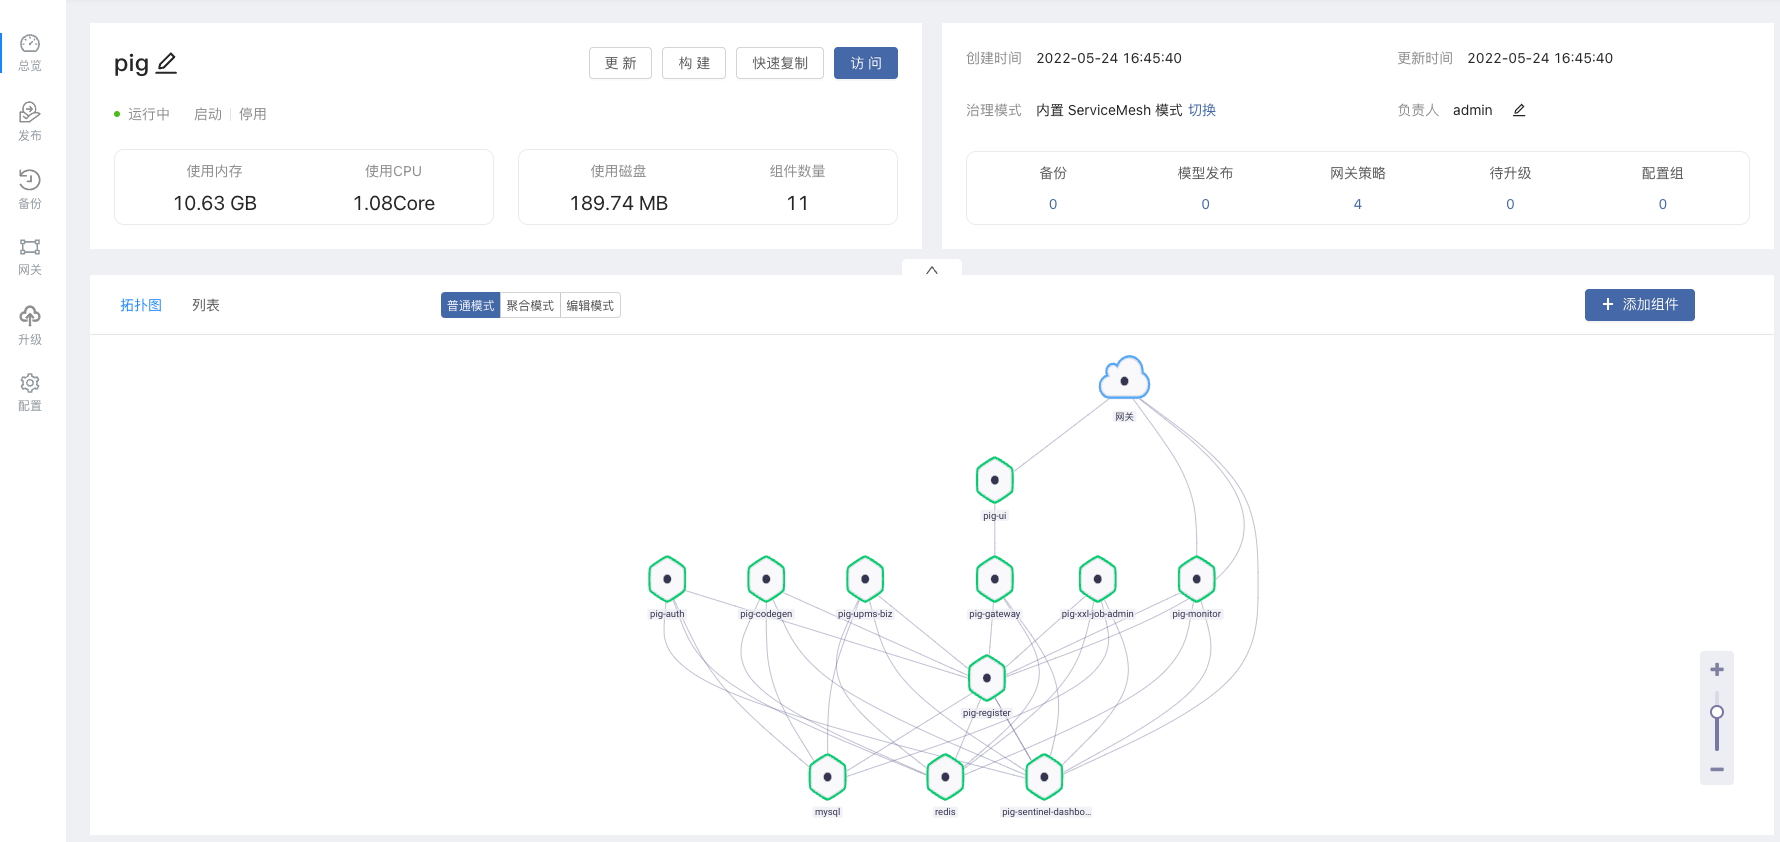
Here choose to install from the open source app store Spring Cloud Pig Microservice component , Search the app store for Pig Installation .
After deployment , The effect is as follows :
4.5 Get into Nocalhost Development mode
We are already here Vscode The cluster is connected in , And is already Rainbond Installed in Spring Cloud Pig Microservices , So next we'll be here Vscode Select one of the components for development , Here, in order to make the effect more obvious , Select development pig-ui Components .
4.5.1 clone Pig-ui Code to local
git clone https://gitee.com/zhangbigqi/pig-ui4.5.2 Start local development
open Vscode, Click button , Find our Pig-ui Components , Because the app is installed from the open source app store ,Deployment The name is an automatically generated string , We need to query in the component .
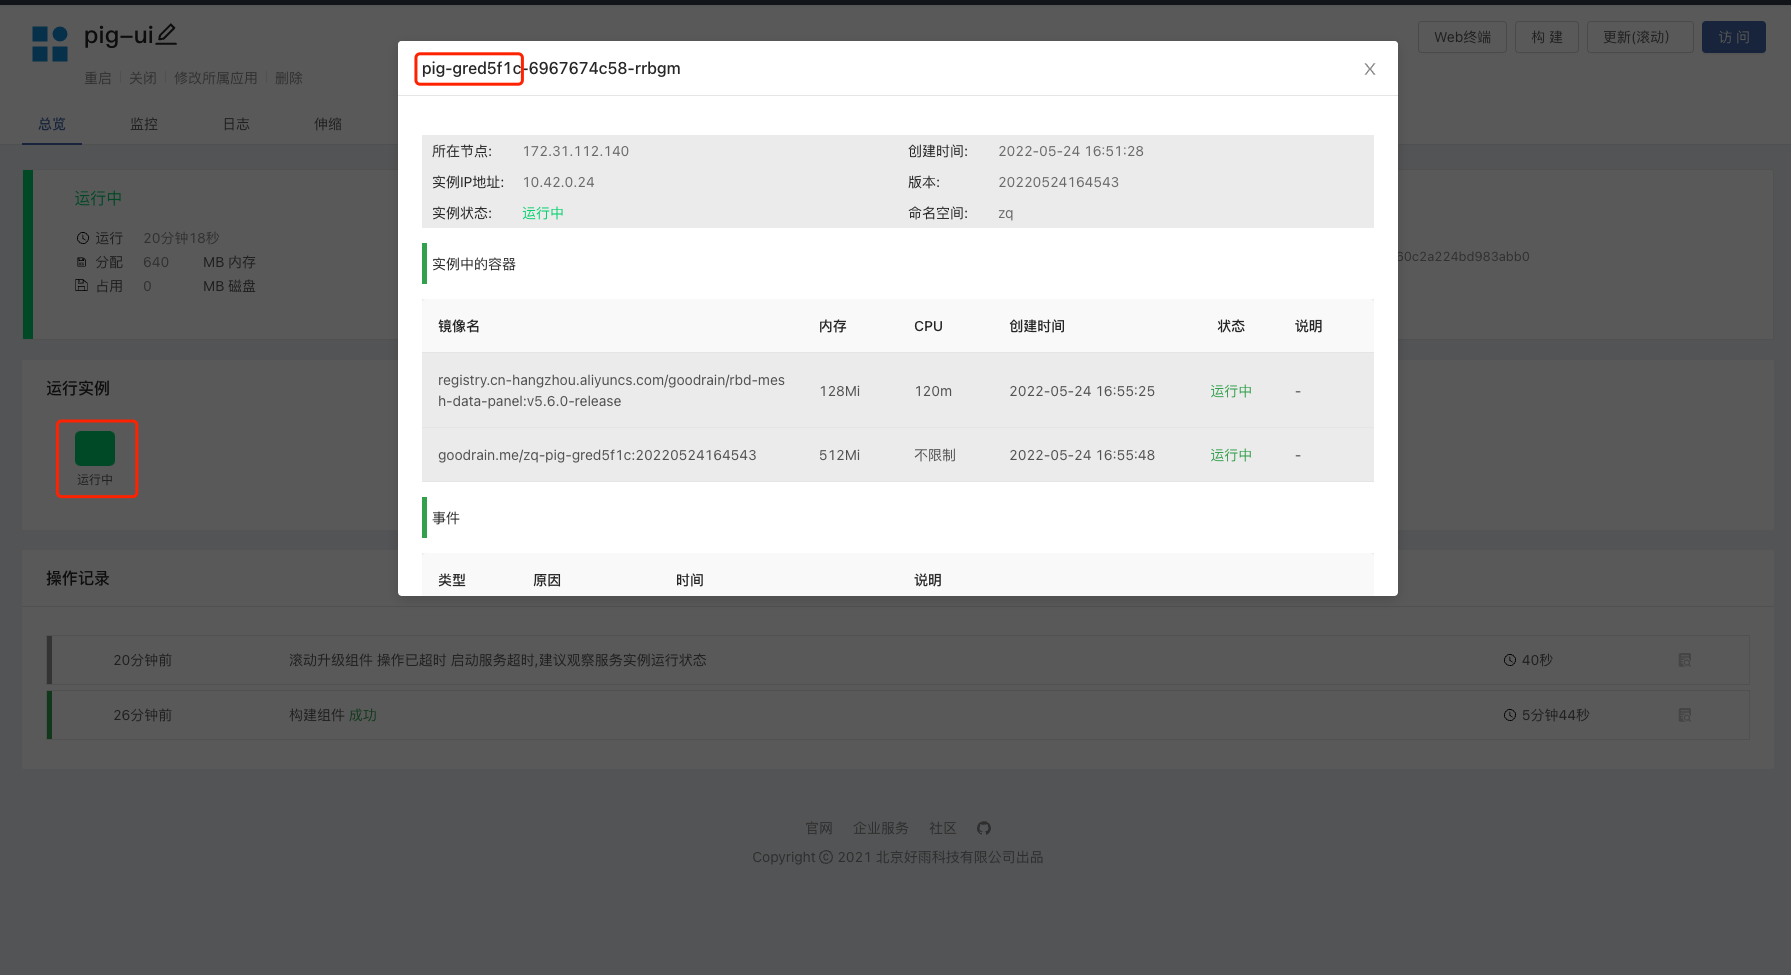

We click next to enter the development mode ,
- Prompt to select container , We choose
gred5f1cThis container , The remaining container is Rainbond Of Mesh Containers , For internal communication , Irreplaceable - Prompt for source directory , Select the code directory we just cloned .
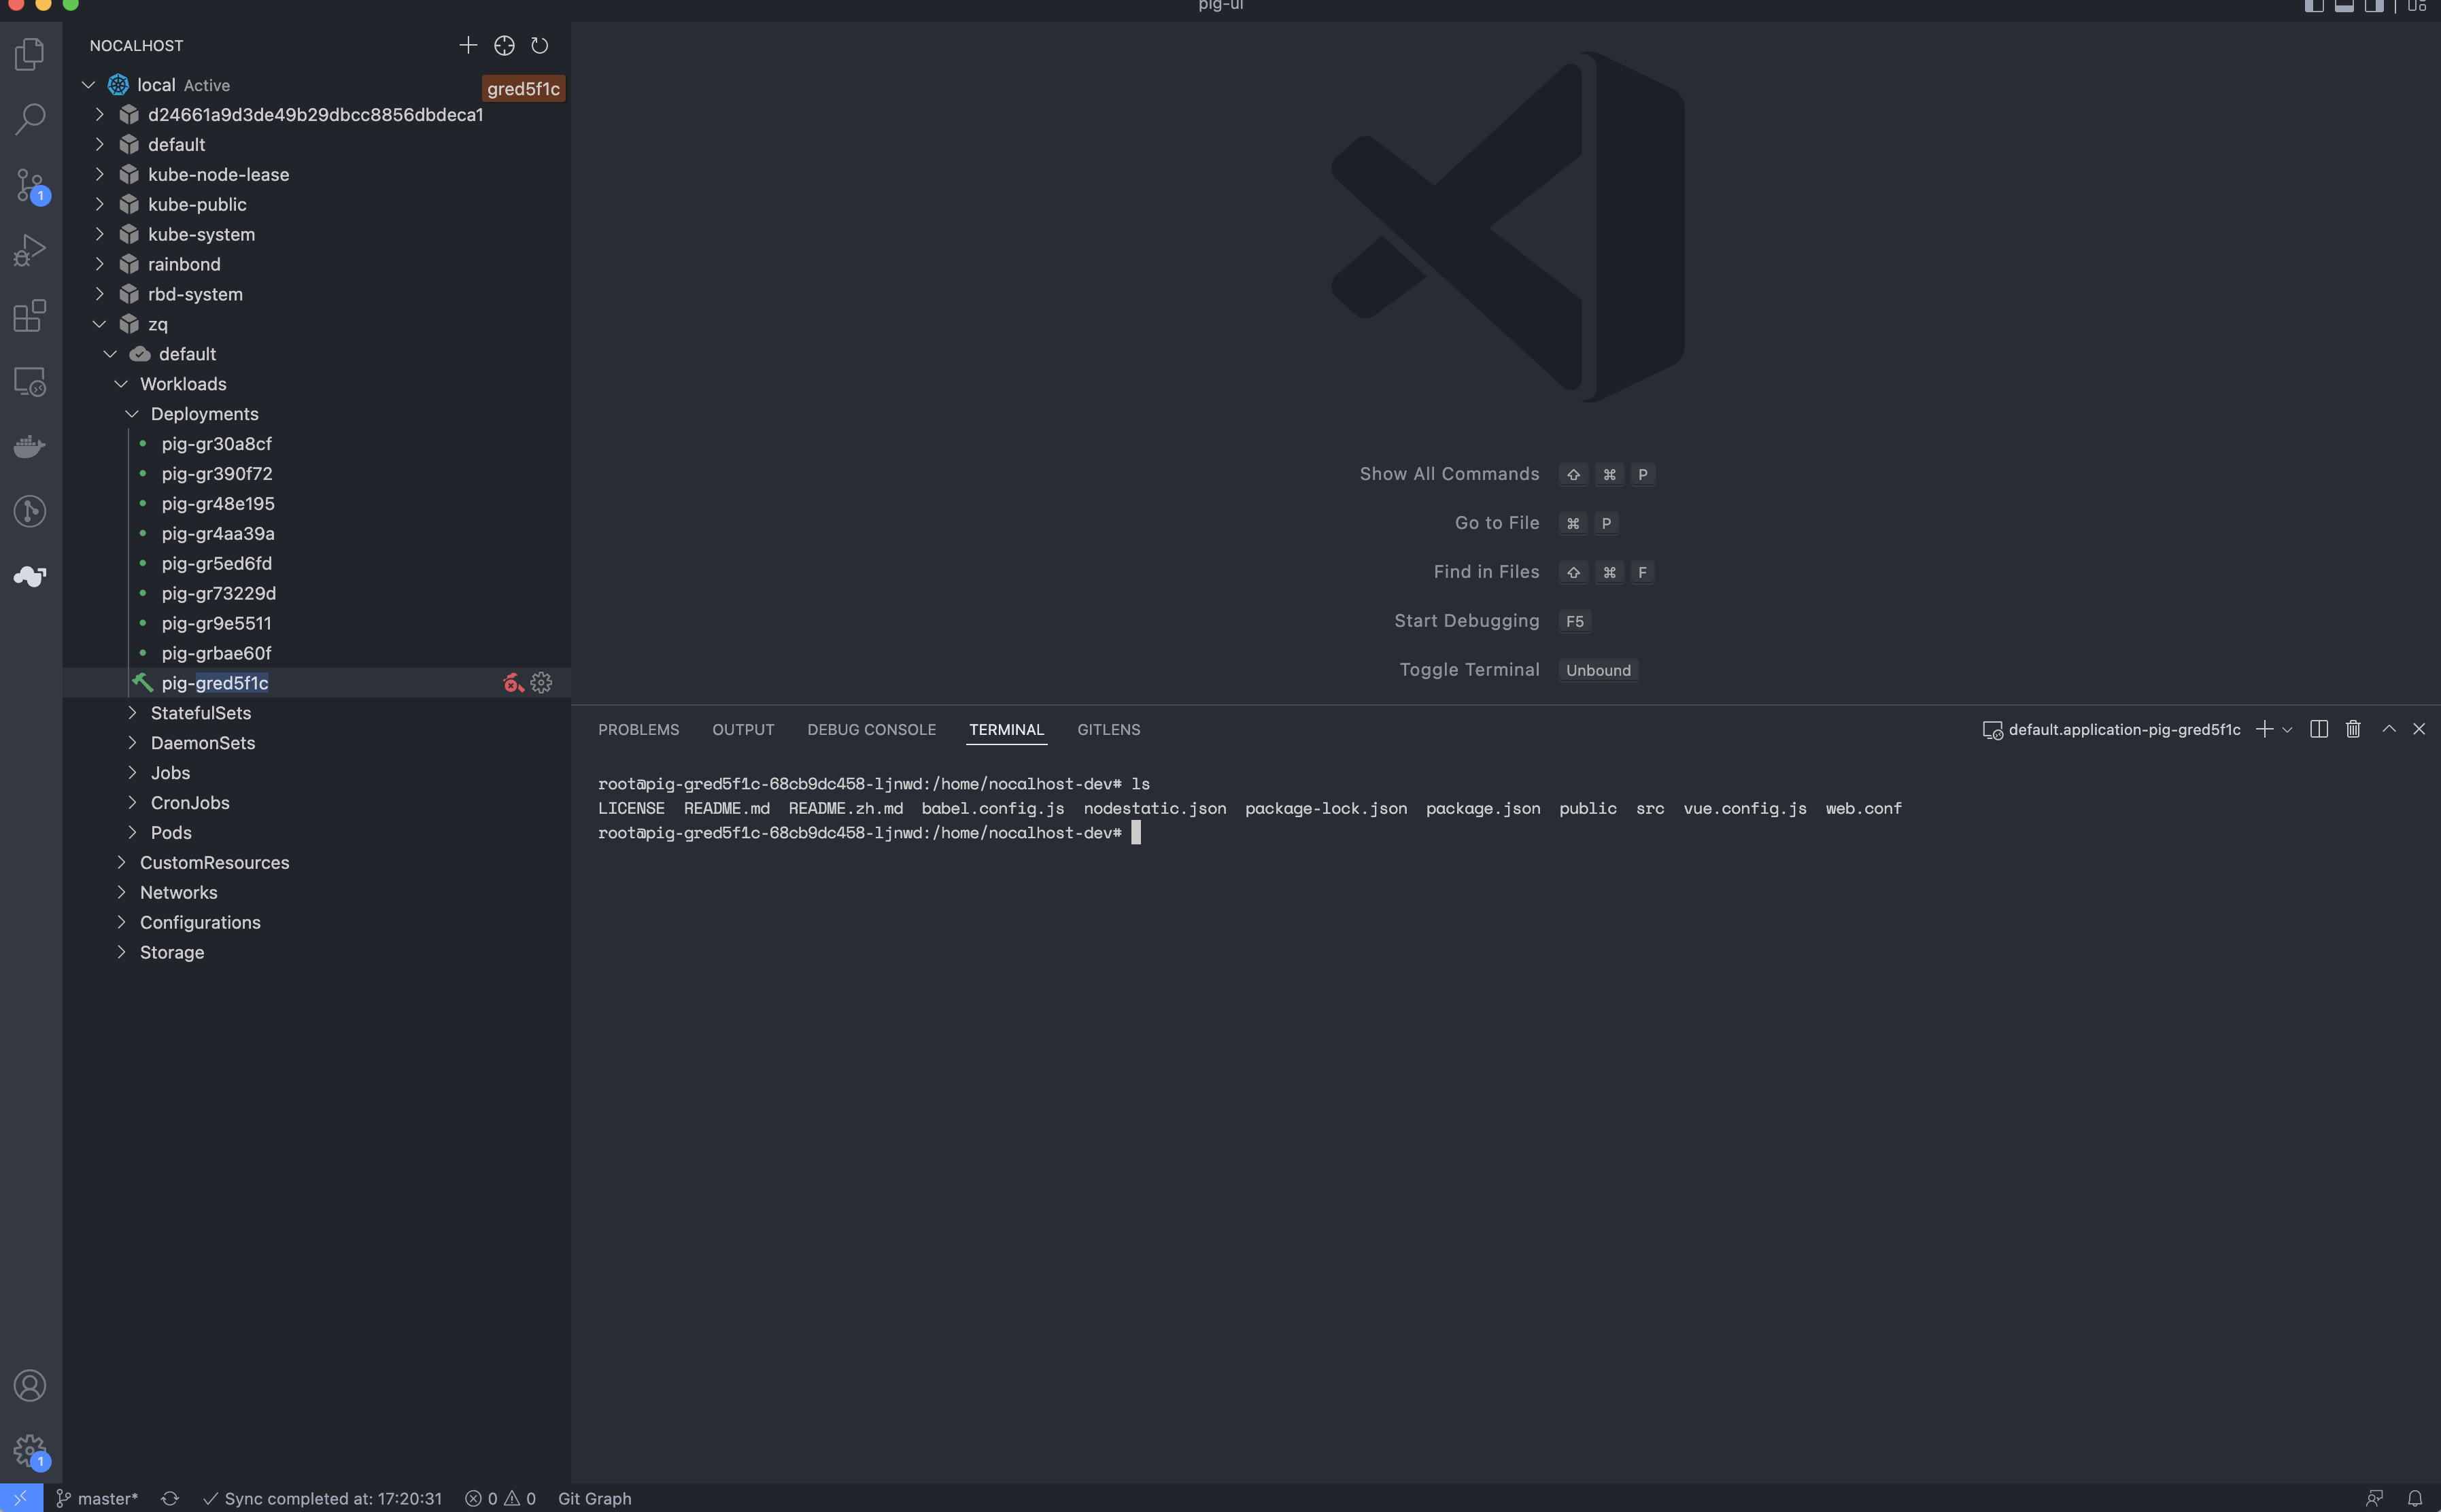
- Wait for a moment , The terminal interface of the remote container will be opened by default, and the files in the container will be synchronized with the local real-time , as follows :
4.5.3 Start project
Installation project dependency , perform
npm installRun the project
npm run dev
The effect is as follows , The port in the container is 80
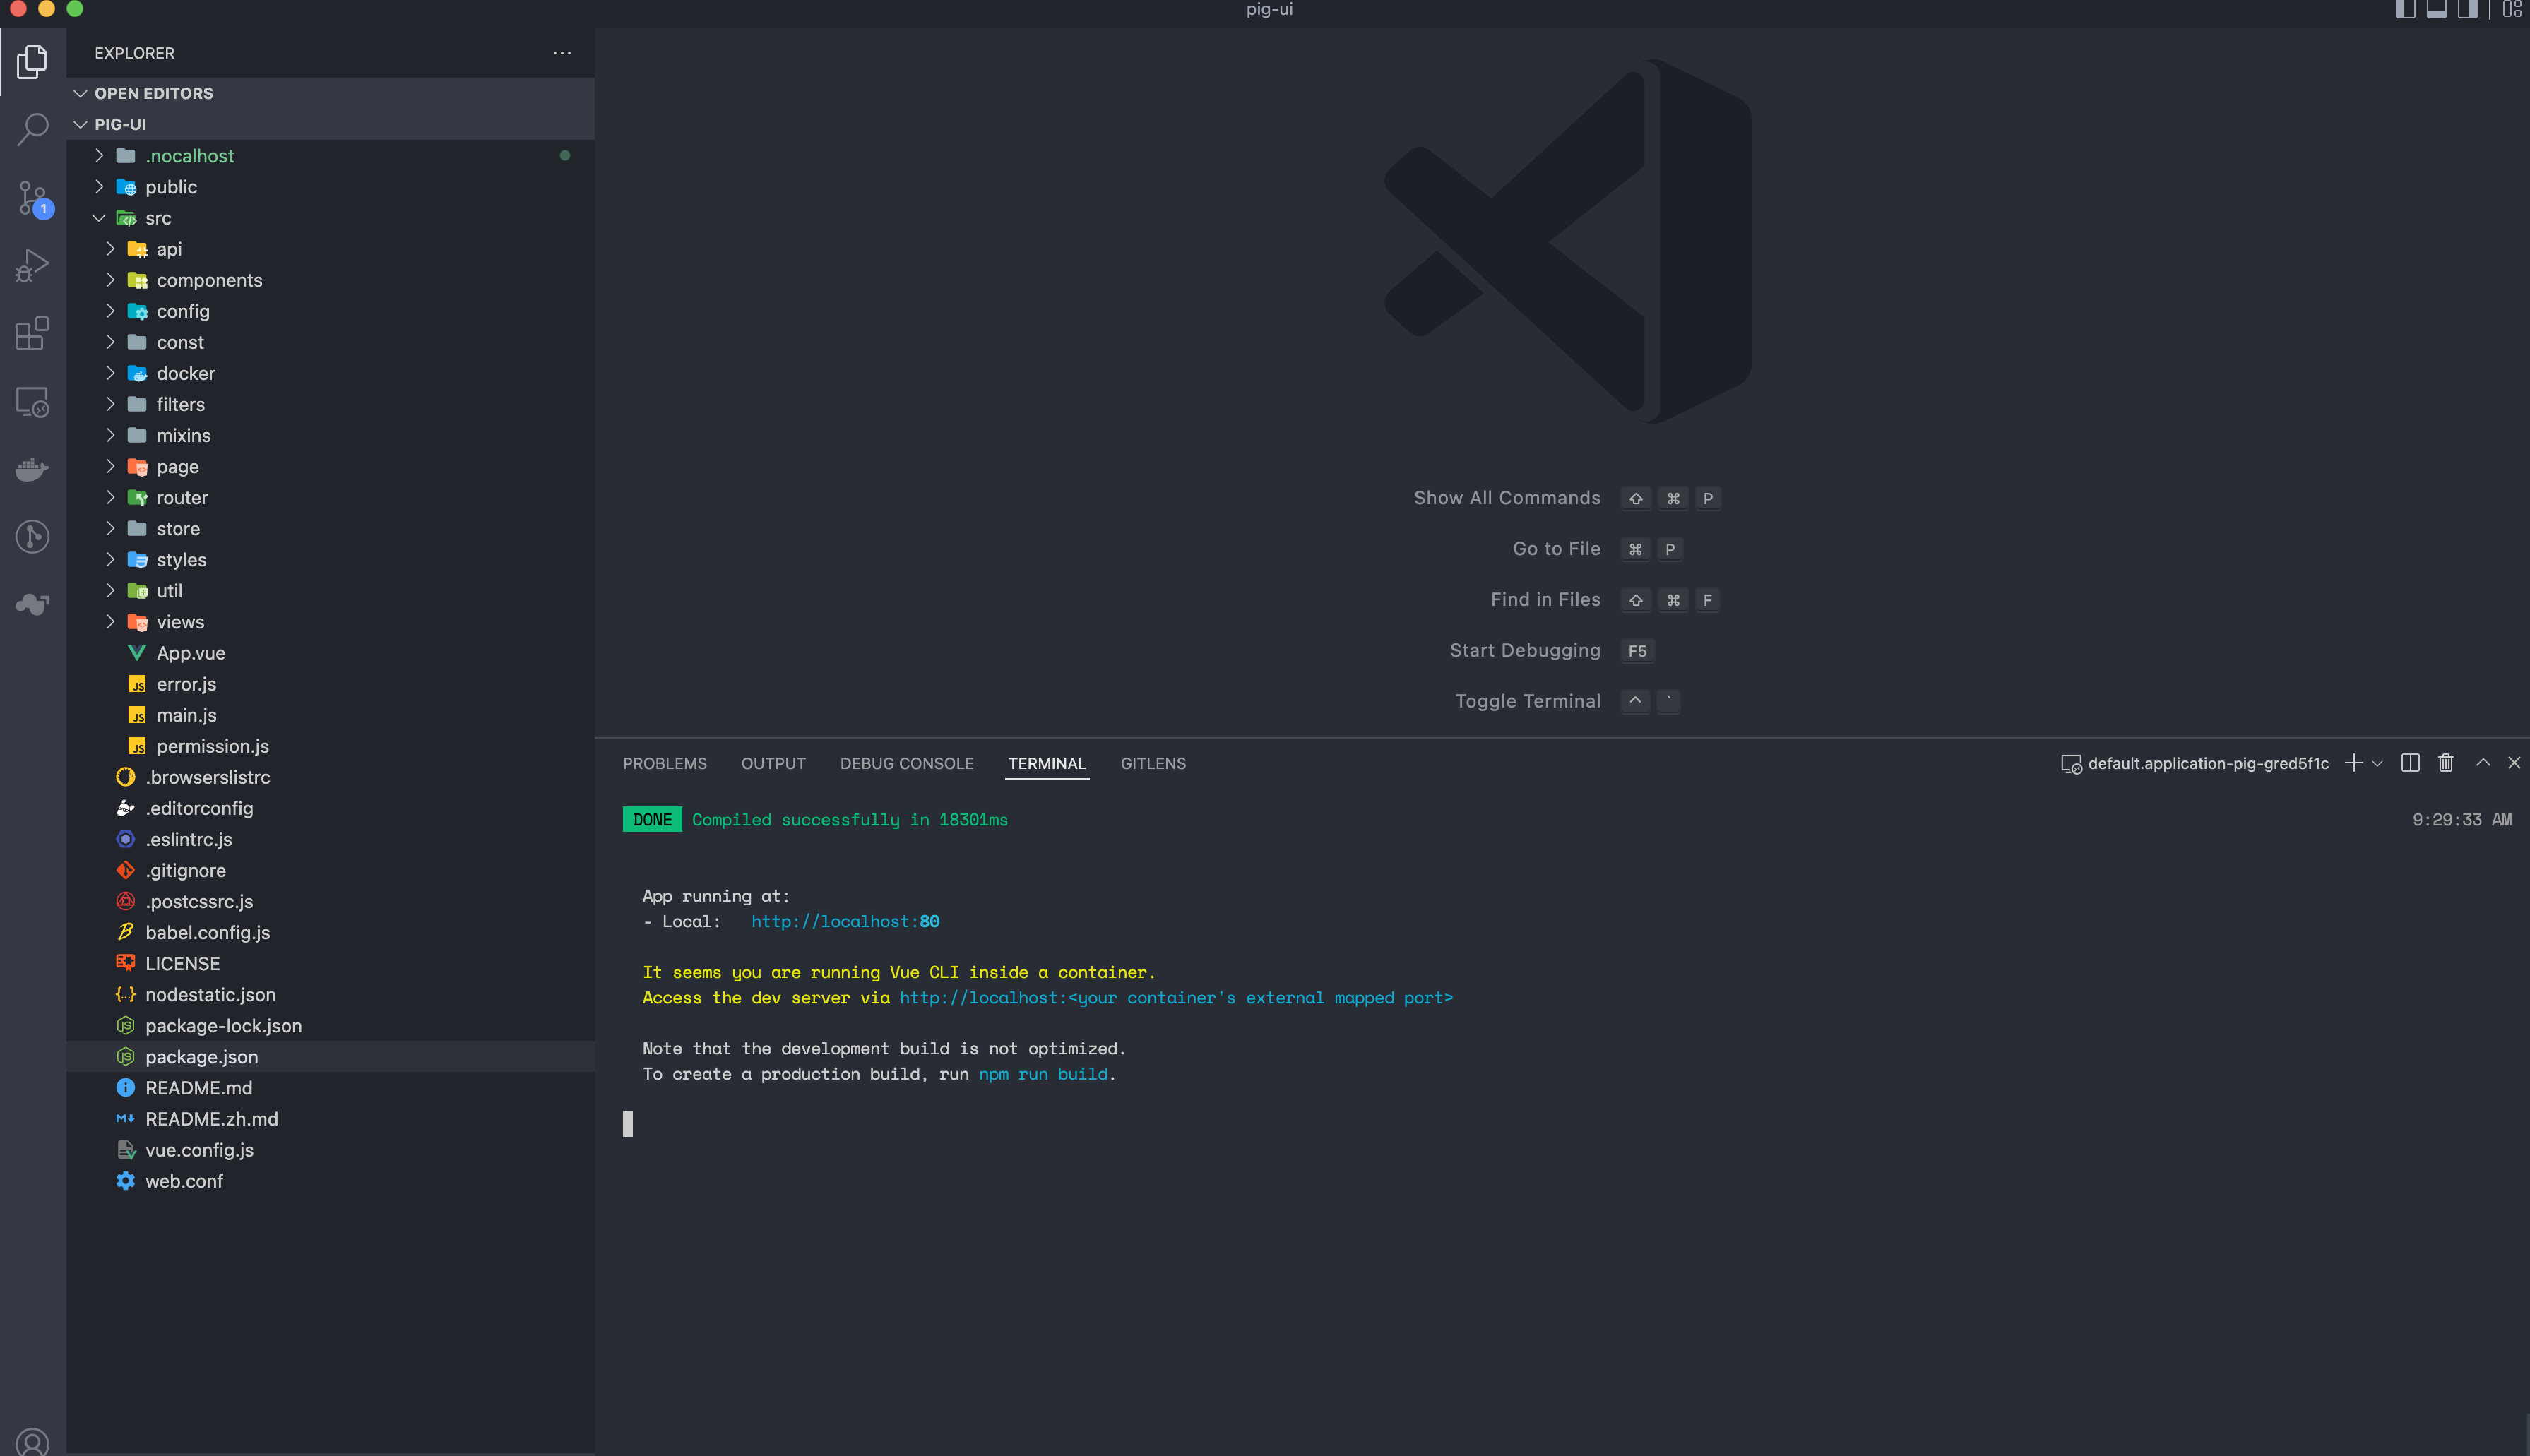
- Turn on port forwarding , Click button
, Find our Deployment, The right choice Port Forward,Add Port Forward, Input
38000:80The container of 80 Port forward to local 38000 port .
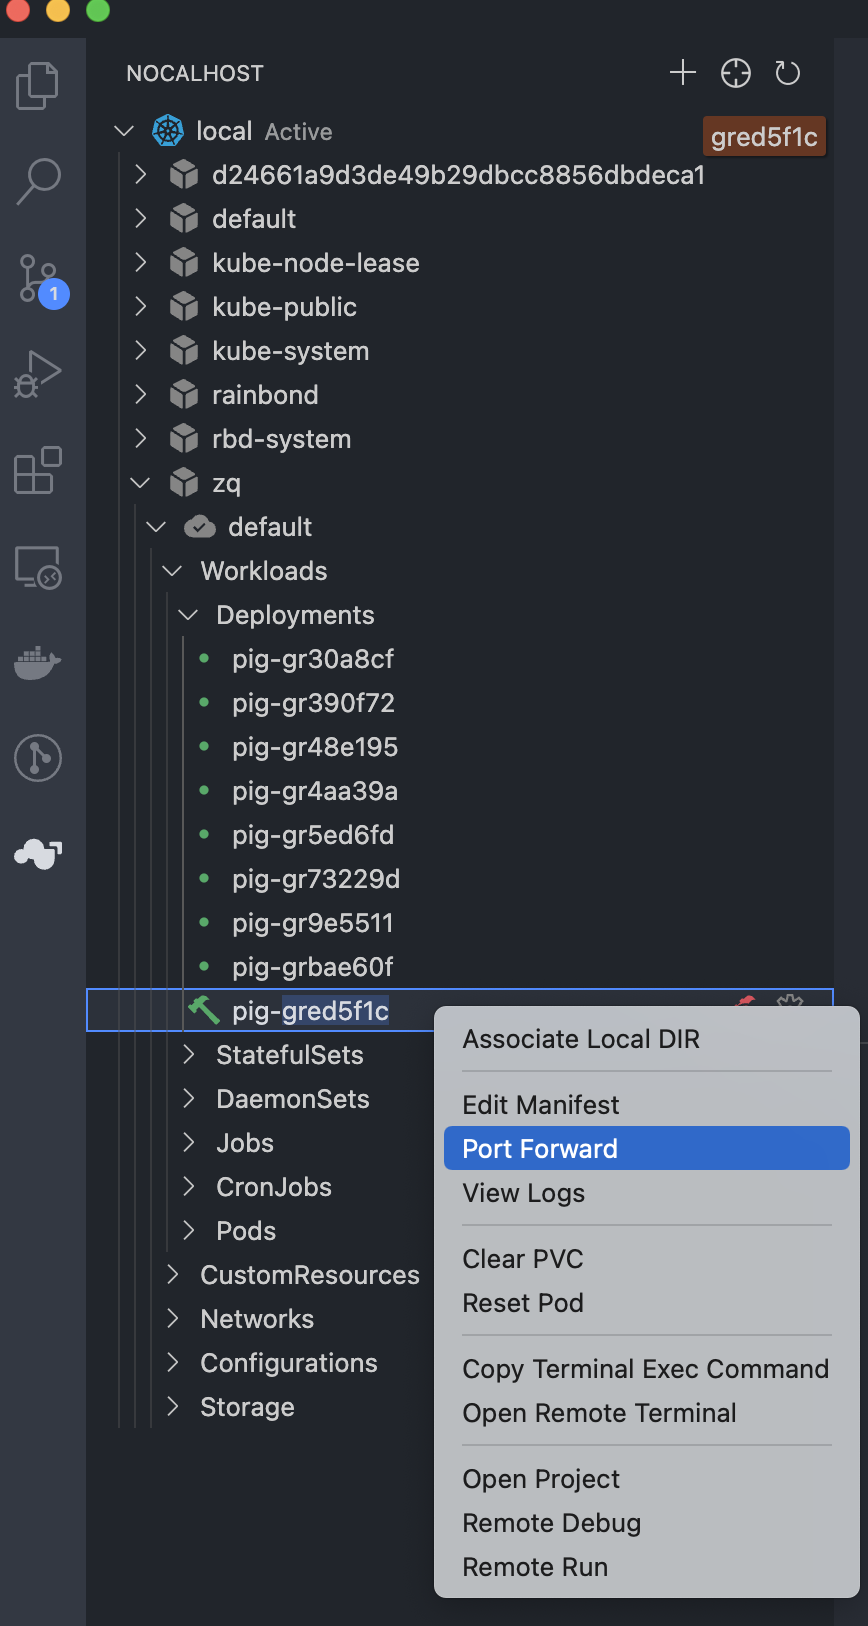
- adopt
http://localhost:38000You can access the page , You can also log in normally .
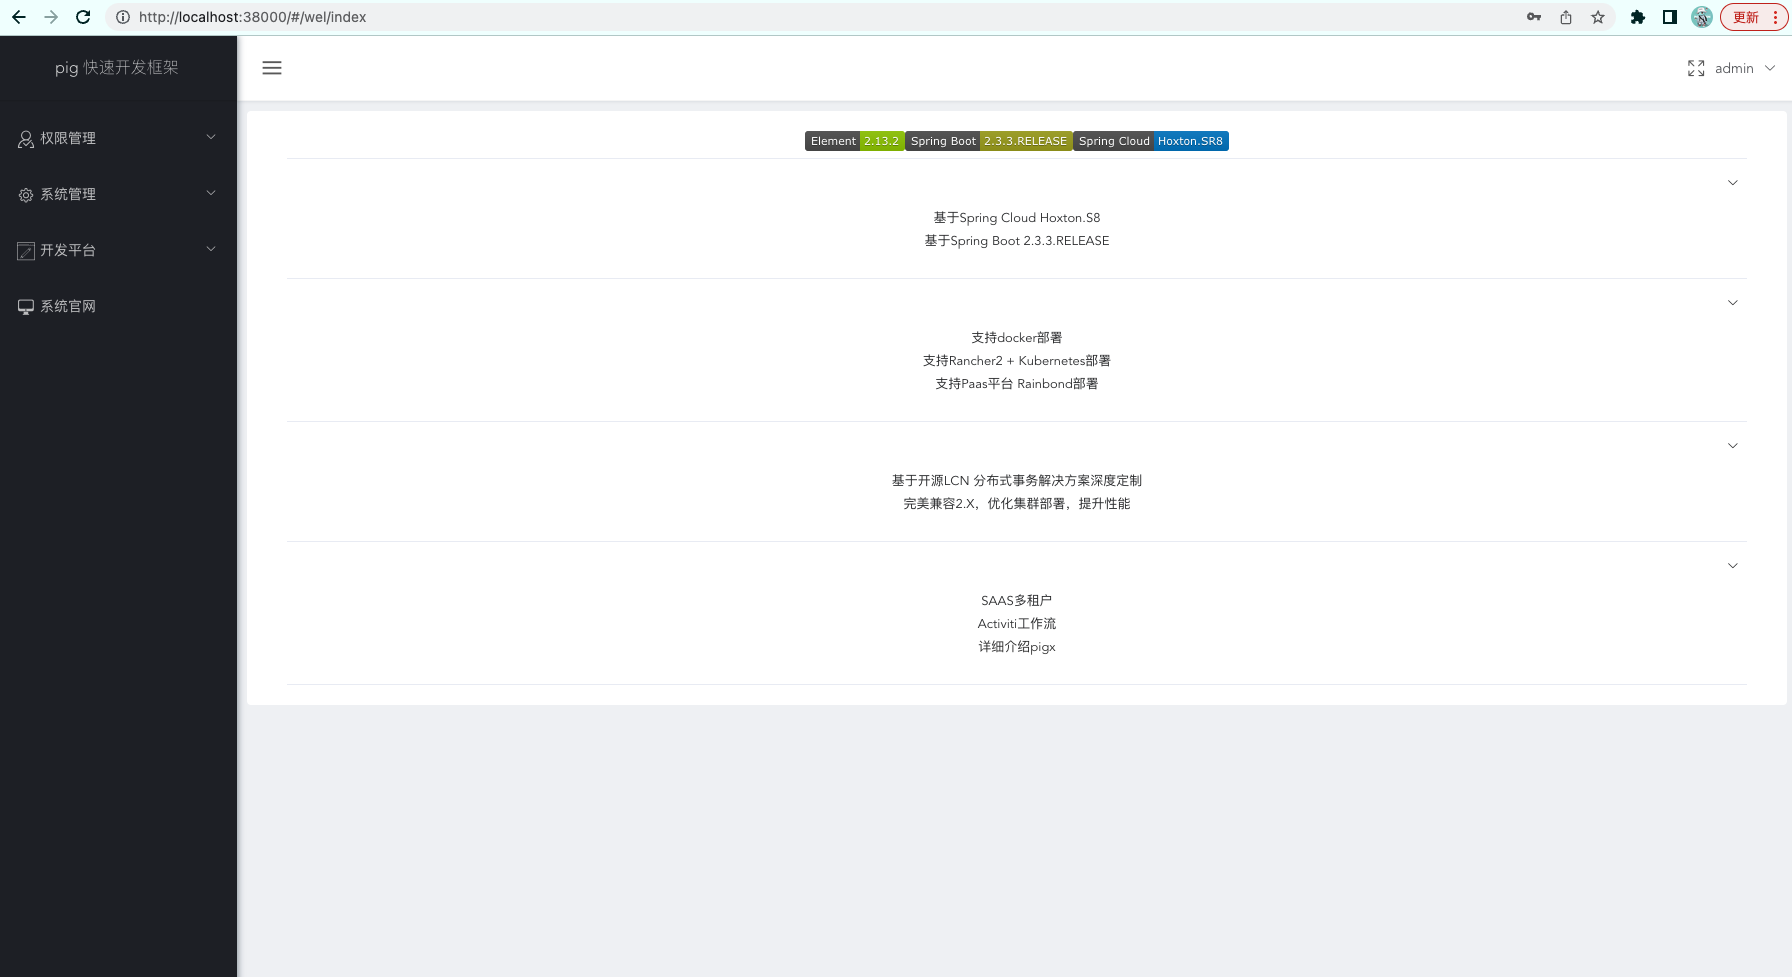
4.5.4 Modify the code to see the effect
The above has demonstrated that if the service in the remote container is accessed locally , Next, let's modify the code to see the effect .
modify src/page/wel.vue, Add a new piece of code , preservation . You can find , When we save , The terminal will restart automatically , Consistent with the effect of local development .
The modification of the file will be synchronized to the container in real time .
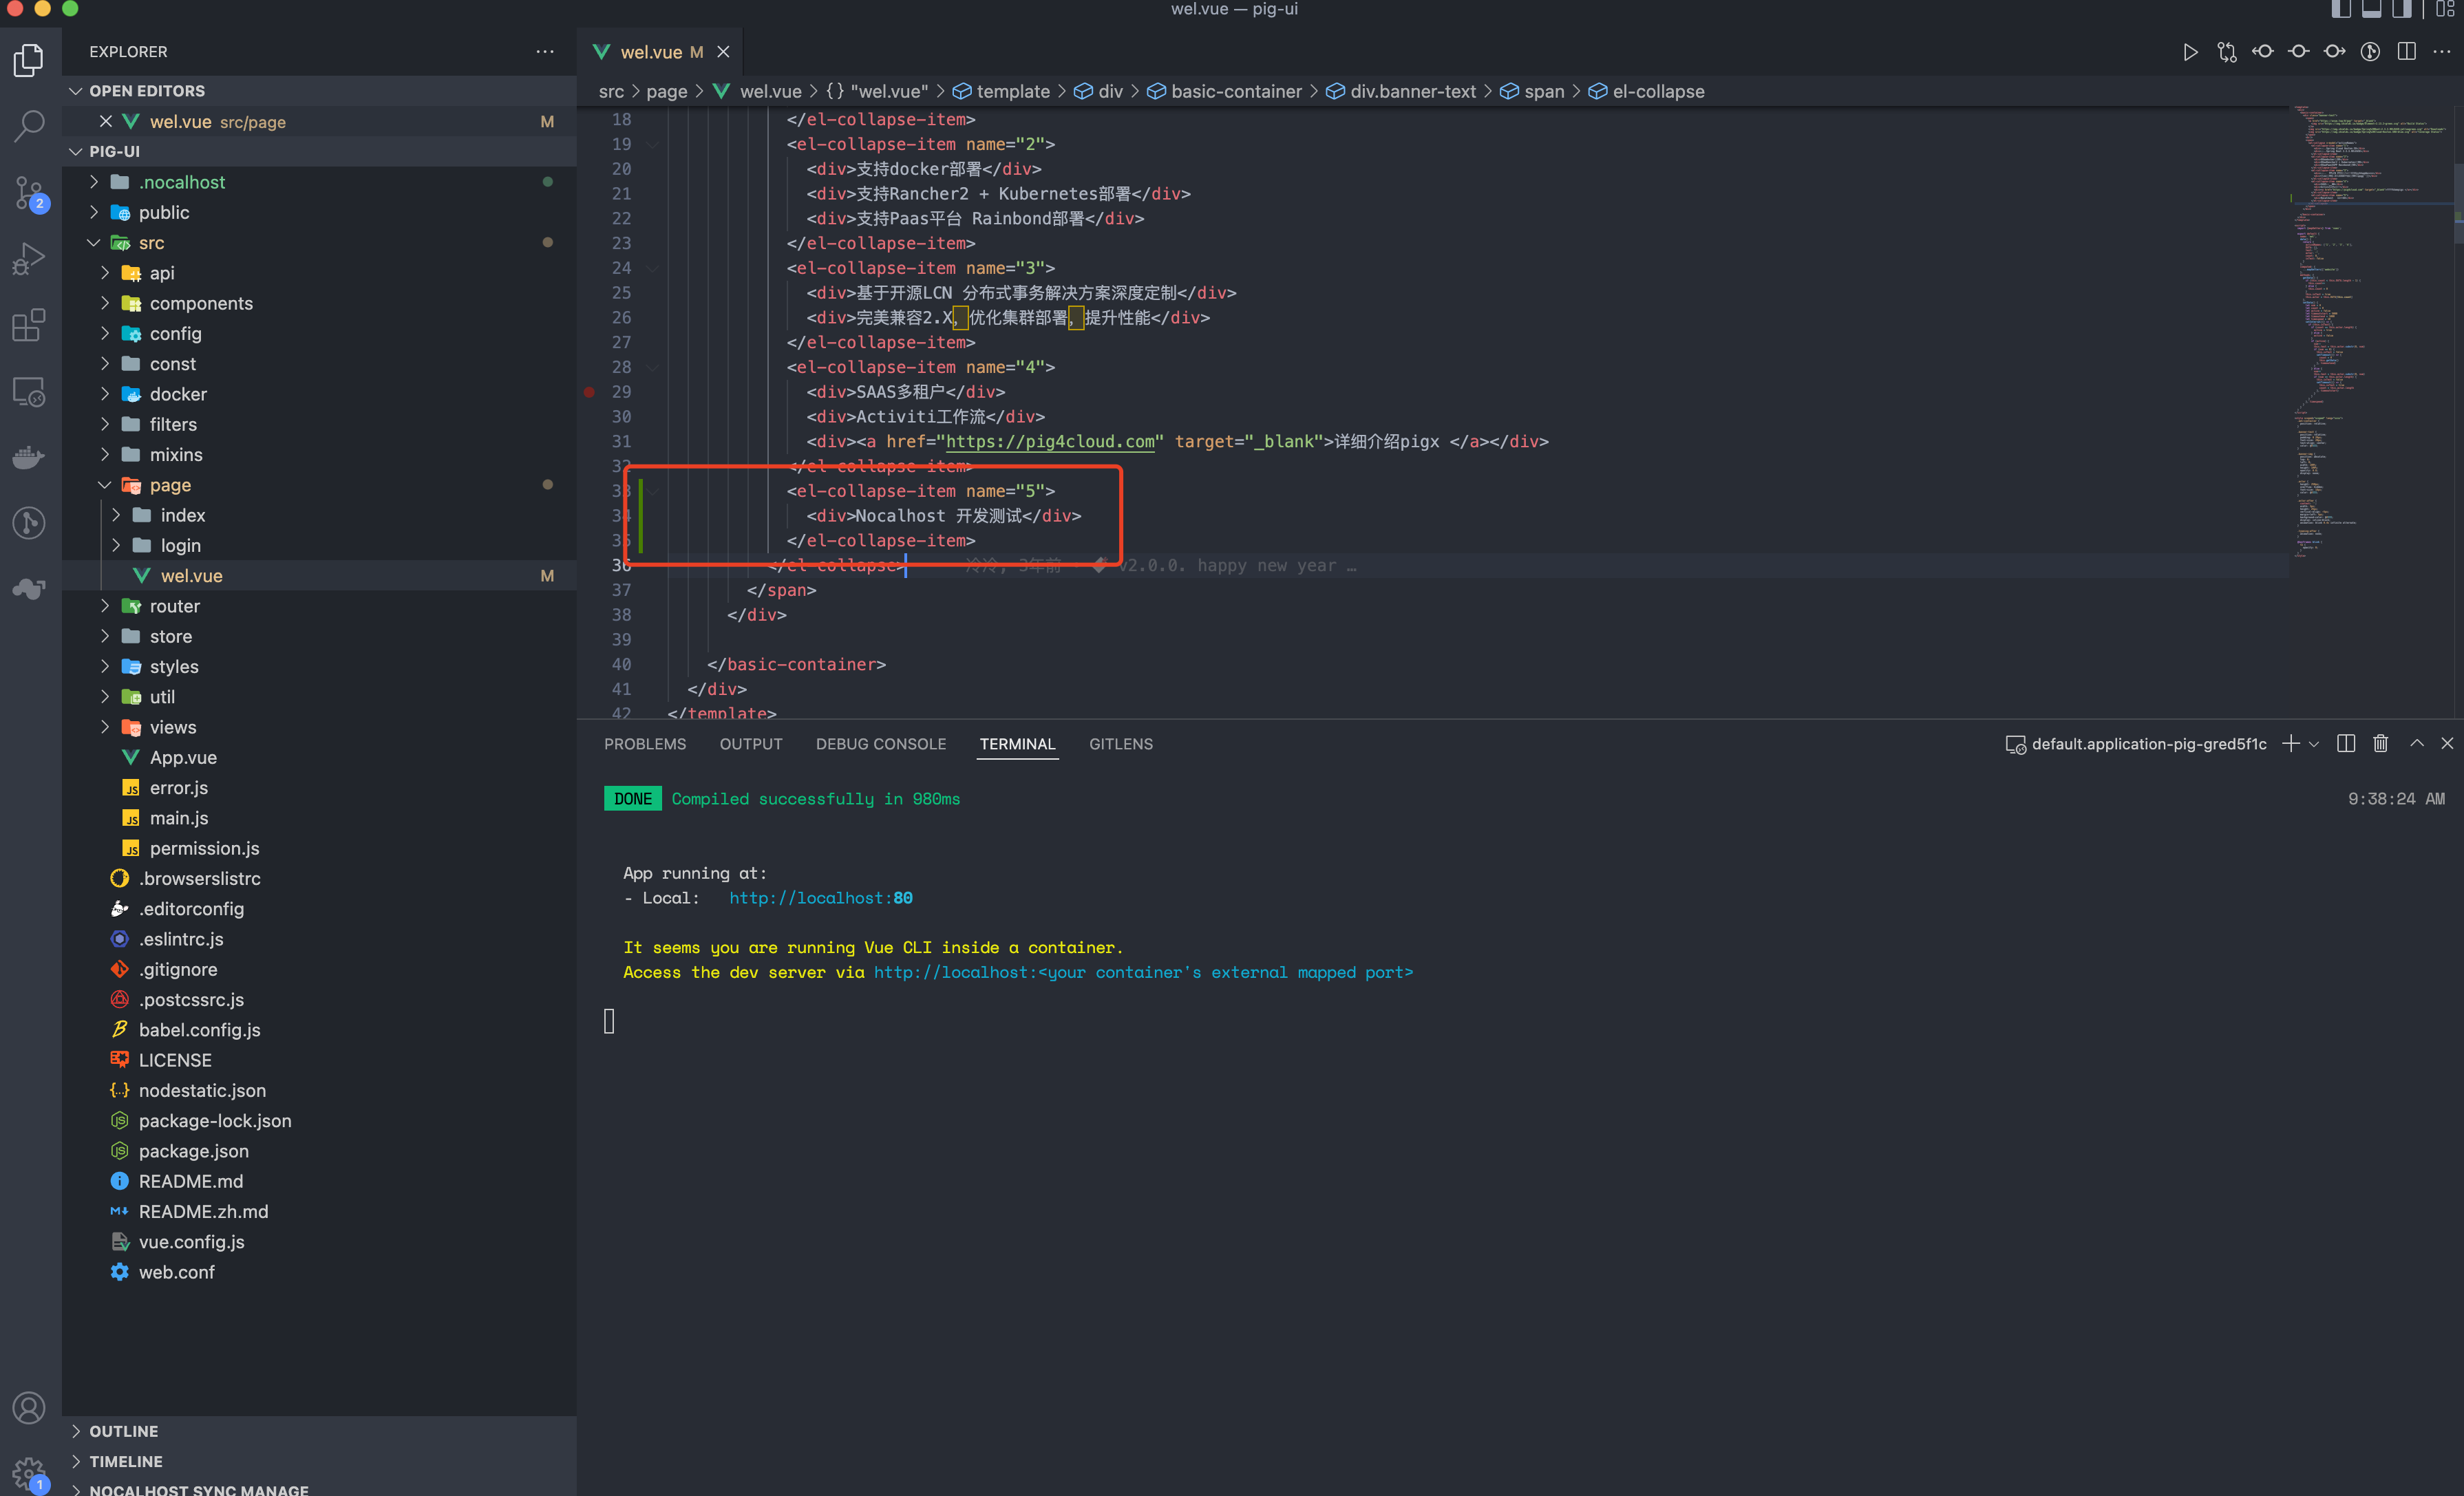
Refresh the page http://localhost:38000, You can see that the modified content has taken effect .
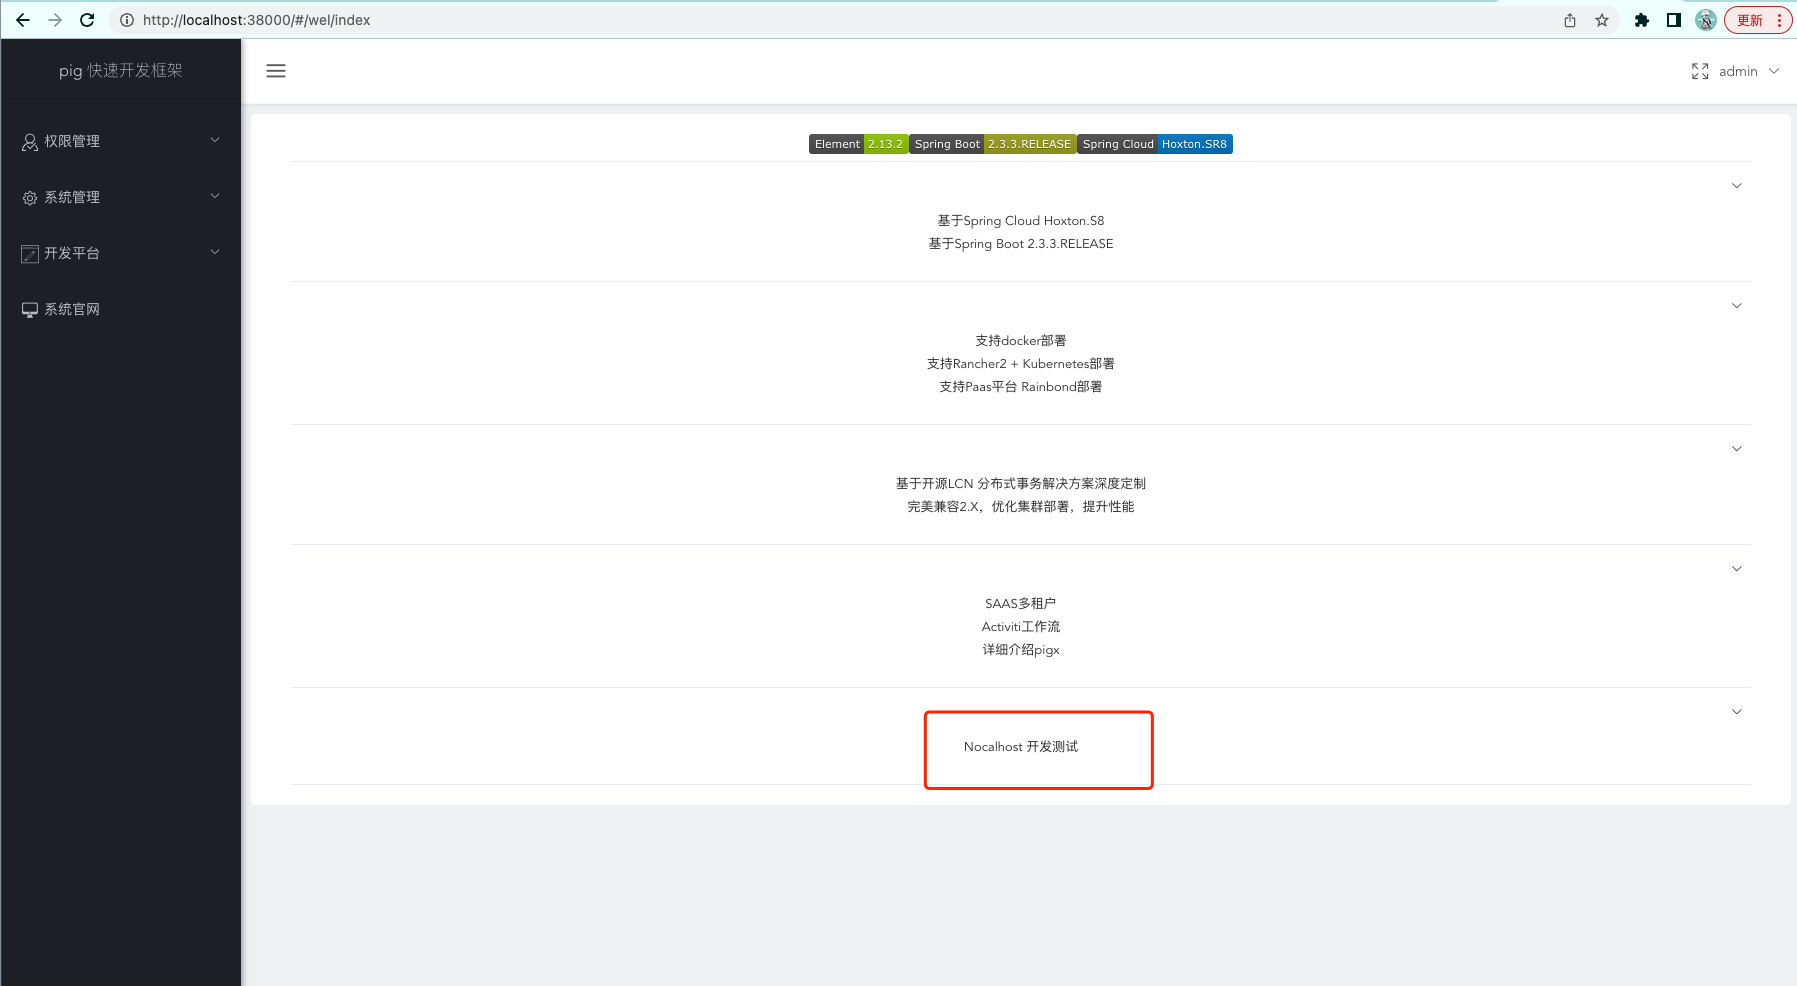
At the end
Through the above practical steps , We can already go through Nocalhost Development Rainbond Microservice applications on , Get rid of local development , Enter cloud native rapid development , Improve our development efficiency .
This article only introduces the basic development , You can also configure for the project Nocalhost Development configuration wait , Guys can explore on their own .
边栏推荐
猜你喜欢
Unityhub cracking & unity cracking
Network learning (II) -- Introduction to socket

Leetcode medium question my schedule I
JS复制图片到剪切板 读取剪切板
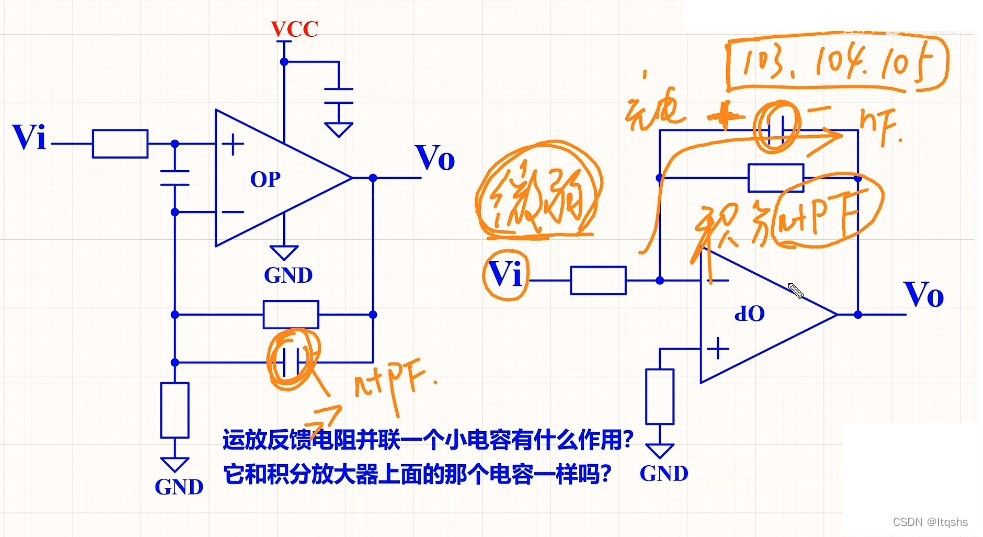
What is the function of paralleling a capacitor on the feedback resistance of the operational amplifier circuit
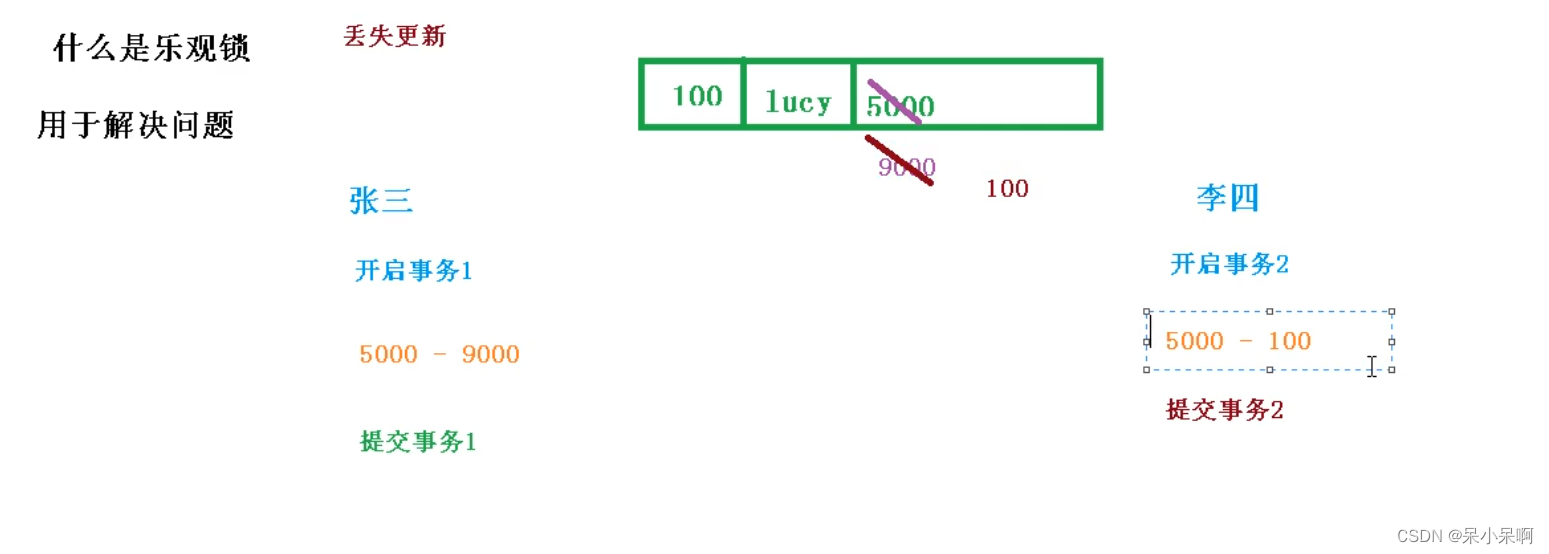
Myabtis_Plus

海信电视开启开发者模式
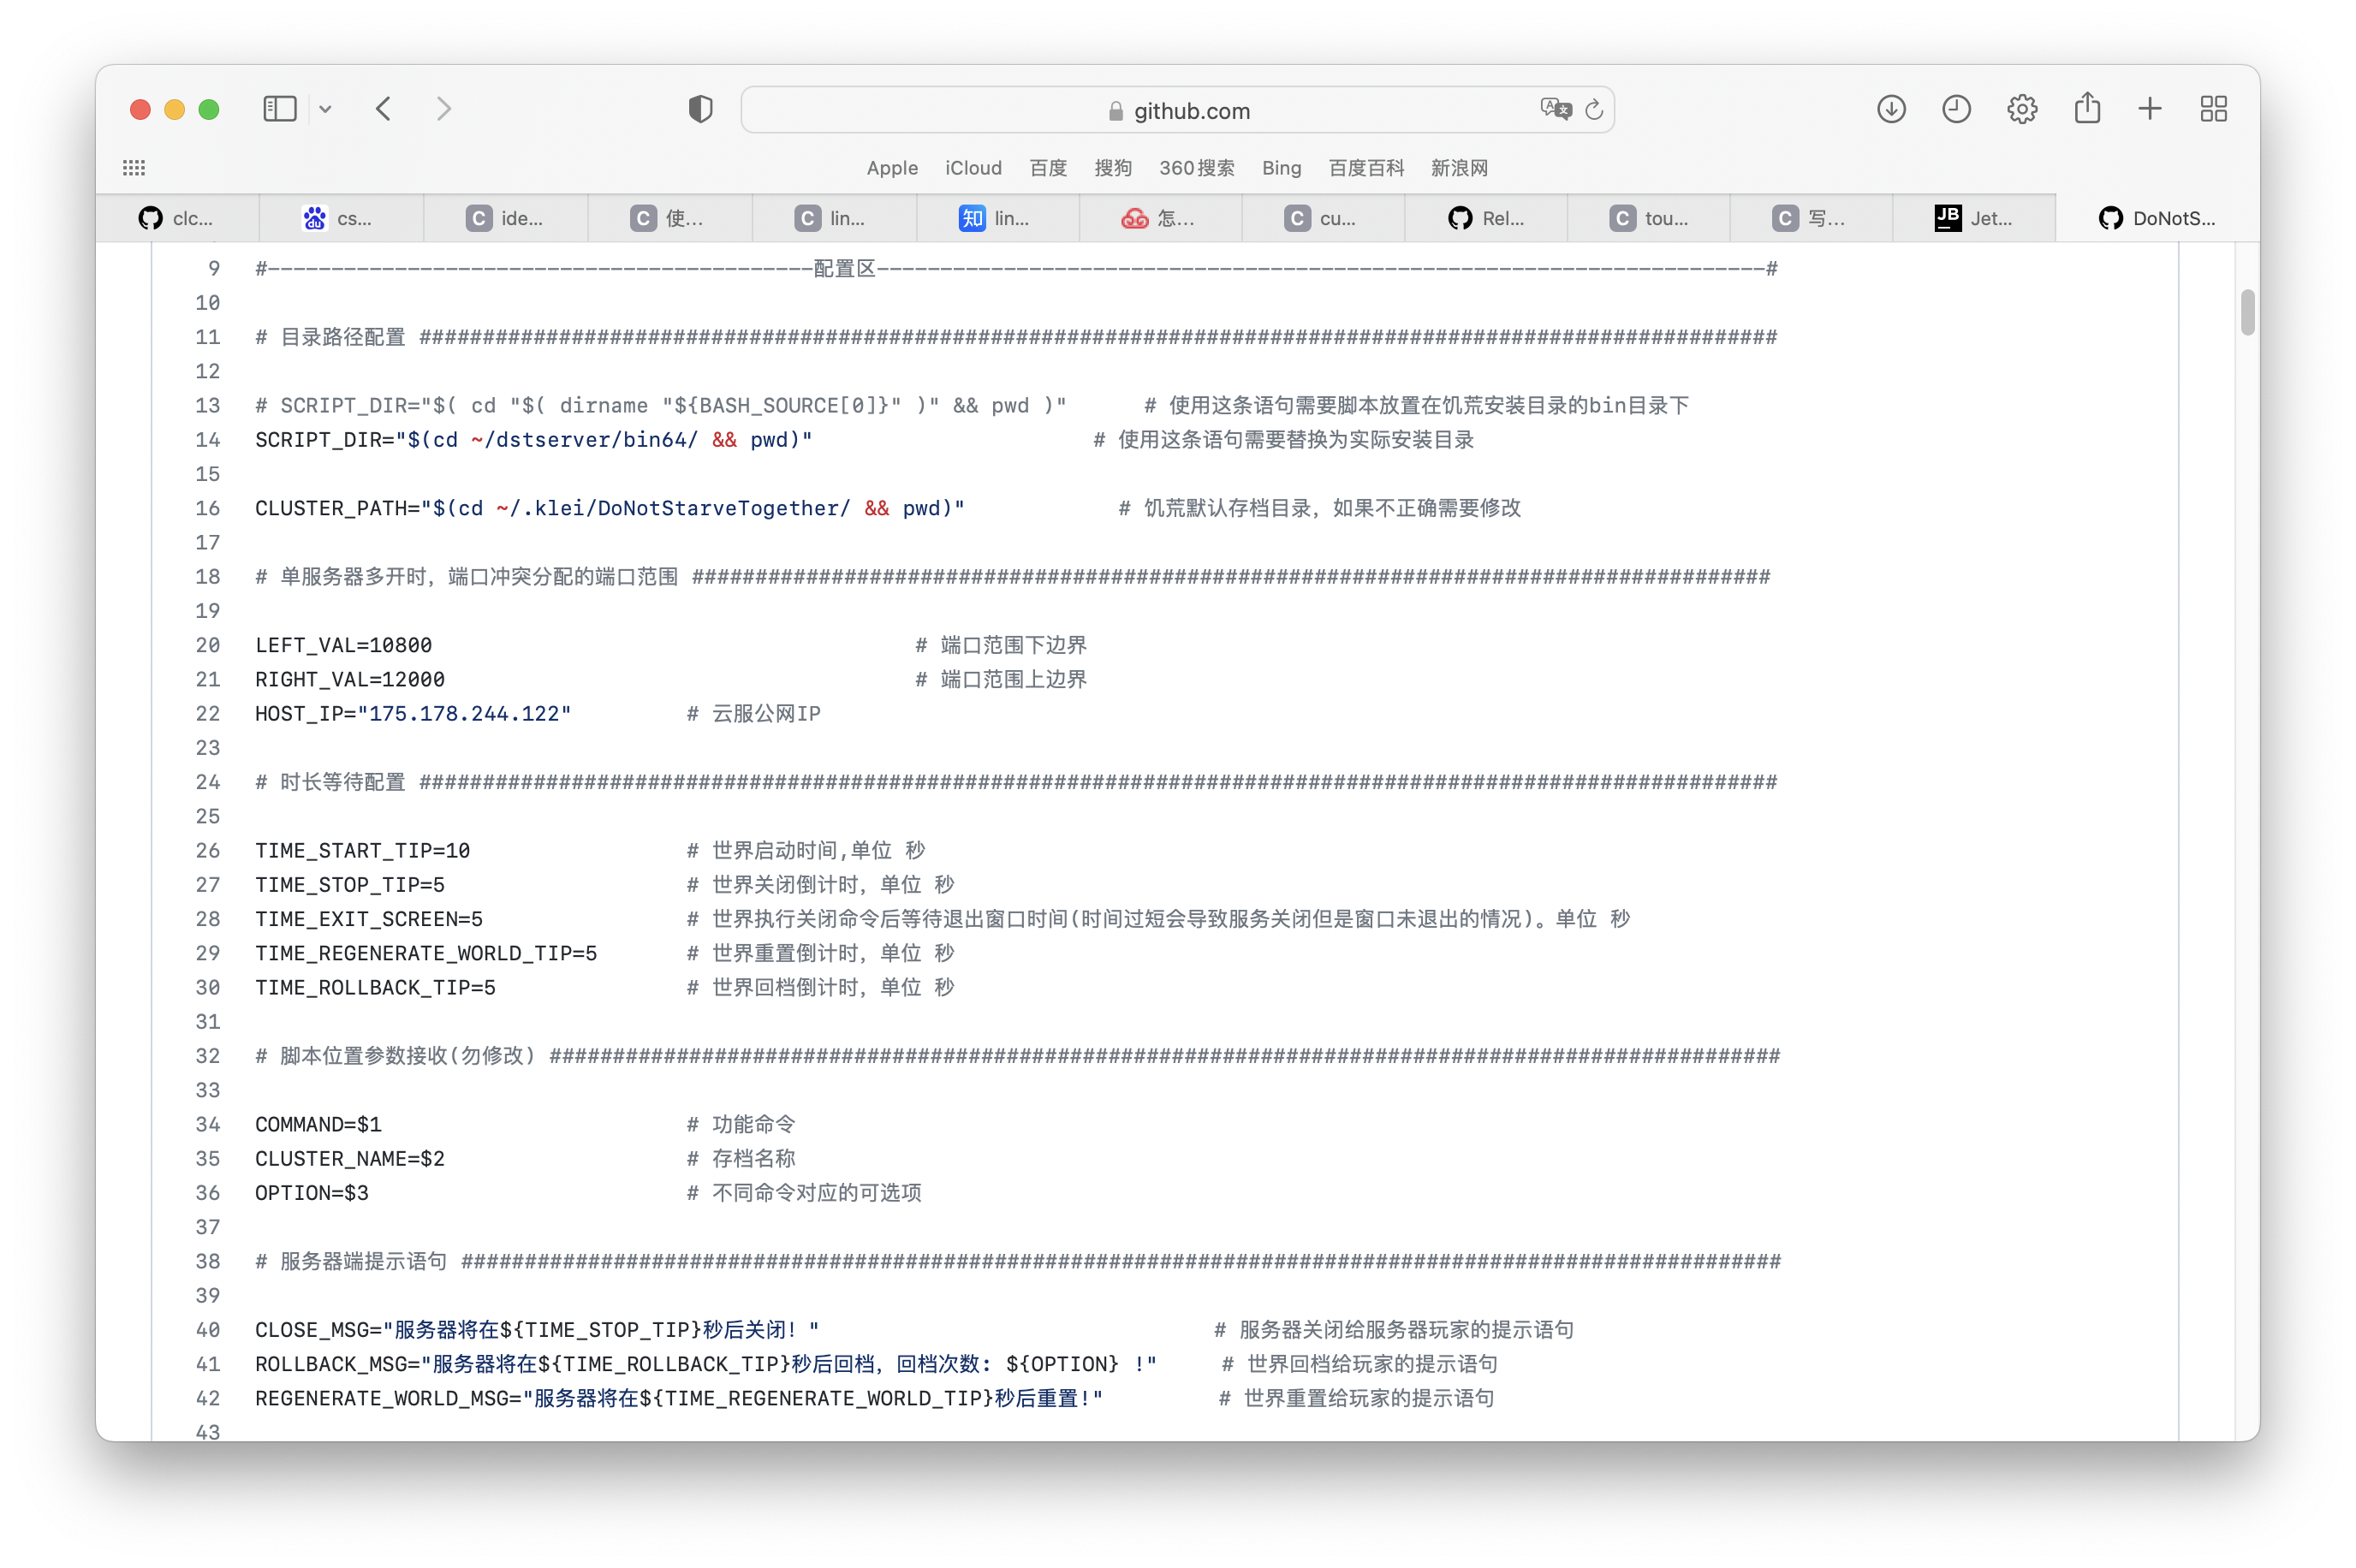
饥荒云服管理脚本
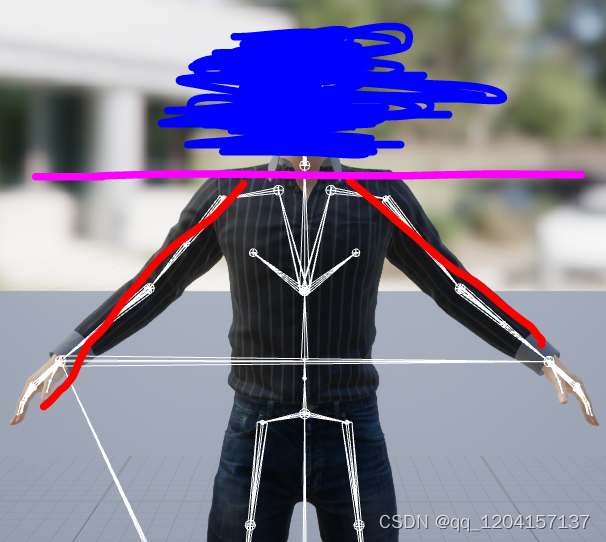
Make LIVELINK's initial pose consistent with that of the mobile capture actor

JS copy picture to clipboard read clipboard
随机推荐
藏书馆App基于Rainbond实现云原生DevOps的实践
利用 Helm 在各类 Kubernetes 中安装 Rainbond
漏洞複現-Fastjson 反序列化
调用 pytorch API完成线性回归
雅思考试自己的复习进度以及方法使用【日更版】
Network learning (I) -- basic model learning
Caractéristiques de bisenet
【雅思口语】安娜口语学习记录 Part2
The reified keyword in kotlin is used for generics
Unityhub cracking & unity cracking
Snyk 依赖性安全漏洞扫描工具
PVTV2--Pyramid Vision TransformerV2学习笔记
通俗易懂单点登录SSO
Search for an element in a binary search tree (BST)
使用 Nocalhost 开发 Rainbond 上的微服务应用
BiSeNet的特点
rsync远程同步
Leetcode simple question: find the K beauty value of a number
【无标题】
Myabtis_ Plus