当前位置:网站首页>Unity3d makes the registration login interface and realizes the scene jump
Unity3d makes the registration login interface and realizes the scene jump
2022-07-06 12:33:00 【SQ Liu】
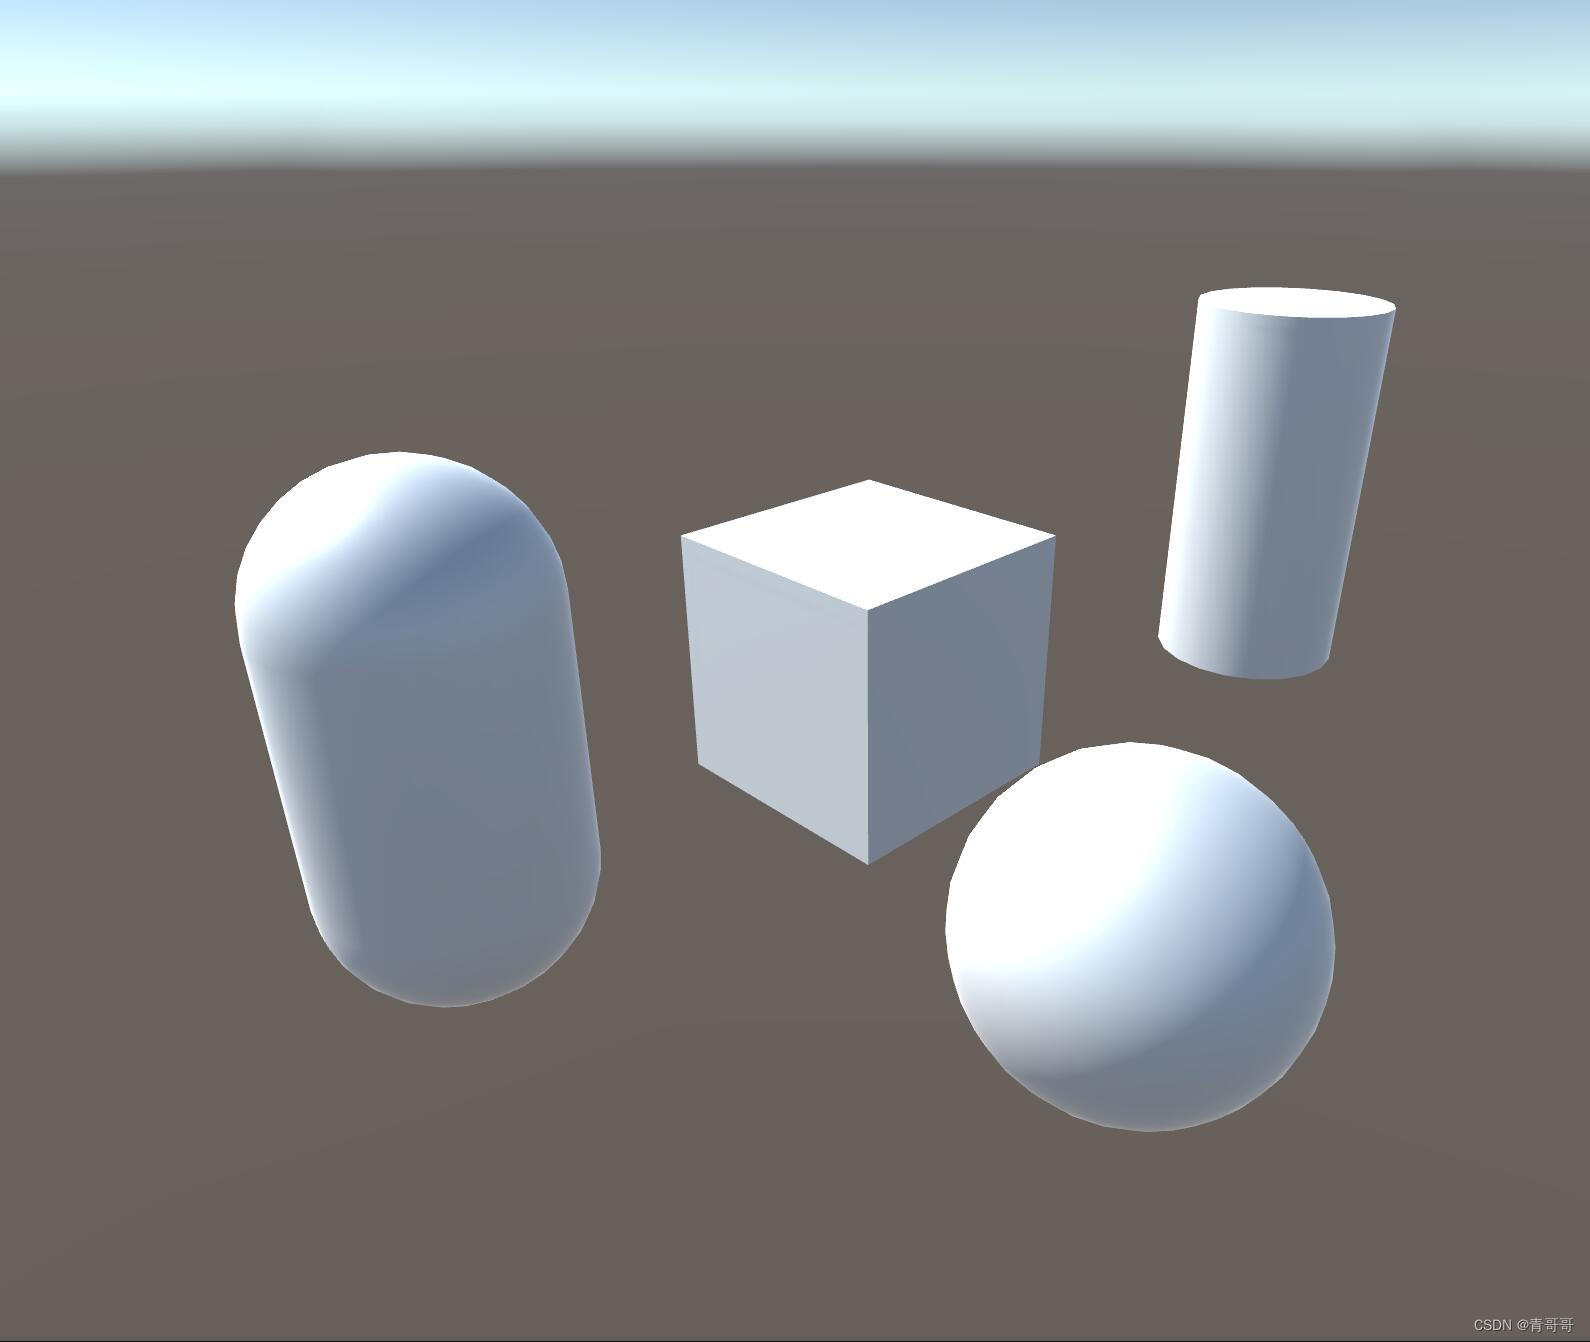
Effect preview picture :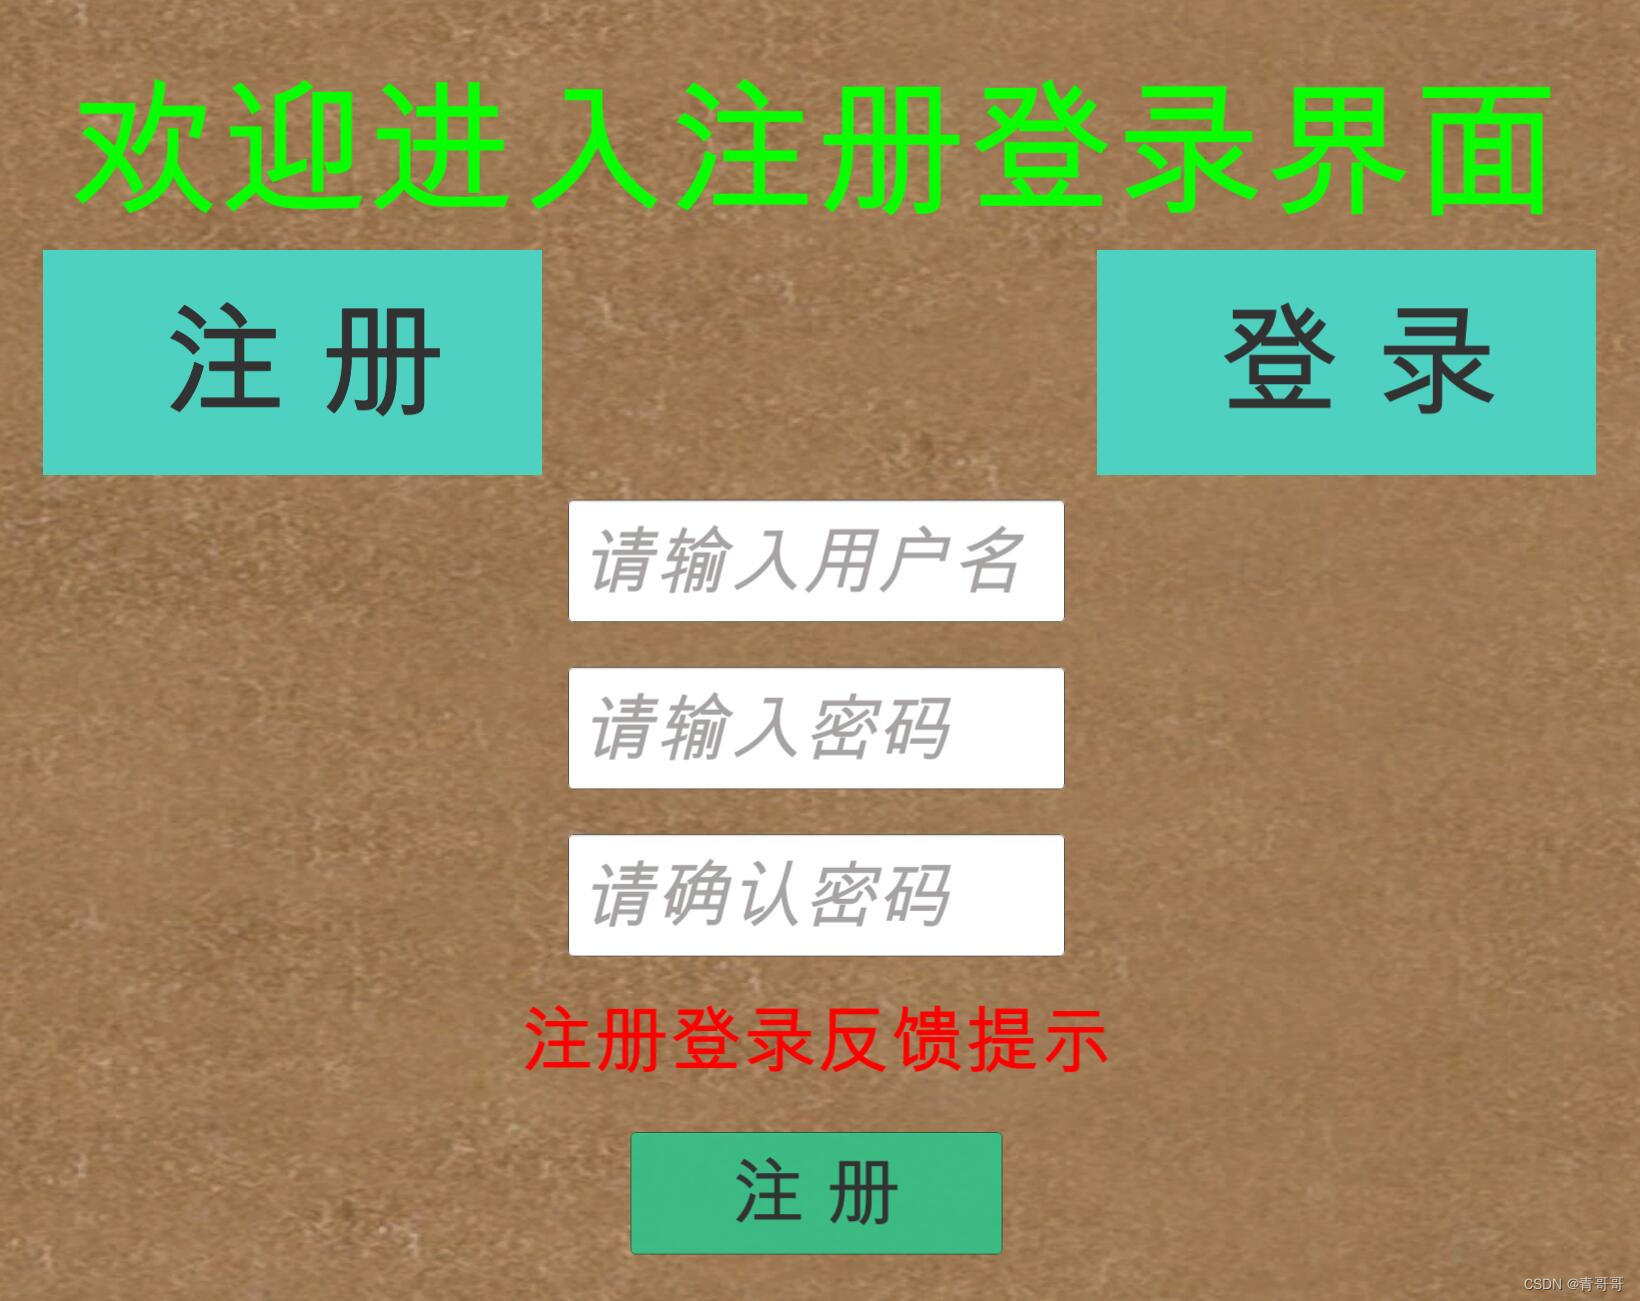
Effect preview video :
One 、 New projects
1、 open Unity3D, Create a new project , I'm going to call it “Login”. The version I use here is Unity2018.4.2f1, The interface may be slightly different during the production of different versions , But it does not affect the realization of specific functions .
2、 The sample scene can be SampleScene Rename it to Login, It's best to know what you mean by what you see .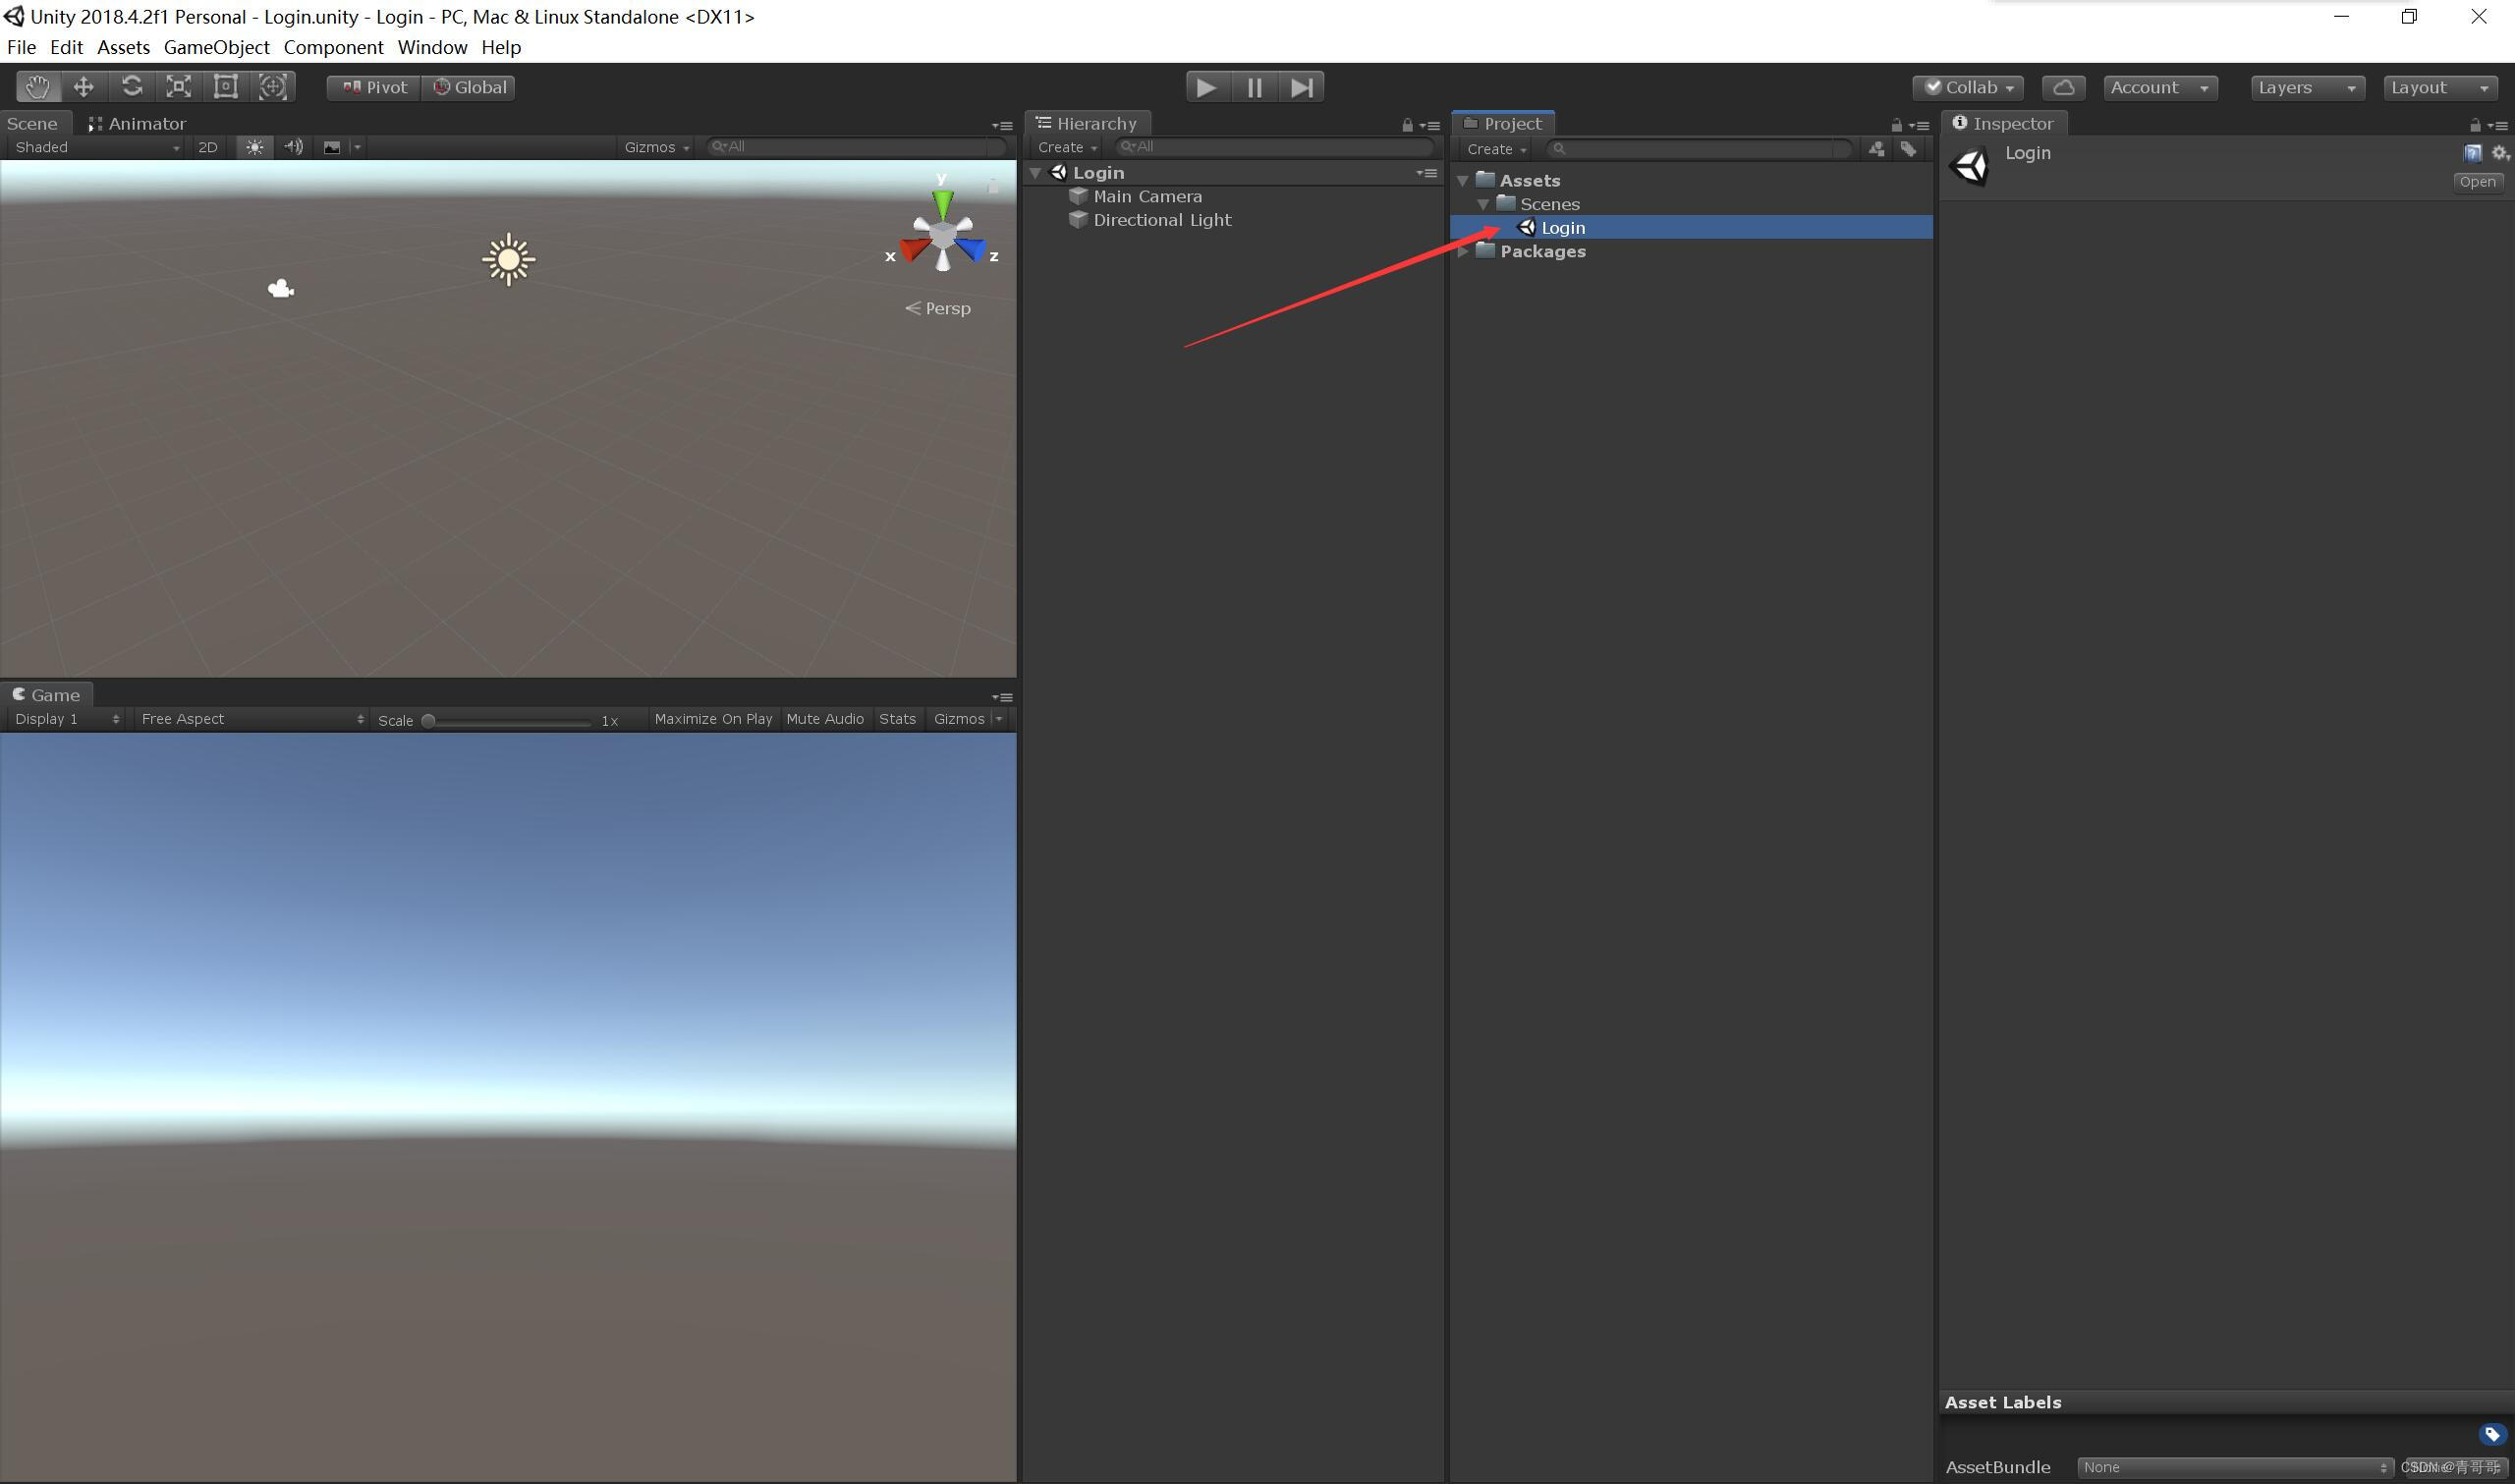
Two 、 The registration login interface is set up
1、 newly build Canvas canvas .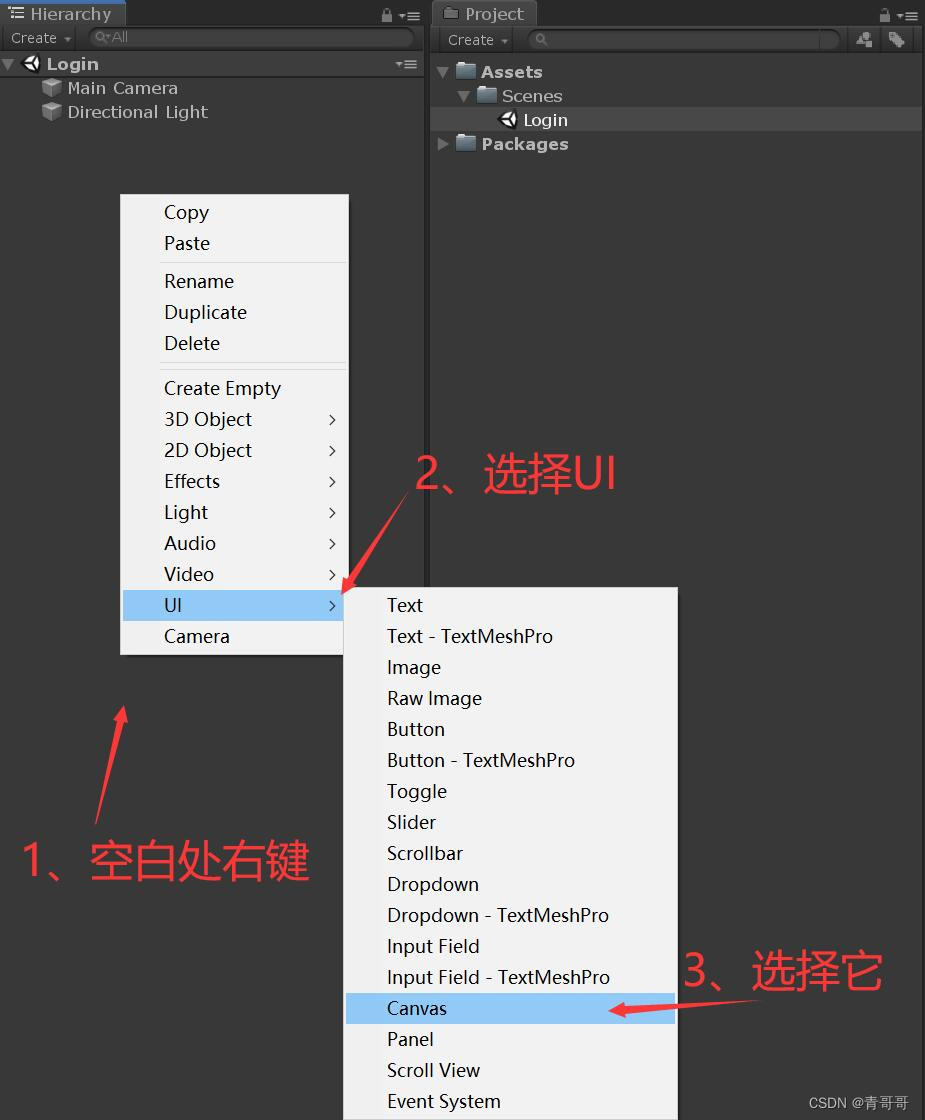
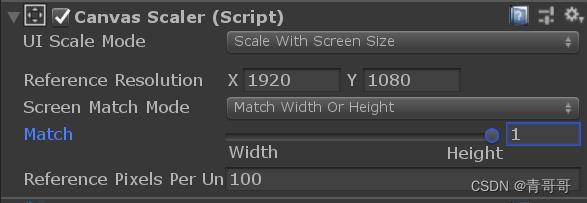
2、 First select Scene In the scene 2D, Let it be in 2D Edit from Perspective . And then modify Canvas Medium Canvas Scaler Canvas resolution adaptive component , As shown in the figure below .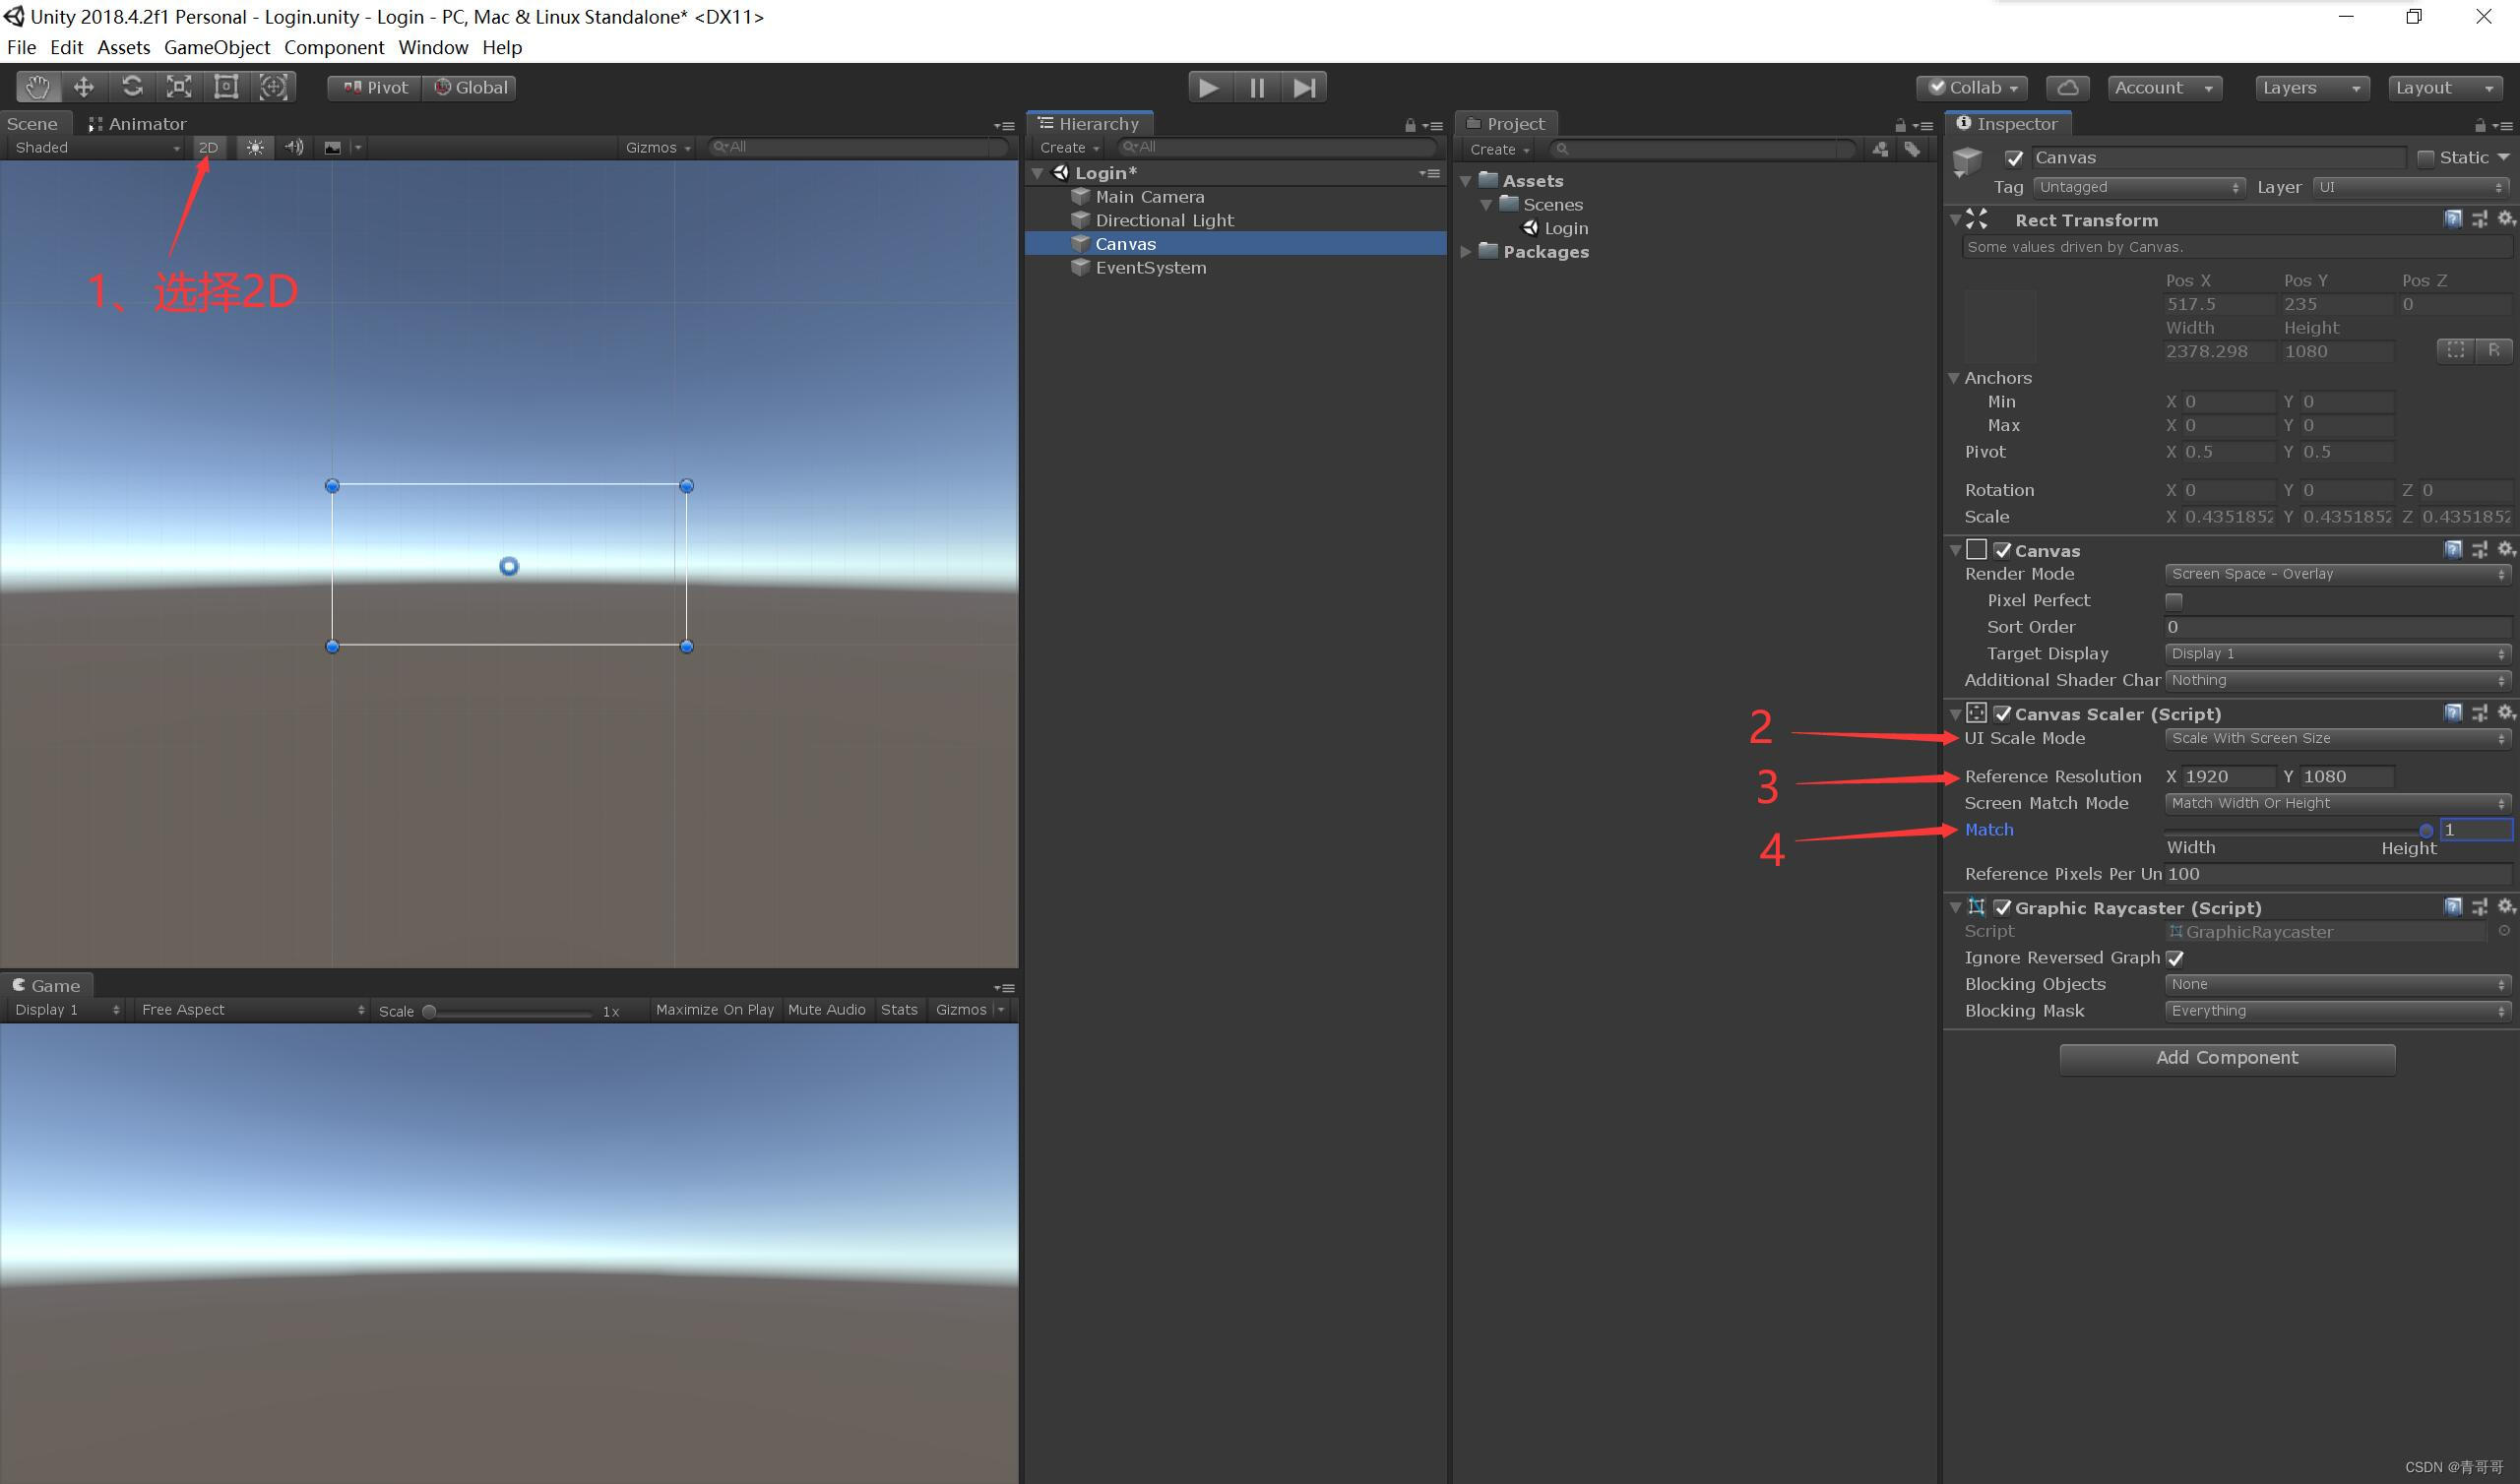
3、 Mouse click Canvas, The right choice Create Empty, Create an empty object , And rename it to Login, It is used to store all the sub objects needed later .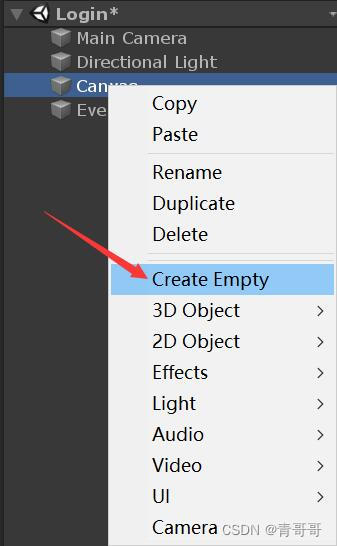
4、 take Login Of Rect Transform The anchor point under the component is set as shown in the following figure ( Anchor point setting method : Click on the following figure first 2, Then press and hold Alt Key not put , Finally, use the mouse to select the anchor you want to set ).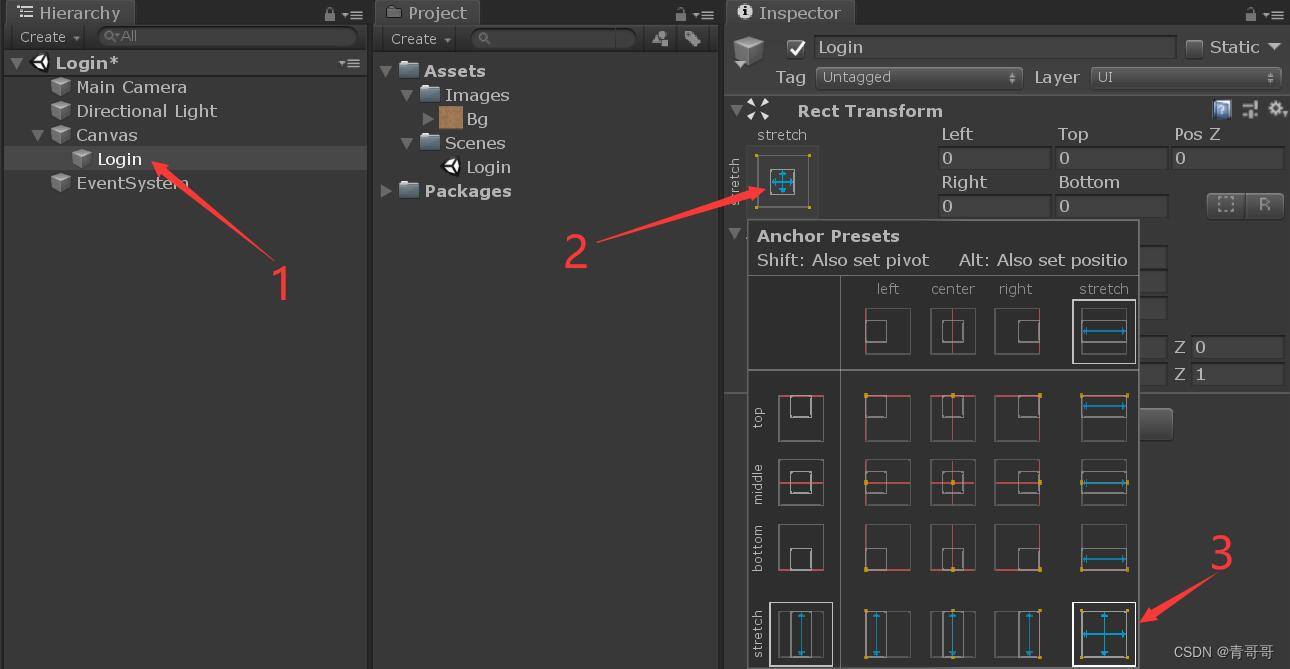
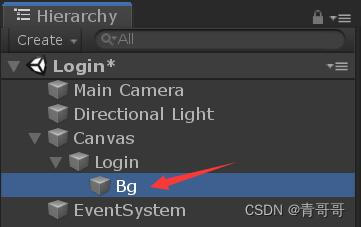
5、 Mouse click Login, The right choice UI Below Image, And rename it to Bg( That's the background ), Use it as the background for the entire login interface .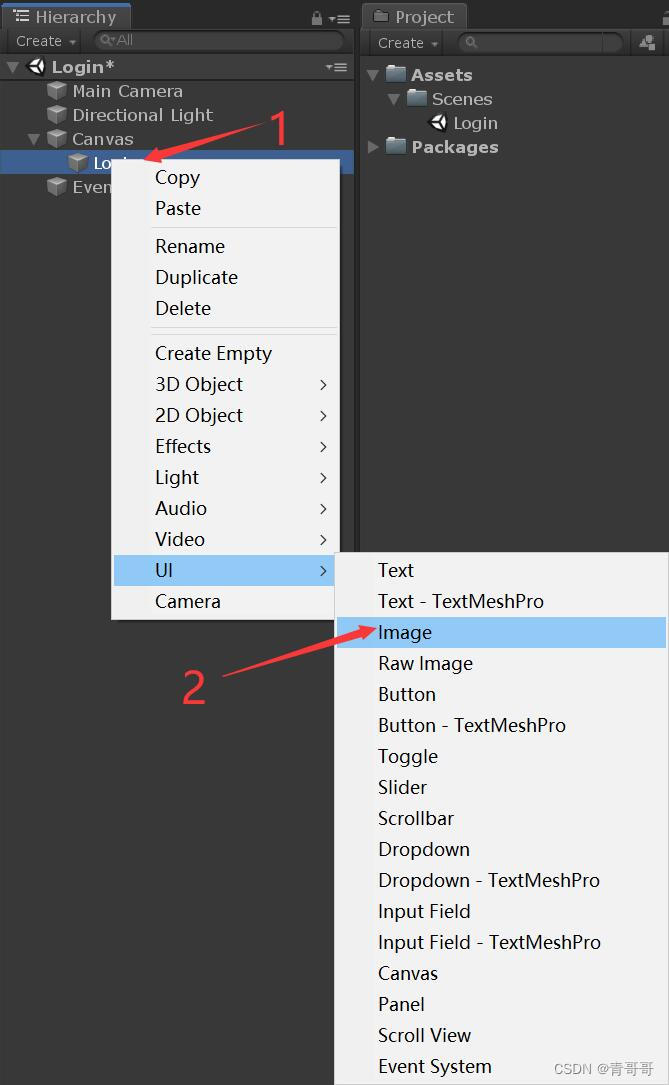
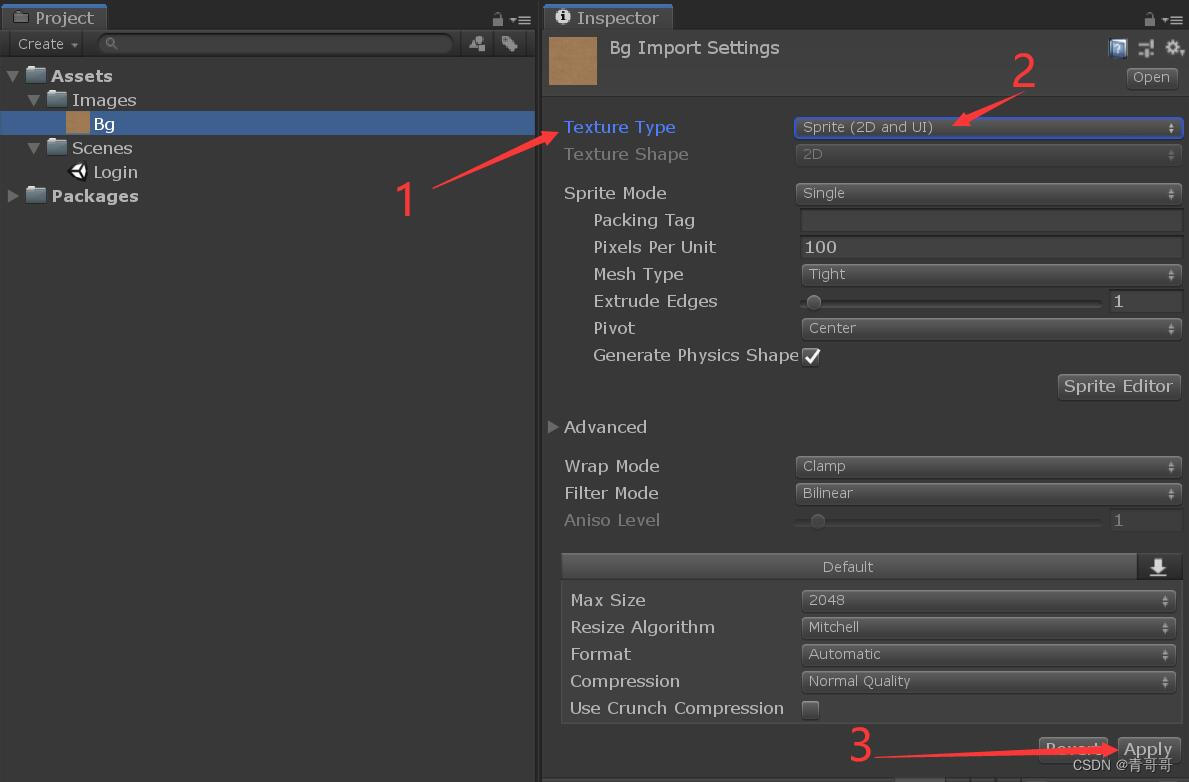
6、 We can download a picture on the Internet , Of course, it can also be based on specific projects , Select the appropriate background image . Here I will rename the downloaded image as Bg, Then drag the picture to Unity New in Images Under the folder , This folder is used to store all the pictures , And the Texture Type It is amended as follows Sprite(2D and UI), Last Apply once , The steps are as follows .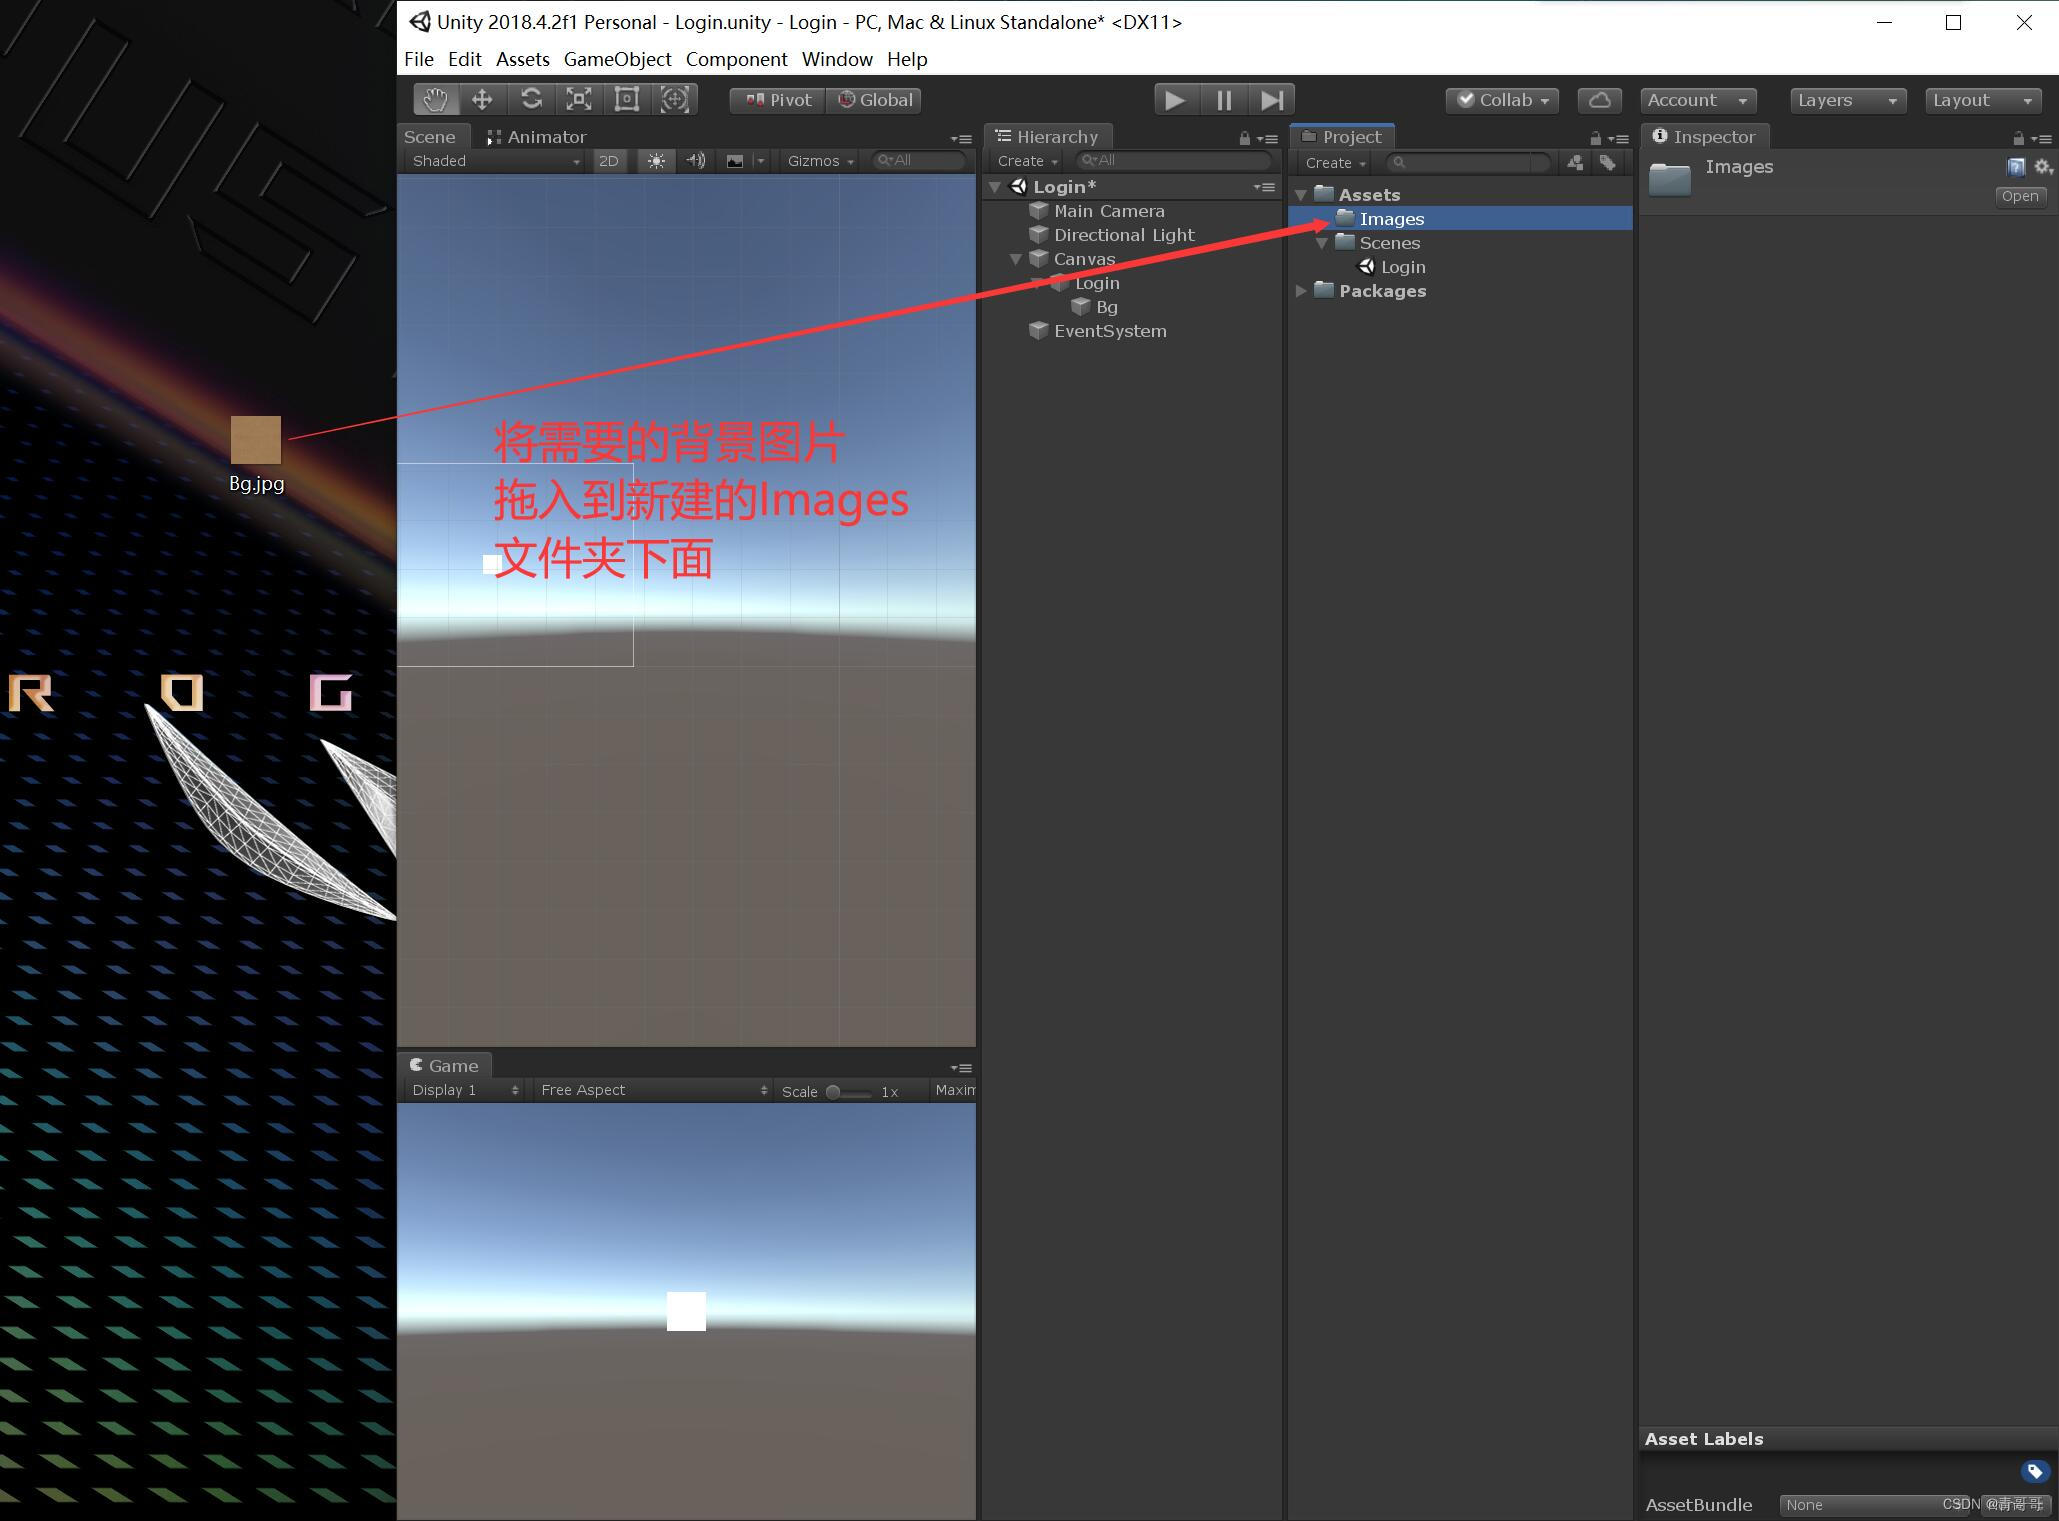
7、 Mouse selected Bg, stay Image(Script) The background image is introduced under the component , Of course, it can also be Color And so on , Then set its anchor , As shown in the figure below .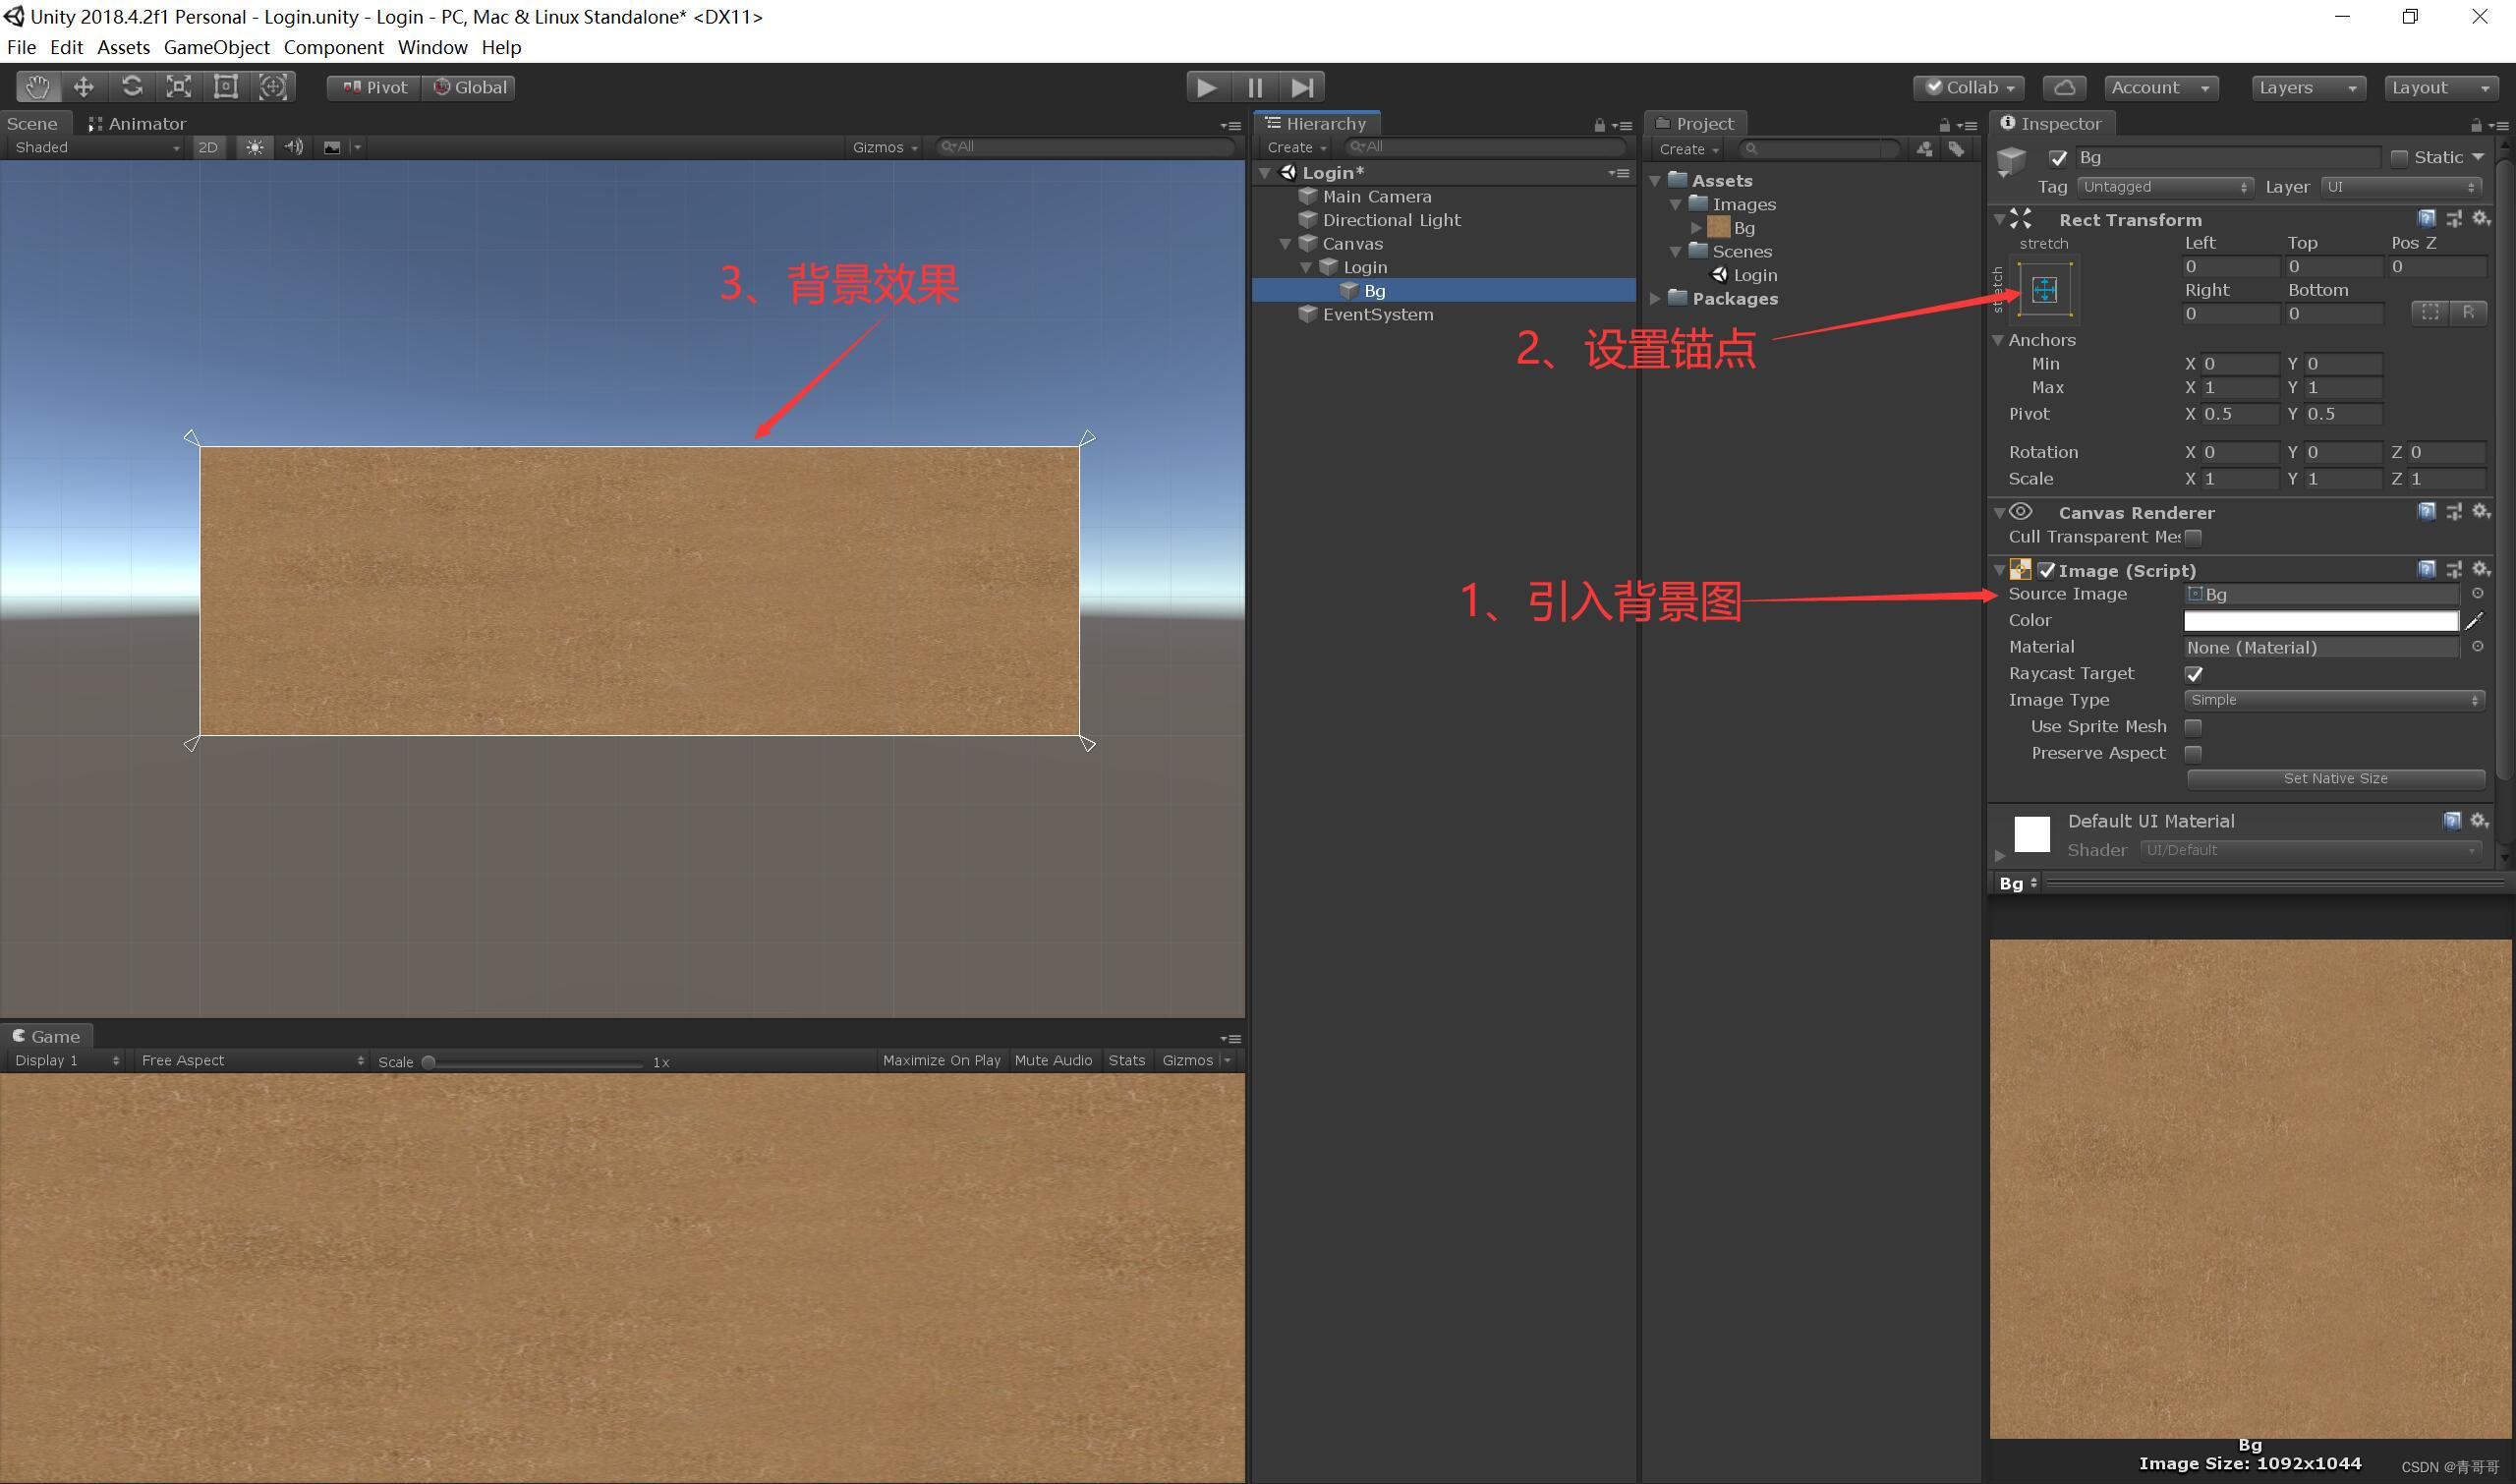
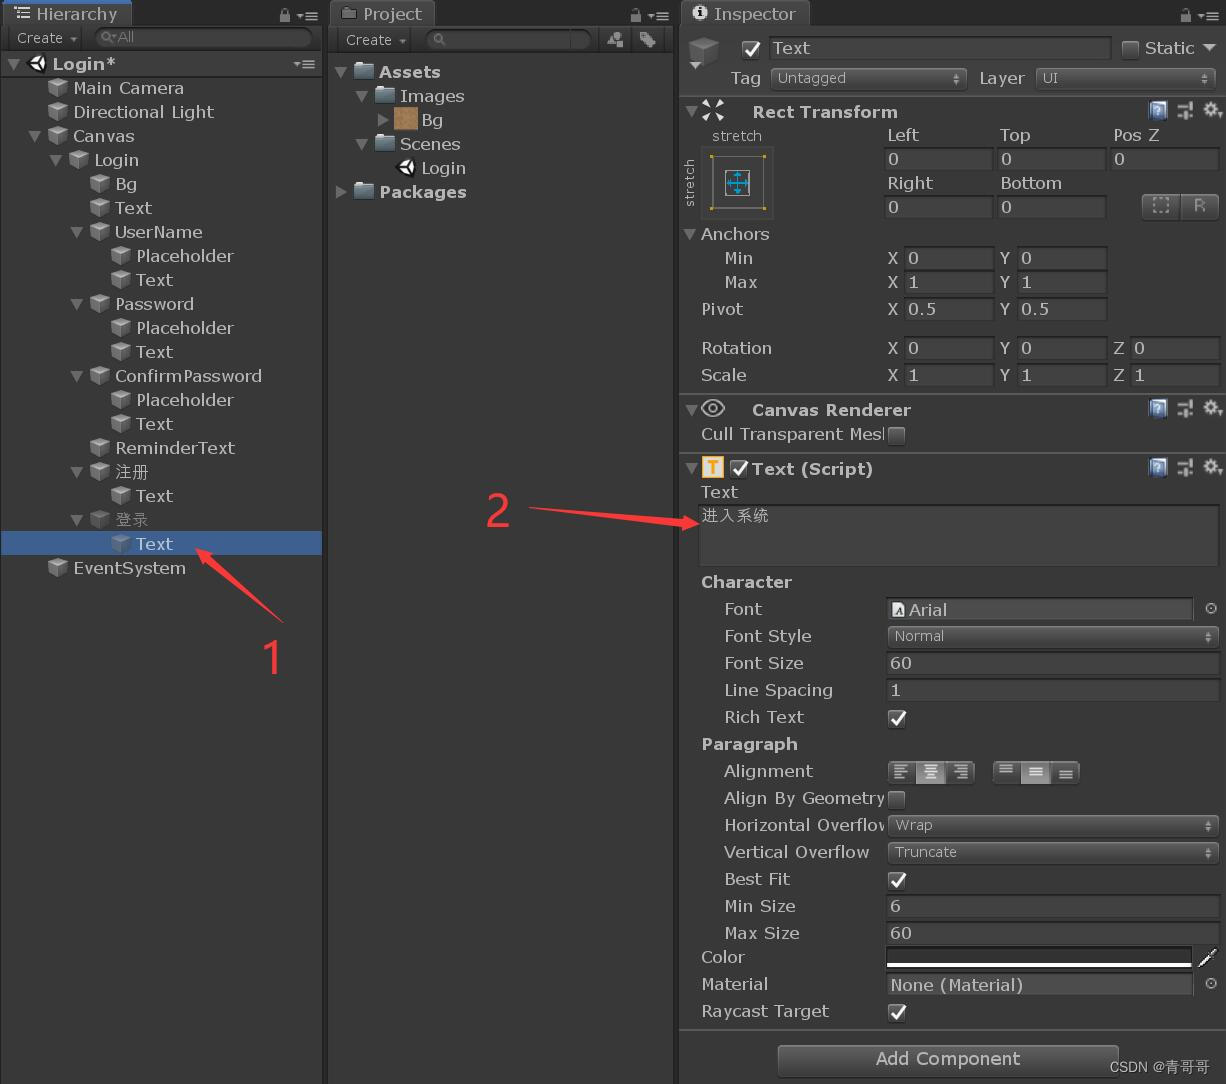
8、 Mouse selected Login, Right click , Create a Text, This text is used to explain .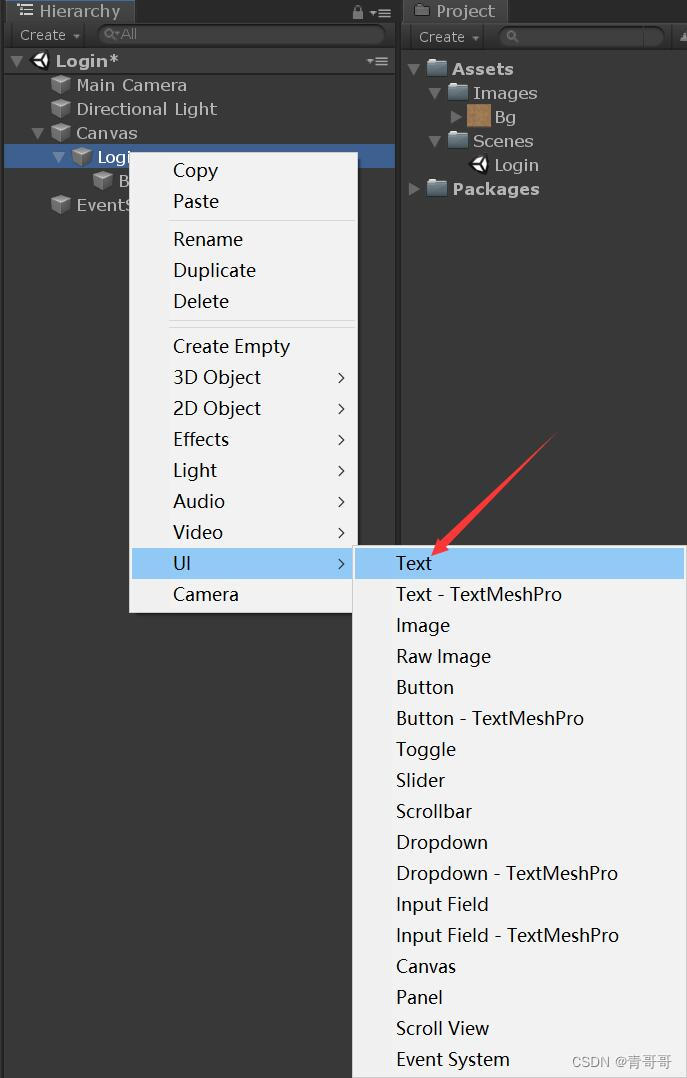
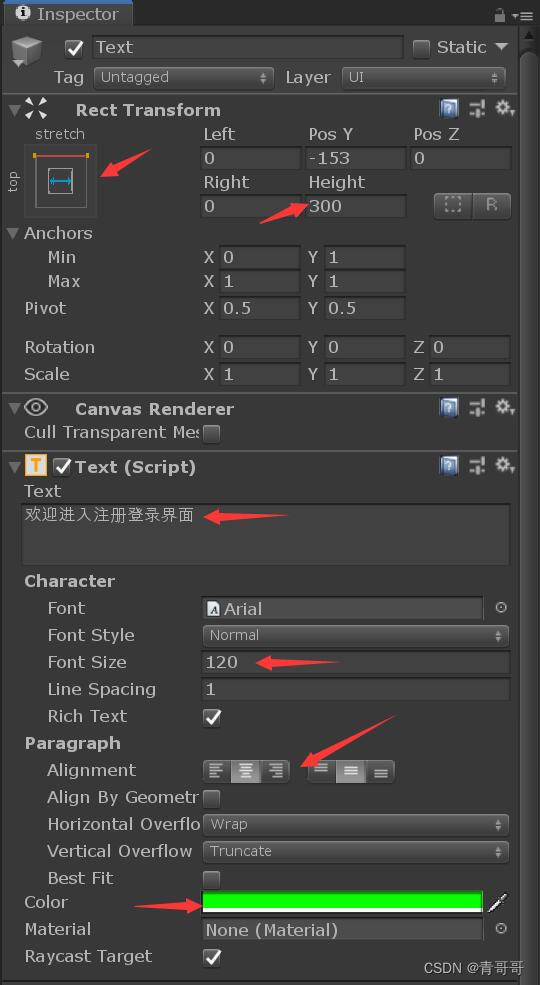
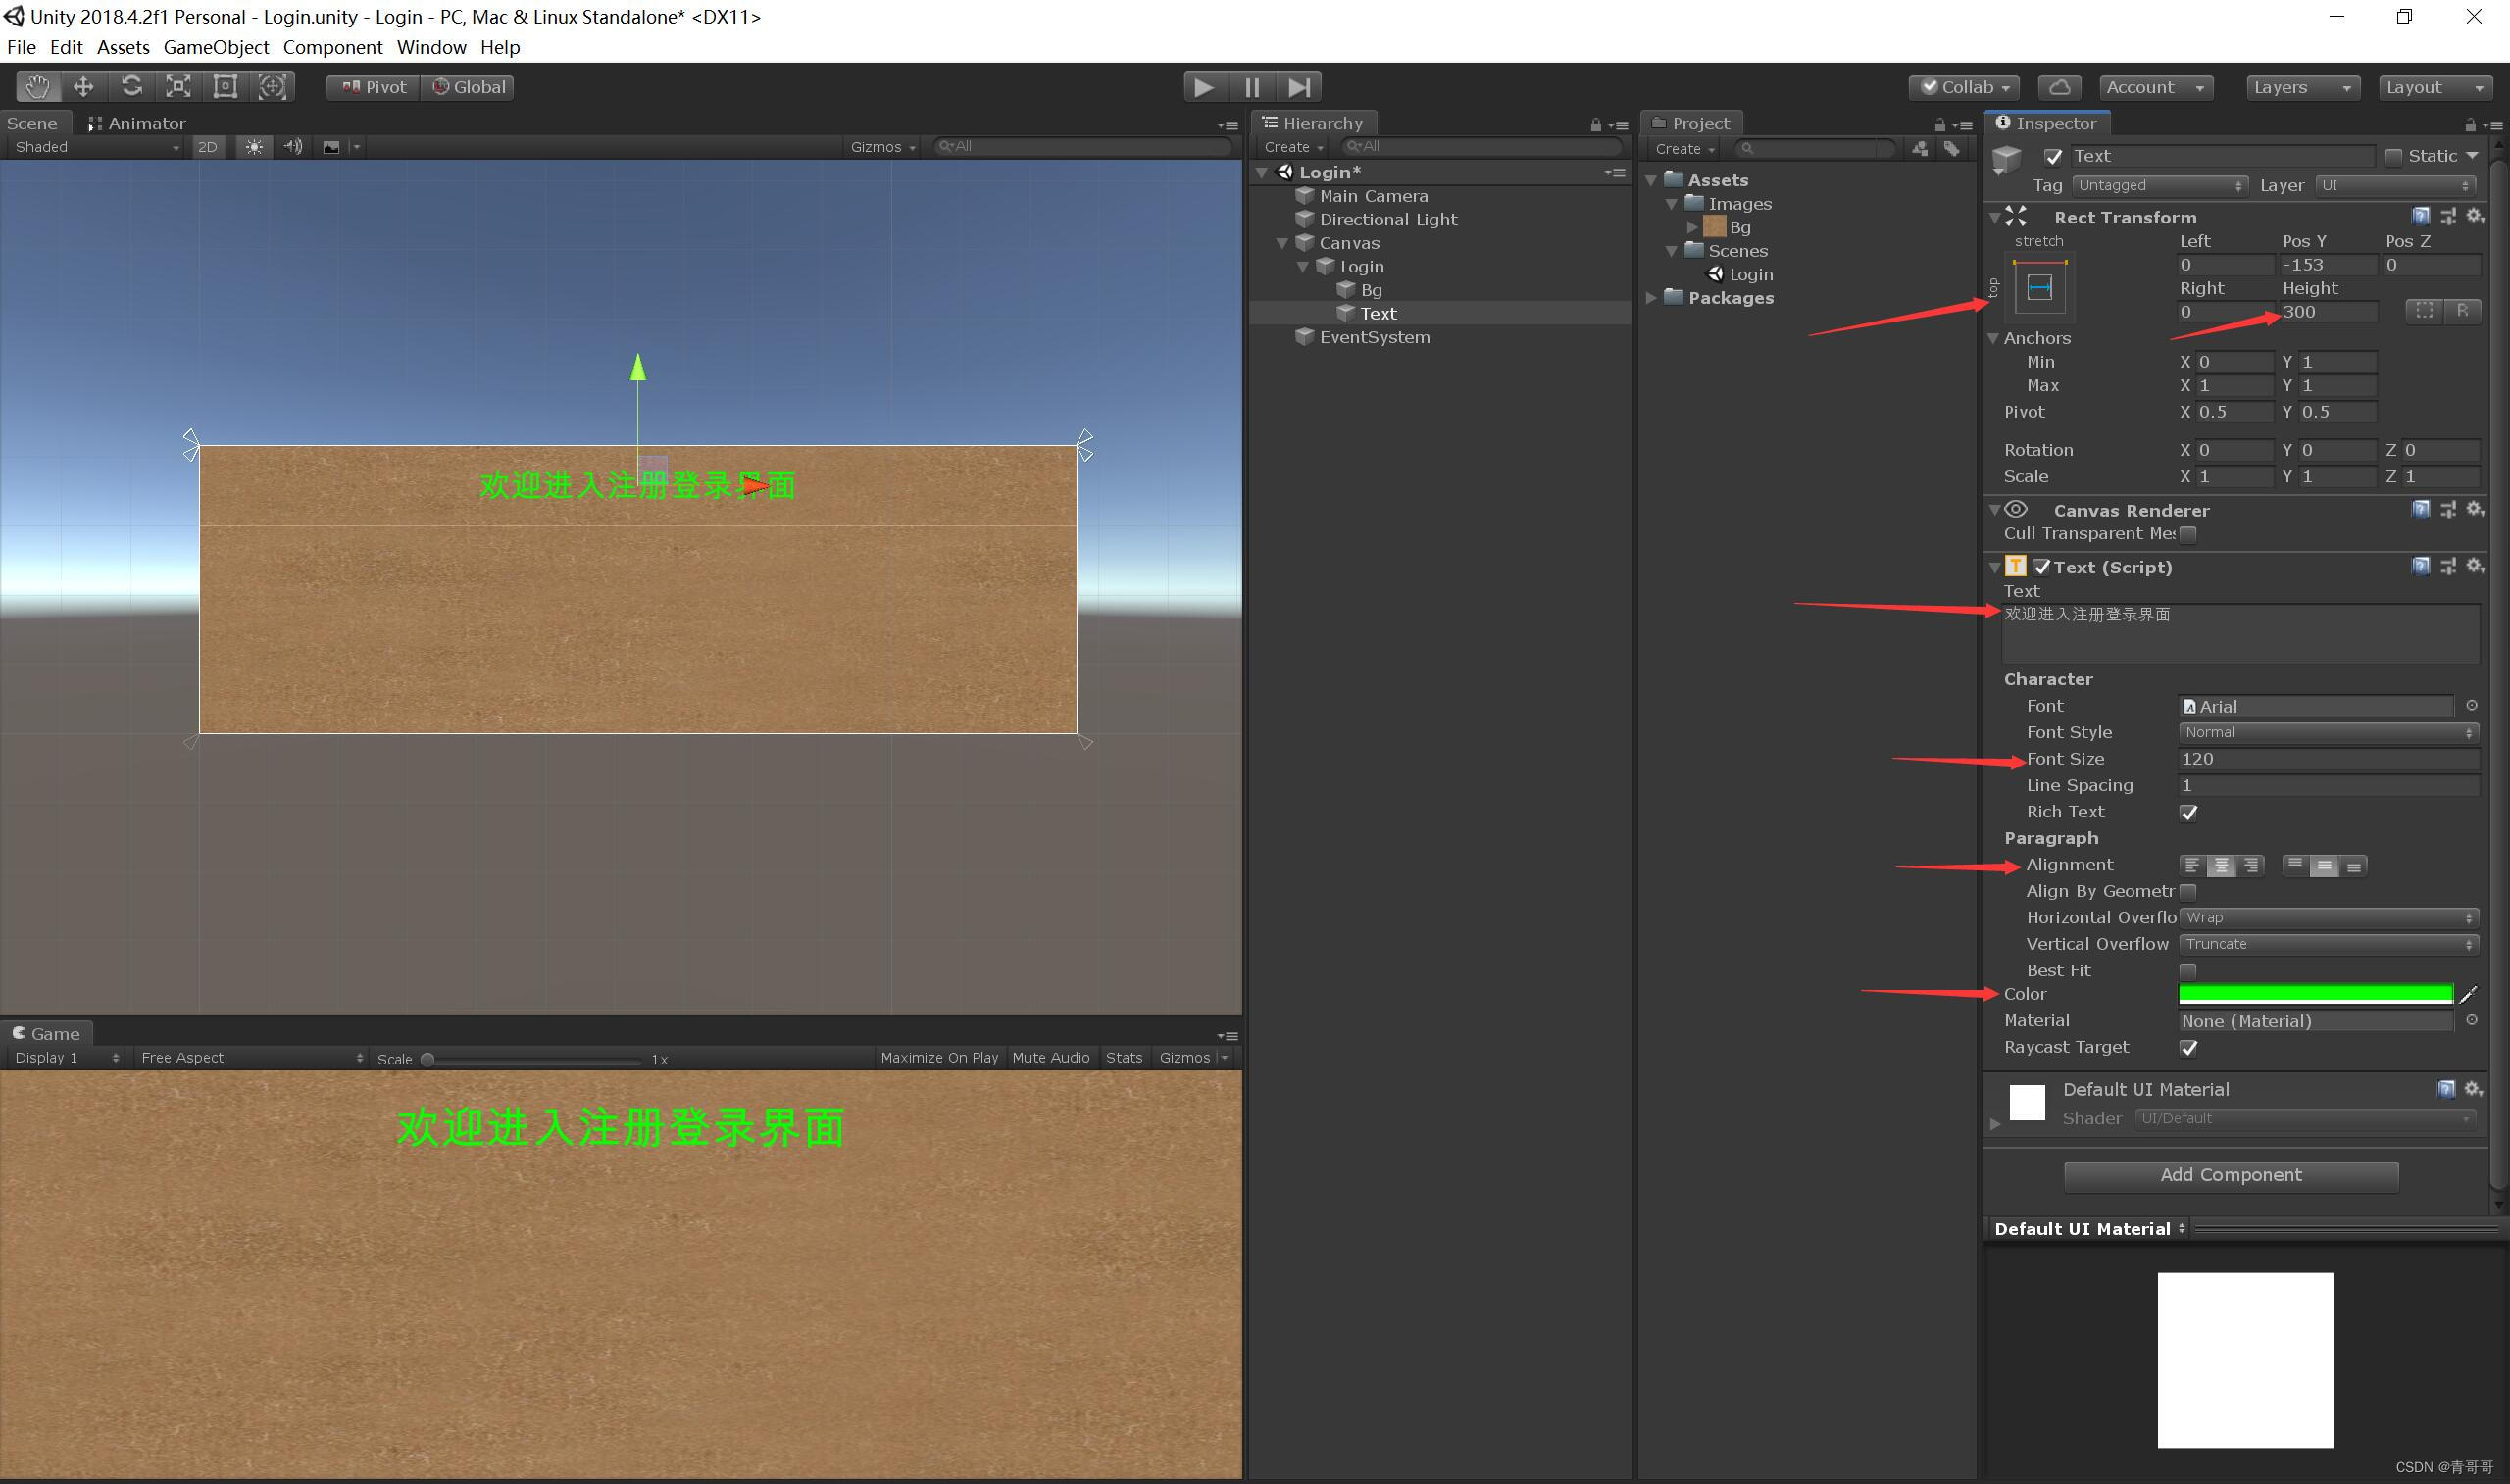
9、 stay Text Enter text in the text input box , Here I am. “ Welcome to the login interface ” For example . You need to set its anchor , I set the top center here , You can also make corresponding settings according to your own needs . Then set the height of the text box Height, For this example 300. You can also adjust the font size , Alignment mode , Font color, etc .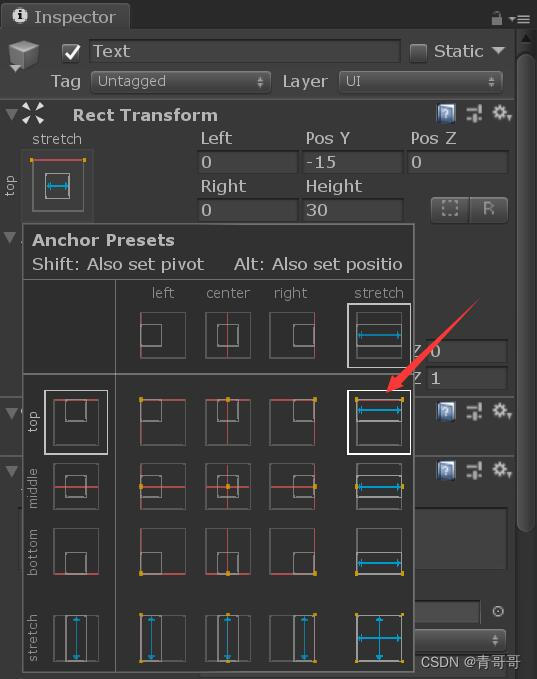
10、 Mouse click Login, Right click , Create a Input Field Input box , Rename it to UserName.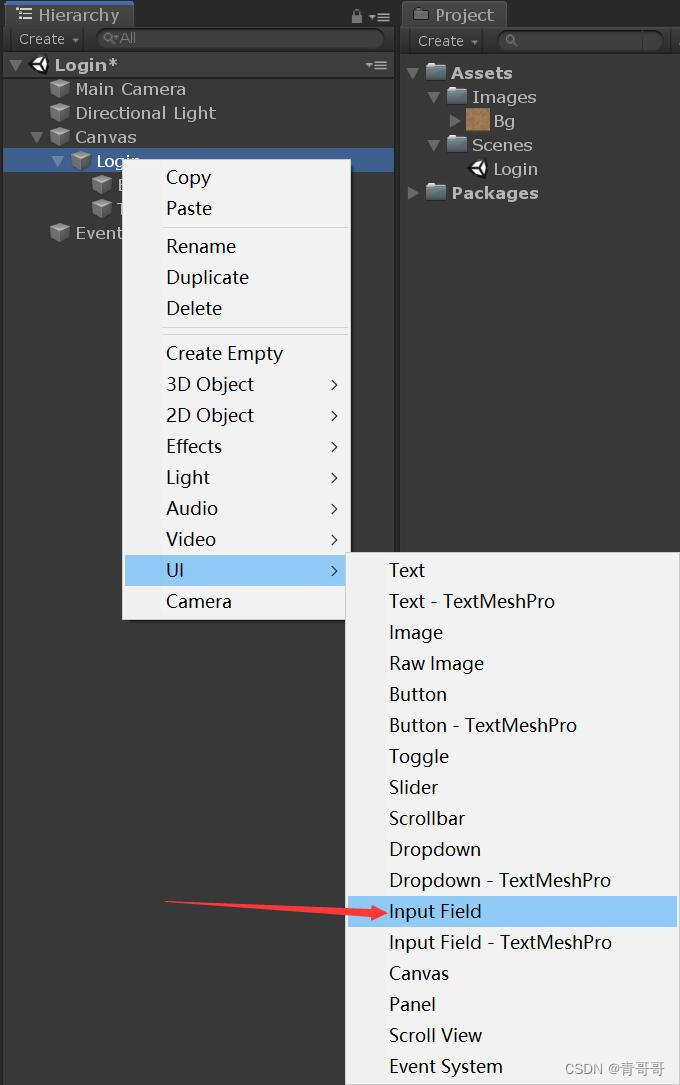
11、UserName The operating .
(1) Click on UserName, Make some changes to it . This example only modifies its width 、 high .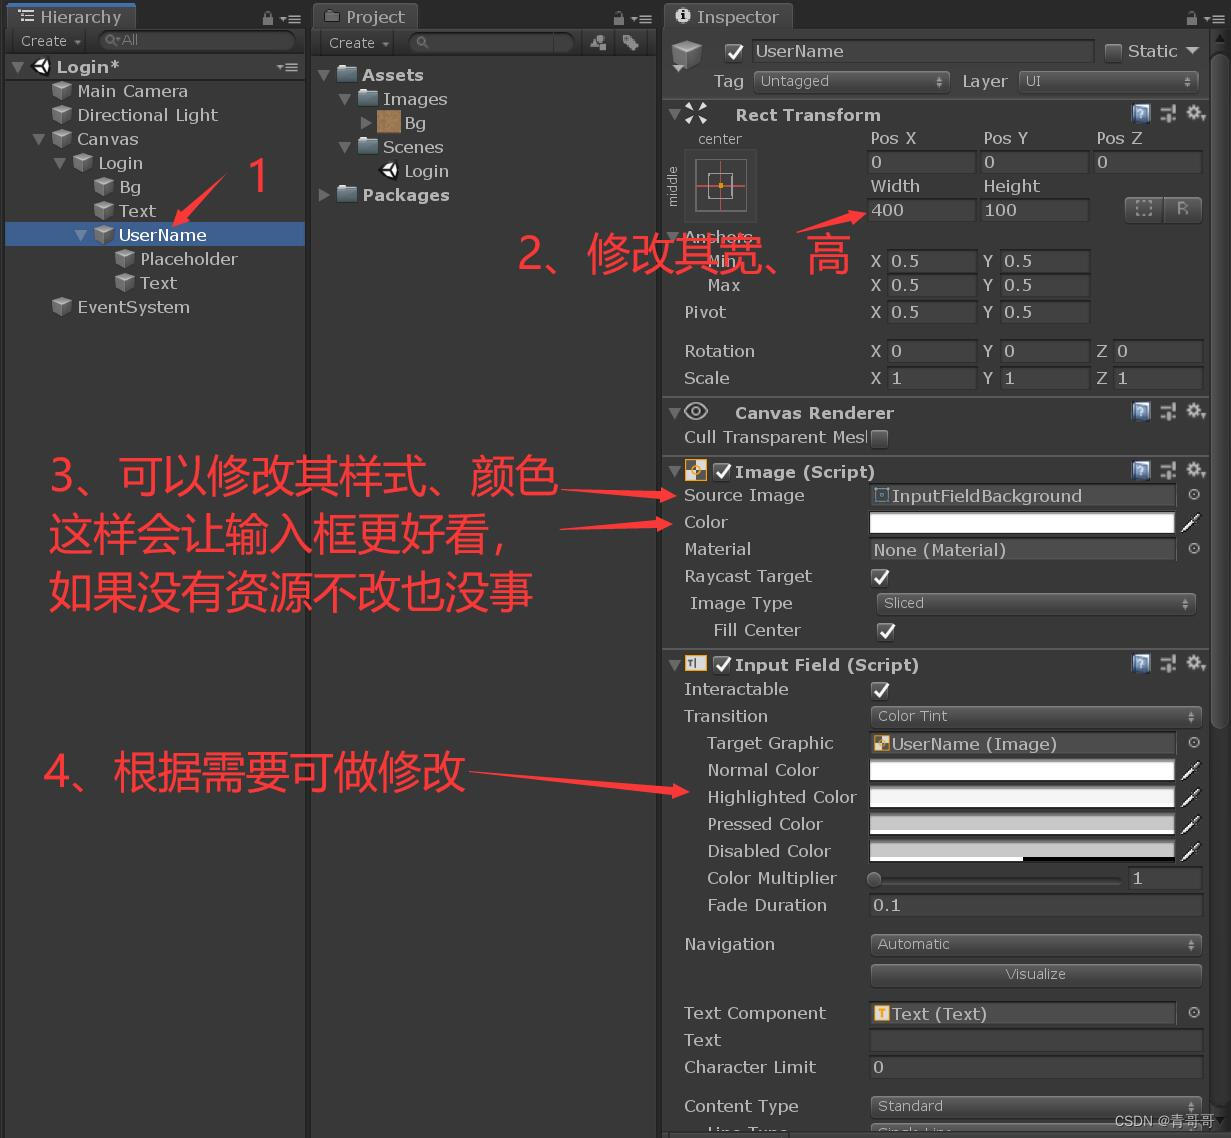
(2) Click on Placeholder, Make some changes to it ,Text Internal input “ Please enter a user name ”, As shown in the figure below .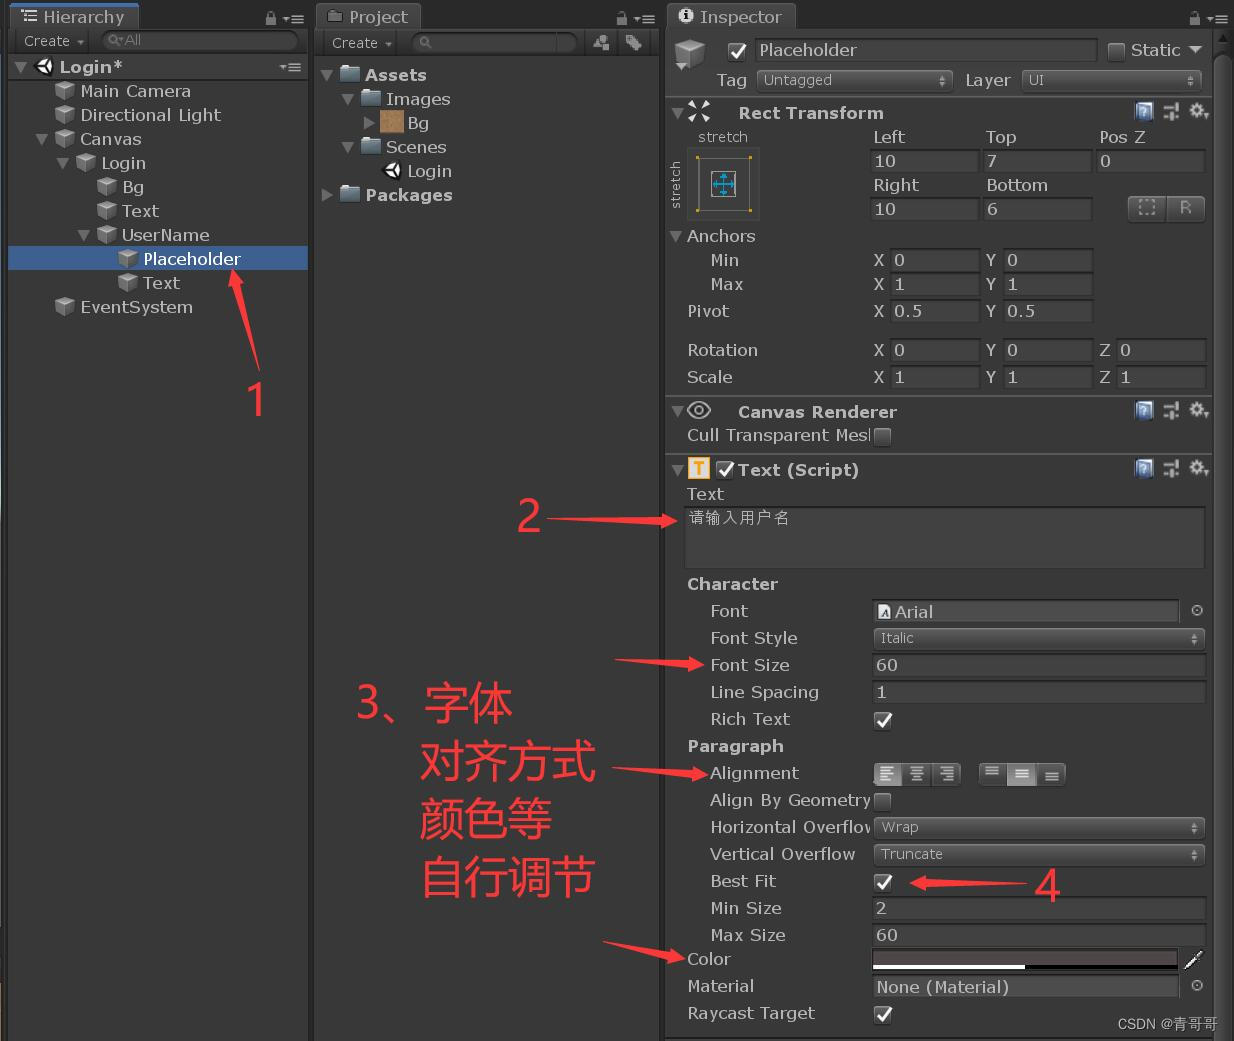
(3) Click on Text, Make some changes to it , As shown in the figure below .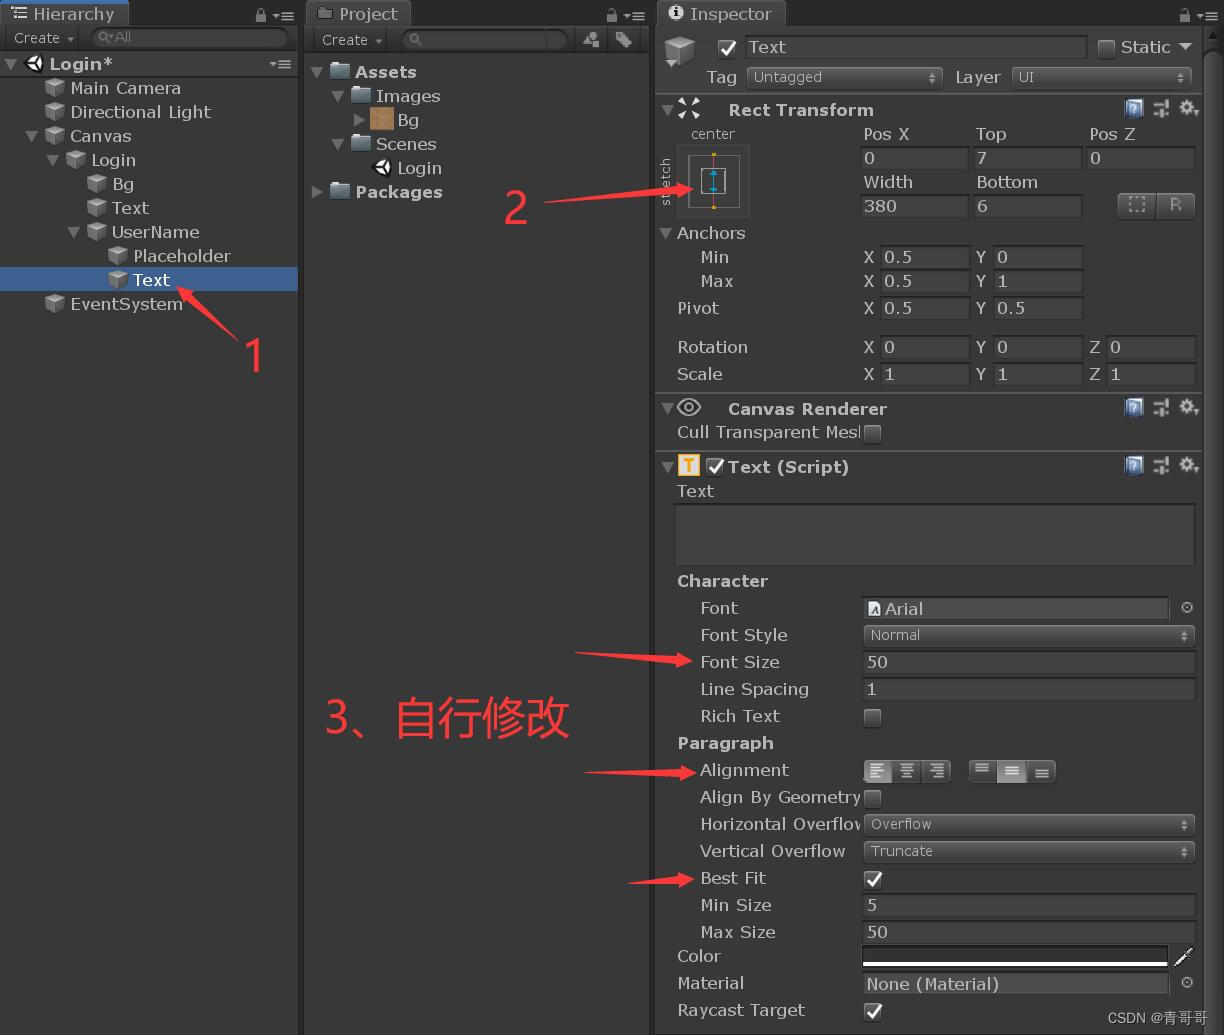
12、 Mouse selected UserName,Ctrl+D, Two copies of , And rename the two copies as Password and ConfirmPassword, That is, password and confirm password , As shown in the figure below .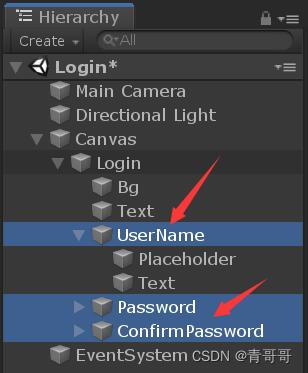
13、Password The operating , Just put the Password Move down as a whole , And modify it Placeholder Inside Text Content is enough , This case Text The content of this article is “ Please input a password ”, Nothing else needs to be changed , As shown in the figure below .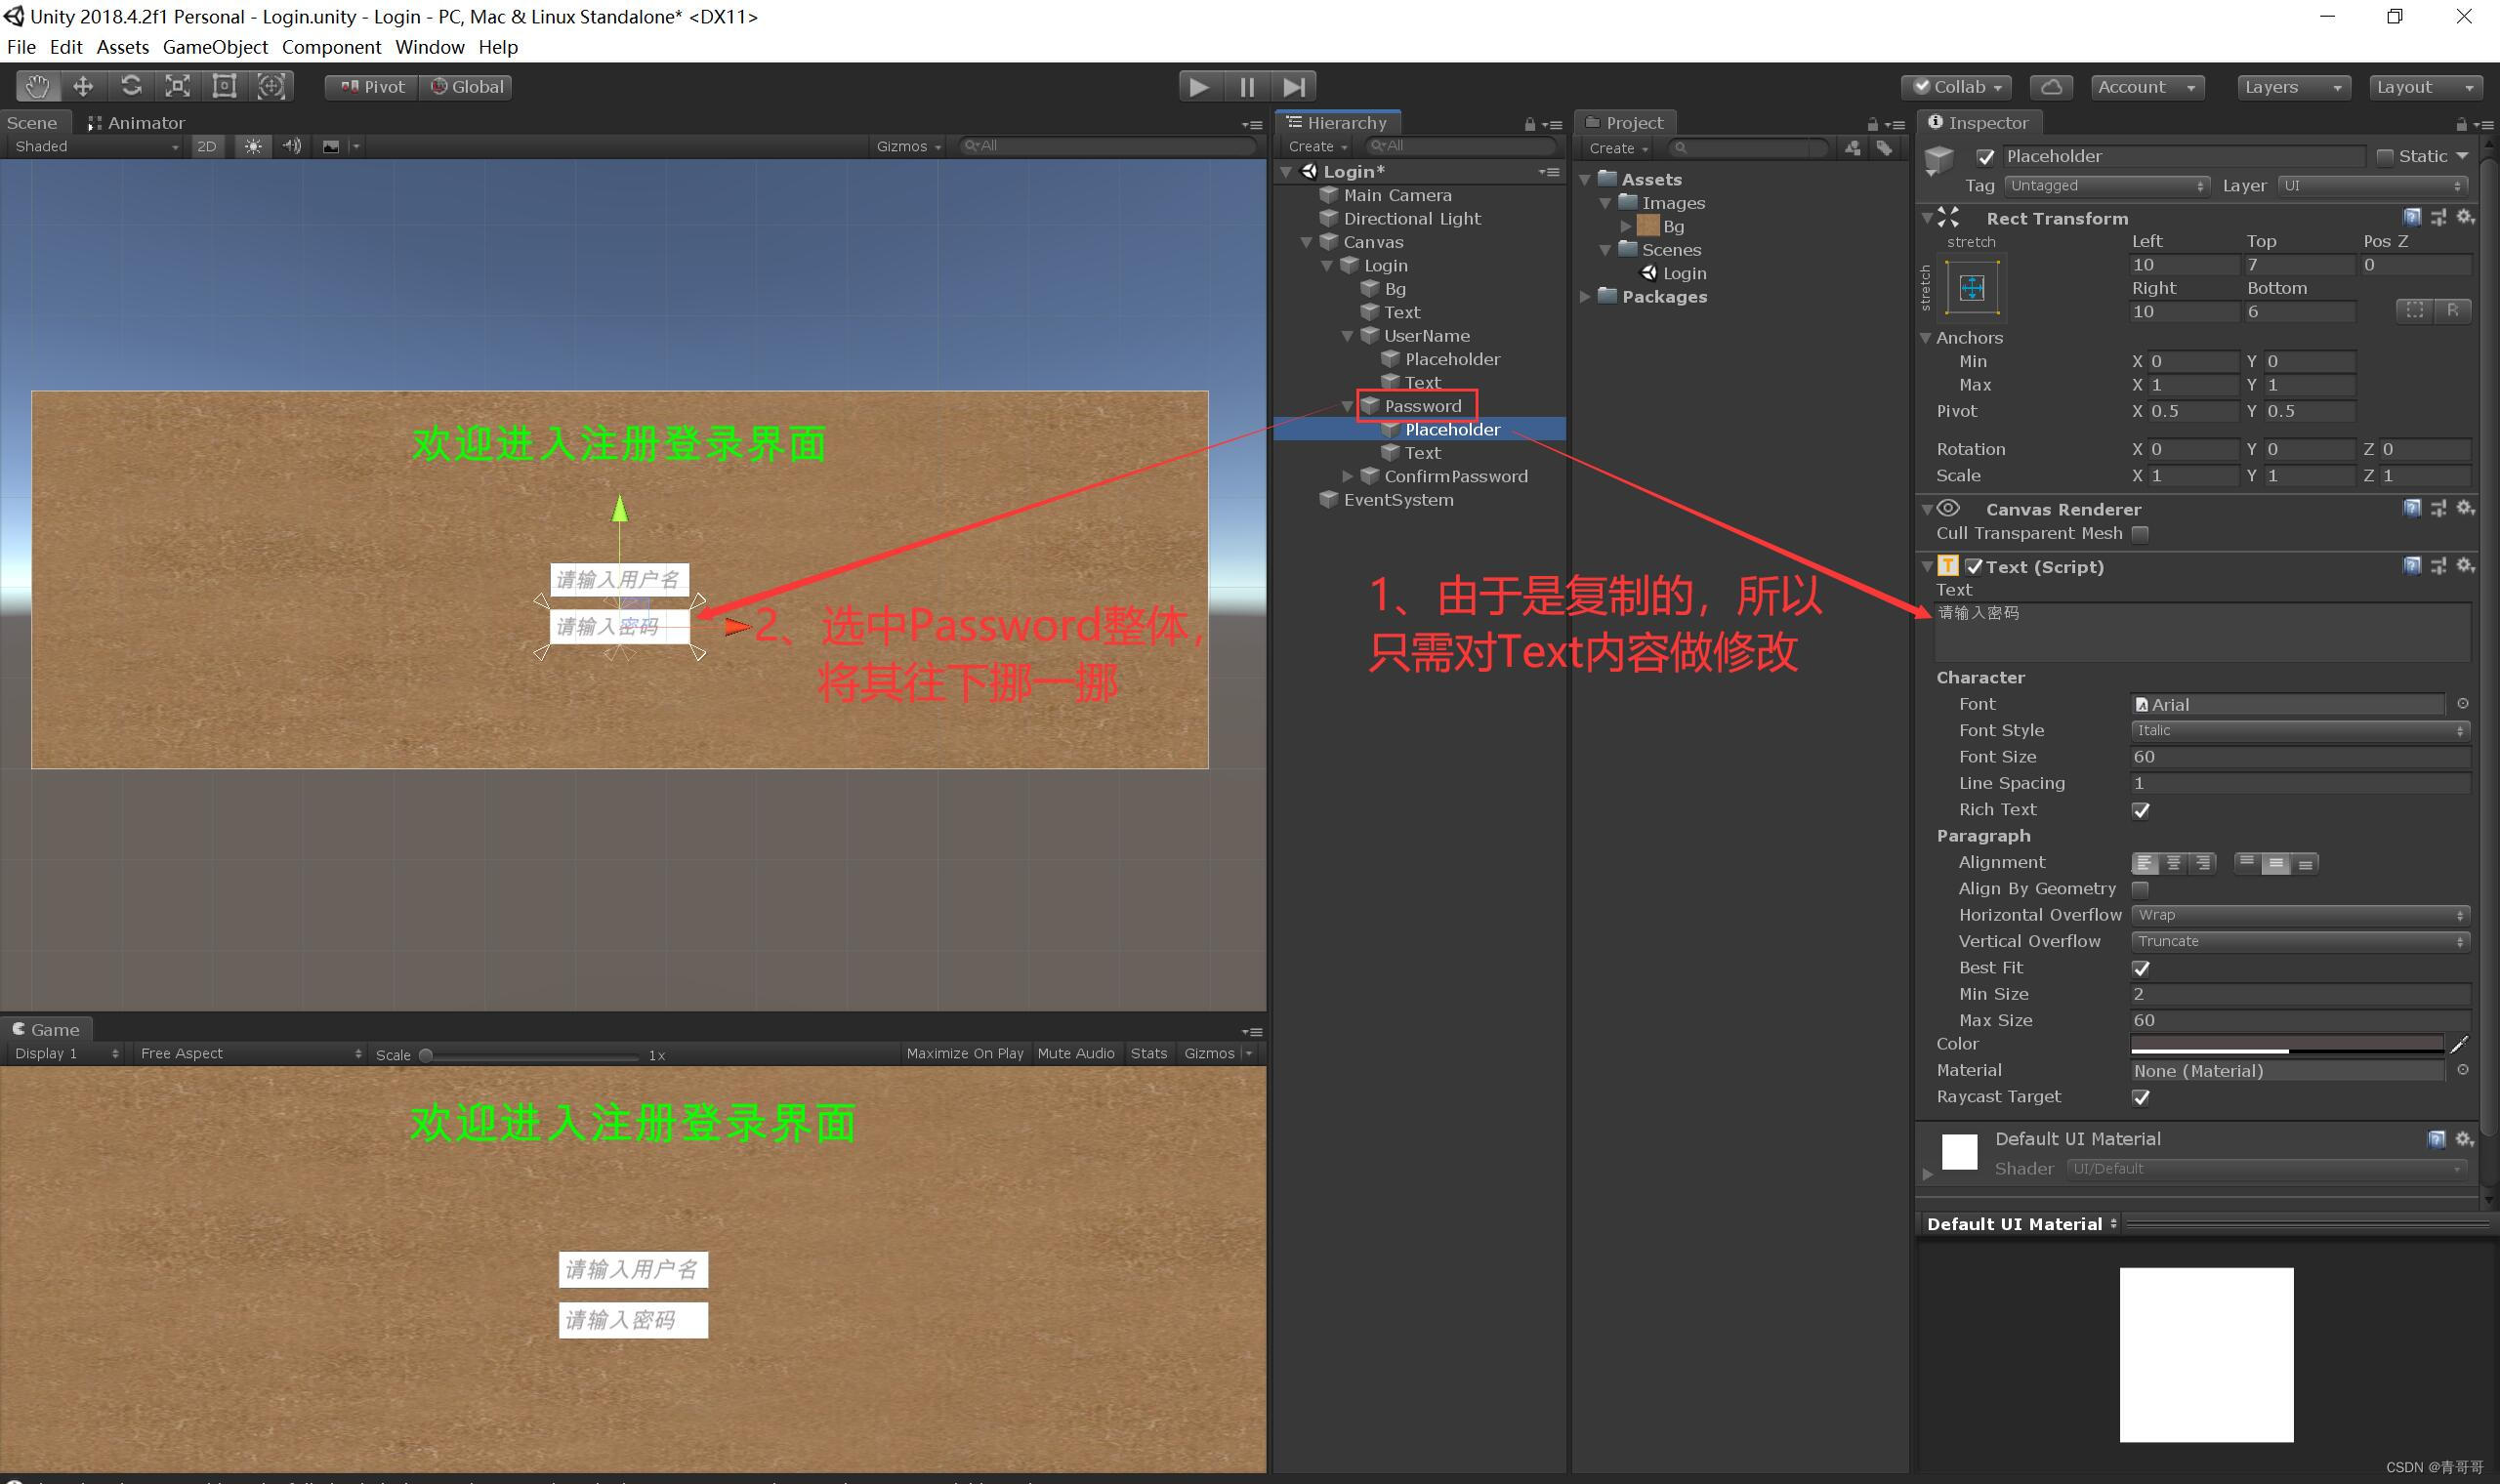
14、ConfirmPassword The operating , Just put the ConfirmPassword Move down as a whole , And modify it Placeholder Inside Text Content is enough , This case Text The content of this article is “ Please confirm the password ”, Nothing else needs to be changed , As shown in the figure below .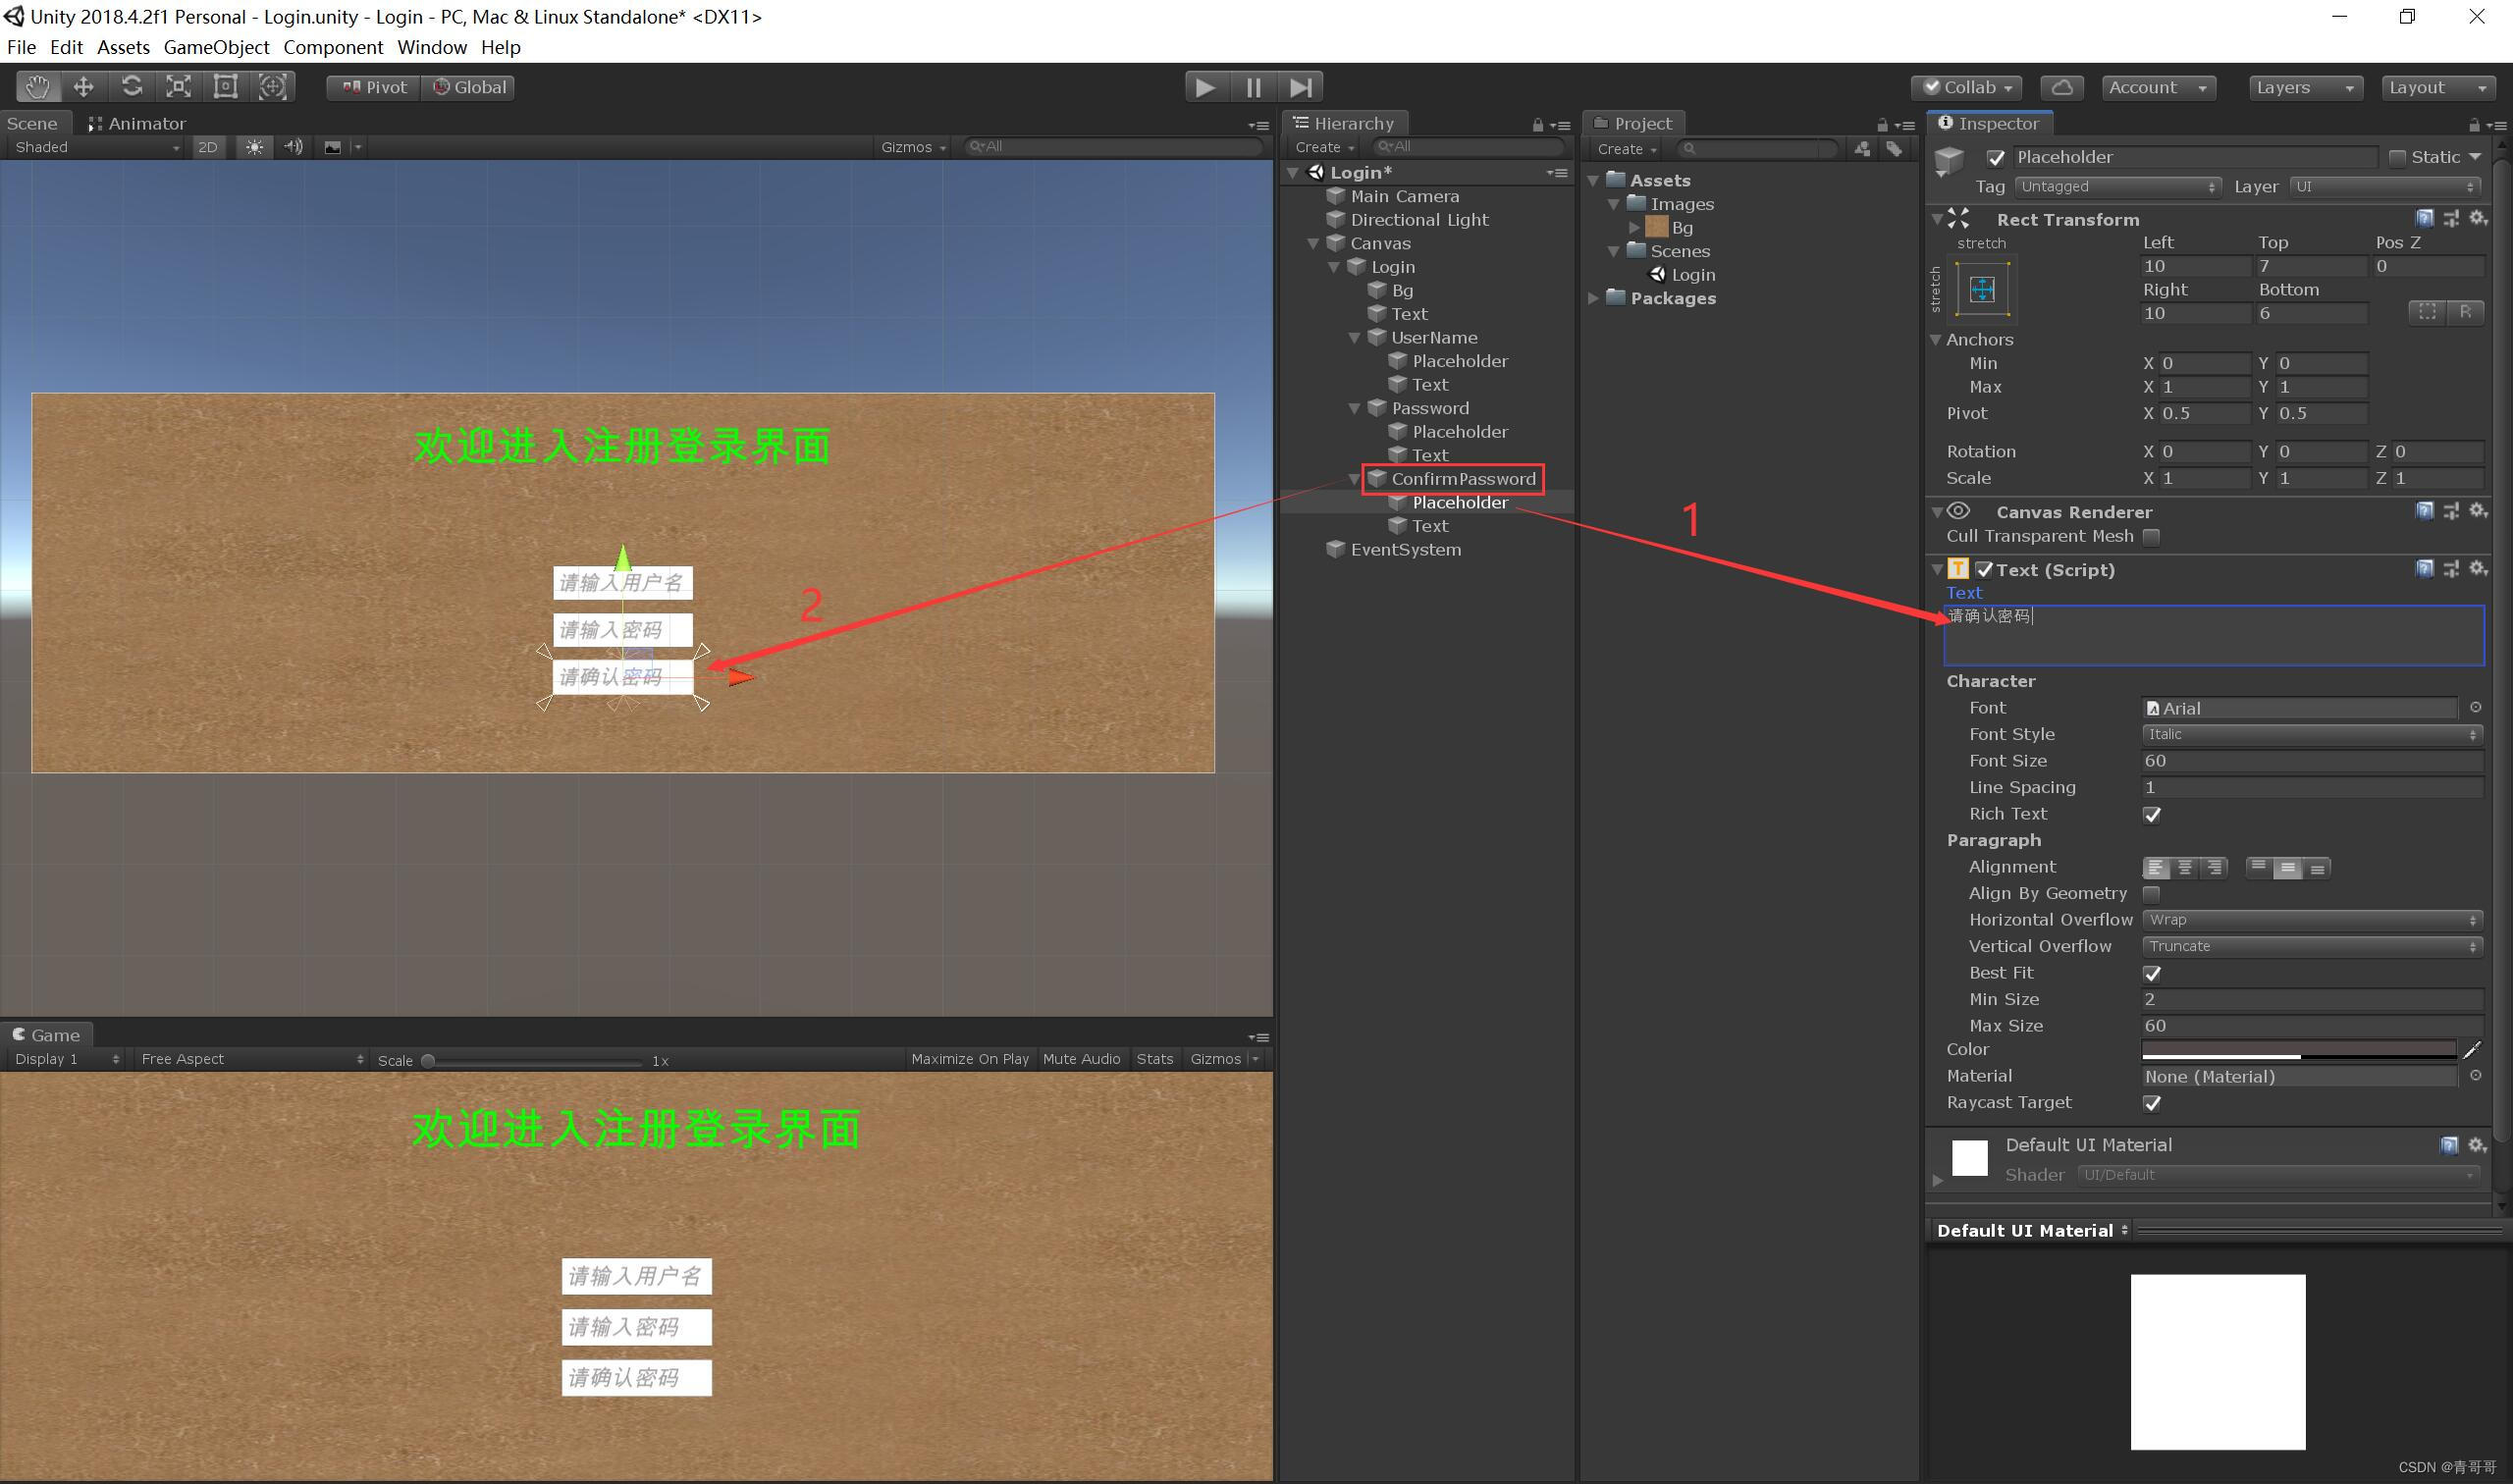
15、 Mouse click Login, Right click , Create a Text The text box , Rename it to ReminderText, The function of this text is : When the registration login succeeds or fails , If the password is entered correctly, the corresponding text prompt will be given .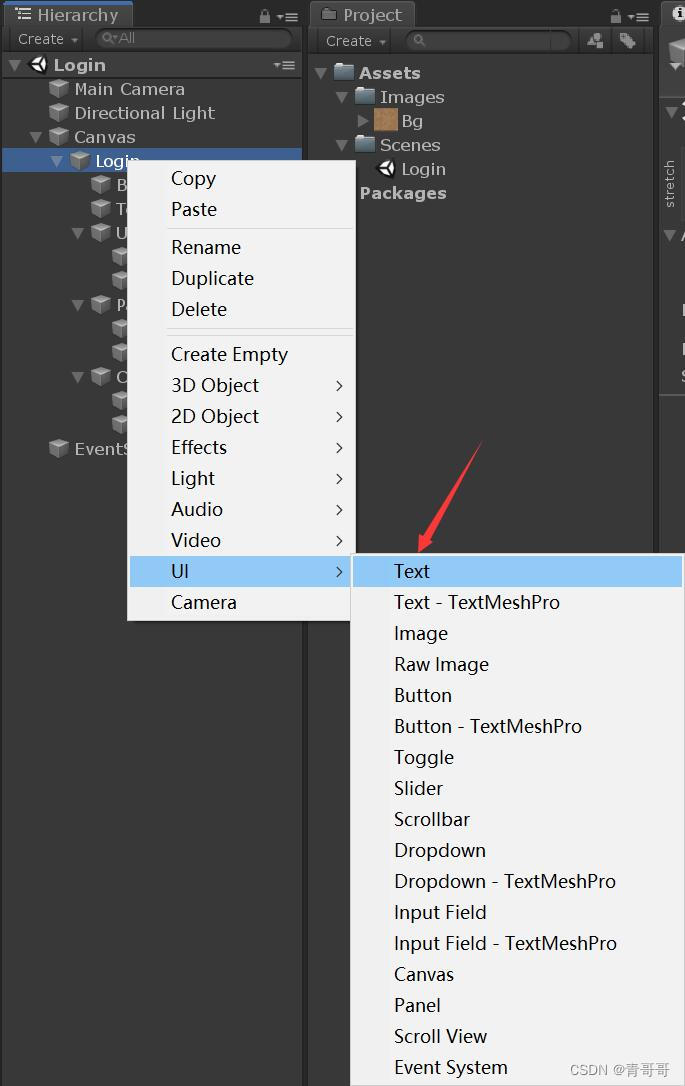
16、 Click on ReminderText, Make some changes to it , As shown in the figure below .
17、 Mouse click Login, Right click , Create a Button, And rename to “ register ”.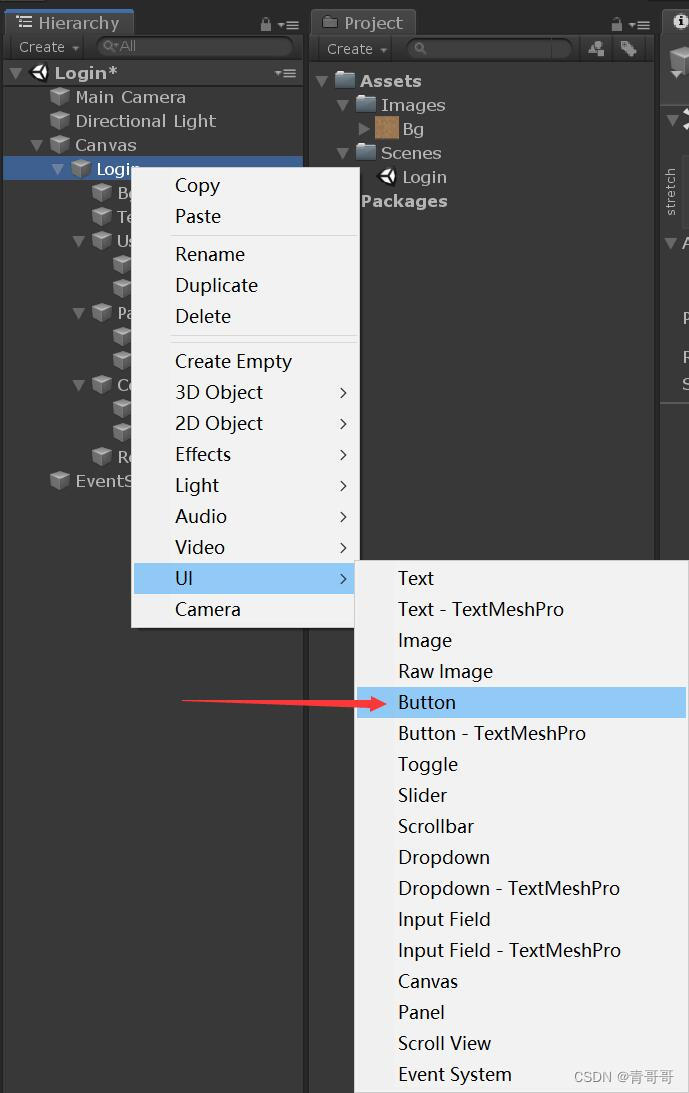
18、“ register ” The operating .
(1) Click on “ register ”, Set it briefly , As shown in the figure below .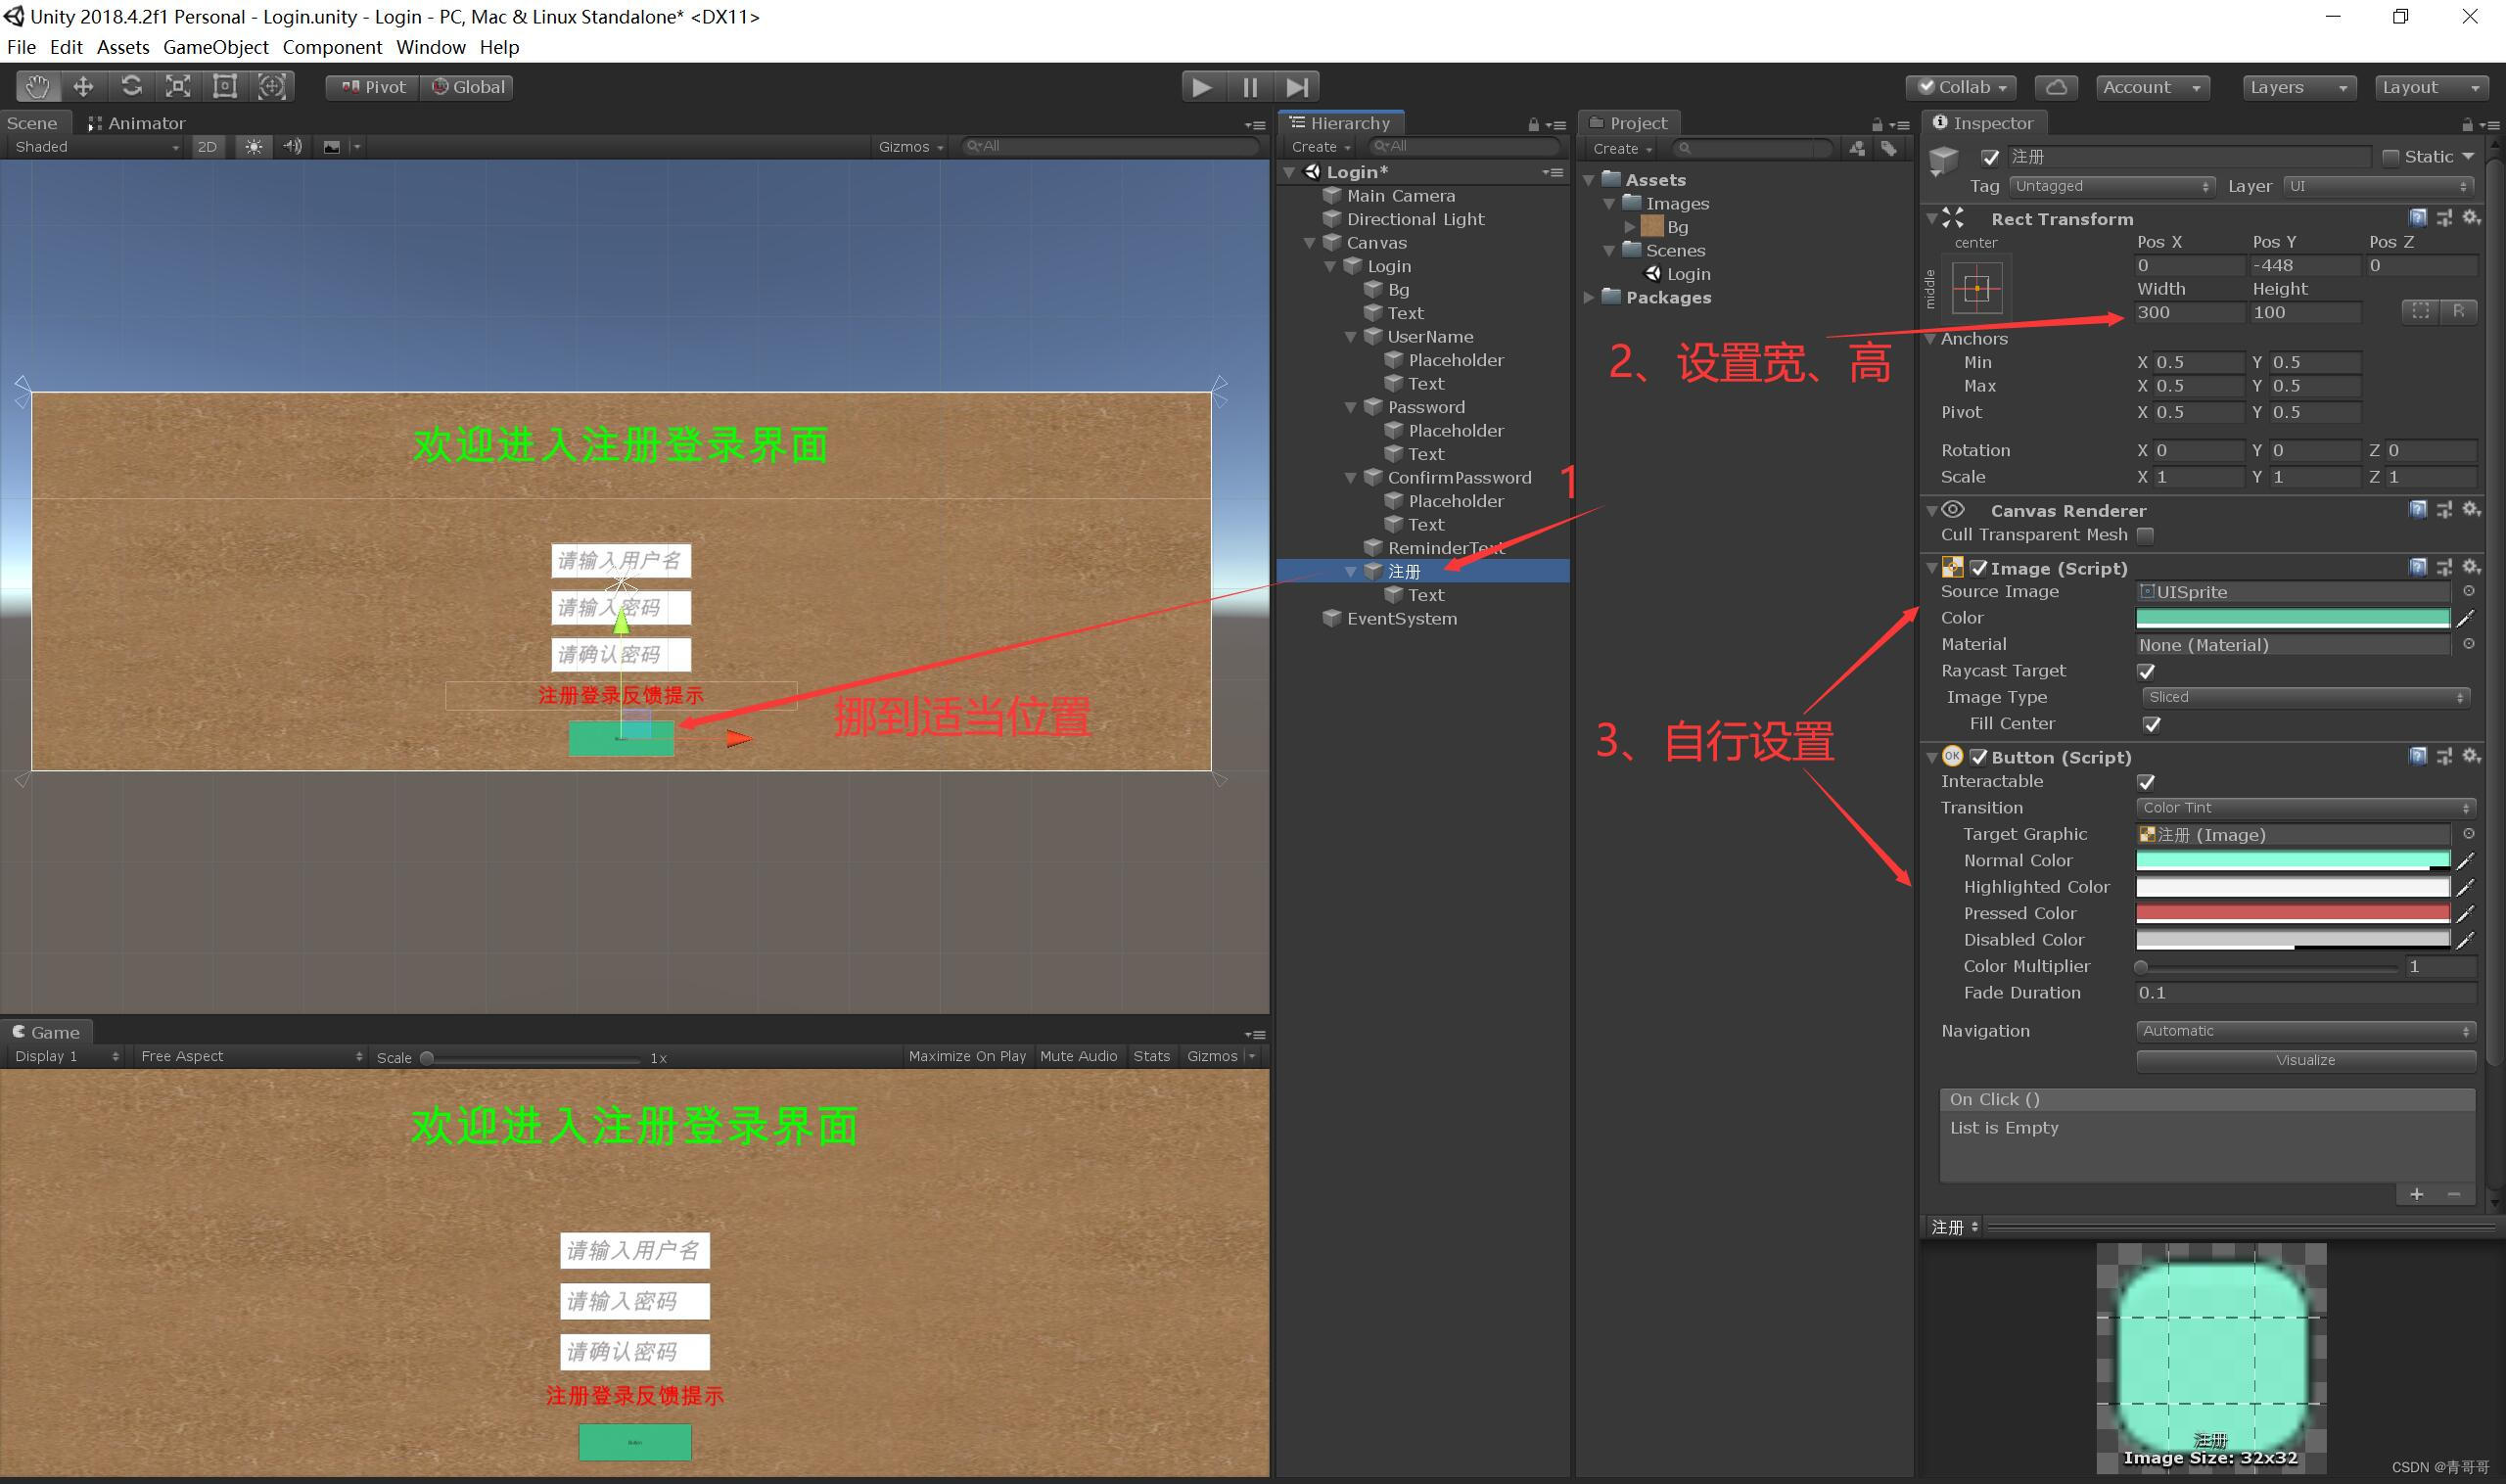
(2) Click on Text, Enter in the text box “ notes book ”, And make simple settings for its font , As shown in the figure below .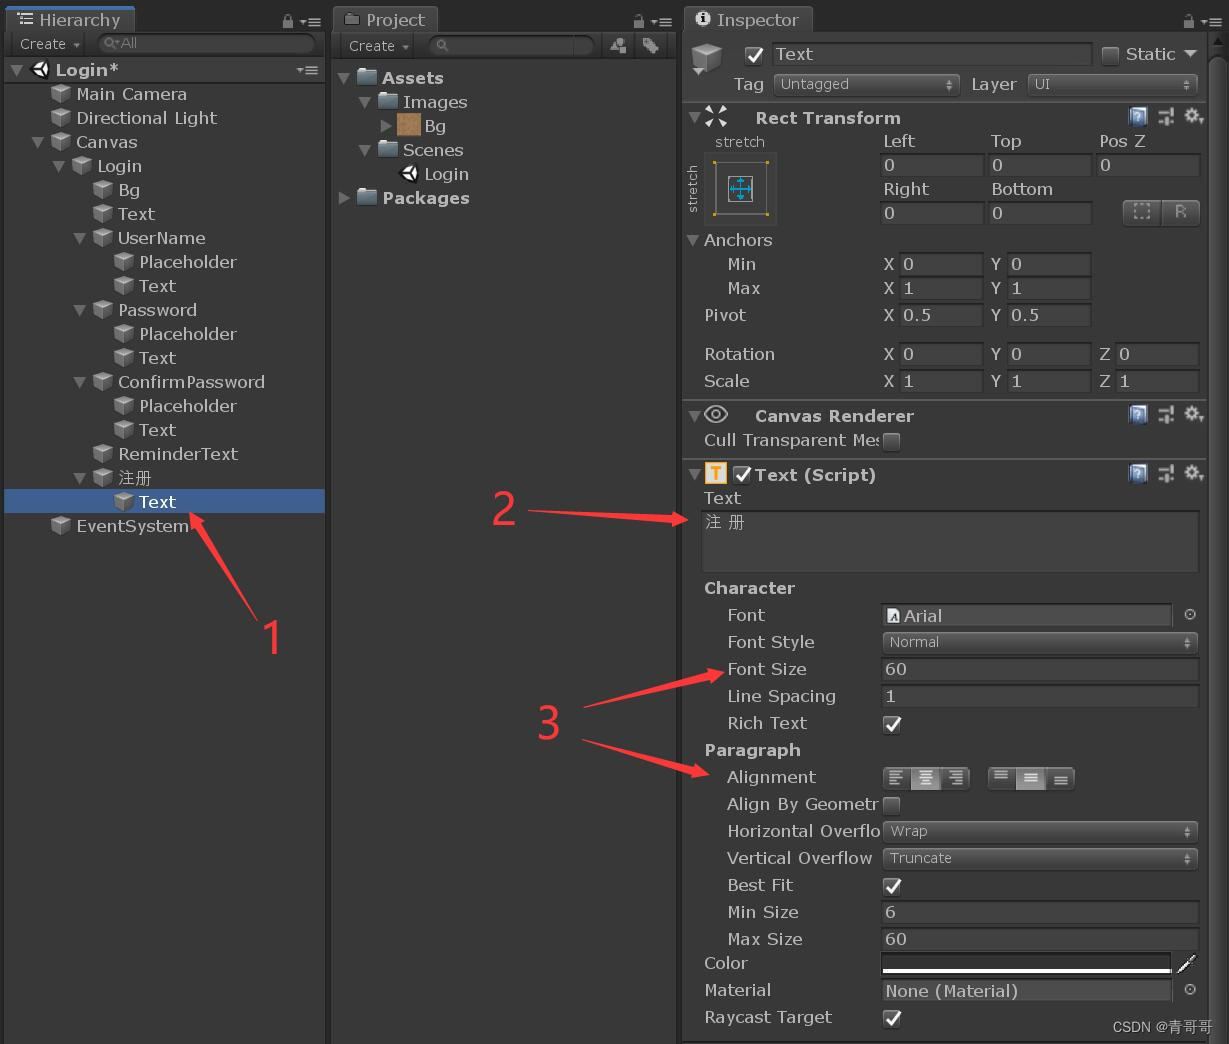
19、 Mouse selected “ register ”,Ctrl+D A copy of , Rename it to “ Sign in ”, And disable it ; In its Text Enter in text box “ Entry system ”, As shown in the figure below .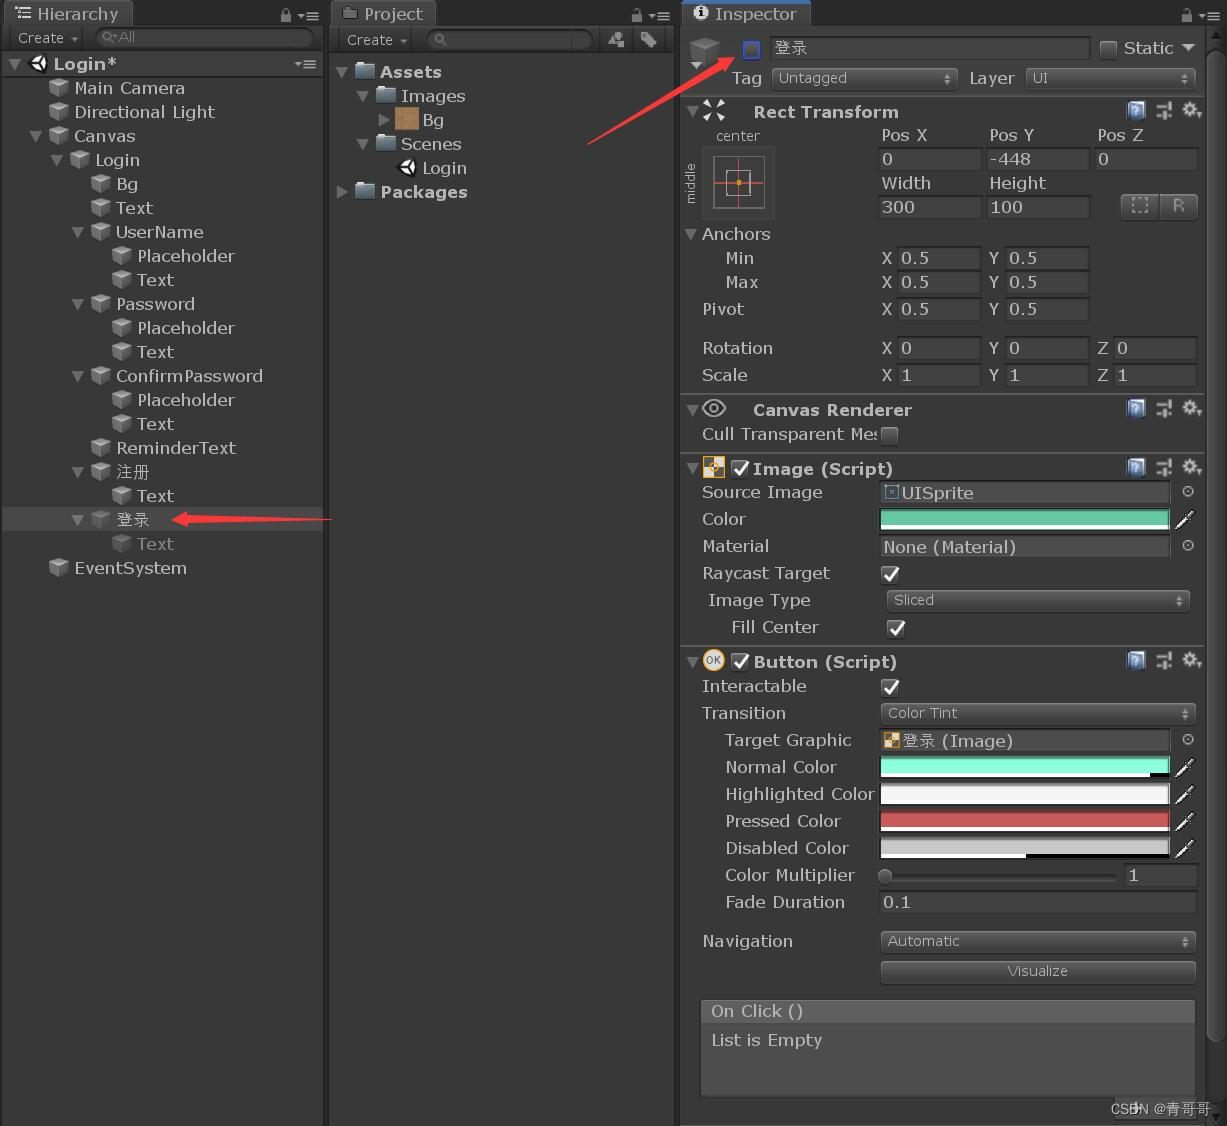
20、 Mouse selected Login, Right click , Create an empty object , And rename to “Toggle Group”.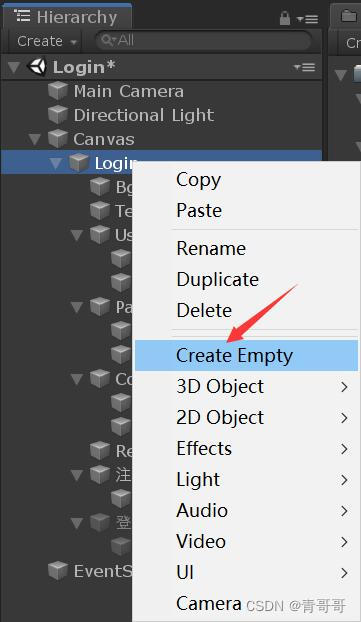
21、 Choose “Toggle Group”, Click on “Add Component” add to “Toggle Group(Script)” Components .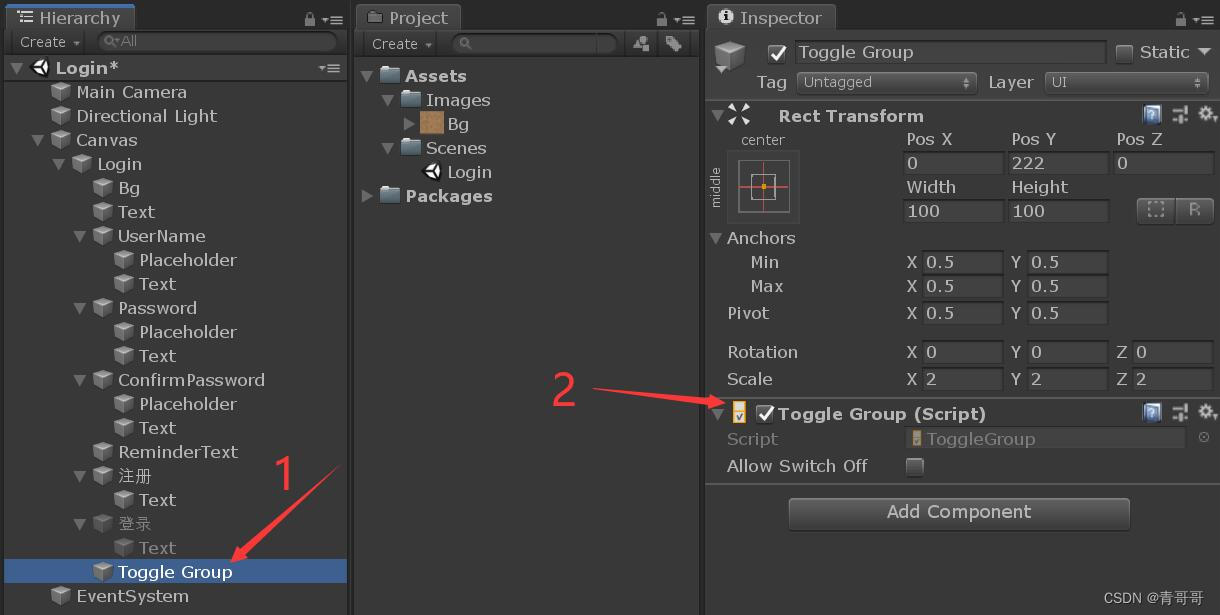
22、 Mouse selected Login, Right click , Create a Toggle, And rename to “Toggle register ”.
23、“Toggle register ” The operating .
(1) Click on “Toggle register ”, Make a preliminary adjustment , As shown in the figure below .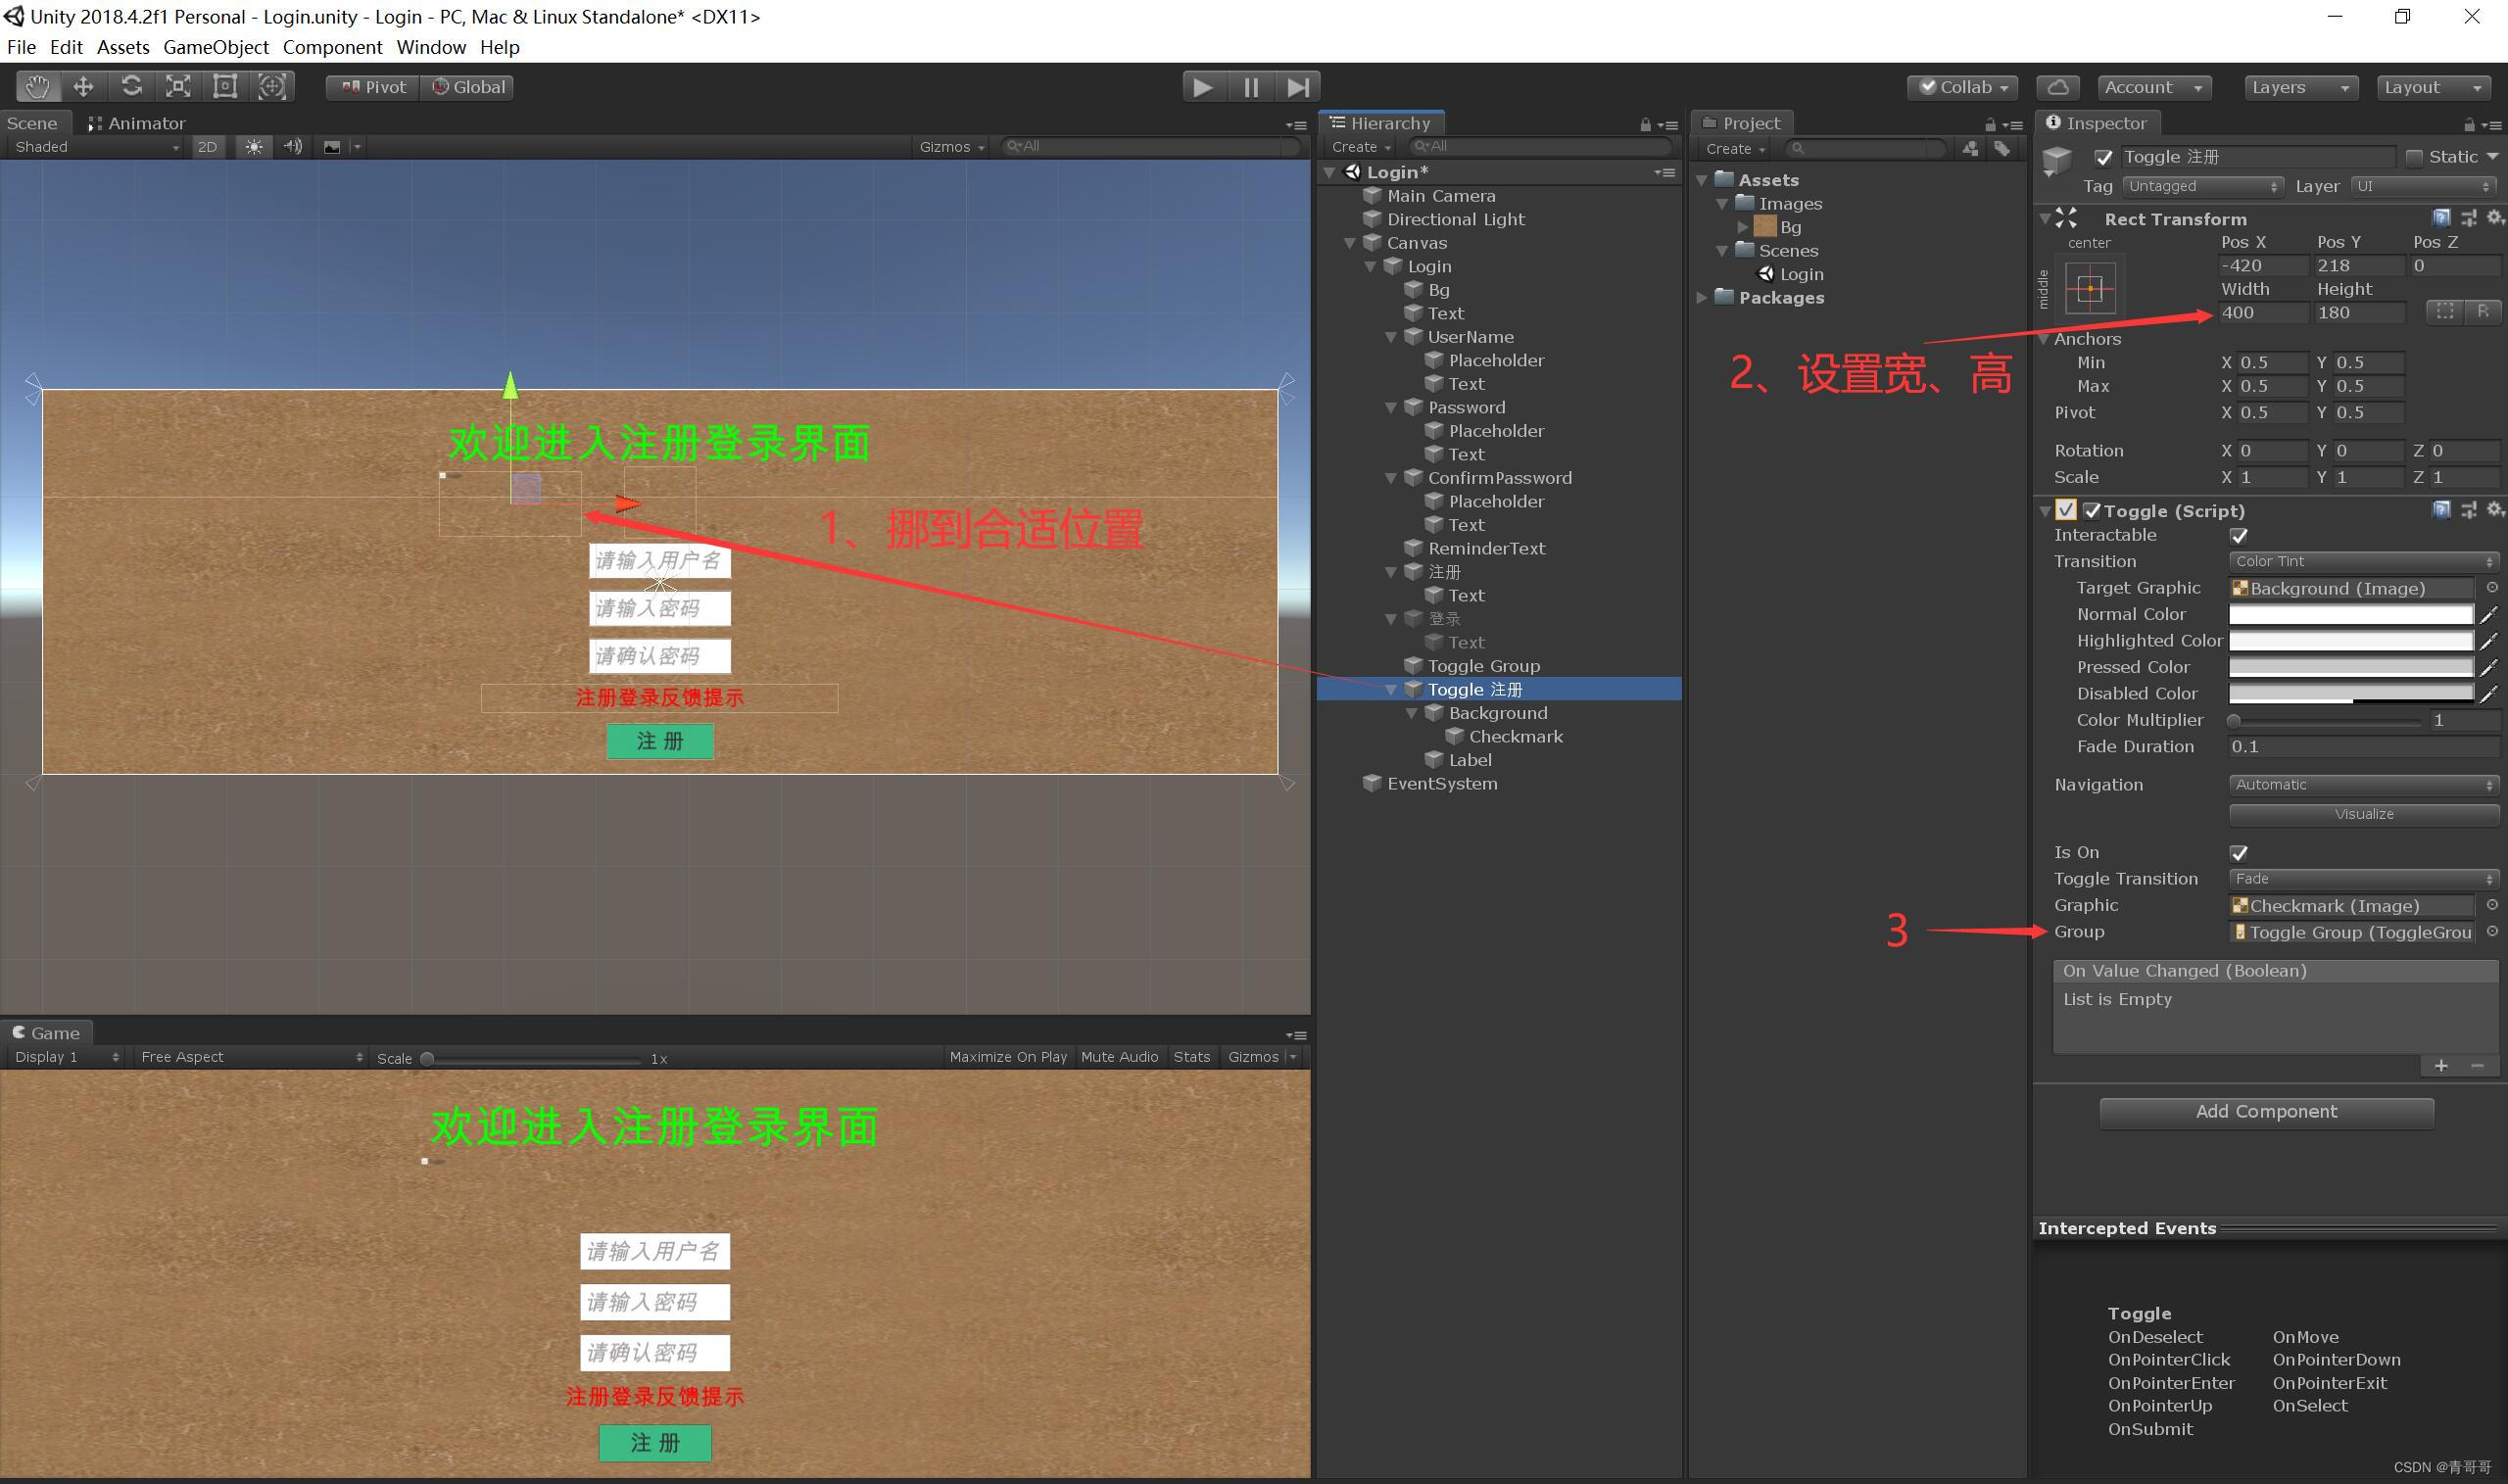
(2) Click on “Background”, Make a preliminary adjustment , As shown in the figure below .
(3) Click on “Checkmark”, Make a preliminary adjustment , As shown in the figure below .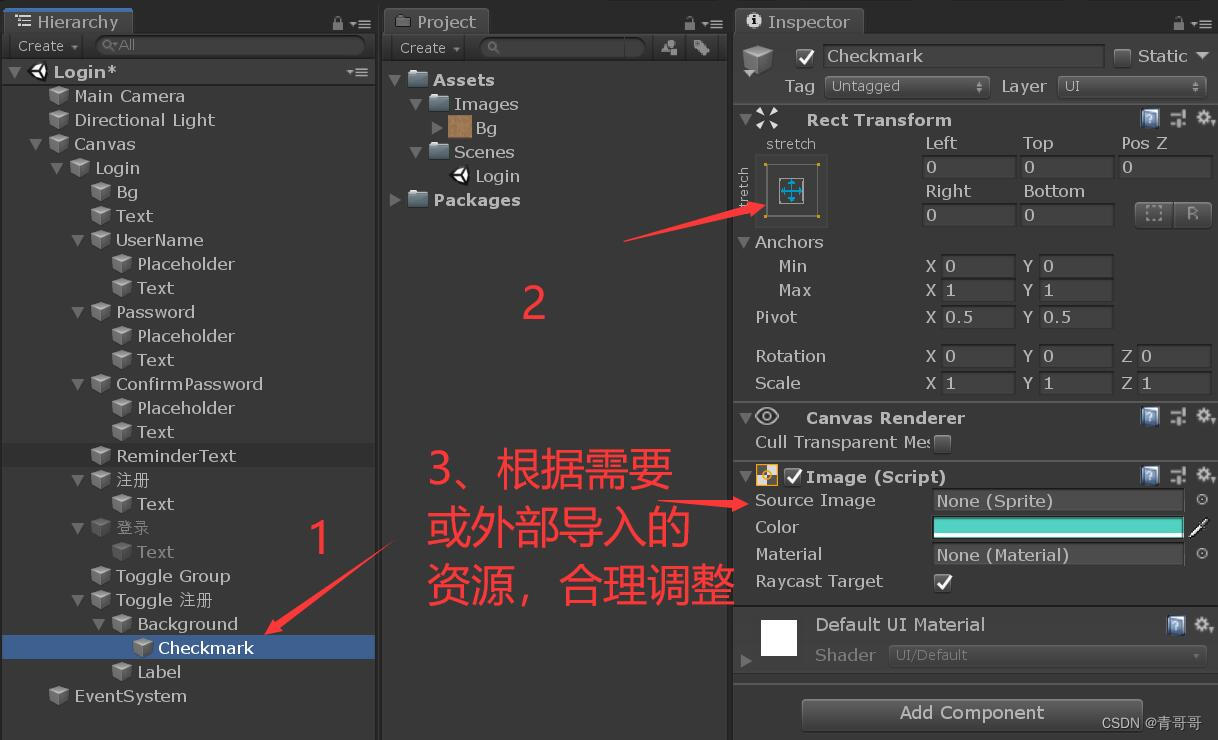
(4) Click on “Label”, Make a preliminary adjustment , As shown in the figure below .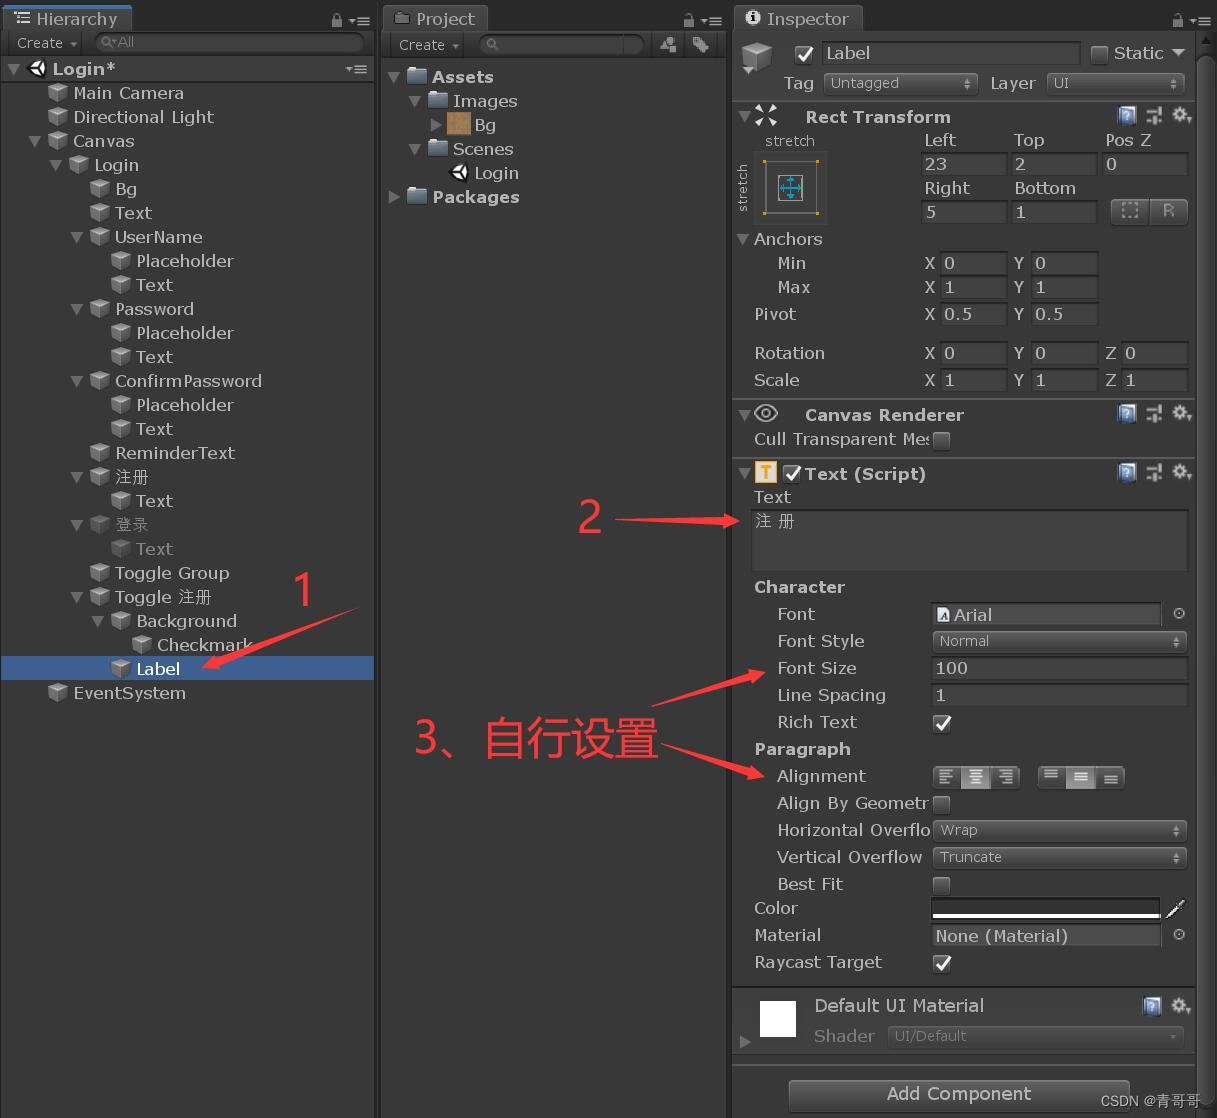
(5) Choose “Label”,Ctrl+D A copy of ,Label (1) No need to make any changes .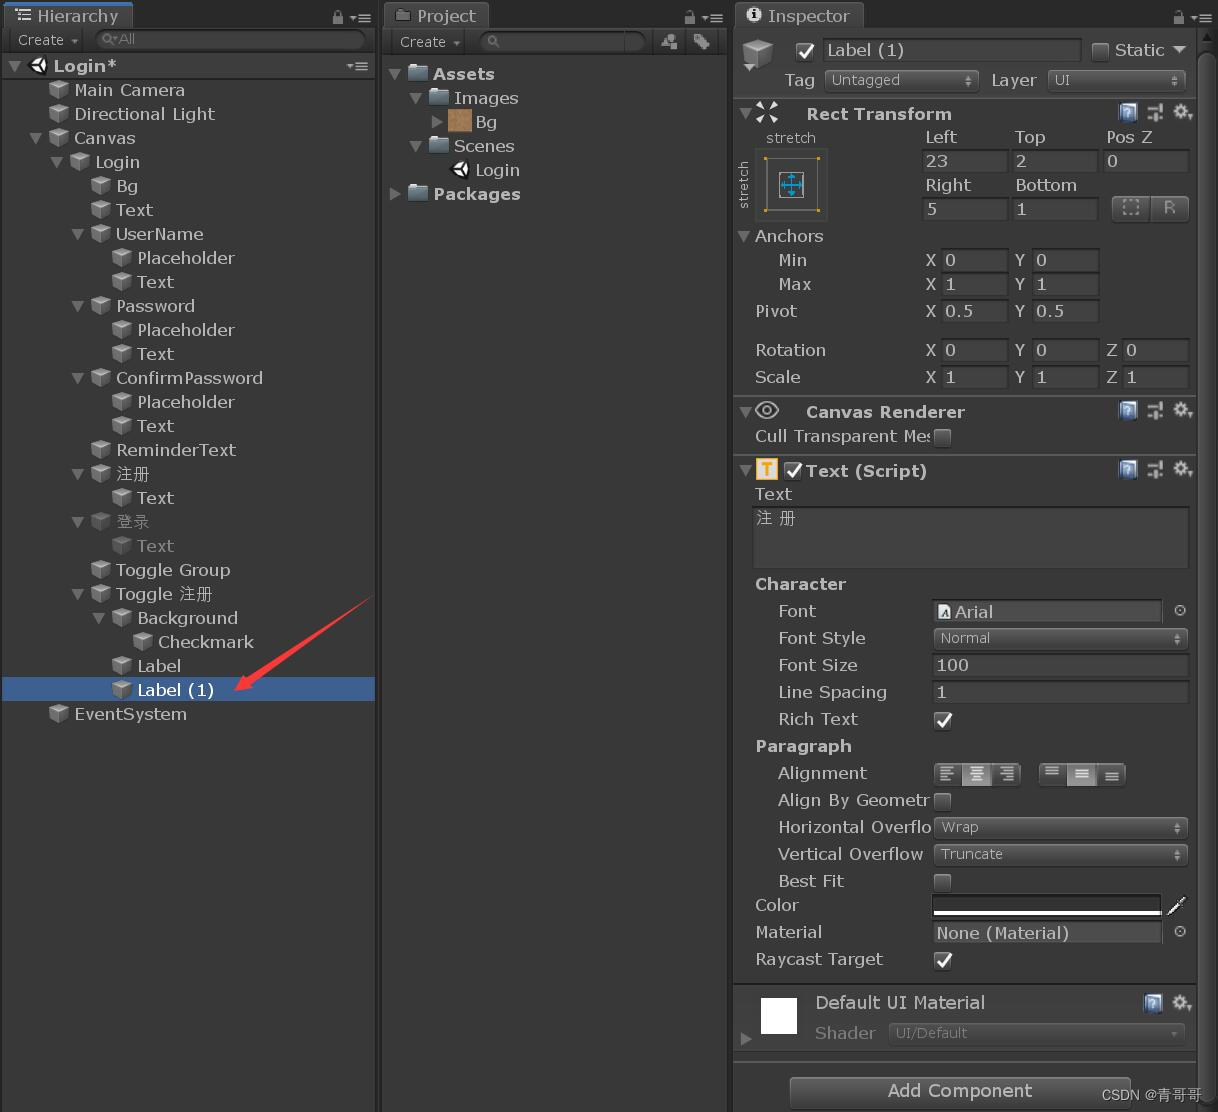
24、 Choose “Toggle register ”,Ctrl+D A copy of , Rename it to “Toggle Sign in ”.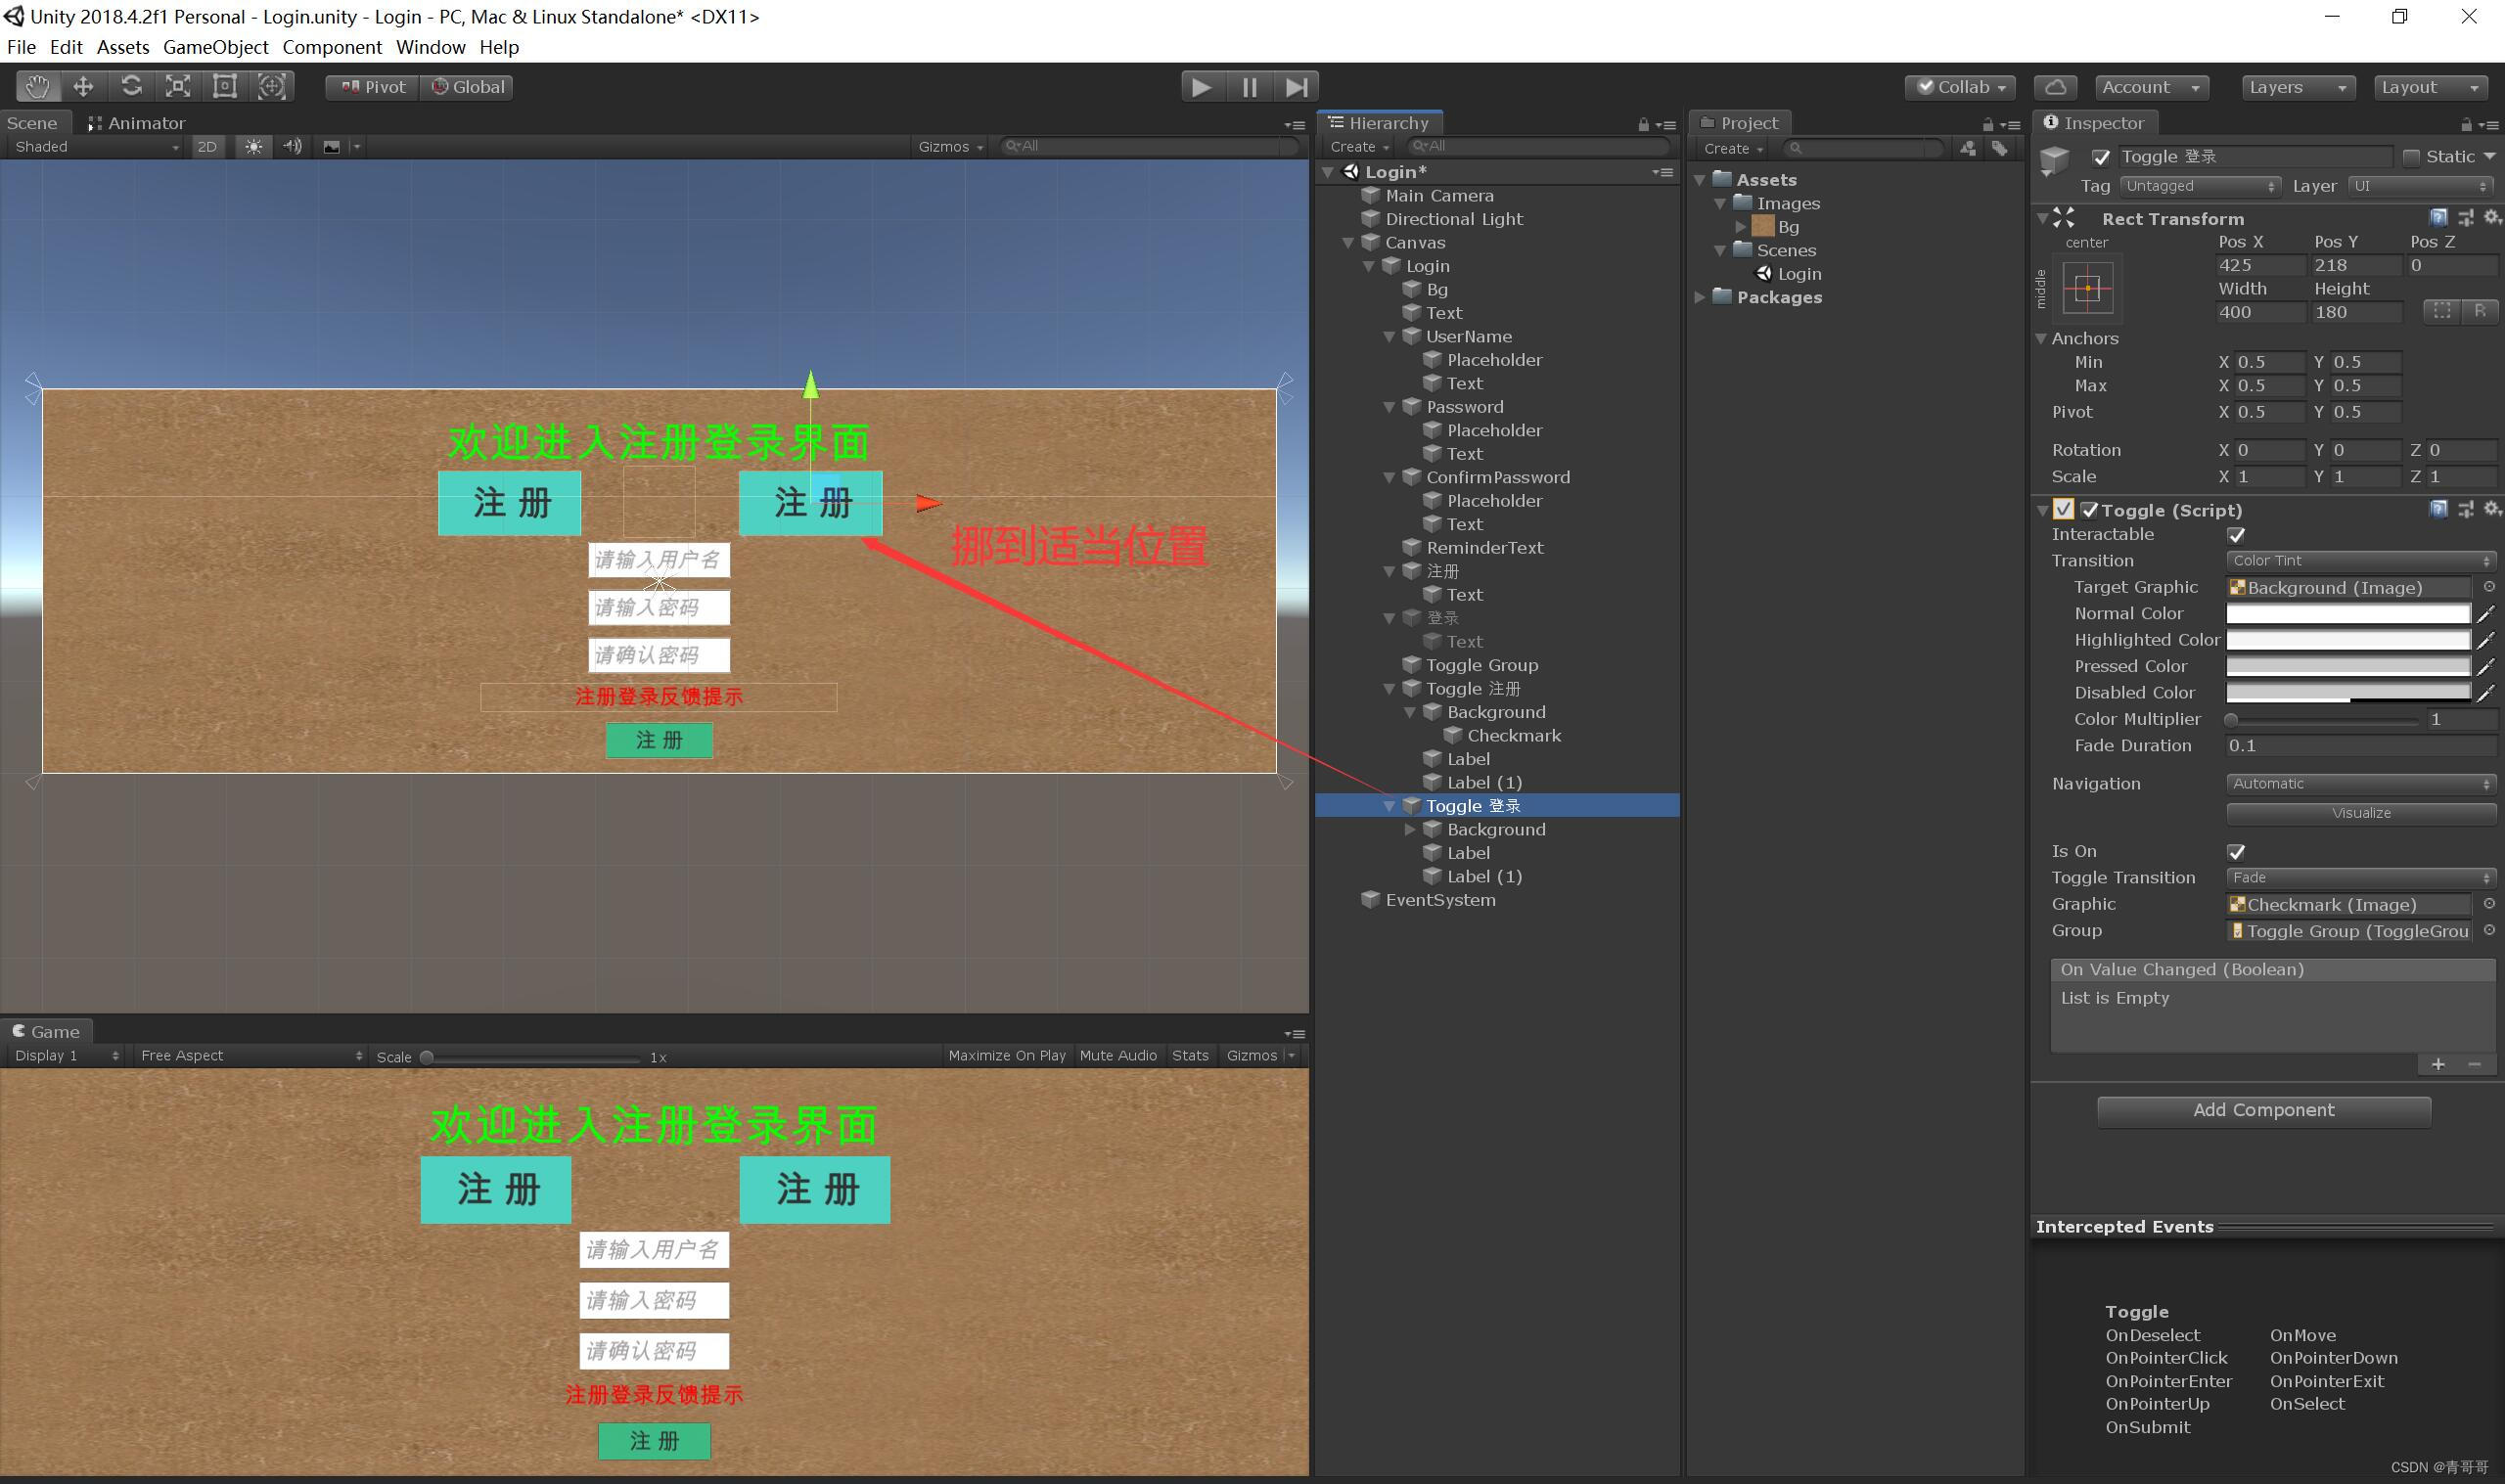
25、“Toggle Sign in ” The operating .
(1) Click on “Toggle Sign in ”, Because it is copied , So just fine tune its position , As shown in the figure below .
(2)“Background”、“Checkmark” No changes needed .
(3) Click on “Label”, Enter “ deng record ”, As shown in the figure below .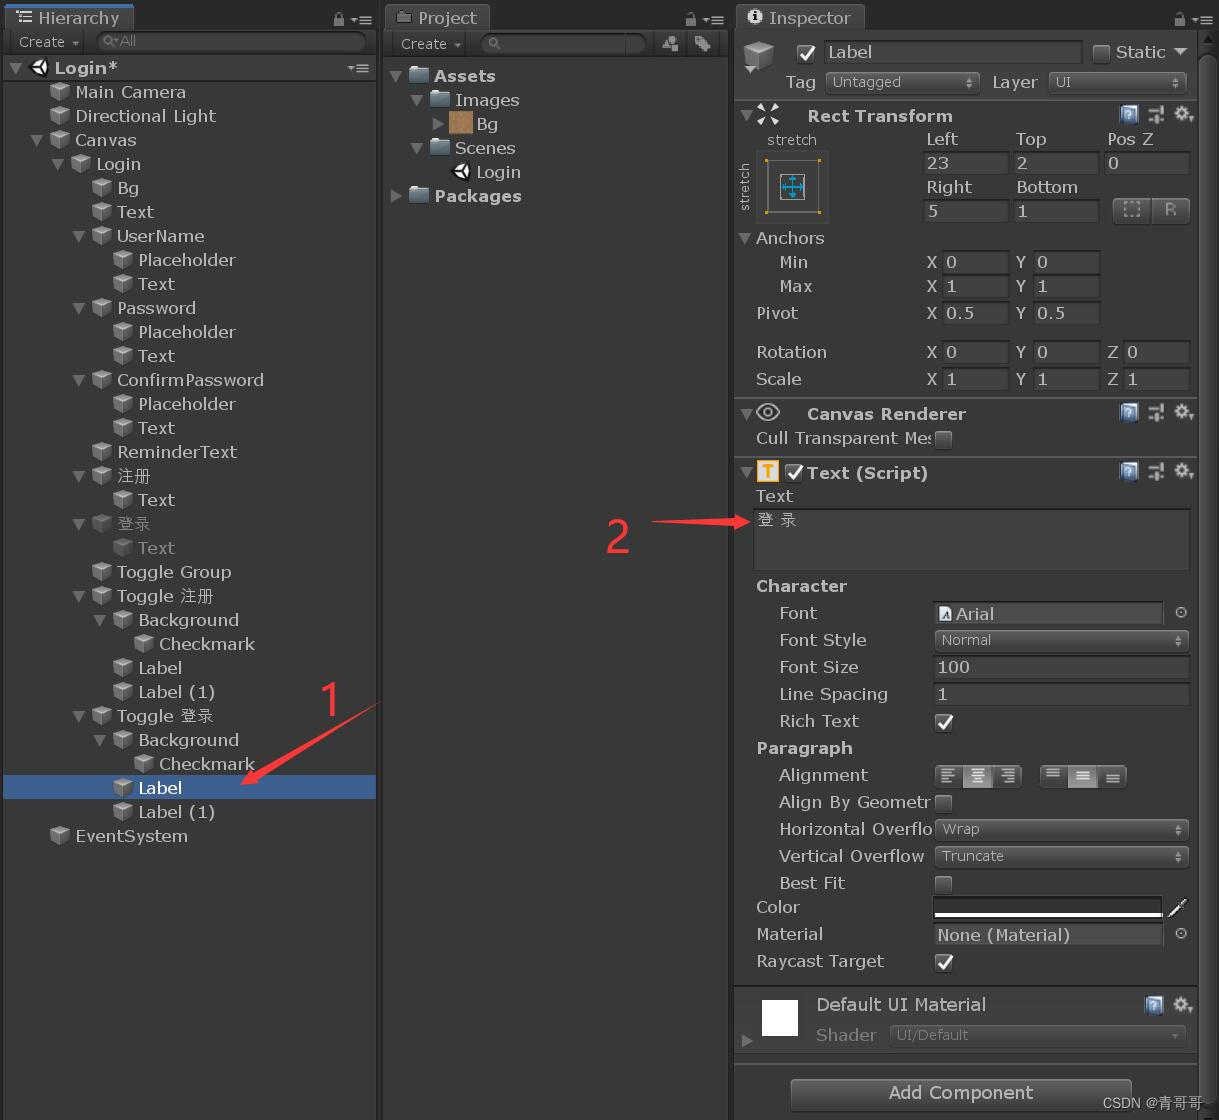
(4) Click on “Label(1)”, Enter “ deng record ”, And disable it , As shown in the figure below .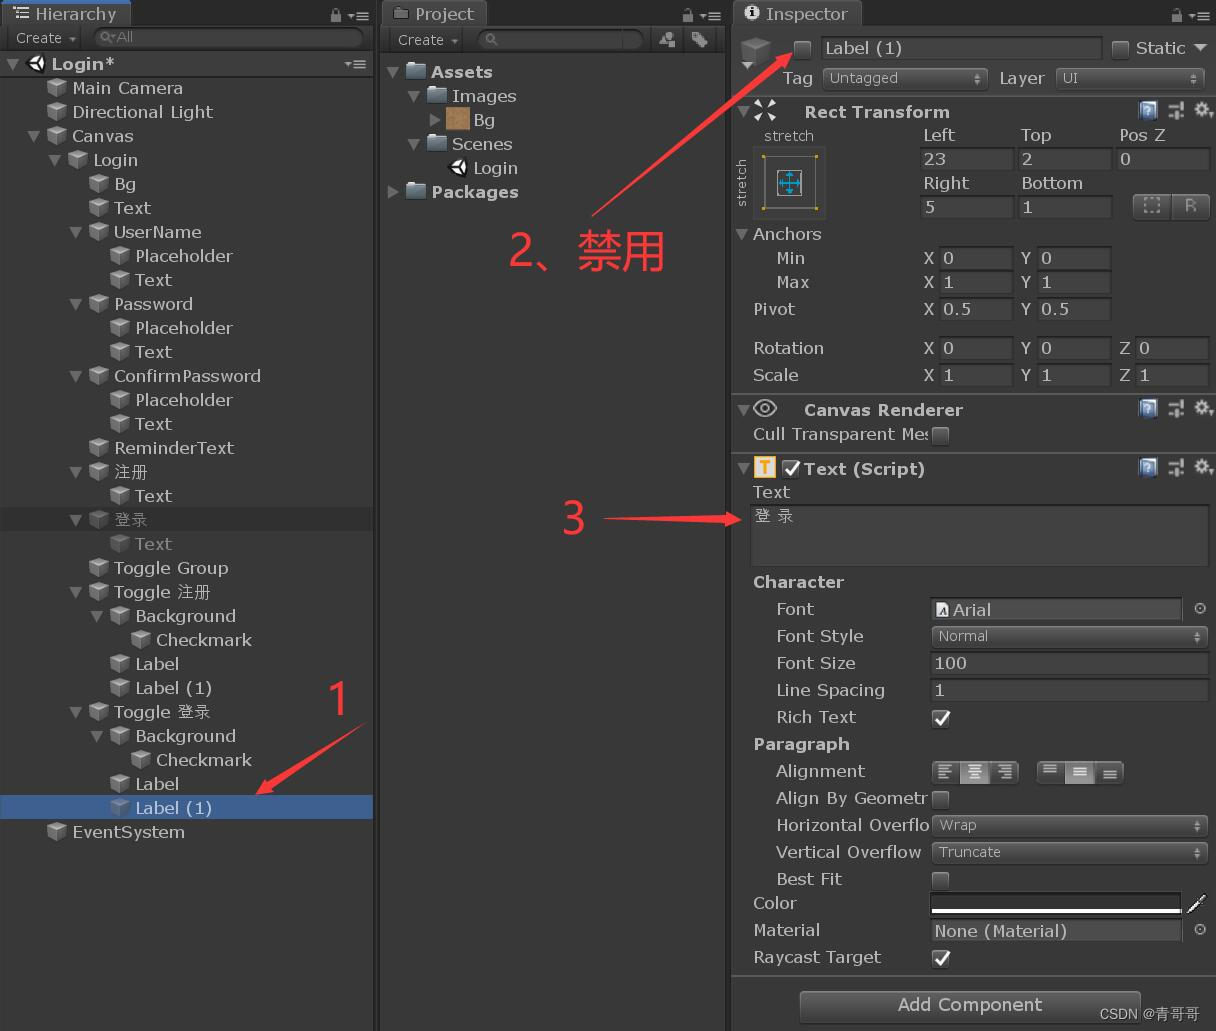
26、 The framework of registration and login interface is basically completed , The effect is shown below .
3、 ... and 、 Register the login code to realize
1、 Create a new one called “Scripts” Folder , Used to store all scripts , Create a new one named “LoginClass” Of C# Script , Double click to open the script , Write code .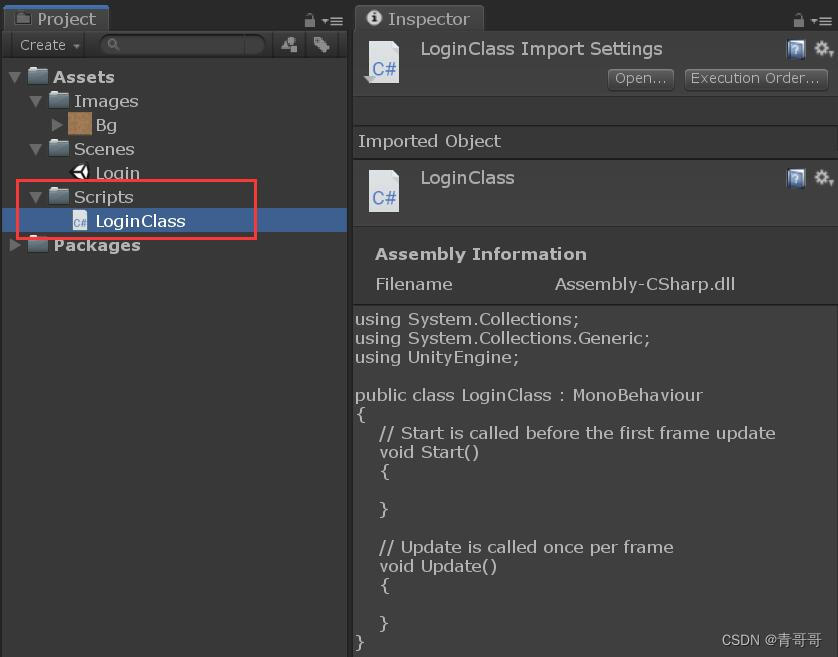
2、 All codes are as follows
using System.Collections;
using System.Collections.Generic;
using UnityEngine;
using UnityEngine.UI;
using System;
using UnityEngine.SceneManagement;

public class LoginClass : MonoBehaviour
{

    // Before entering the variable
    public InputField username, password, confirmPassword;
    public Text reminderText;
    public int errorsNum;
    public Button loginButton;
    public GameObject hallSetUI, loginUI;
    // Post entry variable
    public static string myUsername;

    public void Register()
    {

        if (PlayerPrefs.GetString(username.text) == "")
        {

            if (password.text == confirmPassword.text)
            {

                PlayerPrefs.SetString(username.text, username.text);
                PlayerPrefs.SetString(username.text + "password", password.text);
                reminderText.text = " Registered successfully !";
            }
            else
            {

                reminderText.text = " The two passwords are inconsistent ";
            }
        }
        else
        {

            reminderText.text = " The user already exists ";
        }

    }
    private void Recovery()
    {

        loginButton.interactable = true;
    }
    public void Login()
    {

        if (PlayerPrefs.GetString(username.text) != "")
        {

            if (PlayerPrefs.GetString(username.text + "password") == password.text)
            {

                reminderText.text = " Login successful ";

                myUsername = username.text;
                hallSetUI.SetActive(true);
                loginUI.SetActive(false);
                SceneManager.LoadScene(1);
            }
            else
            {

                reminderText.text = " Wrong password ";
                errorsNum++;
                if (errorsNum >= 3)
                {

                    reminderText.text = " Continuous errors 3 Time , please 30 Try again in seconds !";
                    loginButton.interactable = false;
                    Invoke("Recovery", 5);
                    errorsNum = 0;
                }
            }
        }
        else
        {

            reminderText.text = " Account does not exist ";
        }
    }
}
3、 Save code , go back to Unity3D, Continue to complete the next operation .
Four 、 Add the corresponding event
1、 take LoginClass Add script into Login in , The specific process is shown in the figure below .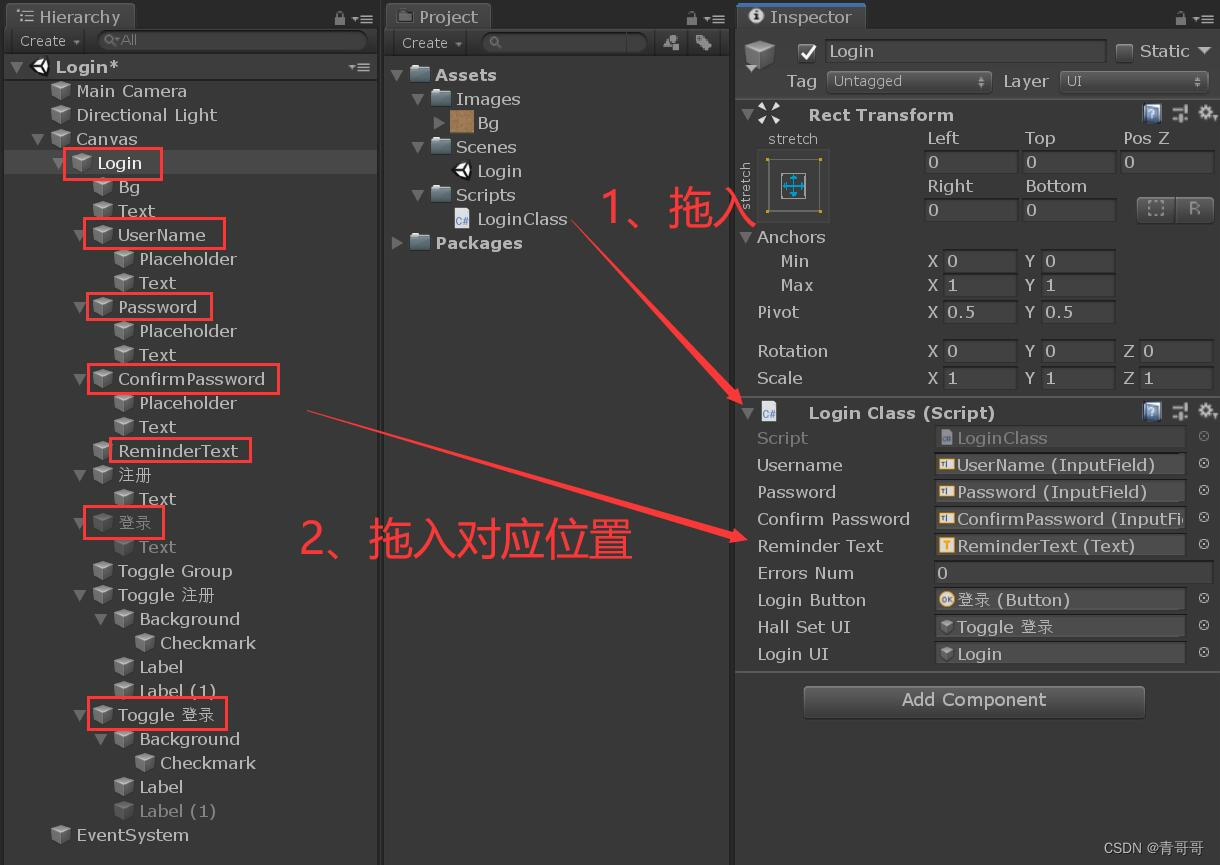
2、 Mouse selected “ register ”, The specific process is shown in the figure below .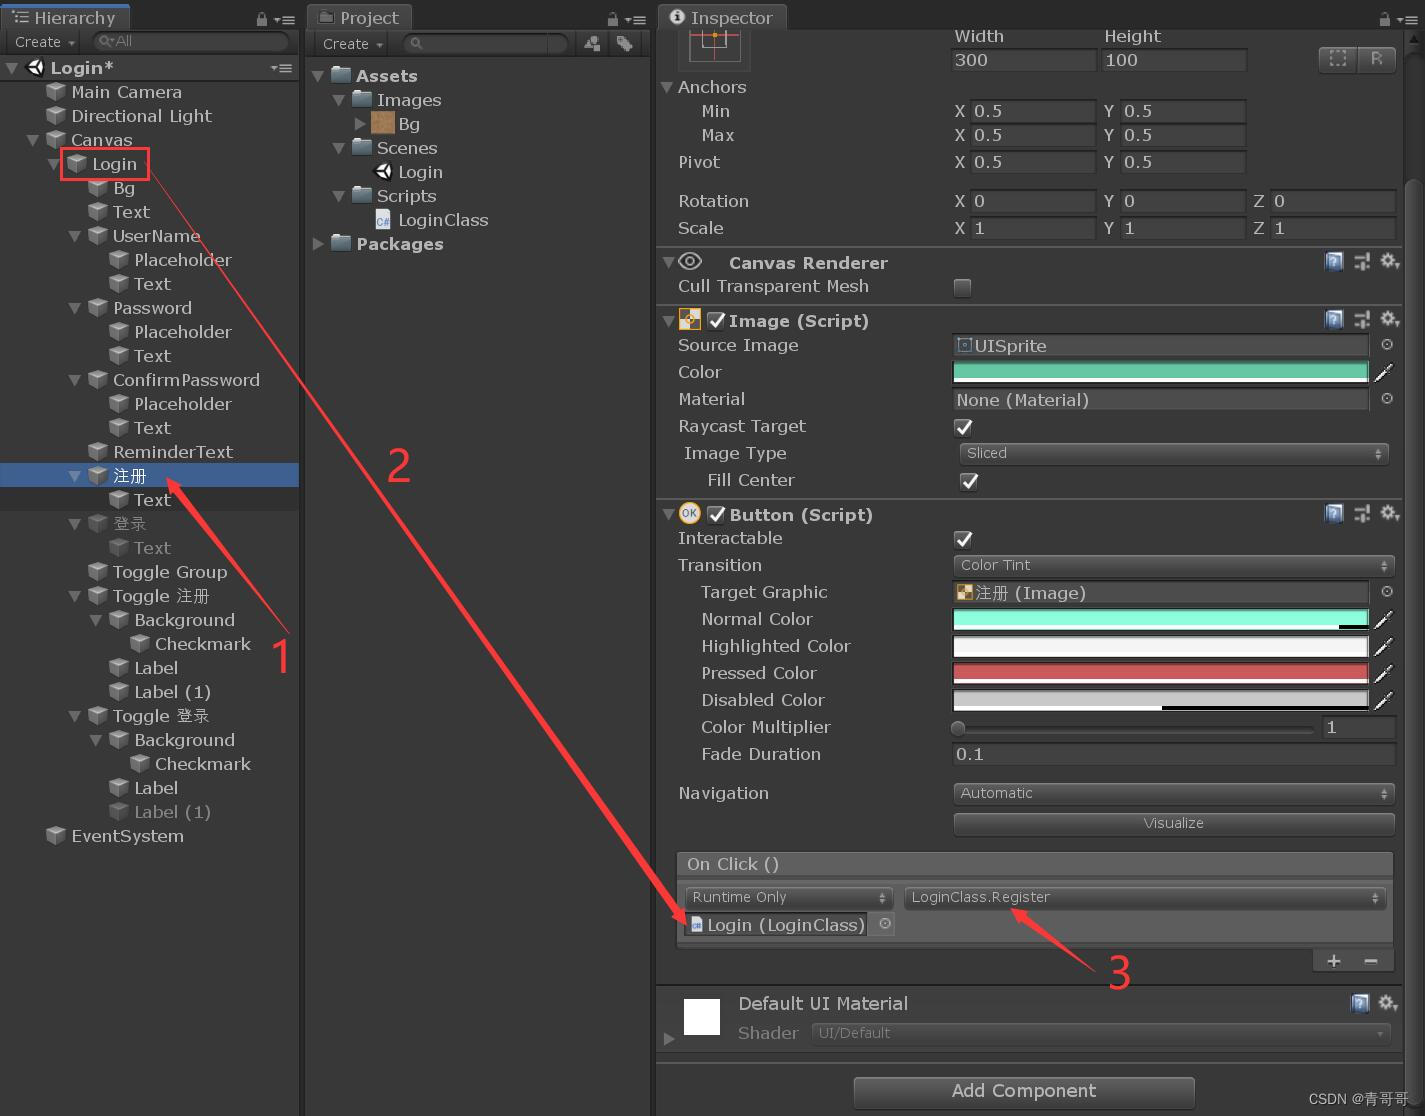

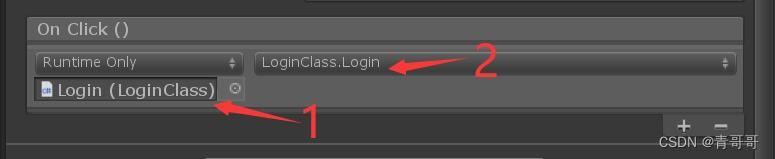
3、 Mouse selected “ Sign in ”, The specific process is shown in the figure below .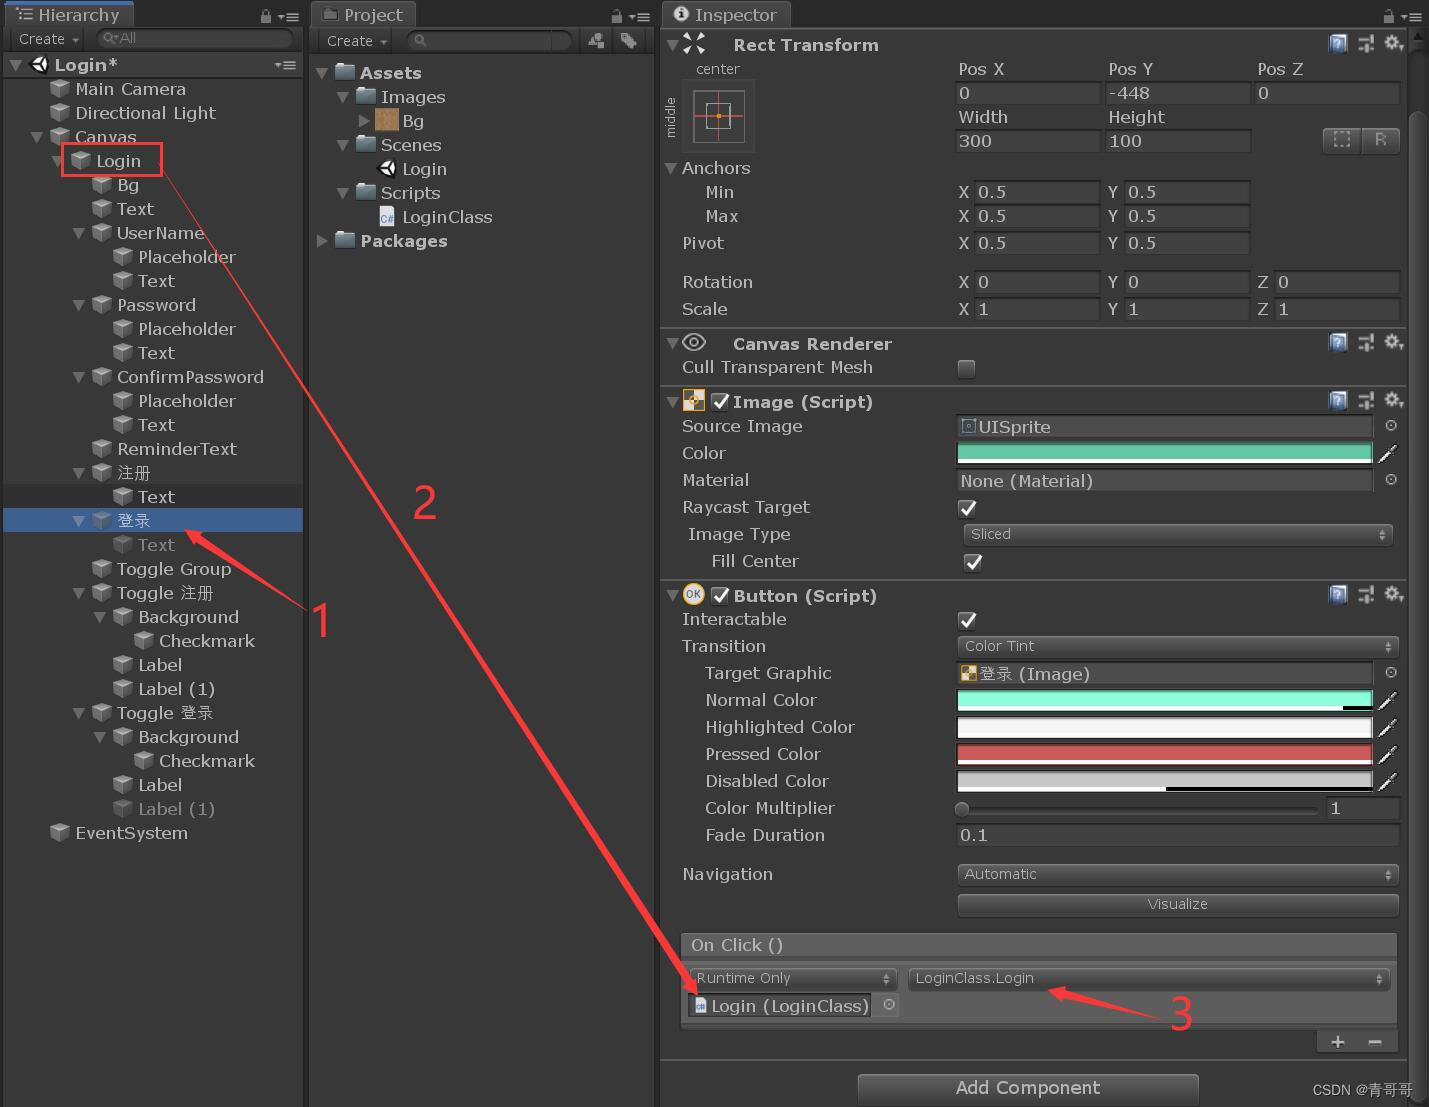
4、 Mouse selected “Toggle register ”, The specific process is shown in the figure below .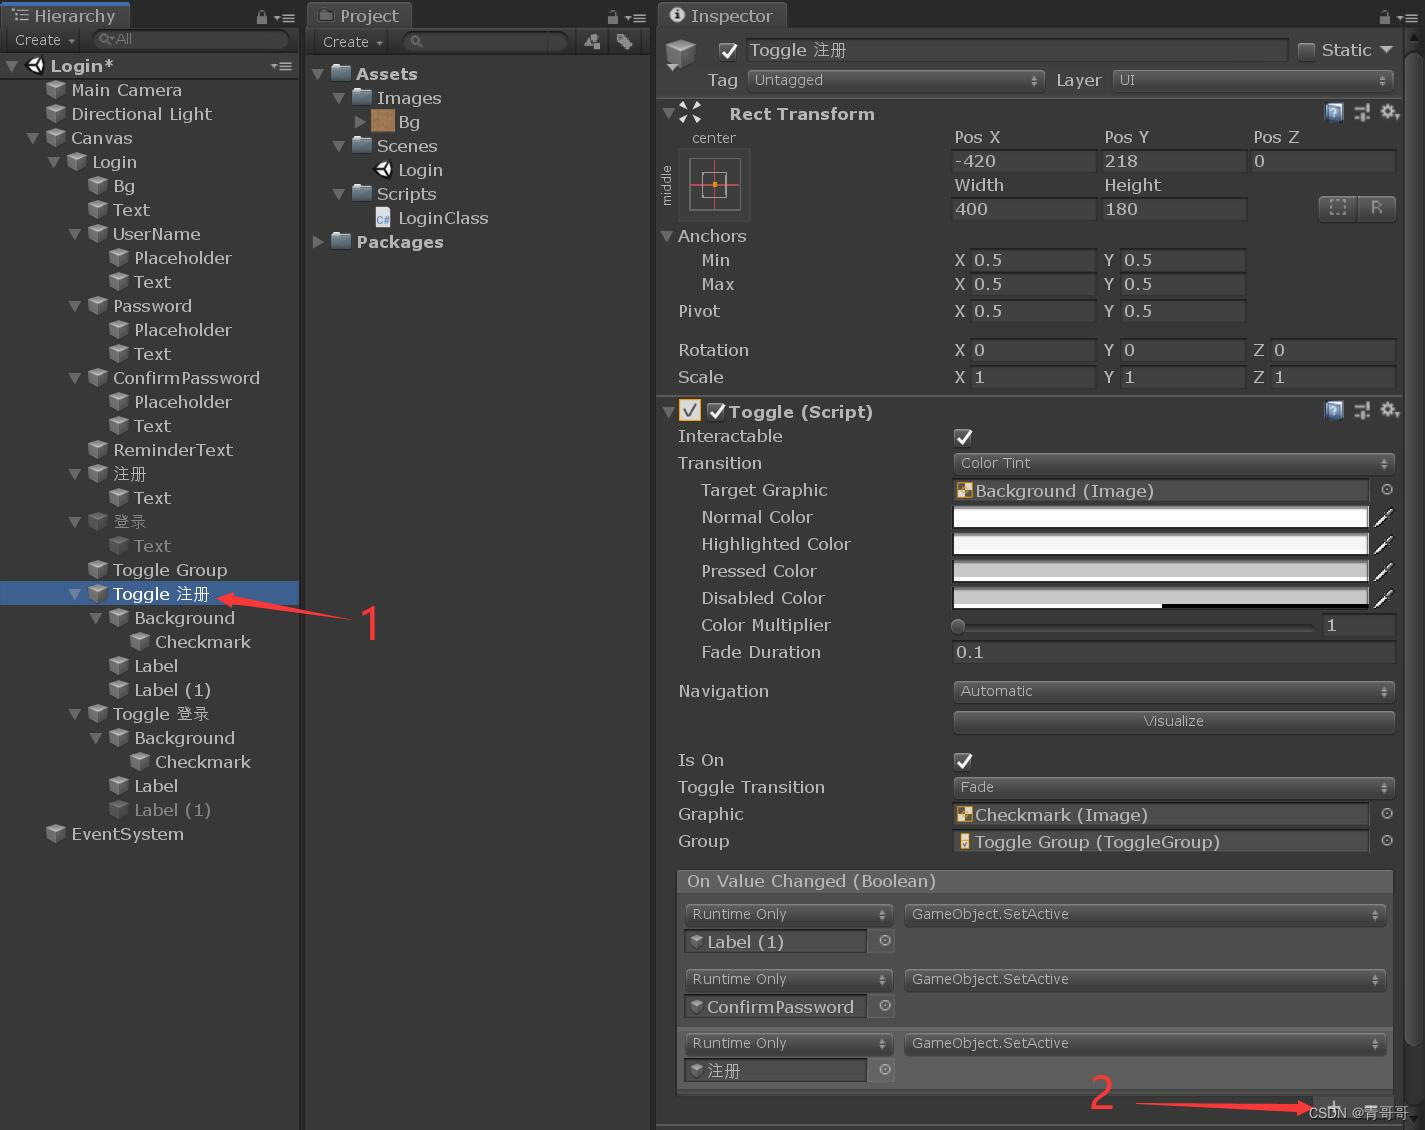
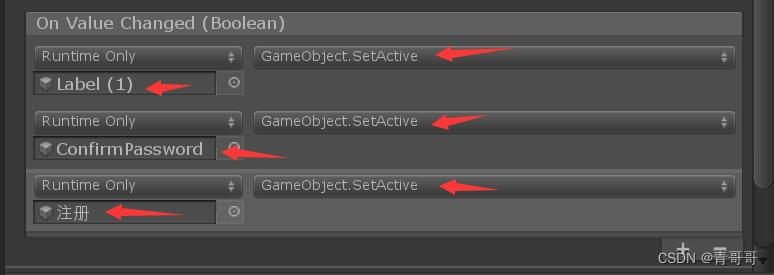
notes : In the picture above Label(1) yes “Toggle register ” Below Label(1).
5、 Mouse selected “Toggle Sign in ”, The specific process is shown in the figure below .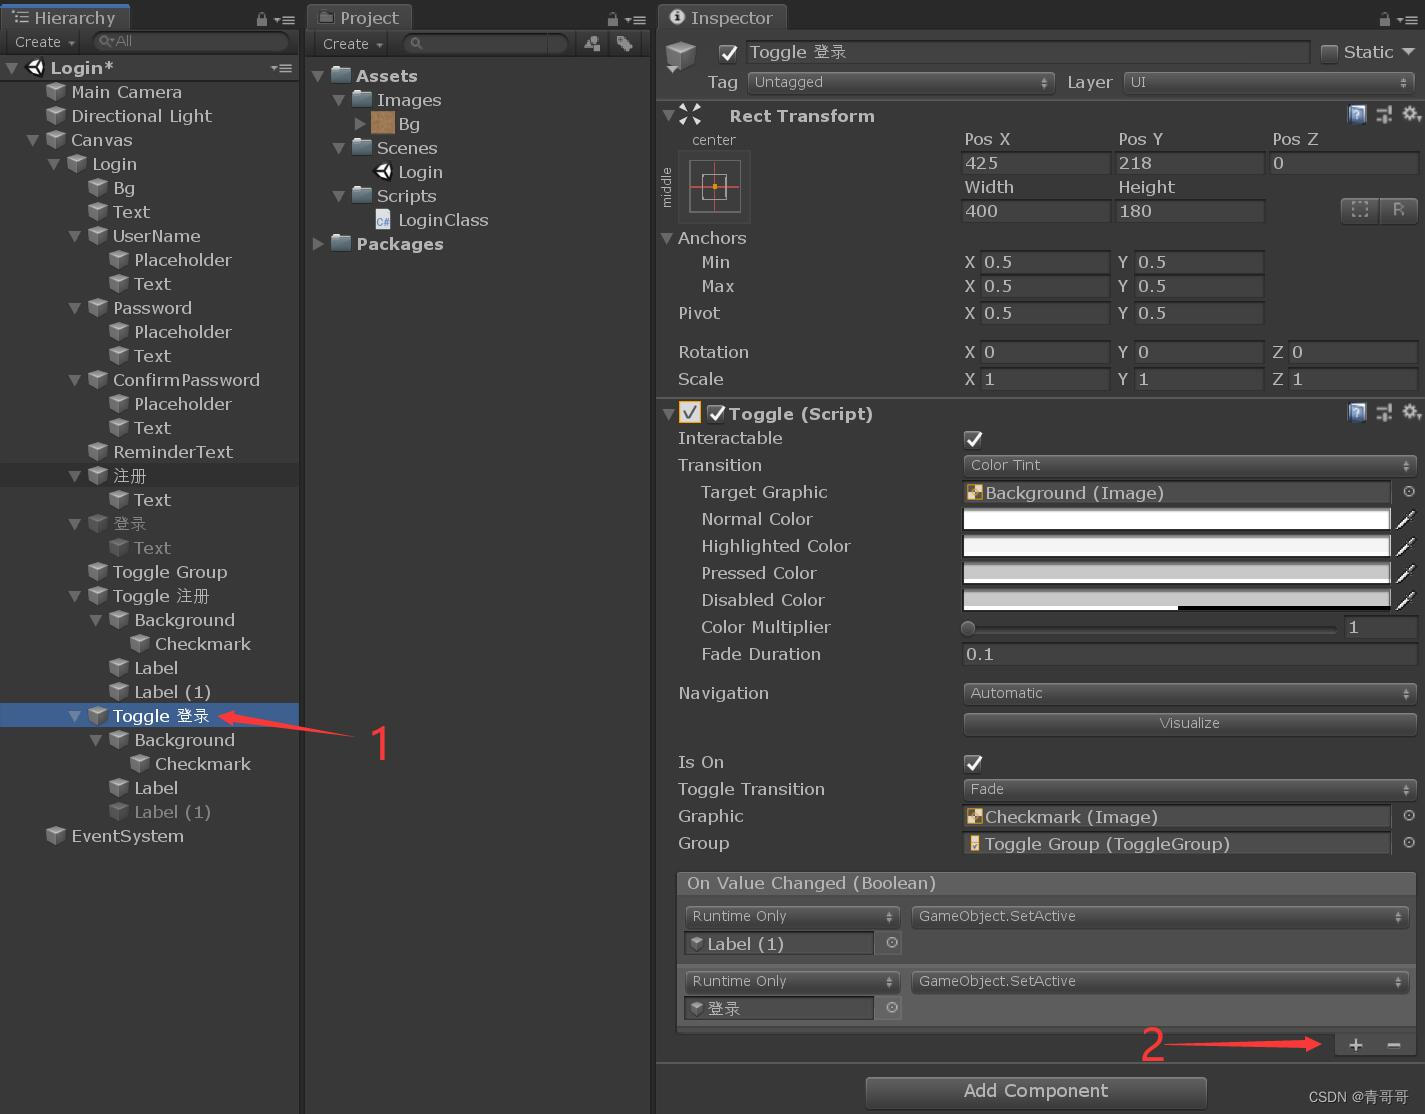

notes : In the picture above Label(1) yes “Toggle Sign in ” Below Label(1).
5、 ... and 、 Create a new jump scene
1、 stay Scenes Under the folder , Right mouse click , Create a new scene , Rename it to Main, As a jump scenario after successful registration and login .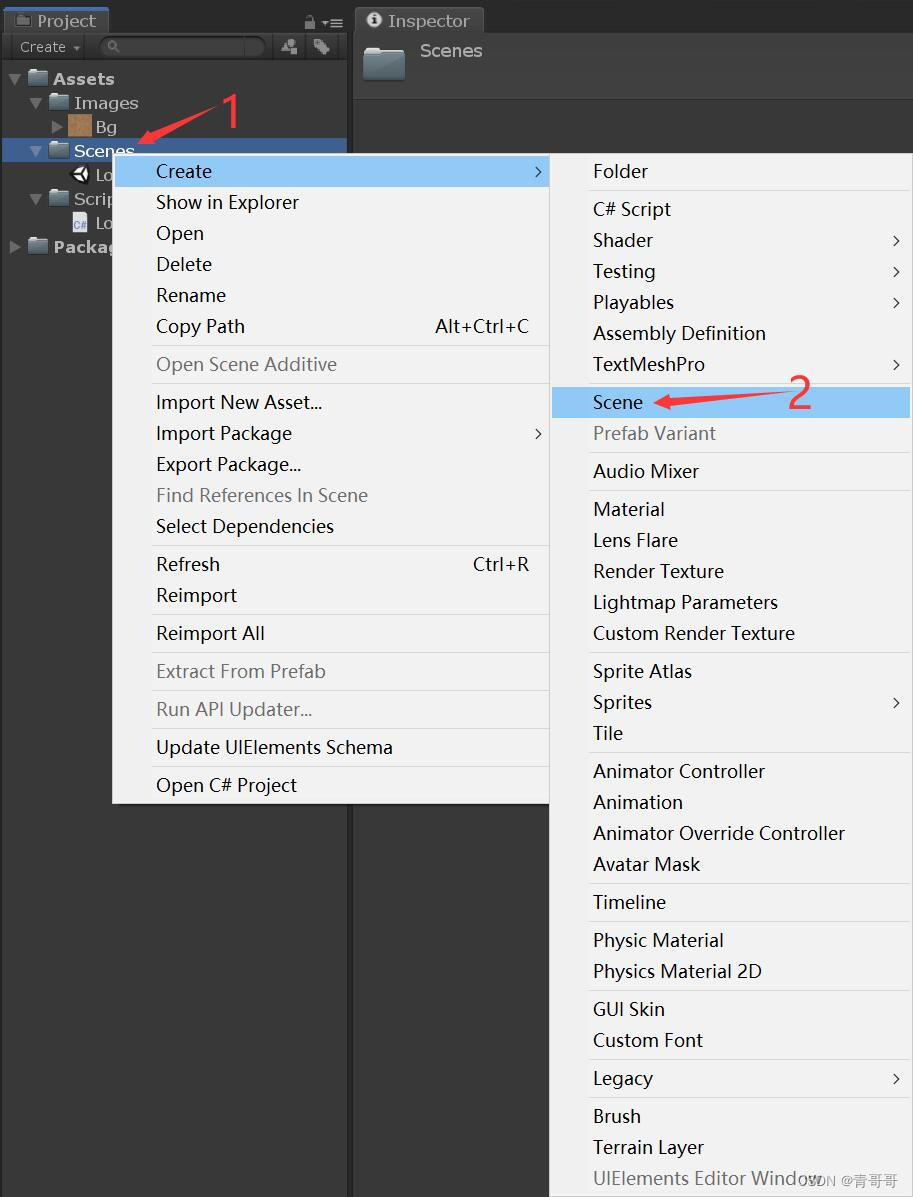
2、 At will Main Add some objects to the scene as a demonstration . And when I'm done , You can select Main Camera, Hold down Ctrl+Shift+F, Or click... On the menu bar GameObject, And then click Align With View Focus on the scene , It's OK, too .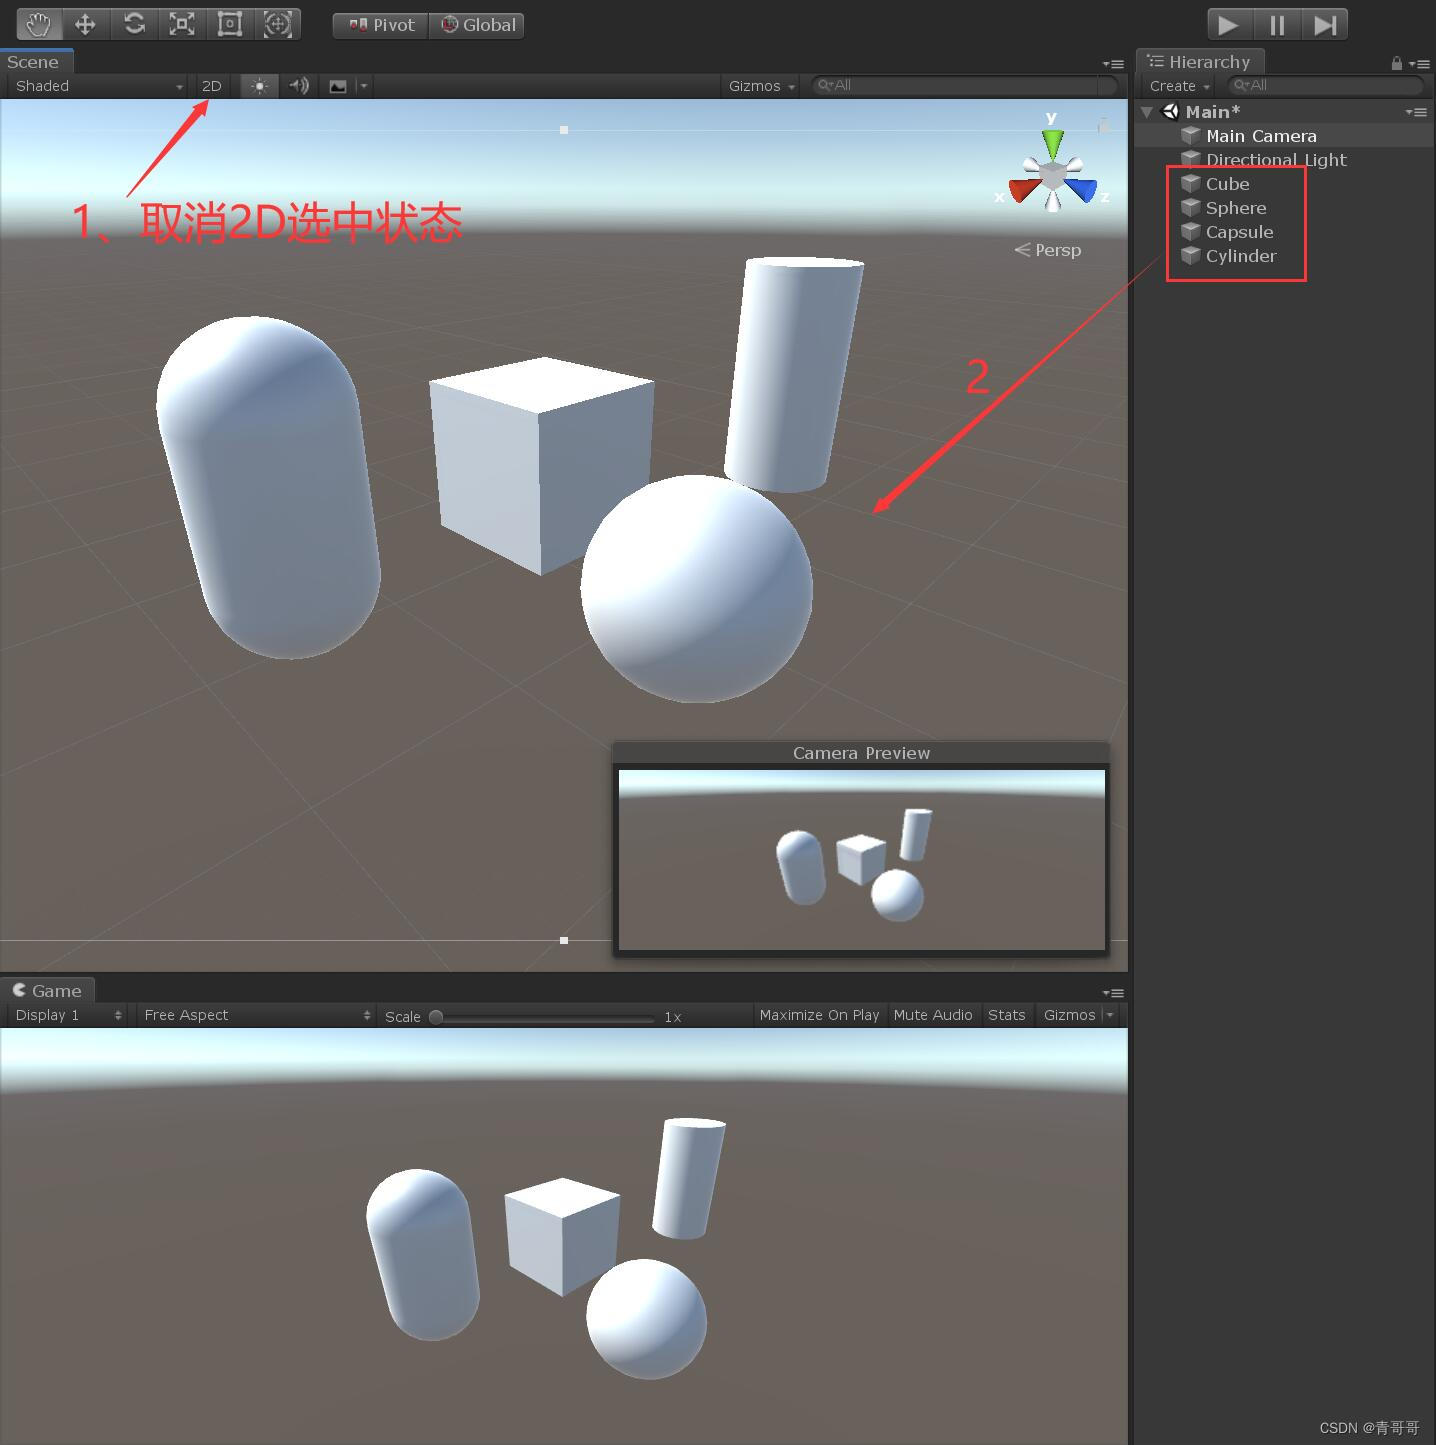
3、 Click on File, choice Build Settings, In turn Login,Main The scene is dragged in , As shown in the figure below .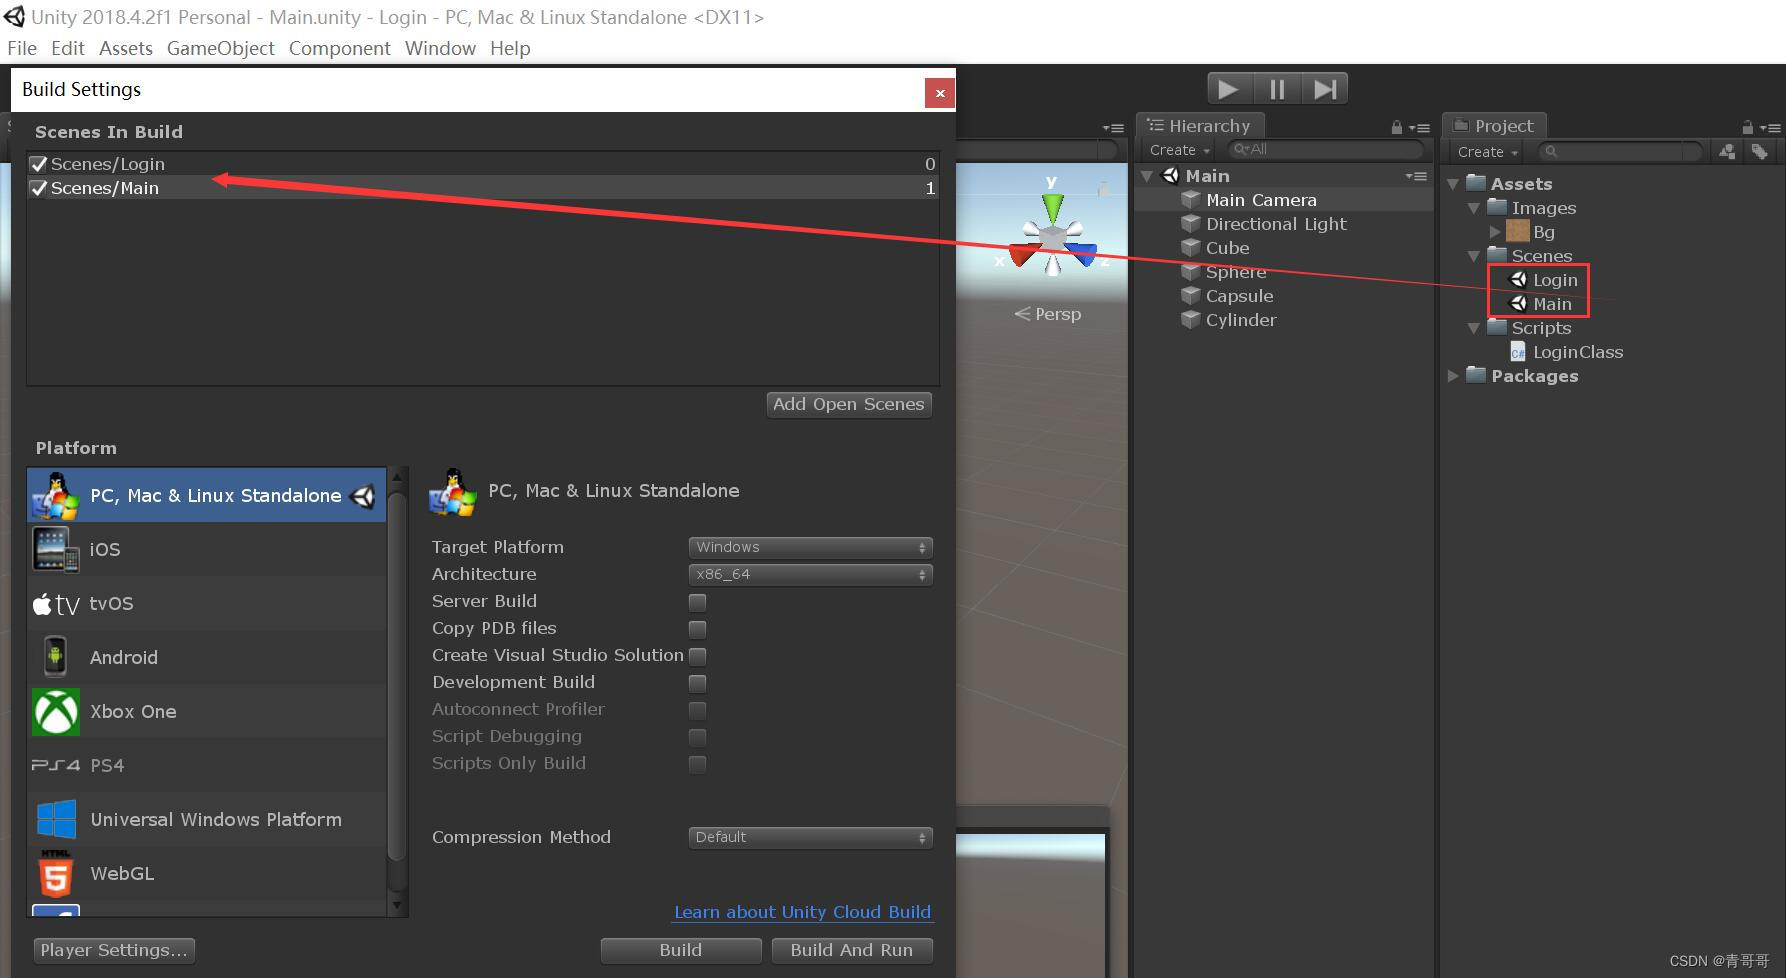
6、 ... and 、 Running effect
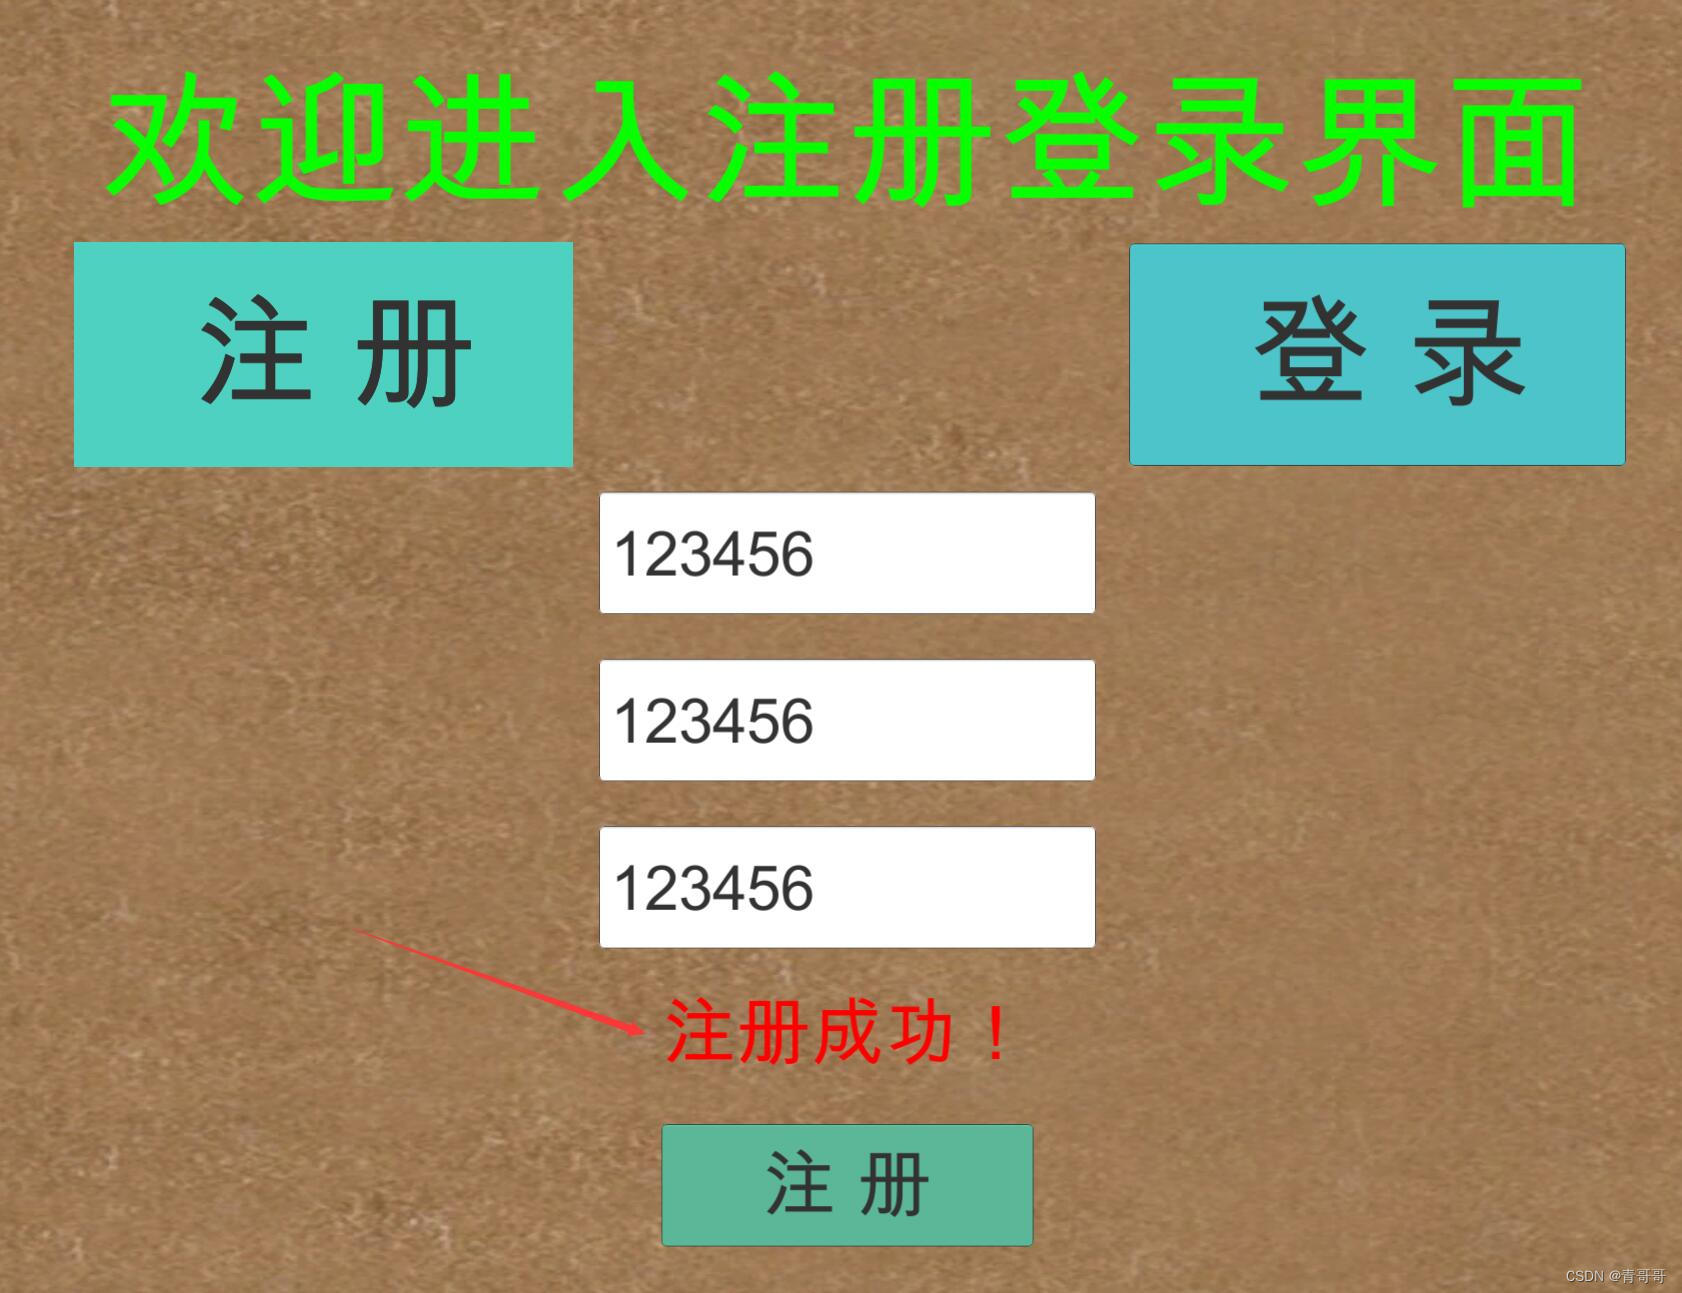
(1) First click on “ register ”, enter one user name 、 password 、 Confirm the password , If the passwords entered before and after are inconsistent , An error message will appear , As shown in the figure below . Only when the password is correct will you be prompted that the registration is successful . If the user name already exists , The corresponding prompt will also appear .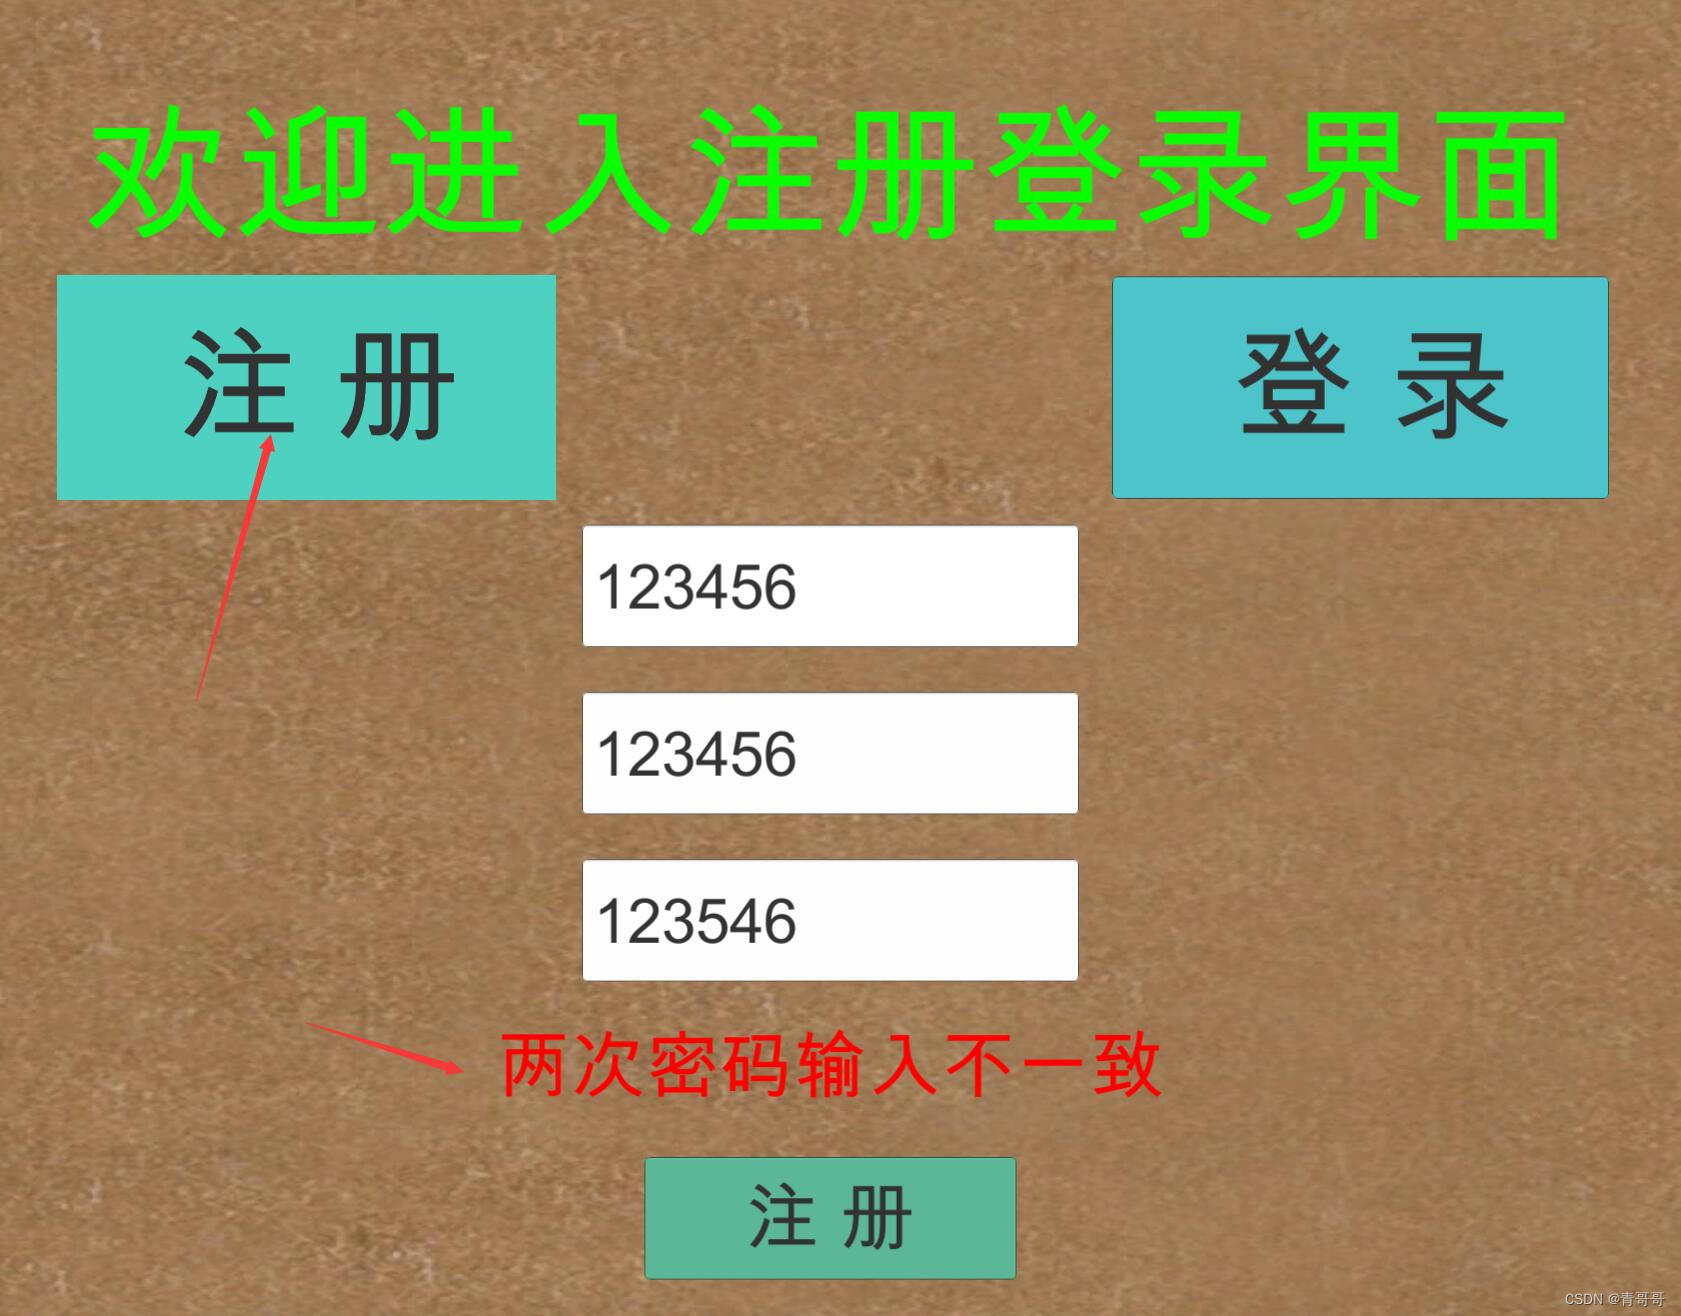
(2) After successful registration , Click on “ Sign in ”, The user name and password are automatically filled in by default , And then click “ Entry system ”, You can jump to the corresponding scene , As shown in the figure below .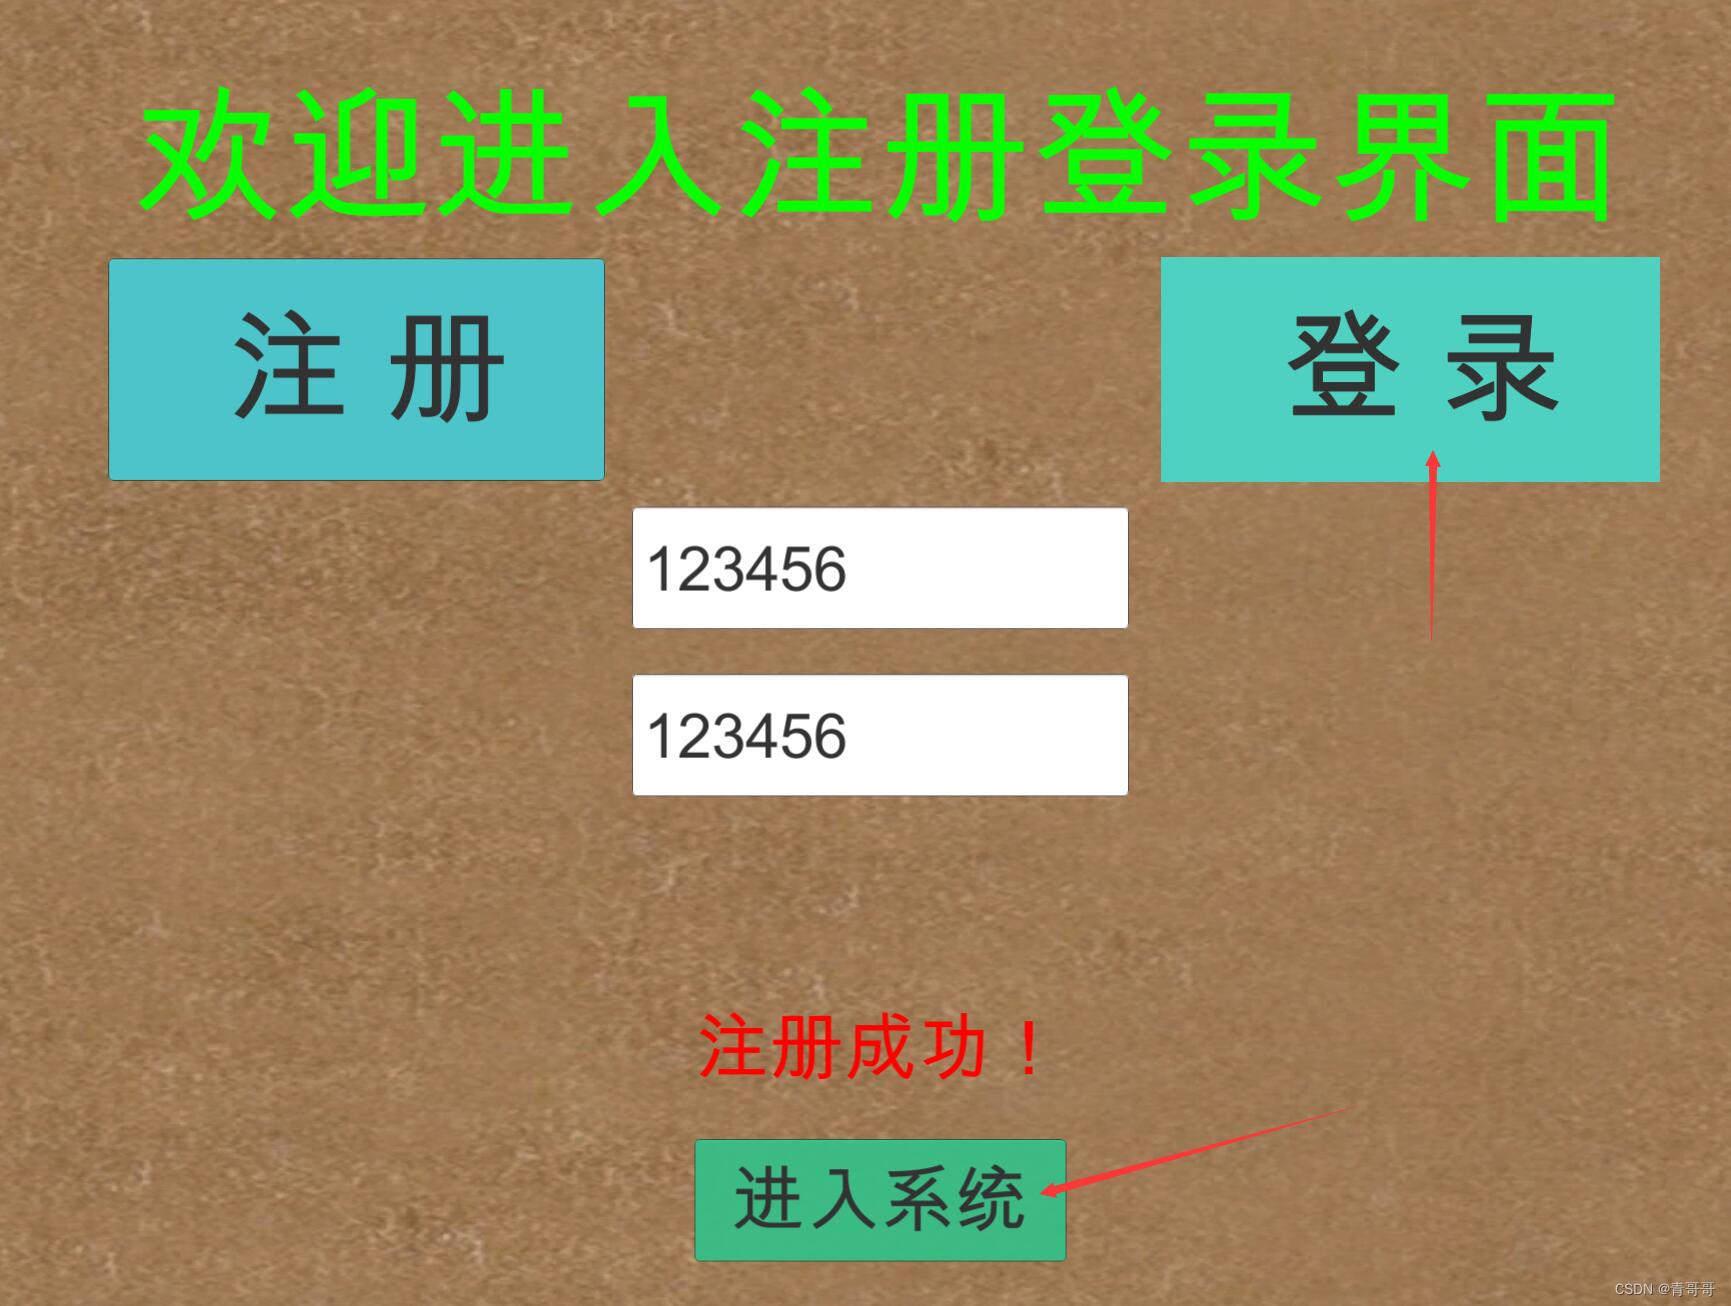
边栏推荐
- [leetcode622] design circular queue
- ESP8266连接onenet(旧版MQTT方式)
- Pat 1097 duplication on a linked list (25 points)
- (四)R语言的数据可视化——矩阵图、柱状图、饼图、散点图与线性回归、带状图
- Programming homework: educational administration management system (C language)
- Working principle of genius telephone watch Z3
- NRF24L01 troubleshooting
- JS 函数提升和var变量的声明提升
- idea问题记录
- 燕山大学校园网自动登录问题解决方案
猜你喜欢
Postman 中级使用教程【环境变量、测试脚本、断言、接口文档等】
MySQL takes up too much memory solution
MySQL时间、时区、自动填充0的问题
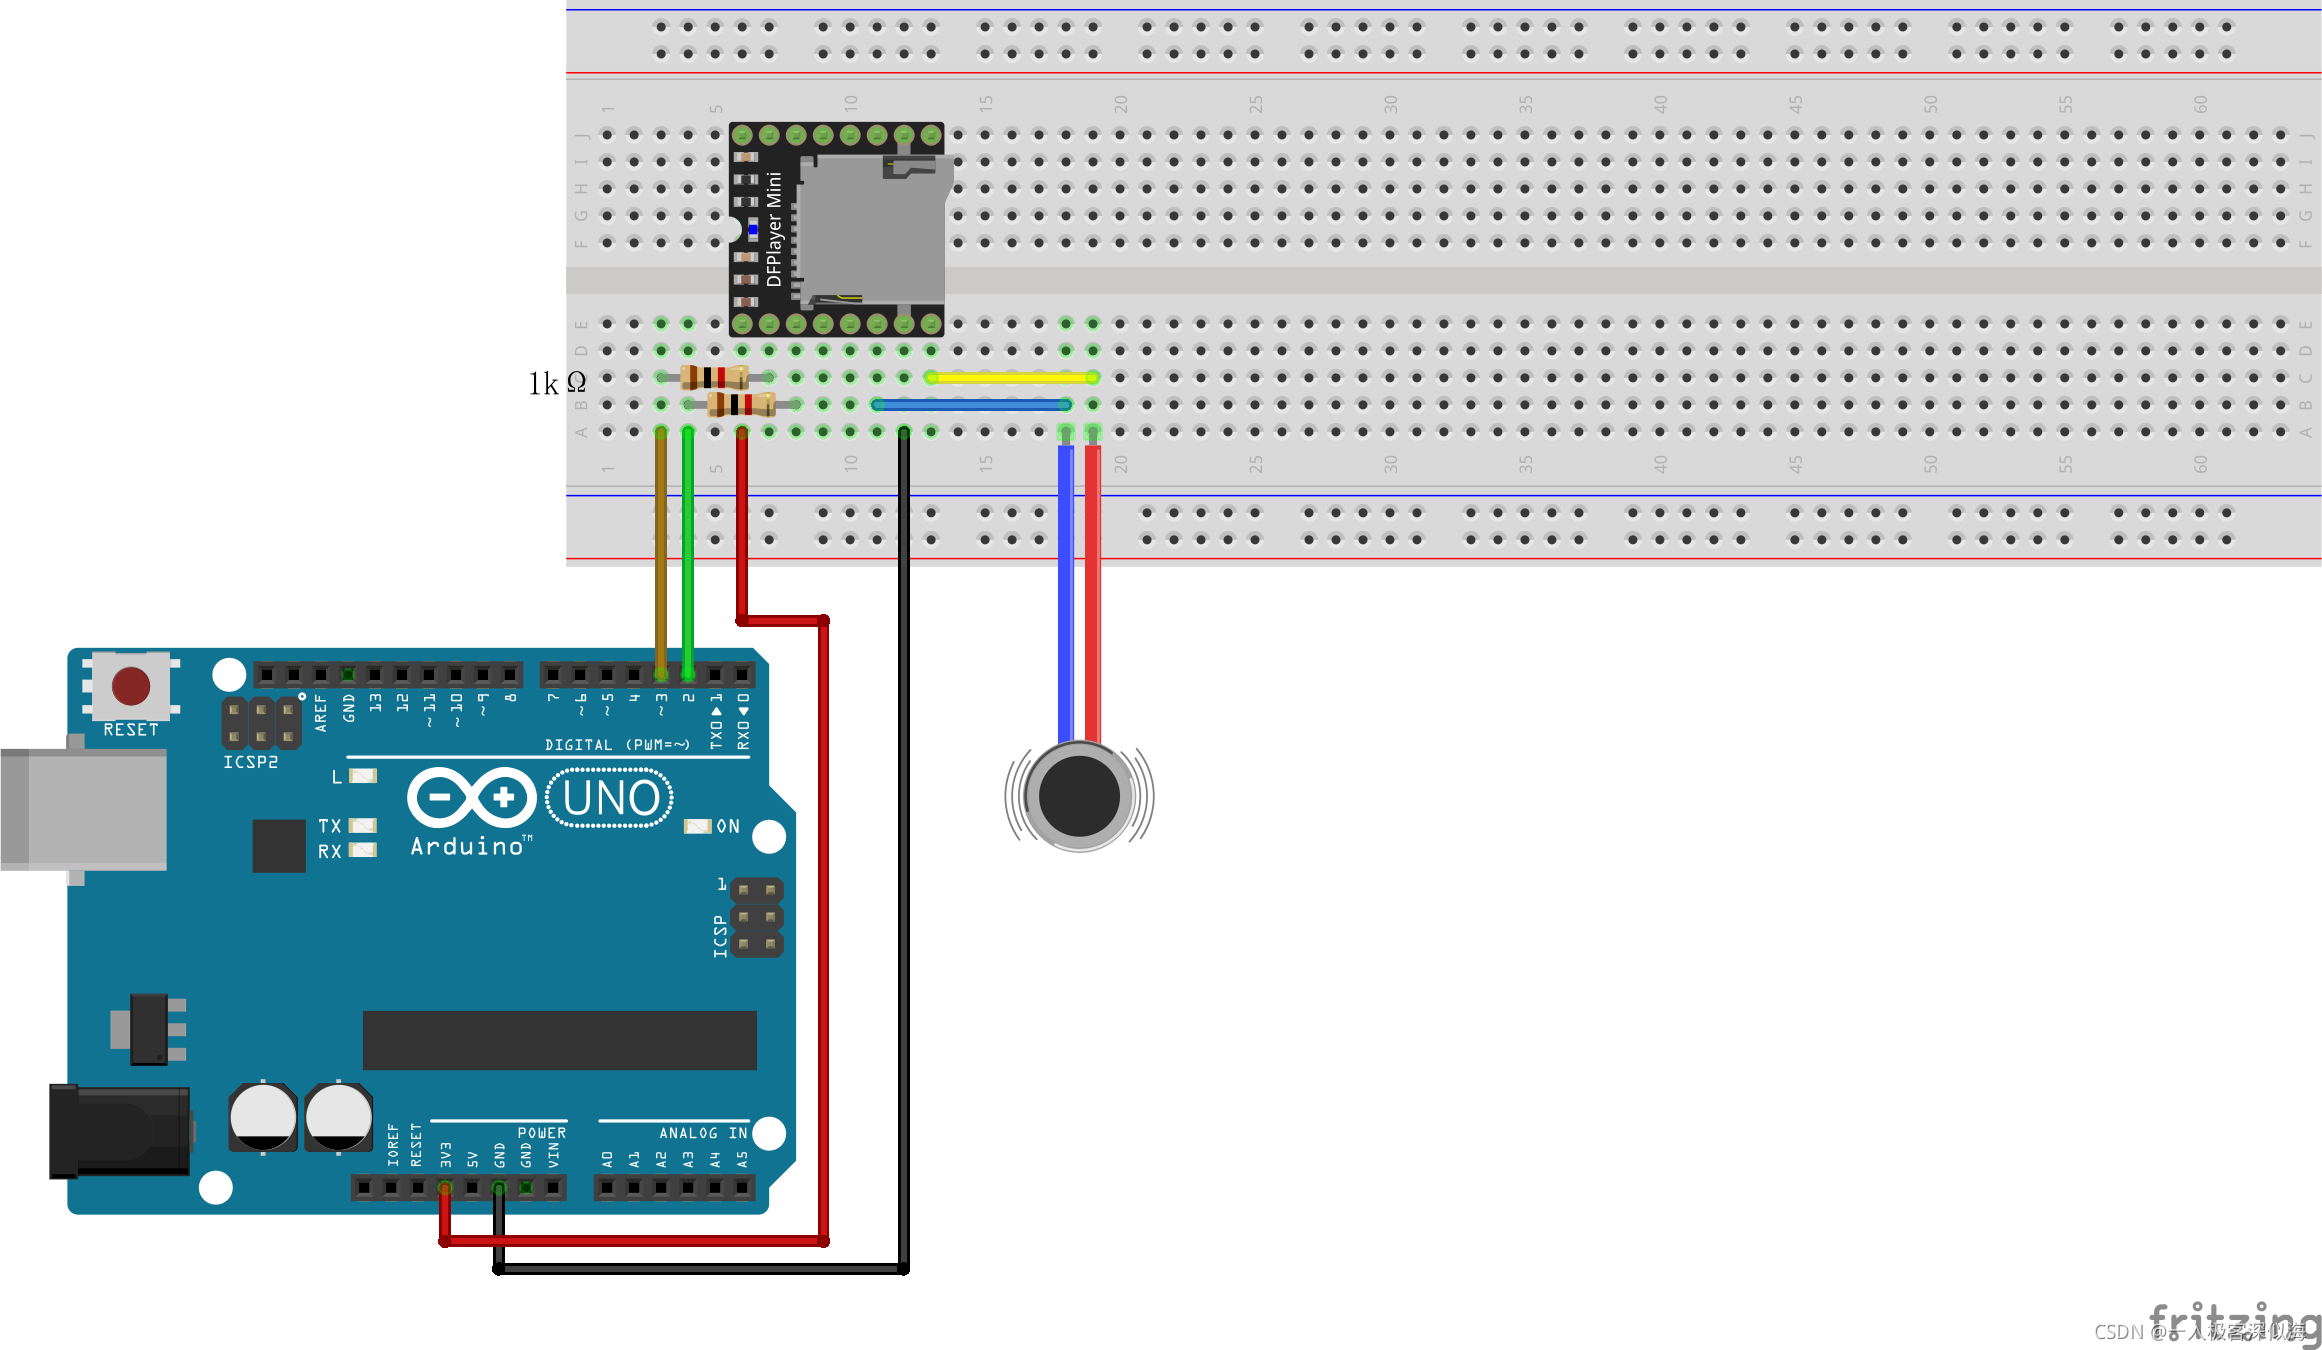
Mp3mini playback module Arduino < dfrobotdfplayermini H> function explanation
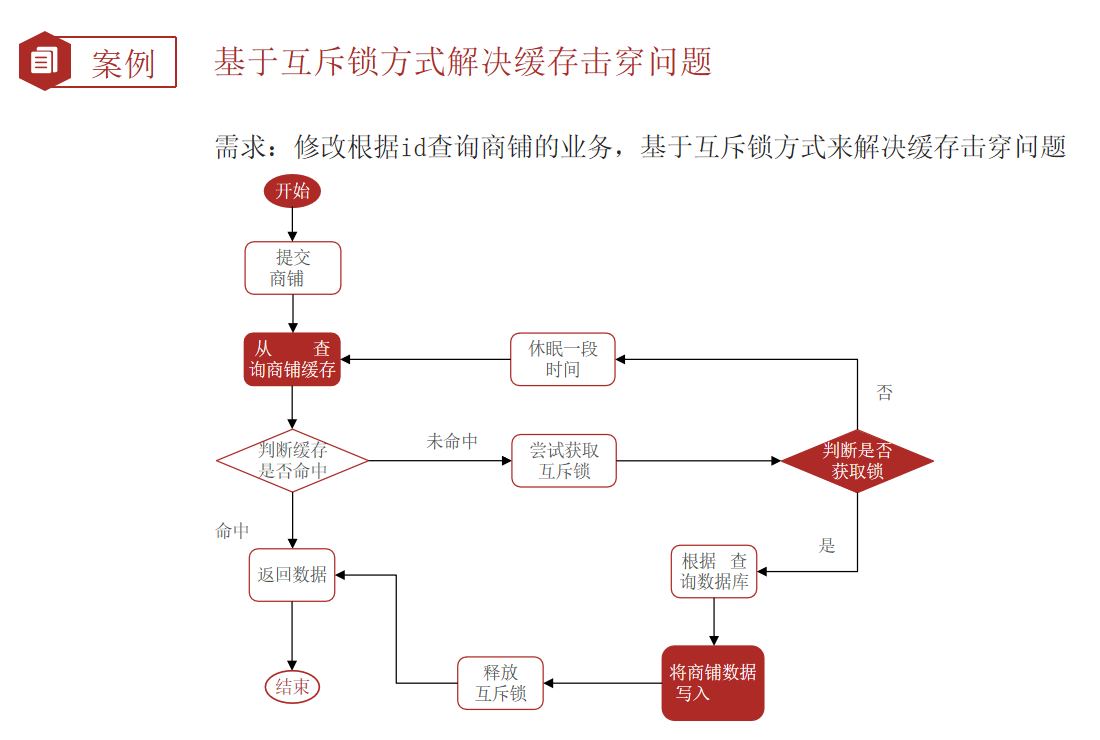
Redis 缓存更新策略,缓存穿透、雪崩、击穿问题
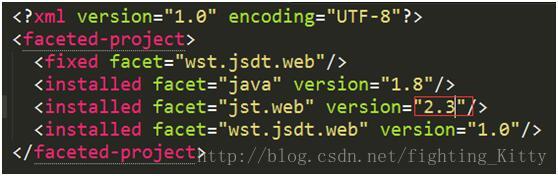
Cannot change version of project facet Dynamic Web Module to 2.3.
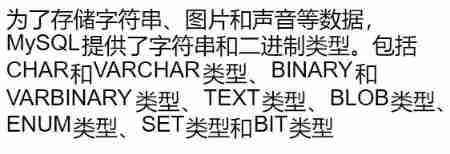
Basic operations of databases and tables ----- classification of data

ES6 grammar summary -- Part 2 (advanced part es6~es11)
open-mmlab labelImg mmdetection
Unity3D制作注册登录界面,并实现场景跳转
随机推荐
@Autowired 和 @Resource 的区别
PT OSC deadlock analysis
Minio file download problem - inputstream:closed
SVN更新后不出现红色感叹号
Working principle of genius telephone watch Z3
[esp32 learning-1] construction of Arduino esp32 development environment
Common DOS commands
About using @controller in gateway
2021.11.10汇编考试
MySQL时间、时区、自动填充0的问题
.elf .map .list .hex文件
JS数组常用方法的分类、理解和运用
[Red Treasure Book Notes simplified version] Chapter 12 BOM
Embedded startup process
JS Title: input array, exchange the largest with the first element, exchange the smallest with the last element, and output array.
Types de variables JS et transformations de type communes
Gateway 根据服务名路由失败,报错 Service Unavailable, status=503
idea问题记录
js题目:输入数组,最大的与第一个元素交换,最小的与最后一个元素交换,输出数组。
Walk into WPF's drawing Bing Dwen Dwen