当前位置:网站首页>open-mmlab labelImg mmdetection
open-mmlab labelImg mmdetection
2022-07-06 12:03:00 【Caojia xiaoyuanbao】
open-mmlab Test items of
Introduction to data marker tool
labelImg
git Address : https://github.com/tzutalin/labelImg
install ( Both methods are applicable to linux and mac Upper conda Virtual environment installation )
according to git Introduce , There are two ways to install :
pip Package installation
pip Package installation (linux The simplest installation method on the ), The installation and use commands are as follows :
#  Environmental preparation
conda create -n labelImg_1 python=3.7
conda activate labelImg_1
# linux install
pip3 install labelImg
# linux Use vnc Open the visual interface . The command line input is as follows :
labelImg
#
labelImg [IMAGE_PATH] [PRE-DEFINED CLASS FILE]
Use pip list Check out the installation package
pip list
Package    Version
---------- ---------
certifi    2021.10.8
labelImg   1.8.6
lxml       4.6.3
pip        21.0.1
PyQt5      5.15.5
PyQt5-Qt5  5.15.2
PyQt5-sip  12.9.0
setuptools 58.0.4
wheel      0.37.0
The software screenshot is as follows 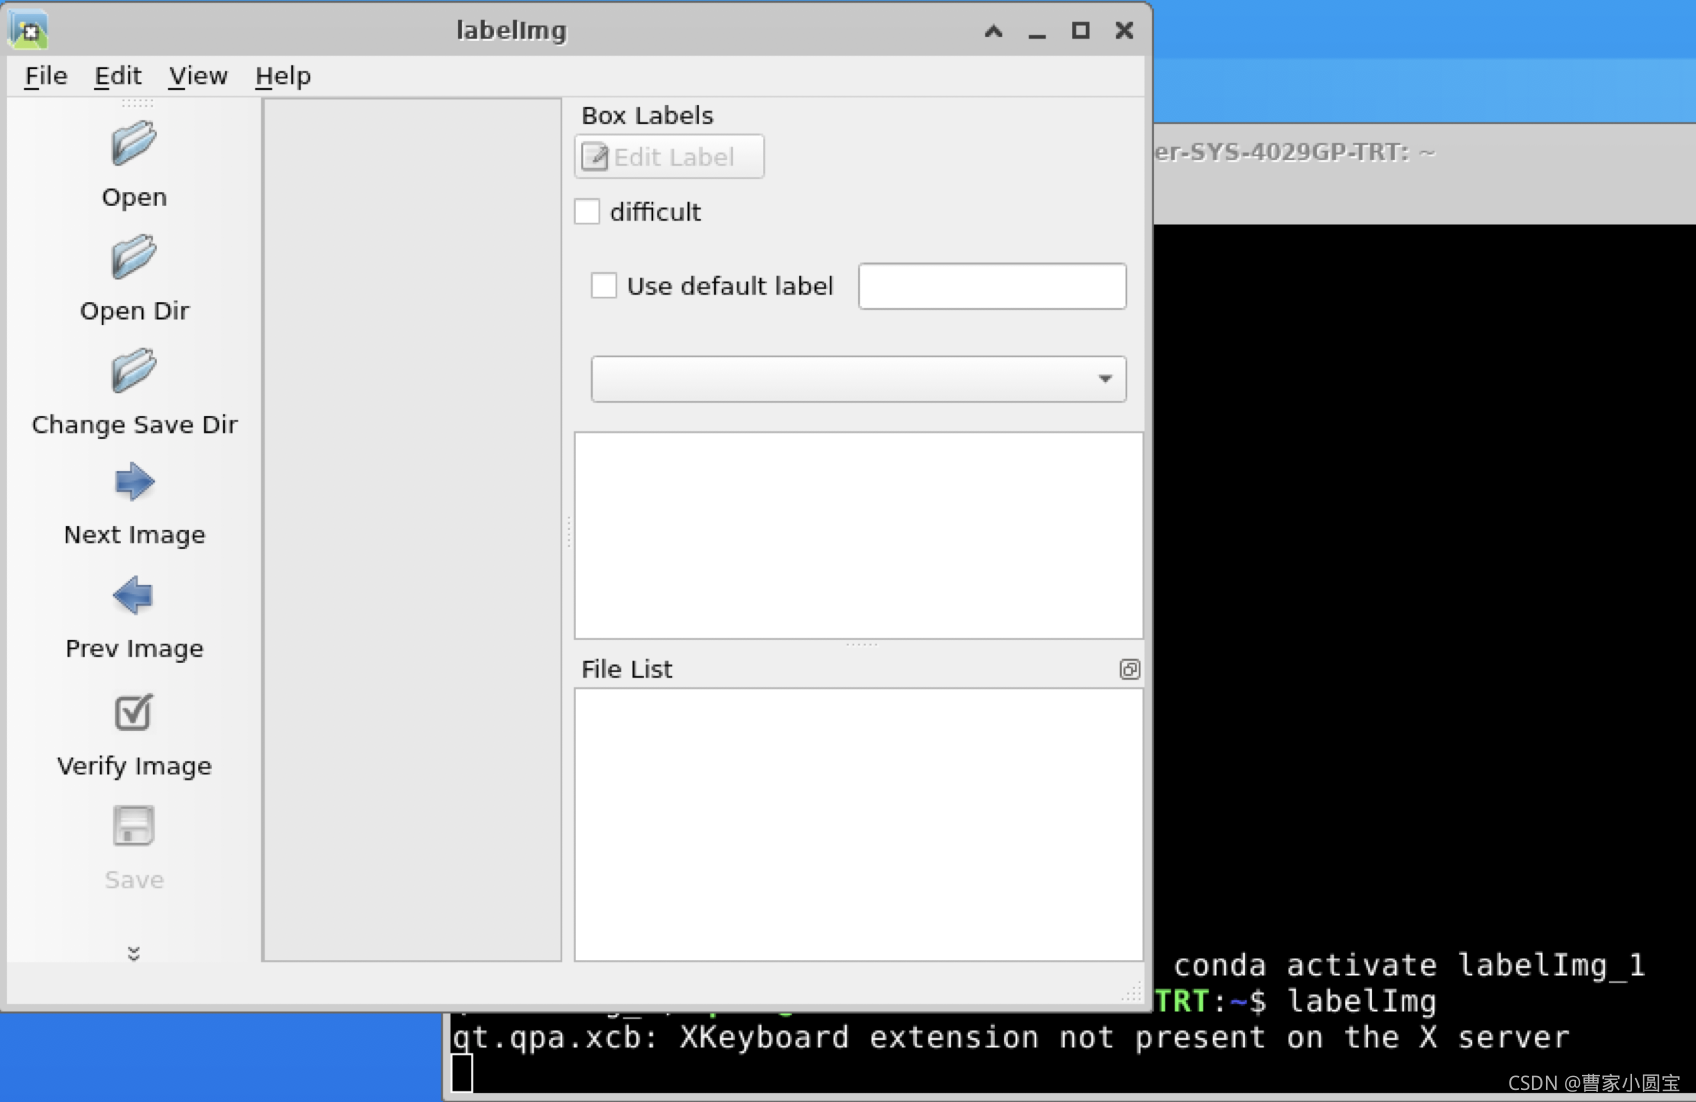
Install from source
Download source code , Prepare the virtual environment
#  Environmental preparation
conda create -n labelImg_2 python==3.7
conda activate labelImg_2
pip install PyQt5
pip install lxml
pyrcc5 -o libs/resources.py resources.qrc
#  download
git clone https://github.com/tzutalin/labelImg
cd labelImg
#  Use
python3 labelImg.py
#
python3 labelImg.py [IMAGE_PATH] [PRE-DEFINED CLASS FILE]
Use pip list Check out the installation package
pip list
Package    Version
---------- ---------
certifi    2021.10.8
lxml       4.6.3
pip        21.2.2
PyQt5      5.15.5
PyQt5-Qt5  5.15.2
PyQt5-sip  12.9.0
setuptools 58.0.4
wheel      0.37.0
The software screenshot is as follows 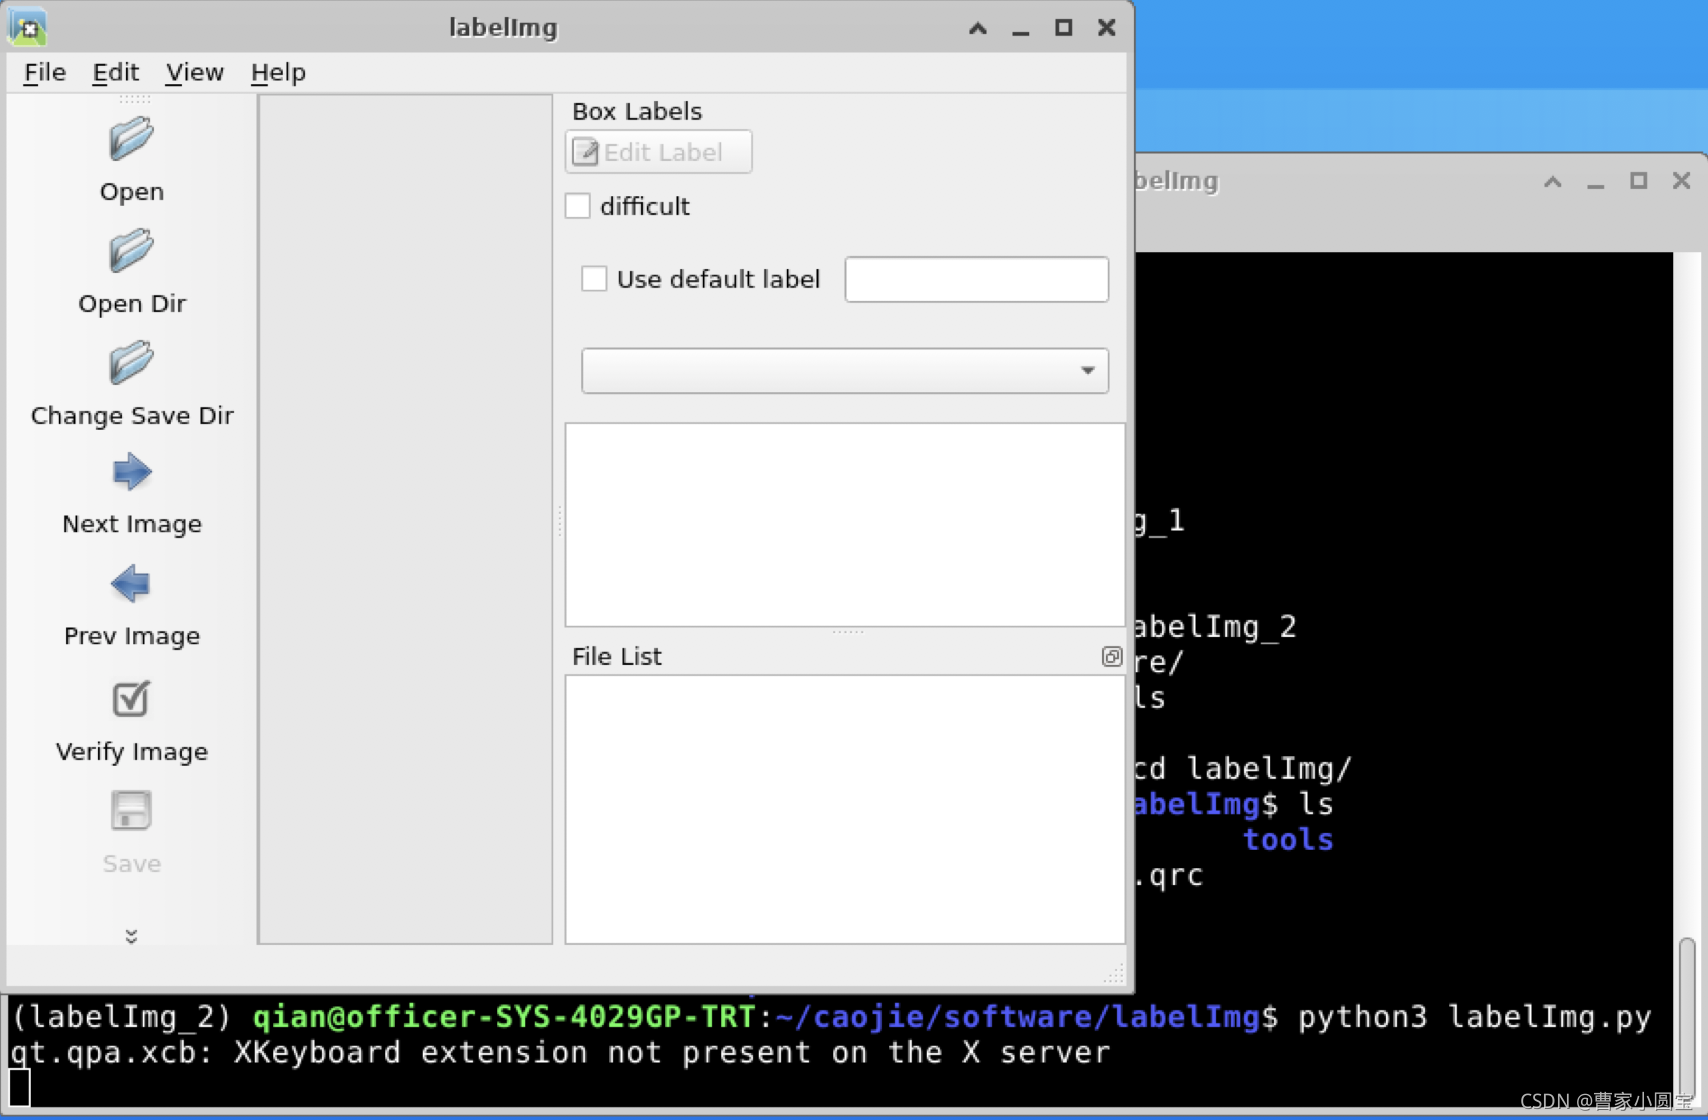
labelme
git Address : https://github.com/wkentaro/labelme
install
The installation command is as follows :
conda create --name=labelme python=3.6
source activate labelme
pip install labelme
Use
Type directly in the environment
labelme
The interface appears as follows , At this point, you can open the image path for annotation :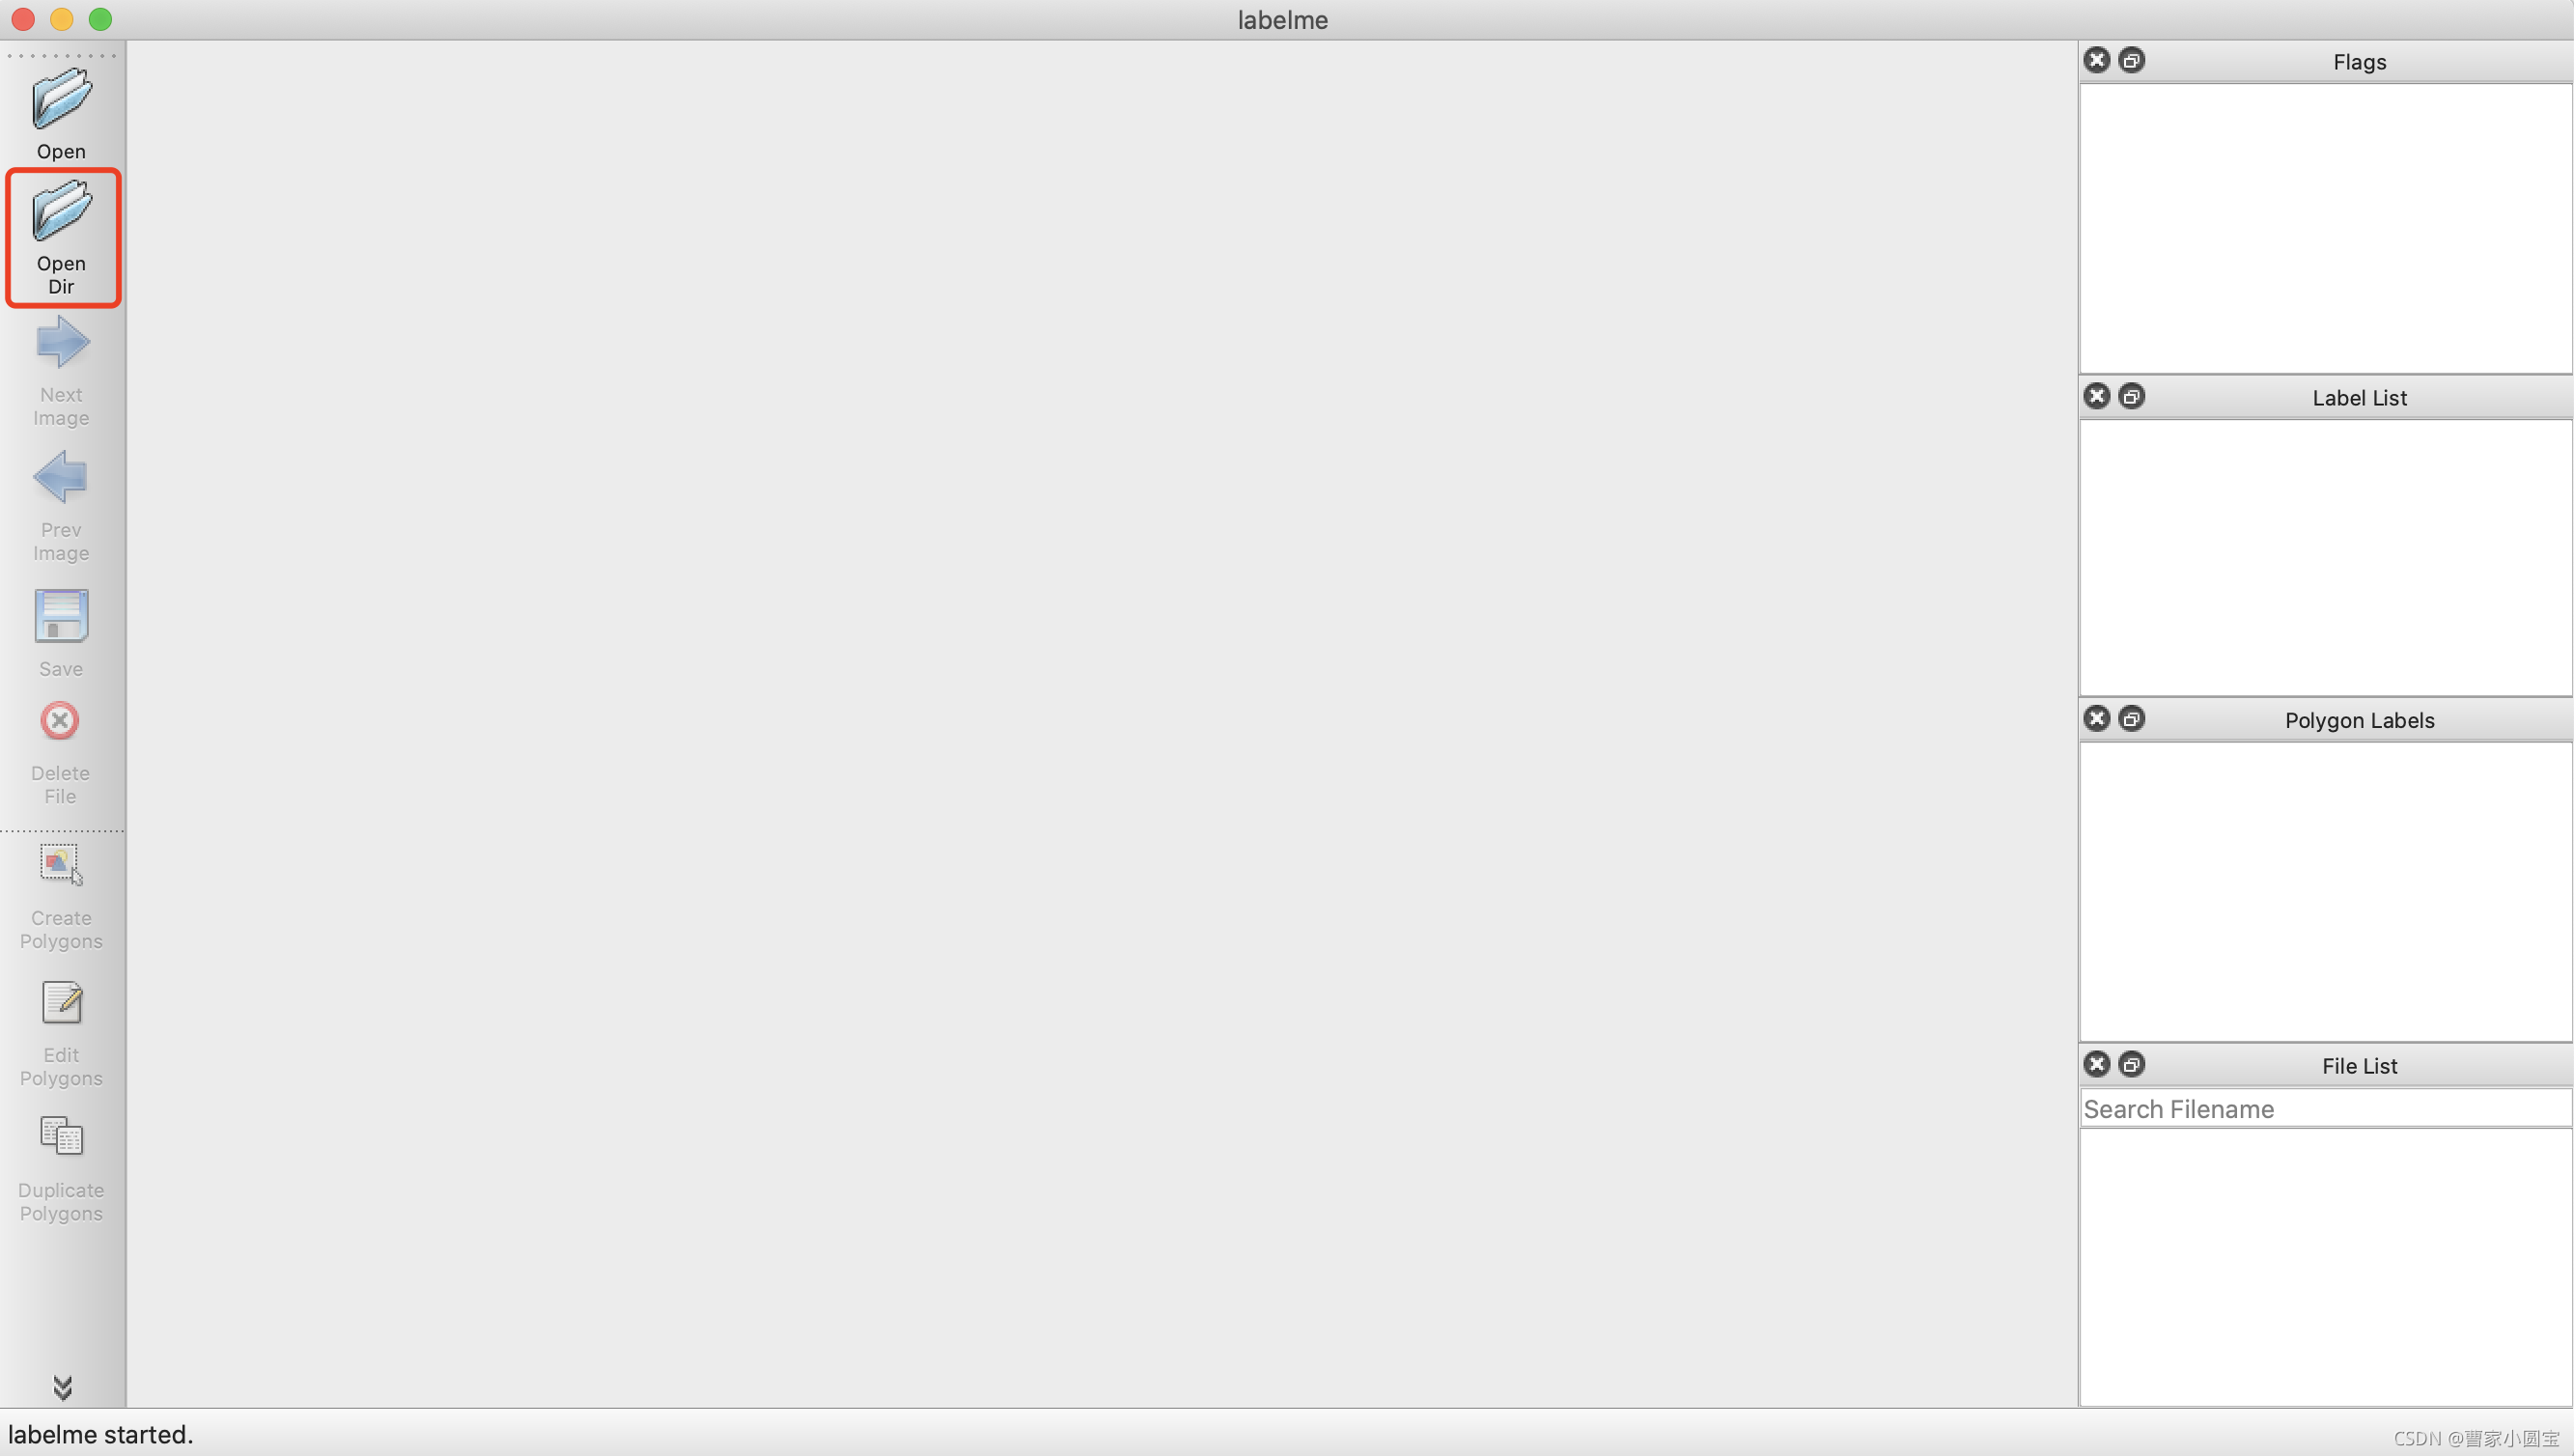
Click on Create Polygons Annotate , Enter the label


Click the menu bar on the left to save , Save as json file .
Generate label data
#  Use command
labelme_json_to_dataset DJI_20210414132518_0423_Z.json
Build folder DJI_20210414132518_0423_Z_json, The contents are as follows :
notes : You can put more than one labelme_json_to_dataset aa.json Write to batch file
mmdetection
git Address : https://github.com/open-mmlab/mmdetection
git clone https://github.com/open-mmlab/mmdetection
Download to server , Update to local , use pycharm Editor open ( Reference resources https://blog.csdn.net/fighting_Kitty/article/details/121023315)
Configuration environment
find readme in Installation,get_started.md Environment installation is detailed in , The main orders are as follows :
#  Creating a virtual environment
conda create -n openmmlab python=3.7 -y
conda activate openmmlab
#  install PyTorch and torchvision
#( According to your own cuda edition (nvcc -V)
#  Go to pytorch Choose on the official website https://pytorch.org/get-started/previous-versions/)
# CUDA 11.0
pip install torch==1.7.1+cu110 torchvision==0.8.2+cu110 torchaudio==0.7.2 -f https://download.pytorch.org/whl/torch_stable.html
# Install MMDetection( Automatic or manual , Automatic simple , Manual is suitable for debugging research code )
pip install openmim
mim install mmdet

#  Manual
pip install torch==1.7.0+cu110 torchvision==0.8.1+cu110 torchaudio==0.7.0  -f https://download.pytorch.org/whl/torch_stable.html
pip install mmcv-full -f https://download.openmmlab.com/mmcv/dist/cu110/1.7.1+cu110/index.htm
attach :cuda see nvcc -V
nvcc -V
nvcc: NVIDIA (R) Cuda compiler driver
Copyright (c) 2005-2020 NVIDIA Corporation
Built on Thu_Jun_11_22:26:38_PDT_2020
Cuda compilation tools, release 11.0, V11.0.194
Build cuda_11.0_bu.TC445_37.28540450_0
function
mkdir checkpoints
cd checkpoints
wget https://download.openmmlab.com/mmdetection/v2.0/faster_rcnn/faster_rcnn_r50_fpn_1x_coco/faster_rcnn_r50_fpn_1x_coco_20200130-047c8118.pth
wget https://github.com/open-mmlab/mmdetection/tree/master/configs/faster_rcnn/faster_rcnn_r50_fpn_1x_coco.py
Code
from mmdet.apis import init_detector, inference_detector

config_file = '../configs/faster_rcnn/faster_rcnn_r50_fpn_1x_coco.py'
# download the checkpoint from model zoo and put it in `checkpoints/`
# url: https://download.openmmlab.com/mmdetection/v2.0/faster_rcnn/faster_rcnn_r50_fpn_1x_coco/faster_rcnn_r50_fpn_1x_coco_20200130-047c8118.pth
checkpoint_file = '../checkpoints/faster_rcnn_r50_fpn_1x_coco_20200130-047c8118.pth'
device = 'cuda:0'
# init a detector
model = init_detector(config_file, checkpoint_file, device=device)
# inference the demo image
inference_detector(model, '../demo/demo.jpg')
Fine tune with your own dataset
Download pre training model
mmdetection It provides a wealth of pre training weight models , This article USES the faster_rcnn_r50_fpn_1x_coco_20200130-047c8118.pth, Download it and put it in checkpoints Under the path
voc The data is modified to standard coco Format
use labelImg Label the detection picture , The format of annotation data is PASCAL VOC The format of , One picture corresponds to one XML Note document .COCO data format , All image data annotation information is saved in one JSON In file . The conversion code is as follows :
import json
import os, sys
import xml.etree.ElementTree as ET
import pdb;pdb.set_trace()
mode = 'test' #  This can be changed to train、val
DATA_DIR = '/home/qian/caojie/software/mmdetection/data/hotel/' + mode + '/'
ANN_DIR = DATA_DIR + 'annotations/'

# ====================  Need modification  train or val ========================
COCO_JSON_FILE = DATA_DIR + 'hotel_' + mode + '.json'  # json save path
VOC_XMLS_DIR = DATA_DIR + 'annotations/'
# ==================================================================

if not os.path.exists(ANN_DIR):
    os.makedirs(ANN_DIR)

# coco images  A list of
images = []

# coco annotations  A list of
annotations = []

# coco categories  A list of
# If necessary, pre-define category and its id
PRE_DEFINE_CATEGORIES = {
    "background": 0, "bed": 1, "chair": 2, "curtain": 3}
categories = [
    {

        'id': 0,
        'name': 'background',
        'supercategory': 'object',
    },
    {

        'id': 1,
        'name': 'bed',
        'supercategory': 'object',
    },
    {

        'id': 2,
        'name': 'chair',
        'supercategory': 'object',
    },
    {

        'id': 3,
        'name': 'curtain',
        'supercategory': 'object',
    }
]

# coco  Store format dictionary
coco_json = {

    "images": images,
    "annotations": annotations,
    "categories": categories
}

''' purpose: voc  Of xml  turn  coco  Of json '''


def labelImg_voc2coco():
    import pdb;pdb.set_trace()
    voc_xmls_list = os.listdir(VOC_XMLS_DIR)
    converted_num = 0
    image_id = 0
    bbox_id = 0

    for xml_fileName in voc_xmls_list:

        #  Progress output
        converted_num += 1
        sys.stdout.write('\r>> Processing %s, Converting xml %d/%d' % (xml_fileName, converted_num, len(voc_xmls_list)))
        sys.stdout.flush()

        #  analysis xml
        xml_fullName = os.path.join(VOC_XMLS_DIR, xml_fileName)
        tree = ET.parse(xml_fullName)  #  analysis xml Element tree
        root = tree.getroot()  #  Get the root node of the tree

        # image: file_name
        filename = get_element(root, 'filename').text.split('.')[0] + '.jpg'  #  read xml The file name in the file
        # filename = xml_fileName #  Read file name

        # image: id
        image_id = image_id + 1

        # image: width & height
        size = get_element(root, 'size')
        img_width = int(get_element(size, 'width').text)
        img_height = int(get_element(size, 'height').text)

        # images
        image = {

            'file_name': filename,
            'id': image_id,
            'width': img_width,
            'height': img_height
        }

        coco_json['images'].append(image)

        for obj in get_elements(root, 'object'):
            # annotation: category_id
            category = get_element(obj, 'name').text
            if category not in PRE_DEFINE_CATEGORIES:
                new_id = len(PRE_DEFINE_CATEGORIES) + 1
                PRE_DEFINE_CATEGORIES[category] = new_id
            category_id = PRE_DEFINE_CATEGORIES[category]

            # annotation: id
            bbox_id += 1

            # annotation: bbox
            bndbox = get_element(obj, 'bndbox')
            xmin = int(get_element(bndbox, 'xmin').text)
            ymin = int(get_element(bndbox, 'ymin').text)
            xmax = int(get_element(bndbox, 'xmax').text)
            ymax = int(get_element(bndbox, 'ymax').text)
            assert (xmax > xmin)
            assert (ymax > ymin)
            bbox_width = abs(xmax - xmin)
            bbox_height = abs(ymax - ymin)

            # annotation: segmentation
            # seg = list(eval(get_element(obj, 'segmentation').text))

            annotation = {

                'id': bbox_id,
                'image_id': image_id,
                'category_id': category_id,
                # 'segmentation': [seg],
                'area': bbox_width * bbox_height,
                'bbox': [xmin, ymin, bbox_width, bbox_height],
                'iscrowd': 0
            }

            coco_json['annotations'].append(annotation)

    print('\r')
    print("Num of categories: %s" % len(categories))
    print("Num of images: %s" % len(images))
    print("Num of annotations: %s" % len(annotations))
    print(PRE_DEFINE_CATEGORIES)
    # coco Format dictionary writes json
    with open(COCO_JSON_FILE, 'w') as outfile:
        outfile.write(json.dumps(coco_json))


''' input: @root:  The root node  @childElementName:  Byte point tag name  output: @elements: All matching sub element objects under the root node  '''


def get_elements(root, childElementName):
    elements = root.findall(childElementName)
    return elements


''' input: @root:  The root node  @childElementName:  Byte point tag name  output: @elements: The first conforming sub element object under the root node  '''


def get_element(root, childElementName):
    element = root.find(childElementName)
    return element


if __name__ == '__main__':
    print('start convert')
    labelImg_voc2coco()
    print('\nconvert finished!')
The final annotation data folder is as follows :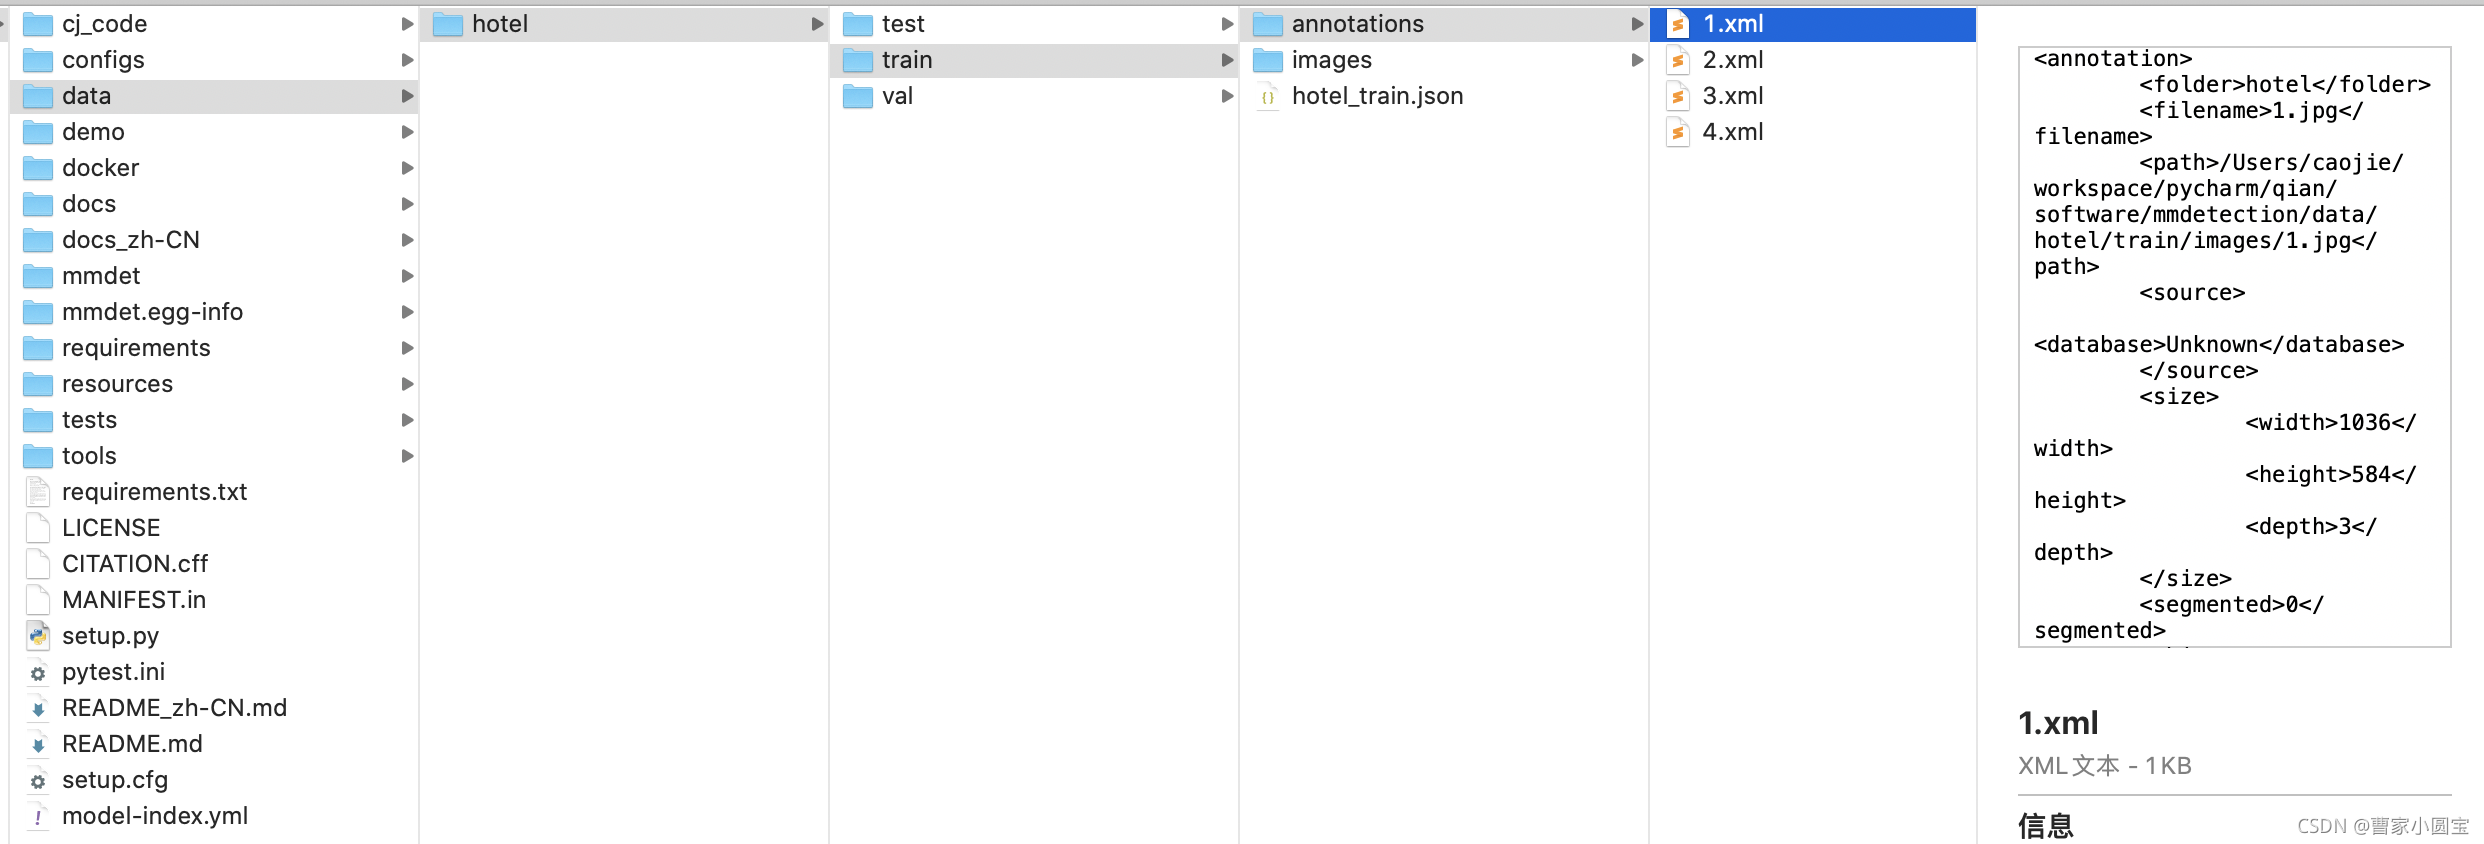
Create a new data class file
Create a new data class file mmdet/datasets/hotel.py, The contents are as follows :
import itertools
import logging
import os.path as osp
import tempfile
import warnings
from collections import OrderedDict

import mmcv
import numpy as np
from mmcv.utils import print_log
from terminaltables import AsciiTable

from mmdet.core import eval_recalls
from .api_wrappers import COCO, COCOeval
from .builder import DATASETS
from .custom import CustomDataset
from .coco import CocoDataset  #  Import coco Dataset class

@DATASETS.register_module()
class HotelDataset(CocoDataset):  #  Here inherit coco Dataset class

    CLASSES = ('background', 'bed', 'chair', 'curtain')

    def load_annotations(self, ann_file):
        """Load annotation from COCO style annotation file. Args: ann_file (str): Path of annotation file. Returns: list[dict]: Annotation info from COCO api. """
        self.coco = COCO(ann_file)
        # The order of returned `cat_ids` will not
        # change with the order of the CLASSES
        self.cat_ids = self.coco.get_cat_ids(cat_names=self.CLASSES)

        self.cat2label = {
    cat_id: i for i, cat_id in enumerate(self.cat_ids)}
        self.img_ids = self.coco.get_img_ids()
        data_infos = []
        total_ann_ids = []
        for i in self.img_ids:
            info = self.coco.load_imgs([i])[0]
            info['filename'] = info['file_name']
            data_infos.append(info)
            ann_ids = self.coco.get_ann_ids(img_ids=[i])
            total_ann_ids.extend(ann_ids)
        assert len(set(total_ann_ids)) == len(
            total_ann_ids), f"Annotation ids in '{
      ann_file}' are not unique!"
        return data_infos
Remember in mmdet/datasets/init.py In file , Add your own dataset name
# Copyright (c) OpenMMLab. All rights reserved.
from .builder import DATASETS, PIPELINES, build_dataloader, build_dataset
from .cityscapes import CityscapesDataset
from .coco import CocoDataset
from .coco_panoptic import CocoPanopticDataset
from .custom import CustomDataset
from .dataset_wrappers import (ClassBalancedDataset, ConcatDataset,
                               MultiImageMixDataset, RepeatDataset)
from .deepfashion import DeepFashionDataset
from .lvis import LVISDataset, LVISV1Dataset, LVISV05Dataset
from .samplers import DistributedGroupSampler, DistributedSampler, GroupSampler
from .utils import (NumClassCheckHook, get_loading_pipeline,
                    replace_ImageToTensor)
from .voc import VOCDataset
from .wider_face import WIDERFaceDataset
from .xml_style import XMLDataset
from .hotel import HotelDataset  #  Import your own data class file here

__all__ = [
    'CustomDataset', 'XMLDataset', 'CocoDataset', 'DeepFashionDataset',
    'VOCDataset', 'CityscapesDataset', 'LVISDataset', 'LVISV05Dataset',
    'LVISV1Dataset', 'GroupSampler', 'DistributedGroupSampler',
    'DistributedSampler', 'build_dataloader', 'ConcatDataset', 'RepeatDataset',
    'ClassBalancedDataset', 'WIDERFaceDataset', 'DATASETS', 'PIPELINES',
    'build_dataset', 'replace_ImageToTensor', 'get_loading_pipeline',
    'NumClassCheckHook', 'CocoPanopticDataset', 'MultiImageMixDataset',
    'HotelDataset'  #  Add your own data set here
]
Because I want to register , therefore , To reinstall from the source mmdet. It's explained later .
Configuration file modification
Create your own profile , Path is :configs/caojie_configs/config.py. According to faster_rcnn_r50_fpn_1x_coco.py What's in the configuration file , Put this 4 Files related model、dataset、schedule、default_runtime The content of , Copy to your own configuration file .
_base_ = [
    '../_base_/models/faster_rcnn_r50_fpn.py',
    '../_base_/datasets/coco_detection.py',
    '../_base_/schedules/schedule_1x.py', '../_base_/default_runtime.py'
]
Finally, my configuration file is as follows :
# model settings
model = dict(
    type='FasterRCNN',
    backbone=dict(
        type='ResNet',
        depth=50,
        num_stages=4,
        out_indices=(0, 1, 2, 3),
        frozen_stages=1,
        norm_cfg=dict(type='BN', requires_grad=True),
        norm_eval=True,
        style='pytorch',
        init_cfg=dict(type='Pretrained', checkpoint='torchvision://resnet50')),
    neck=dict(
        type='FPN',
        in_channels=[256, 512, 1024, 2048],
        out_channels=256,
        num_outs=5),
    rpn_head=dict(
        type='RPNHead',
        in_channels=256,
        feat_channels=256,
        anchor_generator=dict(
            type='AnchorGenerator',
            scales=[8],
            ratios=[0.5, 1.0, 2.0],
            strides=[4, 8, 16, 32, 64]),
        bbox_coder=dict(
            type='DeltaXYWHBBoxCoder',
            target_means=[.0, .0, .0, .0],
            target_stds=[1.0, 1.0, 1.0, 1.0]),
        loss_cls=dict(
            type='CrossEntropyLoss', use_sigmoid=True, loss_weight=1.0),
        loss_bbox=dict(type='L1Loss', loss_weight=1.0)),
    roi_head=dict(
        type='StandardRoIHead',
        bbox_roi_extractor=dict(
            type='SingleRoIExtractor',
            roi_layer=dict(type='RoIAlign', output_size=7, sampling_ratio=0),
            out_channels=256,
            featmap_strides=[4, 8, 16, 32]),
        bbox_head=dict(
            type='Shared2FCBBoxHead',
            in_channels=256,
            fc_out_channels=1024,
            roi_feat_size=7,
            num_classes=4,  #  Fine tuning   Change to   Number of categories +1
            bbox_coder=dict(
                type='DeltaXYWHBBoxCoder',
                target_means=[0., 0., 0., 0.],
                target_stds=[0.1, 0.1, 0.2, 0.2]),
            reg_class_agnostic=False,
            loss_cls=dict(
                type='CrossEntropyLoss', use_sigmoid=False, loss_weight=1.0),
            loss_bbox=dict(type='L1Loss', loss_weight=1.0))),
    # model training and testing settings
    train_cfg=dict(
        rpn=dict(
            assigner=dict(
                type='MaxIoUAssigner',
                pos_iou_thr=0.7,
                neg_iou_thr=0.3,
                min_pos_iou=0.3,
                match_low_quality=True,
                ignore_iof_thr=-1),
            sampler=dict(
                type='RandomSampler',
                num=256,
                pos_fraction=0.5,
                neg_pos_ub=-1,
                add_gt_as_proposals=False),
            allowed_border=-1,
            pos_weight=-1,
            debug=False),
        rpn_proposal=dict(
            nms_pre=2000,
            max_per_img=1000,
            nms=dict(type='nms', iou_threshold=0.7),
            min_bbox_size=0),
        rcnn=dict(
            assigner=dict(
                type='MaxIoUAssigner',
                pos_iou_thr=0.5,
                neg_iou_thr=0.5,
                min_pos_iou=0.5,
                match_low_quality=False,
                ignore_iof_thr=-1),
            sampler=dict(
                type='RandomSampler',
                num=512,
                pos_fraction=0.25,
                neg_pos_ub=-1,
                add_gt_as_proposals=True),
            pos_weight=-1,
            debug=False)),
    test_cfg=dict(
        rpn=dict(
            nms_pre=1000,
            max_per_img=1000,
            nms=dict(type='nms', iou_threshold=0.7),
            min_bbox_size=0),
        rcnn=dict(
            score_thr=0.05,
            nms=dict(type='nms', iou_threshold=0.5),
            max_per_img=100)
        # soft-nms is also supported for rcnn testing
        # e.g., nms=dict(type='soft_nms', iou_threshold=0.5, min_score=0.05)
    ))


# dataset settings
dataset_type = 'HotelDataset'  #  Here change to your own dataset class name   Modelled on the mmdet/datasets/coco.py file
data_root = '/home/qian/caojie/software/mmdetection/data/hotel/'   #  Modify your data directory here
img_norm_cfg = dict(
    mean=[123.675, 116.28, 103.53], std=[58.395, 57.12, 57.375], to_rgb=True)
train_pipeline = [
    dict(type='LoadImageFromFile'),
    dict(type='LoadAnnotations', with_bbox=True),
    dict(type='Resize', img_scale=(1333, 800), keep_ratio=True),
    dict(type='RandomFlip', flip_ratio=0.5),
    dict(type='Normalize', **img_norm_cfg),
    dict(type='Pad', size_divisor=32),
    dict(type='DefaultFormatBundle'),
    dict(type='Collect', keys=['img', 'gt_bboxes', 'gt_labels']),
]
test_pipeline = [
    dict(type='LoadImageFromFile'),
    dict(
        type='MultiScaleFlipAug',
        img_scale=(1333, 800),
        flip=False,
        transforms=[
            dict(type='Resize', keep_ratio=True),
            dict(type='RandomFlip'),
            dict(type='Normalize', **img_norm_cfg),
            dict(type='Pad', size_divisor=32),
            dict(type='ImageToTensor', keys=['img']),
            dict(type='Collect', keys=['img']),
        ])
]
data = dict(
    samples_per_gpu=2,
    workers_per_gpu=2,
    train=dict(
        type=dataset_type,
        ann_file=data_root + 'train/hotel_train.json',   #  Modify your training set data here
        img_prefix=data_root + 'train/images/',  #  Modify your training set data here
        pipeline=train_pipeline),
    val=dict(
        type=dataset_type,
        ann_file=data_root + 'val/hotel_val.json',  #  Modify your own validation set data here
        img_prefix=data_root + 'val/images/',  #  Modify your own validation set data here
        pipeline=test_pipeline),
    test=dict(
        type=dataset_type,
        ann_file=data_root + 'test/hotel_test.json',  #  Modify your own test set data here
        img_prefix=data_root + 'test/images/',  #  Modify your own test set data here
        pipeline=test_pipeline))
evaluation = dict(interval=1, metric='bbox')


# optimizer
optimizer = dict(type='SGD', lr=0.01, momentum=0.9, weight_decay=0.0001)  #  The learning rate is set to be lower during fine-tuning
optimizer_config = dict(grad_clip=None)
# learning policy
lr_config = dict(
    policy='step',
    warmup='linear',
    warmup_iters=500,
    warmup_ratio=0.001,
    step=[8, 11])
runner = dict(type='EpochBasedRunner', max_epochs=8)  #  Fine tuning epochs Set a small point


checkpoint_config = dict(interval=1)
# yapf:disable
log_config = dict(
    interval=50,
    hooks=[
        dict(type='TextLoggerHook'),
        # dict(type='TensorboardLoggerHook')
    ])
# yapf:enable
custom_hooks = [dict(type='NumClassCheckHook')]

dist_params = dict(backend='nccl')
log_level = 'INFO'
load_from = 'checkpoints/faster_rcnn_r50_fpn_1x_coco_20200130-047c8118.pth'  #  Fine tuning , Change to pre training model path
resume_from = None
workflow = [('train', 1)]
Training
Run the command as follows :
python tools/train.py configs/caojie_configs/config.py
Report errors
Traceback (most recent call last):
  File "train.py", line 16, in <module>
    from mmdet.apis import init_random_seed, set_random_seed, train_detector
ImportError: cannot import name 'init_random_seed' from 'mmdet.apis' (/home/qian/anaconda3/envs/openmmlab/lib/python3.7/site-packages/mmdet/apis/__init__.py)
Changed several project codes , The result is a sudden awakening , This is a pip install mmdet The error in the bag , So find the environment directory and have a look , Sure enough, there is a lack init_random_seed, Including the same level directory train.py Inside init_random_seed Function implementation . However, it cannot be installed in the environment pip The package changes around . So I installed it from the source code mmdet, The order is as follows :
cd mmdetection  #  Current project path
pip install -r requirements/build.txt
pip install -v -e .  # or "python setup.py develop"
After training , Generate work_dirs, Save the model here
test
The test and visual operation commands are as follows :
python tools/test.py configs/caojie_configs/config.py work_dirs/config/latest.pth --eval bbox
#  Save the visual detection picture , Add the following parameters
--show --show-dir cj_code/
mmsegmentation
git Address : https://github.com/open-mmlab/mmsegmentation
git clone https://github.com/open-mmlab/mmsegmentation
边栏推荐
- Linux Yum install MySQL
- Understanding of AMBA, AHB, APB and Axi
- Detailed explanation of express framework
- Reading notes of difficult career creation
- RT-Thread 线程的时间片轮询调度
- I2C bus timing explanation
- B tree and b+ tree of MySQL index implementation
- Machine learning -- decision tree (sklearn)
- 程序员老鸟都会搞错的问题 C语言基础 指针和数组
- map文件粗略分析
猜你喜欢
随机推荐
. elf . map . list . Hex file
互联网协议详解
Kconfig Kbuild
列表的使用
R & D thinking 01 ----- classic of embedded intelligent product development process
arduino获取随机数
共用体(union)详解【C语言】
Bubble sort [C language]
Pytorch实现简单线性回归Demo
STM32型号与Contex m对应关系
.elf .map .list .hex文件
Gallery's image browsing and component learning
C语言回调函数【C语言】
A possible cause and solution of "stuck" main thread of RT thread
Redis interview questions
Reno7 60W超级闪充充电架构
Mysql database interview questions
[template] KMP string matching
C language, log print file name, function name, line number, date and time
MATLAB学习和实战 随手记
