当前位置:网站首页>open-mmlab labelImg mmdetection
open-mmlab labelImg mmdetection
2022-07-06 09:16:00 【曹家小圆宝】
open-mmlab的检测项目
数据标柱工具介绍
labelImg
git地址: https://github.com/tzutalin/labelImg
安装(两种方法都适用于linux和mac上的conda虚拟环境下安装)
根据git上介绍,有两种安装方法:
pip包安装
pip包安装(linux上最简单的安装方法),安装命令及使用命令如下:
# 环境准备
conda create -n labelImg_1 python=3.7
conda activate labelImg_1
# linux安装
pip3 install labelImg
# linux使用vnc打开可视化界面。命令行输入如下:
labelImg
#
labelImg [IMAGE_PATH] [PRE-DEFINED CLASS FILE]
使用pip list查看安装包
pip list
Package    Version
---------- ---------
certifi    2021.10.8
labelImg   1.8.6
lxml       4.6.3
pip        21.0.1
PyQt5      5.15.5
PyQt5-Qt5  5.15.2
PyQt5-sip  12.9.0
setuptools 58.0.4
wheel      0.37.0
软件截图如下
从源码安装
下载源代码,准备虚拟环境
# 环境准备
conda create -n labelImg_2 python==3.7
conda activate labelImg_2
pip install PyQt5
pip install lxml
pyrcc5 -o libs/resources.py resources.qrc
# 下载
git clone https://github.com/tzutalin/labelImg
cd labelImg
# 使用
python3 labelImg.py
#
python3 labelImg.py [IMAGE_PATH] [PRE-DEFINED CLASS FILE]
使用pip list查看安装包
pip list
Package    Version
---------- ---------
certifi    2021.10.8
lxml       4.6.3
pip        21.2.2
PyQt5      5.15.5
PyQt5-Qt5  5.15.2
PyQt5-sip  12.9.0
setuptools 58.0.4
wheel      0.37.0
软件截图如下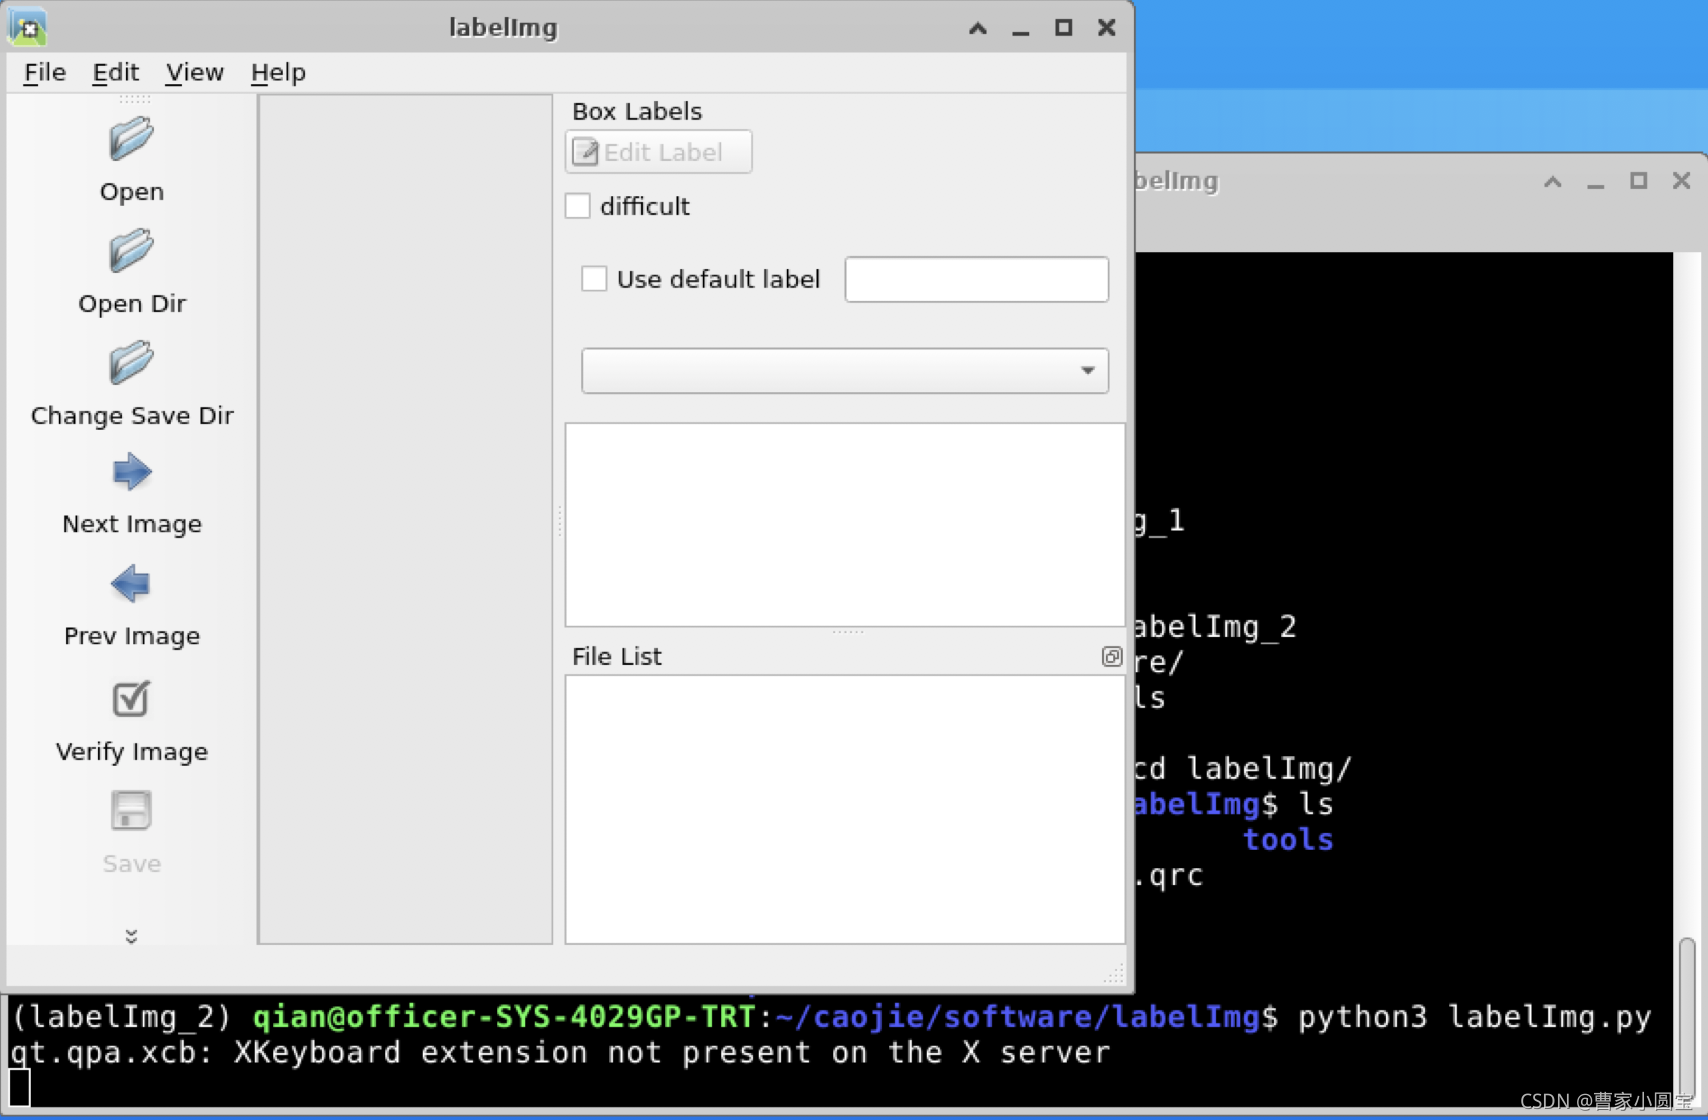
labelme
git地址: https://github.com/wkentaro/labelme
安装
安装命令如下:
conda create --name=labelme python=3.6
source activate labelme
pip install labelme
使用
直接在环境下键入
labelme
出现界面如下,此时可以打开图片路径进行标注: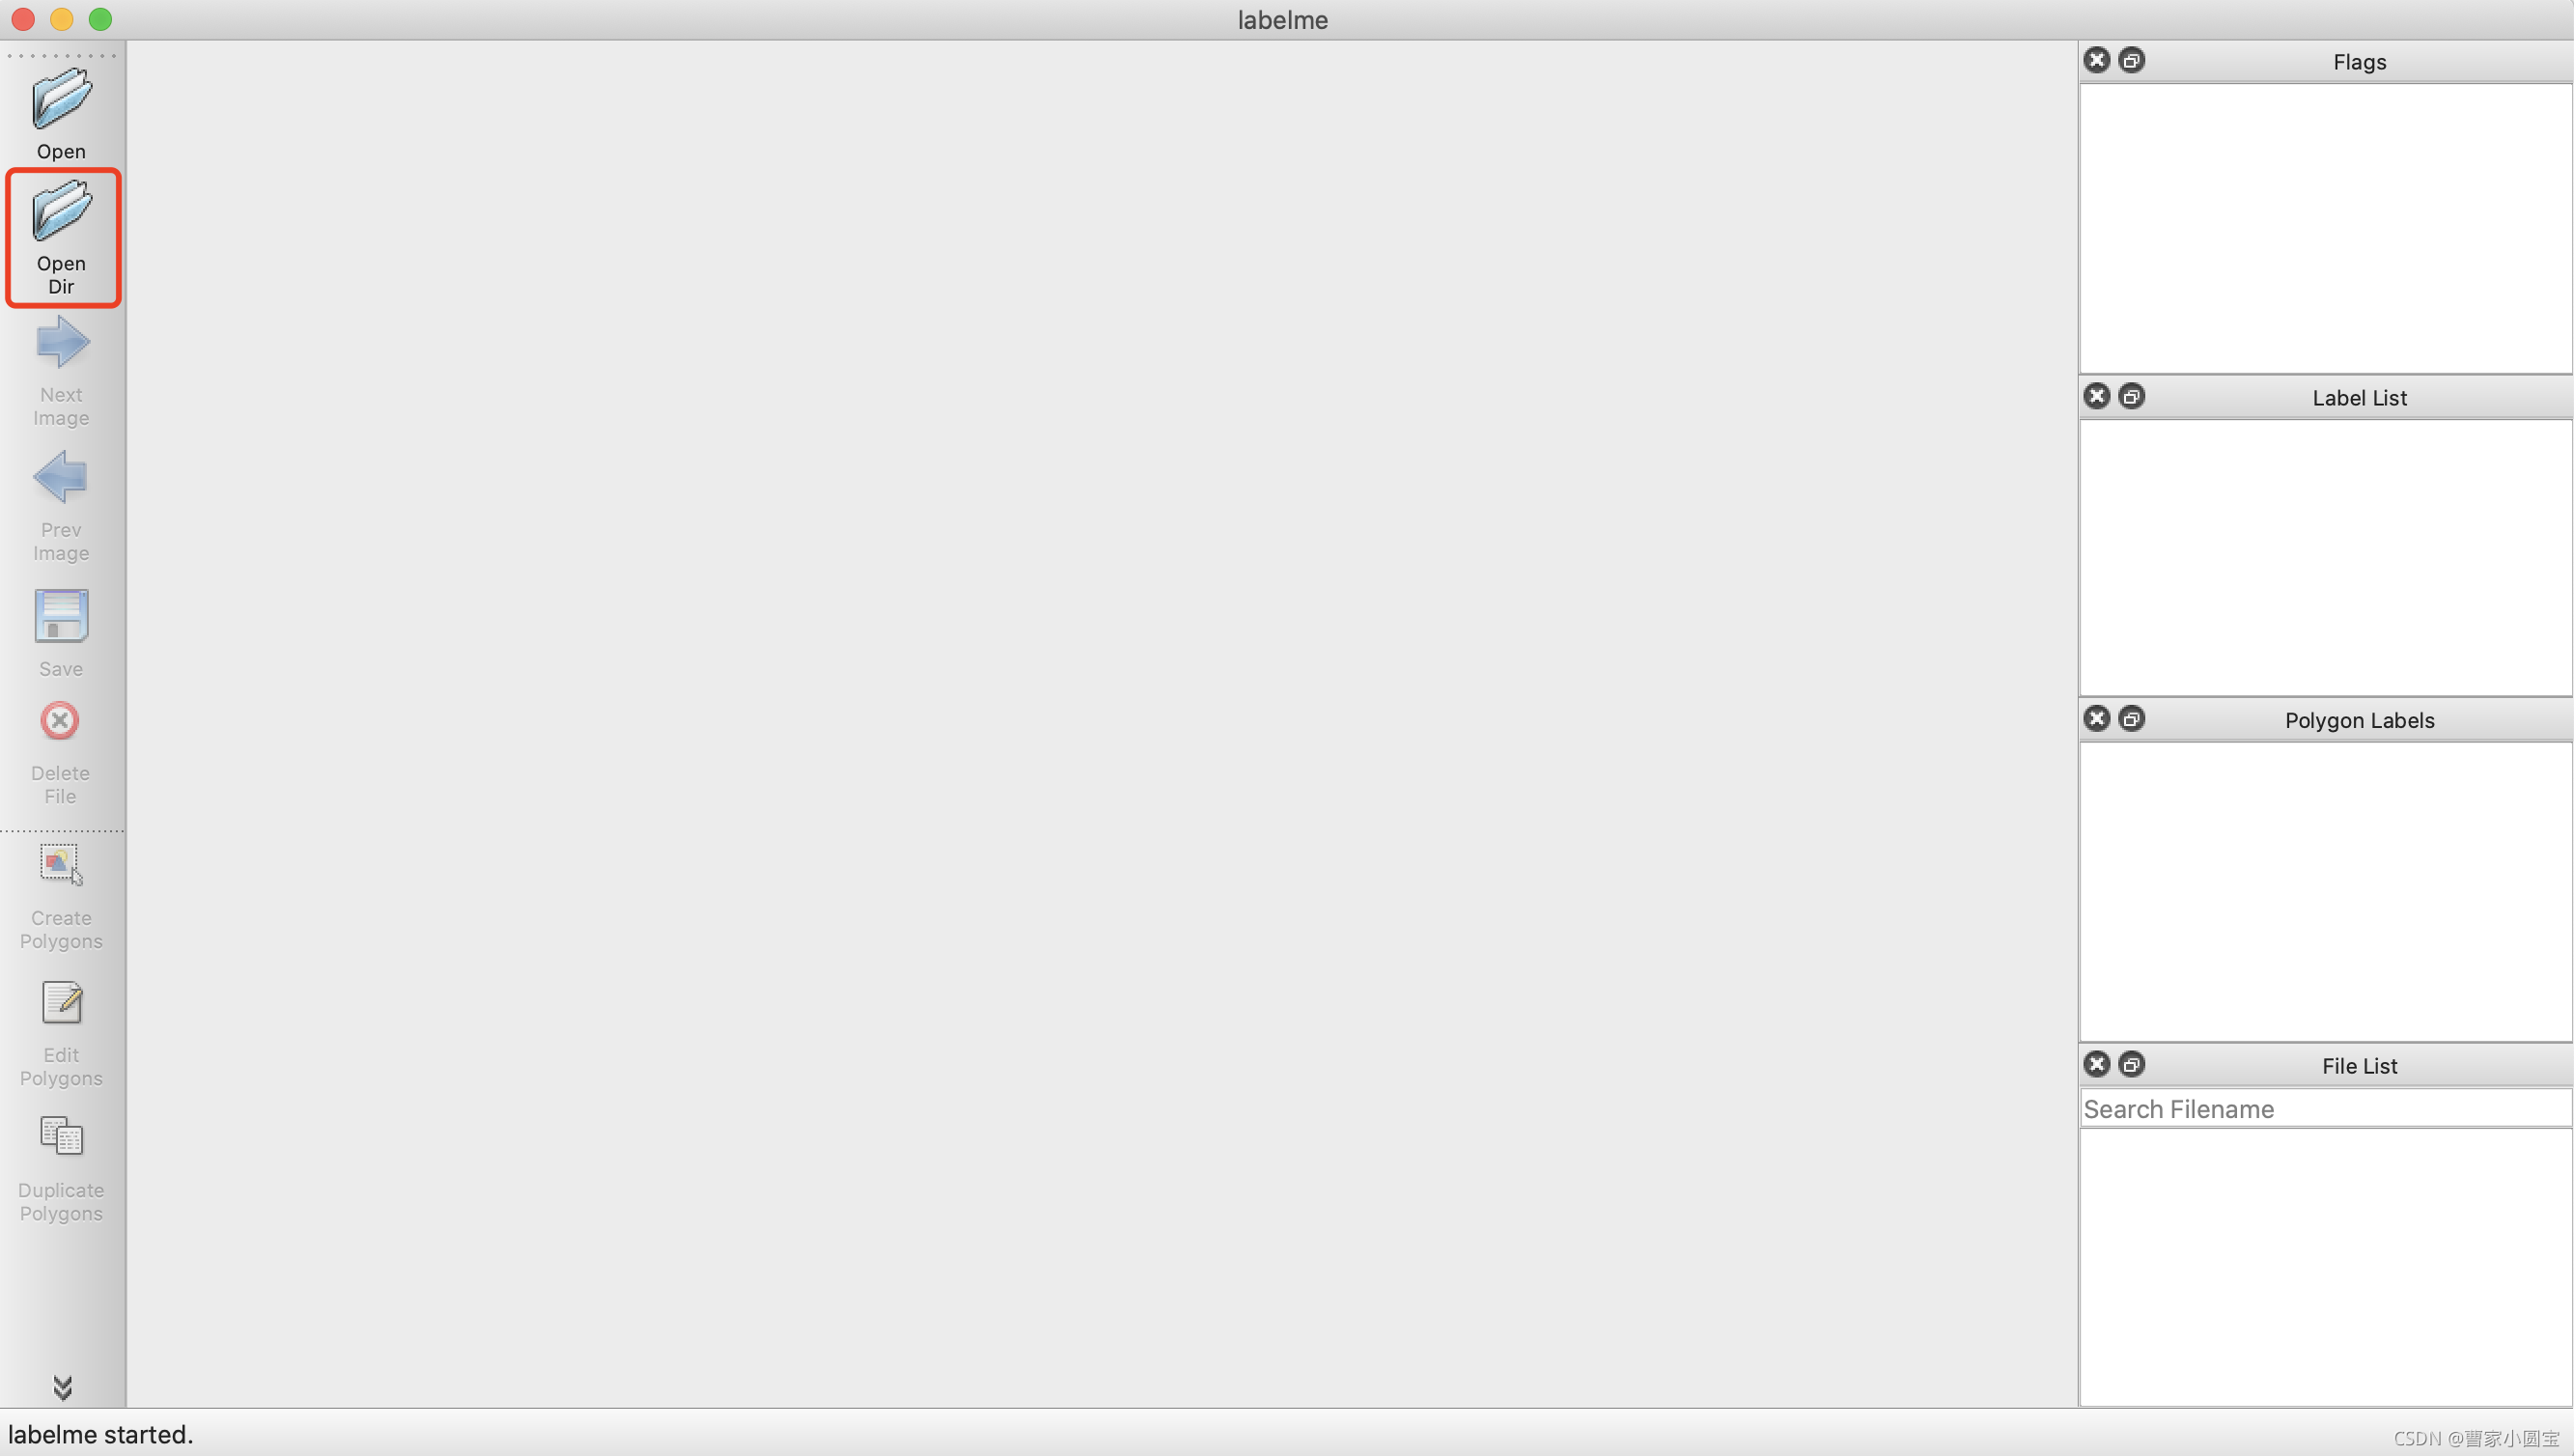
点击Create Polygons进行标注,输入标签


点击左侧菜单栏保存,保存为json文件。
生成label数据
# 运用命令
labelme_json_to_dataset DJI_20210414132518_0423_Z.json
生成文件夹DJI_20210414132518_0423_Z_json,内容如下:
注:可以把多个labelme_json_to_dataset aa.json写入批处理文件中
mmdetection
git地址: https://github.com/open-mmlab/mmdetection
git clone https://github.com/open-mmlab/mmdetection
下载到服务器,更新到本地,用pycharm编辑器打开(参考https://blog.csdn.net/fighting_Kitty/article/details/121023315)
配置环境
找到readme中Installation,get_started.md中详细写了环境安装,主要命令如下:
# 创建虚拟环境
conda create -n openmmlab python=3.7 -y
conda activate openmmlab
# 安装PyTorch and torchvision
#(按照自己的cuda版本(nvcc -V)
# 去pytorch官网上选https://pytorch.org/get-started/previous-versions/)
# CUDA 11.0
pip install torch==1.7.1+cu110 torchvision==0.8.2+cu110 torchaudio==0.7.2 -f https://download.pytorch.org/whl/torch_stable.html
# Install MMDetection(自动或者手动,自动简单,手动适合调试研究代码)
pip install openmim
mim install mmdet

# 手动
pip install torch==1.7.0+cu110 torchvision==0.8.1+cu110 torchaudio==0.7.0  -f https://download.pytorch.org/whl/torch_stable.html
pip install mmcv-full -f https://download.openmmlab.com/mmcv/dist/cu110/1.7.1+cu110/index.htm
附:cuda查看nvcc -V
nvcc -V
nvcc: NVIDIA (R) Cuda compiler driver
Copyright (c) 2005-2020 NVIDIA Corporation
Built on Thu_Jun_11_22:26:38_PDT_2020
Cuda compilation tools, release 11.0, V11.0.194
Build cuda_11.0_bu.TC445_37.28540450_0
运行
mkdir checkpoints
cd checkpoints
wget https://download.openmmlab.com/mmdetection/v2.0/faster_rcnn/faster_rcnn_r50_fpn_1x_coco/faster_rcnn_r50_fpn_1x_coco_20200130-047c8118.pth
wget https://github.com/open-mmlab/mmdetection/tree/master/configs/faster_rcnn/faster_rcnn_r50_fpn_1x_coco.py
代码
from mmdet.apis import init_detector, inference_detector

config_file = '../configs/faster_rcnn/faster_rcnn_r50_fpn_1x_coco.py'
# download the checkpoint from model zoo and put it in `checkpoints/`
# url: https://download.openmmlab.com/mmdetection/v2.0/faster_rcnn/faster_rcnn_r50_fpn_1x_coco/faster_rcnn_r50_fpn_1x_coco_20200130-047c8118.pth
checkpoint_file = '../checkpoints/faster_rcnn_r50_fpn_1x_coco_20200130-047c8118.pth'
device = 'cuda:0'
# init a detector
model = init_detector(config_file, checkpoint_file, device=device)
# inference the demo image
inference_detector(model, '../demo/demo.jpg')
用自己的数据集微调
下载预训练模型
mmdetection里提供了丰富的预训练权重模型,本文使用faster_rcnn_r50_fpn_1x_coco_20200130-047c8118.pth,下载后放到checkpoints路径下
voc数据修改为标准的coco格式
用labelImg标注检测图片,标注数据格式为PASCAL VOC的格式,一个图片对应一个XML注文件。COCO数据格式,所有的图像数据标注信息都保存在一个JSON文件中。转换代码如下:
import json
import os, sys
import xml.etree.ElementTree as ET
import pdb;pdb.set_trace()
mode = 'test' # 这里可以改成train、val
DATA_DIR = '/home/qian/caojie/software/mmdetection/data/hotel/' + mode + '/'
ANN_DIR = DATA_DIR + 'annotations/'

# ==================== 需要修改 train or val ========================
COCO_JSON_FILE = DATA_DIR + 'hotel_' + mode + '.json'  # json save path
VOC_XMLS_DIR = DATA_DIR + 'annotations/'
# ==================================================================

if not os.path.exists(ANN_DIR):
    os.makedirs(ANN_DIR)

# coco images 的列表
images = []

# coco annotations 的列表
annotations = []

# coco categories 的列表
# If necessary, pre-define category and its id
PRE_DEFINE_CATEGORIES = {
    "background": 0, "bed": 1, "chair": 2, "curtain": 3}
categories = [
    {

        'id': 0,
        'name': 'background',
        'supercategory': 'object',
    },
    {

        'id': 1,
        'name': 'bed',
        'supercategory': 'object',
    },
    {

        'id': 2,
        'name': 'chair',
        'supercategory': 'object',
    },
    {

        'id': 3,
        'name': 'curtain',
        'supercategory': 'object',
    }
]

# coco 存储格式的字典
coco_json = {

    "images": images,
    "annotations": annotations,
    "categories": categories
}

''' purpose: voc 的xml 转 coco 的json '''


def labelImg_voc2coco():
    import pdb;pdb.set_trace()
    voc_xmls_list = os.listdir(VOC_XMLS_DIR)
    converted_num = 0
    image_id = 0
    bbox_id = 0

    for xml_fileName in voc_xmls_list:

        # 进度输出
        converted_num += 1
        sys.stdout.write('\r>> Processing %s, Converting xml %d/%d' % (xml_fileName, converted_num, len(voc_xmls_list)))
        sys.stdout.flush()

        # 解析xml
        xml_fullName = os.path.join(VOC_XMLS_DIR, xml_fileName)
        tree = ET.parse(xml_fullName)  # 解析xml元素树
        root = tree.getroot()  # 获得树的根节点

        # image: file_name
        filename = get_element(root, 'filename').text.split('.')[0] + '.jpg'  # 读xml文件里的文件名
        # filename = xml_fileName # 读文件名

        # image: id
        image_id = image_id + 1

        # image: width & height
        size = get_element(root, 'size')
        img_width = int(get_element(size, 'width').text)
        img_height = int(get_element(size, 'height').text)

        # images
        image = {

            'file_name': filename,
            'id': image_id,
            'width': img_width,
            'height': img_height
        }

        coco_json['images'].append(image)

        for obj in get_elements(root, 'object'):
            # annotation: category_id
            category = get_element(obj, 'name').text
            if category not in PRE_DEFINE_CATEGORIES:
                new_id = len(PRE_DEFINE_CATEGORIES) + 1
                PRE_DEFINE_CATEGORIES[category] = new_id
            category_id = PRE_DEFINE_CATEGORIES[category]

            # annotation: id
            bbox_id += 1

            # annotation: bbox
            bndbox = get_element(obj, 'bndbox')
            xmin = int(get_element(bndbox, 'xmin').text)
            ymin = int(get_element(bndbox, 'ymin').text)
            xmax = int(get_element(bndbox, 'xmax').text)
            ymax = int(get_element(bndbox, 'ymax').text)
            assert (xmax > xmin)
            assert (ymax > ymin)
            bbox_width = abs(xmax - xmin)
            bbox_height = abs(ymax - ymin)

            # annotation: segmentation
            # seg = list(eval(get_element(obj, 'segmentation').text))

            annotation = {

                'id': bbox_id,
                'image_id': image_id,
                'category_id': category_id,
                # 'segmentation': [seg],
                'area': bbox_width * bbox_height,
                'bbox': [xmin, ymin, bbox_width, bbox_height],
                'iscrowd': 0
            }

            coco_json['annotations'].append(annotation)

    print('\r')
    print("Num of categories: %s" % len(categories))
    print("Num of images: %s" % len(images))
    print("Num of annotations: %s" % len(annotations))
    print(PRE_DEFINE_CATEGORIES)
    # coco格式字典写入json
    with open(COCO_JSON_FILE, 'w') as outfile:
        outfile.write(json.dumps(coco_json))


''' input: @root: 根节点 @childElementName: 字节点tag名称 output: @elements:根节点下所有符合的子元素对象 '''


def get_elements(root, childElementName):
    elements = root.findall(childElementName)
    return elements


''' input: @root: 根节点 @childElementName: 字节点tag名称 output: @elements:根节点下第一个符合的子元素对象 '''


def get_element(root, childElementName):
    element = root.find(childElementName)
    return element


if __name__ == '__main__':
    print('start convert')
    labelImg_voc2coco()
    print('\nconvert finished!')
最终标注数据文件夹如下: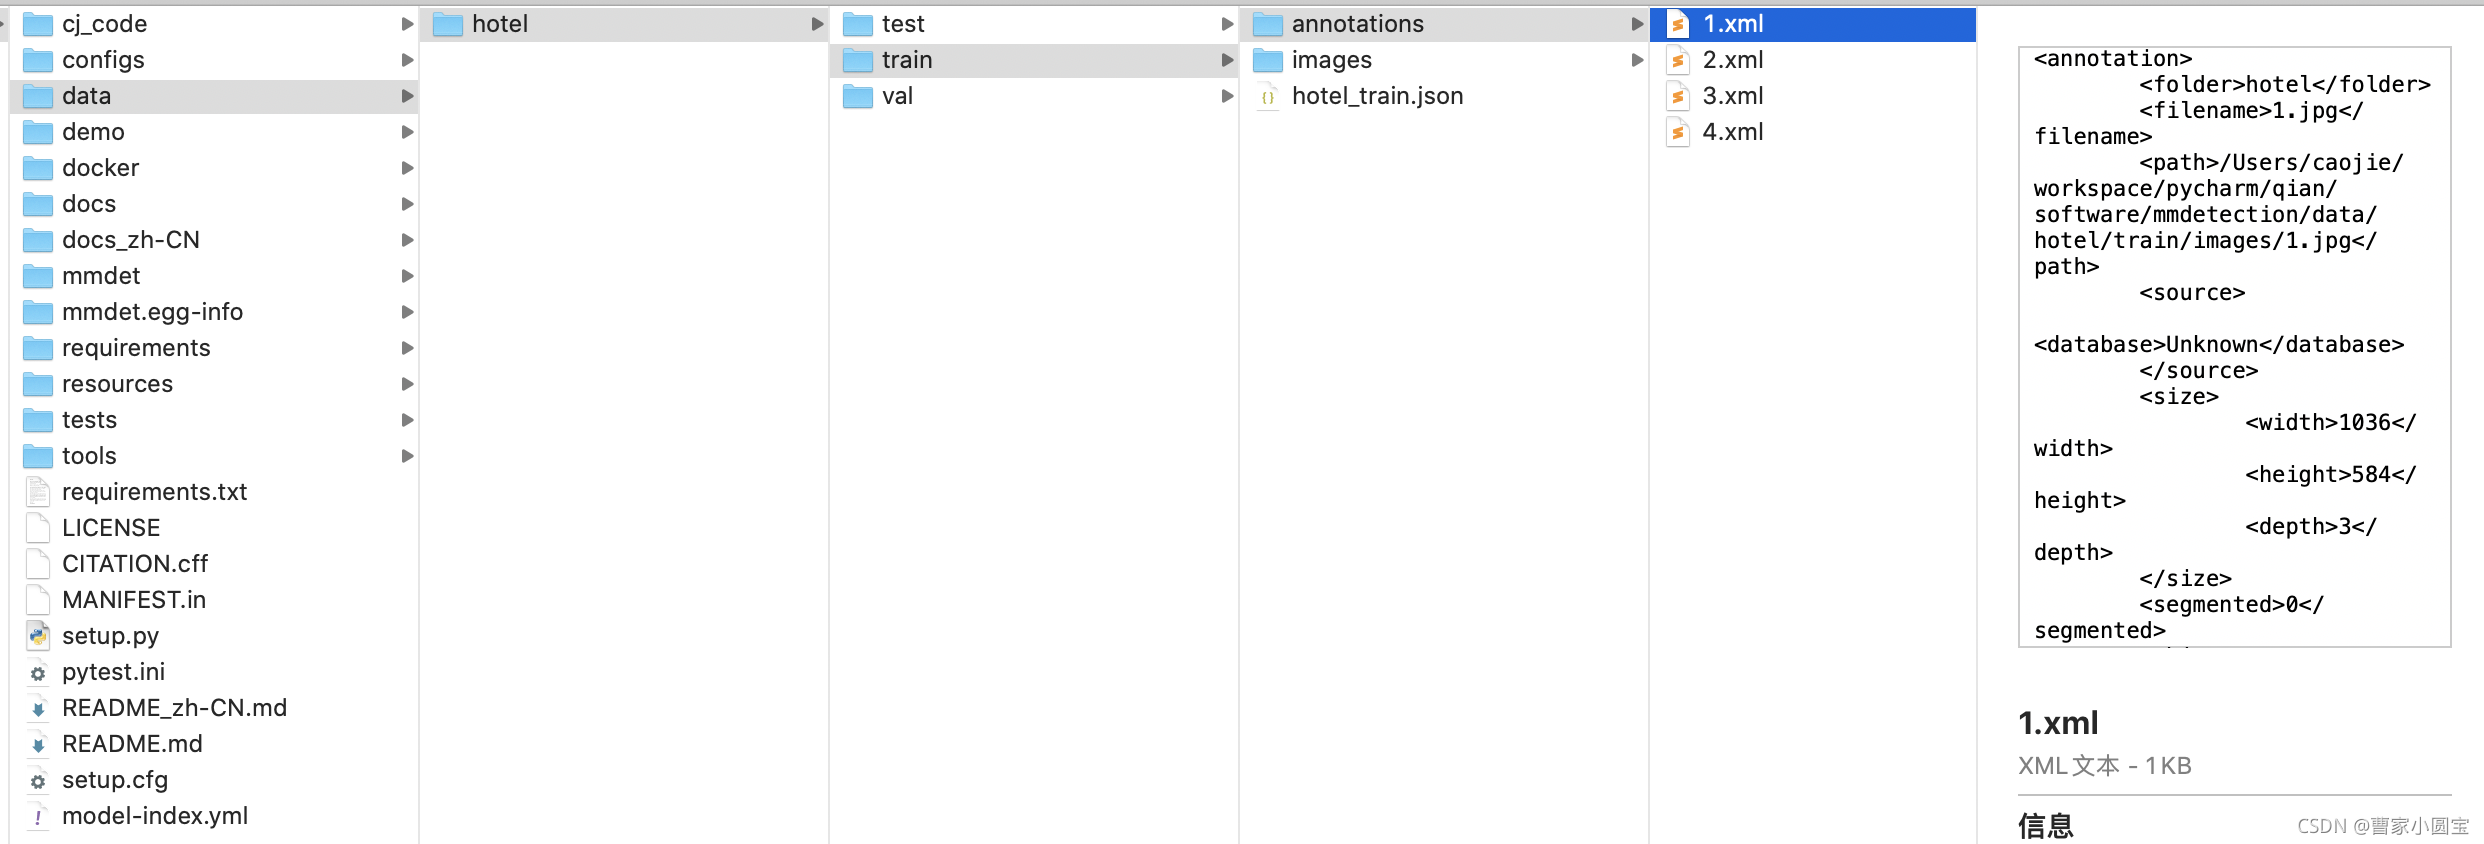
新建数据类文件
新建数据类文件mmdet/datasets/hotel.py,内容如下:
import itertools
import logging
import os.path as osp
import tempfile
import warnings
from collections import OrderedDict

import mmcv
import numpy as np
from mmcv.utils import print_log
from terminaltables import AsciiTable

from mmdet.core import eval_recalls
from .api_wrappers import COCO, COCOeval
from .builder import DATASETS
from .custom import CustomDataset
from .coco import CocoDataset  # 导入coco数据集类

@DATASETS.register_module()
class HotelDataset(CocoDataset):  # 这里继承coco数据集类

    CLASSES = ('background', 'bed', 'chair', 'curtain')

    def load_annotations(self, ann_file):
        """Load annotation from COCO style annotation file. Args: ann_file (str): Path of annotation file. Returns: list[dict]: Annotation info from COCO api. """
        self.coco = COCO(ann_file)
        # The order of returned `cat_ids` will not
        # change with the order of the CLASSES
        self.cat_ids = self.coco.get_cat_ids(cat_names=self.CLASSES)

        self.cat2label = {
    cat_id: i for i, cat_id in enumerate(self.cat_ids)}
        self.img_ids = self.coco.get_img_ids()
        data_infos = []
        total_ann_ids = []
        for i in self.img_ids:
            info = self.coco.load_imgs([i])[0]
            info['filename'] = info['file_name']
            data_infos.append(info)
            ann_ids = self.coco.get_ann_ids(img_ids=[i])
            total_ann_ids.extend(ann_ids)
        assert len(set(total_ann_ids)) == len(
            total_ann_ids), f"Annotation ids in '{
      ann_file}' are not unique!"
        return data_infos
记得在mmdet/datasets/init.py文件中,加入自己的数据集名字
# Copyright (c) OpenMMLab. All rights reserved.
from .builder import DATASETS, PIPELINES, build_dataloader, build_dataset
from .cityscapes import CityscapesDataset
from .coco import CocoDataset
from .coco_panoptic import CocoPanopticDataset
from .custom import CustomDataset
from .dataset_wrappers import (ClassBalancedDataset, ConcatDataset,
                               MultiImageMixDataset, RepeatDataset)
from .deepfashion import DeepFashionDataset
from .lvis import LVISDataset, LVISV1Dataset, LVISV05Dataset
from .samplers import DistributedGroupSampler, DistributedSampler, GroupSampler
from .utils import (NumClassCheckHook, get_loading_pipeline,
                    replace_ImageToTensor)
from .voc import VOCDataset
from .wider_face import WIDERFaceDataset
from .xml_style import XMLDataset
from .hotel import HotelDataset  # 这里导入自己的数据类文件

__all__ = [
    'CustomDataset', 'XMLDataset', 'CocoDataset', 'DeepFashionDataset',
    'VOCDataset', 'CityscapesDataset', 'LVISDataset', 'LVISV05Dataset',
    'LVISV1Dataset', 'GroupSampler', 'DistributedGroupSampler',
    'DistributedSampler', 'build_dataloader', 'ConcatDataset', 'RepeatDataset',
    'ClassBalancedDataset', 'WIDERFaceDataset', 'DATASETS', 'PIPELINES',
    'build_dataset', 'replace_ImageToTensor', 'get_loading_pipeline',
    'NumClassCheckHook', 'CocoPanopticDataset', 'MultiImageMixDataset',
    'HotelDataset'  # 这里加上自己的数据集
]
由于要注册一下,所以,要重新从源码安装mmdet。后面有解释。
配置文件修改
新建自己的配置文件,路径为:configs/caojie_configs/config.py。依照如faster_rcnn_r50_fpn_1x_coco.py配置文件中的内容,把这4个文件有关model、dataset、schedule、default_runtime的内容,都复制到自己的配置文件中。
_base_ = [
    '../_base_/models/faster_rcnn_r50_fpn.py',
    '../_base_/datasets/coco_detection.py',
    '../_base_/schedules/schedule_1x.py', '../_base_/default_runtime.py'
]
最后自己的配置文件如下:
# model settings
model = dict(
    type='FasterRCNN',
    backbone=dict(
        type='ResNet',
        depth=50,
        num_stages=4,
        out_indices=(0, 1, 2, 3),
        frozen_stages=1,
        norm_cfg=dict(type='BN', requires_grad=True),
        norm_eval=True,
        style='pytorch',
        init_cfg=dict(type='Pretrained', checkpoint='torchvision://resnet50')),
    neck=dict(
        type='FPN',
        in_channels=[256, 512, 1024, 2048],
        out_channels=256,
        num_outs=5),
    rpn_head=dict(
        type='RPNHead',
        in_channels=256,
        feat_channels=256,
        anchor_generator=dict(
            type='AnchorGenerator',
            scales=[8],
            ratios=[0.5, 1.0, 2.0],
            strides=[4, 8, 16, 32, 64]),
        bbox_coder=dict(
            type='DeltaXYWHBBoxCoder',
            target_means=[.0, .0, .0, .0],
            target_stds=[1.0, 1.0, 1.0, 1.0]),
        loss_cls=dict(
            type='CrossEntropyLoss', use_sigmoid=True, loss_weight=1.0),
        loss_bbox=dict(type='L1Loss', loss_weight=1.0)),
    roi_head=dict(
        type='StandardRoIHead',
        bbox_roi_extractor=dict(
            type='SingleRoIExtractor',
            roi_layer=dict(type='RoIAlign', output_size=7, sampling_ratio=0),
            out_channels=256,
            featmap_strides=[4, 8, 16, 32]),
        bbox_head=dict(
            type='Shared2FCBBoxHead',
            in_channels=256,
            fc_out_channels=1024,
            roi_feat_size=7,
            num_classes=4,  # 微调时 改成 类别数+1
            bbox_coder=dict(
                type='DeltaXYWHBBoxCoder',
                target_means=[0., 0., 0., 0.],
                target_stds=[0.1, 0.1, 0.2, 0.2]),
            reg_class_agnostic=False,
            loss_cls=dict(
                type='CrossEntropyLoss', use_sigmoid=False, loss_weight=1.0),
            loss_bbox=dict(type='L1Loss', loss_weight=1.0))),
    # model training and testing settings
    train_cfg=dict(
        rpn=dict(
            assigner=dict(
                type='MaxIoUAssigner',
                pos_iou_thr=0.7,
                neg_iou_thr=0.3,
                min_pos_iou=0.3,
                match_low_quality=True,
                ignore_iof_thr=-1),
            sampler=dict(
                type='RandomSampler',
                num=256,
                pos_fraction=0.5,
                neg_pos_ub=-1,
                add_gt_as_proposals=False),
            allowed_border=-1,
            pos_weight=-1,
            debug=False),
        rpn_proposal=dict(
            nms_pre=2000,
            max_per_img=1000,
            nms=dict(type='nms', iou_threshold=0.7),
            min_bbox_size=0),
        rcnn=dict(
            assigner=dict(
                type='MaxIoUAssigner',
                pos_iou_thr=0.5,
                neg_iou_thr=0.5,
                min_pos_iou=0.5,
                match_low_quality=False,
                ignore_iof_thr=-1),
            sampler=dict(
                type='RandomSampler',
                num=512,
                pos_fraction=0.25,
                neg_pos_ub=-1,
                add_gt_as_proposals=True),
            pos_weight=-1,
            debug=False)),
    test_cfg=dict(
        rpn=dict(
            nms_pre=1000,
            max_per_img=1000,
            nms=dict(type='nms', iou_threshold=0.7),
            min_bbox_size=0),
        rcnn=dict(
            score_thr=0.05,
            nms=dict(type='nms', iou_threshold=0.5),
            max_per_img=100)
        # soft-nms is also supported for rcnn testing
        # e.g., nms=dict(type='soft_nms', iou_threshold=0.5, min_score=0.05)
    ))


# dataset settings
dataset_type = 'HotelDataset'  # 这里改为自己的数据集类名 仿照mmdet/datasets/coco.py文件
data_root = '/home/qian/caojie/software/mmdetection/data/hotel/'   # 这里修改自己的数据目录
img_norm_cfg = dict(
    mean=[123.675, 116.28, 103.53], std=[58.395, 57.12, 57.375], to_rgb=True)
train_pipeline = [
    dict(type='LoadImageFromFile'),
    dict(type='LoadAnnotations', with_bbox=True),
    dict(type='Resize', img_scale=(1333, 800), keep_ratio=True),
    dict(type='RandomFlip', flip_ratio=0.5),
    dict(type='Normalize', **img_norm_cfg),
    dict(type='Pad', size_divisor=32),
    dict(type='DefaultFormatBundle'),
    dict(type='Collect', keys=['img', 'gt_bboxes', 'gt_labels']),
]
test_pipeline = [
    dict(type='LoadImageFromFile'),
    dict(
        type='MultiScaleFlipAug',
        img_scale=(1333, 800),
        flip=False,
        transforms=[
            dict(type='Resize', keep_ratio=True),
            dict(type='RandomFlip'),
            dict(type='Normalize', **img_norm_cfg),
            dict(type='Pad', size_divisor=32),
            dict(type='ImageToTensor', keys=['img']),
            dict(type='Collect', keys=['img']),
        ])
]
data = dict(
    samples_per_gpu=2,
    workers_per_gpu=2,
    train=dict(
        type=dataset_type,
        ann_file=data_root + 'train/hotel_train.json',   # 这里修改自己的训练集数据
        img_prefix=data_root + 'train/images/',  # 这里修改自己的训练集数据
        pipeline=train_pipeline),
    val=dict(
        type=dataset_type,
        ann_file=data_root + 'val/hotel_val.json',  # 这里修改自己的验证集数据
        img_prefix=data_root + 'val/images/',  # 这里修改自己的验证集数据
        pipeline=test_pipeline),
    test=dict(
        type=dataset_type,
        ann_file=data_root + 'test/hotel_test.json',  # 这里修改自己的测试集数据
        img_prefix=data_root + 'test/images/',  # 这里修改自己的测试集数据
        pipeline=test_pipeline))
evaluation = dict(interval=1, metric='bbox')


# optimizer
optimizer = dict(type='SGD', lr=0.01, momentum=0.9, weight_decay=0.0001)  # 微调时学习率设小点
optimizer_config = dict(grad_clip=None)
# learning policy
lr_config = dict(
    policy='step',
    warmup='linear',
    warmup_iters=500,
    warmup_ratio=0.001,
    step=[8, 11])
runner = dict(type='EpochBasedRunner', max_epochs=8)  # 微调时epochs设小点


checkpoint_config = dict(interval=1)
# yapf:disable
log_config = dict(
    interval=50,
    hooks=[
        dict(type='TextLoggerHook'),
        # dict(type='TensorboardLoggerHook')
    ])
# yapf:enable
custom_hooks = [dict(type='NumClassCheckHook')]

dist_params = dict(backend='nccl')
log_level = 'INFO'
load_from = 'checkpoints/faster_rcnn_r50_fpn_1x_coco_20200130-047c8118.pth'  # 微调时,改成预训练模型路径
resume_from = None
workflow = [('train', 1)]
训练
运行命令如下:
python tools/train.py configs/caojie_configs/config.py
报错
Traceback (most recent call last):
  File "train.py", line 16, in <module>
    from mmdet.apis import init_random_seed, set_random_seed, train_detector
ImportError: cannot import name 'init_random_seed' from 'mmdet.apis' (/home/qian/anaconda3/envs/openmmlab/lib/python3.7/site-packages/mmdet/apis/__init__.py)
改了好几个项目代码,结果突然醒悟,这是pip install mmdet包中的错误啊,于是找到环境目录下一看,果然是缺少init_random_seed,包括同级目录下train.py里的init_random_seed函数实现。可是也不能对环境下安装的pip包改来改去啊。所以我又从源码安装的mmdet,命令如下:
cd mmdetection  # 当前自己的项目路径
pip install -r requirements/build.txt
pip install -v -e .  # or "python setup.py develop"
训练完成之后,生成work_dirs,模型保存到这里面
测试
测试及可视化运行命令如下:
python tools/test.py configs/caojie_configs/config.py work_dirs/config/latest.pth --eval bbox
# 保存可视化检测图片,再加以下参数
--show --show-dir cj_code/
mmsegmentation
git地址: https://github.com/open-mmlab/mmsegmentation
git clone https://github.com/open-mmlab/mmsegmentation
边栏推荐
- I2C总线时序详解
- STM32 如何定位导致发生 hard fault 的代码段
- 小L的试卷
- Word排版(小计)
- 【yarn】CDP集群 Yarn配置capacity调度器批量分配
- Raspberry pie tap switch button to use
- 【CDH】CDH/CDP 环境修改 cloudera manager默认端口7180
- Using LinkedHashMap to realize the caching of an LRU algorithm
- R & D thinking 01 ----- classic of embedded intelligent product development process
- Oppo vooc fast charging circuit and protocol
猜你喜欢

Composition des mots (sous - total)
数据分析之缺失值填充(重点讲解多重插值法Miceforest)
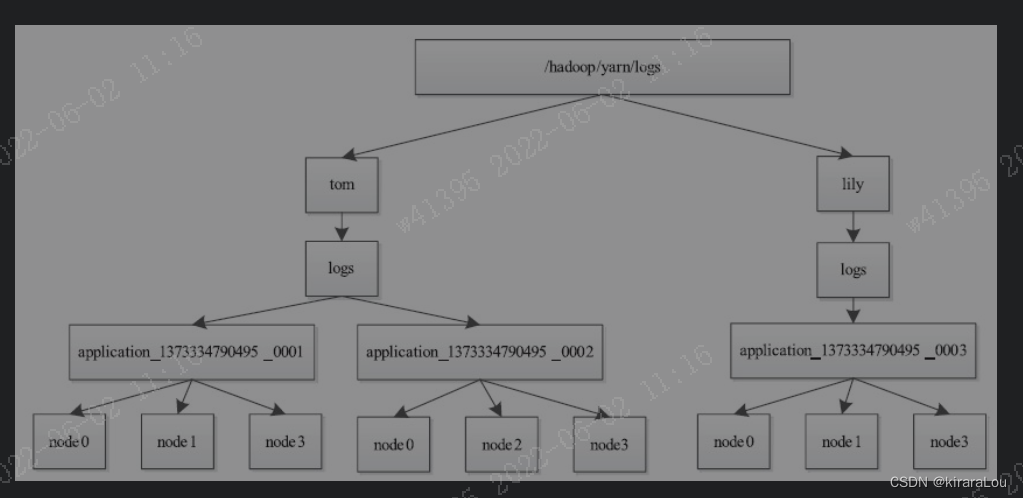
【yarn】Yarn container 日志清理
Mysql database interview questions
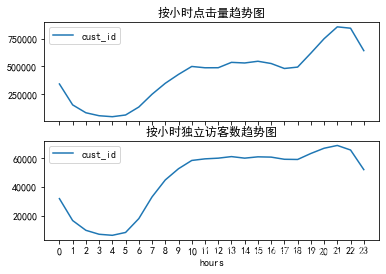
E-commerce data analysis -- User Behavior Analysis
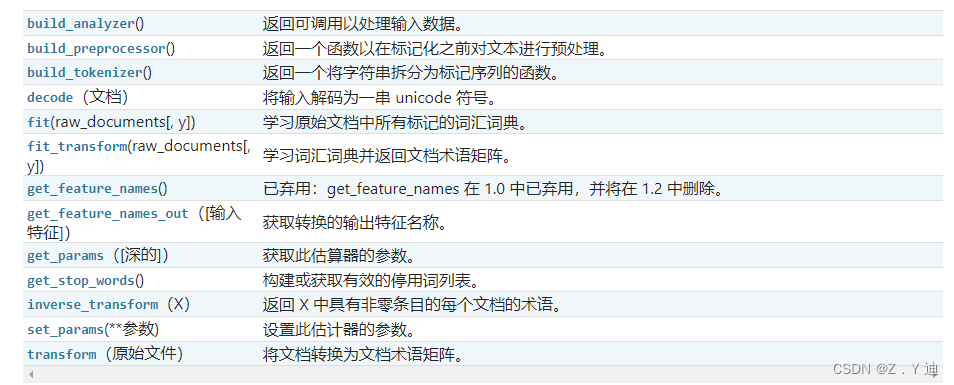
sklearn之feature_extraction.text.CountVectorizer / TfidVectorizer
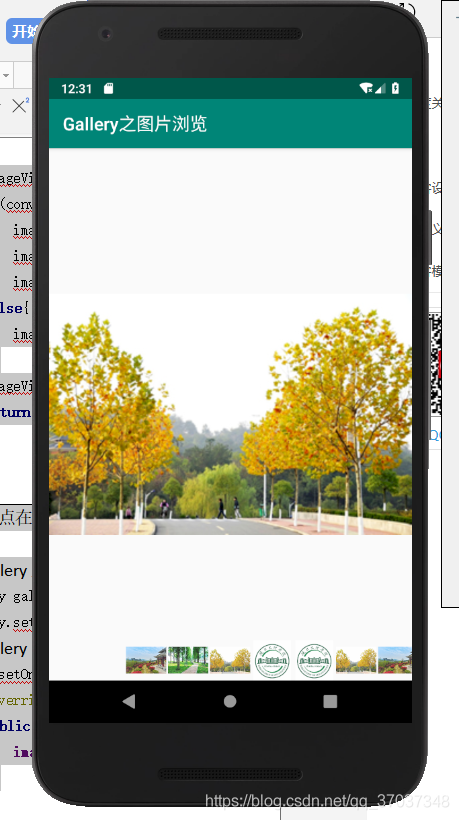
Gallery之图片浏览、组件学习
Unit test - unittest framework
ToggleButton实现一个开关灯的效果
Vert. x: A simple TCP client and server demo
随机推荐
C语言回调函数【C语言】
arduino获取随机数
sklearn之feature_extraction.text.CountVectorizer / TfidVectorizer
FTP file upload file implementation, regularly scan folders to upload files in the specified format to the server, C language to realize FTP file upload details and code case implementation
[BSidesCF_2020]Had_a_bad_day
[mrctf2020] dolls
2020网鼎杯_朱雀组_Web_nmap
使用LinkedHashMap实现一个LRU算法的缓存
【CDH】CDH/CDP 环境修改 cloudera manager默认端口7180
MySQL主从复制的原理以及实现
Raspberry pie tap switch button to use
Those commonly used tool classes and methods in hutool
Reno7 60W超级闪充充电架构
4. Install and deploy spark (spark on Yan mode)
Funny cartoon: Programmer's logic
电商数据分析--用户行为分析
[Presto] Presto parameter configuration optimization
[Bluebridge cup 2020 preliminary] horizontal segmentation
Detailed explanation of express framework
MySQL START SLAVE Syntax