当前位置:网站首页>OpenShift 部署应用
OpenShift 部署应用
2022-07-02 06:29:00 【freesharer】
OpenShift 部署应用
openshift支持以下几种方式创建应用
- 从镜像创建应用程序
- 从源代码创建应用程序
- 从模板创建应用程序
OpenShift 创建用户
Openshift集群部署完成后,存在一个 kubeadmin 默认用户,但无法编辑和修改密码,因此最佳实践和解决方法是创建一个新用户并将该用户的权限提升为cluster-admin,方便后续登录console。
在 OpenShift 中使用身份提供者(identity provider )来验证身份,因此创建用户前需要选择一种identity provider,最简单的提供者是htpasswd,htpasswd只是一个简单的文件,包含用户名和密码,它不需要任何复杂的安装或设置。
下面展示如何使用 htpasswd 提供程序为OpenShift 集群创建一些管理员用户。建议不要在生产集群中设置这种认证方式,比较不安全。用户无法通过这种方法轻松更改自己的密码,并且任何管理员都可以进入并读取htpasswd文件的内容。
1、创建 htpasswd 文件和 OAuth 提供程序,ubuntu默认自带htpasswd命令
首先,在您的主机上创建一个空的htpasswd文件,以下操作在bastion节点执行。
touch htpasswd
2、接下来,使用htpasswd命令将用户和密码添加到文件中。
htpasswd -Bb htpasswd admin Openshift#123
3、在openshift-config项目中创建一个Secret 。这包含htpasswd文件的完整内容,以便 OpenShift 可以读取它来验证用户名和密码:
oc --user=admin create secret generic htpasswd \
    --from-file=htpasswd \
    -n openshift-config
4、现在在集群中创建OAuth自定义资源,仅配置1 个身份提供者htpasswd。这引用了刚刚在上面创建的Secret :
oc replace -f - <<API apiVersion: config.openshift.io/v1 kind: OAuth metadata: name: cluster spec: identityProviders: - name: Local Password mappingMethod: claim type: HTPasswd htpasswd: fileData: name: htpasswd API
5、为管理员用户创建一个组:
oc adm groups new mylocaladmins
6、将用户添加到组中:
oc adm groups add-users mylocaladmins admin
7、重新登录OpenShift Console,出现多种登录方式,选择Local Password,输入用户名密码:admin Openshift#123进行登录。
重新登录后,可以看到当前已经新建了admin用户
OpenShift 使用部署创建应用
1、项目允许用户在独立的空间组织和管理他们的内容,但部分以openshift-和kube-开头的项目是默认项目,运行集群的系统组件,openshift不推荐或限制用户在这些项目下运行 pod 或服务。
首先新建一个项目,即命名空间,切换到项目菜单栏,这里以demo项目为例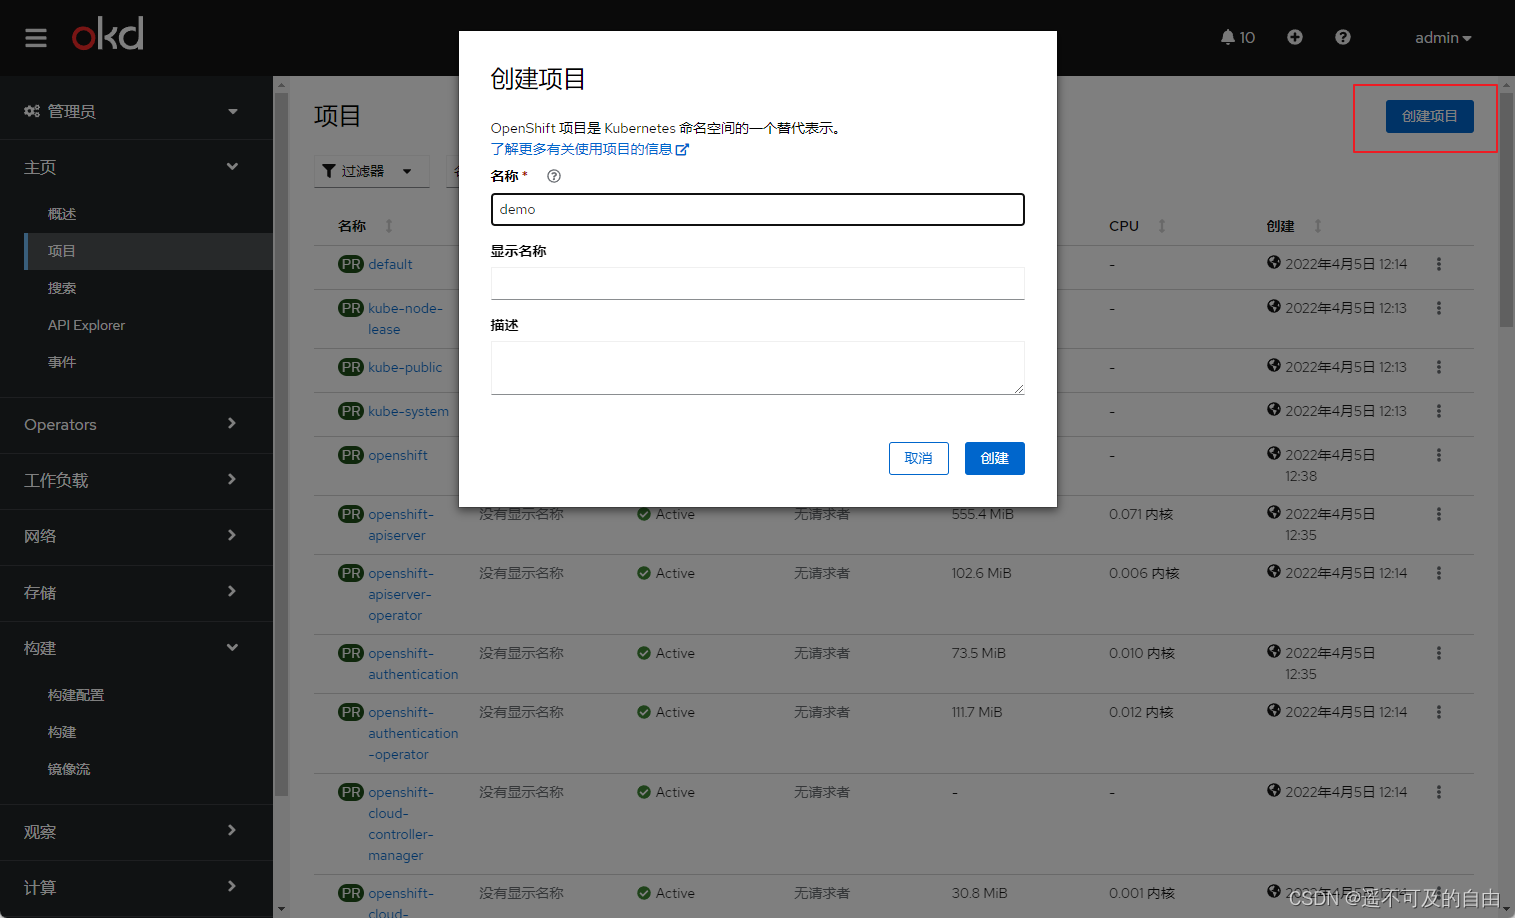
2、点击工作负载中的部署,切换到上面创建的demo项目,点击创建部署,即deployment类型的应用
3、修改示例yaml配置,注意镜像必须是nonroot类型,并且不能监听1024以下端口,这里选择dockerhub上的bitnami nginx镜像。
apiVersion: apps/v1
kind: Deployment
metadata:
  name: example
  namespace: demo
spec:
  selector:
    matchLabels:
      app: nginx
  replicas: 3
  template:
    metadata:
      labels:
        app: nginx
    spec:
      containers:
        - name: nginx
          image: >-
            bitnami/nginx:1.20.2
          ports:
            - containerPort: 8080
4、点击创建后,等待pod状态为running
5、为部署的应用创建服务,切换到网络,点击服务,创建服务
修改yaml为以下内容,注意修改selector和端口,要与部署的应用保持一致
apiVersion: v1
kind: Service
metadata:
  name: example
  namespace: demo
spec:
  selector:
    app: nginx
  ports:
    - protocol: TCP
      port: 8080
      targetPort: 8080
6、最后为部署的应用创建路由,以在集群外进行访问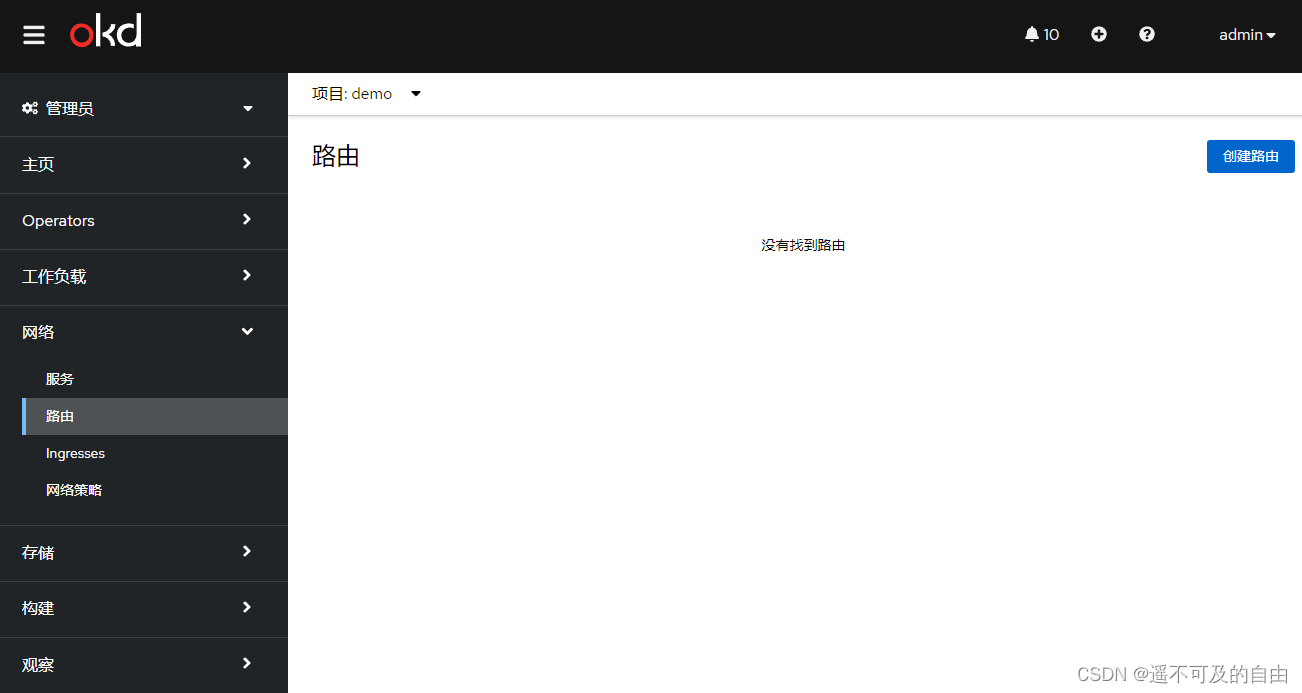
配置如下,其中主机名与集群最初规划一致,域名格式为:*.apps.okd4.example.com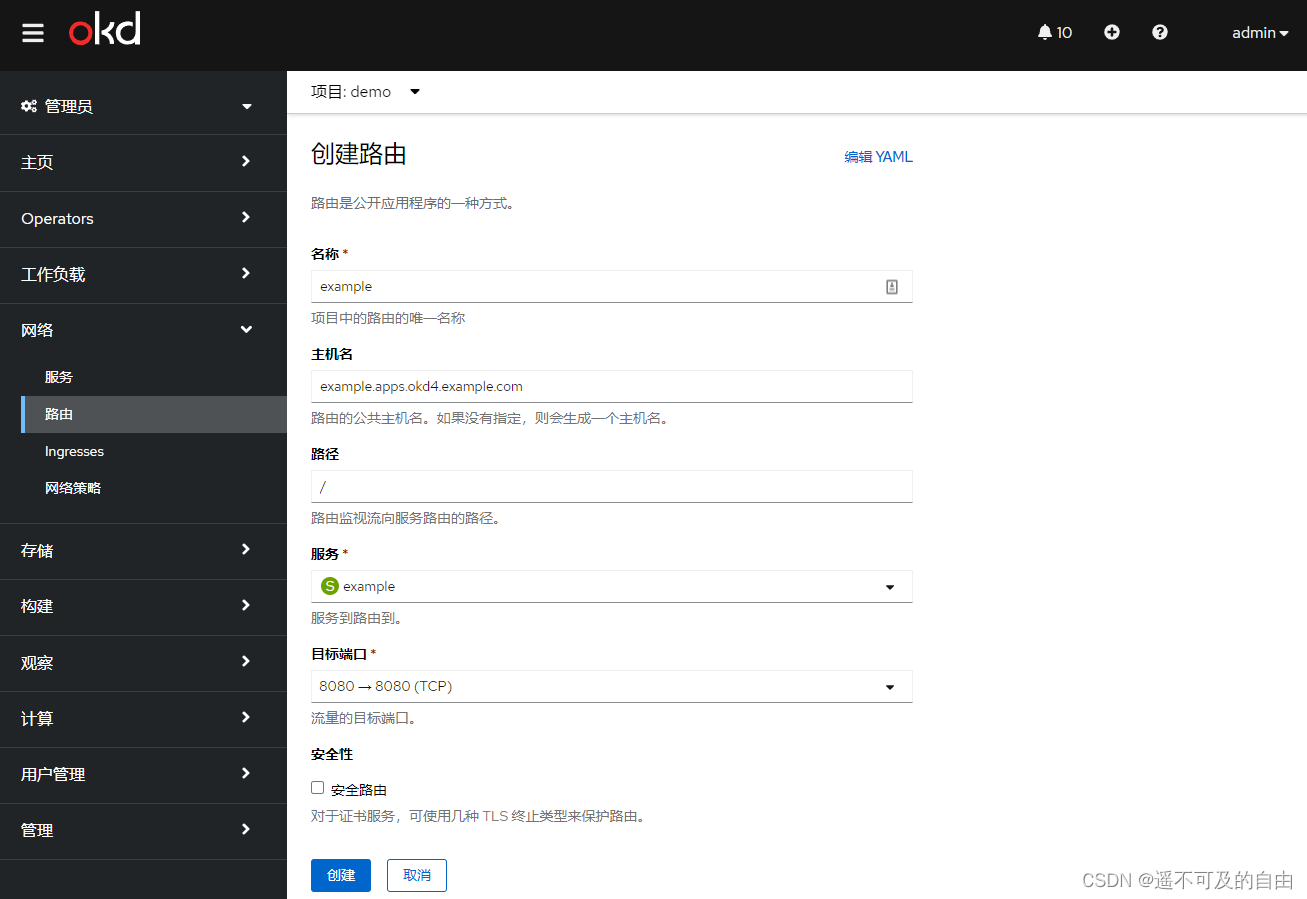
路由创建完成后如下所示,点击位置可以直接访问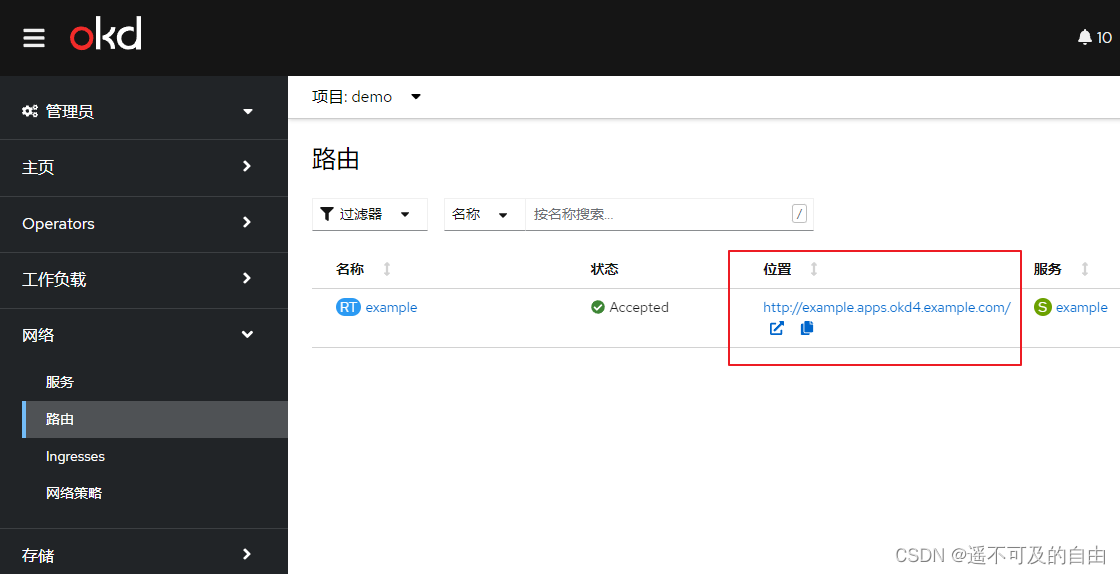
7、或者在浏览器手动输入路由地址来访问应用:http://example.apps.okd4.example.com/
8、也可以使用命令方式从指定镜像部署应用,指定dockerhub上的nginx镜像
[email protected]:~# oc new-app --image=docker.io/bitnami/nginx:1.20.2
--> Found container image ec80aa6 (3 hours old) from docker.io for "docker.io/bitnami/nginx:1.20.2"

    * An image stream tag will be created as "nginx:1.20.2" that will track this image

--> Creating resources ...
    imagestream.image.openshift.io "nginx" created
    deployment.apps "nginx" created
    service "nginx" created
--> Success
    Application is not exposed. You can expose services to the outside world by executing one or more of the commands below:
     'oc expose service/nginx'
    Run 'oc status' to view your app.
会自动创建部署和service,但需要手动创建路由将应用暴露到集群外
[email protected]:~# oc expose service/nginx
route.route.openshift.io/nginx exposed
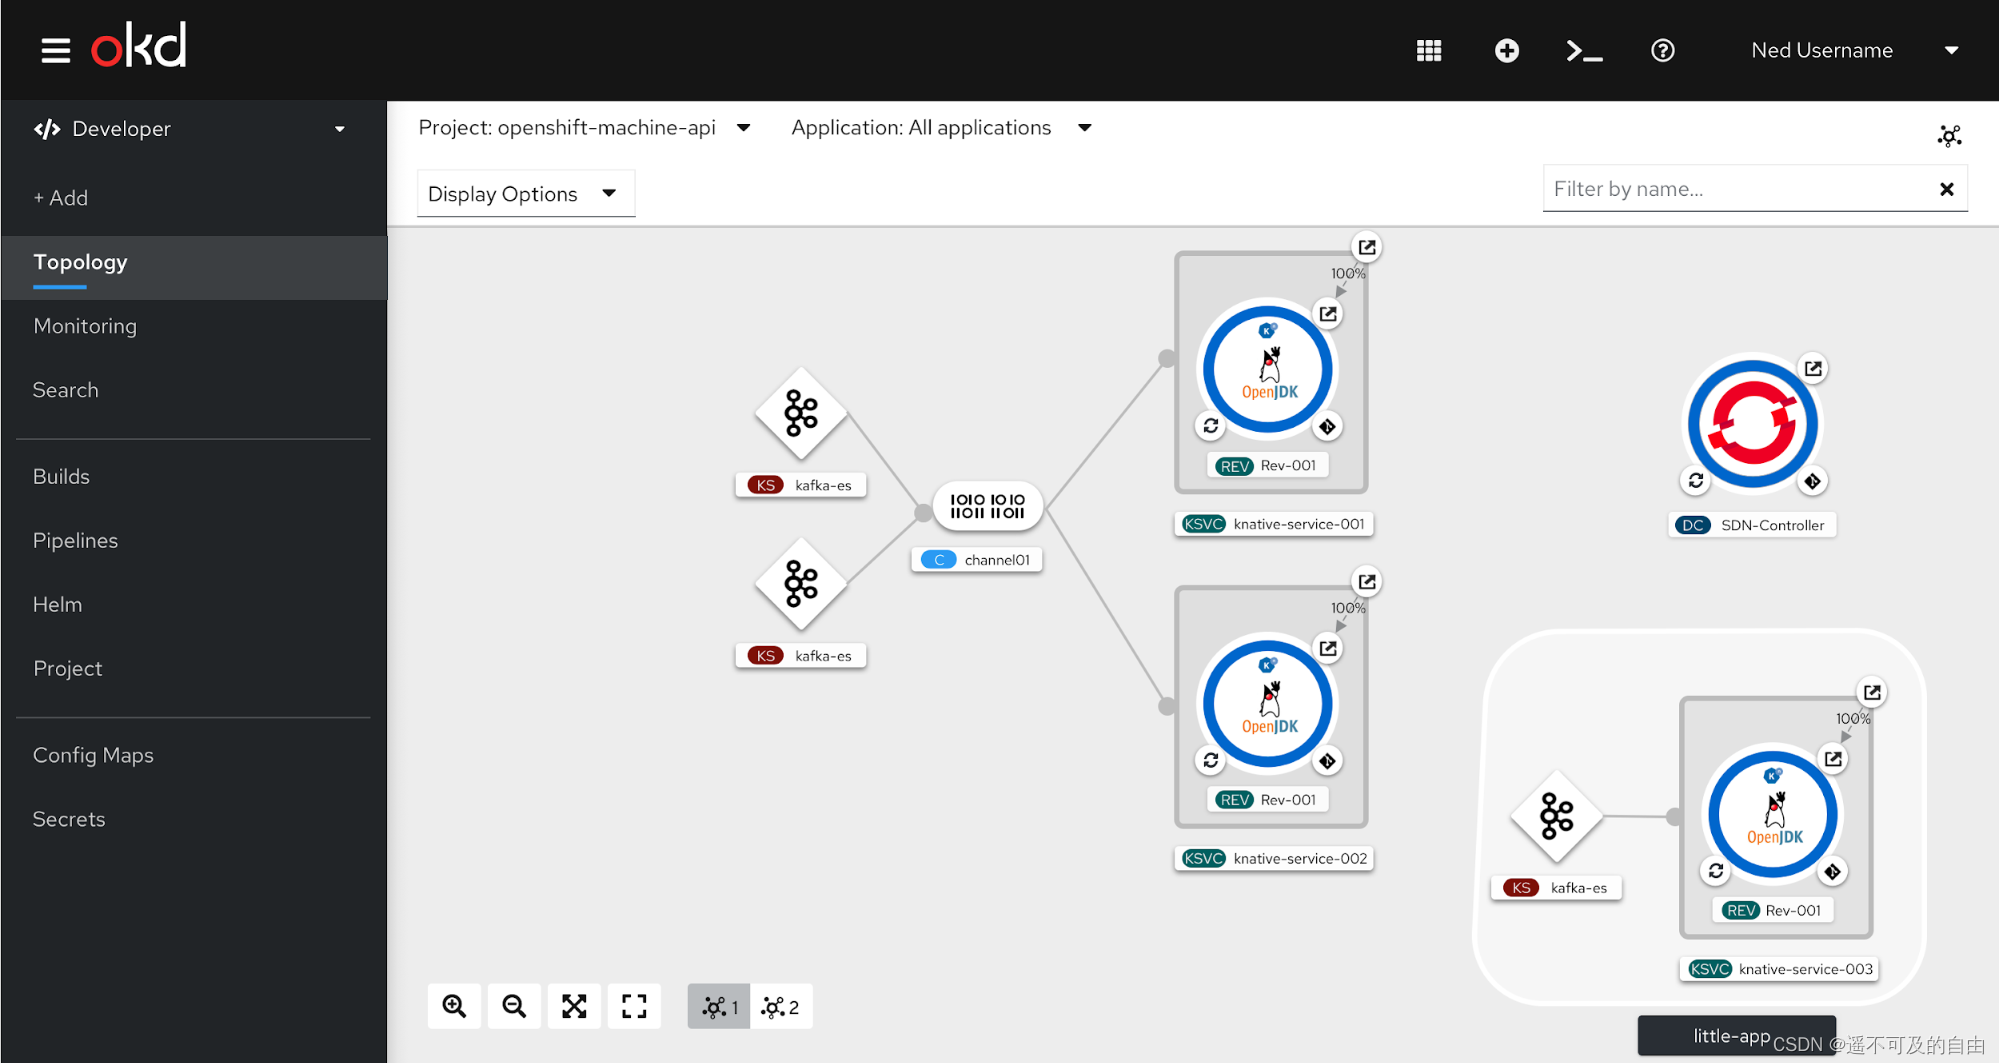
OpenShift使用开发视角创建应用
1、切换到开发者视角,点击添加,选择容器镜像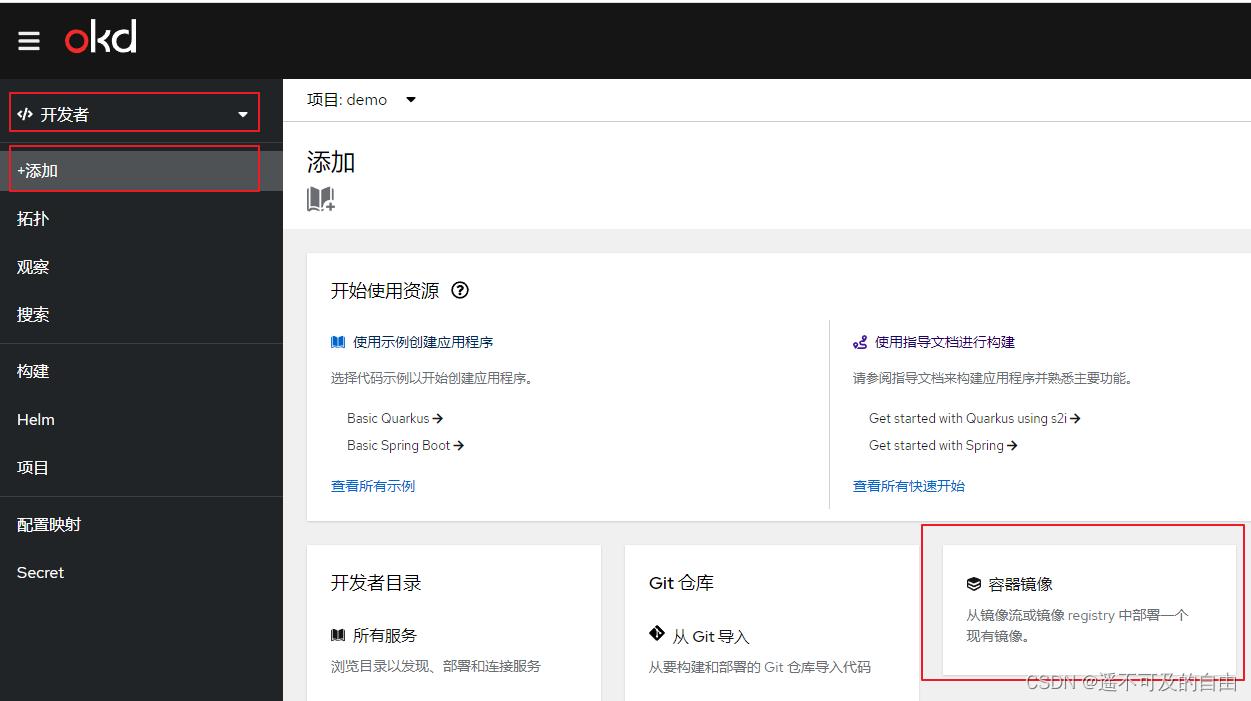
2、镜像选择dockerhub镜像:docker.io/bitnami/nginx:1.20.2
也可以选择内部容器镜像仓库的镜像流标签,需要提前创建一个镜像流,该镜像流标签指向dockerhub中的一个镜像。
oc import-image nginx-app \
  --from=docker.io/bitnami/nginx:1.20.2 \
  --confirm
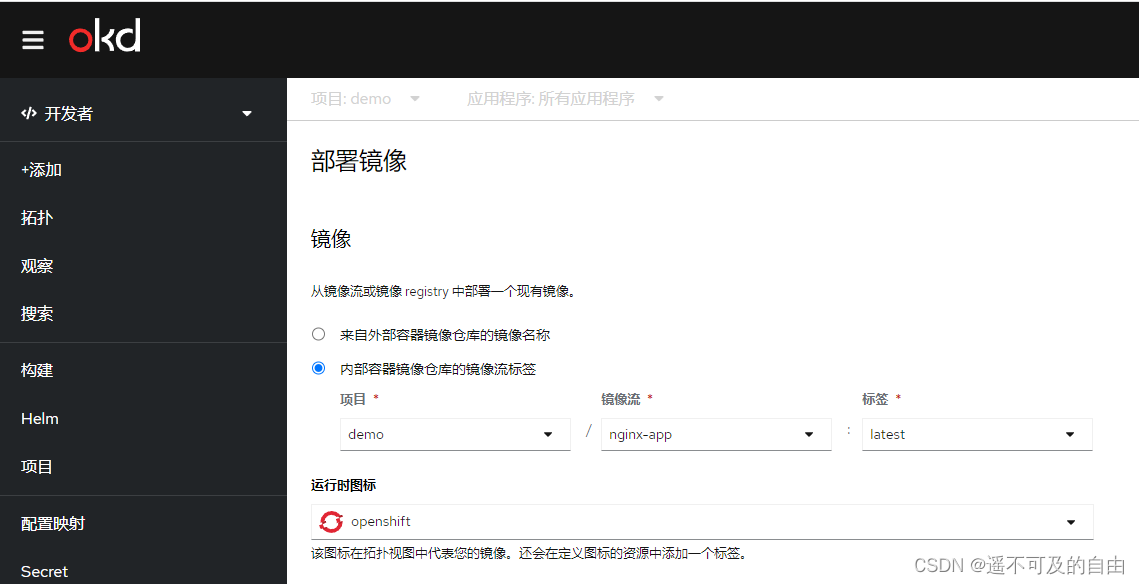
配置完成后点击创建。
3、切换到拓扑,点击打开URL进行访问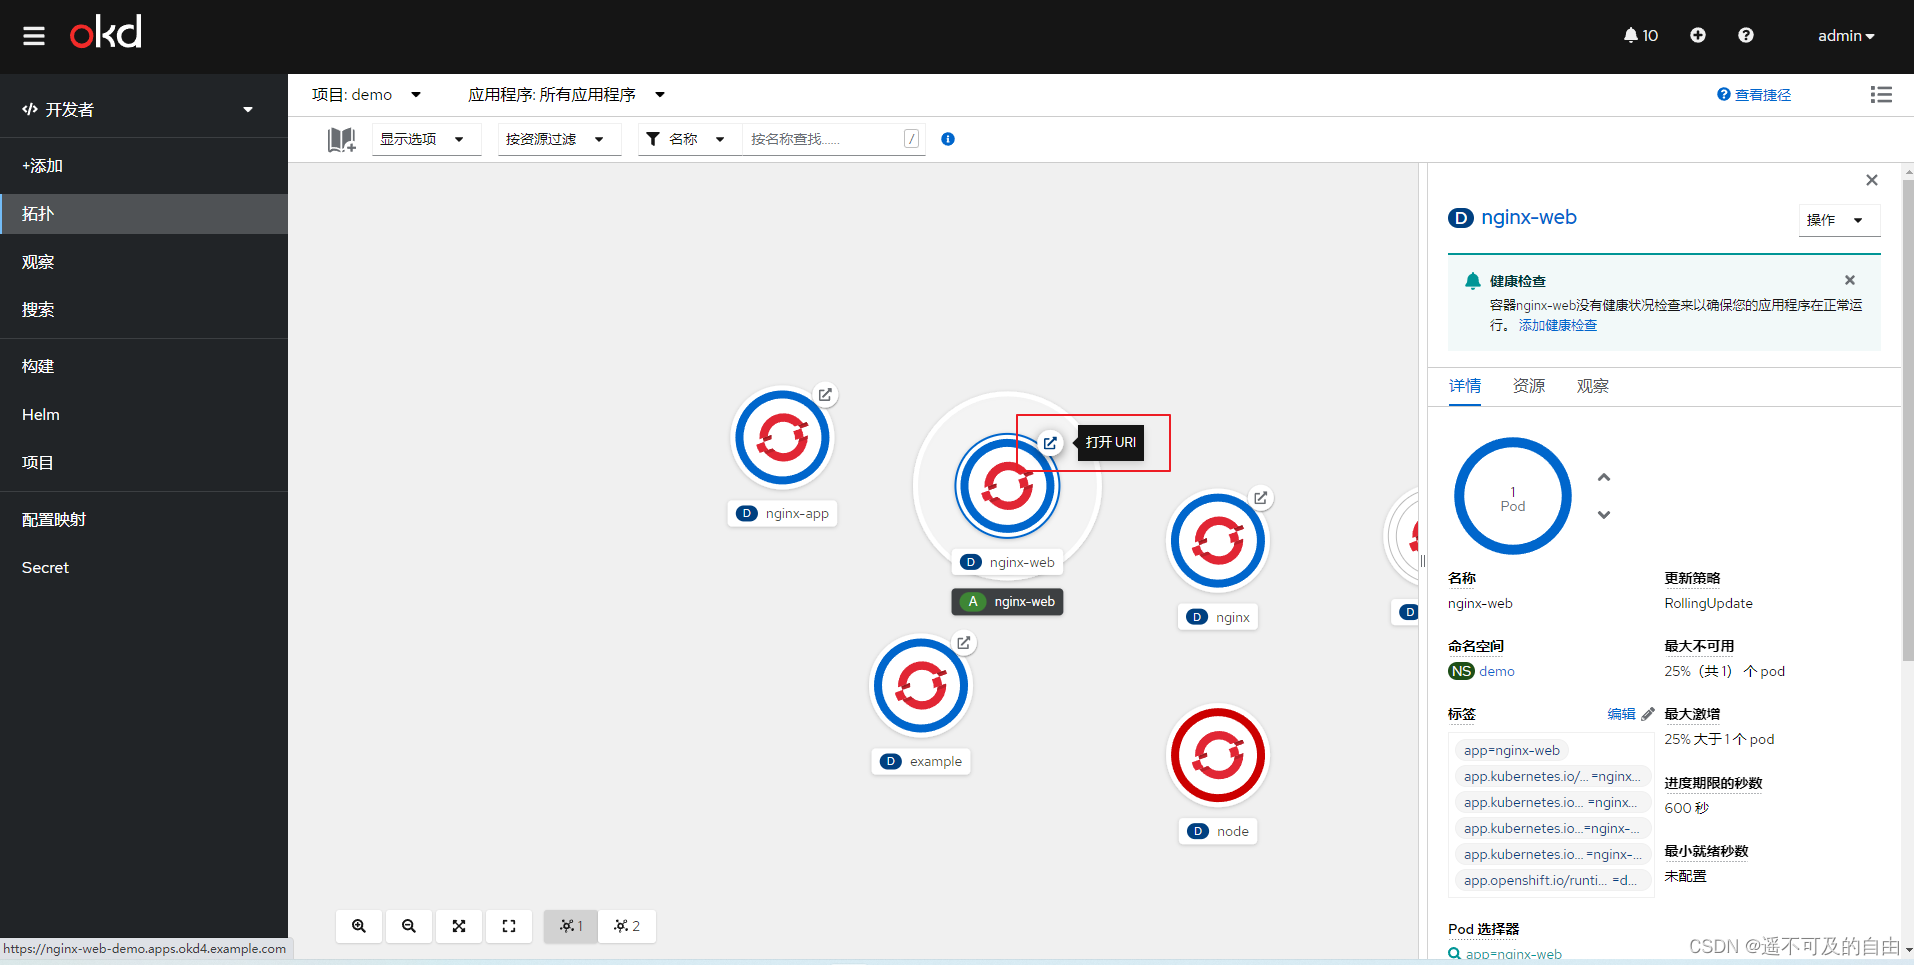
浏览器访问如下:
边栏推荐
- In depth understanding of prototype drawings
- C language implements XML generation and parsing library (XML extension)
- When a custom exception encounters reflection
- The source code of the live app. When the verification method is mailbox verification, the verification code is automatically sent to the entered mailbox
- ICMP Protocol
- Opencv's experience of confusing X and Y coordinates
- ARP and ARP Spoofing
- Viewing JS array through V8
- Wang extracurricular words
- HCIA - data link layer
猜你喜欢
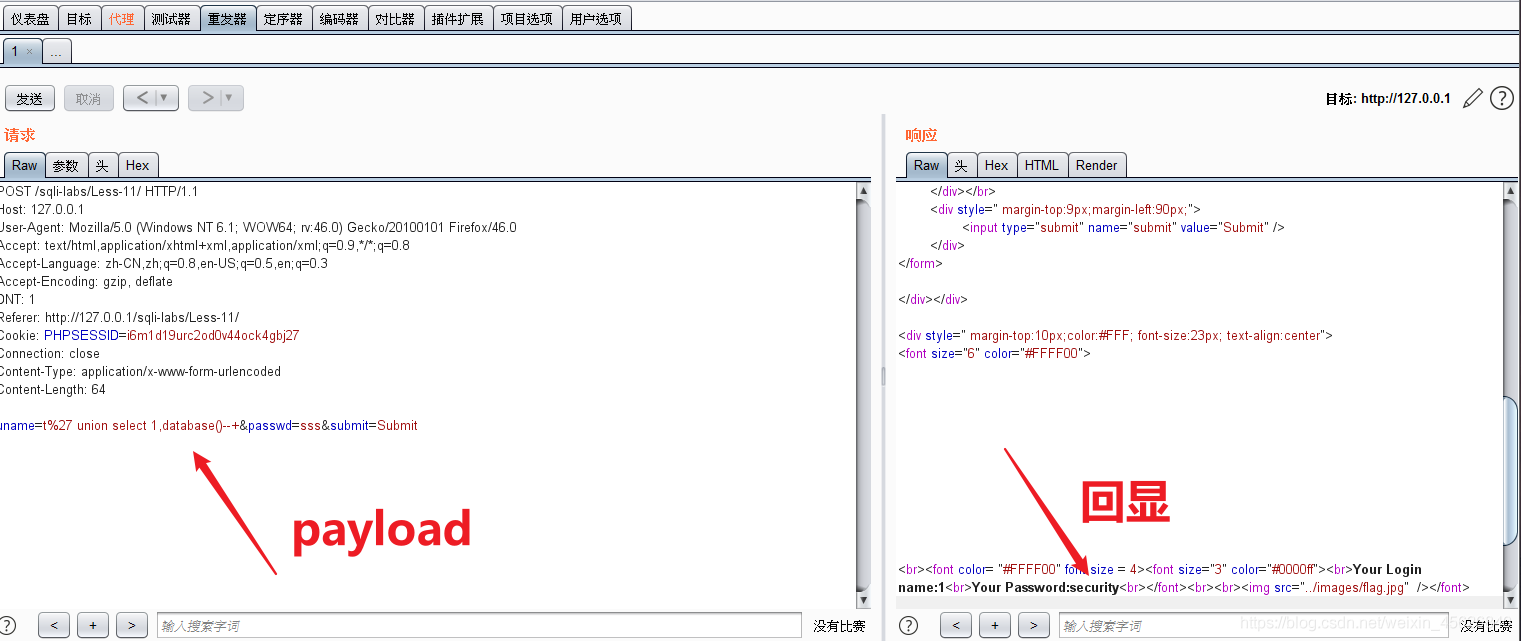
sqli-labs(POST类型注入)
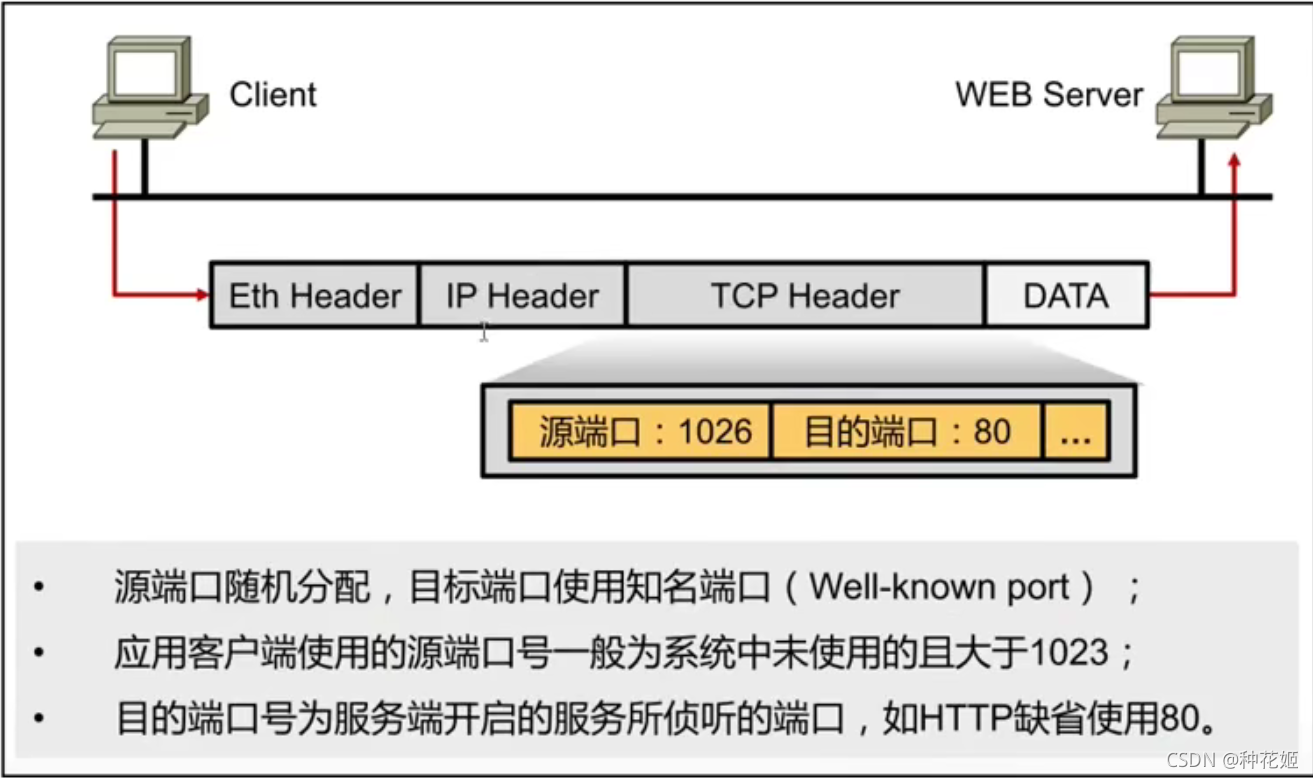
TCP/IP—传输层
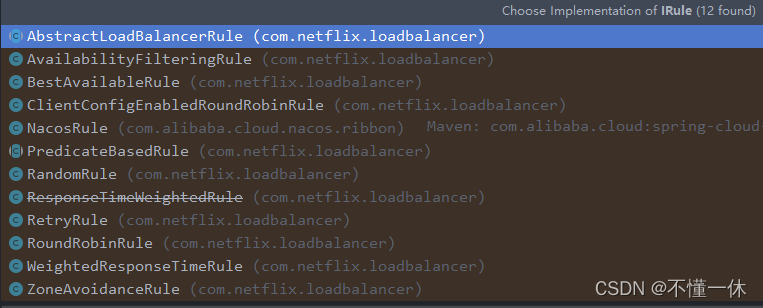
Openfeign facile à utiliser
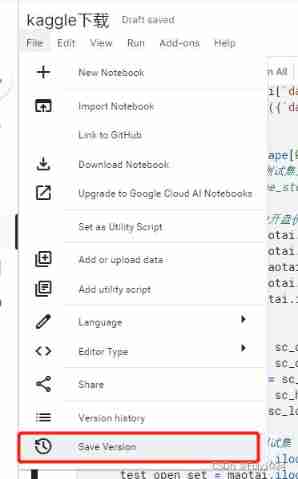
Use the kaggle training model and download your own training model

类和对象(类和类的实例化,this,static关键字,封装)
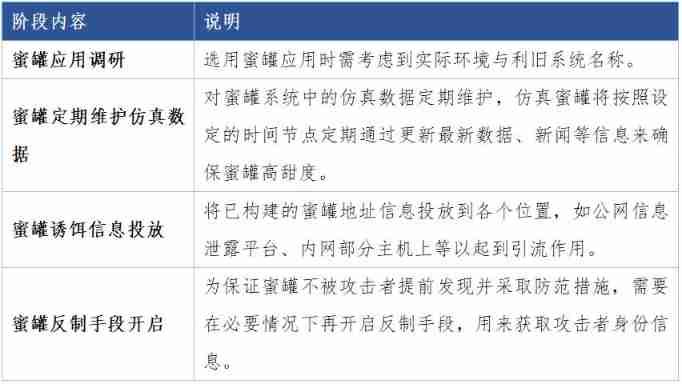
Honeypot attack and defense drill landing application scheme

c语言自定义类型枚举,联合(枚举的巧妙使用,联合体大小的计算)
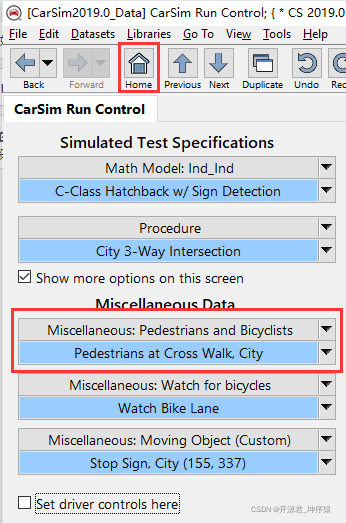
Carsim-問題Failed to start Solver: PATH_ID_OBJ(X) was set to Y; no corresponding value of XXXXX?

Solid principle: explanation and examples

CarSim learning experience - rough translation 1
随机推荐
使用wireshark抓取Tcp三次握手
路由基础—动态路由
Openfeign facile à utiliser
OpenCV 6.4 中值滤波器的使用
idea中注释代码取消代码的快捷键
File upload and download performance test based on the locust framework
zipkin 简单使用
Use the numbers 5, 5, 5, 1 to perform four operations. Each number should be used only once, and the operation result value is required to be 24
Wang extracurricular words
顺序表基本功能函数的实现
Mutex
c语言将字符串中的空格替换成%20
St-link connection error invalid ROM table of STM32 difficult and miscellaneous diseases
Data asset management function
OpenCV3 6.3 用滤波器进行缩减像素采样
c语言自定义类型——结构体,位段(匿名结构体,结构体的自引用,结构体的内存对齐)
File upload Labs
Li Kou daily one question brushing summary: binary tree chapter (continuous update)
CarSim learning experience - rough translation 1
Solid principle: explanation and examples