当前位置:网站首页>Operation of adding material schedule in SolidWorks drawing
Operation of adding material schedule in SolidWorks drawing
2022-07-04 21:36:00 【Cimswxy】
I used to do my graduation project SolidWorks Software export drawing , I have a headache when working on the assembly drawing parts list , Now when I am free, I will record the problems and solutions I encountered when making the list :
0.0 This is the catalogue 0.0
How to add a material schedule
- First of all, you need a complete set SolidWorks Drawing , Including 3D part drawings 、 Three dimensional assembly drawings, etc , Because this operation is to read each part directly from the 3D assembly drawing according to the assembly body in the selected engineering drawing , And generate material list , First click on
annotationInsideformDrop down box under , Click onMaterial list: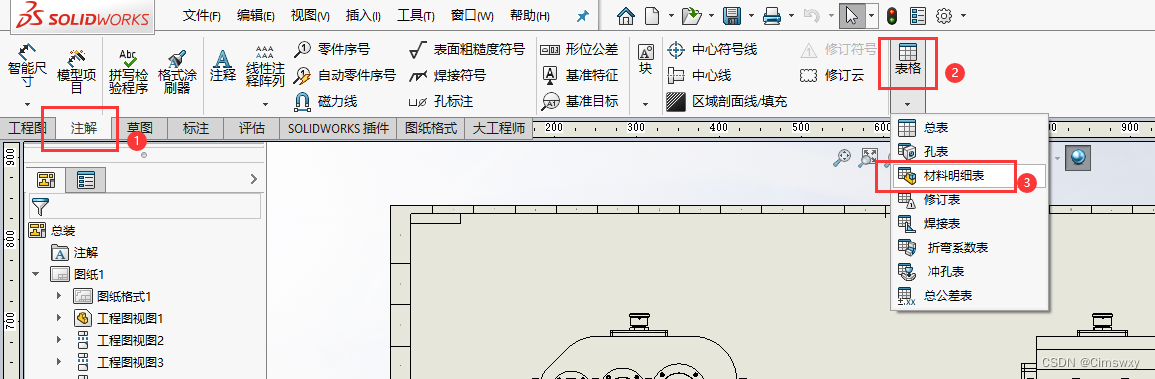
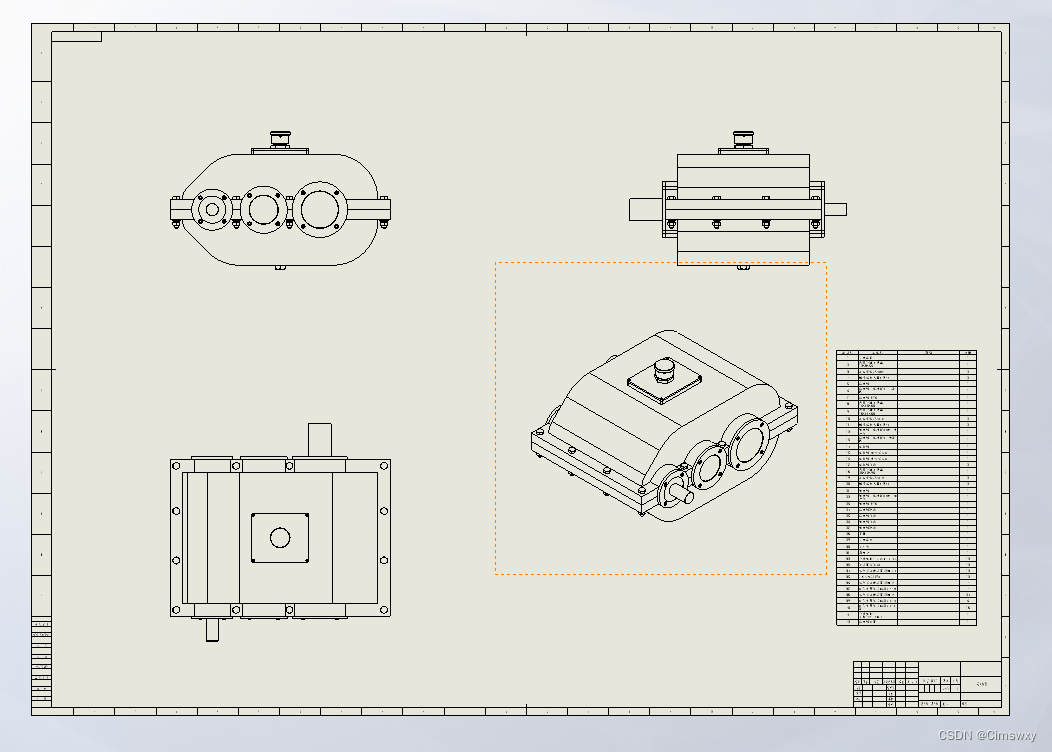
- Follow the prompts to select a drawing view as the specified model :

- choice
Parts only: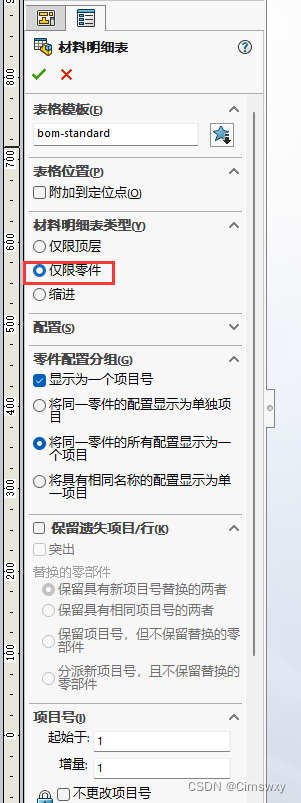
- Click the check mark to add the material list :
How to adjust the order of material list from bottom to top
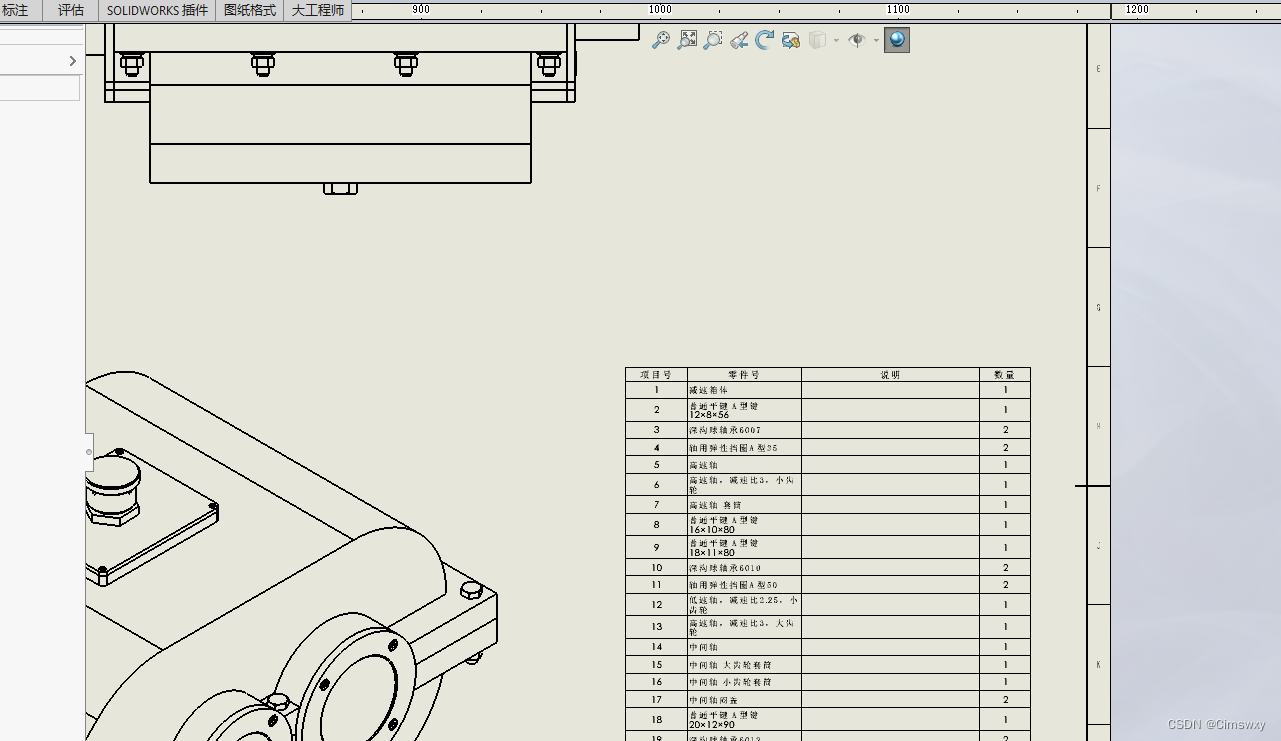
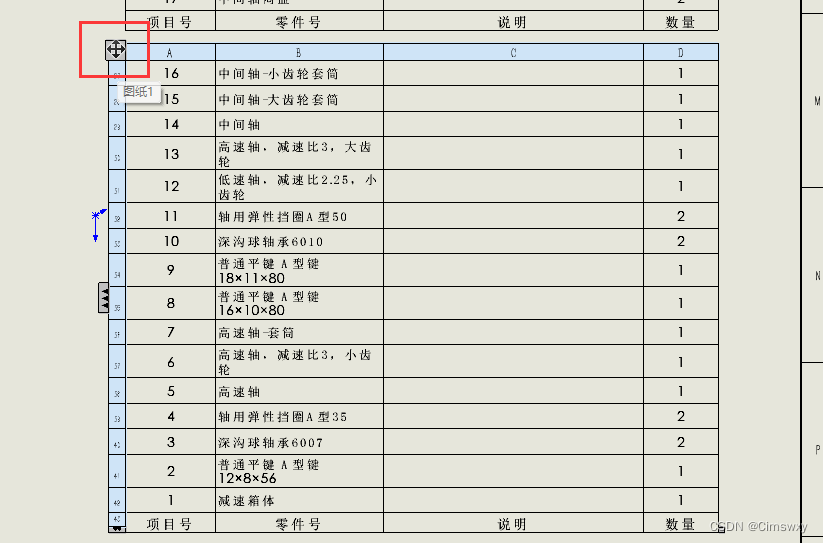
- When you zoom in, you can see , By default, the added parts list is incremented from top to bottom :
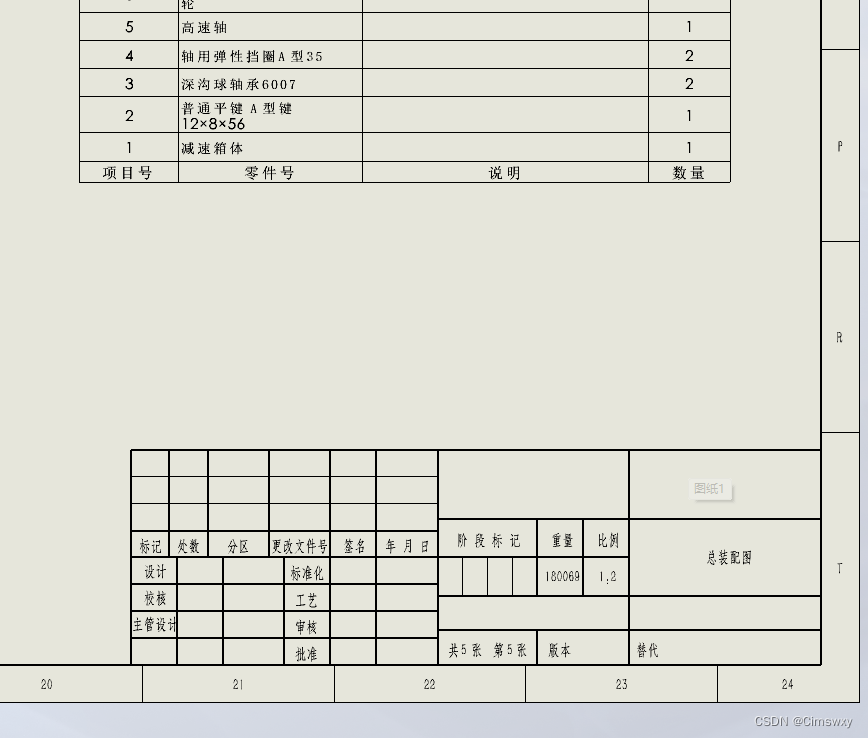
- Click on the blank space of the form , Select... In the pop-up box
Table title above, It can be increased from bottom to top :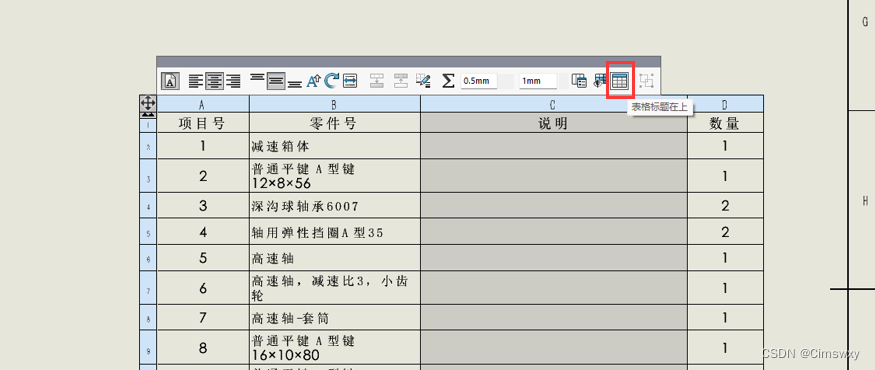
How can the material list become two or more columns if it is too long
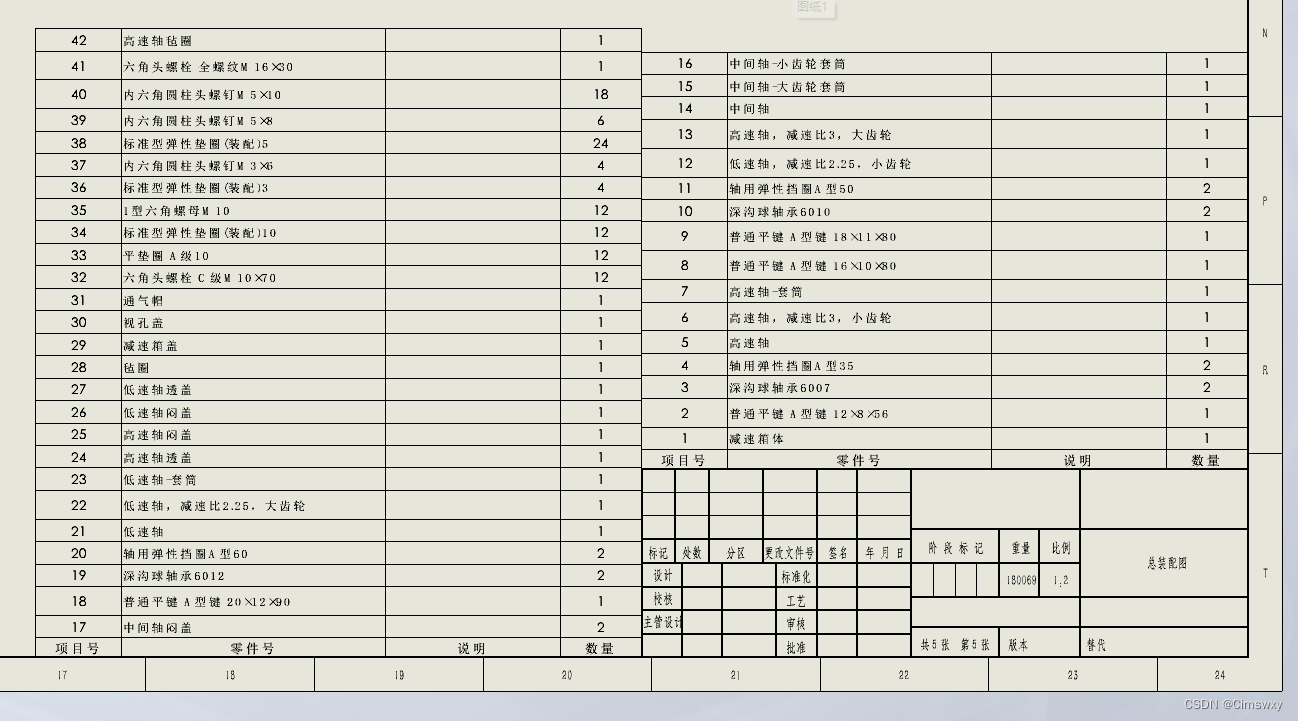
- But we can see that , By default, the added parts list is single column , Is too long. , Inconvenient to display , Right click where you want the table to be disconnected , choice
DivisionMediumHorizontally( Here can also be adjusted according to your own needs , Choose different options ):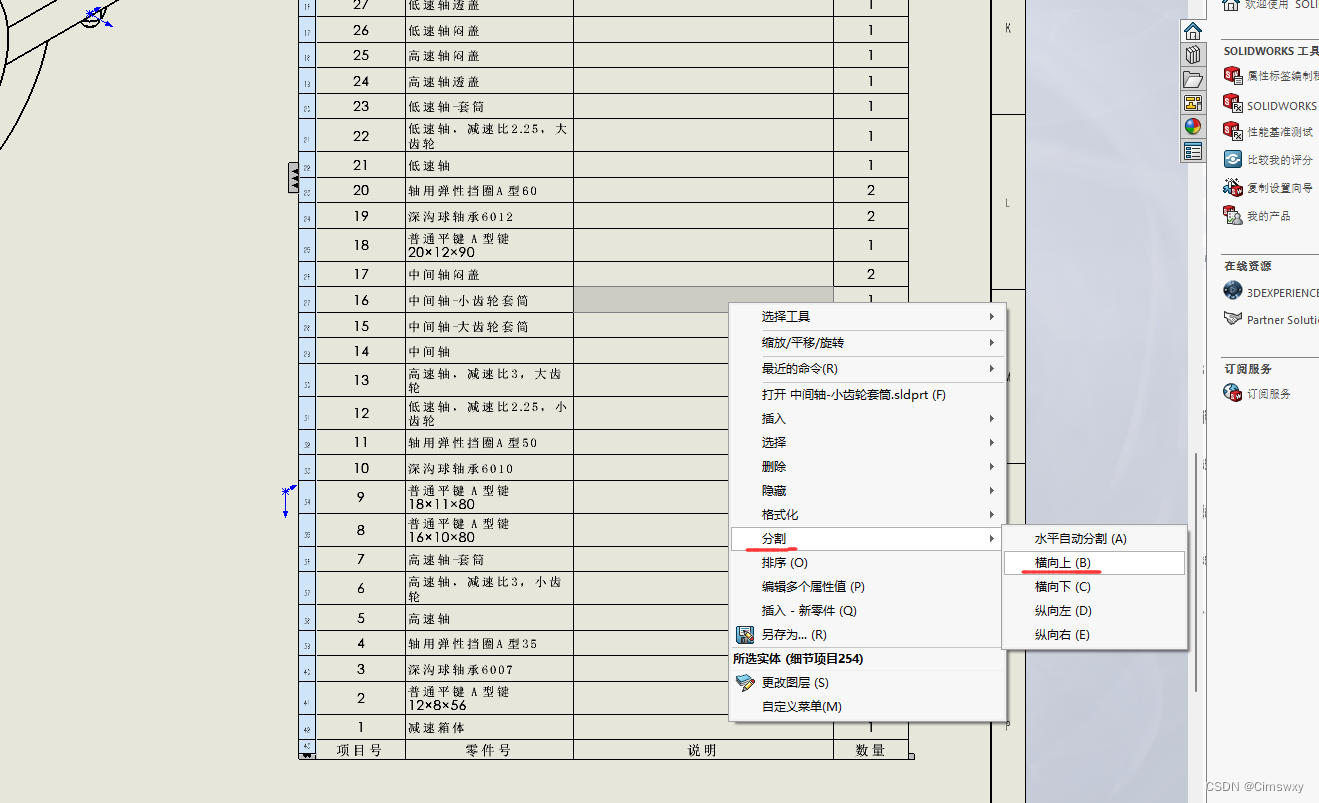
- You can see that the schedule is broken into two sections from the selected position :
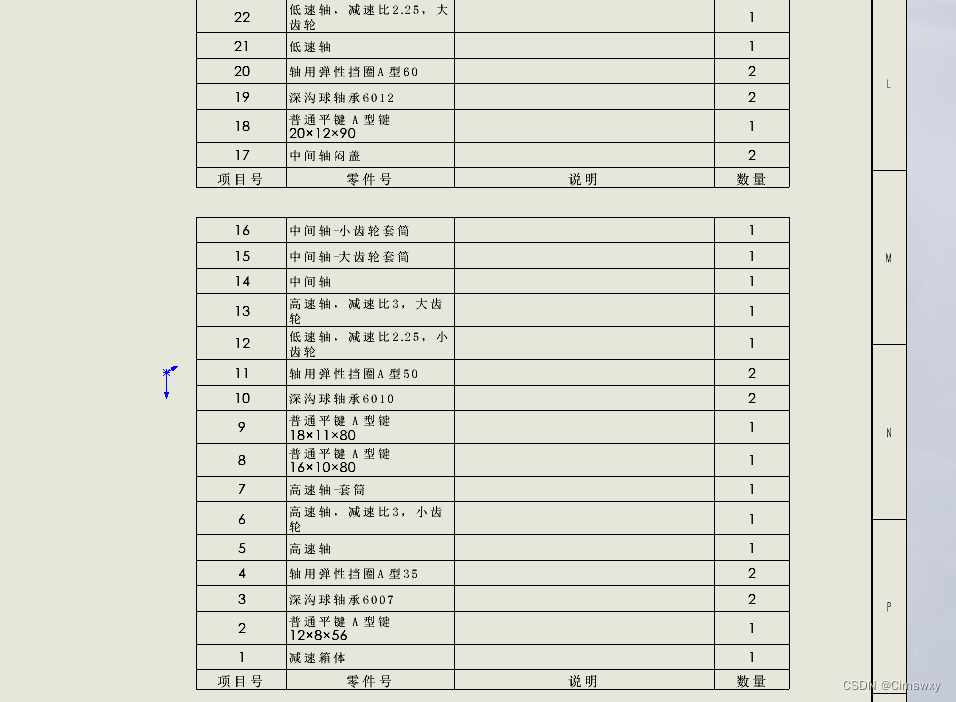
- When you put the mouse on the table , Left click the four-way arrow in the upper left corner , You can adjust the position of the schedule ; Dragging the table border can also adjust the left and right size of the table :
- Then adjust the size and placement of the schedule as needed , Just put it in the right place :
That's all of this , Welcome to leave a message in the comment area to discuss with each other , We also welcome criticism and correction ^ _ ^
边栏推荐
- shp数据制作3DTiles白膜
- Arcgis 10.2.2 | arcgis license server无法启动的解决办法
- admas零件名重复
- [weekly translation go] how to code in go series articles are online!!
- Jerry's ad series MIDI function description [chapter]
- Huawei ENSP simulator configures ACL access control list
- Actual combat simulation │ JWT login authentication
- 更强的 JsonPath 兼容性及性能测试之2022版(Snack3,Fastjson2,jayway.jsonpath)
- Huawei simulator ENSP common commands
- 如何使用ConcurrentLinkedQueue做一个缓存队列
猜你喜欢
Maya lamp modeling
![[public class preview]: basis and practice of video quality evaluation](/img/fd/42b98a08b5a0fd89c119f1d1a8fe1b.png)
[public class preview]: basis and practice of video quality evaluation

Huawei ENSP simulator configures ACL access control list

解析互联网时代的创客教育技术

MP3是如何诞生的?

WGCNA分析基本教程总结
华为ensp模拟器实现通信安全(交换机)

Stealing others' vulnerability reports and selling them into sidelines, and the vulnerability reward platform gives rise to "insiders"

应用实践 | 蜀海供应链基于 Apache Doris 的数据中台建设

Flutter TextField示例
随机推荐
超详细教程,一文入门Istio架构原理及实战应用
插入排序,选择排序,冒泡排序
华为模拟器ensp的路由配置以及连通测试
杰理之AD 系列 MIDI 功能说明【篇】
minidom 模塊寫入和解析 XML
Learning breakout 3 - about energy
华为ensp模拟器 给路由器配置DHCP
Jerry's ad series MIDI function description [chapter]
华为ensp模拟器 DNS服务器的配置
【Try to Hack】宽字节注入
输入的查询SQL语句,是如何执行的?
numpy vstack 和 column_stack
minidom 模块写入和解析 XML
admas零件名重复
面试官:说说XSS攻击是什么?
杰理之AD 系列 MIDI 功能说明【篇】
MP3是如何诞生的?
Liu Jincheng won the 2022 China e-commerce industry innovation Figure Award
Redis:Redis配置文件相关配置、Redis的持久化
maya灯建模