当前位置:网站首页>0.96 inch IIC LCD driver based on stc8g1k08
0.96 inch IIC LCD driver based on stc8g1k08
2022-07-07 11:15:00 【sunflower-ly】
STC8G A series of MCU is integrated inside I2C Serial controller .
STC8G Series of I2C The bus provides two modes of operation : Host mode (SCL For the output port , Send synchronous clock signal ); Slave mode (SCL For the input port , Receive synchronous clock signal ).
I2C Related registers :
I2C Host mode related registers :
I2CCFG: Configuration register , Bus speed control
Symbol | describe | Address | B7 | B6 | B5 | B4 | B3 | B2 | B1 | B0 |
I2CCFG | Configuration register | FE80H | ENI2C | MSSL | MSSPEED[5:0] | |||||
ENI2C:I2C Function enable control bit
0: prohibit I2C function
1: allow I2C function
MSSL:I2C Operating mode selection bit
0: Slave mode
1: Host mode
MSSPEED[5:0]:I2C Bus speed control
I2C Bus speed =FOSC/2/(MSSPEEED*2+4)
Be careful : Only when I2C When the module is in host mode ,MSSPEED The waiting parameter of parameter setting is valid . This parameter is mainly used for I2C Setting of start signal and stop signal establishment and holding time .
I2CMSCR: Host control register
Symbol | describe | Address | B7 | B6 | B5 | B4 | B3 | B2 | B1 | B0 |
I2CMSCR | Host control register | FE81H | EMSI | - | - | - | MSCMD[3:0] | |||
EMSI: Host mode interrupt enable control bit
0: Turn off the interrupt of host mode
1: Turn on the interrupt of host mode
MSCMD[3:0]: Host command
0000: standby , No action
0001: Start instruction , Send the start signal .
0010: Send data instructions
0011: receive ACK command
0100: Receive data command
0101: send out ACK command
0110: Stop the order , Send stop signal .
1001: Start command + Send data command + receive ACK command
1010: Send data command + receive ACK command
1011: Receive data command and send ACK command
1100: Receive data command + send out NAK command
I2CMSAUX: Host auxiliary control register
Symbol | describe | Address | B7 | B6 | B5 | B4 | B3 | B2 | B1 | B0 |
I2CMSAUX | Host auxiliary control register | FE88H | - | - | - | - | - | - | - | WDTA |
WDTA: Host mode ,I2C Data automatic transmission permission bit .
I2CMSST: Host status register
Symbol | describe | Address | B7 | B6 | B5 | B4 | B3 | B2 | B1 | B0 |
I2CMSST | Host status register | FE82H | MSBUSY | MSIF | - | - | - | - | MSACKI | MSACKO |
MSBUSY: Host mode I2C Control status bit
MSIF: Interrupt request bit in host mode
MSACKI: In host mode , send out 0011 Order to I2CMSCR Of MSMD Received after bit ACK data .
MSACKO: In host mode , Prepare to send ACK The signal .
I2C Slave mode related registers :
I2CSLCR: Control register
Symbol | describe | Address | B7 | B6 | B5 | B4 | B3 | B2 | B1 | B0 |
I2CSLCR | Slave control register | FE83H | - | ESTAI | ERXI | ETXI | ESTOI | - | - | SLRST |
ESTAI: Slave mode reception START Signal interrupt enable bit
ERXI: Interrupt allowed bit after receiving a byte in slave mode
ETXI: Interrupt allowed bit after sending a byte in slave mode
ESTOI: Receive in slave mode STOP Interrupt allowable bit of signal
SLRST: Reset slave mode
I2CSLST: Status register
Symbol | describe | Address | B7 | B6 | B5 | B4 | B3 | B2 | B1 | B0 |
I2CSLST | Status register | FE84H | SLBUSY | STAIF | RXIF | TXIF | STOIF | - | SLACKI | SLACKO |
SLBUSY:I2C Controller status bit , Idle and busy
STAIF: Slave mode received START Interrupt request bit after signal
RXIF: Received in slave mode 1 Interrupt request bit after byte data .
TXIF: Interrupt request bit after sending one byte of data in slave mode .
STOIF: Slave mode received STOP Interrupt request bit after signal .
SLACKI: In slave mode , The received ACK data .
SLACKO: In slave mode , Prepare to send ACK The signal .
I2CSLADR: Address register
Symbol | describe | Address | B7 | B6 | B5 | B4 | B3 | B2 | B1 | B0 |
I2CSLADR | Slave address register | FE85H | IACSLADR[7:1] | MA | ||||||
IACSLADR[7:1]: Slave device address
MA: Slave device address comparison control
0: The device address must be the same as I2CSLADR[7:1] identical
1: Ignore I2CSLADR[7:1] Settings in , Receive all device addresses
I2C Data register
I2CTXD: Send data register
Symbol | describe | Address | B7 | B6 | B5 | B4 | B3 | B2 | B1 | B0 |
I2CTXD | Send data register | FE86H | ||||||||
I2CRXD: Receive data register
Symbol | describe | Address | B7 | B6 | B5 | B4 | B3 | B2 | B1 | B0 |
I2CRXD | Receive data register | FE87H | ||||||||
Step by step routines :
The LCD screen is :0.96 " IIC The screen
// Hardware IIC initialization
void iicInit()
{
    P_SW2 = 0xc0;   // SCL(3.2) SDA(3.3)
    I2CCFG = 0xff;  // Turn on iic  Host mode   The highest speed
    I2CMSST = 0x00; // Close the interrupt   Standby mode
}
// The time delay function , The crystal oscillator of single chip microcomputer is 30M
void delay_ms(unsigned int ms)
{
        while(ms)
        {
          unsigned char i=39, j=243;
          do
          {while (--j);}
          while (--i);
                ms--;
          }
         return;
}
// Waiting for leisure
void Wait()
{
    while (!(I2CMSST & 0x40));
    I2CMSST &= ~0x40;
}
// Start signal
void IIC_Start()
{
    I2CMSCR = 0x01;     // send out START command
    Wait();
}
// End signal
void IIC_Stop()
{
    I2CMSCR = 0x06;     // send out STOP command
    Wait();
}
// Wait and send ACK
void IIC_Wait_Ack()
{
    I2CMSCR = 0x00;                             // Set up ACK The signal
    I2CMSCR = 0x05;                             // send out ACK command
    Wait();
}
// Write Bytes
void Write_IIC_Byte(unsigned char dat)
{
    I2CTXD = dat;         // Write data to the data buffer
    I2CMSCR = 0x02;       // send out SEND command
    Wait();
}
// Write instructions
void Write_IIC_Command(unsigned char IIC_Command)
{
       IIC_Start();
       Write_IIC_Byte(0x78);            //Slave address,SA0=0
       IIC_Wait_Ack();
       Write_IIC_Byte(0x00);           //write command
       IIC_Wait_Ack();
       Write_IIC_Byte(IIC_Command);
       IIC_Wait_Ack();
       IIC_Stop();
}
// Writing data
void Write_IIC_Data(unsigned char IIC_Data)
{
        IIC_Start();
        Write_IIC_Byte(0x78);                        //D/C#=0; R/W#=0
        IIC_Wait_Ack();
        Write_IIC_Byte(0x40);                        //write data
        IIC_Wait_Ack();
        Write_IIC_Byte(IIC_Data);
        IIC_Wait_Ack();
        IIC_Stop();
}
// write in OLED Bytes of
void OLED_WR_Byte(unsigned dat,unsigned cmd)
{
      if(cmd)
      {
           Write_IIC_Data(dat);
      }
      else
      {

           Write_IIC_Command(dat);
      }
}
// Write the specified font
void fill_picture(unsigned char dat)
{
         unsigned char m,n;
         for(m=0;m<8;m++)
         {
                   OLED_WR_Byte(0xb0+m,0);                //page0-page1
                   OLED_WR_Byte(0x00,0);                //low column start address
                   OLED_WR_Byte(0x10,0);
                   for(n=0;n<128;n++)
                   {
                       OLED_WR_Byte(dat,1);
                   }
         }
}
// eliminate OLED The screen
void OLED_Clear(void)
{
        u8 i,n;
        for(i=0;i<8;i++)
        {
                OLED_WR_Byte (0xb0+i,OLED_CMD);    // Set page address (0~7)
                OLED_WR_Byte (0x00,OLED_CMD);      // Set the display position — List the addresses
                OLED_WR_Byte (0x10,OLED_CMD);      // Set the display position — Column address
                for(n=0;n<128;n++)OLED_WR_Byte(0,OLED_DATA);
        } // Update display

}
// initialization SSD1306
void OLED_Init(void)
{
         // Turn off display
        OLED_WR_Byte(0xAE,OLED_CMD);//--display off

         // Set clock frequency division and RC Oscillator frequency
         OLED_WR_Byte(0xD5,OLED_CMD);//set osc division
         OLED_WR_Byte(0x80,OLED_CMD);//

         // Set the multiplexing ratio
         OLED_WR_Byte(0xA8,OLED_CMD);//--set multiplex ratio(1 to 64)
         OLED_WR_Byte(0x3F,OLED_CMD);//--1/32 duty

         // Set the display offset , No offset setting 0
         OLED_WR_Byte(0xD3,OLED_CMD);//-set display offset
         OLED_WR_Byte(0x00,OLED_CMD);//

         // Set display start line
         OLED_WR_Byte(0x40,OLED_CMD);//--set start line address

         // Enable charge pump (0x10 Disable charge pump )
         OLED_WR_Byte(0x8D,OLED_CMD);//set charge pump enable
         OLED_WR_Byte(0x14,OLED_CMD);//

         // Left and right display , Normal display 0x01(0xA0 Reverse left and right )
         OLED_WR_Byte(0xA1,OLED_CMD);//set segment remap

         // Up and down display , Normal display 0xc8(0xc0 Up and down reversed )
         OLED_WR_Byte(0xC8,OLED_CMD);//Com scan direction

         // Set the hardware configuration of the column pins
         OLED_WR_Byte(0xDA,OLED_CMD);//set com pin configuartion
         OLED_WR_Byte(0x12,OLED_CMD);//

         // Set contrast 【 The second maximum contrast 】
         OLED_WR_Byte(0x81,OLED_CMD); // contract control
         OLED_WR_Byte(0xFF,OLED_CMD);//--128

         // Set the duration of the precharge device
         OLED_WR_Byte(0xD9,OLED_CMD);//Set Pre-Charge Period
         OLED_WR_Byte(0xF1,OLED_CMD);//

         // adjustment Vcomif The output of the regulator
         OLED_WR_Byte(0xDB,OLED_CMD);//set Vcomh
         OLED_WR_Byte(0x30,OLED_CMD);//

         OLED_WR_Byte(0x00,OLED_CMD);//---set low column address
         OLED_WR_Byte(0x10,OLED_CMD);//---set high column address

         // Set page address
         OLED_WR_Byte(0xB0,OLED_CMD);//--set page address
         OLED_WR_Byte(0xD8,OLED_CMD);//set area color mode off
         OLED_WR_Byte(0x05,OLED_CMD);//
         OLED_WR_Byte(0xA4,OLED_CMD);//

         // Set to normal display ,1: Show ,0: No display
         OLED_WR_Byte(0xA6,OLED_CMD);//--normal / reverse

         // open OLED
         OLED_WR_Byte(0xAF,OLED_CMD);//--turn on oled panel
         OLED_Clear();
}
The main function :
int main(void)
{
   iicInit();
   OLED_Init();
   while(1)
   {
        fill_picture(0xff);
        delay_ms(1000);
        fill_picture(0x00);
        delay_ms(200);
    }

}
During the compilation process, we found that , LCD does not display , The end result is that the pin is not initialized .
P5M0=0xff;
P5M1=0x00;
The initialization test of the MCU pin is successful .
边栏推荐
- Qtcreator sets multiple qmake
- seata 1.3.0 四種模式解决分布式事務(AT、TCC、SAGA、XA)
- 变量的解构赋值
- Verilog 实现数码管显视驱动【附源码】
- Go-Redis 中间件
- 毕业季|与青春作伴,一起向未来!
- Online hard core tools
- Transaction rolled back because it has been marked as rollback only
- A case of compiling QT file qmake compiling script
- Still cannot find RPC dispatcher table failed to connect in virtual KD
猜你喜欢

关于SIoU《SIoU Loss: More Powerful Learning for Bounding Box Regression Zhora Gevorgyan 》的一些看法及代码实现

The concept, implementation and analysis of binary search tree (BST)

Interprocess communication (IPC)
electron添加SQLite数据库

Antd select selector drop-down box follows the scroll bar to scroll through the solution
Still cannot find RPC dispatcher table failed to connect in virtual KD
IDEA快捷键大全
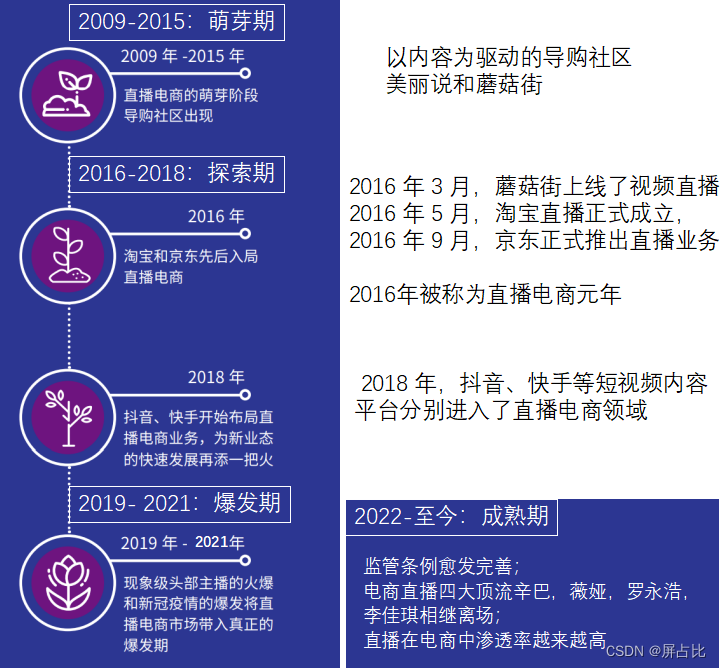
From pornographic live broadcast to live broadcast E-commerce

关于测试人生的一站式发展建议

90后,辞职创业,说要卷死云数据库
随机推荐
How to use cherry pick?
uniCloud
科普达人丨一文弄懂什么是云计算?
解决VSCode只能开两个标签页的问题
Deep understanding of Apache Hudi asynchronous indexing mechanism
[untitled]
uniapp 在onLaunch中跳转页面后,点击事件失效解决方法
高考作文,高频提及科技那些事儿……
A simple example of delegate usage
V-for img SRC rendering fails
The seventh training assignment
Unity script visualization about layout code
基于Retrofit框架的金山API翻译功能案例
关于jmeter中编写shell脚本json的应用
Cmake learning manual
Project ERROR: Unknown module(s) in QT: core gui
Hash / (understanding, implementation and application)
RationalDMIS2022 高级编程宏程序
The use of list and Its Simulation Implementation
uniapp 在onLaunch中跳轉頁面後,點擊事件失效解决方法