当前位置:网站首页>Hugo builds a personal blog
Hugo builds a personal blog
2022-08-05 06:13:00 【CrazyQiQi】
Introduction
If you want to build a static website, one way is to write your own creation, which has a lot of room to play, but the workload is relatively large; if you want to have a website of your own in a short time, you canUse a static site generator.
Here is a summary of static website generatorsGitHub address, there are indeed too many website generators now.
I chose Hugo implemented in Go language as my static website generator. On the one hand, it was the first generator I came into contact with.As a rising star, it is increasingly accepted by everyone.
Here I will introduce how to build a static web page with hugo. There are many tutorials about building a personal blog with Hugo on the Internet, but I will take the trouble to record it.
My blog addresshttps://crazyqii.github.ioh6>
Of course, this article is based on Windows operation. For macOS system, please refer to Hugo official websiteHugo
By default you have installed Git and registered github
Of course, this article is based on Windows operation. For macOS system, please refer to Hugo official websiteHugo
By default you have installed Git and registered github
Quick Start
1. Download Hugo
I chose hugo_0.55.6_Windows-64bit.zip
- Create Hugo/bin directory and download to bin file
- We can see a hugo.exe executable file about hugo, add the download path to the system environment variable.
- Open the cmd console to check if the installation is successful, as shown below

2. Generate website
- Create a sites folder dedicated to the website under the Hugo file.
- The cmd console enters the current folder path, and as an administrator, enter hugo new site myblog (custom) to create a site.
- Of course, there is also an easy way to do that, if you have Git bash, right-click on the current folder, select Git bash and enter the command, it will be OK
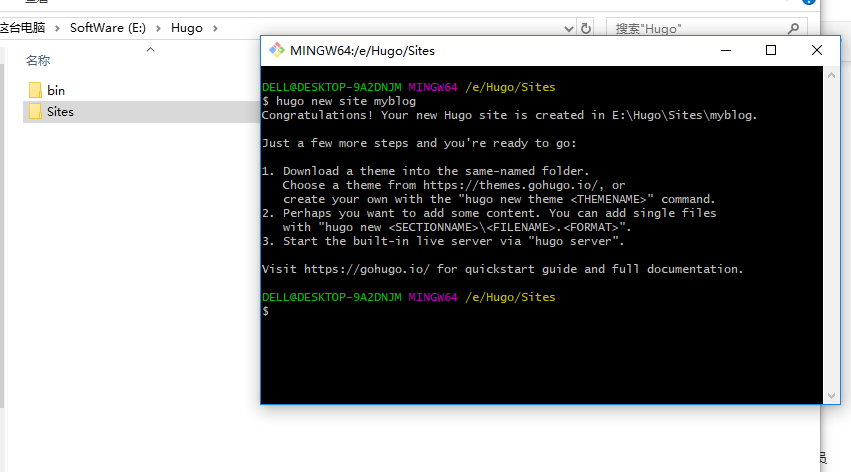
- In this way, a blank site is quickly generated. At this time, if you enter the hugo server command (run Hugo), and then enter localhost:1313 in the browser, you will find that it is blank, mainly because everything in it is empty.No, we need to download the theme ourselves.
3. Download the skin theme
- Select your favorite theme in Hugo theme, jump to the relevant github page, clone to your own blog/themes filein the folder.
git clone https://github.com/spf13/hyde.git
4. Create an article
- cd to the /myblog path, enter the command, create the article
$ hugo new first.md
- You will see the article you just created in the Hugo\Sites\myblog\content path, which is a document in Markdown format
— — —
title: “First”
date: 2019-06-17T12:52:29+08:00
draft: false
— — —
- At this point, re-enter localhost:1313 in the browser to see the content
5. Deploy the website
Blogging is for sharing, so you need to deploy your website for more people to see
- Create a new repository Repository on github and name it crazyqii.github.io (crazyqii is your github username)
- Enter the command to automatically generate static files public
$ hugo --theme=hyde --baseUrl="http://crazyqii.github.io/”
- cd into the public folder and push the files in public to the remote repository
$ git init
$ git remote add origin h ttps://github.com/crazyqii/crazyqii.github.io.git
$ git add -A
$ git commit -m “firstcommit"
$ git push -u origin master
- Visit https://crazyqii.github.io , you can see the website generated by the quick build
An important message is inserted here!!!
If you like cold knowledge,
eager to explore the magical world,
want to be an omniscient scholar,
come and follow us.

边栏推荐
猜你喜欢

IJCAI 2022|Boundary-Guided Camouflage Object Detection Model BGNet
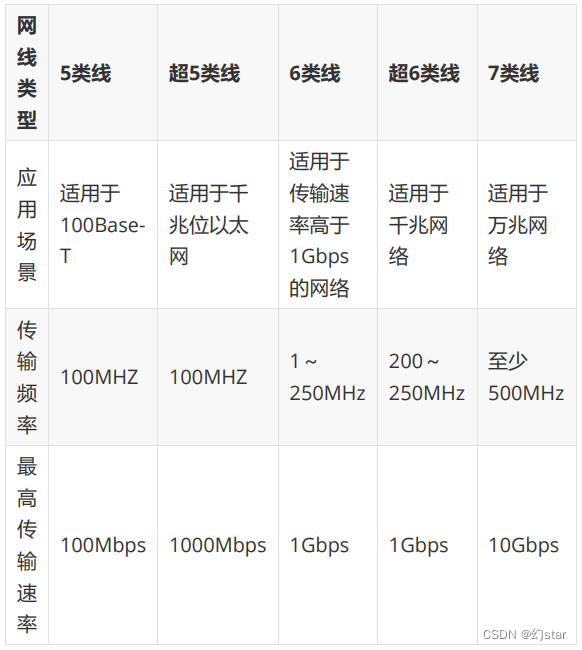
网络布线与数制转换
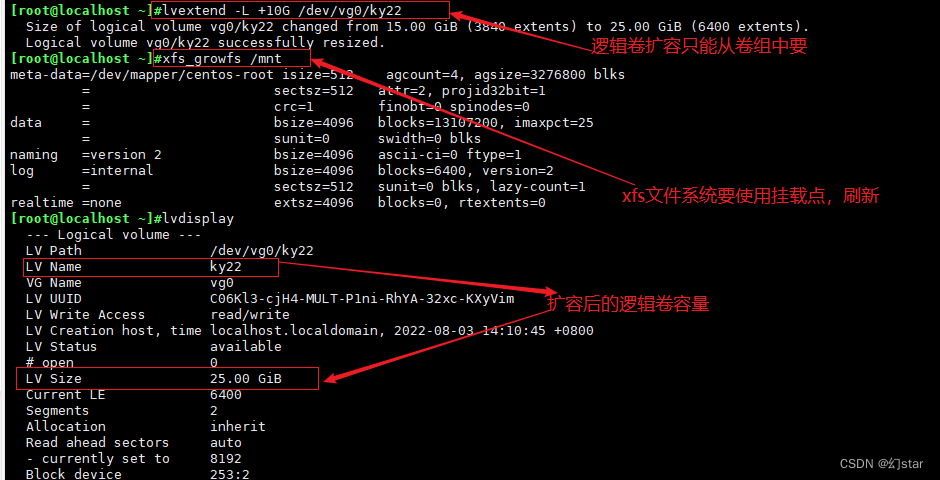
![[Day8] Commands involved in using LVM to expand](/img/ba/39b81cbcecec9bc54a710ff9dba81a.png)
[Day8] Commands involved in using LVM to expand
Getting Started Document 01 series in order

入门文档06 向流(stream)中添加文件
lvm逻辑卷及磁盘配额
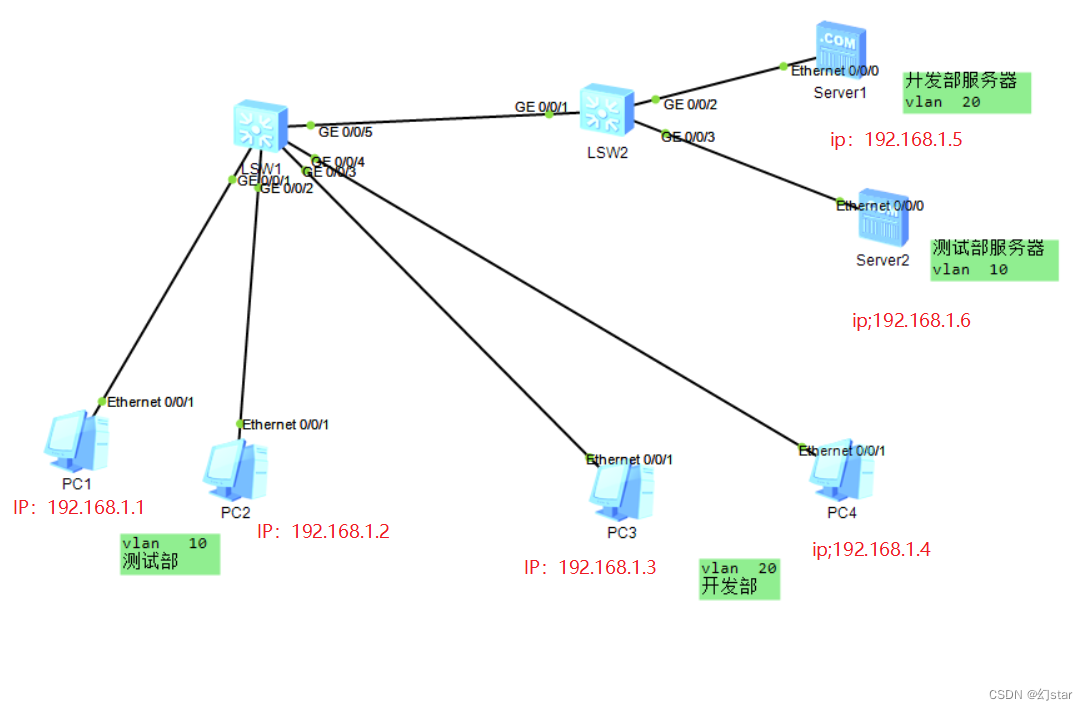
VLAN details and experiments
![[Day5] Soft and hard links File storage, deletion, directory management commands](/img/15/7ed58a180a72ace3463626bf446633.png)
[Day5] Soft and hard links File storage, deletion, directory management commands

运维的高光时刻,从智能化开始
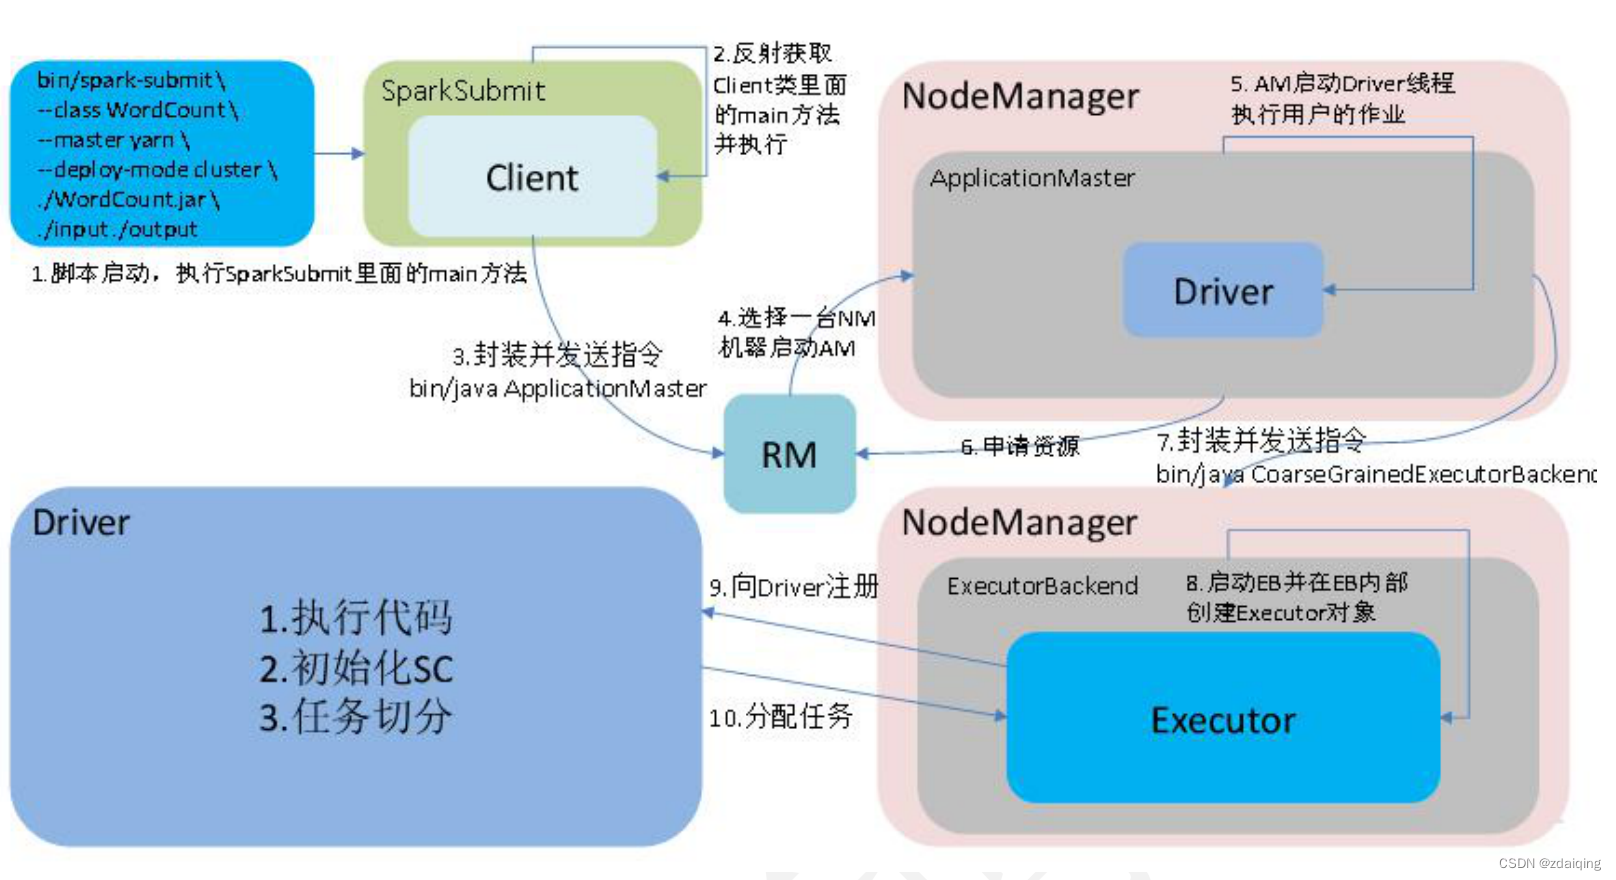
spark源码-任务提交流程之-1-sparkSubmit
随机推荐
D39_向量
【Machine Learning】1 Univariate Linear Regression
Apache configure reverse proxy
SSL证书提示过期或者无效,该怎么处理呢?
lvm逻辑卷及磁盘配额
硬盘分区和永久挂载
入门文档12 webserve + 热更新
添加新硬盘为什么扫描不上?如何解决?
入门文档01 series按顺序执行
[Day8] Commands involved in using LVM to expand
Introductory document 05-2 use return instructions the current task has been completed
什么?CDN缓存加速只适用于加速静态内容?
Three modes of vim
Autoware--北科天绘rfans激光雷达使用相机&激光雷达联合标定文件验证点云图像融合效果
Mongodb查询分析器解析
入门文档03 区分开发与生产环境(生产环境才执行‘热更新’)
IP地址及子网的划分
Getting Started 05 Using cb() to indicate that the current task is complete
Configuration of TensorFlow ObjecDetectionAPI under Anaconda3 of win10 system
Spark源码-任务提交流程之-6.1-sparkContext初始化-创建spark driver端执行环境SparkEnv