当前位置:网站首页>Nodemcu-esp8266 development (vscode+platformio+arduino framework): Part 3 --blinker_ MIOT_ Light (lighting technology app control + Xiaoai classmate control)
Nodemcu-esp8266 development (vscode+platformio+arduino framework): Part 3 --blinker_ MIOT_ Light (lighting technology app control + Xiaoai classmate control)
2022-07-03 09:35:00 【Taodream】
First, build the development environment :https://blog.csdn.net/felix_tao/article/details/113092886
Second, finish Blinker_Hello_WiFi( Lighting technology - mobile phone APP Control routine ):https://blog.csdn.net/felix_tao/article/details/113359707
First step : A copy of Blinker_Hello_WiFi engineering , And rename to Blinker_MIOT_LIGHT.
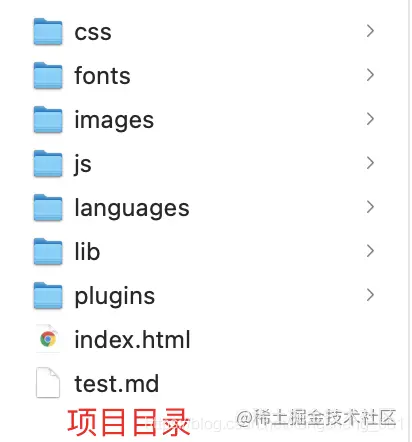
The second step : open VSCODE-> file -> Add folder to workspace -> Select the project folder Blinker_MIOT_LIGHT-> Add to VSCODE in .
The third step : Copy the following code to VSCODE Medium src->main.cpp Inside .
/* *****************************************************************
 *  Program function :
 * 1. Use the development board :nodemcu-ESP8266( modular ESP-12E)
 * 2. Program function : Program function : Use Blinker  mobile phone APP Add devices and bind , adopt APP Remote control the light on the development board 、 And Xiao AI controls the lights on and off on the development board
 * 3. Routine documentation :https://www.diandeng.tech/doc/xiaoai
 *
  Voice commands supported by little love :
  1. The lamp
   open / close { Doorway } Of { The lamp }
   hold { Bedroom } Of { The lamp } Adjustable for { Red }
   The color range is 0-16777215(0xFFFFFF)
   hold { Bedroom } Of { The lamp } Of { Turn up the brightness }
   The brightness range is 1-100
   hold { Doorway } Of { The lamp } Of { Color temperature } Transfer to {1400}
   The color temperature range is 1000-10000
   hold { Bedroom } Of { The lamp } Adjustable for { Moonlight mode }
   Inquire about { Bedroom } Of { The lamp } The state of
  2. Socket
   open / close { The kitchen } Of { Socket }
  { A living room } Of { Socket } Whether to open
  3. sensor
  { Device name } indoor { temperature }/{ humidity }/{PM2.5}/{ Air quality }/{ Carbon dioxide content }
 * *****************************************************************/

//#define LED_BUILTIN 2   //ESP-12E The module itself LED, Corresponding GPIO2, Low level light
//#define LED_BUILTIN 16  //nodemcu-esp8266 The development board extends LED, Corresponding GPIO16, Low level light

#define BLINKER_WIFI
#define BLINKER_MIOT_LIGHT   // Xiao AI supports LED Light control
#define BLINKER_WITHOUT_SSL  //blinker By default, encryption is used for remote communication , But communication encryption will consume a lot of RAM, If you have no requirements for communication security ,
							 // You can add macros BLINKER_WITHOUT_SSL To get more available RAM,BLINKER_WITHOUT_SSL At present, it can only be used for ESP8266, Other devices RAM Enough for encrypted communication

#include <Blinker.h>         // Using third party libraries

char auth[] = "aabfdfc3b167";//Blinker APP Obtained in Secret Key( secret key ), Xiao AI is connected to , You need to choose alicloud broker, Lighting broker Voice control is not supported
char ssid[] = "Xiaomi_123";  //wifi name
char pswd[] = "felix1234";   //wifi password

//  New component object
BlinkerButton Button1("btn-abc");// Component object , Want to be with APP In the component “ Data key name ” Agreement
BlinkerNumber Number1("num-abc");

int counter = 0;// Counter
uint8_t colorR, colorG, colorB, colorW;

//  Press the key to execute the function
void button1_callback(const String & state)
{
    BLINKER_LOG("get button state: ", state);//APP Medium Monitor Control print information
    digitalWrite(LED_BUILTIN, !digitalRead(LED_BUILTIN));// control LED The light is on and off , Low level light , High level off
}

//  If unbound components are triggered , Then the content will be executed
void dataRead(const String & data)
{
    BLINKER_LOG("Blinker readString: ", data);
    counter++;// Unbound components are triggered , It will count
    Number1.print(counter);
}

// Get the current color value
uint32_t getColor()
{
    uint32_t color = colorR << 16 | colorG << 8 | colorB;

    return color;
}

// Little love power callback , for example : turn on the light / Turn off the lights
void miotPowerState(const String & state)
{
    BLINKER_LOG("need set power state: ", state);

    if (state == BLINKER_CMD_ON) {
       digitalWrite(LED_BUILTIN, LOW);// Low level on LED
        BlinkerMIOT.powerState("on");
        BlinkerMIOT.print();
    }
    else if (state == BLINKER_CMD_OFF) {

        digitalWrite(LED_BUILTIN, HIGH);// High level off LED
        BlinkerMIOT.powerState("off");
        BlinkerMIOT.print();
    }
}

// Little love set color callback , for example : Red / green / Blue
void miotColor(int32_t color)
{
    BLINKER_LOG("need set color: ", color);

    colorR = color >> 16 & 0xFF;
    colorG = color >>  8 & 0xFF;
    colorB = color       & 0xFF;

    BLINKER_LOG("colorR: ", colorR, ", colorG: ", colorG, ", colorB: ", colorB);

    BlinkerMIOT.color(color);
    BlinkerMIOT.print();
}

// Little love, adjust the brightness , for example : Turn it on
void miotBright(const String & bright)
{
    BLINKER_LOG("need set brightness: ", bright);

    colorW = bright.toInt();

    BLINKER_LOG("now set brightness: ", colorW);

    BlinkerMIOT.brightness(colorW);
    BlinkerMIOT.print();
}

// Little love, warm call back , for example : Adjust the color temperature to 1400
void miotColoTemp(int32_t colorTemp)
{
    BLINKER_LOG("need set colorTemperature: ", colorTemp);

    BlinkerMIOT.colorTemp(colorTemp);
    BlinkerMIOT.print();
}

void setup()
{
    //  Initialize serial port
    Serial.begin(115200);
    BLINKER_DEBUG.stream(Serial);
    BLINKER_DEBUG.debugAll();

    //  Initialization has LED Of IO
    pinMode(LED_BUILTIN, OUTPUT);// Set the pin to output mode
    digitalWrite(LED_BUILTIN, LOW);// The default LED

    //  initialization blinker
    Blinker.begin(auth, ssid, pswd);// Connect WiFi And devices online
    Blinker.attachData(dataRead);// If the unbound component is triggered, execute the callback
    Button1.attach(button1_callback);// Bind keys

    // Xiao AI, please register
    BlinkerMIOT.attachPowerState(miotPowerState);// Register for little love power callback
    BlinkerMIOT.attachColor(miotColor);// Sign up for little love color callback
    BlinkerMIOT.attachBrightness(miotBright);// Sign up for little love
    BlinkerMIOT.attachColorTemperature(miotColoTemp);// Sign up for little elsevin callback
}

void loop()
{
    Blinker.run();
}
Step four : stay app Add devices to , obtain Secret Key.
1) download APP And install , Open the url https://www.diandeng.tech/doc/getting-start-8266, find “ Download and install blinker APP“, According to different mobile platforms , Download the corresponding APP And install .
2) Get into App, Click on the “+” Number , And then choose Add equipment .
3) Click Select Arduino( Independent equipment )-> WiFi Access .
4) Select the service provider you want to access ( Alibaba cloud 、 Lighting technology 、 Tencent cloud 、OneNet), For example, choose ” Lighting technology “, If you want to connect with Xiao AI , Then choose ” Alibaba cloud “.
5) Copy the application to Secret Key Go to the key column in the code .
Step five : Modify the following code .
Modify the key 、wifi name 、wifi The password is your own .
Be careful : Xiao AI is connected to , You need to choose alicloud broker, Lighting broker Voice control is not supported .
char auth[] = "Your Device Secret Key";//Blinker APP Obtained in Secret Key( secret key )
char ssid[] = "Your WiFi network SSID or name";//wifi name
char pswd[] = "Your WiFi network WPA password or WEP key";//wifi password
Step six : After modification , Compile 、 download , During the compilation process, we found that “ Yellow warning ”, Don't mind , The final compilation is “SUCCESS” Just OK.
After downloading successfully , You can see the LED It lights up , open VSCODE The serial monitor can see and print some information , When you see “MQTT Connected!” Then prove the connection wifi Was a success , When you see "state":"online" The device is online .
VSCODE Information printed by the serial monitor :
......
[32881] MQTT Connected! // Connect wifi success
[32881] Freeheap: 39456
[48020] Got: {"deviceType":"DiyArduino","data":{"get":"state"},"fromDevice":"eeb71ff85f1d11eb81be5254","toDevice":"C133A71AZPR087CQTZ5FFRXR"}
[48022] data: {"get":"state"}
[48024] fromDevice: eeb71ff85f1d11eb81be5254
[48028] Authority uuid
[48051] available: 1
[48051] checkAvail: 1
[48051] parse data: {"get":"state"}
[48051] defined BLINKER_ARDUINOJSON
[48052] autoManager begin: 0 0
[48053] autoFormatData key: state, json: "state":"online" // Device online
Step seven : Using mobile phone APP Carry out remote control in the development board LED The lamp .
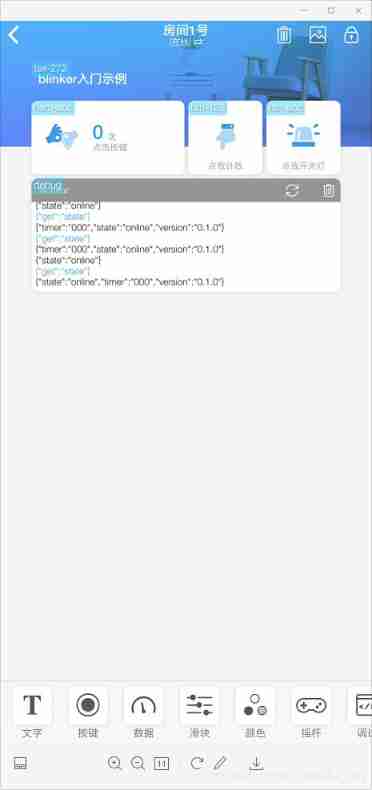
1) open ” Lighting -blinker”APP.
2) On the device list page , Click on the device icon , For example, my device is :“ room 1 Number ”, Click to enter the device control panel .
3) Click on “ Turn on the light ”, You can see on the development board LED The light will switch on and off .
4) because “ Let me count ” Unbound in code , So it triggers dataRead() function .
Step eight : Use Mi Jia APP binding blinker account number .
1) Download Mi Jia APP And open . adopt my > Other platform equipment > Click Add > Lighting technology > Bind account , binding blinker account number .
2) After the binding is successful , Support the little love controlled blinker The device will appear in my > Other platform equipment > Lighting technology In the device list .
3) If there are no devices in the device list , You need to click “ Synchronous devices ”.
4) Back to Mi's house APP home page , On the front page there is a “ Voice icons ”, Click on “ Voice icons ”, say :“ Turn off the lights in room one ”, You'll see on the development board LE The light is off , And then say “ Turn on the room one light ”, You will see LED The light is on .
5) Be careful : Rice house APP The new version V6.0 The above cancels the homepage “ Voice icons ”, Need to download Xiaoai classmate APP Voice control .

Step nine : Use Xiao AI classmate APP Voice control .
1) download “ Little love students ” mobile phone APP, And install .
2) Open Xiaoai's mobile phone APP, Use with MI Jia APP Log in with the same account , stay “ Smart home ” You can see blinker Bound devices “ room 1 Number ”.
3) Click in the middle below “ Voice icons ”, say :“ Turn off the lights in room one ”, You'll see on the development board LE The light is off , And then say “ Turn on the room one light ”, You will see LED The light is on .

Step 10 : Bind Xiaoai speaker , Use Xiaoai speaker voice control .
1) Use Mi AI APP Or Xiaoai speaker APP Bind Xiaoai speaker , For example, my speaker is “ Little love speaker pro”.
2) After binding , Open the little love speaker APP, Click below “ Smart home ” One column , You can see “ room 1 Number ” equipment , You can use “ Little love speaker ” Voice control .
3) Say to Xiaoai's speaker :“ Turn off the lights in room one ”, You'll see on the development board LE The light is off , And then say “ Turn on the room one light ”, You will see LED The light is on .

matters needing attention :
1) If binding blinker Account number , There's no device on the lighting technology list , Maybe you don't have a little love support program in your device , Or the device didn't go live .
2) binding blinker Account number , Xiao AI can also control the device through his mobile phone .
3)blinker App After modifying or adding to the device in , But at Mi's house App in , adopt my > Other platform equipment > Lighting technology > Synchronous devices Update device information .
Complete engineering documents :https://download.csdn.net/download/felix_tao/14975837
Reference documents :
Lighting technology :https://www.diandeng.tech/doc/xiaoai
Reference routine :
Lighting technology blinker library :blinker-library-master\examples\Blinker_MIOT\MIOT_LIGHT
边栏推荐
- Flask+supervisor installation realizes background process resident
- LeetCode每日一题(968. Binary Tree Cameras)
- Win10 quick screenshot
- Using Hudi in idea
- Vscode Arduino installation Library
- Crawler career from scratch (IV): climb the bullet curtain of station B through API
- Overview of image restoration methods -- paper notes
- [kotlin learning] operator overloading and other conventions -- overloading the conventions of arithmetic operators, comparison operators, sets and intervals
- Global KYC service provider advance AI in vivo detection products have passed ISO international safety certification, and the product capability has reached a new level
- IDEA 中使用 Hudi
猜你喜欢

CATIA automation object architecture - detailed explanation of application objects (III) systemservice
解决Editor.md上传图片获取不到图片地址问题

Utilisation de hudi dans idea

Construction of simple database learning environment
Flink学习笔记(八)多流转换

Global KYC service provider advance AI in vivo detection products have passed ISO international safety certification, and the product capability has reached a new level

Hudi学习笔记(三) 核心概念剖析

Vscode Arduino installation Library
![[CSDN]C1训练题解析_第三部分_JS基础](/img/b2/68d53ad09688f7fc922ac65e104f15.png)
[CSDN]C1训练题解析_第三部分_JS基础
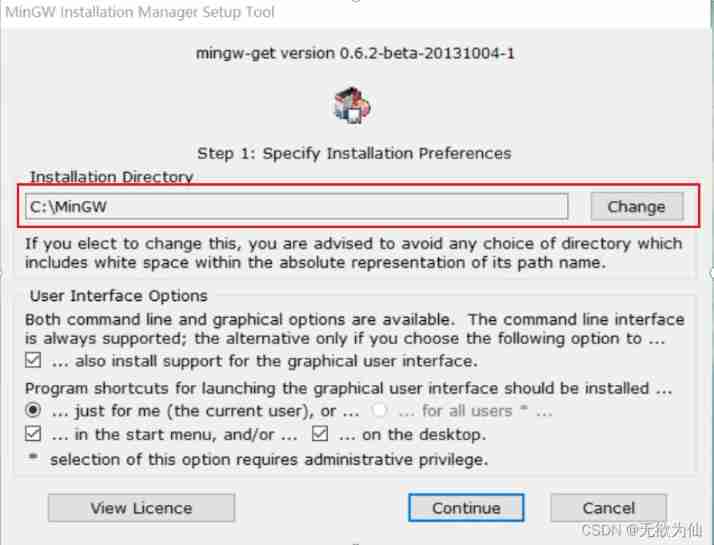
Learning C language from scratch -- installation and configuration of 01 MinGW
随机推荐
Jestson nano downloads updated kernel and DTB from TFTP server
[CSDN]C1训练题解析_第三部分_JS基础
Run flash demo on ECS
LeetCode每日一题(985. Sum of Even Numbers After Queries)
Hudi learning notes (III) analysis of core concepts
LeetCode每日一题(1362. Closest Divisors)
Leetcode daily question (2305. fair distribution of cookies)
制作jetson nano最基本的根文件系统、服务器挂载NFS文件系统
解决Editor.md上传图片获取不到图片地址问题
Banner - Summary of closed group meeting
Win10安装ELK
ERROR: certificate common name “*.” doesn’t match requested ho
Jetson Nano 自定义启动图标kernel Logo cboot logo
Navicat, MySQL export Er graph, er graph
从0开始使用pnpm构建一个Monorepo方式管理的demo
Common formulas of probability theory
PolyWorks script development learning notes (I) - script development environment
[kotlin learning] control flow of higher-order functions -- lambda return statements and anonymous functions
Directory and switching operation in file system
Flink-CDC实践(含实操步骤与截图)